coolant level CHEVROLET ASTRO 2003 Owners Manual
[x] Cancel search | Manufacturer: CHEVROLET, Model Year: 2003, Model line: ASTRO, Model: CHEVROLET ASTRO 2003Pages: 386, PDF Size: 17.31 MB
Page 214 of 386
Driving On Grades Parking on Hills
Reduce speed and shift to a lower gear before you start
down a long or steep downgrade.
If you don’t shift
down, you might have to use your brakes
so much that
they would get hot and no longer work well.
You can tow in DRIVE (D). You may want to shift the
transmission to THIRD
(3) or, if necessary, a lower gear
selection
if the transmission shifts too often (e.g., under
heavy loads and/or hilly conditions).
When towing at high altitude on steep uphill grades,
consider the following: Engine coolant will boil at a lower
temperature than at normal altitudes.
If you turn your
engine
off immediately after towing at high altitude
on steep uphill grades, your vehicle may show signs
similar to engine overheating.
To avoid this, let the
engine run while parked (preferably on level ground)
with the automatic transmission in PARK
(P) for a
few minutes before turning the engine
off. If you do get
the overheat warning, see
Engine Overheating on
page
5-3 1.
You really shoul tot park your vehicle, ith a
trailer attached, on a hill.
If something goes
wrong, your rig could start to move. People
can be injured, and both your vehicle and the
trailer can be damaged.
But if you ever have to park your rig on a hill, here’s
how to do it:
1. Apply your regular brakes, but don’t shift into
2. Have someone place chocks under the trailer
3. When the wheel chocks are in place, release the
4. Reapply the regular brakes. Then apply your PARK (P) yet.
wheels. regular brakes until the chocks absorb the load.
parking brake, and shift to PARK (P).
5. Release the regular brakes.
4-39
Page 232 of 386
A. Windshield Washer Fluid
B. Engine Coolant
C. Engine
Oil Dipstick
D. Transmission Dipstick
E. Engine Air Cleaner/Filter
F. Engine Oil Fill
G. Brake Master Cylinder Reservoir
H. Power Steering Fluid Reservoir
I. Battery
Engine Oil
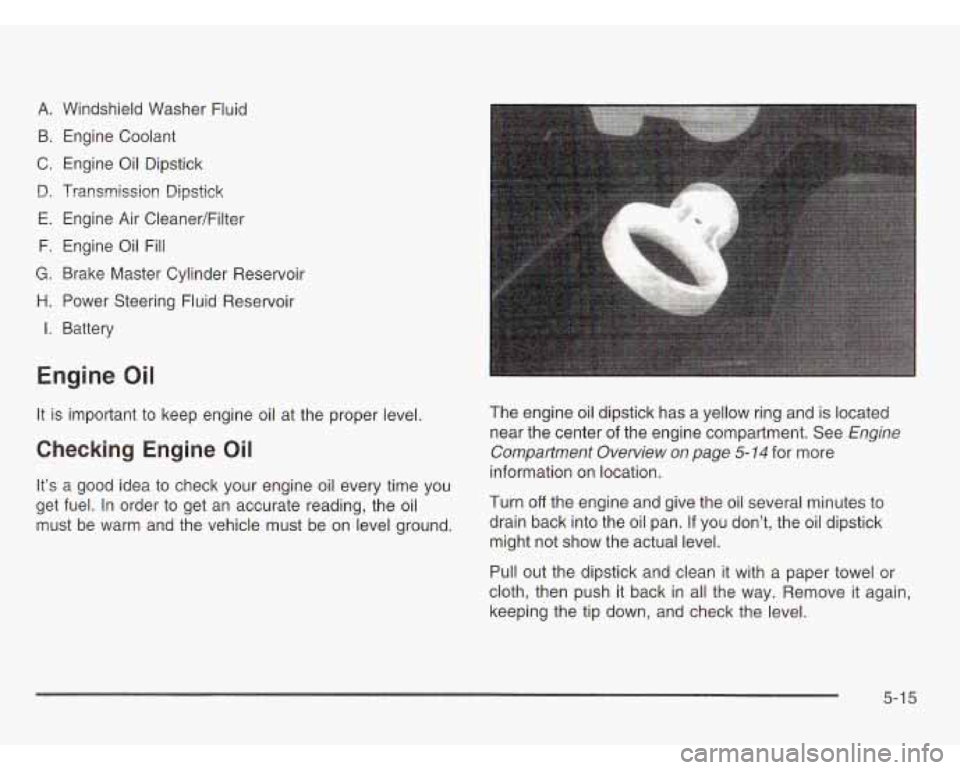
It is important to keep engine oil at the proper level. The engine oil dipstick has a yellow ring and is located
near the center of the engine compartment. See
Engine
information on location.
Checking Engine Oil Compartment Overview on page 5- 14 for more
It’s a good idea to check your engine oil every time
you
get fuel. In order to get an accurate reading, the oil Turn off the engine and give the oil several minutes to
must be warm and the vehicle must be on level ground. drain back into the
Oil pan. If YOU don’t, the oil dipstick
might not show the actual level.
Pull out the dipstick and clean it with a paper towel or
cloth, then push it back in all the way. Remove it again,
keeping the tip down, and check the level.
5-1 5
Page 246 of 386
Notice: If you use an improper coolant mixture,
your engine could overheat and be badly damaged.
The repair cost wouldn’t be covered by your
warranty. Too much water
in the mixture can freeze
and
crack the engine, radiator, heater core and
other parts.
If you have to add coolant more than four times a year,
have your dealer check your cooling system.
Notice: If you use the proper coolant, you don’t
have to add extra inhibitors or additives which claim
to improve
the system. These can be harmful.
Checking Coolant
r
The engine coolant tank is
located in the engine
compartment on the
passenger’s side at the
front. See Engine
Compartment Overview
on page
5-14 for more
information on location. The
vehicle must be on a level surface. When your
engine is cold, the coolant level should be at
ADD,
or a little higher. When your engine is warm, the level
should be up to
FULL HOT, or a little higher.
Adding Coolant
If you need more coolant, add the proper DEX-COOL@
coolant mixtureat the coolant recovery tank.
Lvrl DEX-COOL@
L
A
A
Turning the radiato ressure cap when the
engine and radiator are hot can allow steam and
scalding
liquids to blow out and burn you badly.
With the coolant recovery tank, you will almost
never have to add coolant at the radiator.
Never
turn the radiator pressure cap - even a
little -when the engine and radiator are hot.
5-29
Page 247 of 386
Add coolant mixture at the recovery tank, but be careful
not to
mill it.
You can be burned if you
spill coolant on hot
engine parts. Coolant contains ethylene glycol, and
it will burn if the engine parts are hot
Radiator Pressure Cap
Occasionally check the coolant level in the radiator.
For information on how to add coolant to the radiator,
see
Cooling System on page 5-33.
A L
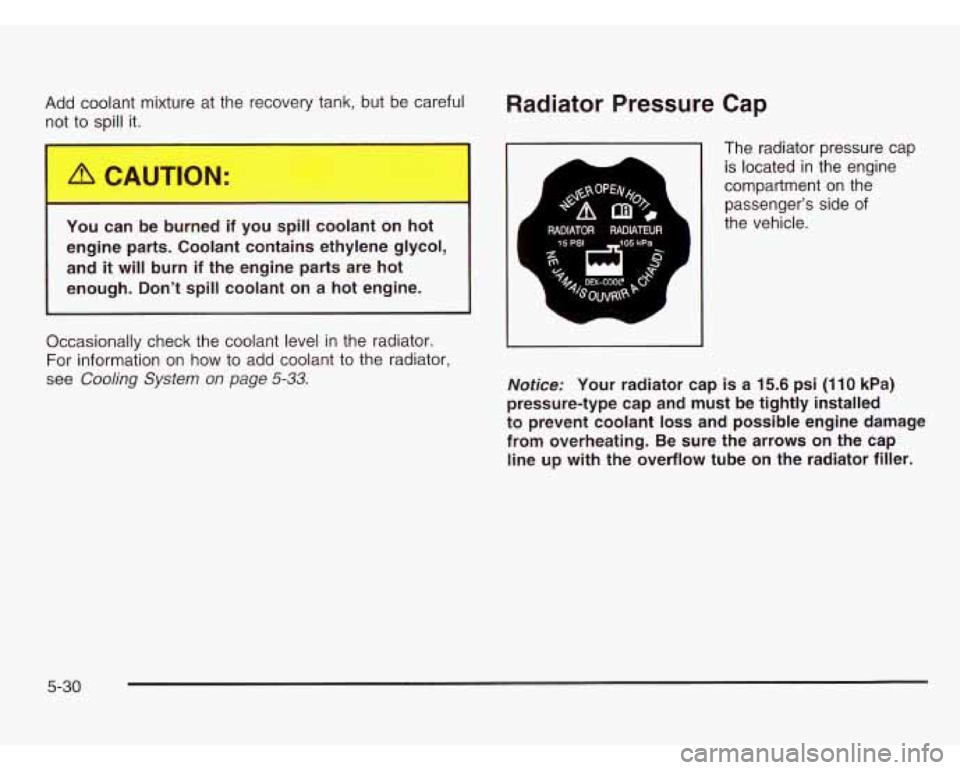
The radiator pressure cap is located in the engine
compartment on the
passenger's side of
the vehicle.
Notice: Your radiator cap is a 15.6 psi (1 10 kPa)
pressure-type cap and must be tightly installed
to prevent coolant
loss and possible engine damage
from overheating. Be sure the arrows on the cap
line up with the overflow tube on the radiator filler.
5-30
Page 250 of 386
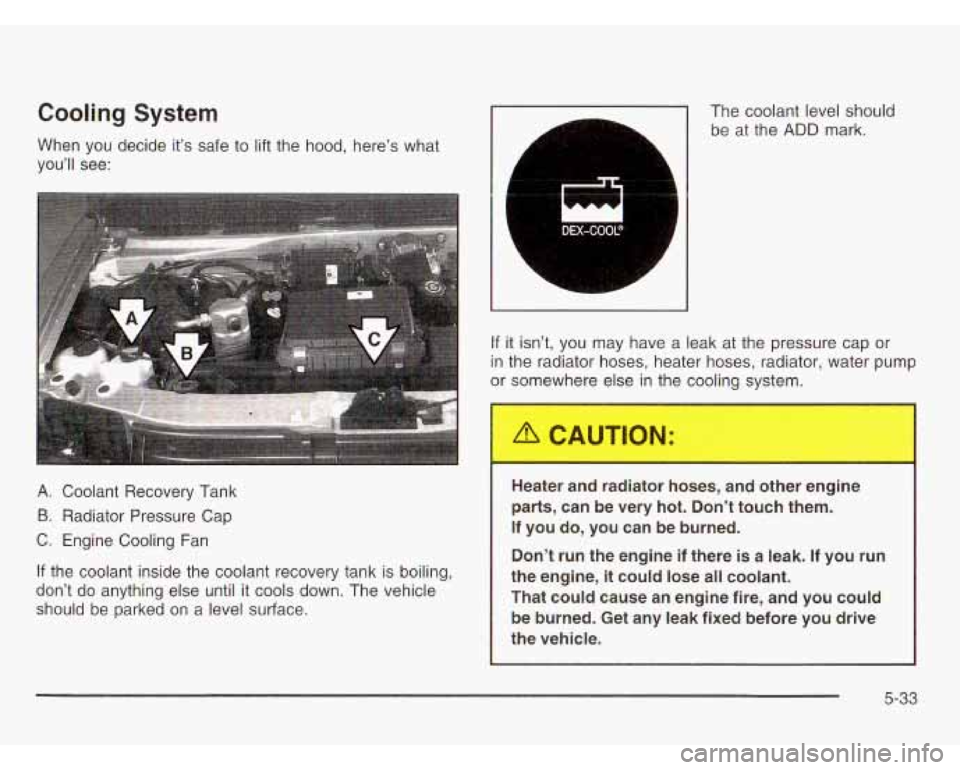
Cooling System
When you decide it’s safe to lift the hood, here’s what
you’ll see: The
coolant level should
be at the
ADD mark.
A. Coolant Recovery Tank
B. Radiator Pressure Cap
C. Engine Cooling Fan
If the coolant inside the coolant recovery tank is boiling,
don’t do anything else until it cools down. The vehicle
should be parked
on a level surface.
A
If it isn’t, you may have a leak at the pressure cap or
in the radiator hoses, heater hoses, radiator, water pump
or somewhere else
in the cooling system.
Heater and radiator hoses, and other engine
parts, can be very hot. Don’t touch them.
If you do, you can be burned.
Don’t run the engine if there
is a leak. If you run
the engine,
it could lose all coolant.
That could cause an engine fire, and you could be burned. Get any leak fixed before you drive
the vehicle.
5-33
Page 251 of 386
If there seems to be no leak, start the engine again. How to Add Coolant to the Coolant
The engine cooling fan speed should increase when idle
speed is doubled by pushing the accelerator pedal
Recovery Tank
down. If it doesn’t, your vehicle needs service. Turn off If you haven’t found a problem yet, but the coolant level
the engine. isn’t at the
ADD mark, add a 50/50 mixture of clean
Nofice: Engine damage from running your engine
without coolant isn’t covered by your warranty.
Notice: When adding coolant, it is important that
you use only
DEX-COOL@ (silicate-free) coolant.
If coolant other than DEX-COOL@’ is added to the
system, premature engine, heater core or radiator
corrosion may result.
In addition, the engine coolant
will require change sooner
- at 30,000 miles
(50 000 km) or 24 months, whichever occurs first.
Damage caused by the use of coolant other than
DEX-COOL@ is not covered by your new vehicle
warranty.
drinkable wafer, and DEX-COOL@ engine coolant at
the coolant recovery tank. See
Engine Coolant on
page 5-28 for more information.
Adding only p.,,n water to your coG...rg
system can be dangerous. Plain water, or
some other
liquid such as alcohol, can boil
before the proper coolant mixture will. Your
vehicle’s coolant warning system
is set for the
proper coolant mixture. With plain water or the
wrong mixture, your engine could get too hot but you wouldn’t get the overheat warning.
Your engine could catch fire and you or others
could be burned. Use a
50/50 mixture of clean,
drinkable water and DEX COOL@ coolant.
5-34
Page 256 of 386
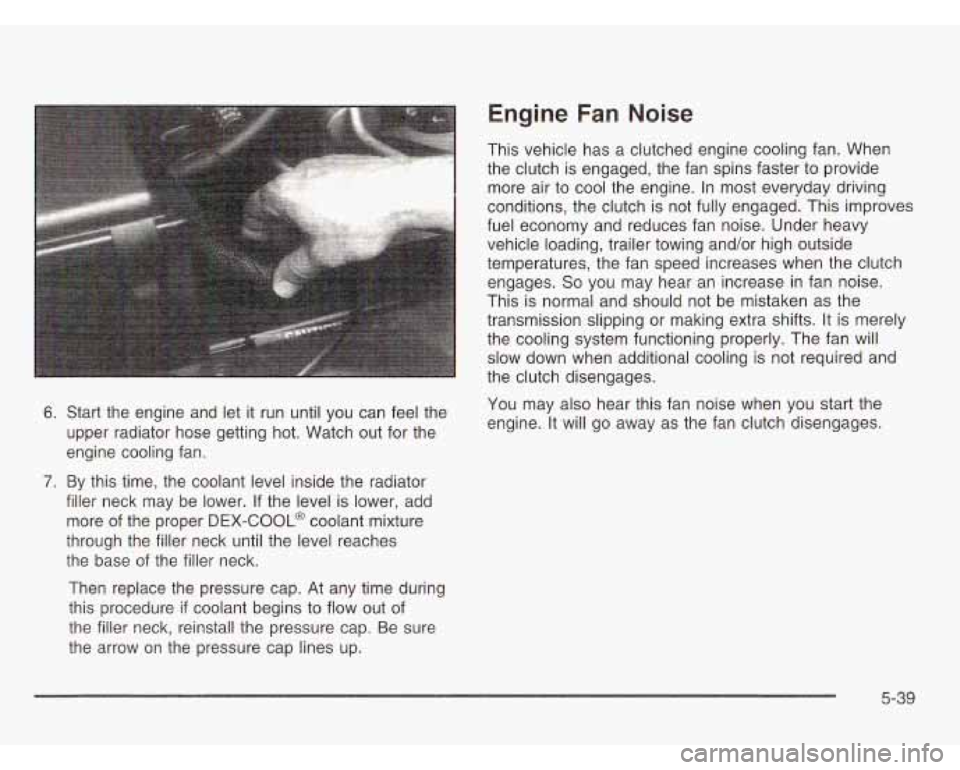
6. Start the engine and let it run until you can feel the
upper radiator hose getting hot. Watch out for the
engine cooling fan.
7. By this time, the coolant level inside the radiator
filler neck may be lower.
If the level is lower, add
more of the proper
DEX-COOL@ coolant mixture
through the filler neck until the level reaches
the base of the filler neck.
Then replace the pressure cap. At any time during
this procedure
if coolant begins to flow out of
the filler neck, reinstall the pressure cap. Be sure
the arrow on the pressure cap lines up.
Engine Fan Noise
This vehicle has a clutched engine cooling fan. When
the clutch is engaged, the fan spins faster to provide
more air to cool the engine. In most everyday driving
conditions, the clutch is not fully engaged. This improves
fuel economy and reduces fan noise. Under heavy
vehicle loading, trailer towing and/or high outside
temperatures, the fan speed increases when the clutch
engages.
So you may hear an increase in fan noise.
This is normal and should not be mistaken as the
transmission slipping or making extra shifts. It is merely
the cooling system functioning properly. The fan will
slow down when additional cooling is not required and
the clutch disengages.
You may also hear this fan noise when you start the
engine. It will go away as the fan clutch disengages.
5-39
Page 344 of 386
97,500 Miles (162 500 km)
U Change engine oil and filter (or every 12 months,
0 Lubricate chassis components (or every 12 months,
0 Check readfront axle fluid level and add fluid as
whichever occurs first).
An Emission Control Service.
whichever
occurs first). (See footnote #).
needed. Check constant velocity joints and axle seals
for leaking.
page 5-64 for proper rotation pattern and additional
information.
(See footnote +).
0 Rotate tires. See Tire Inspection and Rotation on
100,000 Miles (166 000 km)
0 Inspect spark plug wires. An Emission Control
U Replace spark plugs. An Emission Control Service.
Service.
0 If you haven’t used your
vehicle under severe service
conditions listed previously and, therefore, haven’t
changed your automatic transmission fluid, change
both the fluid and filter.
150,000 Miles (240 000 km)
U Drain, flush and refill cooling system (or every
60 months since last service, whichever occurs first).
See
Engine Coolant on page 5-28 for what to use.
inspect hoses. Clean radiator, condenser, pressure
cap and neck. Pressure test the cooling system
and pressure cap.
An Emission Control Service.
U Inspect engine accessory drive belt. An Emission
Control Service.
0 Change transfer case fluid.
0 Inspect Positive Crankcase Ventilation (PCV) valve.
An Emission Control Service.
6-25
Page 345 of 386
Part B: Owner Checks and Services
Listed in this part are owner checks and services
which should be performed at the intervals specified to
help ensure the safety, dependability and emission
control performance of your vehicle.
Be sure any necessary repairs are completed at once.
Whenever any fluids or lubricants are added to your
vehicle, make sure they are the proper ones, as shown
in Part D.
At Each Fuel Fill
It is important for you or a service station attendant to
perform these underhood checks at each fuel fill.
Engine Oil Level Check
Check the engine oil level and add the proper oil
if necessary. See Engine Oil on page 5-15 for
further details.
Engine Coolant Level Check
Check the engine coolant level and add DEX-COOL@
coolant mixture
if necessary. See Engine Coolant
on page
5-28 for further details.
Windshield Washer Fluid Level Check
Check the windshield washer fluid level in the windshield
washer tank and add the proper fluid
if necessary.
See
Windshield Washer Fluid on page 5-41 for
further details.
At Least Once a Month
Tire Inflation Check
Make sure tires are inflated to the correct pressures.
Don’t forget to check your spare tire. See
Tires on
page
5-63 for further details.
At Least Twice a Year
Restraint System Check
Make sure the safety belt reminder light and all your belts,
buckles, latch plates, retractors and anchorages are
working properly. Look for any other loose or damaged
safety belt system parts. If you see anything that might
keep a safety belt system from doing its job, have it
repaired. Have any torn or frayed safety belts replaced.
Also look for any opened or broken air bag coverings,
and have them repaired or replaced. (The air bag
system does not need regular maintenance.)
6-26
Page 372 of 386
Engine Coolant Level Check ............................. 6-26
Engine Oil Additives
........................................ 5-18
Entry Lighting
................................................. 3-15
Erasing HomeLink@ Buttons
.............................. 2-37
Except Cargo Vans
................................. 1-38, 1-47
Express-Down Window
.................................... 2-1 7
Extender, Safety Belt
....................................... 1-34
Exterior Lamps
............................................... 3-12
Engine
Oil Level Check
................................... 6-26
Exit Lighting
................................................... 3-15
F
FabricKarpet ................................................. 5-83
Filter Engine Air Cleaner
...................................... 5-24
Finding a Station
.................................... 3-39, 3-41
Finish Care
.................................................... 5-87
Finish Damage
............................................... 5-88
Fixed Mast Antenna
........................................ 3-50
Flash-to-Pass
................. ........................... 3-7
Flat Tire
........................................................ 5-70
Fluid Flat Tire, Changing
......................................... 5-71
Automatic Transmission
................................ 5-25
Power Steering
........................................... 5-40
Windshield Washer
...................................... 5-41
FM
............................................................... 3-50
Following Distance
.......................................... 4-38 Footnotes
..... ................................ 6.7.
6-18
Front Axle
........ ................................... 5-54
Front Doors
..................................................... 2-8
Fuel
............................................................... 5-5
Additives ...................................................... 5-6
California Fuel
.............................................. 5-6
Filling a Portable Fuel Container
.................... 5-10
Filling Your Tank
........................................... 5-8
Fuels in Foreign Countries
.............................. 5-7
Gage
......................................................... 3-36
Gasoline Octane
........................................... 5-5
Gasoline Specifications .................................. 5-5
System Inspection
....................................... 6-30
Fuel Regulator
................................................ 2-21
Fuses Low Warning
Light
....................................... 3-37
Fuses and Circuit Breakers
........................... 5-93
Windshield Wiper
......................................... 5-92
G
Gage
Check Gages Warning Light
.......................... 3-36
Engine Coolant Temperature
......................... 3-30
Fuel
.......................................................... 3-36
Oil Pressure
............................................... 3-34
Speedometer
.............................................. 3-25
Voltmeter Gage
........................................... 3-28
Garage Door Opener
....................................... 2-34
5