ECO mode CHEVROLET ASTRO 2004 Owners Manual
[x] Cancel search | Manufacturer: CHEVROLET, Model Year: 2004, Model line: ASTRO, Model: CHEVROLET ASTRO 2004Pages: 382, PDF Size: 2.73 MB
Page 57 of 382
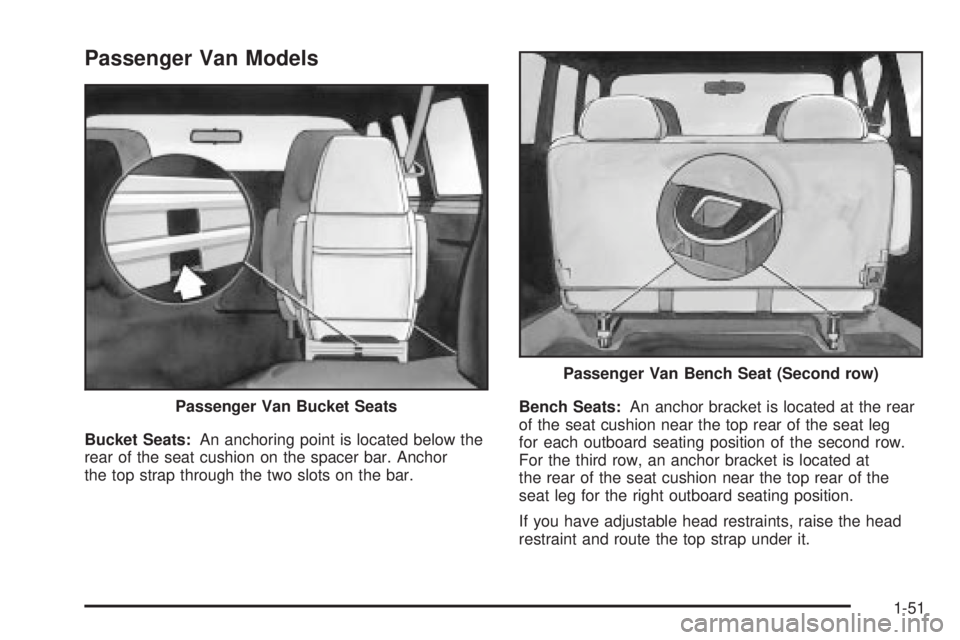
Passenger Van Models
Bucket Seats:An anchoring point is located below the
rear of the seat cushion on the spacer bar. Anchor
the top strap through the two slots on the bar.Bench Seats:An anchor bracket is located at the rear
of the seat cushion near the top rear of the seat leg
for each outboard seating position of the second row.
For the third row, an anchor bracket is located at
the rear of the seat cushion near the top rear of the
seat leg for the right outboard seating position.
If you have adjustable head restraints, raise the head
restraint and route the top strap under it. Passenger Van Bucket Seats
Passenger Van Bench Seat (Second row)
1-51
Page 86 of 382
To enter the program mode you need to do the
following:
1. Begin with the ignition in OFF. Then, pull back on
the turn signal/multifunction lever all the way
toward you and hold it while you perform the
next step.
2. Turn your key to RUN and OFF twice. Then, with
the key in OFF, release the turn signal/multifunction
lever. Once you do this, you will hear the lock
switch lock and unlock.
You are now ready to program the automatic door
locks. Select one of the following four programming
options and follow the instructions. You will have thirty
seconds to begin programming. If you exceed the
thirty second limit, the locks will automatically lock and
unlock to indicate that you have left the program
mode. If this occurs, repeat the procedure beginning
with Step 1. You can exit the program mode any time by
turning the ignition to RUN. The locks will automatically
lock and unlock to indicate that you are leaving the
program mode. If the lock/unlock switches are not
pressed while in the programming mode, the auto
lock/unlock setting will not be modi®ed.The following is a list of the available programming
options:
·All doors lock/Only the driver's door unlocks:
Press the lock side of the power lock switch on
the door panel once and then the unlock side once.
·All doors lock/All doors unlock:Press the
lock side of the power lock switch on the door panel
once, and then the unlock side twice.
·All doors lock/None of the doors unlock:Press
the lock side of the power lock switch on the door
panel once, and then the unlock side three times.
·No doors lock/None of the doors unlock:Press
the lock side of the power lock switch on the door
panel twice. This turns off the automatic lock
feature.
For more information, see your dealer.
Leaving Your Vehicle
If you are leaving your vehicle, take your key, open your
door and set the locks from inside. Then get out and
close the door.
2-8
Page 101 of 382
If you manually select SECOND (2), the transmission
will drive in second gear. You may use this feature
for reducing torque to the rear wheels when you
are trying to start your vehicle from a stop on slippery
road surfaces.
FIRST (1):This position gives you even more power
(but lower fuel economy) than SECOND (2). You
can use it on very steep hills, or in deep snow or mud.
If the shift selector lever is put in FIRST (1), the
transmission won't shift into ®rst gear until the vehicle is
going slow enough.
Notice:Spinning the tires or holding the vehicle in
one place on a hill using only the accelerator
pedal may damage the transmission. If you are
stuck, do not spin the tires. When stopping on a hill,
use the brakes to hold the vehicle in place.
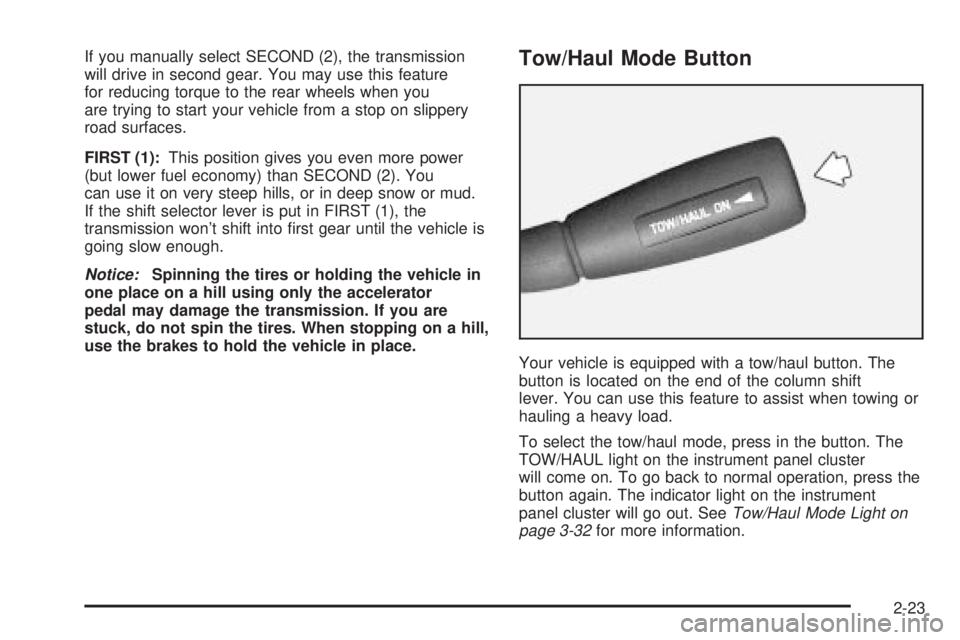
Tow/Haul Mode Button
Your vehicle is equipped with a tow/haul button. The
button is located on the end of the column shift
lever. You can use this feature to assist when towing or
hauling a heavy load.
To select the tow/haul mode, press in the button. The
TOW/HAUL light on the instrument panel cluster
will come on. To go back to normal operation, press the
button again. The indicator light on the instrument
panel cluster will go out. See
Tow/Haul Mode Light on
page 3-32for more information.
2-23
Page 112 of 382
HomeLinkžis now in the train (learning) mode and can
be programmed at any time beginning with Step 2
under ªProgramming HomeLink
ž.º
Individual buttons can not be erased, but they can be
reprogrammed. See ªReprogramming a Single
HomeLink
žButtonº next.
Reprogramming a Single HomeLinkž
Button
To program a device to HomeLinkžusing a HomeLinkž
button previously trained, follow these steps:
1. Press and hold the desired HomeLinkžbutton. Do
not release the button.
2. The indicator light will begin to ¯ash after
20 seconds. While still holding the HomeLink
ž
button, proceed with Step 2 under ªProgramming
HomeLinkž.º
Resetting Defaults
To reset HomeLinkžto default settings do the following:
1. Hold down the two outside buttons for about
20 seconds until the indicator light begins to ¯ash.
2. Continue to hold both buttons until the HomeLink
ž
indicator light turns off.
3. Release both buttons.
For questions or comments, contact HomeLink
žat
1-800-355-3515, or on the internet at
www.homelink.com.
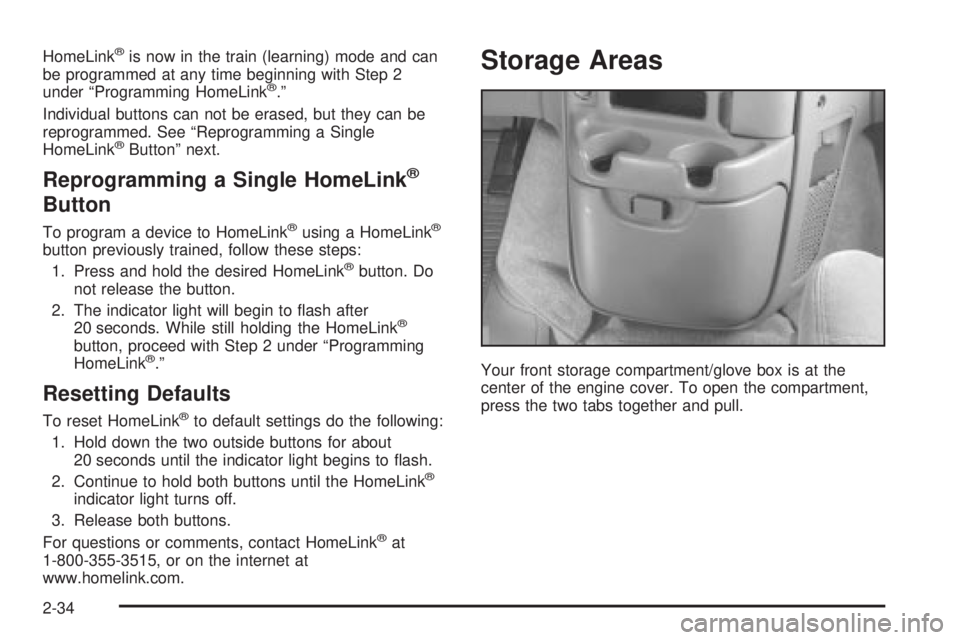
Storage Areas
Your front storage compartment/glove box is at the
center of the engine cover. To open the compartment,
press the two tabs together and pull.
2-34
Page 117 of 382
Before you turn on the ignition and move the vehicle,
the temperature indicated will be the last outside
temperature recorded with the ignition on. If the outside
temperature is 37ÉF (3ÉC) or lower, the display will
toggle between the word ICE and the current
temperature every eight seconds. This is a warning to
the driver that road conditions may be icy, and that
appropriate precautions should be taken.
The compass is self-calibrating, so it does not need to
be manually set. However, if C (Calibration) is displayed,
the compass will need to be calibrated. You may also
place the compass in a noncalibrated mode by pressing
and holding the US/MET and MODE buttons
simultaneously while in the COMP/TEMP mode. After
about 10 seconds, the compass will display C and
you can release the buttons. Drive the vehicle in
a complete 360É circle three times at a speed of less
than 5 mph (8 km/h), and the compass will function
normally. Once the calibration is complete, the display
will return to a compass reading.
Variance is the difference between magnetic north and
geographic north. In some areas, the difference
between the two can be great enough to cause false
compass readings. If this happens, follow these
instructions to set the variance for your particular
location:
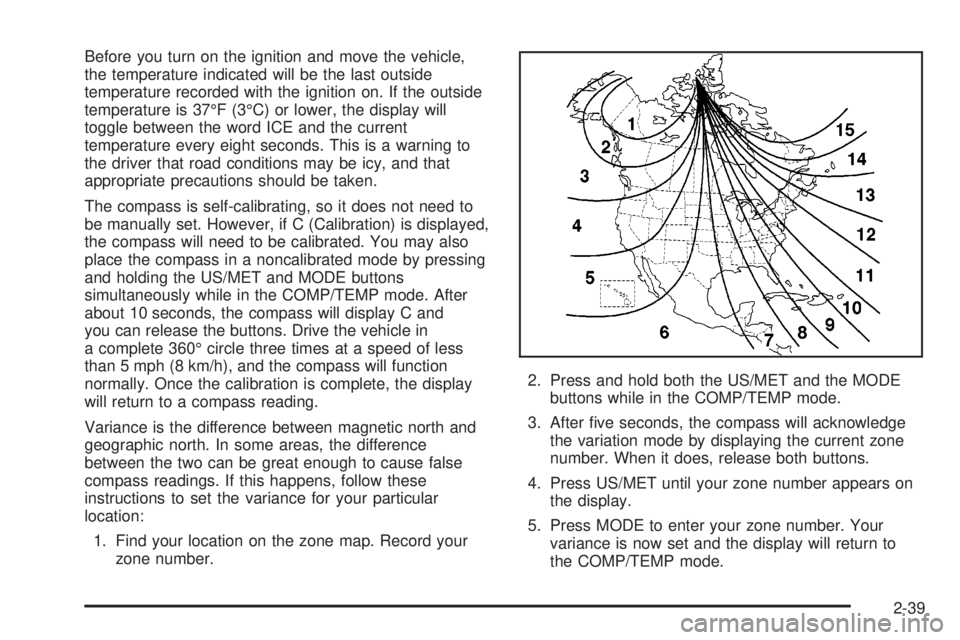
1. Find your location on the zone map. Record your
zone number.2. Press and hold both the US/MET and the MODE
buttons while in the COMP/TEMP mode.
3. After ®ve seconds, the compass will acknowledge
the variation mode by displaying the current zone
number. When it does, release both buttons.
4. Press US/MET until your zone number appears on
the display.
5. Press MODE to enter your zone number. Your
variance is now set and the display will return to
the COMP/TEMP mode.
2-39
Page 118 of 382
TRIP:Once in the TRIP mode, pressing the MODE
button will take you through the following TRIP functions:
·AVG ECON (Average Economy):The average
fuel economy since the last reset is displayed.
·INST ECON (Instantaneous Economy):
Instantaneous fuel economy for the last second of
driving is displayed.
·RANGE:The display indicates the estimated
distance that can be travelled with the remaining
fuel in the tank, based on the fuel economy for the
last few hours of driving.
·FUEL USED:The fuel used since the last reset is
displayed.
·AVG SPEED (Average Speed):The average
speed since the last reset is displayed.
To reset the trip computer, press the MODE and
US/MET buttons simultaneously for at least two
seconds. All functions will be displayed brie¯y once the
system is reset. Reset can only be performed in the
AVG ECON, FUEL USED and AVG SPEED modes. All
three modes are reset simultaneously.
Sunglasses Storage Compartment
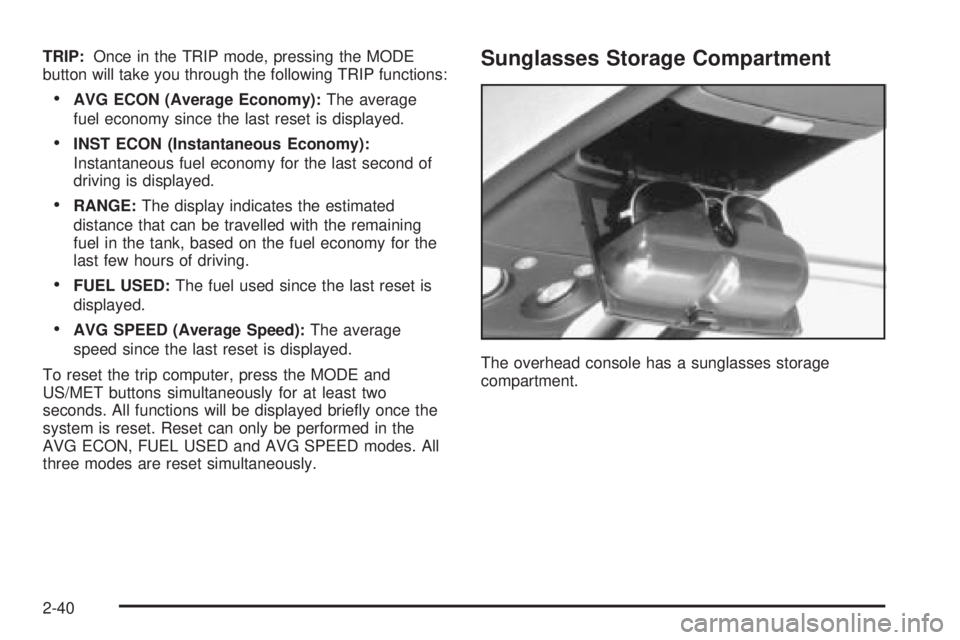
The overhead console has a sunglasses storage
compartment.
2-40
Page 135 of 382
When it begins to get dark, the automatic headlamp
system will switch from DRL to the headlamps or the last
chosen headlamp setting that was used.
To idle your vehicle with the DRL off, put the
transmission in PARK (P). The DRL will stay off until
you shift out of PARK (P).
The following does not apply to vehicles ®rst sold in
Canada.
When necessary, you may turn off the automatic
headlamp system and the Daytime Running
Lamps (DRL) feature by following the steps below:
1. Turn the ignition to RUN.
2. Press the DOME OVERRIDE button four times
within six seconds. After the fourth press of the
button, a chime will sound informing you that
the system is off.
To return to the automatic mode, push the DOME
OVERRIDE button four times within six seconds (the
chime will sound), or turn the ignition to off and then to
RUN again.
As with any vehicle, you should turn on the regular
headlamp system when you need it.
Interior Lamps
Instrument Panel Brightness Control
The thumbwheel for this feature is located to the right of
the exterior lamps control. Turn the thumbwheel up to
brighten the lights or down to dim them.
Moving the thumbwheel up to the ®rst position will
activate the interior dome lamps.
Exit Lighting
With exit lighting, the interior lamps will come on when
you remove the key from the ignition. The lights will
not come on if the DOME OVERRIDE button is
pressed in.
Entry Lighting
Your vehicle is equipped with an illuminated entry
feature.
When a door is opened, the dome lamps will come on if
the DOME OVERRIDE button is in the out position.
The dome lamps will not come on when the Dutch doors
are opened. When all the doors are closed, the lamps
will stay on for a short period of time and will then
go out. If the DOME OVERRIDE button is pressed in,
the lamps will not come on.
3-15
Page 158 of 382
Audio System(s)
Notice:Before you add any sound equipment to
your vehicle ± like a tape player, CB radio, mobile
telephone or two-way radio ± be sure you can
add what you want. If you can, it's very important to
do it properly. Added sound equipment may
interfere with the operation of your vehicle's engine,
radio or other systems, and even damage them.
Your vehicle's systems may interfere with the
operation of sound equipment that has been added
improperly.
So, before adding sound equipment, check with
your dealer and be sure to check federal rules
covering mobile radio and telephone units.
Your audio system has been designed to operate easily
and to give years of listening pleasure. You will get
the most enjoyment out of it if you acquaint yourself with
it ®rst. Figure out which radio you have in your vehicle,
®nd out what your audio system can do and how to
operate all of its controls to be sure you're getting the
most out of the advanced engineering that went into it.
Your vehicle has a feature called Retained Accessory
Power (RAP). With RAP, you can play your audio
system even after the ignition is turned off. See
ªRetained Accessory Power (RAP)º under
Ignition
Positions on page 2-17.
Setting the Time for Radios with the
Set Button
Press SET. Within ®ve seconds, press and hold the left
SEEK arrow until the correct hour appears on the
display. Press and hold the right SEEK arrow until the
correct minute appears on the display.
Setting the Time for Radios with HR
and MN Buttons
Press and hold HR until the correct hour appears on the
display. Press and hold MN until the correct minute
appears on the display. To display the time with
the ignition off, press RECALL or HR/MN and the time
will be displayed for a few seconds. There is an
initial two-second delay before the clock goes into the
time-set mode.
3-38
Page 167 of 382
While listening to a CD, press the up arrow to hear the
next track on the CD. Press the down arrow to go
back to the start of the current track if more than eight
seconds have played. The SEEK button is inactive if the
CD mode on the front radio is in use.
To scan preset stations, press and hold either SEEK
arrow until SCAN appears on the radio display.
The radio will go to a station, play for a few seconds,
then go on to the next station. Press either SEEK arrow
again to stop scanning. The scan function is inactive
if the front radio is in use.
P.SET PROG (Preset Program):The front passengers
must be listening to something different for each of
these functions to work:
·Press this button to scan through the preset radio
stations set on the pushbuttons on the main radio.
The radio will go to a preset station, play for a
few seconds, then go on to the next preset station.
Press this button again to stop scanning.
TAPE CD:Press this button to play CD when listening
to the radio.
Theft-Deterrent Feature
THEFTLOCKžis designed to discourage theft of your
radio. It works by using a secret code to disable all radio
functions whenever battery power is interrupted.
The THEFTLOCK
žfeature for the radio may be used or
ignored. If ignored, the system plays normally and the
radio is not protected by the feature. If THEFTLOCK
žis
activated, your radio will not operate if stolen.
When THEFTLOCK
žis activated, LOC will appear on
the radio display to indicate a locked condition anytime
battery power has been interrupted. If your battery
loses power for any reason, you must unlock the radio
with the secret code before it will operate.
3-47
Page 206 of 382
If yours was built with trailering options, as many are,
it's ready for heavier trailers. But trailering is different
than just driving your vehicle by itself. Trailering means
changes in handling, acceleration, braking, durability
and fuel economy. Successful, safe trailering takes
correct equipment, and it has to be used properly.
That's the reason for this part. In it are many time-tested,
important trailering tips and safety rules. Many of
these are important for your safety and that of your
passengers. So please read this section carefully before
you pull a trailer.
If You Do Decide To Pull A Trailer
If you do, here are some important points:
·There are many different laws, including speed limit
restrictions, having to do with trailering. Make sure
your rig will be legal, not only where you live
but also where you'll be driving. A good source for
this information can be state or provincial police.
·Consider using a sway control. See ªHitchesº later
in this section.
·Don't tow a trailer at all during the ®rst 500 miles
(800 km) your new vehicle is driven. Your engine,
axle or other parts could be damaged.
·Then, during the ®rst 500 miles (800 km) that you
tow a trailer, don't drive over 50 mph (80 km/h)
and don't make starts at full throttle. This helps your
engine and other parts of your vehicle wear in at
the heavier loads.
·See also ªDriving on Gradesº later in this section.
Three important considerations have to do with weight:
·the weight of the trailer,
·the weight of the trailer tongue
·and the weight on your vehicle's tires.
Tow/Haul Mode
Tow/haul is designed to assist while your vehicle is
pulling a large or heavy load or trailer. Tow/haul is most
useful while pulling such a load in rolling terrain, in
stop-and-go traffic, or when you need improved
low-speed control, such as when parking. The purpose
of the tow/haul mode is to:
·Reduce the frequency and improve the predictability
of transmission shifts,
·provide the same solid shift feel when pulling a
heavy load as when the vehicle is unloaded, and
·improve control of vehicle speed while requiring less
throttle pedal activity.
4-36