remove seats CHEVROLET ASTRO CARGO VAN 1995 2.G Owners Manual
[x] Cancel search | Manufacturer: CHEVROLET, Model Year: 1995, Model line: ASTRO CARGO VAN, Model: CHEVROLET ASTRO CARGO VAN 1995 2.GPages: 342, PDF Size: 17.57 MB
Page 16 of 342
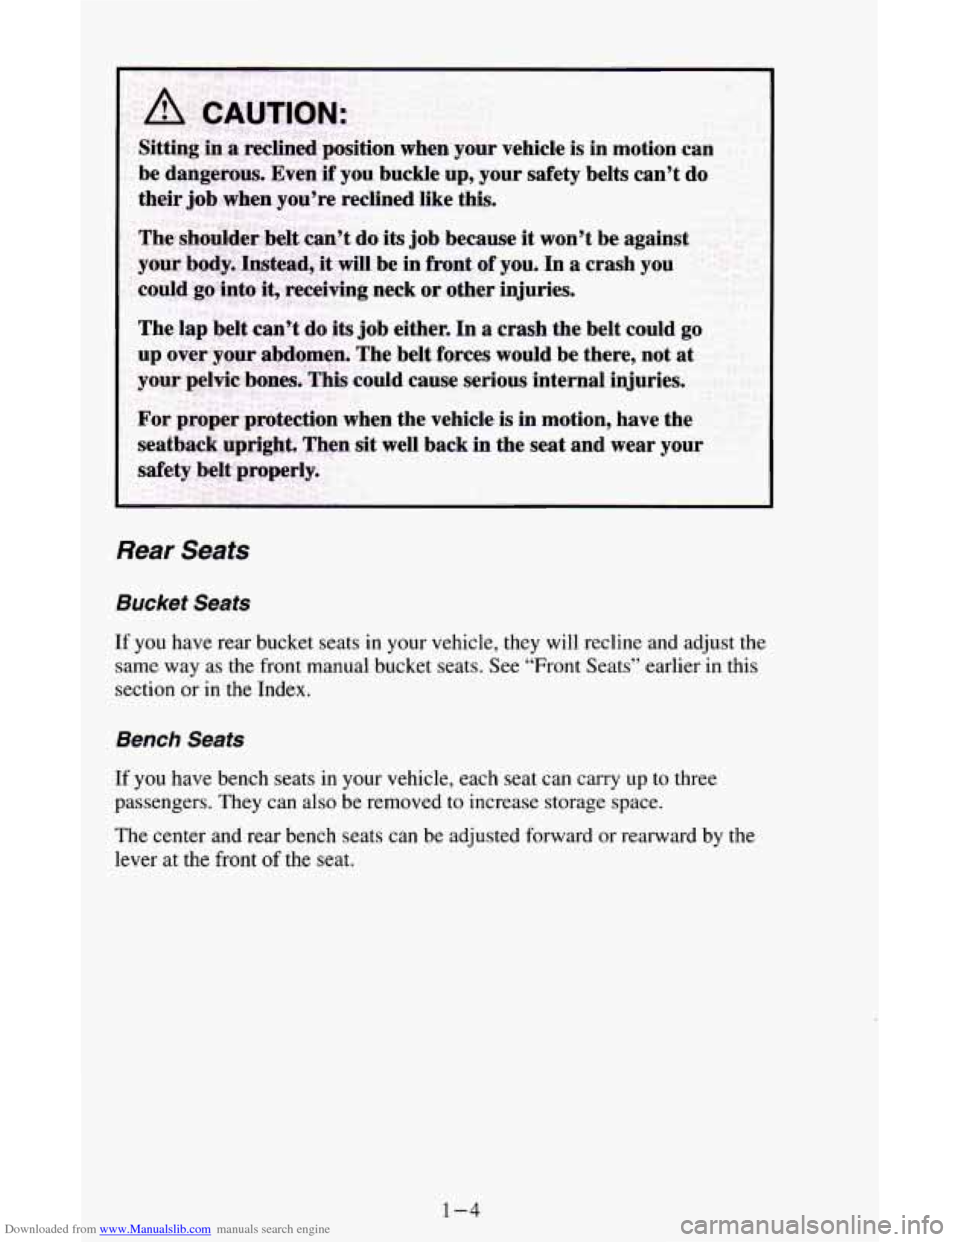
Downloaded from www.Manualslib.com manuals search engine The lap belt can’t do its job either. In a crash the belt could go
Rear Seats
Bucket Seats
If you have rear bucket seats in your vehicle, they will recline and adjust the
same way as the front manual bucket seats. See “Front Seats” earlier in this
section or in the Index.
Bench Seats
If you have bench seats in your vehicle, each seat can carry up to three
passengers. They can also be removed
to increase storage space.
The center and rear bench seats can be adjusted forward or rearward by the
lever
at the front of the seat.
1-4
Page 19 of 342
Downloaded from www.Manualslib.com manuals search engine Removable Seats (Touring and Non-Touring Bench Seats)
To Remove The Seat
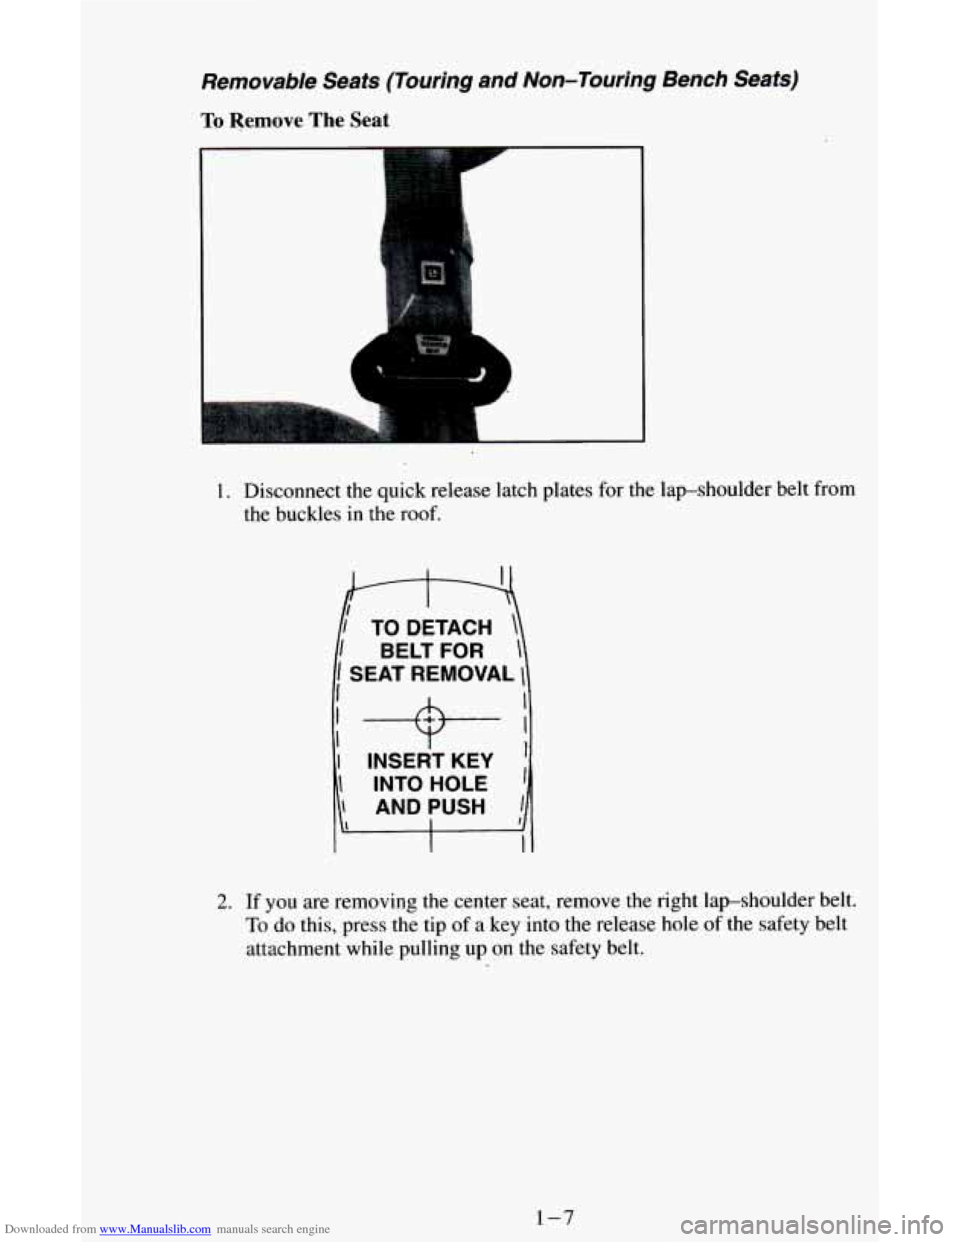
1. Disconnect the quick release latch plates for the lap-shoulder belt from
the buckles
in the roof.
BELTFOR
SEAT REMOVAL I
I I .-+-
1, I=;":
I INTO HOLE 1 I I
2. If you are removing the center seat, remove the right lapshoulder belt.
To do this, press the tip of a key into the release hole of the safety belt
attachment while pulling up
on the safety belt.
1-7
Page 20 of 342
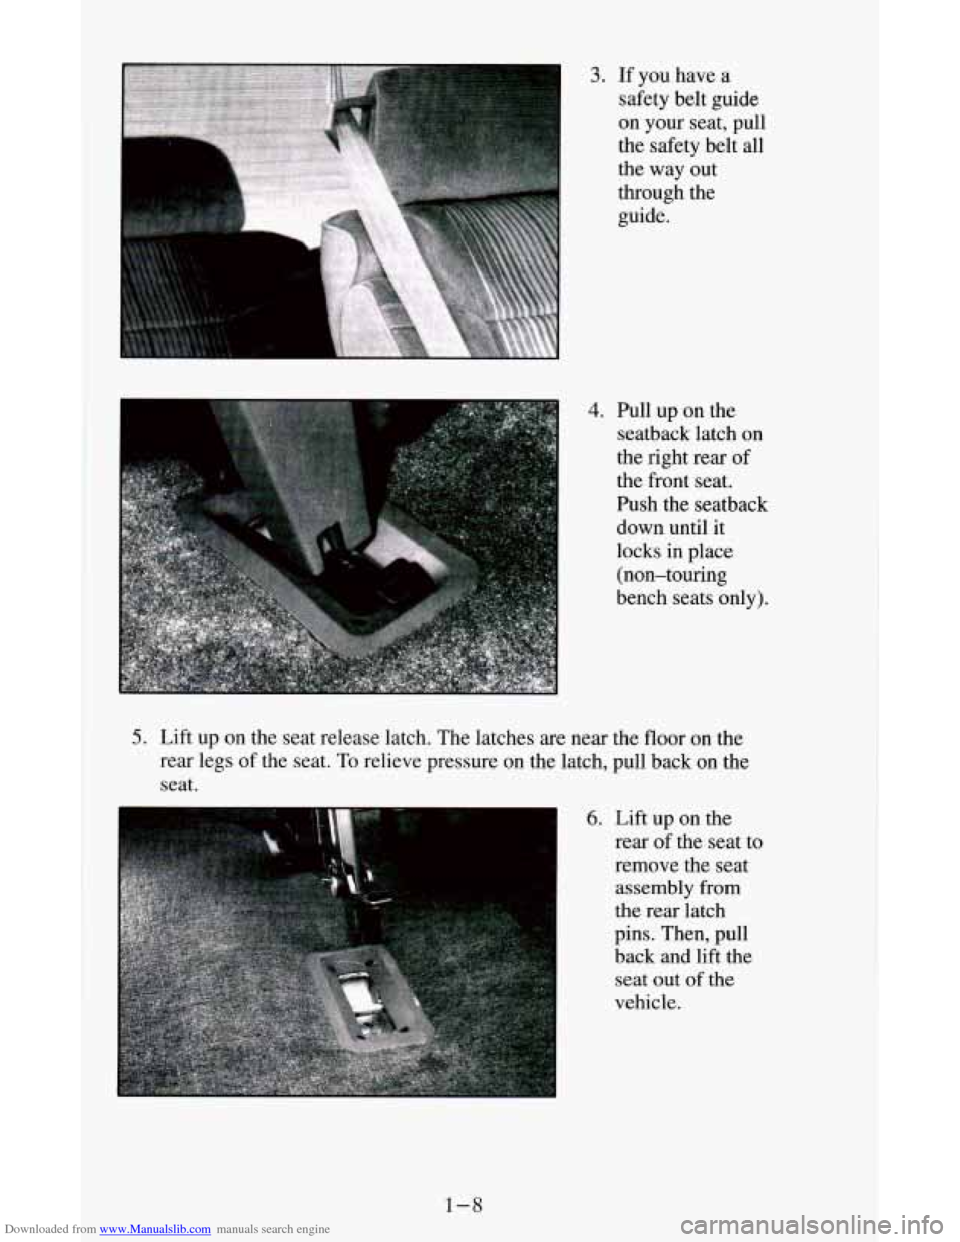
Downloaded from www.Manualslib.com manuals search engine 3. If you have a
safety belt guide
on your seat, pull
the safety belt all
the way out
through the
guide.
4. Pull up on the seatback latch on
the right rear
of
the front seat.
Push the seatback
down until it
locks in place
(non-touring
bench seats only).
5. Lift up on the seat release latch. The latches are near the floor on the
rear legs
of the seat. To relieve pressure on the latch, pull back on the
seat.
6. Lift up on the
rear
of the seat to
remove the seat assembly from
the rear latch
pins. Then, pull
back and lift the seat out
of the
vehicle.
1-8
Page 221 of 342
Downloaded from www.Manualslib.com manuals search engine Used oil can be a real threat to the environment. If you change your own oil,
be sure to drain all free-flowing
oil from the filter before disposal. Don’t
ever dispose
of oil by putting it in the trash, pouring it on the ground, into
sewers, or into streams or bodies
of water. Instead, recycle it by taking it to
a place that collects used oil. If you have a problem properly disposing of
your used oil, ask your dealer, a service station
or a local recycling center
for help.
Engine Cover
To Remove the Engine Cover:
1. Move both front seats as far back as they will go.
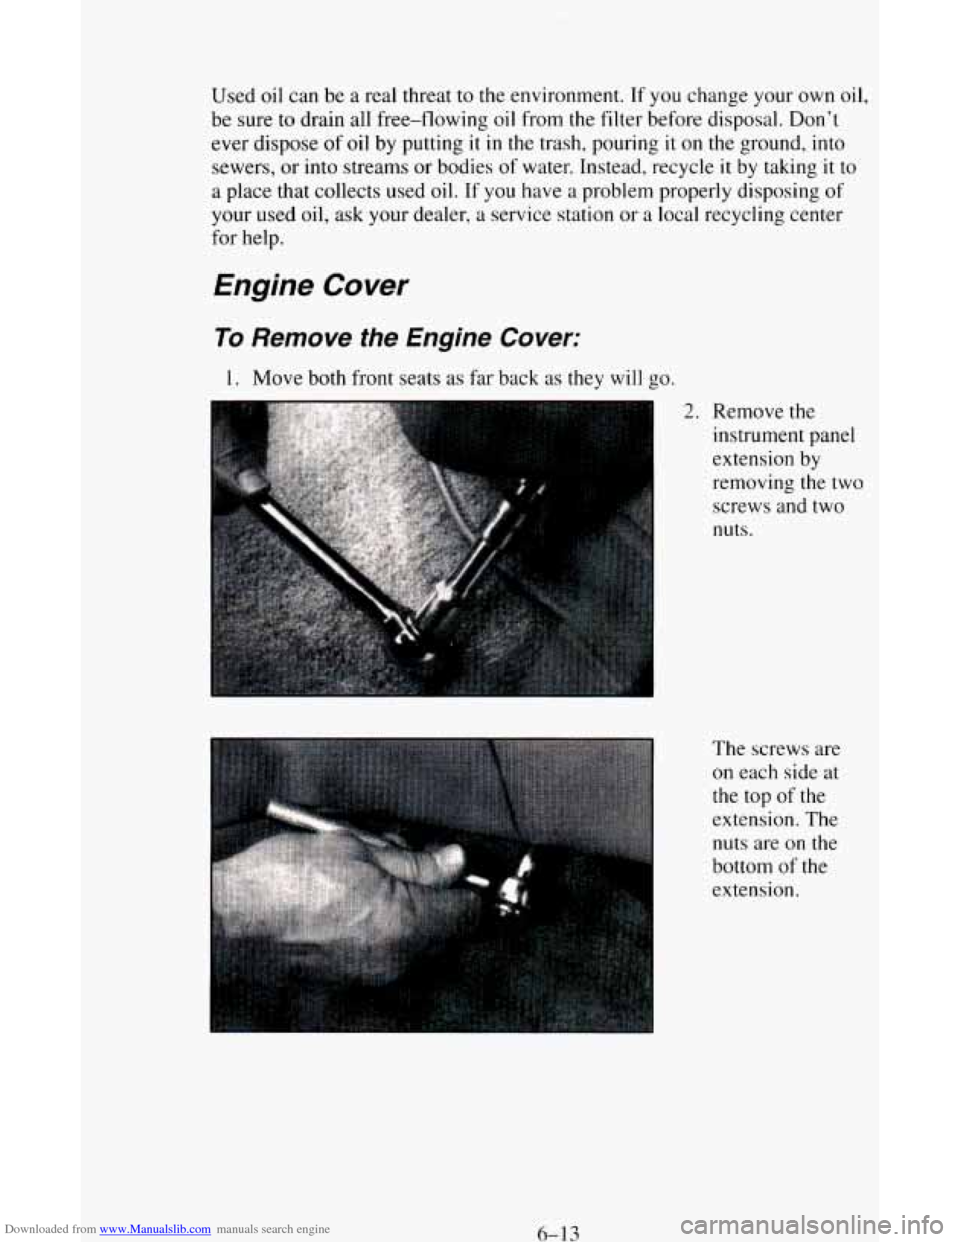
I 2. Remove the
instrument panel
extension by
removing the two
screws and two
nuts.
The screws are
on each side at
the top of the
extension. The
nuts are on the
bottom
of the
extension.
6-1 3
Page 264 of 342
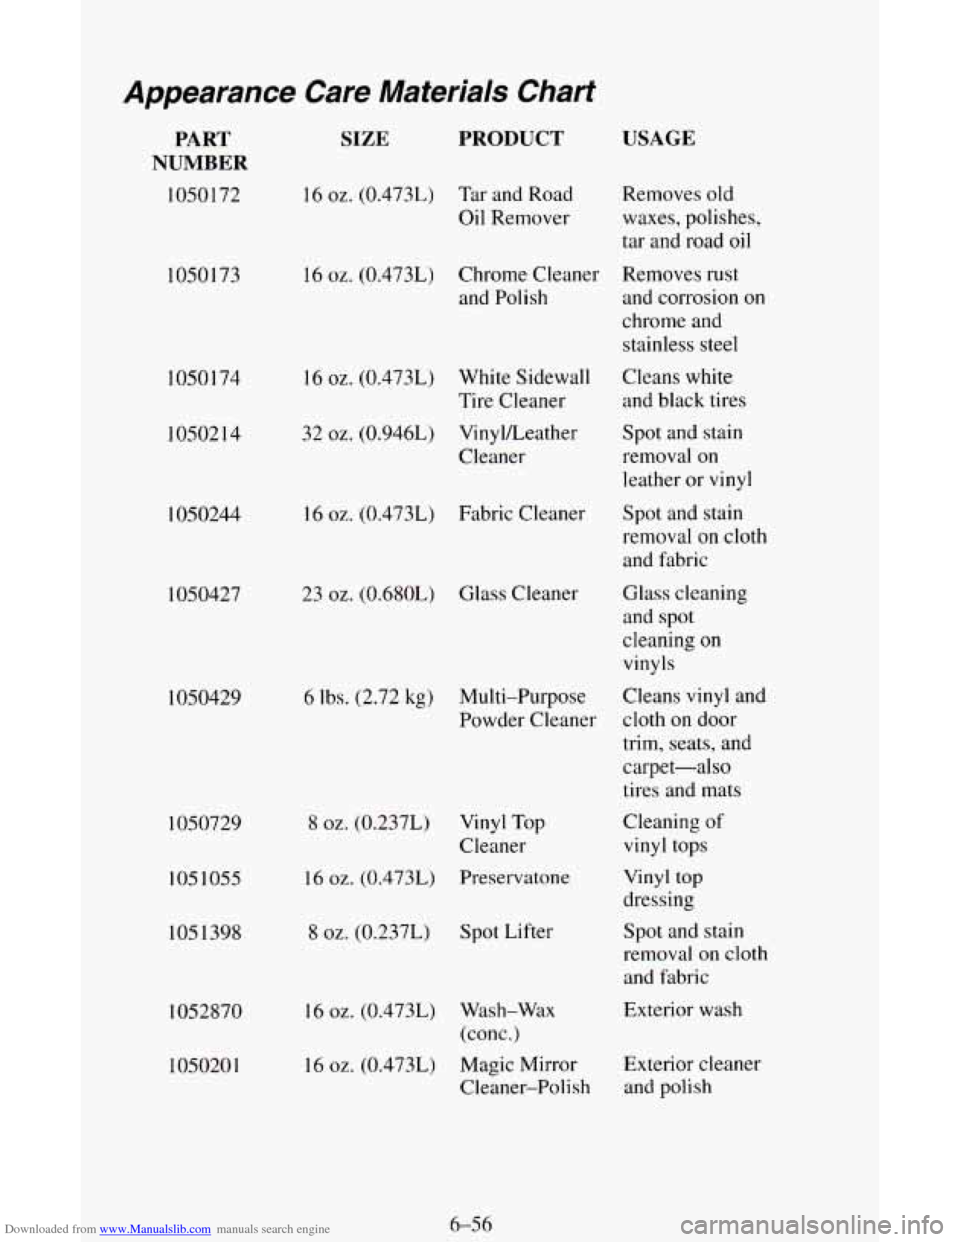
Downloaded from www.Manualslib.com manuals search engine Appearance Care Materials Chart
PART
NUMBER
1050 172
1050173
1050174
1050214 I050244
1050427
1050429
1050729
1051055
1051398 1052870
105020
1
SIZE PRODUCT
16 oz. (0.473L) Tar and Road
Oil Remover
16 oz. (0.473L) White Sidewall
32
oz. (0,9461) VinyVLeather
Tire
Cleaner
Cleaner
USAGE
Removes old
waxes, polishes,
tar and road oil
16 oz. (0.473L) Chrome Cleaner Removes rust
and Polish and corrosion
on
chrome and
stainless steel
Cleans white
and black tires
Spot and stain
removal
on
leather or vinyl
16 oz. (0.473L) Fabric Cleaner
23 oz. (0.680L) Glass Cleaner
8 oz. (0.237L) Vinyl Top
Cleaner
16 oz. (0.4731) Preservatone
8 oz. (0.237L) Spot
Lifter Spot
and stain
removal on cloth
and fabric
Glass cleaning
and spot
cleaning on
vinyls
6 lbs. (2.72
kg) Multi-Purpose Cleans vinyl and
Powder Cleaner cloth
on door
trim,
seats, and
carpet-also
tires and mats
Cleaning
of
vinyl tops
Vinyl top
dressing
Spot and stain
removal on cloth
and fabric
16 oz. (0.473L) Wash-Wax
16
oz. (0.473L) Magic Mirror (conc.)
Cleaner-Polish Exterior
wash
Exterior cleaner
and polish
6-56