jack CHEVROLET ASTRO CARGO VAN 2003 2.G Owners Manual
[x] Cancel search | Manufacturer: CHEVROLET, Model Year: 2003, Model line: ASTRO CARGO VAN, Model: CHEVROLET ASTRO CARGO VAN 2003 2.GPages: 382, PDF Size: 2.63 MB
Page 286 of 382
Used Replacement Wheels
{CAUTION:
Putting a used wheel on your vehicle is
dangerous. You can't know how it's been used
or how far it's been driven. It could fail
suddenly and cause a crash. If you have to
replace a wheel, use a new GM original
equipment wheel.
Tire Chains
Notice:Use tire chains only where legal and only
when you must. Use only SAE Class²S²type chains
that are the proper size for your tires. Install them
on the rear axle tires and tighten them as tightly as
possible with the ends securely fastened. Drive
slowly and follow the chain manufacturer's
instructions. If you can hear the chains contacting
your vehicle, stop and retighten them. If the contact
continues, slow down until it stops. Driving too
fast or spinning the wheels with chains on will
damage your vehicle.
If a Tire Goes Flat
It's unusual for a tire to ªblowoutº while you're driving,
especially if you maintain your tires properly. If air goes
out of a tire, it's much more likely to leak out slowly.
But if you should ever have a ªblowout,º here are a few
tips about what to expect and what to do:
If a front tire fails, the ¯at tire will create a drag that
pulls the vehicle toward that side. Take your foot off the
accelerator pedal and grip the steering wheel ®rmly.
Steer to maintain lane position, and then gently brake to
a stop well out of the traffic lane.
A rear blowout, particularly on a curve, acts much like a
skid and may require the same correction you'd use
in a skid. In any rear blowout, remove your foot from the
accelerator pedal. Get the vehicle under control by
steering the way you want the vehicle to go. It may be
very bumpy and noisy, but you can still steer. Gently
brake to a stop, well off the road if possible.
If a tire goes ¯at, the next part shows how to use your
jacking equipment to change a ¯at tire safely.
5-70
Page 287 of 382
Changing a Flat Tire
If a tire goes ¯at, avoid further tire and wheel damage by
driving slowly to a level place. Turn on your hazard
warning ¯ashers.
{CAUTION:
Changing a tire can cause an injury. The
vehicle can slip off the jack and roll over you
or other people. You and they could be badly
injured. Find a level place to change your tire.
To help prevent the vehicle from moving:
1. Set the parking brake ®rmly.
2. Put the shift lever in PARK (P).
3. Turn off the engine.
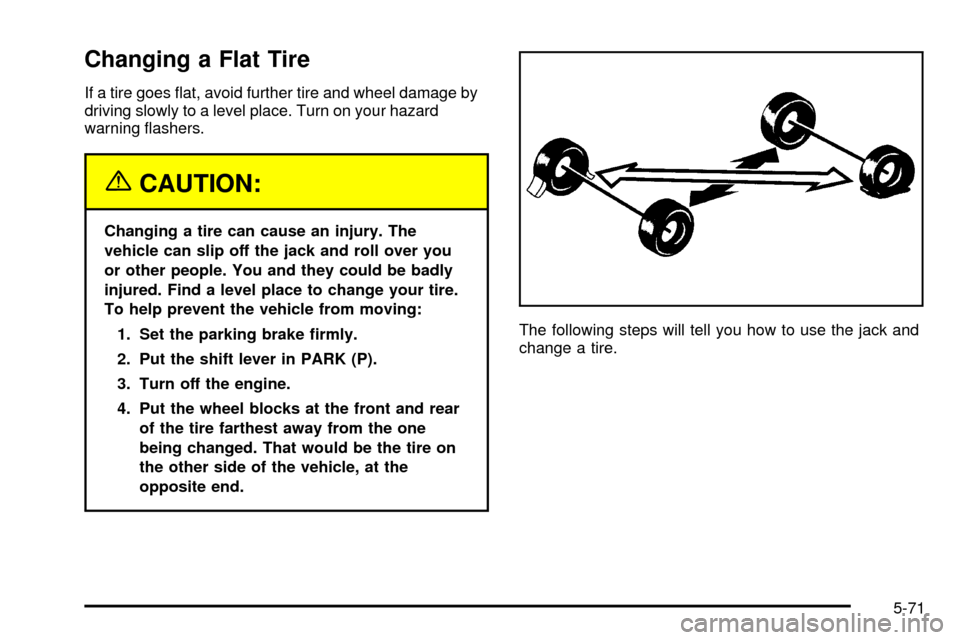
4. Put the wheel blocks at the front and rear
of the tire farthest away from the one
being changed. That would be the tire on
the other side of the vehicle, at the
opposite end.The following steps will tell you how to use the jack and
change a tire.
5-71
Page 288 of 382

Removing the Spare Tire and Tools
The jacking equipment you'll need is stored by your
vehicle's rear doors, along the passenger's side wall.
1. Remove the jack cover by pulling it away from
the side wall and down to release the tabs
securing the top of the cover.2. Remove the wheel blocks by turning the top nut
counterclockwise. Remove the nut and washer,
then pull the wheel blocks off the bolt.
3. Push down on the bolt and remove the hooked end
from the slot. Slide the jack toward the front of the
vehicle and lift it from the mounting. Remove
the extension and the ratchet from the pouch.
5-72
Page 291 of 382
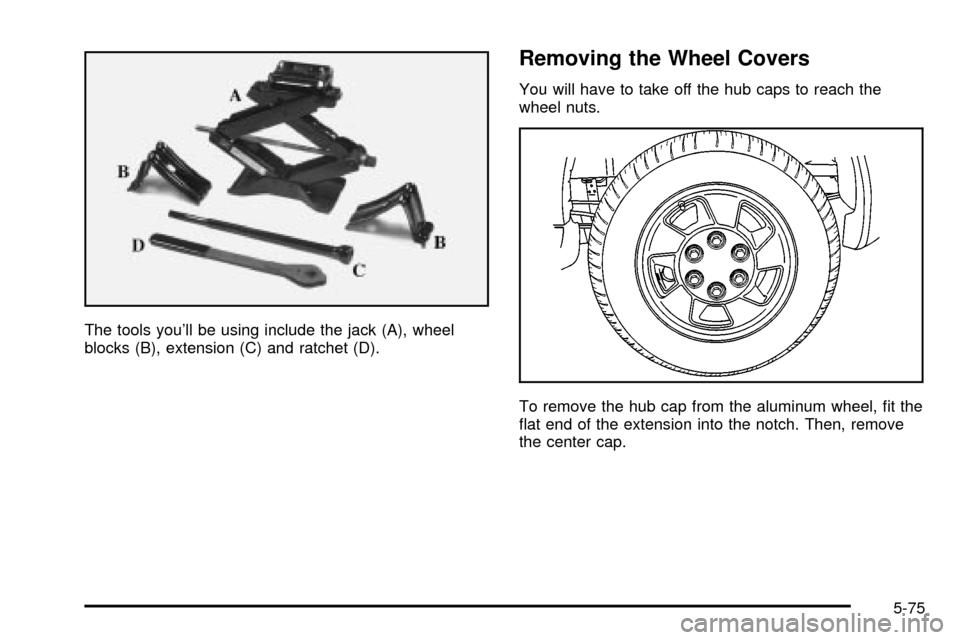
The tools you'll be using include the jack (A), wheel
blocks (B), extension (C) and ratchet (D).
Removing the Wheel Covers
You will have to take off the hub caps to reach the
wheel nuts.
To remove the hub cap from the aluminum wheel, ®t the
¯at end of the extension into the notch. Then, remove
the center cap.
5-75
Page 292 of 382
Removing the Flat Tire and Installing
the Spare Tire
1. Before you start, block the front and rear of the tire
farthest away from the one being changed. Then
put your compact spare tire near the ¯at tire.
{CAUTION:
Getting under a vehicle when it is jacked up is
dangerous. If the vehicle slips off the jack you
could be badly injured or killed. Never get under
a vehicle when it is supported only by a jack.
{CAUTION:
Raising your vehicle with the jack improperly
positioned can damage the vehicle and even
make the vehicle fall. To help avoid personal
injury and vehicle damage, be sure to ®t the
jack lift head into the proper location before
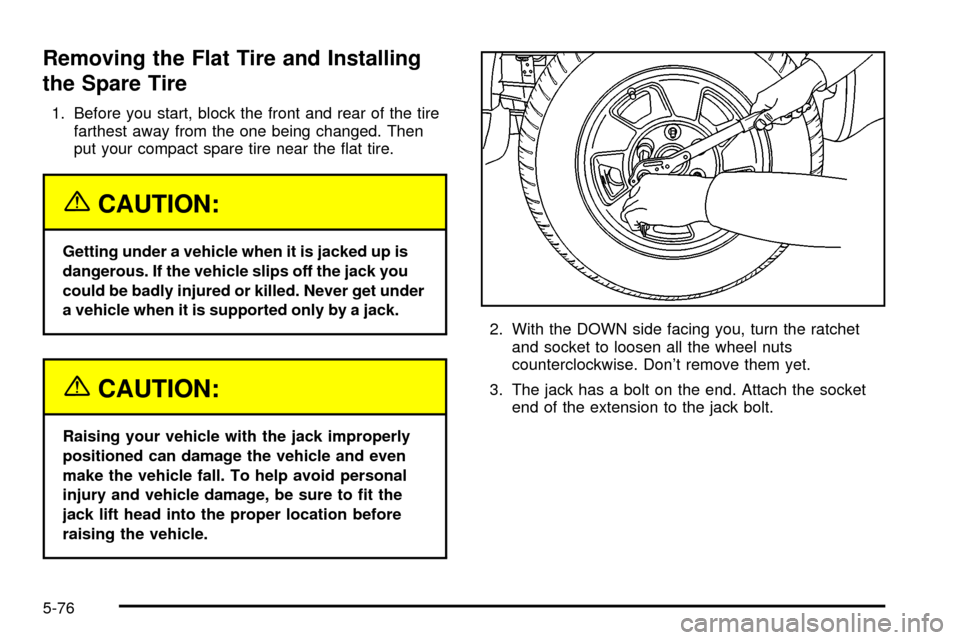
raising the vehicle.2. With the DOWN side facing you, turn the ratchet
and socket to loosen all the wheel nuts
counterclockwise. Don't remove them yet.
3. The jack has a bolt on the end. Attach the socket
end of the extension to the jack bolt.
5-76
Page 293 of 382

4. Attach the ratchet to the extension with the UP side
facing you.
5. Turn the ratchet clockwise. That will raise the jack
lift head a little.
6. Position the jack under the vehicle.A. Front Jack Location
B. Jack
C. Ratchet and ExtensionFront Position
5-77
Page 294 of 382
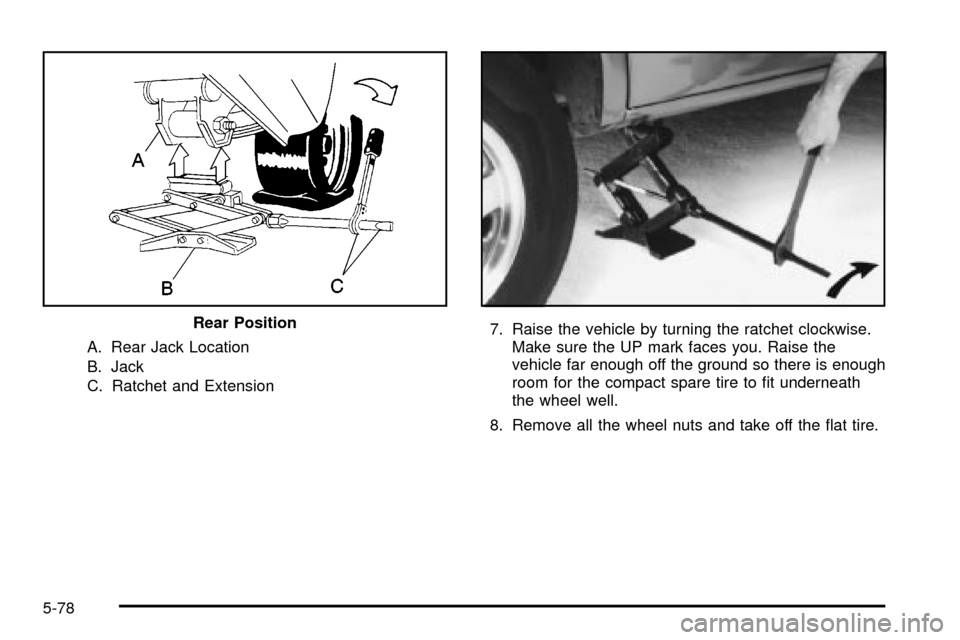
A. Rear Jack Location
B. Jack
C. Ratchet and Extension7. Raise the vehicle by turning the ratchet clockwise.
Make sure the UP mark faces you. Raise the
vehicle far enough off the ground so there is enough
room for the compact spare tire to ®t underneath
the wheel well.
8. Remove all the wheel nuts and take off the ¯at tire. Rear Position
5-78
Page 295 of 382
9. Remove any rust or dirt from the wheel bolts,
mounting surfaces and spare wheel.
{CAUTION:
Rust or dirt on the wheel, or on the parts to
which it is fastened, can make the wheel nuts
become loose after a time. The wheel could
come off and cause an accident. When you
change a wheel, remove any rust or dirt from
the places where the wheel attaches to the
vehicle. In an emergency, you can use a cloth
or a paper towel to do this; but be sure to use
a scraper or wire brush later, if you need to, to
get all the rust or dirt off.
{CAUTION:
Never use oil or grease on studs or nuts. If you
do, the nuts might come loose. Your wheel
could fall off, causing a serious accident.10. Put on the compact spare tire. Put the nuts on by
hand. Make sure the cone-shaped end is toward
the wheel. Tighten each nut by hand until the wheel
is held against the hub. If a nut can't be turned
by hand, use the extension and see your dealer as
soon as possible.
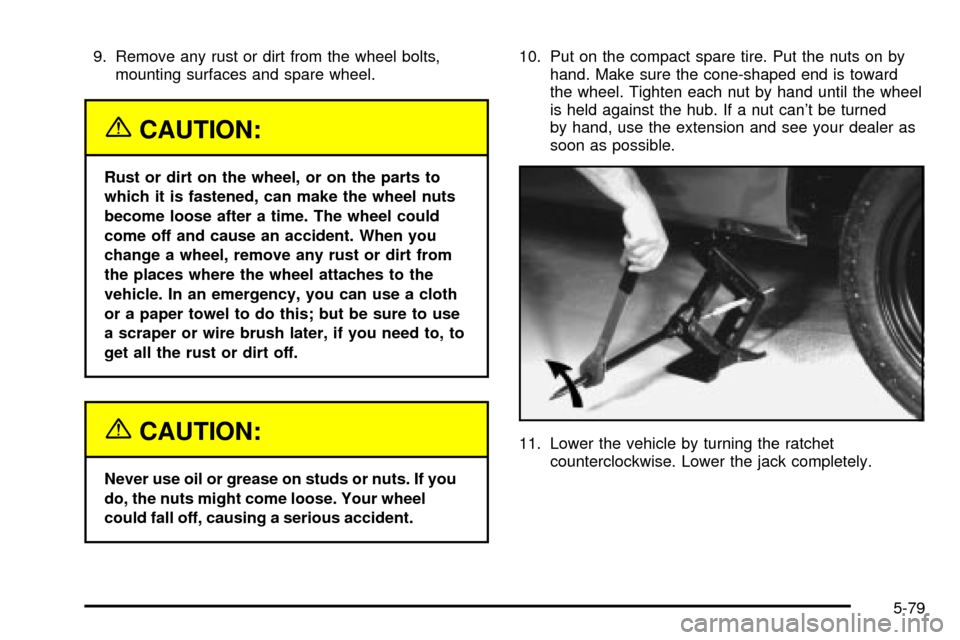
11. Lower the vehicle by turning the ratchet
counterclockwise. Lower the jack completely.
5-79
Page 297 of 382
Storing a Flat or Spare Tire and Tools
{CAUTION:
Storing a jack, a tire, or other equipment in the
passenger compartment of the vehicle could
cause injury. In a sudden stop or collision,
loose equipment could strike someone. Store
all these in the proper place.
1. Put the ¯at tire on the ground at the rear of the
vehicle with the valve stem pointed down.
2. Tilt the retainer plate downward and through the
wheel opening. Make sure it is fully seated across
the underside of the wheel. Attach the ratchet,
with the UP side facing you, to the extension.3. Put the ¯at end of the extension on an angle
through the hole in the rear door frame, above
the bumper.
The compact spare is for temporary use only.
Replace the compact spare tire with a full-size tire
as soon as you can. SeeCompact Spare Tire
on page 5-82. See the storage instructions label to
restore your compact spare properly.
4. Raise the tire fully against the underside of the
vehicle by turning the ratchet/wheel wrench until
you hear two clicks or feel it skip twice. The spare
tire hoist cannot be overtightened.
5. Make sure the tire is stored securely. Push, pull,
and then try to rotate or turn the tire. If the tire
moves, use the ratchet/wheel wrench to tighten
the cable.
Return the jacking equipment to its proper location.
5-81