lock CHEVROLET ASTRO PASSENGER 1994 1.G Workshop Manual
[x] Cancel search | Manufacturer: CHEVROLET, Model Year: 1994, Model line: ASTRO PASSENGER, Model: CHEVROLET ASTRO PASSENGER 1994 1.GPages: 340, PDF Size: 16.86 MB
Page 203 of 340
Downloaded from www.Manualslib.com manuals search engine Changing a Flat Tire
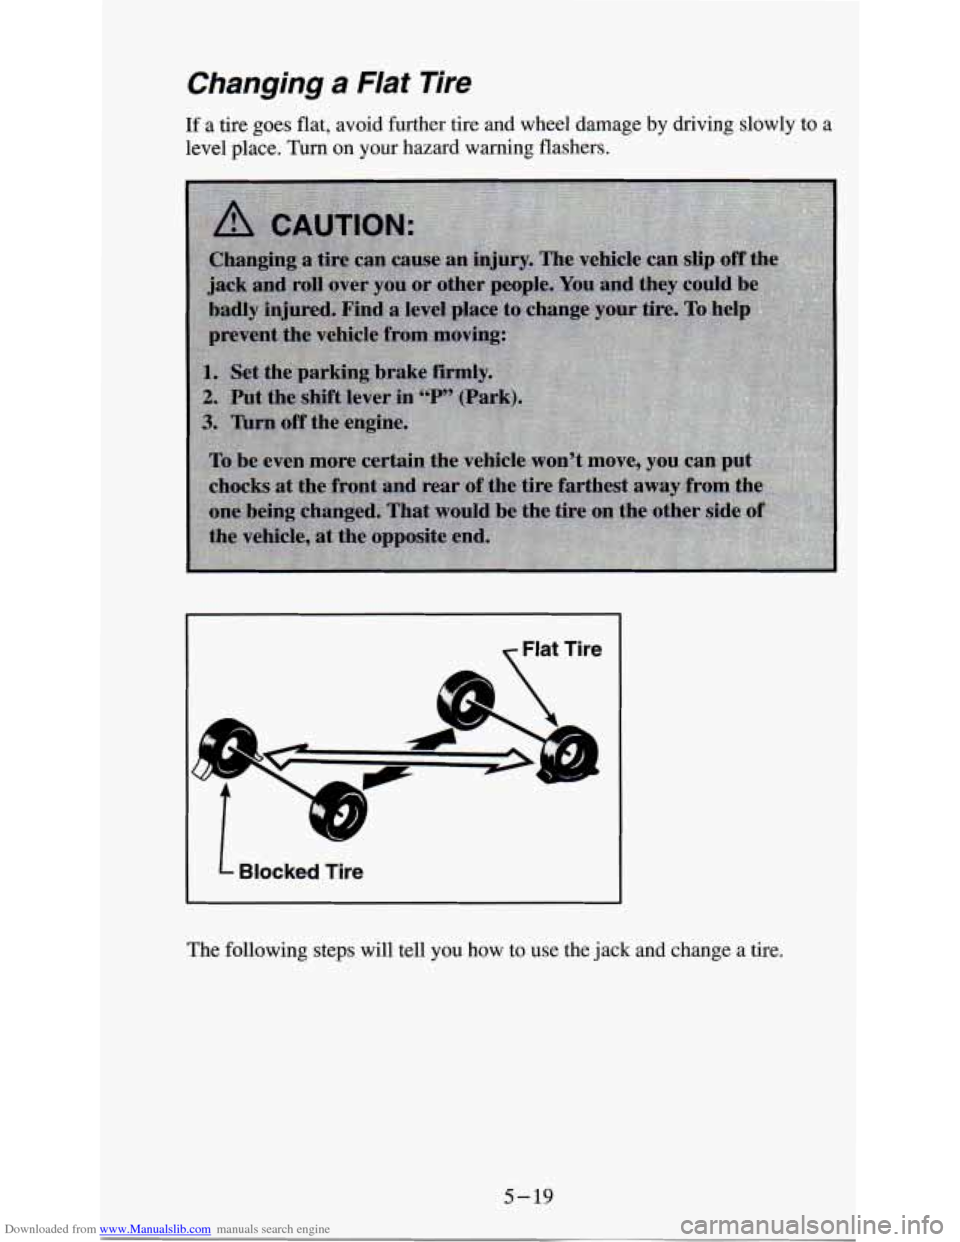
If a tire goes flat, avoid further tire and wheel damage by driving slowly to a
level place. Turn on your hazard warning flashers.
I Flat Tire
L U
Blocked Tire
c
The following steps will tell you how to use the jack and change a tire.
5-19
Page 204 of 340
Downloaded from www.Manualslib.com manuals search engine Jack Storage
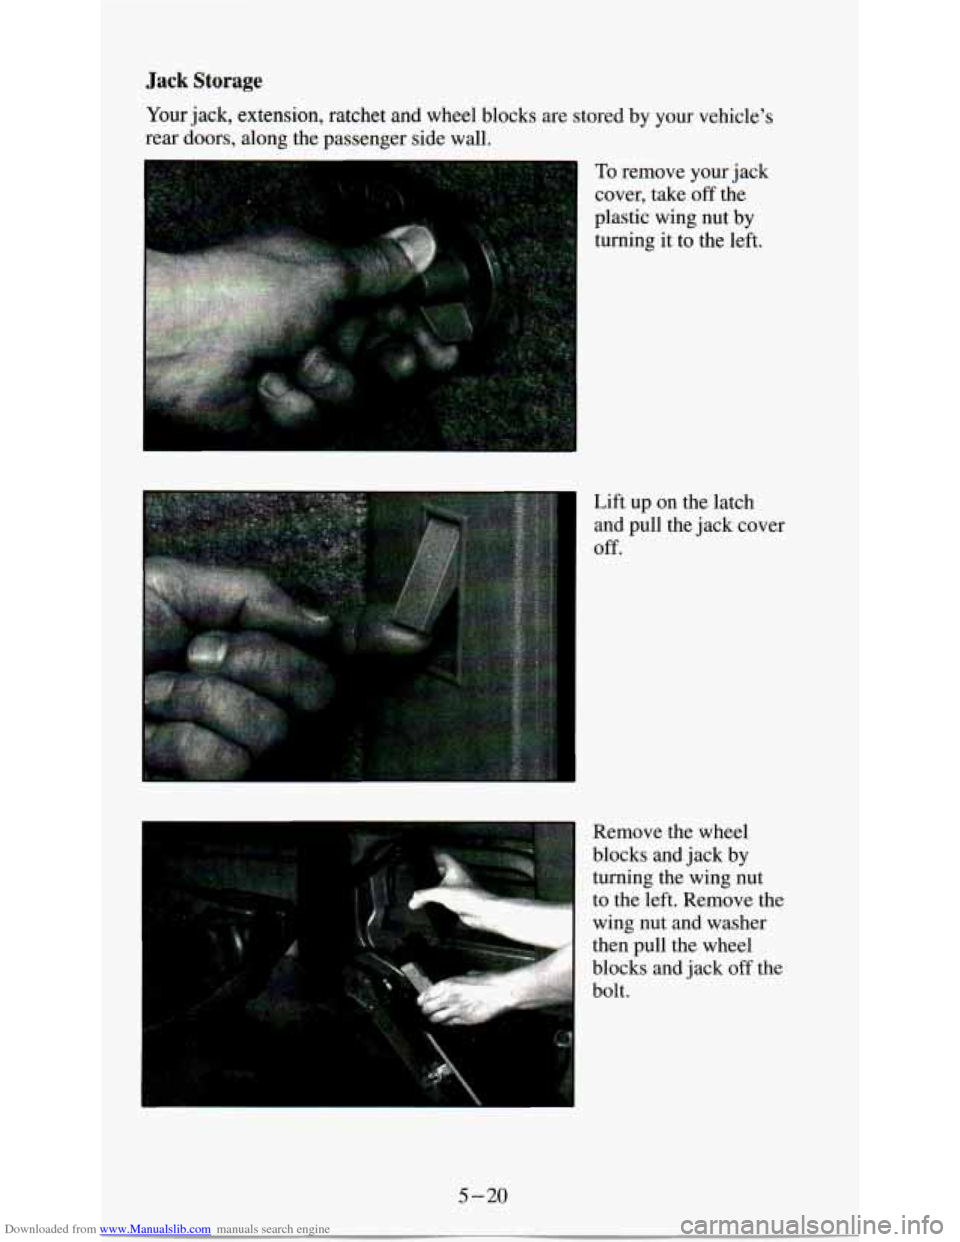
Your jack, extension, ratchet and wheel blocks are stored by your vehicle’s
rear doors, along the passenger side wall.
I
To remove your jack
cover, take off the
plastic wing
nut by
turning it
to the left.
Lift up on the latch
and pull the jack cover
off.
Remove the wheel
blocks and jack
by
turning the wing nut
to the left. Remove the
wing nut and washer
then
pull the wheel
blocks and jack off the
5-20
Page 205 of 340
Downloaded from www.Manualslib.com manuals search engine Jacking Tool Storage
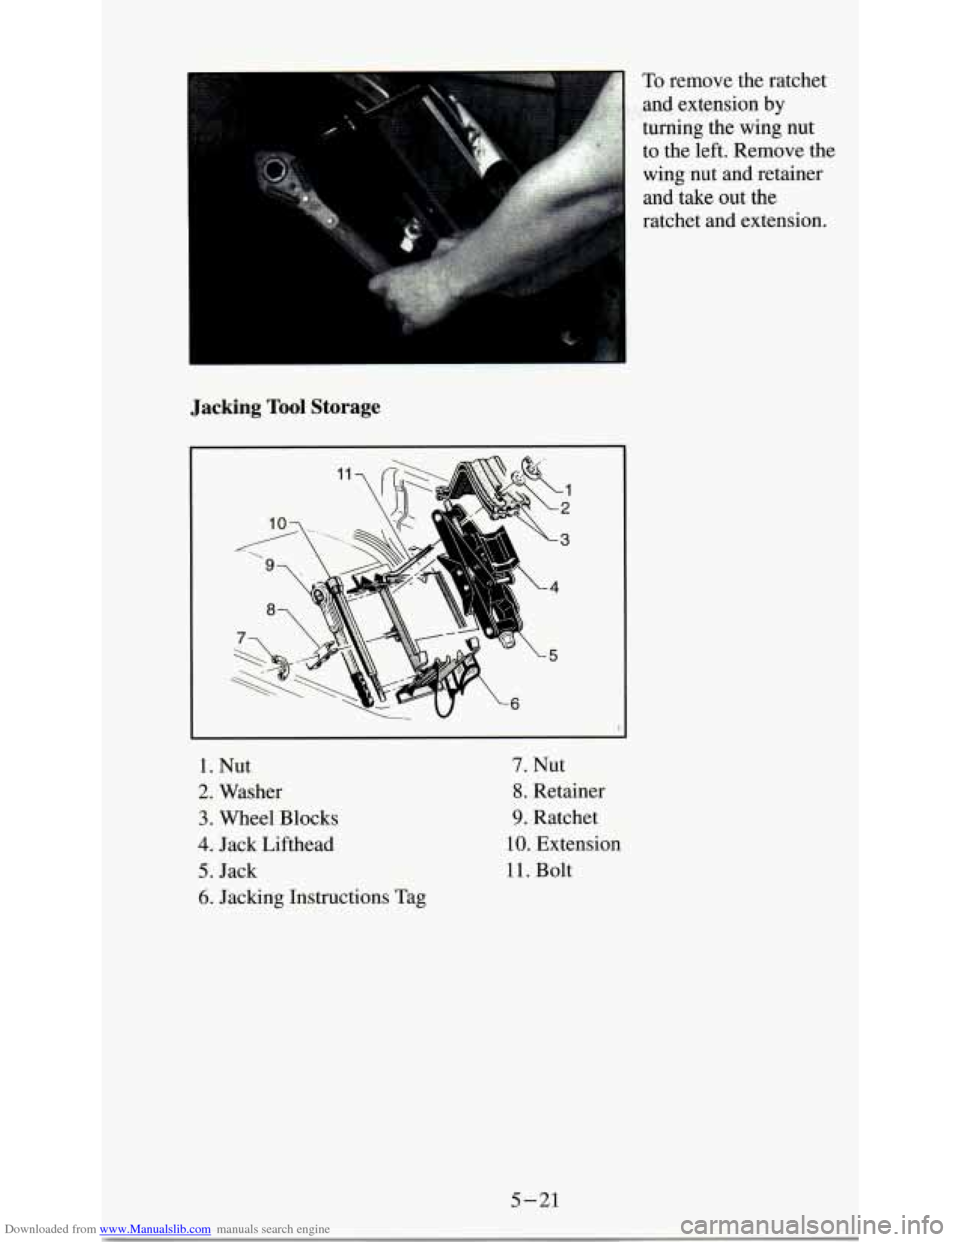
To remove the ratchet
turning the wing nut to the left. Remove the
wing nut
and retainer
and take out
the
ratchet and extension.
'. and extension by
1. Nut
2. Washer
3. Wheel Blocks
4. Jack Lifthead
5. Jack
6. Jacking Instructions Tag
7. Nut
8. Retainer
9. Ratchet
10. Extension
11. Bolt
5 -21
Page 208 of 340
Downloaded from www.Manualslib.com manuals search engine Changing the Tire
::..., ...
..... ... .: .... ,,..., . :<>,,.I . .!:%,%%:y ew::;;,. ' , ' ..:... : ................ *.. -9. .:: .'.,, :. , : ....... . ._.. /I:i .... jl w.,.:. .... :.i. Start with the jack, .I:.:,/ .... r.e . :...... ,: .: ...... . ...... .. .. .. . ,, ratchet, extension and
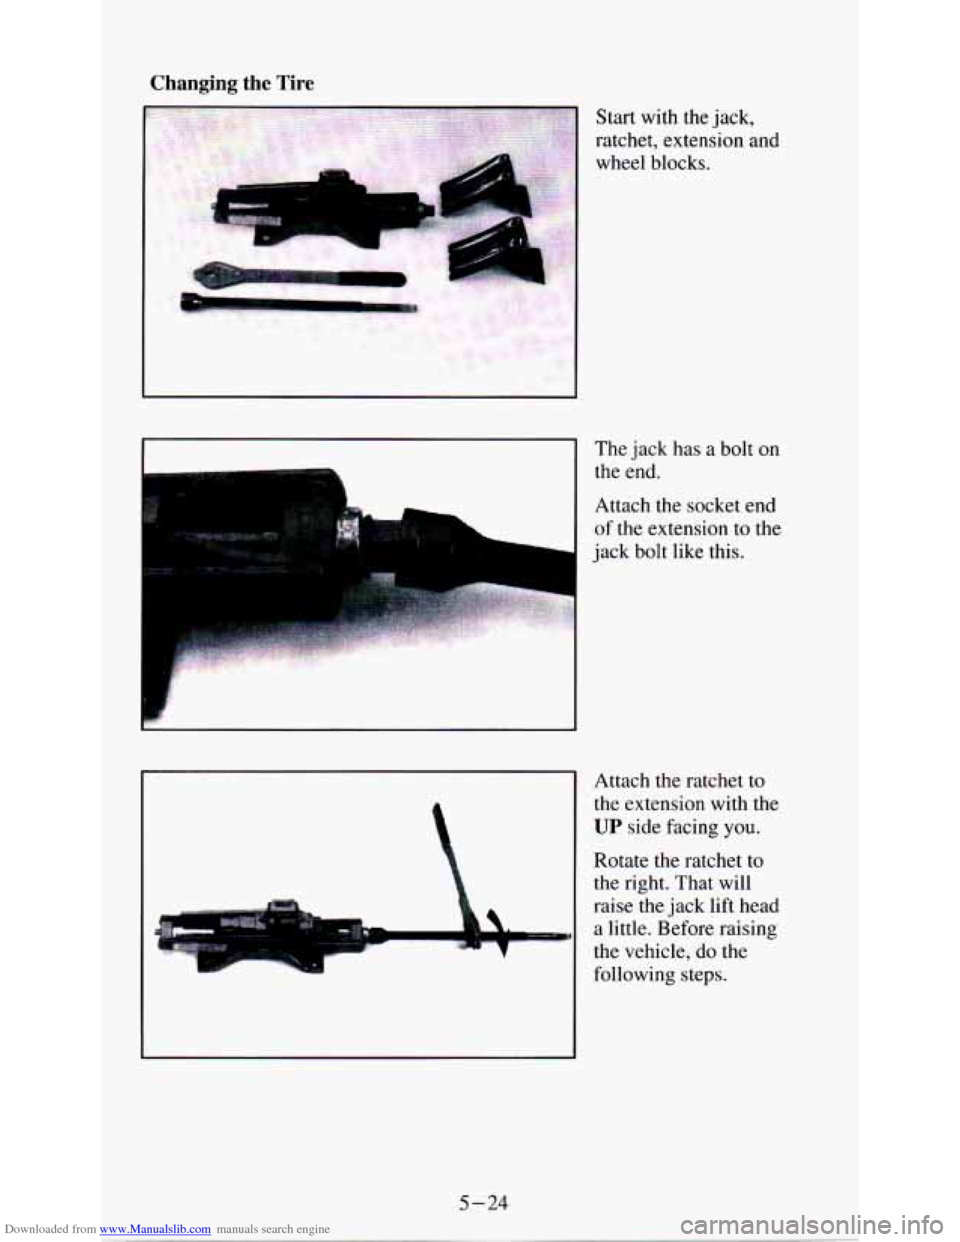
wheel blocks.
I
The jack has a bolt on
the end.
Attach the socket end
of the extension to the
jack bolt like
this.
Attach the ratchet to
the extension with the
UP side facing you.
Rotate the ratchet to
the right. That will
raise the jack lift head
a little. Before raising
the vehicle, do the
following steps.
5-24
Page 209 of 340
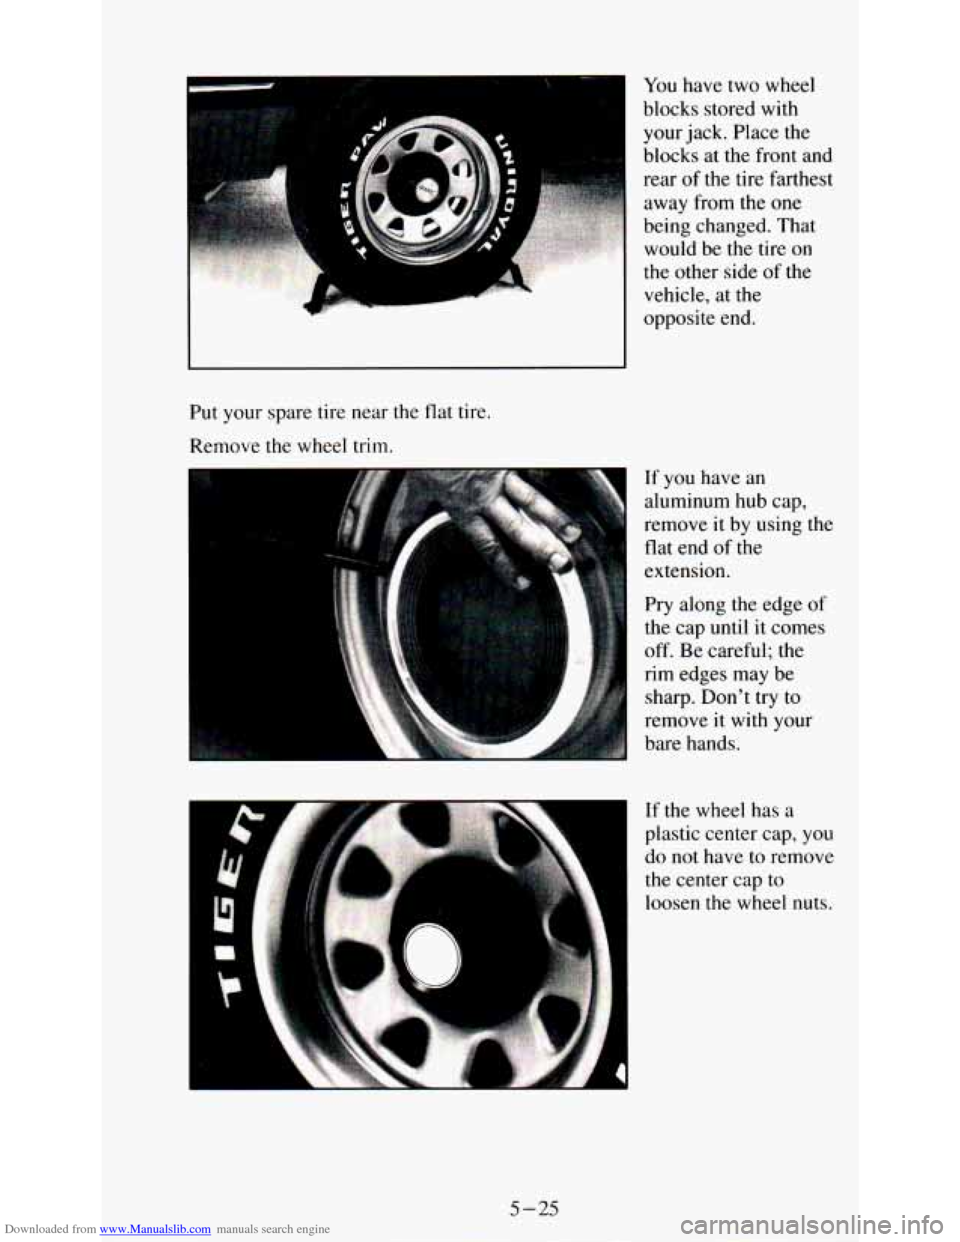
Downloaded from www.Manualslib.com manuals search engine your jack. Place the
blocks at the front
and
rear of the tire farthest
Put your spare tire near the flat tire.
Remove the wheel trim. If
you have an
aluminum hub cap,
remove it by using the
flat end
of the
extension.
Pry along the edge
of
the cap until it comes
off. Be careful; the
rim edges
may be
sharp. Don't try
to
remove it with your
bare hands.
If the wheel has a
plastic center cap,
you
do not have to remove
the center cap to
loosen the wheel nuts.
5 -25
Page 214 of 340
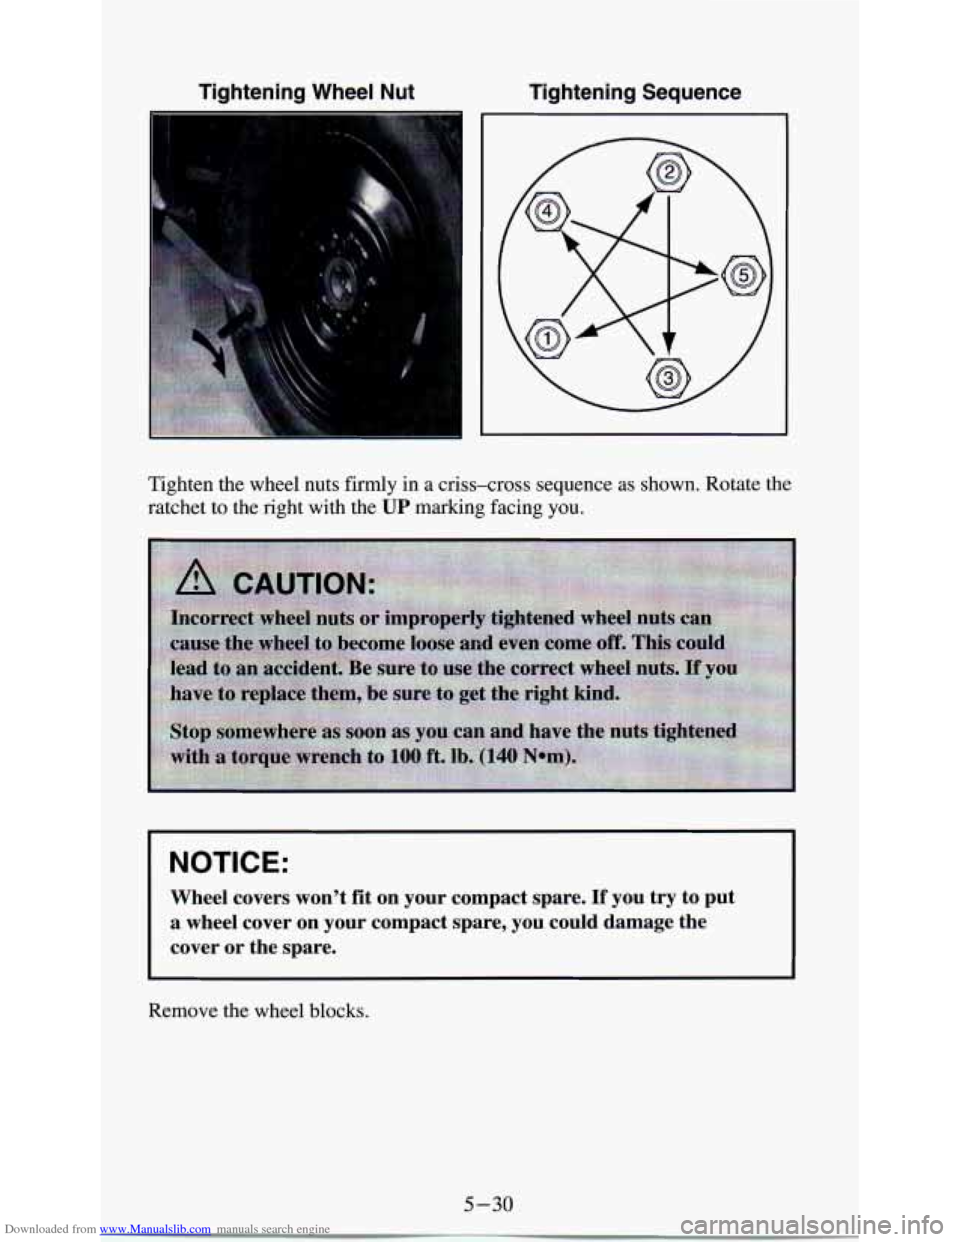
Downloaded from www.Manualslib.com manuals search engine Tightening Wheel Nut Tightening Sequence
Tighten the wheel nuts firmly in a criss-cross sequence as shown. Rotate the
ratchet to the right with the
UP marking facing you.
NOTICE:
Wheel covers won't fit on your compact spare. If you try to put
a wheel cover on your compact spare, you could damage the
cover or the spare.
Remove the wheel blocks.
5-30
Page 215 of 340
Downloaded from www.Manualslib.com manuals search engine Storing The Jack and Spare Tire
Put the tire on the ground at the rear of the vehicle, with the valve stem
pointed down.
Pull the retaining bar through the center of the wheel, making sure it is
properly attached. Attach the ratchet, with the
UP side facing you, to the
extension.
Put the flat end
of the extension on an angle through the hole in the rear
door frame, above the bumper. Turn the ratchet to the right until the tire is
against the underside
of the vehicle.
You will hear two"c1icks" when the tire is all the way.
Try to move the tire
with your hands to make sure it is securely in place.
Return the jack, ratchet, extension and wheel blocks to the proper location
in the rear storage area. Replace all bolts, retainers and wing nuts in the
proper location. Secure the jacking equipment in its proper location and
replace the jack storage cover.
Page 224 of 340
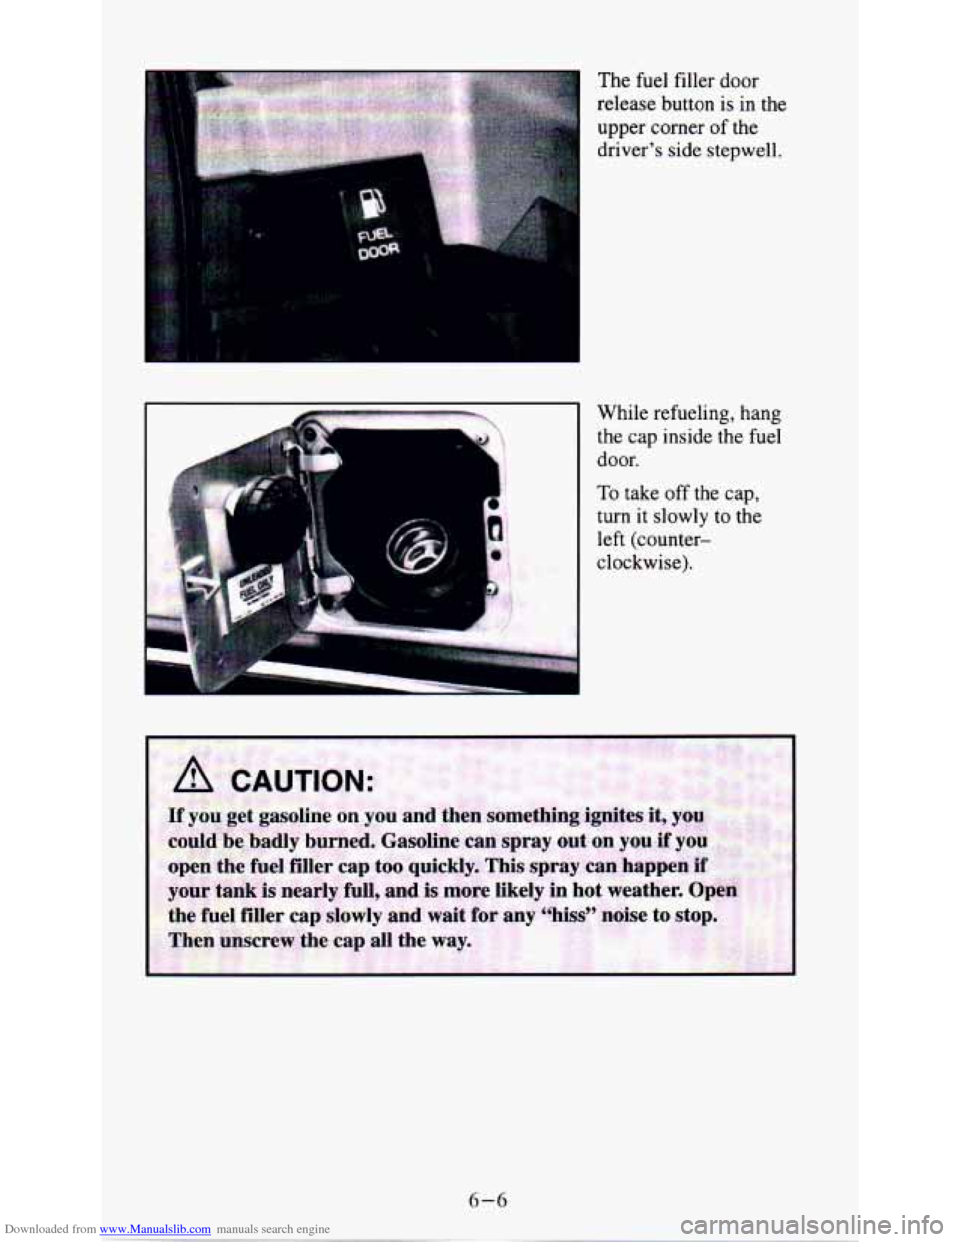
Downloaded from www.Manualslib.com manuals search engine While refueling, hang
the cap inside the fuel
door.
To take off the cap,
turn
it slowly to the
left (counter-
clockwise). The
fuel filler door
release button
is in the
upper corner of the
driver's side stepwell.
Page 232 of 340
Downloaded from www.Manualslib.com manuals search engine Engine Oil Additives
Don’t add anything to your oil. Your GM dealer is ready to advise if you
think something should be added.
When to Change Engine Oil
See if any one of these is true for you:
Most trips are less than 4 miles (6 km).
It’s below freezing outside and most trips are less than 10 miles
(16
km).
The engine is at low speed most of the time (as in door-to-door
You tow a trailer often.
delivery,
or in stop-and-go traffic).
0 Most trips are through dusty places.
If any one of these is true for your vehicle, then
you need to change your oil
andfilter every 3,000 miles (5 000 km) or 3 months - whichever comes
first
.
If none of them is true, change the oil every 7,500 miles (12 500 km) or
12 months
- whichever comes first. Change the filter at the first oil change
and at every other oil change after that.
Engine Coolanf Heater (Engine Block Heater)
An engine coolant heater can be a big help if you have to park outside in
very cold weather,
0°F (-18°C) or colder. If your vehicle has this option,
see “Engine Coolant Heater” in the Index.
What to Do with Used Oil
Did you know that used engine oil contains certain elements that may be
unhealthy for your
skin and could even cause cancer? Don’t let used oil stay
on your skin for very long. Clean your skin and nails with soap and water,
or a good hand cleaner. Wash or properly throw away clothing or rags
containing used engine oil. (See the manufacturer’s warnings about the use
and disposal of oil products.)
Used oil can be a real threat to the environment. If you change your own oil,
be sure to drain all free-flowing oil from the filter before disposal. Don’t
ever dispose of oil by putting it
in the trash, pouring it on the ground, into
sewers, or into streams or bodies of water. Instead, recycle it by taking it to
a place that collects used oil. If you have a problem properly disposing of
your used oil, ask your dealer, a service station or a local recycling center
for help.
6-14
Page 259 of 340
Downloaded from www.Manualslib.com manuals search engine Other Maintenance Rems
Front Suspension and Steering Linkage
Refer to the Maintenance Schedule to determine how often to lubricate the
fittings and what type of lubricant to use.
Front Wheel Bearing (Two-Wheel Drive)
If your vehicle is two-wheel drive, it has wheel bearings that must be
cleaned and repacked.
Refer to the Maintenance Schedule to determine how often this must be
done.
Single Belt Accessory Drive
Your new vehicle uses a serpentine belt that is lighter, and more durable
than systems with several belts.
The belt runs over or around the pulleys on the engine.
A tensioner is used
to keep the belt tight at all times. The tensioner also makes replacing the
belt easier. If you need to replace the belt, be sure to get the correct
replacement belt. Your dealership or parts supplier can help you with this.
The Accessory Drive Belt Routing label on your vehicle will show you how
to route the belt your vehicle uses.
Windshield Wiper Blade Inserts
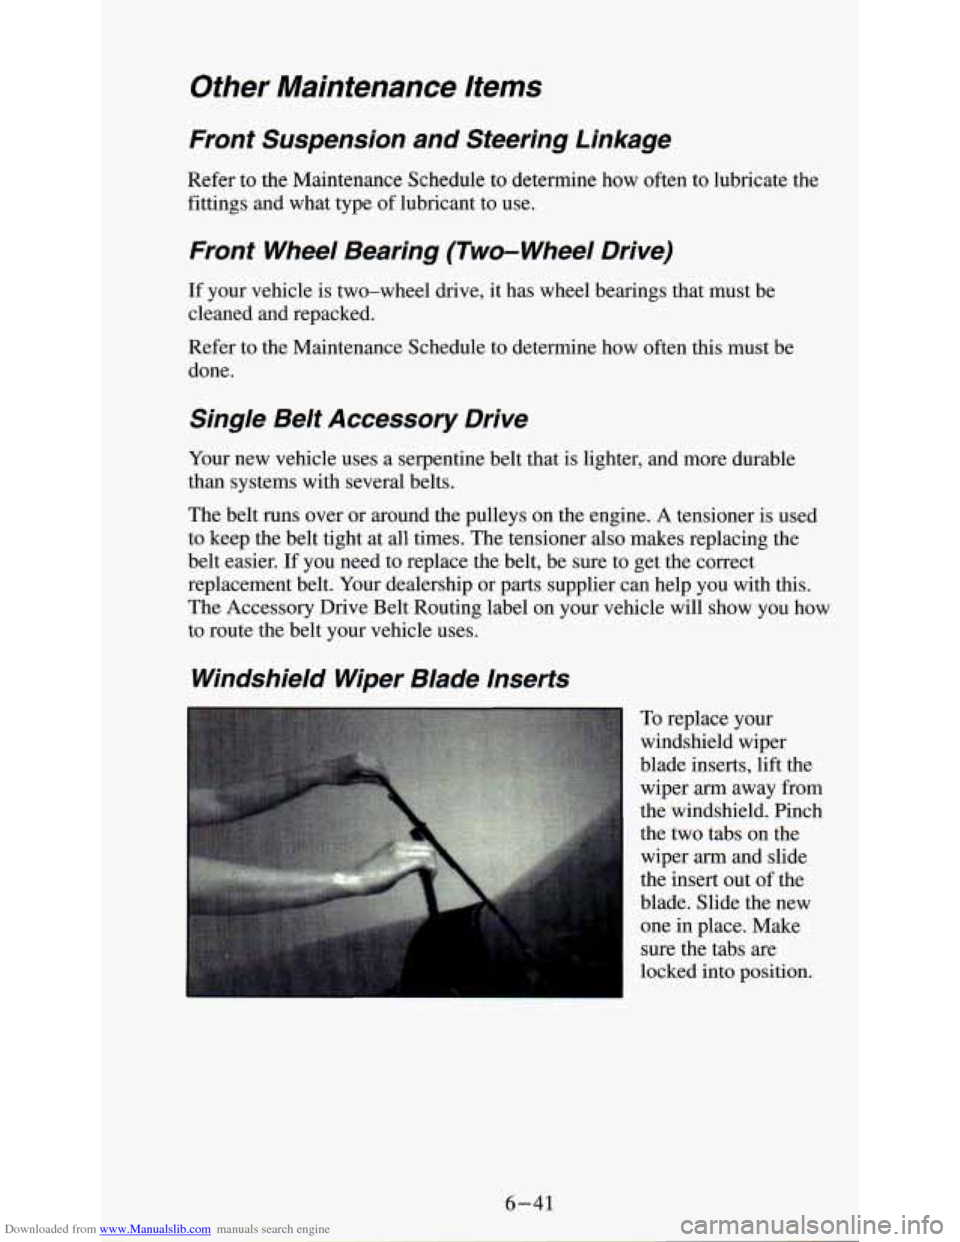
To replace your
windshield wiper
blade inserts, lift the
wiper
arm away from
the windshield. Pinch
the two tabs on the
wiper
arm and slide
the insert out of the
blade. Slide the new
one in place. Make
sure the tabs are
locked into position.
6-41