oil CHEVROLET AVALANCHE 2003 1.G Owner's Manual
[x] Cancel search | Manufacturer: CHEVROLET, Model Year: 2003, Model line: AVALANCHE, Model: CHEVROLET AVALANCHE 2003 1.GPages: 492, PDF Size: 3.53 MB
Page 352 of 492

How to Reset the CHANGE ENGINE OIL
Message System
The GM Oil Life System calculates when to change
your engine oil and ®lter based on vehicle use. Anytime
your oil is changed, reset the system so it can
calculate when the next oil change is required. If a
situation occurs where you change your oil prior to a
CHANGE ENGINE OIL message being turned on, reset
the system.
To reset the CHANGE ENGINE OIL message, see ªGM
Oil Life Systemº under
DIC Operation and Displays
on page 3-46for vehicles equipped with the DIC, or do
the following:
1. Turn the ignition key to RUN with the engine off.
2. Fully press and release the accelerator pedal three
times within ®ve seconds.
If the OIL LIFE RESET message ¯ashes for 10 seconds,
the system is reset.
If the system does not reset, try the procedure once
again. If it still does not reset, see your dealer for
service.
What to Do with Used Oil
Used engine oil contains certain elements that may be
unhealthy for your skin and could even cause cancer.
Don't let used oil stay on your skin for very long. Clean
your skin and nails with soap and water, or a good
hand cleaner. Wash or properly dispose of clothing or
rags containing used engine oil. See the manufacturer's
warnings about the use and disposal of oil products.
Used oil can be a threat to the environment. If you
change your own oil, be sure to drain all the oil from the
®lter before disposal. Never dispose of oil by putting it in
the trash, pouring it on the ground, into sewers, or into
streams or bodies of water. Instead, recycle it by taking it
to a place that collects used oil. If you have a problem
properly disposing of your used oil, ask your dealer, a
service station or a local recycling center for help.
5-19
Page 353 of 492
Engine Air Cleaner/Filter
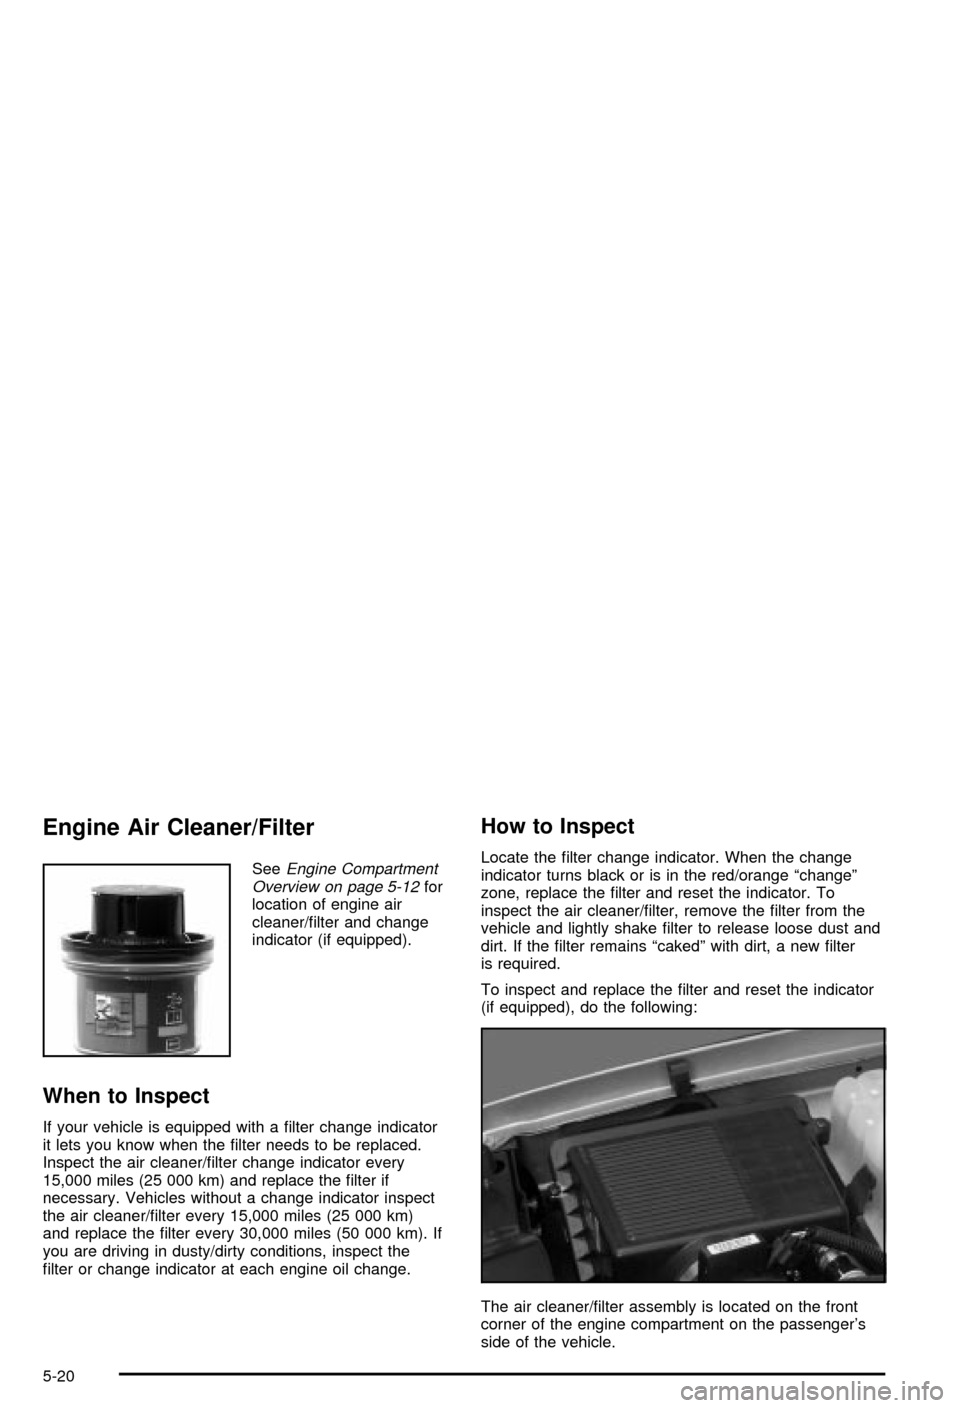
SeeEngine Compartment
Overview on page 5-12for
location of engine air
cleaner/®lter and change
indicator (if equipped).
When to Inspect
If your vehicle is equipped with a ®lter change indicator
it lets you know when the ®lter needs to be replaced.
Inspect the air cleaner/®lter change indicator every
15,000 miles (25 000 km) and replace the ®lter if
necessary. Vehicles without a change indicator inspect
the air cleaner/®lter every 15,000 miles (25 000 km)
and replace the ®lter every 30,000 miles (50 000 km). If
you are driving in dusty/dirty conditions, inspect the
®lter or change indicator at each engine oil change.
How to Inspect
Locate the ®lter change indicator. When the change
indicator turns black or is in the red/orange ªchangeº
zone, replace the ®lter and reset the indicator. To
inspect the air cleaner/®lter, remove the ®lter from the
vehicle and lightly shake ®lter to release loose dust and
dirt. If the ®lter remains ªcakedº with dirt, a new ®lter
is required.
To inspect and replace the ®lter and reset the indicator
(if equipped), do the following:
The air cleaner/®lter assembly is located on the front
corner of the engine compartment on the passenger's
side of the vehicle.
5-20
Page 355 of 492

Automatic Transmission Fluid
When to Check and Change
A good time to check your automatic transmission ¯uid
level is when the engine oil is changed.
Change both the ¯uid and ®lter every 50,000 miles
(83 000 km) if the vehicle is mainly driven under one or
more of these conditions:
·In heavy city traffic where the outside temperature
regularly reaches 90ÉF (32ÉC) or higher.
·In hilly or mountainous terrain.
·When doing frequent trailer towing.
·Uses such as found in taxi, police or delivery
service.
If you do not use your vehicle under any of these
conditions, change the ¯uid and ®lter every
100,000 miles (166 000 km).
See
Part A: Scheduled Maintenance Services on
page 6-4.
How to Check
Because this operation can be a little difficult, you may
choose to have this done at the dealership service
department.
If you do it yourself, be sure to follow all the instructions
here, or you could get a false reading on the dipstick.
Notice:Too much or too little ¯uid can damage
your transmission. Too much can mean that some
of the ¯uid could come out and fall on hot engine
part or exhaust system parts, starting a ®re.
Too little ¯uid could cause the transmission to
overheat. Be sure to get an accurate reading if you
check your transmission ¯uid.
Wait at least 30 minutes before checking the
transmission ¯uid level if you have been driving:
·When outside temperatures are above 90ÉF (32ÉC).
·At high speed for quite a while.
·In heavy traffic ± especially in hot weather.
·While pulling a trailer.
To get the right reading, the ¯uid should be at normal
operating temperature, which is 180ÉF to 200ÉF (82ÉC to
93ÉC).
5-22
Page 358 of 492

A 50/50 mixture of clean, drinkable water and
DEX-COOLžcoolant will:
·Give freezing protection down to-34ÉF (-37ÉC).
·Give boiling protection up to 265ÉF (129ÉC).
·Protect against rust and corrosion.
·Help keep the proper engine temperature.
·Let the warning lights and gages work as they
should.
Notice:When adding coolant, it is important that
you use only DEX-COOLž(silicate-free) coolant.
If coolant other than DEX-COOLžis added to
the system, premature engine, heater core or
radiator corrosion may result. In addition, the engine
coolant will require change sooner -- at 30,000 miles
(50,000 km) or 24 months, whichever occurs ®rst.
Damage caused by the use of coolant other
than DEX-COOL
žis not covered by your new vehicle
warranty.
What to Use
Use a mixture of one-halfclean, drinkable waterand
one-half DEX-COOLžcoolant which won't damage
aluminum parts. If you use this coolant mixture,
you don't need to add anything else.
{CAUTION:
Adding only plain water to your cooling
system can be dangerous. Plain water, or
some other liquid such as alcohol, can boil
before the proper coolant mixture will. Your
vehicle's coolant warning system is set for the
proper coolant mixture. With plain water or the
wrong mixture, your engine could get too hot
but you wouldn't get the overheat warning.
Your engine could catch ®re and you or others
could be burned. Use a 50/50 mixture of clean,
drinkable water and DEX-COOL
žcoolant.
Notice:If you use an improper coolant mixture,
your engine could overheat and be badly damaged.
The repair cost wouldn't be covered by your
warranty. Too much water in the mixture can freeze
and crack the engine, radiator, heater core and
other parts.
If you have to add coolant more than four times a year,
have your dealer check your cooling system.
Notice:If you use the proper coolant, you don't
have to add extra inhibitors or additives which claim
to improve the system. These can be harmful.
5-25
Page 360 of 492

{CAUTION:
You can be burned if you spill coolant on hot
engine parts. Coolant contains ethylene glycol,
and it will burn if the engine parts are hot
enough. Don't spill coolant on a hot engine.
When replacing the pressure cap, make sure it is
hand-tight.
Coolant Surge Tank Pressure Cap
The coolant surge tank pressure cap must be fully
installed on the coolant surge tank. SeeEngine
Compartment Overview on page 5-12for more
information on location.
Notice:Your pressure cap is a pressure-type cap
and must be tightly installed to prevent coolant loss
and possible engine damage from overheating.
See ªCapacities and Speci®cationsº for more
information.
Engine Overheating
You will ®nd a coolant temperature gage on your
vehicle's instrument panel. SeeEngine Coolant
Temperature Gage on page 3-39. In addition, you will
®nd a LOW COOLANT, ENGINE COOLANT HOT,
ENGINE OVERHEATED and a REDUCED ENGINE
POWER message in the DIC on the instrument panel.
See
DIC Warnings and Messages on page 3-57.
Overheated Engine Protection
Operating Mode
If an overheated engine condition exists and the
REDUCED ENGINE POWER message is displayed, an
overheat protection mode which alternates ®ring
groups of cylinders helps prevent engine damage. In
this mode, you will notice a loss in power and engine
performance. This operating mode allows your vehicle to
be driven to a safe place in an emergency. Driving
extended miles (km) and/or towing a trailer in the
overheat protection mode should be avoided.
Notice:After driving in the overheated engine
protection operating mode, to avoid engine damage,
allow the engine to cool before attempting any
repair. The engine oil will be severely degraded.
Repair the cause of coolant loss, change the oil and
reset the oil life system. See ªEngine Oilº in the
Index.
5-27
Page 363 of 492
Cooling System
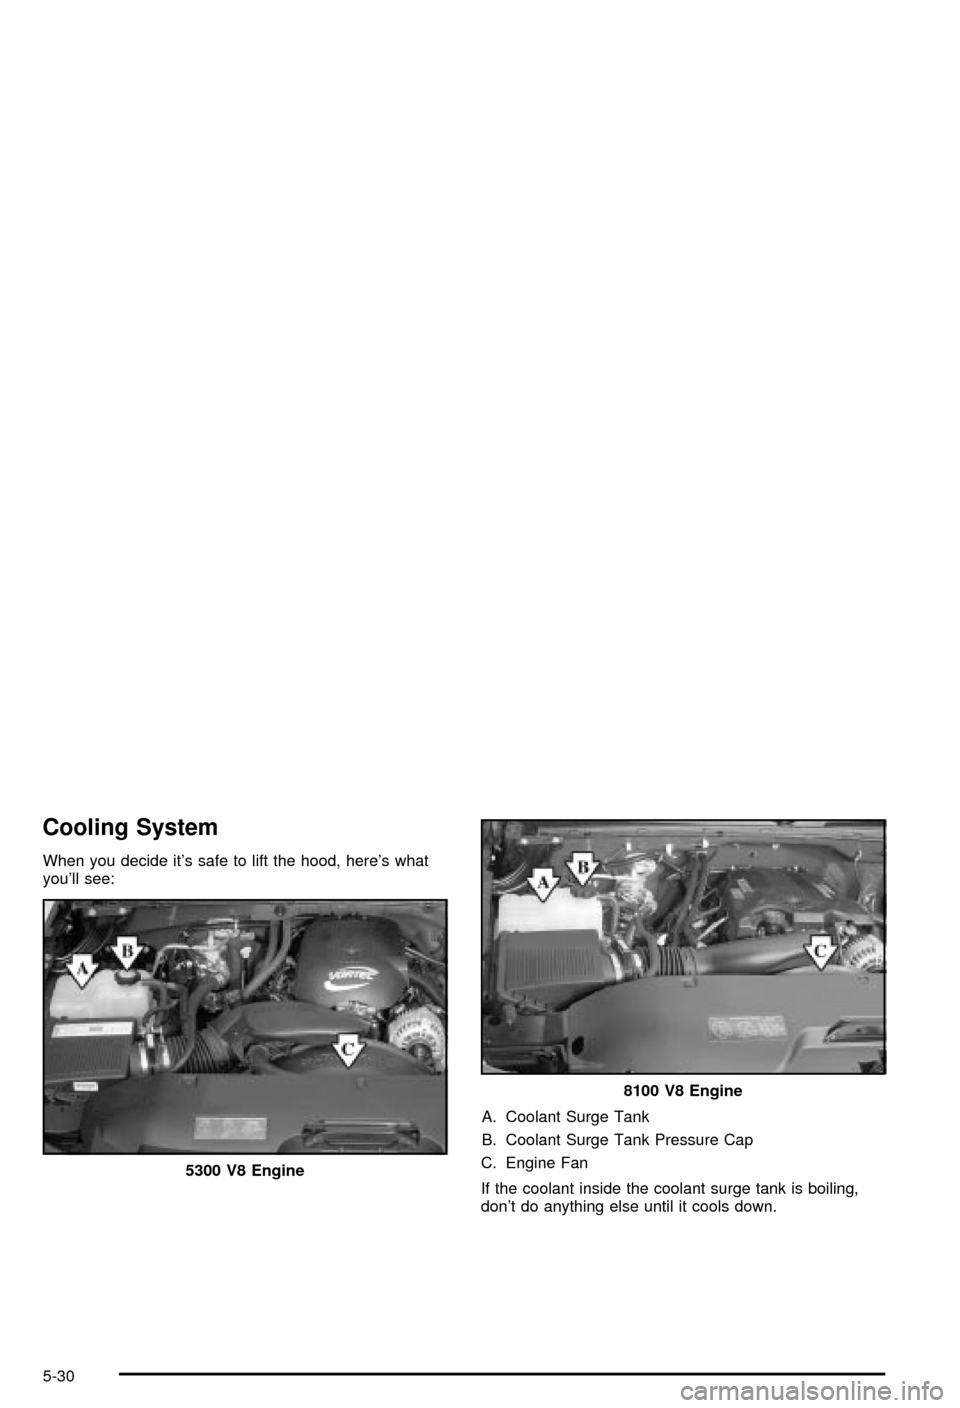
When you decide it's safe to lift the hood, here's what
you'll see:
A. Coolant Surge Tank
B. Coolant Surge Tank Pressure Cap
C. Engine Fan
If the coolant inside the coolant surge tank is boiling,
don't do anything else until it cools down. 5300 V8 Engine
8100 V8 Engine
5-30
Page 366 of 492
{CAUTION:
Adding only plain water to your cooling
system can be dangerous. Plain water, or
some other liquid such as alcohol, can boil
before the proper coolant mixture will. Your
vehicle's coolant warning system is set for the
proper coolant mixture. With plain water or the
wrong mixture, your engine could get too hot
but you wouldn't get the overheat warning.
Your engine could catch ®re and you or others
could be burned. Use a 50/50 mixture of clean,
drinkable water and DEX-COOL
žcoolant.
Notice:In cold weather, water can freeze and crack
the engine, radiator, heater core and other parts.
Use the recommended coolant and the proper
coolant mixture.
{CAUTION:
You can be burned if you spill coolant on hot
engine parts. Coolant contains ethylene glycol
and it will burn if the engine parts are hot
enough. Don't spill coolant on a hot engine.
5-33
Page 374 of 492

Notice:
·Using the wrong ¯uid can badly damage brake
system parts. For example, just a few drops of
mineral-based oil, such as engine oil, in your
brake system can damage brake system
parts so badly that they'll have to be replaced.
Don't let someone put in the wrong kind of ¯uid.
·If you spill brake ¯uid on your vehicle's painted
surfaces, the paint ®nish can be damaged. Be
careful not to spill brake ¯uid on your vehicle. If
you do, wash it off immediately. See
ªAppearance Careº in the Index.
Brake Wear
Your vehicle has four-wheel disc brakes.
Disc brake pads have built-in wear indicators that make
a high-pitched warning sound when the brake pads
are worn and new pads are needed. The sound
may come and go or be heard all the time your vehicle
is moving (except when you are pushing on the
brake pedal ®rmly).
{CAUTION:
The brake wear warning sound means that
soon your brakes won't work well. That could
lead to an accident. When you hear the brake
wear warning sound, have your vehicle
serviced.
Notice:Continuing to drive with worn-out brake
pads could result in costly brake repair.
Some driving conditions or climates may cause a brake
squeal when the brakes are ®rst applied or lightly
applied. This does not mean something is wrong with
your brakes.
Properly torqued wheel nuts are necessary to help
prevent brake pulsation. When tires are rotated, inspect
brake pads for wear and evenly tighten wheel nuts in
the proper sequence to GM torque speci®cations.
Brake linings should always be replaced as complete
axle sets.
See
Brake System Inspection on page 6-16.
5-41
Page 386 of 492
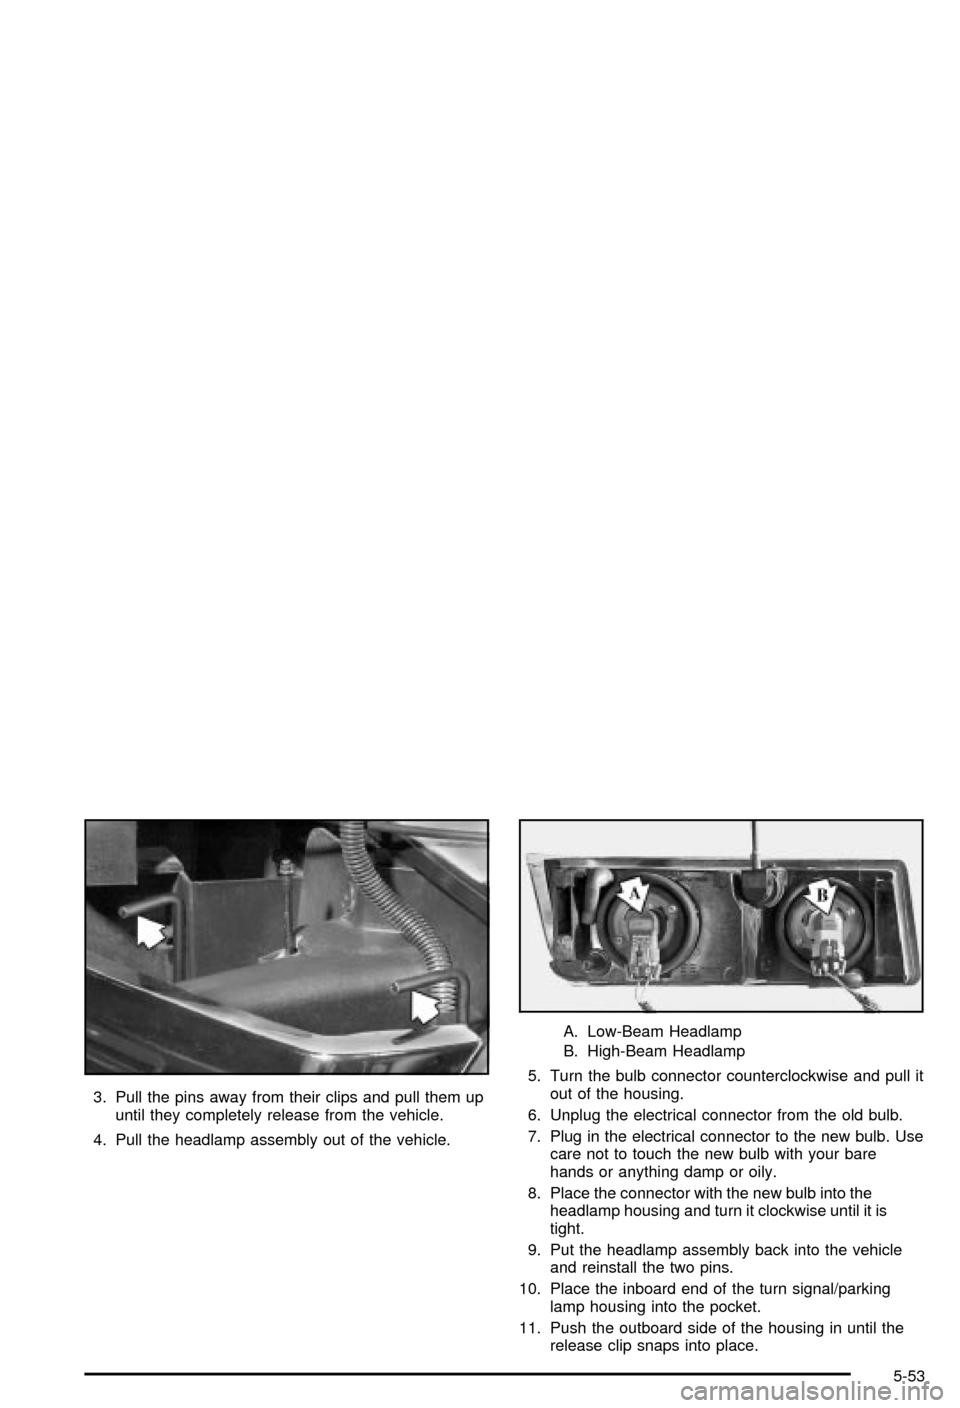
3. Pull the pins away from their clips and pull them up
until they completely release from the vehicle.
4. Pull the headlamp assembly out of the vehicle.A. Low-Beam Headlamp
B. High-Beam Headlamp
5. Turn the bulb connector counterclockwise and pull it
out of the housing.
6. Unplug the electrical connector from the old bulb.
7. Plug in the electrical connector to the new bulb. Use
care not to touch the new bulb with your bare
hands or anything damp or oily.
8. Place the connector with the new bulb into the
headlamp housing and turn it clockwise until it is
tight.
9. Put the headlamp assembly back into the vehicle
and reinstall the two pins.
10. Place the inboard end of the turn signal/parking
lamp housing into the pocket.
11. Push the outboard side of the housing in until the
release clip snaps into place.
5-53
Page 411 of 492
{CAUTION:
Rust or dirt on the wheel, or on the parts to
which it is fastened, can make the wheel nuts
become loose after a time. The wheel could
come off and cause an accident. When you
change a wheel, remove any rust or dirt from
the places where the wheel attaches to the
vehicle. In an emergency, you can use a cloth
or a paper towel to do this; but be sure to use
a scraper or wire brush later, if you need to, to
get all the rust or dirt off.
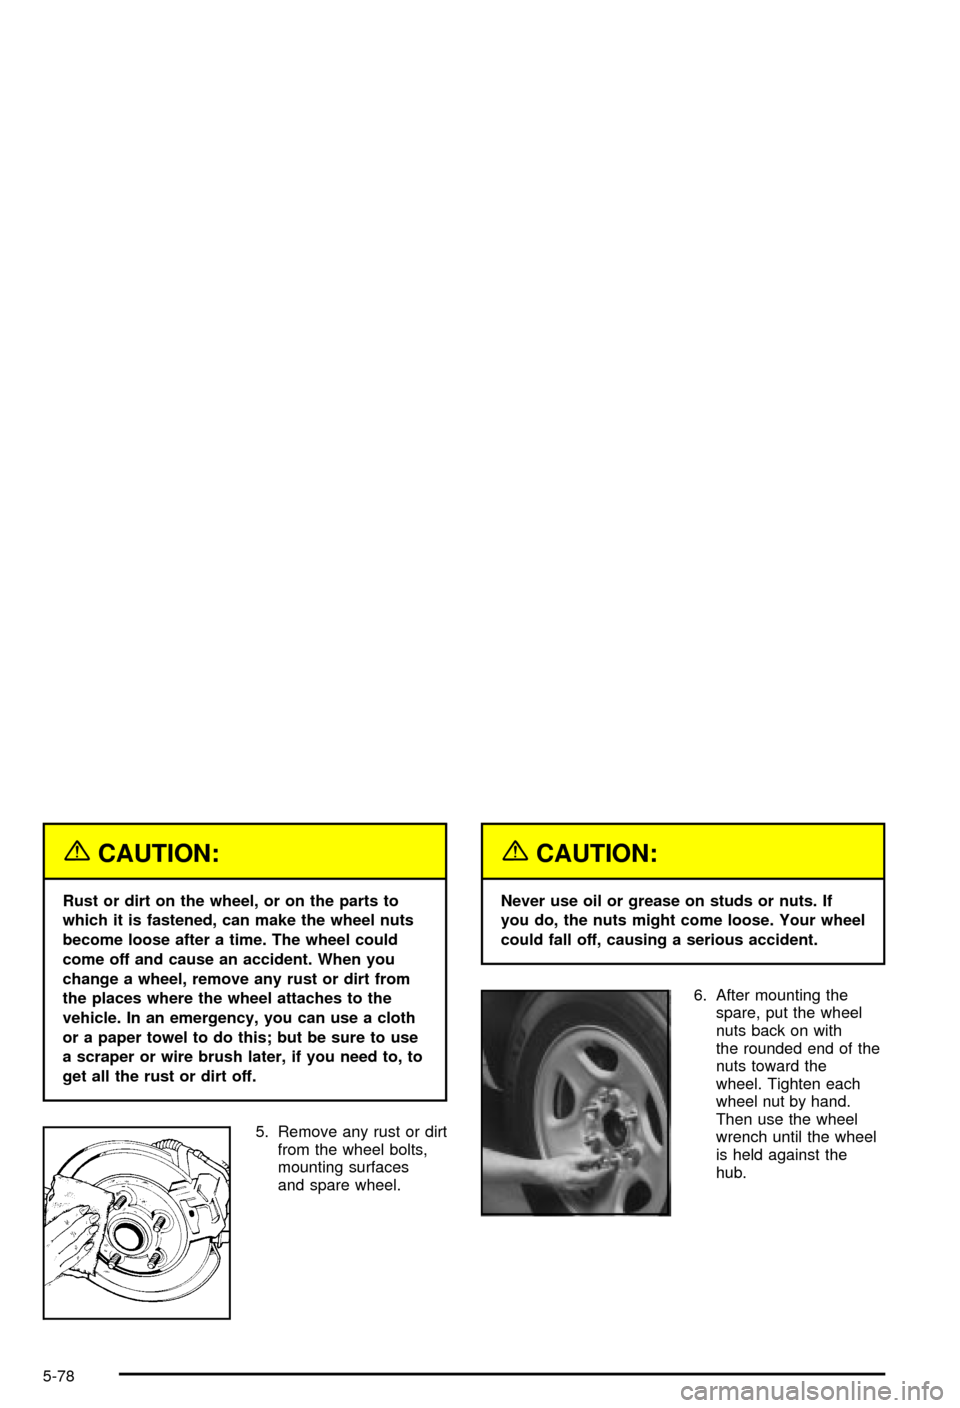
5. Remove any rust or dirt
from the wheel bolts,
mounting surfaces
and spare wheel.
{CAUTION:
Never use oil or grease on studs or nuts. If
you do, the nuts might come loose. Your wheel
could fall off, causing a serious accident.
6. After mounting the
spare, put the wheel
nuts back on with
the rounded end of the
nuts toward the
wheel. Tighten each
wheel nut by hand.
Then use the wheel
wrench until the wheel
is held against the
hub.
5-78