inflation pressure CHEVROLET AVALANCHE 2012 2.G User Guide
[x] Cancel search | Manufacturer: CHEVROLET, Model Year: 2012, Model line: AVALANCHE, Model: CHEVROLET AVALANCHE 2012 2.GPages: 508, PDF Size: 7.78 MB
Page 403 of 508
Black plate (59,1)Chevrolet Avalanche Owner Manual - 2012
Vehicle Care 10-59
Federal Communications
Commission (FCC) Rules and
with Industry Canada
Standards
SeeRadio Frequency Statement on
page 13‑20 for information
regarding Part 15 of the Federal
Communications Commission (FCC)
Rules and with Industry Canada
Standards RSS-GEN/210/220/310.
Tire Pressure Monitor
Operation
This vehicle may have a Tire
Pressure Monitor System (TPMS).
The TPMS is designed to warn the
driver when a low tire pressure
condition exists. TPMS sensors are
mounted onto each tire and wheel
assembly, excluding the spare tire
and wheel assembly. The TPMS
sensors monitor the air pressure in
the tires and transmit the tire
pressure readings to a receiver
located in the vehicle.
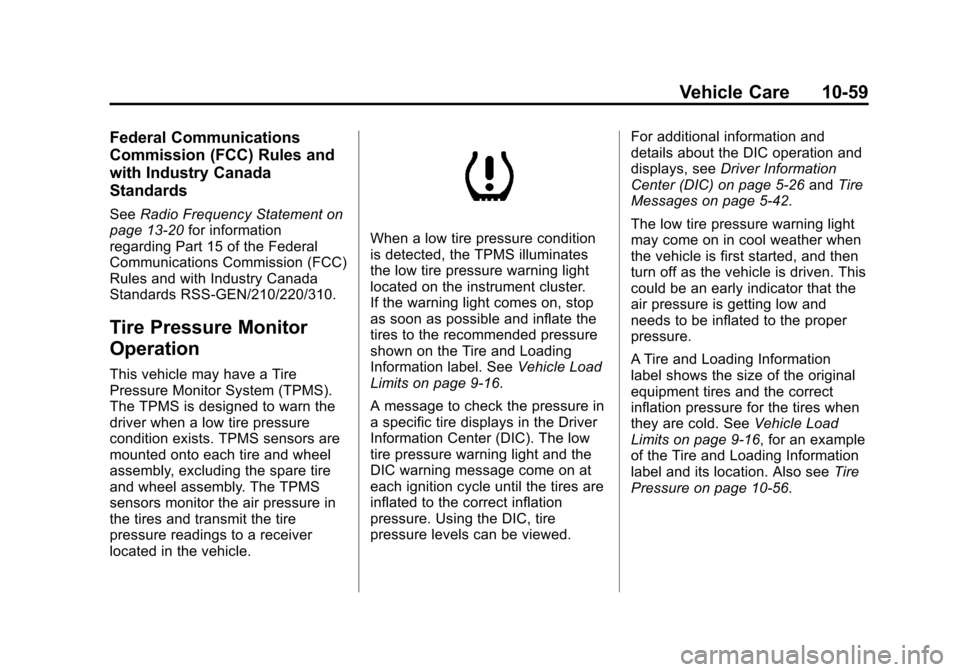
When a low tire pressure condition
is detected, the TPMS illuminates
the low tire pressure warning light
located on the instrument cluster.
If the warning light comes on, stop
as soon as possible and inflate the
tires to the recommended pressure
shown on the Tire and Loading
Information label. See Vehicle Load
Limits on page 9‑16.
A message to check the pressure in
a specific tire displays in the Driver
Information Center (DIC). The low
tire pressure warning light and the
DIC warning message come on at
each ignition cycle until the tires are
inflated to the correct inflation
pressure. Using the DIC, tire
pressure levels can be viewed. For additional information and
details about the DIC operation and
displays, see
Driver Information
Center (DIC) on page 5‑26 andTire
Messages on page 5‑42.
The low tire pressure warning light
may come on in cool weather when
the vehicle is first started, and then
turn off as the vehicle is driven. This
could be an early indicator that the
air pressure is getting low and
needs to be inflated to the proper
pressure.
A Tire and Loading Information
label shows the size of the original
equipment tires and the correct
inflation pressure for the tires when
they are cold. See Vehicle Load
Limits on page 9‑16, for an example
of the Tire and Loading Information
label and its location. Also see Tire
Pressure on page 10‑56.
Page 407 of 508
Black plate (63,1)Chevrolet Avalanche Owner Manual - 2012
Vehicle Care 10-63
Adjust the front and rear tires to
the recommended inflation
pressure on the Tire and
Loading Information label after
the tires have been rotated. See
Tire Pressure on page 10‑56
andVehicle Load Limits on
page 9‑16.
Reset the Tire Pressure Monitor
System. See Tire Pressure
Monitor Operation on
page 10‑59.
Check that all wheel nuts are
properly tightened. See “Wheel
Nut Torque” underCapacities
and Specifications on
page 12‑2.{WARNING
Rust or dirt on a wheel, or on the
parts to which it is fastened, can
make wheel nuts become loose
after time. The wheel could come
off and cause an accident. When
changing a wheel, remove any
rust or dirt from places where the
wheel attaches to the vehicle. In
an emergency, a cloth or a paper
towel can be used; however, use
a scraper or wire brush later to
remove all rust or dirt.
Lightly coat the center of the
wheel hub with wheel bearing
grease after a wheel change or
tire rotation to prevent corrosion
or rust build-up. Do not get
grease on the flat wheel
mounting surface or on the
wheel nuts or bolts.
When It Is Time for New
Tires
Factors, such as maintenance,
temperatures, driving speeds,
vehicle loading, and road conditions
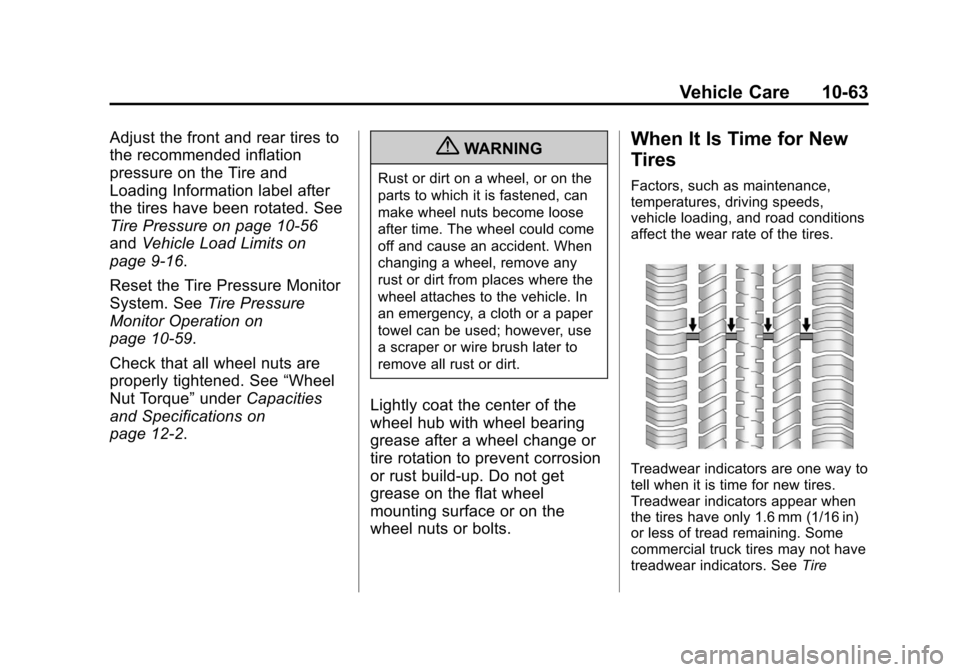
affect the wear rate of the tires.
Treadwear indicators are one way to
tell when it is time for new tires.
Treadwear indicators appear when
the tires have only 1.6 mm (1/16 in)
or less of tread remaining. Some
commercial truck tires may not have
treadwear indicators. See Tire
Page 408 of 508
Black plate (64,1)Chevrolet Avalanche Owner Manual - 2012
10-64 Vehicle Care
Inspection on page 10‑62andTire
Rotation on page 10‑62 for
additional information.
The rubber in tires ages over time.
This also applies to the spare tire,
if the vehicle has one, even if it is
never used. Multiple conditions
including temperatures, loading
conditions, and inflation pressure
maintenance affect how fast aging
takes place. Tires will typically need
to be replaced due to wear before
they may need to be replaced
due to age. Consult the tire
manufacturer for more information
on when tires should be replaced.
Vehicle Storage
Tires age when stored normally
mounted on a parked vehicle. Park
a vehicle that will be stored for at
least a month in a cool, dry, clean
area away from direct sunlight to
slow aging. This area should be
free of grease, gasoline or other
substances that can deteriorate
rubber. Parking for an extended period can
cause flat spots on the tires that
may result in vibrations while
driving. When storing a vehicle for
at least a month, remove the tires
or raise the vehicle to reduce the
weight from the tires.
Buying New Tires
GM has developed and matched
specific tires for the vehicle. The
original equipment tires installed
were designed to meet General
Motors Tire Performance Criteria
Specification (TPC Spec) system
rating. When replacement tires are
needed, GM strongly recommends
buying tires with the same TPC
Spec rating.
GM's exclusive TPC Spec system
considers over a dozen critical
specifications that impact the
overall performance of the vehicle,
including brake system
performance, ride and handling,
traction control, and tire pressure
monitoring performance. GM's TPC
Spec number is molded onto the
tire's sidewall near the tire size.
If the tires have an all‐season tread
design, the TPC Spec number will
be followed by MS for mud and
snow. See
Tire Sidewall Labeling on
page 10‑50 for additional
information.
GM recommends replacing all the
tires at the same time. Uniform tread
depth on all tires will help to
maintain the performance of the
vehicle. Braking and handling
performance may be adversely
affected if all the tires are not
replaced at the same time. See Tire
Inspection on page 10‑62 andTire
Rotation on page 10‑62 for
information on proper tire rotation.
Page 412 of 508
Black plate (68,1)Chevrolet Avalanche Owner Manual - 2012
10-68 Vehicle Care
Grades B and A represent
higher levels of performance on
the laboratory test wheel than
the minimum required by law.
Warning: The temperature grade
for this tire is established for a
tire that is properly inflated and
not overloaded. Excessive
speed, underinflation,
or excessive loading, either
separately or in combination,
can cause heat buildup and
possible tire failure.
Wheel Alignment and Tire
Balance
The tires and wheels were aligned
and balanced at the factory to
provide the longest tire life and best
overall performance. Adjustments to
wheel alignment and tire balancing
will not be necessary on a regular
basis. However, check the
alignment if there is unusual tire
wear or if the vehicle is pulling to
one side or the other. If the vehiclevibrates when driving on a smooth
road, the tires and wheels might
need to be rebalanced. See your
dealer for proper diagnosis.
Wheel Replacement
Replace any wheel that is bent,
cracked, or badly rusted or
corroded. If wheel nuts keep coming
loose, the wheel, wheel bolts, and
wheel nuts should be replaced.
If the wheel leaks air, replace it.
Some aluminum wheels can be
repaired. See your dealer if any of
these conditions exist.
Your dealer will know the kind of
wheel that is needed.
Each new wheel should have the
same load-carrying capacity,
diameter, width, offset, and be
mounted the same way as the
one it replaces.
Replace wheels, wheel bolts, wheel
nuts, or Tire Pressure Monitor
System (TPMS) sensors with new
GM original equipment parts.
{WARNING
Using the wrong replacement
wheels, wheel bolts, or wheel
nuts can be dangerous. It could
affect the braking and handling of
the vehicle. Tires can lose air,
and cause loss of control, causing
a crash. Always use the correct
wheel, wheel bolts, and wheel
nuts for replacement.
Notice: The wrong wheel can
also cause problems with bearing
life, brake cooling, speedometer
or odometer calibration,
headlamp aim, bumper height,
vehicle ground clearance, and tire
or tire chain clearance to the
body and chassis.
See If a Tire Goes Flat on
page 10‑70 for more information.
Page 430 of 508
Black plate (86,1)Chevrolet Avalanche Owner Manual - 2012
10-86 Vehicle Care
Full-Size Spare Tire
Your vehicle, when new, had a
fully-inflated spare tire. A spare tire
may lose air over time, so check its
inflation pressure regularly. SeeTire
Pressure on page 10‑56 and
Vehicle Load Limits on page 9‑16
for information regarding proper tire
inflation and loading your vehicle.
For instruction on how to remove,
install or store a spare tire, see
“Removing the Flat Tire and
Installing the Spare” and“Storing a
Flat or Spare Tire and Tools” under
Tire Changing on page 10‑72.
Notice: If the vehicle has
four-wheel drive and a different
size spare tire is installed, do not
drive in four-wheel drive until
the flat tire is repaired and/or
replaced. The vehicle could be
damaged and the repairs would
not be covered by the warranty.
Never use four-wheel drive when
a different size spare tire is
installed on the vehicle. Your vehicle may have a different
size spare tire than the road tires
originally installed on your vehicle.
This spare tire was developed for
use on your vehicle, so it is all right
to drive on it. If your vehicle has
four-wheel drive and the different
size spare tire is installed, keep the
vehicle in two-wheel drive.
After installing the spare tire on your
vehicle, you should stop as soon as
possible and make sure the spare
tire is correctly inflated. Have the
damaged or flat road tire repaired or
replaced as soon as you can and
installed back onto your vehicle.
This way, the spare tire will be
available in case you need it again.
Do not mix tires and wheels of
different sizes, because they will not
fit. Keep your spare tire and its
wheel together. If your vehicle has a
spare tire that does not match your
vehicle's original road tires and
wheels in size and type, do not
include the spare in the tire rotation.
Jump Starting
For more information about the
vehicle battery, see
Battery on
page 10‑30.
If the vehicle's battery has run
down, you may want to use another
vehicle and some jumper cables to
start your vehicle. Be sure to use
the following steps to do it safely.
{WARNING
Batteries can hurt you. They can
be dangerous because:
.They contain acid that can
burn you.
.They contain gas that can
explode or ignite.
.They contain enough
electricity to burn you.
If you do not follow these steps
exactly, some or all of these
things can hurt you.
Page 449 of 508
Black plate (3,1)Chevrolet Avalanche Owner Manual - 2012
Service and Maintenance 11-3
Maintenance
Schedule
Owner Checks and Services
At Each Fuel Stop
.Check the engine oil level. See
Engine Oil on page 10‑8.
Once a Month
.Check the tire inflation
pressures. See Tire Pressure on
page 10‑56.
.Inspect the tires for wear. See
Tire Inspection on page 10‑62.
.Check the windshield washer
fluid level. See Washer Fluid on
page 10‑26.
Engine Oil Change
When the CHANGE ENGINE OIL
SOON message displays, have the
engine oil and filter changed within
the next 1 000 km/600 mi. If driven
under the best conditions, the
engine oil life system might not
indicate the need for vehicle service
for more than a year. The engine oil
and filter must be changed at least
once a year and the oil life system
must be reset. Your trained dealer
technician can perform this work.
If the engine oil life system is reset
accidentally, service the vehicle
within 5 000 km/3,000 mi since the
last service. Reset the oil life
system when the oil is changed.
See Engine Oil Life System on
page 10‑11.
Tire Rotation and Required
Services Every 12 000 km/
7,500 mi
Rotate the tires, if recommended for
the vehicle, and perform the
following services. See Tire
Rotation on page 10‑62.
.Check engine oil level and oil
life percentage. If needed,
change engine oil and filter, and
reset oil life system. See Engine
Oil on page 10‑8 andEngine Oil
Life System on page 10‑11.
.Check engine coolant level. See
Engine Coolant on page 10‑18.
.Check windshield washer fluid
level. See Washer Fluid on
page 10‑26.
Page 450 of 508

Black plate (4,1)Chevrolet Avalanche Owner Manual - 2012
11-4 Service and Maintenance
.Visually inspect windshield wiper
blades for wear, cracking,
or contamination. SeeExterior
Care on page 10‑96. Replace
worn or damaged wiper blades.
See Wiper Blade Replacement
on page 10‑35.
.Check tire inflation pressures.
See Tire Pressure on
page 10‑56.
.Inspect tire wear. See Tire
Inspection on page 10‑62.
.Visually check for fluid leaks.
.Inspect engine air cleaner filter.
See Engine Air Cleaner/Filter on
page 10‑16.
.Inspect brake system.
.Visually inspect steering,
suspension, and chassis
components for damaged, loose,
or missing parts or signs of
wear. See Exterior Care on
page 10‑96.
.Check restraint system
components. See Safety System
Check on page 3‑20.
.Visually inspect fuel system for
damage or leaks.
.Visually inspect exhaust system
and nearby heat shields for
loose or damaged parts.
.Lubricate body components. See
Exterior Care on page 10‑96.
.Check starter switch. See Starter
Switch Check on page 10‑33.
.Check automatic transmission
shift lock control function. See
Automatic Transmission Shift
Lock Control Function Check on
page 10‑33.
.Check ignition transmission lock.
See Ignition Transmission Lock
Check on page 10‑34.
.Check parking brake and
automatic transmission park
mechanism. See Park Brake and
P (Park) Mechanism Check on
page 10‑34.
.Check accelerator pedal for
damage, high effort, or binding.
Replace if needed.
.Visually inspect gas strut for
signs of wear, cracks, or other
damage. Check the hold open
ability of the strut. See your
dealer if service is required.
.Inspect sunroof track and seal,
if equipped. See Sunroof on
page 2‑25.
Page 507 of 508

Black plate (11,1)Chevrolet Avalanche Owner Manual - 2012
INDEX i-11
Storage Areas (cont'd)Glove Box . . . . . . . . . . . . . . . . . . . . . 4-1
Roof Rack System . . . . . . . . . . . . 4-13
Top-Box Storage . . . . . . . . . . . . . . . 4-2
Stuck Vehicle . . . . . . . . . . . . . . . . . . 9-15
Sun Visors . . . . . . . . . . . . . . . . . . . . . 2-25
Sunroof . . . . . . . . . . . . . . . . . . . . . . . . 2-25
Symbols . . . . . . . . . . . . . . . . . . . . . . . . . . iv
System Infotainment . . . . . . . . . . . . . . . . . . . 7-1
Roof Rack . . . . . . . . . . . . . . . . . . . . 4-13
T
Tachometer . . . . . . . . . . . . . . . . . . . . 5-12
Tailgate . . . . . . . . . . . . . . . . . . . . . . . . 2-16
TaillampsBulb Replacement . . . . . . . . . . 10-38
Text Telephone (TTY) Users . . . 13-6
Theft-Deterrent Systems . . . . . . . 2-18 Immobilizer . . . . . . . . . . . . . . . . . . . 2-18
Throttle, Adjustable . . . . . . . . . . . . 9-22
Time . . . . . . . . . . . . . . . . . . . . . . . . . . . . 5-8
Tires Buying New Tires . . . . . . . . . . . 10-64
Chains . . . . . . . . . . . . . . . . . . . . . . 10-69
Changing . . . . . . . . . . . . . . . . . . . 10-72 Tires (cont'd)
Designations . . . . . . . . . . . . . . . 10-52
Different Size . . . . . . . . . . . . . . . 10-66
Full-Size Spare . . . . . . . . . . . . . 10-86
If a Tire Goes Flat . . . . . . . . . . 10-70
Inflation Monitor System . . . . 10-59
Inspection . . . . . . . . . . . . . . . . . . 10-62
Messages . . . . . . . . . . . . . . . . . . . . 5-42
Pressure Light . . . . . . . . . . . . . . . . 5-24
Pressure Monitor System . . . 10-58
Rotation . . . . . . . . . . . . . . . . . . . . 10-62
Secondary Latch System . . . 10-83
Sidewall Labeling . . . . . . . . . . . 10-50
Terminology and
Definitions . . . . . . . . . . . . . . . . . 10-53
Uniform Tire Quality Grading . . . . . . . . . . . . . . . . . . . 10-66
Wheel Alignment and Tire
Balance . . . . . . . . . . . . . . . . . . . 10-68
Wheel Replacement . . . . . . . . 10-68
When It Is Time for New Tires . . . . . . . . . . . . . . . . . . . . . . 10-63
Top-Box Storage . . . . . . . . . . . . . . . . 4-2
Tow/Haul Mode . . . . . . . . . . . . . . . . 9-36
Tow/Haul Mode Light . . . . . . . . . . 5-23 Towing
Driving Characteristics . . . . . . . . 9-67
Equipment . . . . . . . . . . . . . . . . . . . . 9-75
General Information . . . . . . . . . . 9-66
Recreational Vehicle . . . . . . . . 10-91
Trailer . . . . . . . . . . . . . . . . . . . . . . . . 9-71
Trailer Sway Control (TSC) . . . 9-83
Vehicle . . . . . . . . . . . . . . . . . . . . . 10-91
Traction Control System (TCS)/StabiliTrak
®Light . . . . . . . . . . . . 5-23
Trailer Sway Control (TSC) . . . . . . . . . . 9-83
Trailer Towing . . . . . . . . . . . . . . . . . 9-71
Transfer Case . . . . . . . . . . . 9-37, 9-42
Transmission Automatic . . . . . . . . . . . . . . . . . . . . . 9-32
Fluid, Automatic . . . . . . . . . . . . 10-13
Messages . . . . . . . . . . . . . . . . . . . . 5-43
Transportation Program, Courtesy . . . . . . . . . . . . . . . . . . . . 13-13
Trip Odometer . . . . . . . . . . . . . . . . . 5-12