wipers CHEVROLET AVEO 2002 Service Repair Manual
[x] Cancel search | Manufacturer: CHEVROLET, Model Year: 2002, Model line: AVEO, Model: CHEVROLET AVEO 2002Pages: 5127, PDF Size: 41.82 MB
Page 1553 of 5127
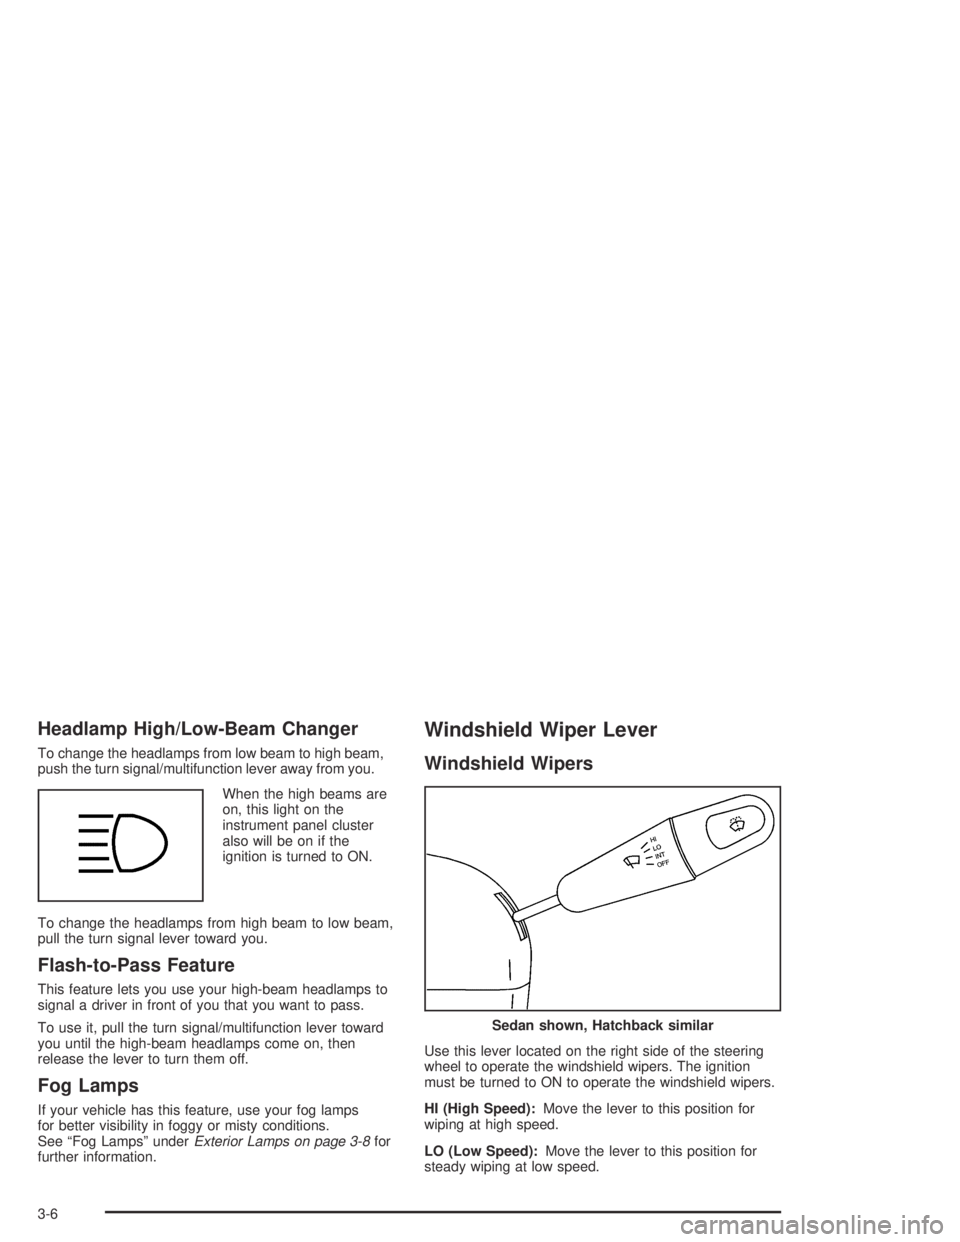
Headlamp High/Low-Beam Changer
To change the headlamps from low beam to high beam,
push the turn signal/multifunction lever away from you.
When the high beams are
on, this light on the
instrument panel cluster
also will be on if the
ignition is turned to ON.
To change the headlamps from high beam to low beam,
pull the turn signal lever toward you.
Flash-to-Pass Feature
This feature lets you use your high-beam headlamps to
signal a driver in front of you that you want to pass.
To use it, pull the turn signal/multifunction lever toward
you until the high-beam headlamps come on, then
release the lever to turn them off.
Fog Lamps
If your vehicle has this feature, use your fog lamps
for better visibility in foggy or misty conditions.
See “Fog Lamps” underExterior Lamps on page 3-8for
further information.
Windshield Wiper Lever
Windshield Wipers
Use this lever located on the right side of the steering
wheel to operate the windshield wipers. The ignition
must be turned to ON to operate the windshield wipers.
HI (High Speed):Move the lever to this position for
wiping at high speed.
LO (Low Speed):Move the lever to this position for
steady wiping at low speed.
Sedan shown, Hatchback similar
3-6
Page 1554 of 5127
INT (Intermittent):Move the lever to this position to
choose a delayed wiping cycle.
OFF:Move the lever to this position to turn off the
windshield wipers.
Misting Function
Move the lever toward the INT position for a single
wiping cycle. Hold it there until the windshield wipers
start; then let go. The windshield wipers will stop
after one wipe. If you want more wipes, hold the band
toward INT longer.
Remember that damaged wiper blades may prevent you
from seeing well enough to drive safely. To avoid
damage, be sure to clear ice and snow from the wiper
blades before using them.
If they are frozen to the windshield, carefully loosen or
thaw them. If your blades do become damaged, get
new blades or blade inserts.
Heavy snow or ice can overload your wiper motor.
A circuit breaker will stop the motor until it cools.
Clear away snow or ice to prevent an overload.
Windshield Washer
To wash your windshield, pull the windshield wiper/
washer lever toward you with the ignition turned to ON.
{CAUTION:
In freezing weather, do not use your washer
until the windshield is warmed. Otherwise the
washer �uid can form ice on the windshield,
blocking your vision.
When you release the lever, the washers will stop, but
the wipers will continue to wipe for several cycles and
will either stop or will resume at the speed you were
using before.
Rear Window Washer/Wiper
Your vehicle may have a rear window washer/wiper.
Operate the rear window washer/wiper system by
pushing the windshield wiper/washer lever away from
you. The wiper operates continuously when the lever is
in the first position. Washer fluid sprays onto the rear
window and the wiper operates continuously when
the lever is pushed to the second position.
3-7
Page 1777 of 5127
W
Warning Lights, Gages and Indicators................3-17
Warnings
Hazard Warning Flashers............................... 3-3
Other Warning Devices.................................. 3-4
Safety and Symbols......................................... iii
Vehicle Damage.............................................. iv
Washing Your Vehicle......................................5-79
Weatherstrip Lubrication...................................6-20
What Kind of Engine Oil to Use........................5-16
What to Do with Used Oil................................5-19
What to Use..................................5-23, 5-34, 5-35
Wheels
Alignment and Tire Balance..........................5-64
Replacement...............................................5-64
When to Add Engine Oil..................................5-16
When to Change Engine Oil.............................5-18
When to Check..............................................5-59
When to Check and What to Use.....................5-22
When to Check Power Steering Fluid................5-34
When to Inspect the Engine Air Cleaner/Filter........5-20Where to Put the Restraint...............................1-37
Why Safety Belts Work....................................1-11
Window Lockout.............................................2-14
Windows.......................................................2-13
Manual......................................................2-14
Power........................................................2-14
Windshield Washer........................................... 3-7
Fluid..........................................................5-35
Windshield Washer Fluid Level Check................6-19
Windshield Wiper
Blade Replacement......................................5-50
Fuses........................................................5-84
Windshield Wiper Lever..................................... 3-6
Windshield Wipers............................................ 3-6
Winter Driving................................................4-24
Wiper Blade Check.........................................6-20
Y
Your Vehicle and the Environment....................... 6-2
14
Page 1892 of 5127
Instrument Panel Overview...............................3-4
Hazard Warning Flashers................................3-6
Other Warning Devices...................................3-6
Horn .............................................................3-6
Tilt Wheel.....................................................3-6
Turn Signal/Multifunction Lever.........................3-7
Turn and Lane-Change Signals........................3-7
Headlamp High/Low-Beam Changer..................3-8
Flash-to-Pass.................................................3-8
Windshield Wipers..........................................3-8
Windshield Washer.........................................3-9
Rear Window Wiper/Washer...........................3-10
Cruise Control..............................................3-10
Exterior Lamps.............................................3-13
Headlamps on Reminder................................3-13
Daytime Running Lamps (DRL).......................3-14
Fog Lamps ..................................................3-15
Instrument Panel Brightness...........................3-15
Dome Lamp .................................................3-16
Accessory Power Outlet(s).............................3-16
Ashtray(s) and Cigarette Lighter......................3-17
Climate Controls............................................3-18
Climate Control System.................................3-18
Outlet Adjustment.........................................3-21
Passenger Compartment Air Filter...................3-21Warning Lights, Gages, and Indicators............3-23
Instrument Panel Cluster................................3-24
Speedometer and Odometer...........................3-25
Trip Odometer..............................................3-25
Tachometer.................................................3-25
Safety Belt Reminder Tone............................3-25
Passenger Airbag Status Indicator...................3-26
Brake System Warning Light..........................3-27
Engine Coolant Temperature Gage..................3-28
Cruise Control Light......................................3-29
Highbeam On Light.......................................3-29
Daytime Running Lamps (DRL) Indicator Light.....3-29
Fuel Gage...................................................3-30
Low Fuel Warning Light.................................3-30
Secondary Information Center (SIC).................3-31
Clock..........................................................3-32
Safety Belt Reminder Light.............................3-32
Airbag Readiness Light..................................3-32
Charging System Light..................................3-33
Anti-Lock Brake System Warning Light.............3-34
Hold Mode Light...........................................3-34
Malfunction Indicator Lamp.............................3-34
Oil Pressure Light.........................................3-37
Fog Lamp Light............................................3-38
Door Ajar Light.............................................3-38
Section 3 Instrument Panel
3-1
Page 1899 of 5127
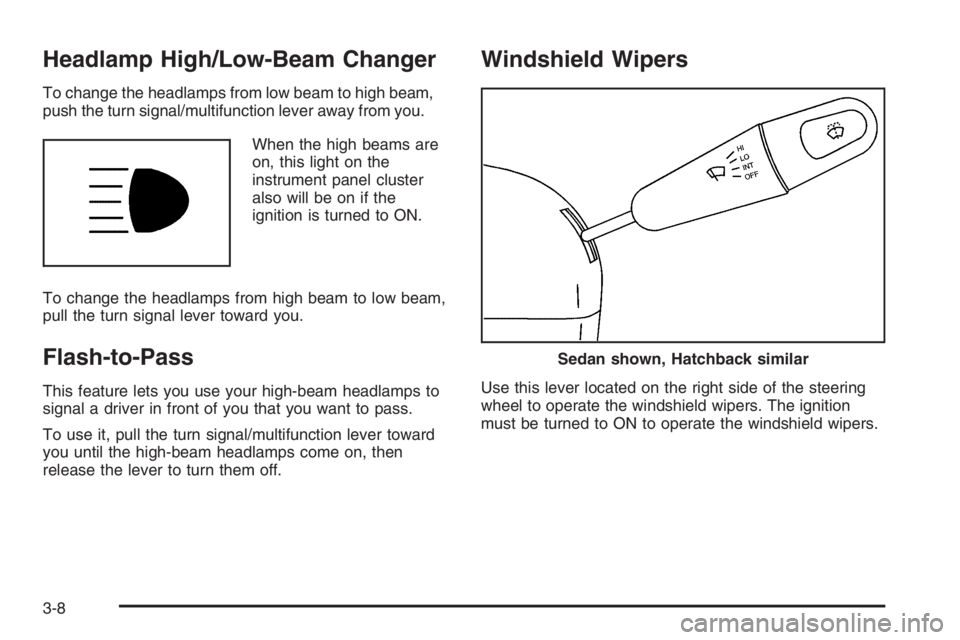
Headlamp High/Low-Beam Changer
To change the headlamps from low beam to high beam,
push the turn signal/multifunction lever away from you.
When the high beams are
on, this light on the
instrument panel cluster
also will be on if the
ignition is turned to ON.
To change the headlamps from high beam to low beam,
pull the turn signal lever toward you.
Flash-to-Pass
This feature lets you use your high-beam headlamps to
signal a driver in front of you that you want to pass.
To use it, pull the turn signal/multifunction lever toward
you until the high-beam headlamps come on, then
release the lever to turn them off.
Windshield Wipers
Use this lever located on the right side of the steering
wheel to operate the windshield wipers. The ignition
must be turned to ON to operate the windshield wipers.
Sedan shown, Hatchback similar
3-8
Page 1900 of 5127
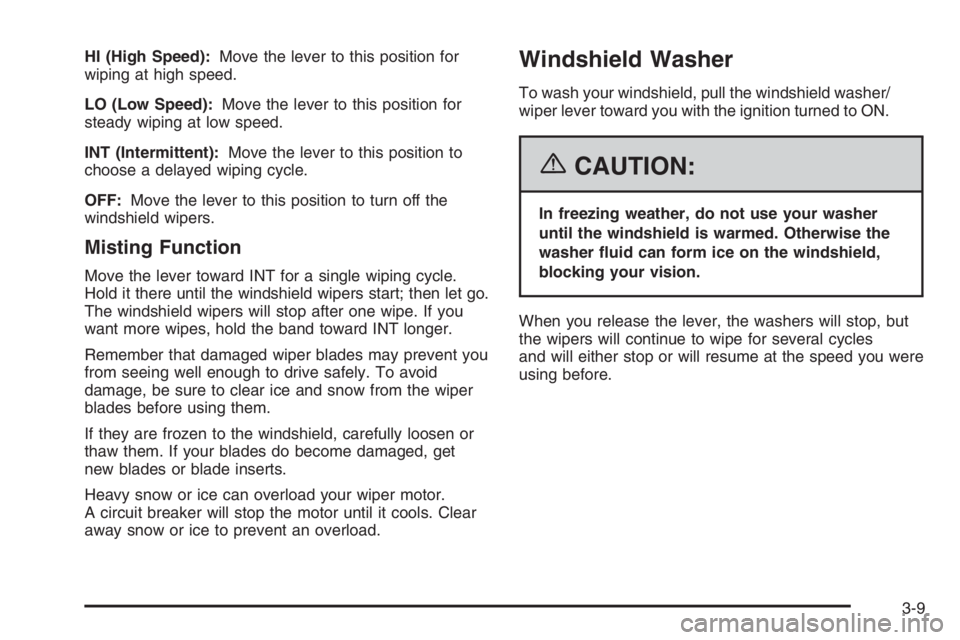
HI (High Speed):Move the lever to this position for
wiping at high speed.
LO (Low Speed):Move the lever to this position for
steady wiping at low speed.
INT (Intermittent):Move the lever to this position to
choose a delayed wiping cycle.
OFF:Move the lever to this position to turn off the
windshield wipers.
Misting Function
Move the lever toward INT for a single wiping cycle.
Hold it there until the windshield wipers start; then let go.
The windshield wipers will stop after one wipe. If you
want more wipes, hold the band toward INT longer.
Remember that damaged wiper blades may prevent you
from seeing well enough to drive safely. To avoid
damage, be sure to clear ice and snow from the wiper
blades before using them.
If they are frozen to the windshield, carefully loosen or
thaw them. If your blades do become damaged, get
new blades or blade inserts.
Heavy snow or ice can overload your wiper motor.
A circuit breaker will stop the motor until it cools. Clear
away snow or ice to prevent an overload.
Windshield Washer
To wash your windshield, pull the windshield washer/
wiper lever toward you with the ignition turned to ON.
{CAUTION:
In freezing weather, do not use your washer
until the windshield is warmed. Otherwise the
washer �uid can form ice on the windshield,
blocking your vision.
When you release the lever, the washers will stop, but
the wipers will continue to wipe for several cycles
and will either stop or will resume at the speed you were
using before.
3-9
Page 2139 of 5127
V
Vehicle
Control........................................................ 4-6
Damage Warnings........................................... iv
Loading......................................................4-27
Parking Your...............................................2-29
Symbols......................................................... iv
Vehicle Data Collection and Event Data
Recorders..................................................7-10
Vehicle Identification
Number (VIN).............................................5-74
Service Parts Identification Label...................5-74
Ventilation Adjustment......................................3-21
Visors...........................................................2-13
W
Warning Lights, Gages and Indicators................3-23
Warnings
Hazard Warning Flashers............................... 3-6
Other Warning Devices.................................. 3-6
Safety and Symbols......................................... iii
Vehicle Damage.............................................. ivWheels
Alignment and Tire Balance..........................5-56
Different Size..............................................5-54
Replacement...............................................5-56
Where to Put the Restraint...............................1-40
Windows.......................................................2-12
Manual......................................................2-12
Power ........................................................2-13
Windshield
Washer........................................................ 3-9
Washer Fluid..............................................5-31
Wiper Blade Replacement.............................5-44
Wiper Blades, Cleaning................................5-70
Wiper Fuses...............................................5-75
Wipers......................................................... 3-8
Windshield, Rear Washer/Wiper........................3-10
Winter Driving................................................4-22Y
Your Vehicle and the Environment....................... 6-2
12
Page 4356 of 5127
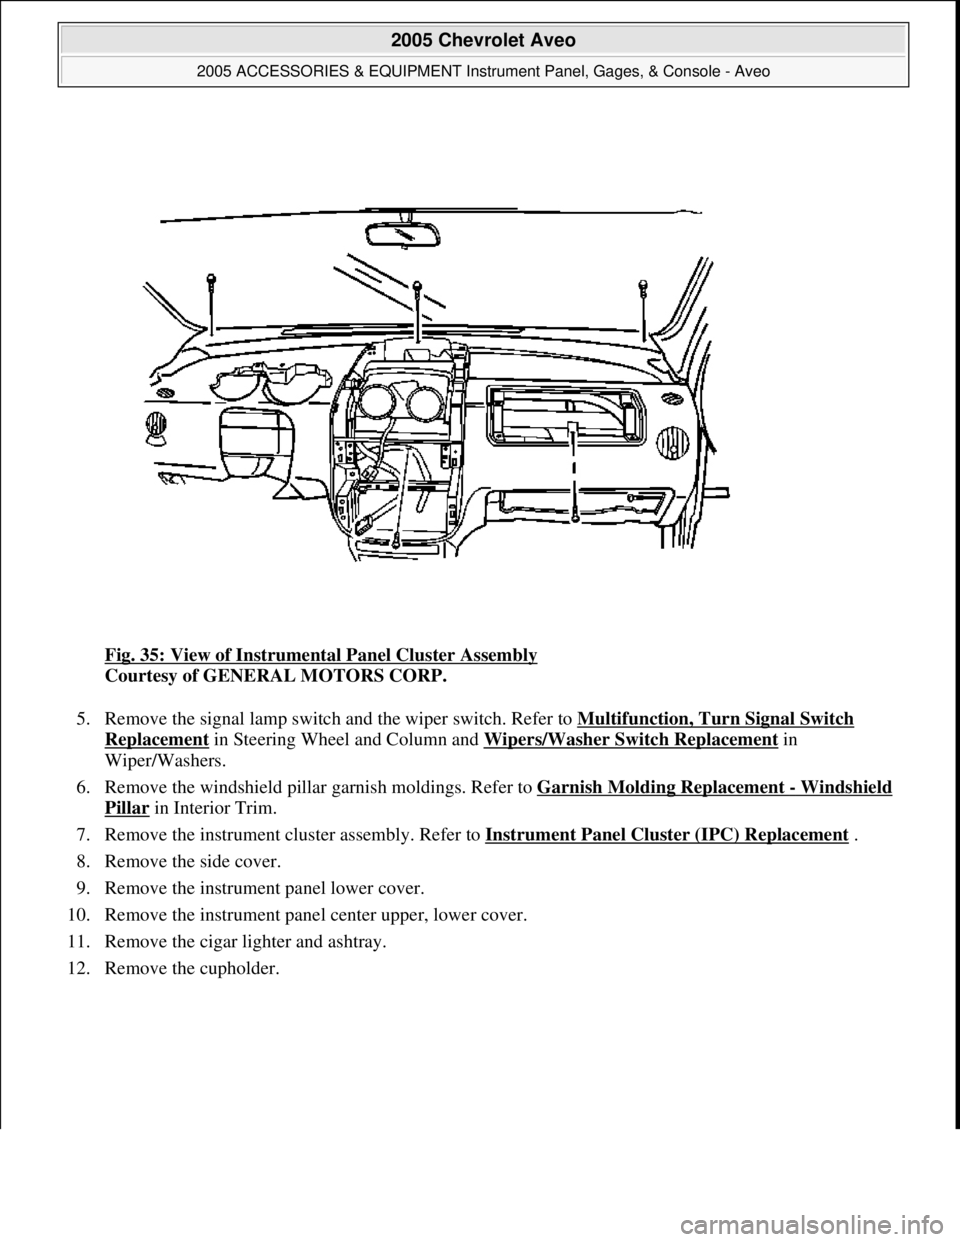
Fig. 35: View of Instrumental Panel Cluster Assembly
Courtesy of GENERAL MOTORS CORP.
5. Remove the signal lamp switch and the wiper switch. Refer to Multifunction, Turn Signal Switch
Replacement in Steering Wheel and Column and Wipers/Washer Switch Replacement in
Wiper/Washers.
6. Remove the windshield pillar garnish moldings. Refer to Garnish Molding Replacement
- Windshield
Pillar in Interior Trim.
7. Remove the instrument cluster assembly. Refer to Instrument Panel Cluster (IPC) Replacement
.
8. Remove the side cover.
9. Remove the instrument panel lower cover.
10. Remove the instrument panel center upper, lower cover.
11. Remove the cigar lighter and ashtray.
12. Remove the cupholder.
2005 Chevrolet Aveo
2005 ACCESSORIES & EQUIPMENT Instrument Panel, Gages, & Console - Aveo
Microsoft
Friday, July 31, 2009 1:07:03 PMPage 63 © 2005 Mitchell Repair Information Company, LLC.
Page 4362 of 5127
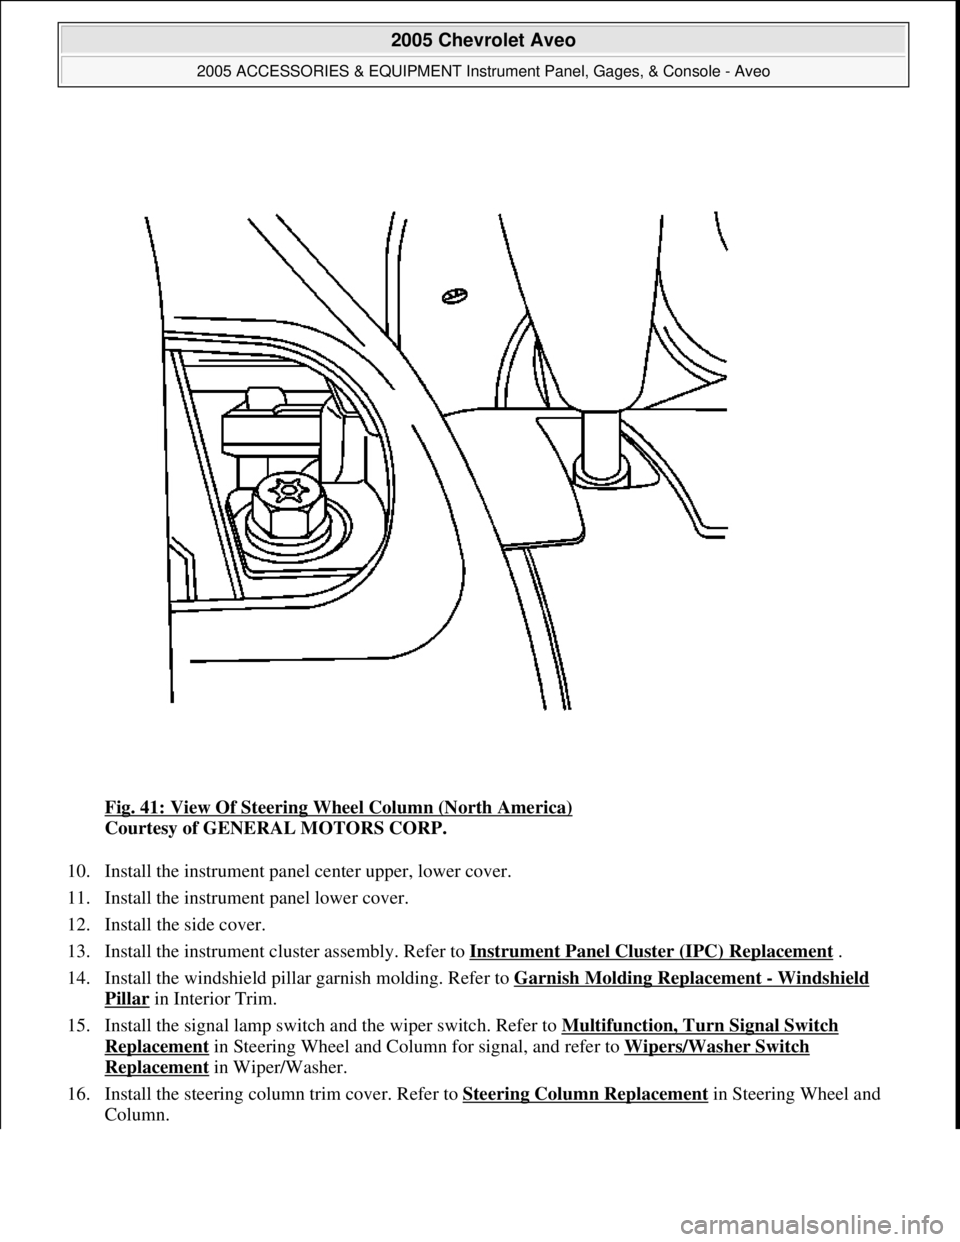
Fig. 41: View Of Steering Wheel Column (North America)
Courtesy of GENERAL MOTORS CORP.
10. Install the instrument panel center upper, lower cover.
11. Install the instrument panel lower cover.
12. Install the side cover.
13. Install the instrument cluster assembly. Refer to Instrument Panel Cluster (IPC) Replacement
.
14. Install the windshield pillar garnish molding. Refer to Garnish Molding Replacement
- Windshield
Pillar in Interior Trim.
15. Install the signal lamp switch and the wiper switch. Refer to Multifunction, Turn Signal Switch
Replacement in Steering Wheel and Column for signal, and refer to Wipers/Washer Switch
Replacement in Wiper/Washer.
16. Install the steering column trim cover. Refer to Steering Column Replacement
in Steering Wheel and
Column.
2005 Chevrolet Aveo
2005 ACCESSORIES & EQUIPMENT Instrument Panel, Gages, & Console - Aveo
Microsoft
Friday, July 31, 2009 1:07:03 PMPage 69 © 2005 Mitchell Repair Information Company, LLC.
Page 4364 of 5127
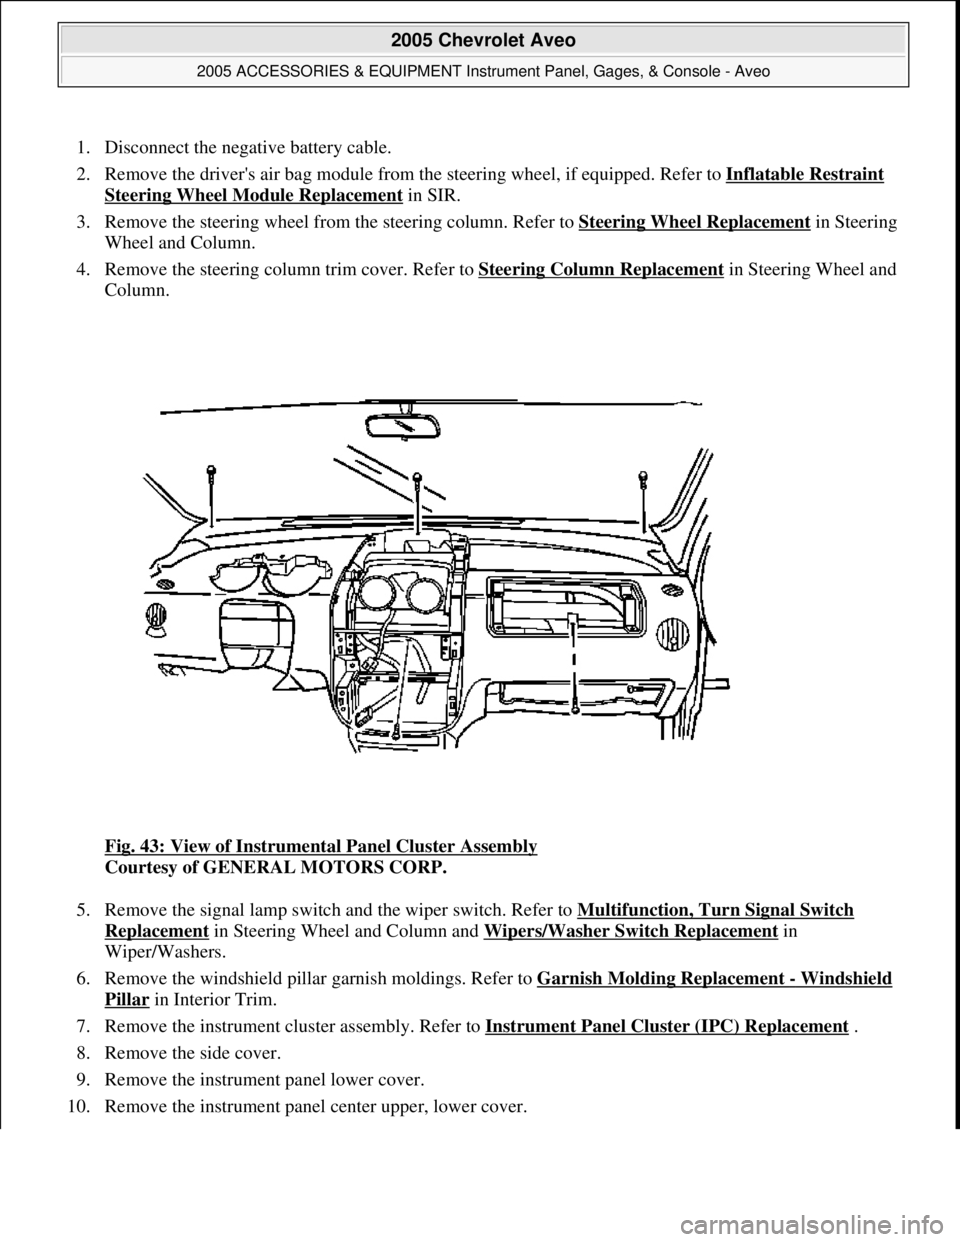
1. Disconnect the negative battery cable.
2. Remove the driver's air bag module from the steering wheel, if equipped. Refer to Inflatable Restraint
Steering Wheel Module Replacement in SIR.
3. Remove the steering wheel from the steering column. Refer to Steering Wheel Replacement
in Steering
Wheel and Column.
4. Remove the steering column trim cover. Refer to Steering Column Replacement
in Steering Wheel and
Column.
Fig. 43: View of Instrumental Panel Cluster Assembly
Courtesy of GENERAL MOTORS CORP.
5. Remove the signal lamp switch and the wiper switch. Refer to Multifunction, Turn Signal Switch
Replacement in Steering Wheel and Column and Wipers/Washer Switch Replacement in
Wiper/Washers.
6. Remove the windshield pillar garnish moldings. Refer to Garnish Molding Replacement
- Windshield
Pillar in Interior Trim.
7. Remove the instrument cluster assembly. Refer to Instrument Panel Cluster (IPC) Replacement
.
8. Remove the side cover.
9. Remove the instrument panel lower cover.
10. Remove the instrument panel center upper, lower cover.
2005 Chevrolet Aveo
2005 ACCESSORIES & EQUIPMENT Instrument Panel, Gages, & Console - Aveo
Microsoft
Friday, July 31, 2009 1:07:03 PMPage 71 © 2005 Mitchell Repair Information Company, LLC.