phone CHEVROLET AVEO 2008 1.G Owners Manual
[x] Cancel search | Manufacturer: CHEVROLET, Model Year: 2008, Model line: AVEO, Model: CHEVROLET AVEO 2008 1.GPages: 384, PDF Size: 6.67 MB
Page 75 of 384
Adding Equipment to Your
Airbag-Equipped Vehicle
Q:Is there anything I might add to or change
about the vehicle that could keep the airbags
from working properly?
A:Yes. If you add things that change your vehicle’s
frame, bumper system, height, front end or side
sheet metal, they may keep the airbag system from
working properly. Changing or moving any parts
of the front seats, safety belts, the airbag sensing
and diagnostic module, steering wheel, instrument
panel, front sensors, or airbag wiring can affect
the operation of the airbag system.
In addition, your vehicle has a passenger sensing
system for the right front passenger’s position,
which includes sensors that are part of the
passenger’s seat. The passenger sensing system
may not operate properly if the original seat
trim is replaced with non-GM covers, upholstery
or trim, or with GM covers, upholstery or trim
designed for a different vehicle. Any object, such
as an aftermarket seat heater or a comfort
enhancing pad or device, installed under or on
top of the seat fabric, could also interfere with
the operation of the passenger sensing system.This could either prevent proper deployment of
the passenger airbag(s) or prevent the passenger
sensing system from properly turning off the
passenger airbag(s). SeePassenger Sensing
System on page 1-65.
If you have any questions about this, you should
contact Customer Assistance before you modify
your vehicle. The phone numbers and addresses
for Customer Assistance are in Step Two of
the Customer Satisfaction Procedure in this manual.
SeeCustomer Satisfaction Procedure on page 7-2.
Q:Because I have a disability, I have to get
my vehicle modi�ed. How can I �nd out whether
this will affect my airbag system?
A:If you have questions, call Customer Assistance.
The phone numbers and addresses for Customer
Assistance are in Step Two of the Customer
Satisfaction Procedure in this manual. See
Customer Satisfaction Procedure on page 7-2.
In addition, your dealer/retailer and the service manual
have information about the location of the airbag
sensors, sensing and diagnostic module and airbag
wiring.
1-71
Page 132 of 384
Dome Lamp
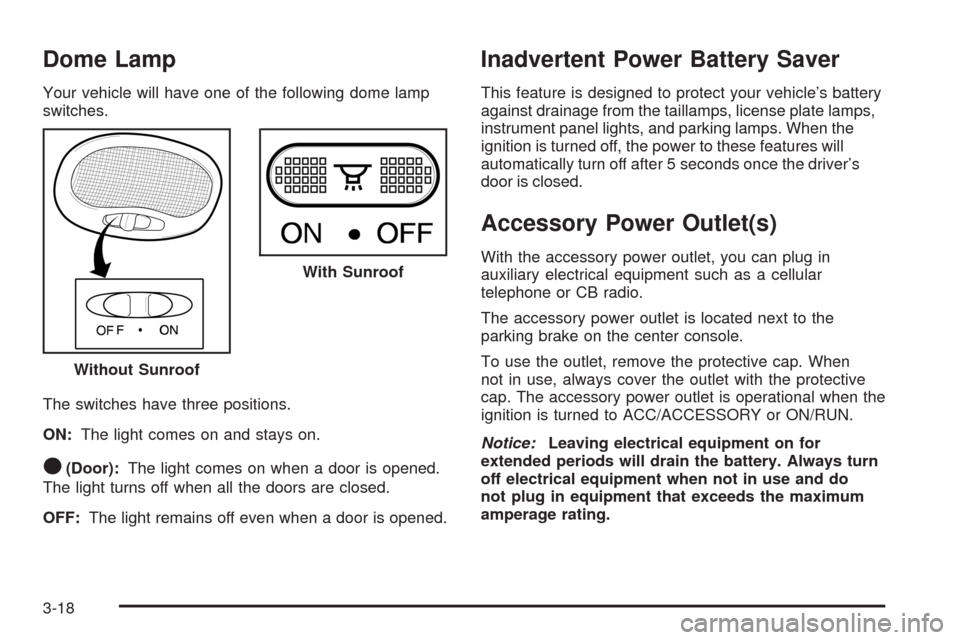
Your vehicle will have one of the following dome lamp
switches.
The switches have three positions.
ON:The light comes on and stays on.
O(Door):The light comes on when a door is opened.
The light turns off when all the doors are closed.
OFF:The light remains off even when a door is opened.
Inadvertent Power Battery Saver
This feature is designed to protect your vehicle’s battery
against drainage from the taillamps, license plate lamps,
instrument panel lights, and parking lamps. When the
ignition is turned off, the power to these features will
automatically turn off after 5 seconds once the driver’s
door is closed.
Accessory Power Outlet(s)
With the accessory power outlet, you can plug in
auxiliary electrical equipment such as a cellular
telephone or CB radio.
The accessory power outlet is located next to the
parking brake on the center console.
To use the outlet, remove the protective cap. When
not in use, always cover the outlet with the protective
cap. The accessory power outlet is operational when the
ignition is turned to ACC/ACCESSORY or ON/RUN.
Notice:Leaving electrical equipment on for
extended periods will drain the battery. Always turn
off electrical equipment when not in use and do
not plug in equipment that exceeds the maximum
amperage rating. Without SunroofWith Sunroof
3-18
Page 168 of 384
Audio System(s)
Determine which radio your vehicle has and then read
the pages following to familiarize yourself with its
features.
{CAUTION:
This system provides you with far greater
access to audio stations and song listings.
Giving extended attention to entertainment
tasks while driving can cause a crash and you
or others can be injured or killed. Always keep
your eyes on the road and your mind on the
drive — avoid engaging in extended searching
while driving.
Keeping your mind on the drive is important for safe
driving. SeeDefensive Driving on page 4-2. Here
are some ways in which you can help avoid distraction
while driving.While your vehicle is parked:
•Familiarize yourself with all of its controls.
•Familiarize yourself with its operation.
•Set up your audio system by presetting your
favorite radio stations, setting the tone, and
adjusting the speakers. Then, when driving
conditions permit, you can tune to your favorite
radio stations using the presets and steering
wheel controls if the vehicle has them.
Notice:Before adding any sound equipment to
your vehicle, such as an audio system, CD player,
CB radio, mobile telephone, or two-way radio, make
sure that it can be added by checking with your
dealer/retailer. Also, check federal rules covering
mobile radio and telephone units. If sound equipment
can be added, it is very important to do it properly.
Added sound equipment may interfere with the
operation of your vehicle’s engine, radio, or other
systems, and even damage them. Your vehicle’s
systems may interfere with the operation of sound
equipment that has been added.
3-54
Page 173 of 384
Order of Sound Function
The order for displayed sound function is EQ OFF,
CLASSIC, DANCE, ROCK, JAZZ, POP, VOICE,
TECHNO, and EQ OFF.
Using the Auxiliary Input Jack
AUX IN (Auxiliary Input):Your radio system has an
auxiliary input jack located on the lower right side of the
faceplate. This is not an audio output; do not plug the
headphone set into the front auxiliary input jack. You can
however, connect an external audio device such as an
iPod, laptop computer, MP3 player, CD changer, or XM™
receiver, etc. to the auxiliary input jack for use as another
source for audio listening.
The auxiliary input jack will also accept cell phone
connectors. Plug the cell phone connector into the
auxiliary input jack to hear the other side of a cell phone’s
conversation through the vehicle sound system.Drivers are encouraged to set up any auxiliary device
while the vehicle is in park (P). SeeDefensive Driving on
page 4-2for more information on driver distraction.
To use a portable audio player, connect a 3.5 mm
(1/8 inch) cable to the radio’s front auxiliary input jack.
When a device is connected, turn the portable audio
player on. Press and hold the radio AM/AUX button for
more than two seconds or until audio from the device
begins to play over the car speakers.
O(Power/Volume):Turn this knob clockwise or
counterclockwise to increase or decrease the volume
of the portable player. You may need to do additional
volume adjustments from the portable device if the
volume is not loud or soft enough.
AM/AUX:Press this button to listen to the radio while
a portable audio device is playing. The portable audio
device will continue playing, so you may want to stop it
or turn it off.
3-59
Page 179 of 384
Using the Auxiliary Input Jack
The radio system has an auxiliary input jack located on
the lower right side of the faceplate. This is not an audio
output. Do not plug the headphone set into the front
auxiliary input jack. An external audio device such as
an iPod, laptop computer, MP3 player, CD changer,
or cassette tape player, etc. can be connected to the
auxiliary input jack for use as another source for audio
listening.
The auxiliary input jack also accepts cell phone
connectors. Plug the cell phone connector into the
auxiliary input jack to hear a person speaking on a cell
phone during conversation through the vehicle sound
system.
Drivers are encouraged to set up any auxiliary device
while the vehicle is in PARK (P). SeeDefensive Driving
on page 4-2for more information on driver distraction.To use a portable audio player, connect a 3.5 mm
(1/8 inch) cable to the radio’s front auxiliary input jack.
While a device is connected, turn the portable audio
player on and press the radio CD/AUX button to
hear audio from the device over the vehicle speakers.
CD/AUX (CD/Auxiliary):Press this button once to
play a CD while a portable audio device is playing.
Press this button a second time for the system to begin
playing audio from the connected portable audio player.
Once in this mode, Auxinput appears on the display. If the
auxiliary jack does not detect the presence of an output
jack, the auxiliary mode does not display.
O(Power/Volume):Turn theOknob clockwise or
counterclockwise to increase or decrease the volume
of the portable player. Additional adjustments on a
portable device might be needed to get the desired
volume.
3-65
Page 185 of 384
If any error occurs repeatedly or if an error cannot be
corrected, contact your dealer/retailer. If the radio
displays an error message, write it down and provide it
to your dealer/retailer when reporting the problem.
Using the Auxiliary Input Jack
AUX IN (Auxiliary Input):The radio system has an
auxiliary input jack located on the lower right side of
the faceplate. This is not an audio output. Do not plug
the headphone set into the front auxiliary input jack.
An external audio device such as an iPod, laptop
computer, MP3 player, CD changer, or XM™ receiver,
etc. can be connected to the auxiliary input jack for
use as another source for audio listening.
The auxiliary input jack also accepts cell phone
connectors. Plug the cell phone connector into the
auxiliary input jack to hear a person speck on a
cell phone during a conversation through the vehicle
sound system.Drivers are encouraged to set up any auxiliary device
while the vehicle is in PARK (P). SeeDefensive Driving
on page 4-2for more information on driver distraction.
To use a portable audio player, connect a 3.5 mm
(1/8 inch) cable to the radio’s front auxiliary input jack.
While a device is connected, turn the portable audio
player on and press the radio CD/AUX button to
hear audio from the device over the vehicle speakers.
O(Power/Volume):Turn this knob clockwise or
counterclockwise to increase or decrease the volume of
the portable player. Additional adjustments on a portable
device might be needed to get the desired volume.
CD/AUX (CD/Auxiliary):Press this button once to play
a CD while a portable audio device is playing. Press
this button a second time for the system to begin playing
audio from the connected portable audio player. Once
in this mode, Auxinput displays. If the auxiliary jack does
not detect the presence of an output jack, the auxiliary
mode does not display.
3-71
Page 193 of 384
Radio Reception
Frequency interference and static can occur during
normal radio reception if items such as cell phone
chargers, vehicle convenience accessories, and external
electronic devices are plugged into the accessory
power outlet. If there is interference or static, unplug
the item from the accessory power outlet.
AM
The range for most AM stations is greater than for FM,
especially at night. The longer range can cause station
frequencies to interfere with each other. For better radio
reception, most AM radio stations boost the power levels
during the day, and then reduce these levels during the
night. Static can also occur when things like storms and
power lines interfere with radio reception. When this
happens, try reducing the treble on your radio.
FM Stereo
FM stereo gives the best sound, but FM signals reach
only about 10 to 40 miles (16 to 65 km). Tall buildings
or hills can interfere with FM signals, causing the sound
to fade in and out.
Care of Your CDs
Handle CDs carefully. Store them in their original cases
or other protective cases and away from direct sunlight
and dust. The CD player scans the bottom surface of the
disc. If the surface of a CD is damaged, such as cracked,
broken, or scratched, the CD does not play properly or
not at all. If the surface of a CD is soiled, take a soft, lint
free cloth or dampen a clean, soft cloth in a mild, neutral
detergent solution mixed with water, and clean it.
Make sure the wiping process starts from the center
to the edge.
Do not touch the bottom side of a CD while handling it;
this could damage the surface. Pick up CDs by grasping
the outer edges or the edge of the hole and the
outer edge.
Care of the CD Player
Do not use CD lens cleaners for CD players because
the lens of the CD optics can become contaminated by
lubricants.
3-79
Page 194 of 384
Fixed Mast Antenna (Hatchback)
The fixed mast antenna can withstand most car
washes without being damaged. If the mast should
ever become slightly bent, straighten it out by hand.
If the mast is badly bent, replace it.
Check occasionally to make sure the mast is still
tightened to the antenna base located on the roof of
the vehicle. If tightening is required, tighten by hand.
Backglass Antenna (Sedan)
The AM-FM antenna is integrated with the rear window
defogger, located in the rear window. Make sure that
the inside surface of the rear window is not scratched
and that the lines on the glass are not damaged. If the
inside surface is damaged, it could interfere with radio
reception. Also, for proper radio reception, the antenna
connector at the top-center of the rear window needs to
be properly attached to the post on the glass.
Notice:Using a razor blade or sharp object to
clear the inside rear window may damage the rear
window antenna and/or the rear window defogger.
Repairs would not be covered by your warranty.
Do not clear the inside rear window with sharp
objects.Notice:Do not apply aftermarket glass tinting
with metallic �lm. The metallic �lm in some tinting
materials will interfere with or distort the incoming
radio reception. Any damage caused to your
backglass antenna due to metallic tinting materials
will not be covered by your warranty.
Because this antenna is built into your rear window,
there is a reduced risk of damage caused by car washes
and vandals.
If static is heard on the radio, when the rear window
defogger is turned on, it could mean that a defogger
grid line has been damaged. If this is true, the grid line
must be repaired.
If adding a cellular telephone to your vehicle, and the
antenna needs to be attached to the glass, make
sure that the grid lines for the AM-FM antenna are not
damaged. There is enough space between the grid lines
to attach a cellular telephone antenna without interfering
with radio reception.
3-80
Page 229 of 384
Fuels in Foreign Countries
If you plan on driving in another country outside the
United States or Canada, the proper fuel might be hard
to find. Never use leaded gasoline or any other fuel
not recommended in the previous text on fuel. Costly
repairs caused by use of improper fuel would not
be covered by your warranty.
To check the fuel availability, ask an auto club, or
contact a major oil company that does business in the
country where you will be driving.
Filling the Tank
{CAUTION:
Fuel vapor burns violently and a fuel �re can
cause bad injuries. To help avoid injuries to
you and others, read and follow all the
instructions on the pump island. Turn off your
engine when you are refueling. Do not smoke
if you are near fuel or refueling your vehicle.
CAUTION: (Continued)
CAUTION: (Continued)
Do not use cellular phones. Keep sparks,
�ames, and smoking materials away from fuel.
Do not leave the fuel pump unattended when
refueling your vehicle. This is against the law
in some places. Do not re-enter the vehicle
while pumping fuel. Keep children away from
the fuel pump; never let children pump fuel.
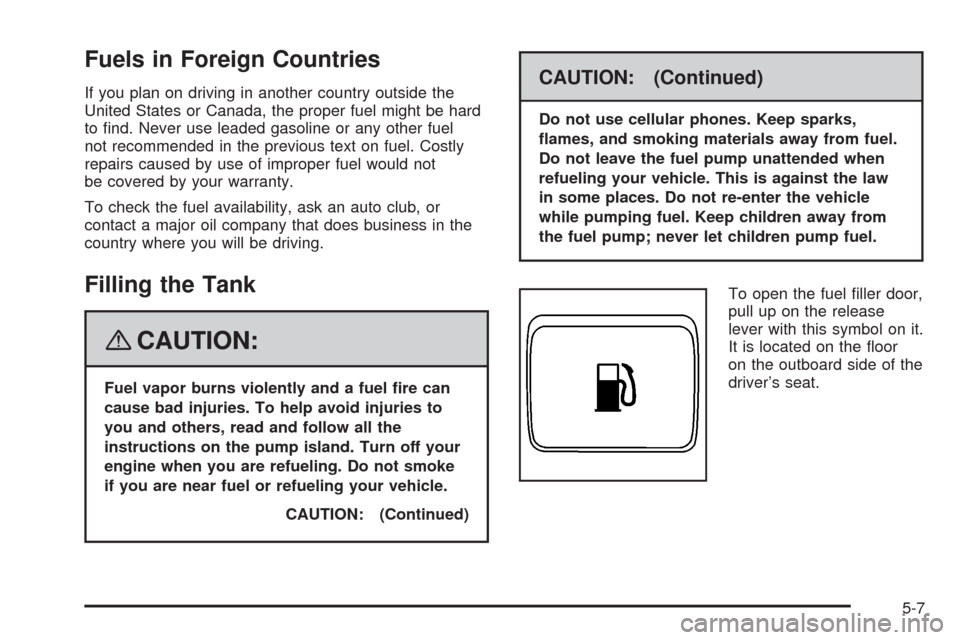
To open the fuel filler door,
pull up on the release
lever with this symbol on it.
It is located on the floor
on the outboard side of the
driver’s seat.
5-7
Page 231 of 384
When replacing the fuel cap, turn it clockwise until it
clicks. Make sure the cap is fully installed. The
diagnostic system can determine if the fuel cap has
been left off or improperly installed. This would allow fuel
to evaporate into the atmosphere. SeeMalfunction
Indicator Lamp on page 3-49.
{CAUTION:
If a �re starts while you are refueling, do not
remove the nozzle. Shut off the �ow of fuel by
shutting off the pump or by notifying the
station attendant. Leave the area immediately.
Notice:If you need a new fuel cap, be sure to get
the right type. Your dealer/retailer can get one
for you. If you get the wrong type, it may not �t
properly. This may cause your malfunction indicator
lamp to light and may damage your fuel tank and
emissions system. SeeMalfunction Indicator Lamp
on page 3-49.
Filling a Portable Fuel Container
{CAUTION:
Never �ll a portable fuel container while it is in
your vehicle. Static electricity discharge from
the container can ignite the fuel vapor.
You can be badly burned and your vehicle
damaged if this occurs. To help avoid injury to
you and others:
Dispense fuel only into approved
containers.
Do not �ll a container while it is inside a
vehicle, in a vehicle’s trunk, pickup bed, or
on any surface other than the ground.
Bring the �ll nozzle in contact with the
inside of the �ll opening before operating
the nozzle. Contact should be maintained
until the �lling is complete.
Do not smoke while pumping fuel.
Do not use a cellular phone while
pumping fuel.
5-9