warning CHEVROLET AVEO 2011 1.G User Guide
[x] Cancel search | Manufacturer: CHEVROLET, Model Year: 2011, Model line: AVEO, Model: CHEVROLET AVEO 2011 1.GPages: 328, PDF Size: 5.37 MB
Page 43 of 328
Black plate (11,1)Chevrolet Aveo Owner Manual - 2011
Keys, Doors and Windows 2-11
To avoid activating the alarm by
accident, do one of the following:
.Unlock the driver or passenger
front door using the key.
.Press the unlock button on the
RKE transmitter.
Unlocking a door any other way will
activate the alarm when a door or
the trunk or liftgate is opened.
If you do not want to arm the
theft-deterrent system, lock the
vehicle using the key or the manual
door locks.
Disarming the System
To disarm the system, do one of the
following:
.Unlock the driver or passenger
front door using the key.
.Press the unlock button on the
RKE transmitter.
‐ The LED light on the
transmitter will flash once.
‐ All of the doors will unlock.
‐ The hazard warning lamps will
flash twice.
If the door is not opened or if the
engine is not started within
30 seconds after disarming the
system using the transmitter, all of
the doors will automatically lock and
the theft-deterrent mode will re-arm.
How the System Alarm is
Activated
If a door or the trunk or liftgate is
opened without using the key or the
RKE transmitter, the horn will sound
and the lamps will flash for up to
30 seconds.
How to Turn Off the System
Alarm
If the system alarm is active, it can
be deactivated using one of the
following methods:
.Press one of the buttons on the
RKE transmitter.
.Unlock the driver or passenger
front door using the key.
Otherwise, the alarm will
automatically stop after 30 seconds.
The system will then lock the doors
and re-arm the theft-deterrent
system.
Page 44 of 328
Black plate (12,1)Chevrolet Aveo Owner Manual - 2011
2-12 Keys, Doors and Windows
How to Detect a Tamper
Condition
If the hazard warning lamps
flash once when you press the lock
button on the RKE transmitter, the
theft-deterrent system alarm was
activated while you were away.
Immobilizer
SeeRadio Frequency Statement on
page 13‑16 for information
regarding Part 15 of the Federal
Communications Commission (FCC)
rules and Industry Canada
Standards RSS-210/220/310.
Immobilizer Operation
The vehicle may have a passive
theft-deterrent system.
The immobilizer system prevents
the vehicle from being started by an
unauthorized person by isolating the
power supply to the ignition system,
the fuel pump, and the fuel injectors. The system is automatically armed
when the key is removed from
the ignition. You do not have to
manually arm or disarm the system.
The vehicle has a special key that
works with the theft-deterrent
system. There is a transponder in
the key head that is electronically
coded. The correct key will start the
vehicle. An invalid key immobilizes
the engine. If the key is ever
damaged, you may not be able to
start the vehicle.
When trying to start the vehicle,
if the engine does not start and the
security light flashes or comes on,
there may be a problem with the
theft-deterrent system. Turn the
ignition off and try again.
If the engine still does not start, and
the key appears to be undamaged,
try another key. At this time, you
may also want to check the fuse.
See
Fuses and Circuit Breakers on
page 10‑36. If the engine still does
not start with the other key, your
vehicle needs service. If the vehicle
does start, the first key may be
faulty. See your dealer who can
have a new key made.
Up to 10 keys may be programmed
for the vehicle. If you lose or
damage your keys, only a dealer
can have new keys made.
If you are ever driving and the
security light comes on and stays
on, you will be able to restart
the engine if you turn it off. The
theft-deterrent system, however, is
not working properly and must be
serviced by your dealer. Your
vehicle is not protected by the
theft-deterrent system at this time.
In an emergency, contact Roadside
Assistance. See Roadside
Assistance Program on page 13‑6.
Page 45 of 328
Black plate (13,1)Chevrolet Aveo Owner Manual - 2011
Keys, Doors and Windows 2-13
Exterior Mirrors
Convex Mirrors
{WARNING
A convex mirror can make things,
like other vehicles, look farther
away than they really are. If you
cut too sharply into the right lane,
you could hit a vehicle on the
right. Check the inside mirror or
glance over your shoulder before
changing lanes.
The passenger side mirror is convex
shaped. A convex mirror's surface is
curved so more can be seen from
the driver seat.
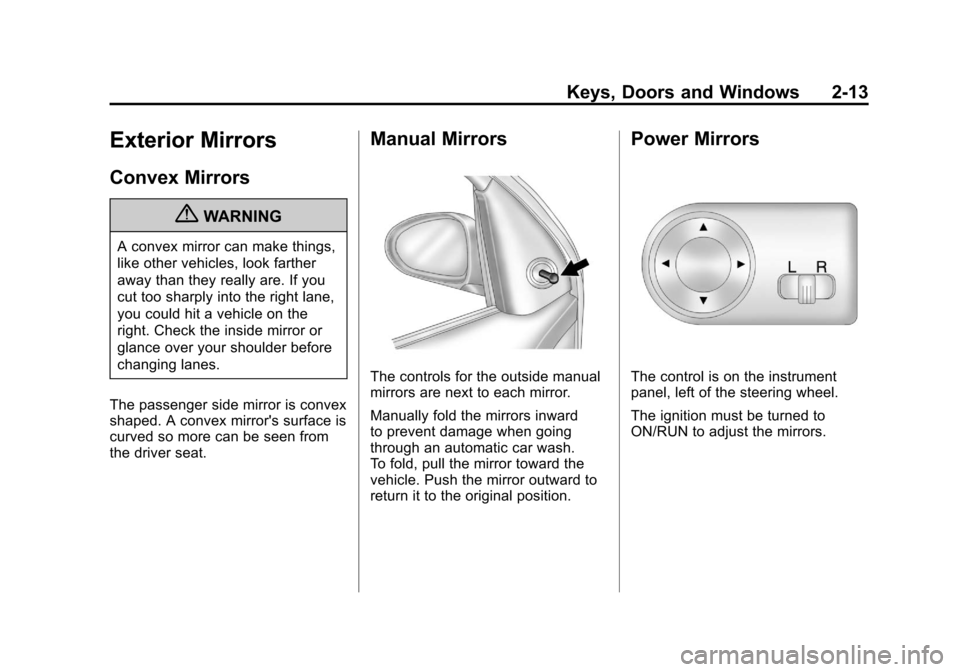
Manual Mirrors
The controls for the outside manual
mirrors are next to each mirror.
Manually fold the mirrors inward
to prevent damage when going
through an automatic car wash.
To fold, pull the mirror toward the
vehicle. Push the mirror outward to
return it to the original position.
Power Mirrors
The control is on the instrument
panel, left of the steering wheel.
The ignition must be turned to
ON/RUN to adjust the mirrors.
Page 46 of 328
Black plate (14,1)Chevrolet Aveo Owner Manual - 2011
2-14 Keys, Doors and Windows
To adjust the mirrors:
1. Select the mirror you want toadjust by moving the selector
switch to L for the driver side
mirror or R for the passenger
side mirror.
2. Press one of the four arrows on the control pad to move the
mirror in the desired direction.
Manually fold the mirrors inward
to prevent damage when going
through an automatic car wash.
To fold, pull the mirror toward the
vehicle. Push the mirror outward, to
return it to its original position.
Heated Mirrors
For vehicles with this feature:
<(Rear Window Defogger):
Press to heat the mirrors. See
“Rear Window and Outside Mirror
Defogger” underClimate Control
Systems on page 8‑1 for more
information.
Interior Mirrors
Manual Rearview Mirror
Hold the inside rearview mirror in
the center to move it for a clearer
view behind your vehicle. Adjust
the mirror to avoid glare from the
headlamps behind you. Push the
tab forward for daytime use and pull
it for nighttime use.
Windows
{WARNING
Leaving children, helpless adults,
or pets in a vehicle with the
windows closed is dangerous.
They can be overcome by
the extreme heat and suffer
permanent injuries or even death
from heat stroke. Never leave a
child, a helpless adult, or a pet
alone in a vehicle, especially with
the windows closed in warm or
hot weather.
Page 47 of 328
Black plate (15,1)Chevrolet Aveo Owner Manual - 2011
Keys, Doors and Windows 2-15
The vehicle aerodynamics are
designed to improve fuel economy
performance. This may result in a
pulsing sound when either rear
window is down and the front
windows are up. To reduce the
sound, open either a front window
or the sunroof (if equipped).
Manual Windows
Use the window crank to open and
close each window.
The rear windows do not open fully.
Power Windows
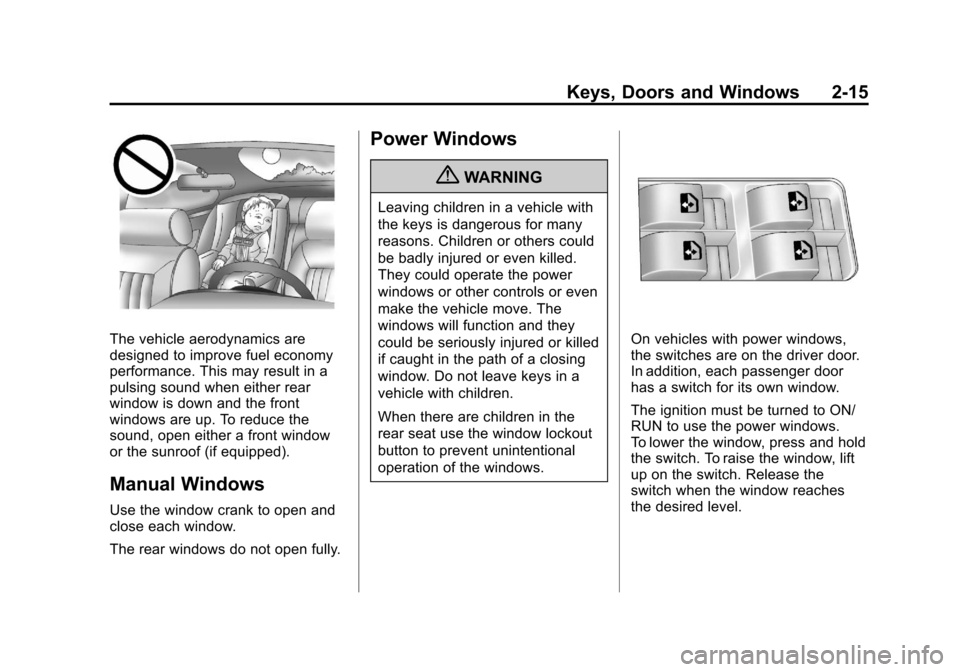
{WARNING
Leaving children in a vehicle with
the keys is dangerous for many
reasons. Children or others could
be badly injured or even killed.
They could operate the power
windows or other controls or even
make the vehicle move. The
windows will function and they
could be seriously injured or killed
if caught in the path of a closing
window. Do not leave keys in a
vehicle with children.
When there are children in the
rear seat use the window lockout
button to prevent unintentional
operation of the windows.
On vehicles with power windows,
the switches are on the driver door.
In addition, each passenger door
has a switch for its own window.
The ignition must be turned to ON/
RUN to use the power windows.
To lower the window, press and hold
the switch. To raise the window, lift
up on the switch. Release the
switch when the window reaches
the desired level.
Page 52 of 328
Black plate (2,1)Chevrolet Aveo Owner Manual - 2011
3-2 Seats and Restraints
Head Restraints
The front seats have adjustable
head restraints in the outboard
seating positions.
{WARNING
With head restraints that are not
installed and adjusted properly,
there is a greater chance that
occupants will suffer a neck/
spinal injury in a crash. Do not
drive until the head restraints for
all occupants are installed and
adjusted properly.
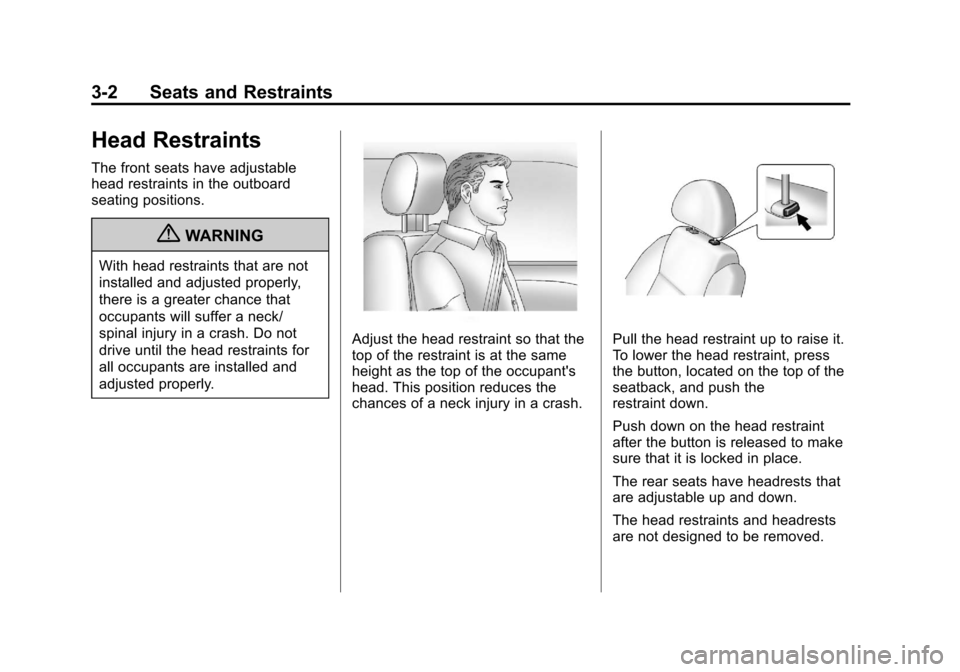
Adjust the head restraint so that the
top of the restraint is at the same
height as the top of the occupant's
head. This position reduces the
chances of a neck injury in a crash.Pull the head restraint up to raise it.
To lower the head restraint, press
the button, located on the top of the
seatback, and push the
restraint down.
Push down on the head restraint
after the button is released to make
sure that it is locked in place.
The rear seats have headrests that
are adjustable up and down.
The head restraints and headrests
are not designed to be removed.
Page 53 of 328
Black plate (3,1)Chevrolet Aveo Owner Manual - 2011
Seats and Restraints 3-3
Front Seats
Seat Adjustment
Manual Seats
{WARNING
You can lose control of the
vehicle if you try to adjust a
manual driver seat while the
vehicle is moving. The sudden
movement could startle and
confuse you, or make you push a
pedal when you do not want to.
Adjust the driver seat only when
the vehicle is not moving.
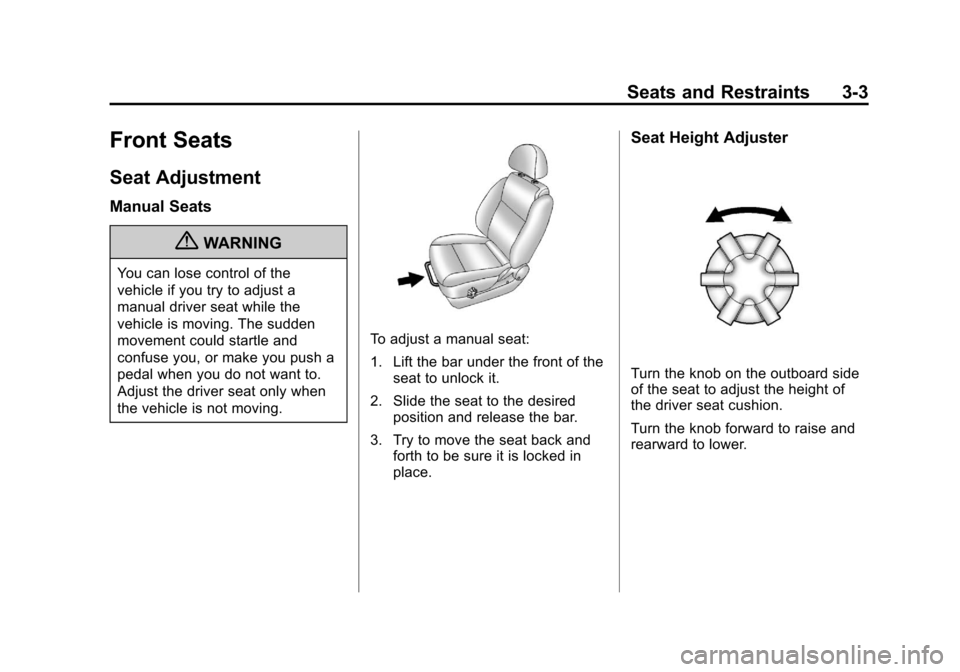
To adjust a manual seat:
1. Lift the bar under the front of theseat to unlock it.
2. Slide the seat to the desired position and release the bar.
3. Try to move the seat back and forth to be sure it is locked in
place.
Seat Height Adjuster
Turn the knob on the outboard side
of the seat to adjust the height of
the driver seat cushion.
Turn the knob forward to raise and
rearward to lower.
Page 54 of 328
Black plate (4,1)Chevrolet Aveo Owner Manual - 2011
3-4 Seats and Restraints
Lumbar Adjustment
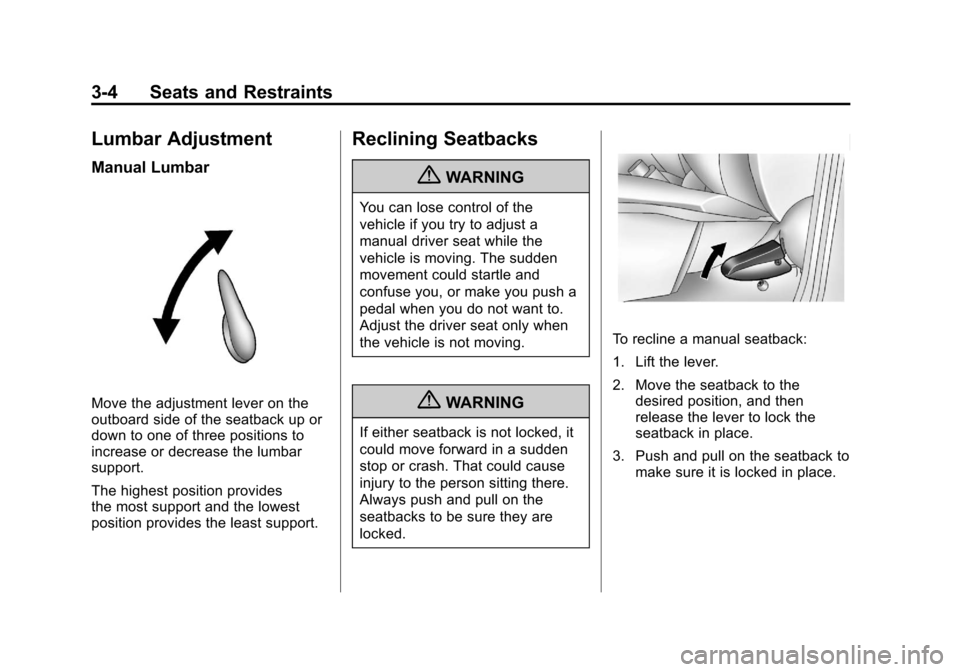
Manual Lumbar
Move the adjustment lever on the
outboard side of the seatback up or
down to one of three positions to
increase or decrease the lumbar
support.
The highest position provides
the most support and the lowest
position provides the least support.
Reclining Seatbacks
{WARNING
You can lose control of the
vehicle if you try to adjust a
manual driver seat while the
vehicle is moving. The sudden
movement could startle and
confuse you, or make you push a
pedal when you do not want to.
Adjust the driver seat only when
the vehicle is not moving.
{WARNING
If either seatback is not locked, it
could move forward in a sudden
stop or crash. That could cause
injury to the person sitting there.
Always push and pull on the
seatbacks to be sure they are
locked.
To recline a manual seatback:
1. Lift the lever.
2. Move the seatback to thedesired position, and then
release the lever to lock the
seatback in place.
3. Push and pull on the seatback to make sure it is locked in place.
Page 55 of 328
Black plate (5,1)Chevrolet Aveo Owner Manual - 2011
Seats and Restraints 3-5
To return the seatback to the upright
position:
1. Lift the lever fully withoutapplying pressure to the
seatback, and the seatback will
return to the upright position.
2. Push and pull on the seatback to make sure it is locked.
{WARNING
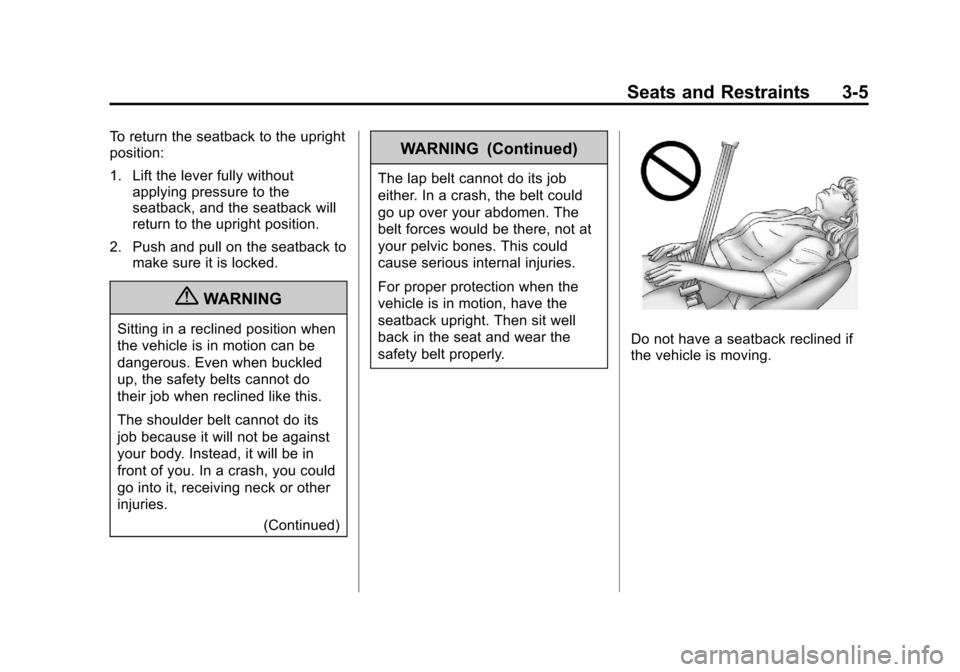
Sitting in a reclined position when
the vehicle is in motion can be
dangerous. Even when buckled
up, the safety belts cannot do
their job when reclined like this.
The shoulder belt cannot do its
job because it will not be against
your body. Instead, it will be in
front of you. In a crash, you could
go into it, receiving neck or other
injuries.
(Continued)
WARNING (Continued)
The lap belt cannot do its job
either. In a crash, the belt could
go up over your abdomen. The
belt forces would be there, not at
your pelvic bones. This could
cause serious internal injuries.
For proper protection when the
vehicle is in motion, have the
seatback upright. Then sit well
back in the seat and wear the
safety belt properly.
Do not have a seatback reclined if
the vehicle is moving.
Page 57 of 328
Black plate (7,1)Chevrolet Aveo Owner Manual - 2011
Seats and Restraints 3-7
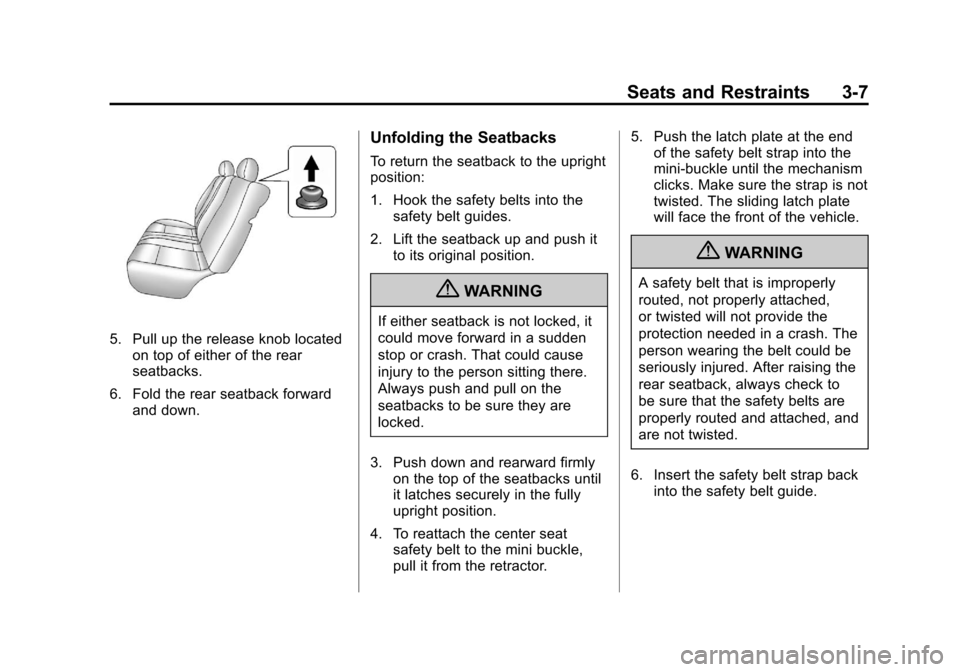
5. Pull up the release knob locatedon top of either of the rear
seatbacks.
6. Fold the rear seatback forward and down.
Unfolding the Seatbacks
To return the seatback to the upright
position:
1. Hook the safety belts into thesafety belt guides.
2. Lift the seatback up and push it to its original position.
{WARNING
If either seatback is not locked, it
could move forward in a sudden
stop or crash. That could cause
injury to the person sitting there.
Always push and pull on the
seatbacks to be sure they are
locked.
3. Push down and rearward firmly on the top of the seatbacks until
it latches securely in the fully
upright position.
4. To reattach the center seat safety belt to the mini buckle,
pull it from the retractor. 5. Push the latch plate at the end
of the safety belt strap into the
mini-buckle until the mechanism
clicks. Make sure the strap is not
twisted. The sliding latch plate
will face the front of the vehicle.
{WARNING
A safety belt that is improperly
routed, not properly attached,
or twisted will not provide the
protection needed in a crash. The
person wearing the belt could be
seriously injured. After raising the
rear seatback, always check to
be sure that the safety belts are
properly routed and attached, and
are not twisted.
6. Insert the safety belt strap back into the safety belt guide.