brake light CHEVROLET AVEO 2011 1.G Owners Manual
[x] Cancel search | Manufacturer: CHEVROLET, Model Year: 2011, Model line: AVEO, Model: CHEVROLET AVEO 2011 1.GPages: 328, PDF Size: 5.37 MB
Page 1 of 328

Black plate (1,1)Chevrolet Aveo Owner Manual - 2011
2011 Chevrolet Aveo Owner ManualM
In Brief. . . . . . . . . . . . . . . . . . . . . . . . 1-1
Instrument Panel . . . . . . . . . . . . . . 1-2
Initial Drive Information . . . . . . . . 1-3
Vehicle Features . . . . . . . . . . . . . 1-16
Performance and Maintenance . . . . . . . . . . . . . . . . 1-21
Keys, Doors and Windows . . . 2-1
Keys and Locks . . . . . . . . . . . . . . . 2-2
Doors . . . . . . . . . . . . . . . . . . . . . . . . . . 2-7
Vehicle Security . . . . . . . . . . . . . . 2-10
Exterior Mirrors . . . . . . . . . . . . . . . 2-13
Interior Mirrors . . . . . . . . . . . . . . . . 2-14
Windows . . . . . . . . . . . . . . . . . . . . . 2-14
Roof . . . . . . . . . . . . . . . . . . . . . . . . . . 2-16
Seats and Restraints . . . . . . . . . 3-1
Head Restraints . . . . . . . . . . . . . . . 3-2
Front Seats . . . . . . . . . . . . . . . . . . . . 3-3
Rear Seats . . . . . . . . . . . . . . . . . . . . 3-6
Safety Belts . . . . . . . . . . . . . . . . . . 3-11
Airbag System . . . . . . . . . . . . . . . . 3-24
Child Restraints . . . . . . . . . . . . . . 3-38 Storage
. . . . . . . . . . . . . . . . . . . . . . . 4-1
Storage Compartments . . . . . . . . 4-1
Instruments and Controls . . . . 5-1
Controls . . . . . . . . . . . . . . . . . . . . . . . 5-1
Warning Lights, Gauges, and Indicators . . . . . . . . . . . . . . . . . . . . 5-7
Trip Computer . . . . . . . . . . . . . . . . 5-21
Lighting . . . . . . . . . . . . . . . . . . . . . . . 6-1
Exterior Lighting . . . . . . . . . . . . . . . 6-1
Interior Lighting . . . . . . . . . . . . . . . . 6-4
Lighting Features . . . . . . . . . . . . . . 6-5
Infotainment System . . . . . . . . . 7-1
Introduction . . . . . . . . . . . . . . . . . . . . 7-1
Radio . . . . . . . . . . . . . . . . . . . . . . . . . . 7-3
Audio Players . . . . . . . . . . . . . . . . 7-10
Climate Controls . . . . . . . . . . . . . 8-1
Climate Control Systems . . . . . . 8-1
Air Vents . . . . . . . . . . . . . . . . . . . . . . . 8-4
Maintenance . . . . . . . . . . . . . . . . . . . 8-5 Driving and Operating
. . . . . . . . 9-1
Driving Information . . . . . . . . . . . . . 9-2
Starting and Operating . . . . . . . 9-17
Engine Exhaust . . . . . . . . . . . . . . 9-24
Automatic Transmission . . . . . . 9-25
Manual Transmission . . . . . . . . . 9-29
Brakes . . . . . . . . . . . . . . . . . . . . . . . 9-30
Cruise Control . . . . . . . . . . . . . . . . 9-32
Fuel . . . . . . . . . . . . . . . . . . . . . . . . . . 9-34
Towing . . . . . . . . . . . . . . . . . . . . . . . 9-39
Conversions and Add-Ons . . . 9-40
Vehicle Care . . . . . . . . . . . . . . . . . 10-1
General Information . . . . . . . . . . 10-3
Vehicle Checks . . . . . . . . . . . . . . . 10-5
Headlamp Aiming . . . . . . . . . . . 10-30
Bulb Replacement . . . . . . . . . . 10-31
Electrical System . . . . . . . . . . . . 10-36
Wheels and Tires . . . . . . . . . . . 10-42
Jump Starting . . . . . . . . . . . . . . . 10-70
Towing . . . . . . . . . . . . . . . . . . . . . . 10-74
Appearance Care . . . . . . . . . . . 10-76
Page 5 of 328

Black plate (5,1)Chevrolet Aveo Owner Manual - 2011
Introduction v
Vehicle Symbol Chart
Here are some additional symbols
that may be found on the vehicle
and what they mean. For more
information on the symbol, refer to
the Index.
9:Airbag Readiness Light
#:Air Conditioning
!:Antilock Brake System (ABS)
g:Audio Steering Wheel Controls
or OnStar®
$: Brake System Warning Light
":Charging System
I:Cruise Control
B: Engine Coolant Temperature
O:Exterior Lamps
#:Fog Lamps
.: Fuel Gauge
+:Fuses
3: Headlamp High/Low-Beam
Changer
j: LATCH System Child
Restraints
*: Malfunction Indicator Lamp
::Oil Pressure
}:Power
/:Remote Vehicle Start
>:Safety Belt Reminders
7:Tire Pressure Monitor
d:Traction Control
M:Windshield Washer Fluid
Page 113 of 328
Black plate (1,1)Chevrolet Aveo Owner Manual - 2011
Instruments and Controls 5-1
Instruments and
Controls
Controls
Steering Wheel Adjustment . . . 5-1
Steering Wheel Controls . . . . . . 5-2
Horn . . . . . . . . . . . . . . . . . . . . . . . . . . 5-3
Windshield Wiper/Washer . . . . . 5-3
Rear Window Wiper/Washer . . . . . . . . . . . . . . . . . . . . . . 5-5
Clock . . . . . . . . . . . . . . . . . . . . . . . . . 5-5
Power Outlets . . . . . . . . . . . . . . . . . 5-5
Cigarette Lighter . . . . . . . . . . . . . . 5-6
Ashtrays . . . . . . . . . . . . . . . . . . . . . . 5-7
Warning Lights, Gauges, and
Indicators
Warning Lights, Gauges, and Indicators . . . . . . . . . . . . . . . . . . . . 5-7
Instrument Cluster . . . . . . . . . . . . 5-8
Speedometer . . . . . . . . . . . . . . . . . 5-9
Odometer . . . . . . . . . . . . . . . . . . . . . 5-9
Trip Odometer . . . . . . . . . . . . . . . . . 5-9
Tachometer . . . . . . . . . . . . . . . . . . . 5-9
Fuel Gauge . . . . . . . . . . . . . . . . . . 5-10 Engine Coolant Temperature
Gauge . . . . . . . . . . . . . . . . . . . . . . 5-11
Safety Belt Reminders . . . . . . . 5-11
Airbag Readiness Light . . . . . . 5-12
Passenger Airbag Status Indicator . . . . . . . . . . . . . . . . . . . . 5-12
Charging System Light . . . . . . 5-13
Malfunction Indicator Lamp . . . . . . . . . . . . . 5-14
Brake System Warning Light . . . . . . . . . . . . . . . . . . . . . . . 5-16
Antilock Brake System (ABS) Warning Light . . . . . . . . . . . . . . 5-17
Up-Shift Light . . . . . . . . . . . . . . . . 5-17
Hold Mode Light . . . . . . . . . . . . . 5-18
Tire Pressure Light . . . . . . . . . . 5-18
Engine Oil Pressure Light . . . . 5-18
Change Engine Oil Light . . . . . 5-19
Low Fuel Warning Light . . . . . . 5-20
High-Beam On Light . . . . . . . . . 5-20
Daytime Running Lamps (DRL) Indicator Light . . . . . . . 5-20
Front Fog Lamp Light . . . . . . . . 5-20
Cruise Control Light . . . . . . . . . 5-21
Door Ajar Light . . . . . . . . . . . . . . 5-21
Trip Computer
Trip Computer (US Only) . . . . 5-21
Controls
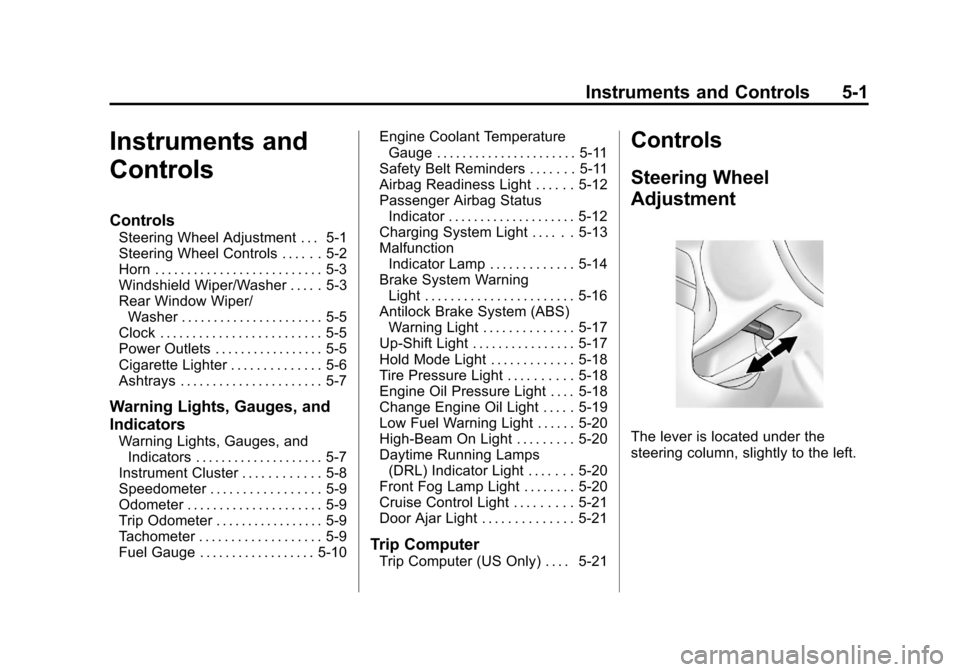
Steering Wheel
Adjustment
The lever is located under the
steering column, slightly to the left.
Page 128 of 328
Black plate (16,1)Chevrolet Aveo Owner Manual - 2011
5-16 Instruments and Controls
Emissions Inspection and
Maintenance Programs
Some state/provincial and local
governments may have programs to
inspect the on-vehicle emission
control equipment. For the
inspection, the emission system test
equipment is connected to the
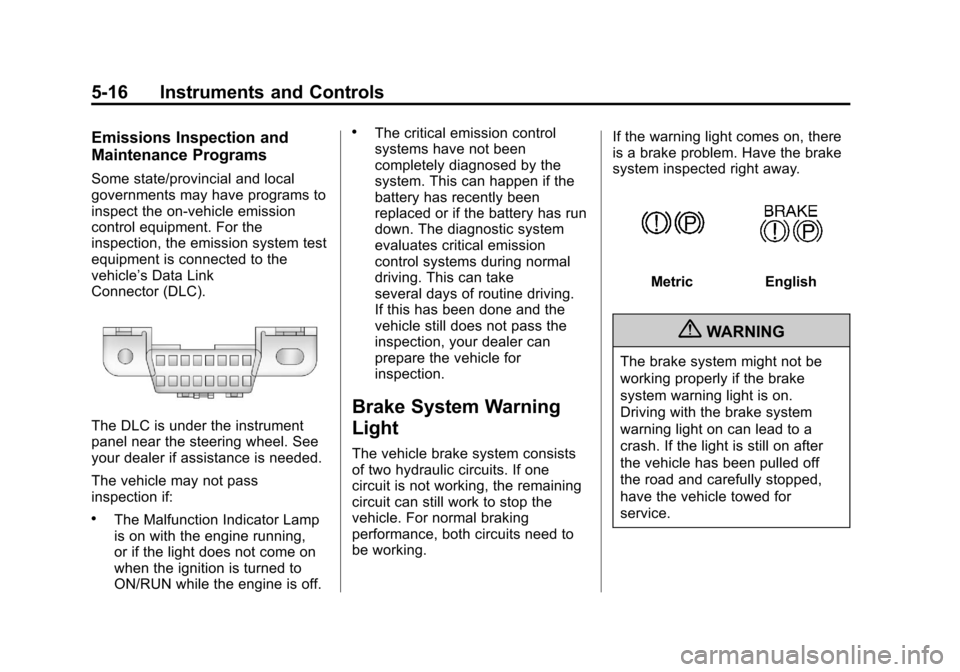
vehicle’s Data Link
Connector (DLC).
The DLC is under the instrument
panel near the steering wheel. See
your dealer if assistance is needed.
The vehicle may not pass
inspection if:
.The Malfunction Indicator Lamp
is on with the engine running,
or if the light does not come on
when the ignition is turned to
ON/RUN while the engine is off.
.The critical emission control
systems have not been
completely diagnosed by the
system. This can happen if the
battery has recently been
replaced or if the battery has run
down. The diagnostic system
evaluates critical emission
control systems during normal
driving. This can take
several days of routine driving.
If this has been done and the
vehicle still does not pass the
inspection, your dealer can
prepare the vehicle for
inspection.
Brake System Warning
Light
The vehicle brake system consists
of two hydraulic circuits. If one
circuit is not working, the remaining
circuit can still work to stop the
vehicle. For normal braking
performance, both circuits need to
be working.If the warning light comes on, there
is a brake problem. Have the brake
system inspected right away.
MetricEnglish
{WARNING
The brake system might not be
working properly if the brake
system warning light is on.
Driving with the brake system
warning light on can lead to a
crash. If the light is still on after
the vehicle has been pulled off
the road and carefully stopped,
have the vehicle towed for
service.
Page 129 of 328
Black plate (17,1)Chevrolet Aveo Owner Manual - 2011
Instruments and Controls 5-17
This light should come on briefly
when the ignition is turned to ON.
If it does not come on then, have it
fixed so it will be ready to warn if
there is a problem.
When the ignition is on, the brake
system warning light will also come
on when the parking brake is set.
The light will stay on if the parking
brake does not fully release. If it
stays on after the parking brake is
fully released, it means there is a
brake problem.
If the light comes on while driving,
carefully pull off the road and stop.
The pedal may be harder to push or
may go closer to the floor. It may
take longer to stop. If the light is still
on, have the vehicle towed for
service. SeeTowing the Vehicle on
page 10‑74.Antilock Brake System
(ABS) Warning Light
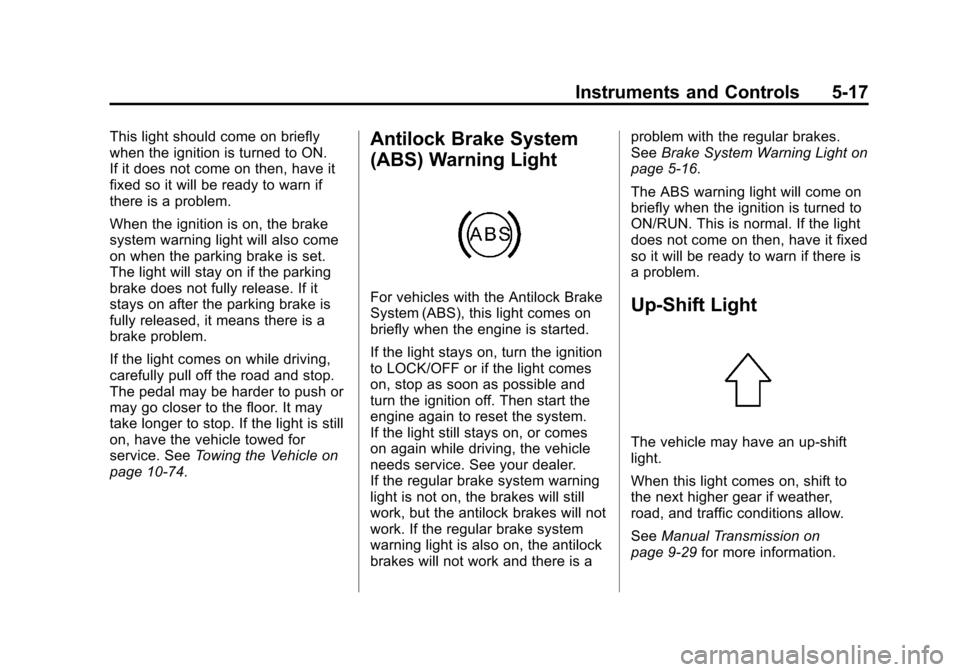
For vehicles with the Antilock Brake
System (ABS), this light comes on
briefly when the engine is started.
If the light stays on, turn the ignition
to LOCK/OFF or if the light comes
on, stop as soon as possible and
turn the ignition off. Then start the
engine again to reset the system.
If the light still stays on, or comes
on again while driving, the vehicle
needs service. See your dealer.
If the regular brake system warning
light is not on, the brakes will still
work, but the antilock brakes will not
work. If the regular brake system
warning light is also on, the antilock
brakes will not work and there is a problem with the regular brakes.
See
Brake System Warning Light on
page 5‑16.
The ABS warning light will come on
briefly when the ignition is turned to
ON/RUN. This is normal. If the light
does not come on then, have it fixed
so it will be ready to warn if there is
a problem.Up-Shift Light
The vehicle may have an up-shift
light.
When this light comes on, shift to
the next higher gear if weather,
road, and traffic conditions allow.
See Manual Transmission on
page 9‑29 for more information.
Page 136 of 328
Black plate (2,1)Chevrolet Aveo Owner Manual - 2011
6-2 Lighting
Headlamp High/
Low-Beam Changer
The headlamps must be on for this
feature to work.
Push the turn signal lever away
from you to turn the high beams on.
The
3light comes on in instrument
panel cluster while the high beams
are on and the ignition is turned to
ON/RUN.
Pull the lever toward you to return to
low beams.
Flash-to-Pass
This feature is used to signal to the
vehicle ahead that you want
to pass.
Pull the turn signal/multifunction
lever toward you until the high-beam
headlamps come on, then release
the lever to turn them off.
Daytime Running
Lamps (DRL)
Daytime Running Lamps (DRL) can
make it easier for others to see the
front of your vehicle during the day.
Fully functional daytime running
lamps are required on all vehicles
first sold in Canada.
The DRL system makes the
headlamps come on when the
following conditions are met:
.The ignition is on.
.The exterior lamp band is in
OFF or in the parking lamp
position.
.The parking brake is released.
An indicator light on instrument
panel cluster comes on when the
DRL system is on. When the DRL system is on, the
taillamps, sidemarker lamps,
parking lamps, and instrument panel
lights do not come on unless the
exterior lamps control is turned to
the parking lamp or headlamp
position.
The DRL system turns off when one
of the following conditions are met:
.The ignition is off.
.The parking brake is on.
.The high-beam headlamps
are on.
.The low-beam headlamps
are on.
.The flash-to-pass feature
is used.
The regular headlamp system
should be used when needed.
Page 165 of 328
Black plate (3,1)Chevrolet Aveo Owner Manual - 2011
Driving and Operating 9-3
Medical research shows that
alcohol in a person's system can
make crash injuries worse,
especially injuries to the brain,
spinal cord, or heart. This means
that when anyone who has been
drinking—driver or passenger —is
in a crash, that person's chance of
being killed or permanently disabled
is higher than if the person had not
been drinking.
Control of a Vehicle
The following three systems
help to control the vehicle while
driving —brakes, steering, and
accelerator. At times, as when
driving on snow or ice, it is easy to
ask more of those control systems
than the tires and road can provide.
Meaning, you can lose control of the
vehicle.
Adding non‐dealer accessories can
affect vehicle performance. See
Accessories and Modifications on
page 10‑4.
Braking
See Brake System Warning Light on
page 5‑16.
Braking action involves perception
time and reaction time. Deciding to
push the brake pedal is perception
time. Actually doing it is
reaction time.
Average reaction time is about
three‐fourths of a second. But that
is only an average. It might be less
with one driver and as long as two
or three seconds or more with
another. Age, physical condition,
alertness, coordination, and
eyesight all play a part. So do
alcohol, drugs, and frustration. But
even in three‐fourths of a second, a
vehicle moving at 100 km/h
(60 mph) travels 20 m (66 ft). That
could be a lot of distance in an
emergency, so keeping enough
space between the vehicle and
others is important. And, of course, actual stopping
distances vary greatly with the
surface of the road, whether it is
pavement or gravel; the condition of
the road, whether it is wet, dry,
or icy; tire tread; the condition of the
brakes; the weight of the vehicle;
and the amount of brake force
applied.
Avoid needless heavy
braking. Some people drive in
spurts
—heavy acceleration
followed by heavy braking —rather
than keeping pace with traffic. This
is a mistake. The brakes might not
have time to cool between hard
stops. The brakes will wear out
much faster with a lot of heavy
braking. Keeping pace with the
traffic and allowing realistic
following distances eliminates a lot
of unnecessary braking. That means
better braking and longer brake life.
Page 167 of 328
Black plate (5,1)Chevrolet Aveo Owner Manual - 2011
Driving and Operating 9-5
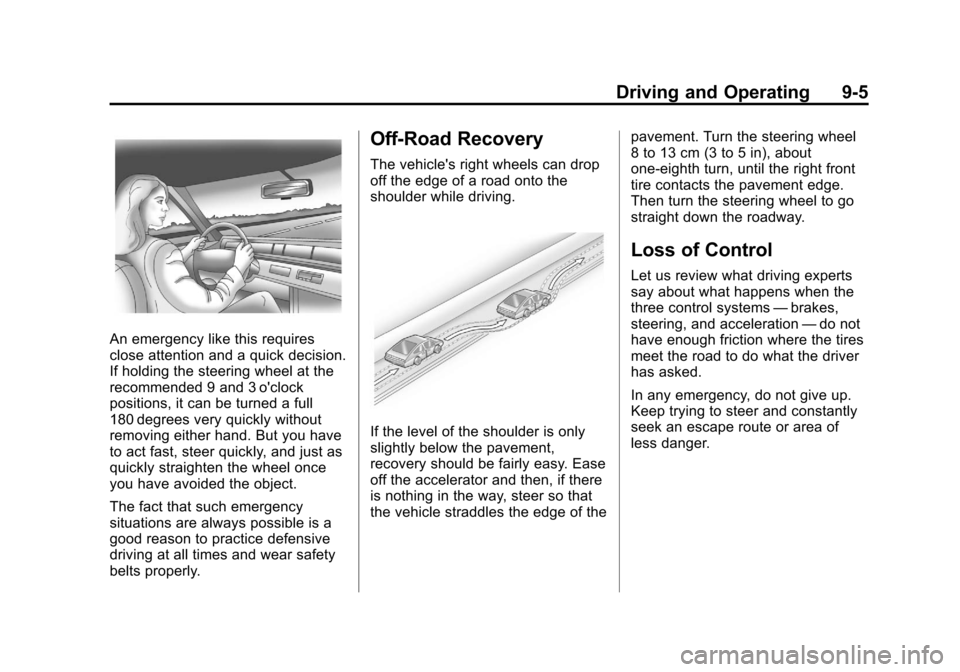
An emergency like this requires
close attention and a quick decision.
If holding the steering wheel at the
recommended 9 and 3 o'clock
positions, it can be turned a full
180 degrees very quickly without
removing either hand. But you have
to act fast, steer quickly, and just as
quickly straighten the wheel once
you have avoided the object.
The fact that such emergency
situations are always possible is a
good reason to practice defensive
driving at all times and wear safety
belts properly.
Off-Road Recovery
The vehicle's right wheels can drop
off the edge of a road onto the
shoulder while driving.
If the level of the shoulder is only
slightly below the pavement,
recovery should be fairly easy. Ease
off the accelerator and then, if there
is nothing in the way, steer so that
the vehicle straddles the edge of thepavement. Turn the steering wheel
8 to 13 cm (3 to 5 in), about
one-eighth turn, until the right front
tire contacts the pavement edge.
Then turn the steering wheel to go
straight down the roadway.
Loss of Control
Let us review what driving experts
say about what happens when the
three control systems
—brakes,
steering, and acceleration —do not
have enough friction where the tires
meet the road to do what the driver
has asked.
In any emergency, do not give up.
Keep trying to steer and constantly
seek an escape route or area of
less danger.
Page 169 of 328
Black plate (7,1)Chevrolet Aveo Owner Manual - 2011
Driving and Operating 9-7
Driving on Wet Roads
Rain and wet roads can reduce
vehicle traction and affect your
ability to stop and accelerate.
Always drive slower in these types
of driving conditions and avoid
driving through large puddles and
deep‐standing or flowing water.
{WARNING
Wet brakes can cause crashes.
They might not work as well in a
quick stop and could cause
pulling to one side. You could
lose control of the vehicle.
After driving through a large
puddle of water or a car/vehicle
wash, lightly apply the brake
pedal until the brakes work
normally.(Continued)
WARNING (Continued)
Flowing or rushing water creates
strong forces. Driving through
flowing water could cause the
vehicle to be carried away. If this
happens, you and other vehicle
occupants could drown. Do not
ignore police warnings and be
very cautious about trying to drive
through flowing water.
Hydroplaning
Hydroplaning is dangerous. Water
can build up under the vehicle's
tires so they actually ride on the
water. This can happen if the road is
wet enough and you are going fast
enough. When the vehicle is
hydroplaning, it has little or no
contact with the road.
There is no hard and fast rule about
hydroplaning. The best advice is to
slow down when the road is wet.
Other Rainy Weather Tips
Besides slowing down, other wet
weather driving tips include:
.Allow extra following distance.
.Pass with caution.
.Keep windshield wiping
equipment in good shape.
.Keep the windshield washer fluid
reservoir filled.
.Have good tires with proper
tread depth. SeeTires on
page 10‑42.
.Turn off cruise control.
Page 180 of 328
Black plate (18,1)Chevrolet Aveo Owner Manual - 2011
9-18 Driving and Operating
LOCK (STOPPING THE ENGINE/
LOCK/OFF):When the vehicle is
stopped, turn the ignition switch to
LOCK/OFF to turn the engine off.
This position locks the steering
wheel, ignition, shift lever and
transmission. This is the only
position in which you can insert or
remove the key.
Do not turn the engine off when the
vehicle is moving. This will cause a
loss of power assist in the brake
and steering systems and disable
the airbags.
In an emergency:
1. Brake using a firm and steady pressure. Do not pump the
brakes repeatedly. This may
deplete power assist, requiring
increased brake pedal force.
2. Shift the vehicle to neutral. This can be done while the vehicle is
moving. After shifting to neutral,
firmly apply the brakes and steer
the vehicle to a safe location. 3. Come to a complete stop. Shift
to P (Park) with an automatic
transmission, or neutral with a
manual transmission. Turn the
ignition to LOCK/OFF.
4. Set the parking brake. See Parking Brake on page 9‑31.
The steering can bind with the
wheels turned off center. If this
happens, move the steering wheel
from right to left while turning the
key to ACC/ACCESSORY. If this
doesn't work, then the vehicle needs
service.
ACC (ACC/ACCESSORY): This
position operates some of the
electrical accessories, such as the
radio, but not the climate control
system. ON (ON/RUN):
This position can
be used to operate the electrical
accessories, and to display some
instrument panel cluster warning
and indicator lights. The switch
stays in this position when the
engine is running. If you leave the
key in the ACC/ACCESSORY or
ON/RUN position with the engine
off, the battery could be drained.
You may not be able to start the
vehicle if the battery is allowed to
drain for an extended period of time.
START: This is the position that
starts the engine. When the engine
cranks, release the key. The ignition
switch returns to ON/RUN for
driving. Do not turn the key to
START if the engine is running.