window CHEVROLET AVEO 2011 1.G Owners Manual
[x] Cancel search | Manufacturer: CHEVROLET, Model Year: 2011, Model line: AVEO, Model: CHEVROLET AVEO 2011 1.GPages: 328, PDF Size: 5.37 MB
Page 1 of 328

Black plate (1,1)Chevrolet Aveo Owner Manual - 2011
2011 Chevrolet Aveo Owner ManualM
In Brief. . . . . . . . . . . . . . . . . . . . . . . . 1-1
Instrument Panel . . . . . . . . . . . . . . 1-2
Initial Drive Information . . . . . . . . 1-3
Vehicle Features . . . . . . . . . . . . . 1-16
Performance and Maintenance . . . . . . . . . . . . . . . . 1-21
Keys, Doors and Windows . . . 2-1
Keys and Locks . . . . . . . . . . . . . . . 2-2
Doors . . . . . . . . . . . . . . . . . . . . . . . . . . 2-7
Vehicle Security . . . . . . . . . . . . . . 2-10
Exterior Mirrors . . . . . . . . . . . . . . . 2-13
Interior Mirrors . . . . . . . . . . . . . . . . 2-14
Windows . . . . . . . . . . . . . . . . . . . . . 2-14
Roof . . . . . . . . . . . . . . . . . . . . . . . . . . 2-16
Seats and Restraints . . . . . . . . . 3-1
Head Restraints . . . . . . . . . . . . . . . 3-2
Front Seats . . . . . . . . . . . . . . . . . . . . 3-3
Rear Seats . . . . . . . . . . . . . . . . . . . . 3-6
Safety Belts . . . . . . . . . . . . . . . . . . 3-11
Airbag System . . . . . . . . . . . . . . . . 3-24
Child Restraints . . . . . . . . . . . . . . 3-38 Storage
. . . . . . . . . . . . . . . . . . . . . . . 4-1
Storage Compartments . . . . . . . . 4-1
Instruments and Controls . . . . 5-1
Controls . . . . . . . . . . . . . . . . . . . . . . . 5-1
Warning Lights, Gauges, and Indicators . . . . . . . . . . . . . . . . . . . . 5-7
Trip Computer . . . . . . . . . . . . . . . . 5-21
Lighting . . . . . . . . . . . . . . . . . . . . . . . 6-1
Exterior Lighting . . . . . . . . . . . . . . . 6-1
Interior Lighting . . . . . . . . . . . . . . . . 6-4
Lighting Features . . . . . . . . . . . . . . 6-5
Infotainment System . . . . . . . . . 7-1
Introduction . . . . . . . . . . . . . . . . . . . . 7-1
Radio . . . . . . . . . . . . . . . . . . . . . . . . . . 7-3
Audio Players . . . . . . . . . . . . . . . . 7-10
Climate Controls . . . . . . . . . . . . . 8-1
Climate Control Systems . . . . . . 8-1
Air Vents . . . . . . . . . . . . . . . . . . . . . . . 8-4
Maintenance . . . . . . . . . . . . . . . . . . . 8-5 Driving and Operating
. . . . . . . . 9-1
Driving Information . . . . . . . . . . . . . 9-2
Starting and Operating . . . . . . . 9-17
Engine Exhaust . . . . . . . . . . . . . . 9-24
Automatic Transmission . . . . . . 9-25
Manual Transmission . . . . . . . . . 9-29
Brakes . . . . . . . . . . . . . . . . . . . . . . . 9-30
Cruise Control . . . . . . . . . . . . . . . . 9-32
Fuel . . . . . . . . . . . . . . . . . . . . . . . . . . 9-34
Towing . . . . . . . . . . . . . . . . . . . . . . . 9-39
Conversions and Add-Ons . . . 9-40
Vehicle Care . . . . . . . . . . . . . . . . . 10-1
General Information . . . . . . . . . . 10-3
Vehicle Checks . . . . . . . . . . . . . . . 10-5
Headlamp Aiming . . . . . . . . . . . 10-30
Bulb Replacement . . . . . . . . . . 10-31
Electrical System . . . . . . . . . . . . 10-36
Wheels and Tires . . . . . . . . . . . 10-42
Jump Starting . . . . . . . . . . . . . . . 10-70
Towing . . . . . . . . . . . . . . . . . . . . . . 10-74
Appearance Care . . . . . . . . . . . 10-76
Page 7 of 328
Black plate (1,1)Chevrolet Aveo Owner Manual - 2011
In Brief 1-1
In Brief
Instrument Panel
Instrument Panel . . . . . . . . . . . . . . 1-2
Initial Drive Information
Initial Drive Information . . . . . . . . 1-3
Starting the Engine . . . . . . . . . . . 1-4
Remote Keyless Entry (RKE)System . . . . . . . . . . . . . . . . . . . . . . 1-4
Door Locks . . . . . . . . . . . . . . . . . . . 1-5
Liftgate . . . . . . . . . . . . . . . . . . . . . . . . 1-5
Trunk Release . . . . . . . . . . . . . . . . 1-6
Windows . . . . . . . . . . . . . . . . . . . . . . 1-6
Seat Adjustment . . . . . . . . . . . . . . 1-7
Second Row Seats . . . . . . . . . . . 1-8
Head Restraint Adjustment . . . . 1-8
Safety Belts . . . . . . . . . . . . . . . . . . . 1-9 Sensing System for Passenger
Airbag . . . . . . . . . . . . . . . . . . . . . . . 1-9
Mirror Adjustment . . . . . . . . . . . . 1-10
Steering Wheel Adjustment . . . . . . . . . . . . . . . . . 1-11
Interior Lighting . . . . . . . . . . . . . . 1-11
Exterior Lighting . . . . . . . . . . . . . 1-11
Windshield Wiper/Washer . . . . 1-12
Climate Controls . . . . . . . . . . . . . 1-13
Transmission . . . . . . . . . . . . . . . . 1-14
Vehicle Features
Radio(s) . . . . . . . . . . . . . . . . . . . . . 1-16
Satellite Radio . . . . . . . . . . . . . . . 1-17
Portable Audio Devices . . . . . . 1-18
Steering Wheel Controls . . . . . 1-18
Cruise Control . . . . . . . . . . . . . . . 1-19
Trip Computer (US Only) . . . . 1-19
Power Outlets . . . . . . . . . . . . . . . 1-20
Sunroof . . . . . . . . . . . . . . . . . . . . . . 1-20
Performance and Maintenance
Tire Pressure Monitor . . . . . . . . 1-21
Engine Oil Life System . . . . . . 1-21
Hood Release . . . . . . . . . . . . . . . 1-22
Driving for Better Fuel Economy . . . . . . . . . . . . . . . . . . . 1-22
Roadside Assistance Program . . . . . . . . . . . . . . . . . . . . 1-23
OnStar
®. . . . . . . . . . . . . . . . . . . . . 1-24
Page 9 of 328
Black plate (3,1)Chevrolet Aveo Owner Manual - 2011
In Brief 1-3
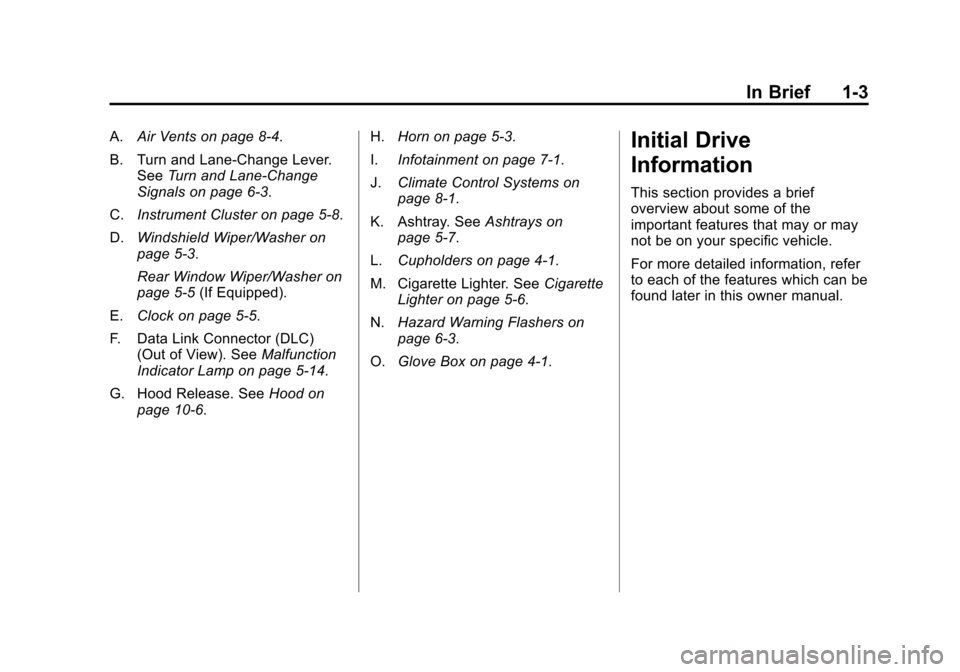
A.Air Vents on page 8‑4.
B. Turn and Lane‐Change Lever. See Turn and Lane-Change
Signals on page 6‑3.
C. Instrument Cluster on page 5‑8.
D. Windshield Wiper/Washer on
page 5‑3.
Rear Window Wiper/Washer on
page 5‑5 (If Equipped).
E. Clock on page 5‑5.
F. Data Link Connector (DLC) (Out of View). See Malfunction
Indicator Lamp on page 5‑14.
G. Hood Release. See Hood on
page 10‑6. H.
Horn on page 5‑3.
I. Infotainment on page 7‑1.
J. Climate Control Systems on
page 8‑1.
K. Ashtray. See Ashtrays on
page 5‑7.
L. Cupholders on page 4‑1.
M. Cigarette Lighter. See Cigarette
Lighter on page 5‑6.
N. Hazard Warning Flashers on
page 6‑3.
O. Glove Box on page 4‑1.Initial Drive
Information
This section provides a brief
overview about some of the
important features that may or may
not be on your specific vehicle.
For more detailed information, refer
to each of the features which can be
found later in this owner manual.
Page 12 of 328
Black plate (6,1)Chevrolet Aveo Owner Manual - 2011
1-6 In Brief
Trunk Release
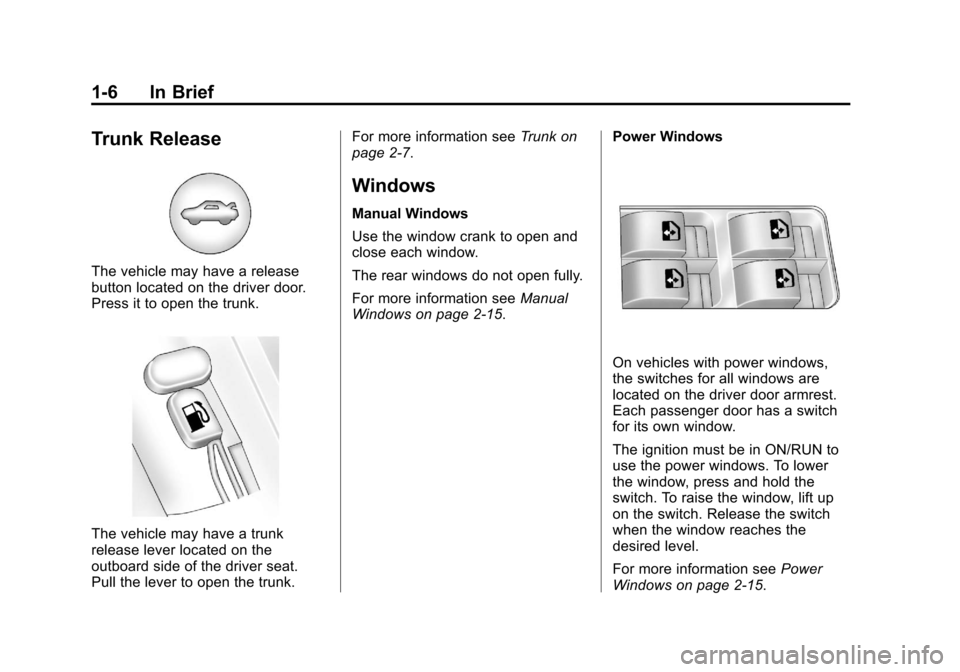
The vehicle may have a release
button located on the driver door.
Press it to open the trunk.
The vehicle may have a trunk
release lever located on the
outboard side of the driver seat.
Pull the lever to open the trunk.For more information see
Trunk on
page 2‑7.
Windows
Manual Windows
Use the window crank to open and
close each window.
The rear windows do not open fully.
For more information see Manual
Windows on page 2‑15. Power Windows
On vehicles with power windows,
the switches for all windows are
located on the driver door armrest.
Each passenger door has a switch
for its own window.
The ignition must be in ON/RUN to
use the power windows. To lower
the window, press and hold the
switch. To raise the window, lift up
on the switch. Release the switch
when the window reaches the
desired level.
For more information see
Power
Windows on page 2‑15.
Page 19 of 328
Black plate (13,1)Chevrolet Aveo Owner Manual - 2011
In Brief 1-13
Misting Function
Move the lever toward INT for a
single wiping cycle. Hold it there
until the windshield wipers start;
then let go. For several wipes, hold
the band toward INT longer.
Windshield Washer
Pull the windshield washer/wiper
lever toward you to spray washer
fluid on the windshield.
SeeWindshield Wiper/Washer on
page 5‑3. For vehicles with a Rear
Window Wiper/Washer, see Rear
Window Wiper/Washer on page 5‑5.
Climate Controls
For vehicles with these climate
control systems, the heating,
cooling, and ventilation can be
controlled for the vehicle.
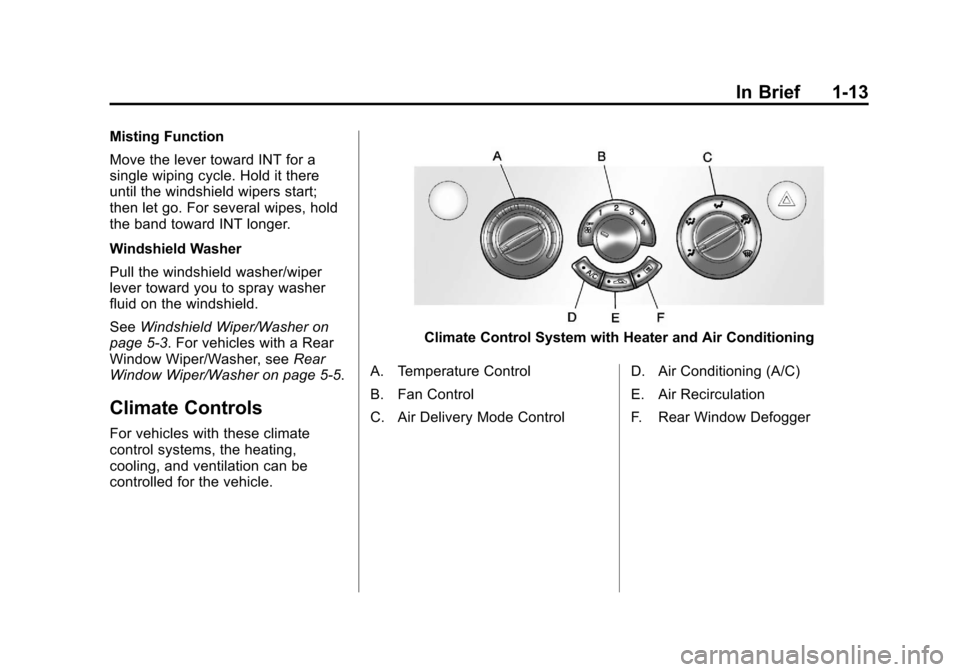
Climate Control System with Heater and Air Conditioning
A. Temperature Control
B. Fan Control
C. Air Delivery Mode Control D. Air Conditioning (A/C)
E. Air Recirculation
F. Rear Window Defogger
Page 20 of 328
Black plate (14,1)Chevrolet Aveo Owner Manual - 2011
1-14 In Brief
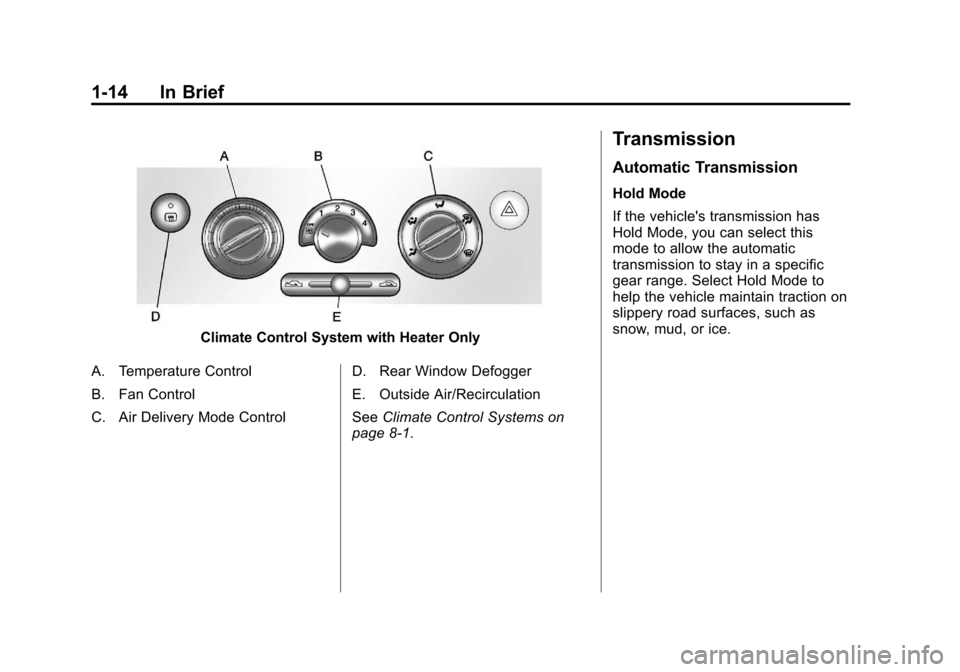
Climate Control System with Heater Only
A. Temperature Control
B. Fan Control
C. Air Delivery Mode Control D. Rear Window Defogger
E. Outside Air/Recirculation
See
Climate Control Systems on
page 8‑1.
Transmission
Automatic Transmission
Hold Mode
If the vehicle's transmission has
Hold Mode, you can select this
mode to allow the automatic
transmission to stay in a specific
gear range. Select Hold Mode to
help the vehicle maintain traction on
slippery road surfaces, such as
snow, mud, or ice.
Page 33 of 328
Black plate (1,1)Chevrolet Aveo Owner Manual - 2011
Keys, Doors and Windows 2-1
Keys, Doors and
Windows
Keys and Locks
Keys . . . . . . . . . . . . . . . . . . . . . . . . . . 2-2
Remote Keyless Entry (RKE)System . . . . . . . . . . . . . . . . . . . . . . 2-3
Remote Keyless Entry (RKE) System Operation . . . . . . . . . . . 2-3
Door Locks . . . . . . . . . . . . . . . . . . . 2-5
Central Door Unlocking System . . . . . . . . . . . . . . . . . . . . . . 2-6
Door Ajar Reminder . . . . . . . . . . . 2-6
Safety Locks . . . . . . . . . . . . . . . . . . 2-6
Doors
Trunk . . . . . . . . . . . . . . . . . . . . . . . . . 2-7
Liftgate (Hatchback) . . . . . . . . . . 2-9
Vehicle Security
Vehicle Security . . . . . . . . . . . . . . 2-10
Anti-Theft Alarm System . . . . . 2-10
Immobilizer . . . . . . . . . . . . . . . . . . 2-12
Immobilizer Operation . . . . . . . 2-12
Exterior Mirrors
Convex Mirrors . . . . . . . . . . . . . . 2-13
Manual Mirrors . . . . . . . . . . . . . . . 2-13
Power Mirrors . . . . . . . . . . . . . . . . 2-13
Heated Mirrors . . . . . . . . . . . . . . . 2-14
Interior Mirrors
Manual Rearview Mirror . . . . . . 2-14
Windows
Windows . . . . . . . . . . . . . . . . . . . . . 2-14
Manual Windows . . . . . . . . . . . . 2-15
Power Windows . . . . . . . . . . . . . 2-15
Sun Visors . . . . . . . . . . . . . . . . . . . 2-16
Roof
Sunroof . . . . . . . . . . . . . . . . . . . . . . 2-16
Page 34 of 328
Black plate (2,1)Chevrolet Aveo Owner Manual - 2011
2-2 Keys, Doors and Windows
Keys and Locks
Keys
{WARNING
Leaving children in a vehicle with
the ignition key is dangerous for
many reasons. Children or others
could be badly injured or even
killed. They could operate the
power windows or other controls
or even make the vehicle move.
The windows will function with the
keys in the ignition and children
could be seriously injured or killed
if caught in the path of a closing
window. Do not leave the keys in
a vehicle with children.
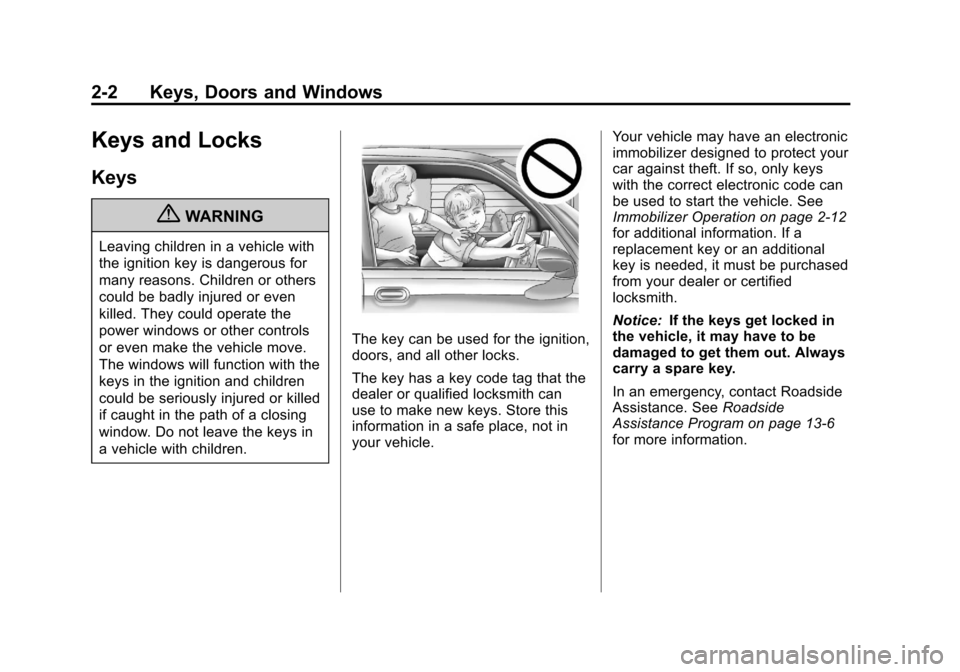
The key can be used for the ignition,
doors, and all other locks.
The key has a key code tag that the
dealer or qualified locksmith can
use to make new keys. Store this
information in a safe place, not in
your vehicle.Your vehicle may have an electronic
immobilizer designed to protect your
car against theft. If so, only keys
with the correct electronic code can
be used to start the vehicle. See
Immobilizer Operation on page 2‑12
for additional information. If a
replacement key or an additional
key is needed, it must be purchased
from your dealer or certified
locksmith.
Notice:
If the keys get locked in
the vehicle, it may have to be
damaged to get them out. Always
carry a spare key.
In an emergency, contact Roadside
Assistance. See Roadside
Assistance Program on page 13‑6
for more information.
Page 35 of 328
Black plate (3,1)Chevrolet Aveo Owner Manual - 2011
Keys, Doors and Windows 2-3
Remote Keyless Entry
(RKE) System
SeeRadio Frequency Statement on
page 13‑16 for information
regarding Part 15 of the Federal
Communications Commission (FCC)
rules and Industry Canada
Standards RSS-210/220/310.
If there is a decrease in the RKE
operating range:
.Check the distance. The
transmitter may be too far
from the vehicle.
.Check the location. Other
vehicles or objects may be
blocking the signal.
.Check the transmitter's battery.
See “Battery Replacement” later
in this section.
.If the transmitter is still not
working correctly, see your
dealer or a qualified technician
for service.
Remote Keyless Entry
(RKE) System Operation
The Remote Keyless Entry (RKE)
transmitter functions work up to
20 m (65 ft) away from the vehicle.
There are other conditions which
can affect the performance of the
transmitter. See Remote Keyless
Entry (RKE) System on page 2‑3.
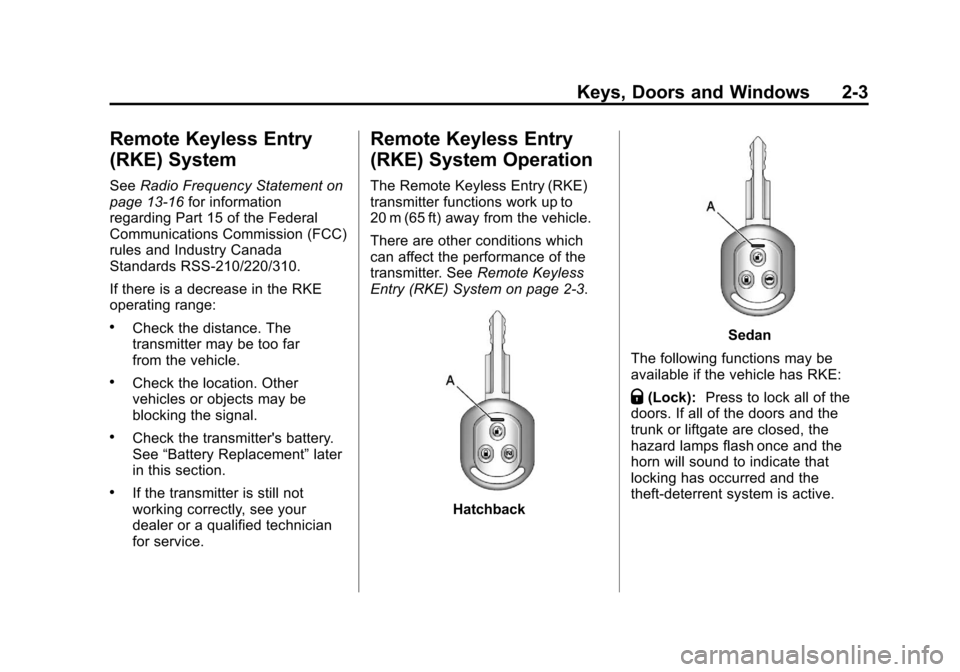
Hatchback
Sedan
The following functions may be
available if the vehicle has RKE:
Q(Lock): Press to lock all of the
doors. If all of the doors and the
trunk or liftgate are closed, the
hazard lamps flash once and the
horn will sound to indicate that
locking has occurred and the
theft-deterrent system is active.
Page 36 of 328
Black plate (4,1)Chevrolet Aveo Owner Manual - 2011
2-4 Keys, Doors and Windows
K(Unlock):Press to unlock
all of the doors. The hazard
lamps flash twice to indicate that
unlocking has occurred and that
the theft-deterrent system is
deactivated. If the doors are not
opened within 30 seconds, the
doors will lock again.
3(Panic) (Hatchback): Press to
sound the panic alarm. The hazard
lamps will flash and the panic alarm
will stay on for about 30 seconds.
Press any of the buttons on the
transmitter to turn off the alarm.
V(Remote Trunk Release)
(Sedan): Press and hold for
approximately one second to open
the trunk.
The LED light (A) on the transmitter
flashes when the buttons on the
transmitter are pressed. If the light
does not flash, see “Battery
Replacement” in this section.
The buttons do not operate and the
theft-deterrent system does not
activate if the key is in the ignition.
Programming Transmitters to
the Vehicle
Only RKE transmitters programmed
to the vehicle will work. If a
transmitter is lost or stolen, a
replacement can be purchased and
programmed through your dealer.
When the replacement transmitter
is programmed to the vehicle, all
remaining transmitters must also be
programmed. Any lost or stolen
transmitters no longer work once
the new transmitter is programmed.
Each vehicle can have up to
five transmitters programmed to it.
Battery Replacement
Replace the battery if the LED on
the transmitter does not flash when
you press the buttons.
Notice: When replacing the
battery, do not touch any of the
circuitry on the transmitter. Static
from your body could damage the
transmitter. To replace the battery:
1. Remove the screw from the back
of the cover and open the cover
of the transmitter.
2. Pull the transmitter out of the cover and carefully turn the
circle cover of the transmitter
unit toward open.
3. Remove the battery.
4. Insert the new battery, positive side facing up.
Use one three-volt, CR1620,
or equivalent, type battery.
5. Turn the circle cover of the transmitter unit toward close and
put the transmitter unit in the
cover.
6. Put the two halves back together and replace the screw. Make
sure the cover is on tightly, so
water will not get in.
7. Test the transmitter operation.