radiator cap CHEVROLET BLAZER 1994 2.G Owners Manual
[x] Cancel search | Manufacturer: CHEVROLET, Model Year: 1994, Model line: BLAZER, Model: CHEVROLET BLAZER 1994 2.GPages: 348, PDF Size: 17.88 MB
Page 214 of 348
Downloaded from www.Manualslib.com manuals search engine If No Steam Is Coming From Your Engine
If you get the overheat warning but see or hear no steam, the problem may
not be too serious. Sometimes the engine can get a little too hot when you:
Climb a long hill on a hot day.
Stop after high speed driving.
Idle for long periods in traffic.
Tow a trailer.
If
you get the overheat warning with no sign of steam, try this for a minute
or so:
1. If you have an air conditioner, turn it off.
2. Turn on your heater to full hot at the highest fan speed and open the
3. If you’re in a traffic jam, shift to “N” (Neutral).
window as
necessary.
If
you no longer have the overheat warning, you can drive. Just to be safe,
drive slower for about
ten minutes. If the warning doesn’t come back on,
you can drive normally.
If
the warning continues, pull over, stop, and park your vehicle right away.
If there’s still no sign of steam, push
the accelerator until the engine speed is
about twice as fast as normal idle speed. Bring the engine speed back to
normal idle speed after two
or three minutes. Now see if the warning stops.
But then, if you still have the warning, TURN OFF THE ENGINE AND
GET EVERYONE OUT OF THE VEHICLE until it cools down.
You may decide not to
lift the hood but to get service help right away.
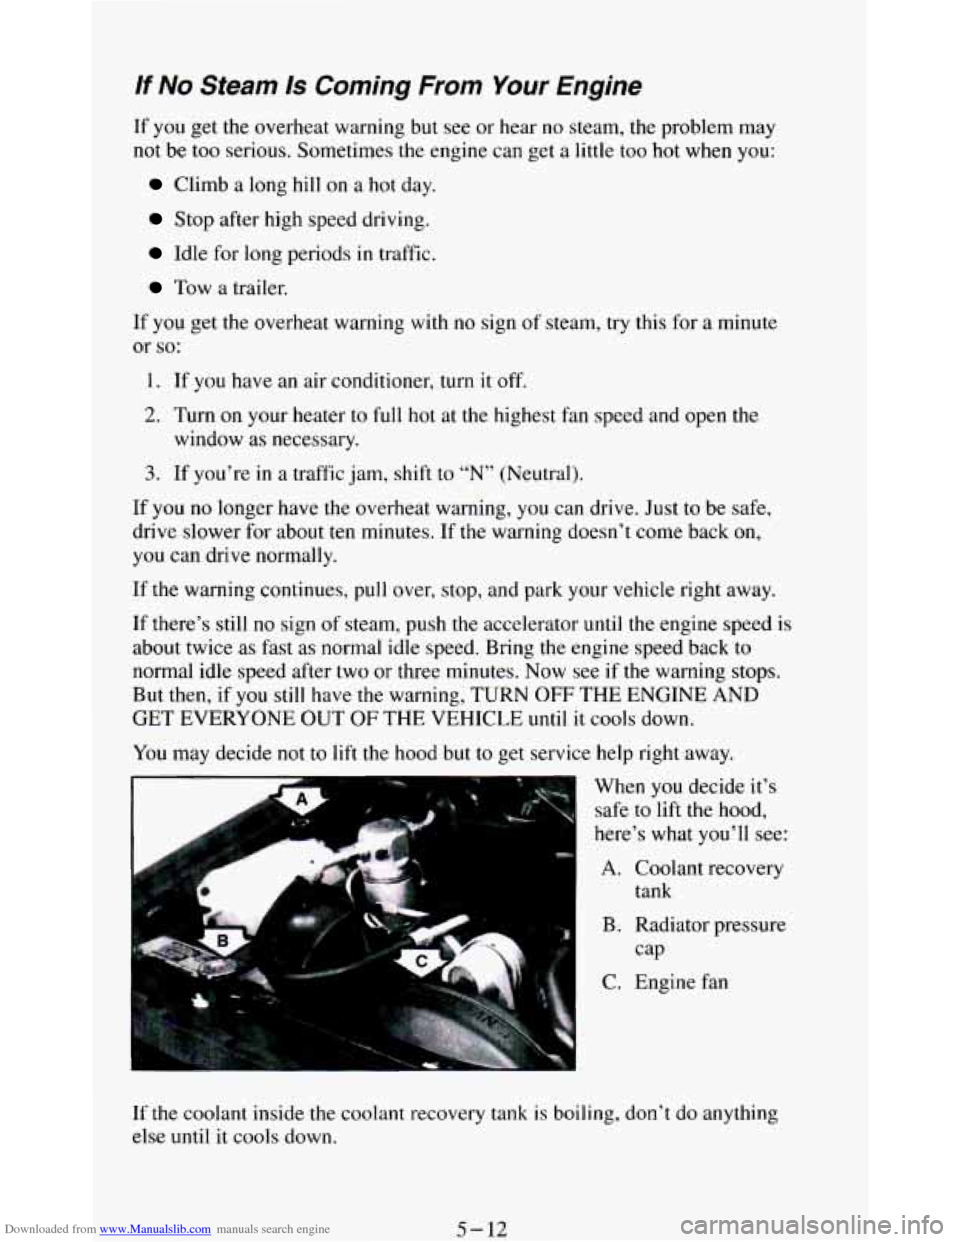
When
you decide it’s
safe to
lift the hood,
here’s what you’ll see:
A. Coolant recovery
B. Radiator pressure
C. Engine fan tank
cap
If the
coolant inside the coolant recovery tank is boiling, don’t do anything
else until
it cools down.
5-12
Page 217 of 348
Downloaded from www.Manualslib.com manuals search engine How to Add Coolant to the Radiator
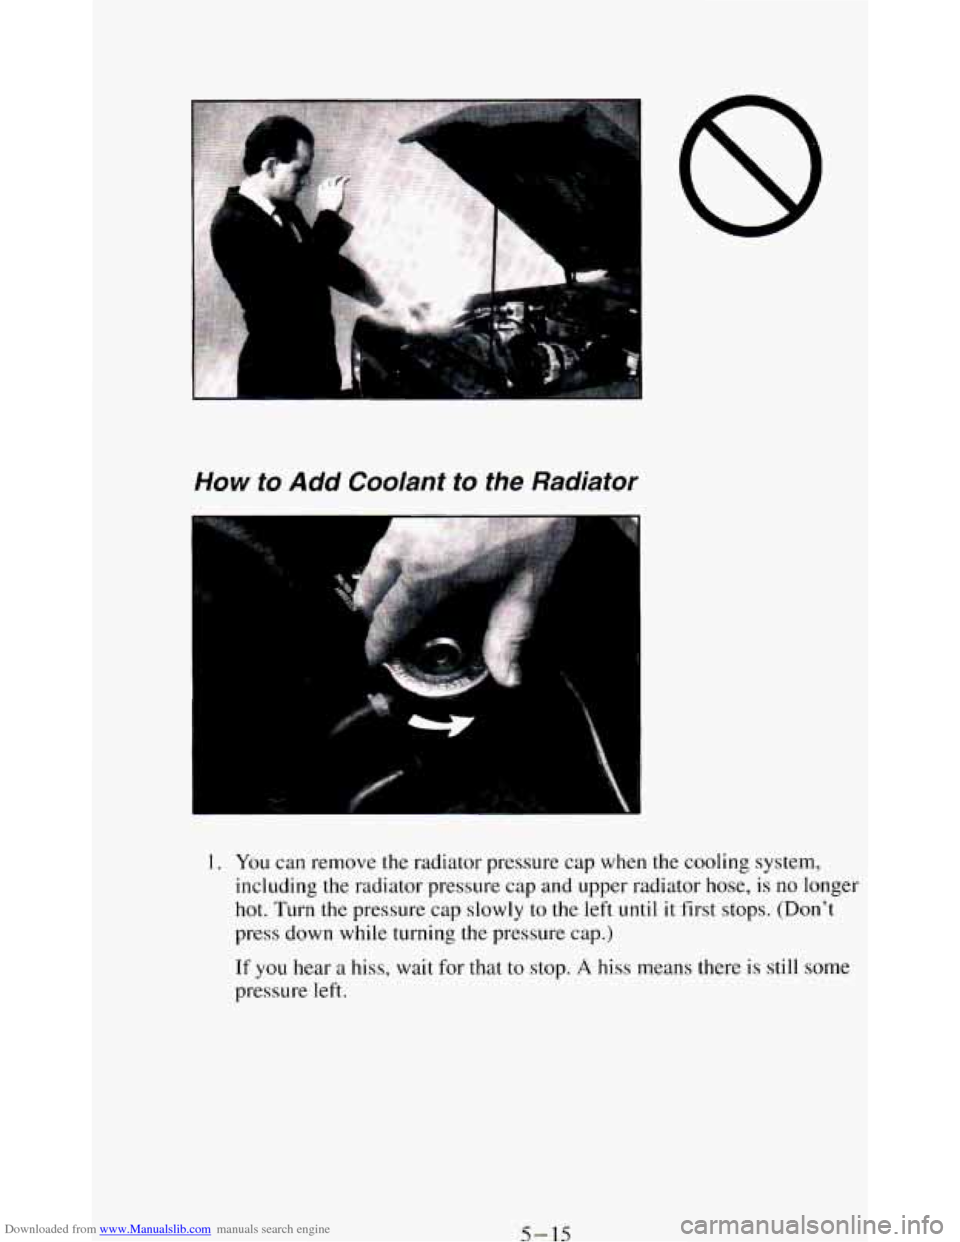
1. You can remove the radiator pressure cap when the cooling system,
including the radiator pressure cap and upper radiator hose,
is no longer
hot. Turn
the pressure cap slowly to the left until it first stops. (Don't
press down while turning the pressure cap.)
If you hear a hiss, wait for that to stop. A hiss means there is still some
pressure left.
5-15
Page 218 of 348
Downloaded from www.Manualslib.com manuals search engine r
I-
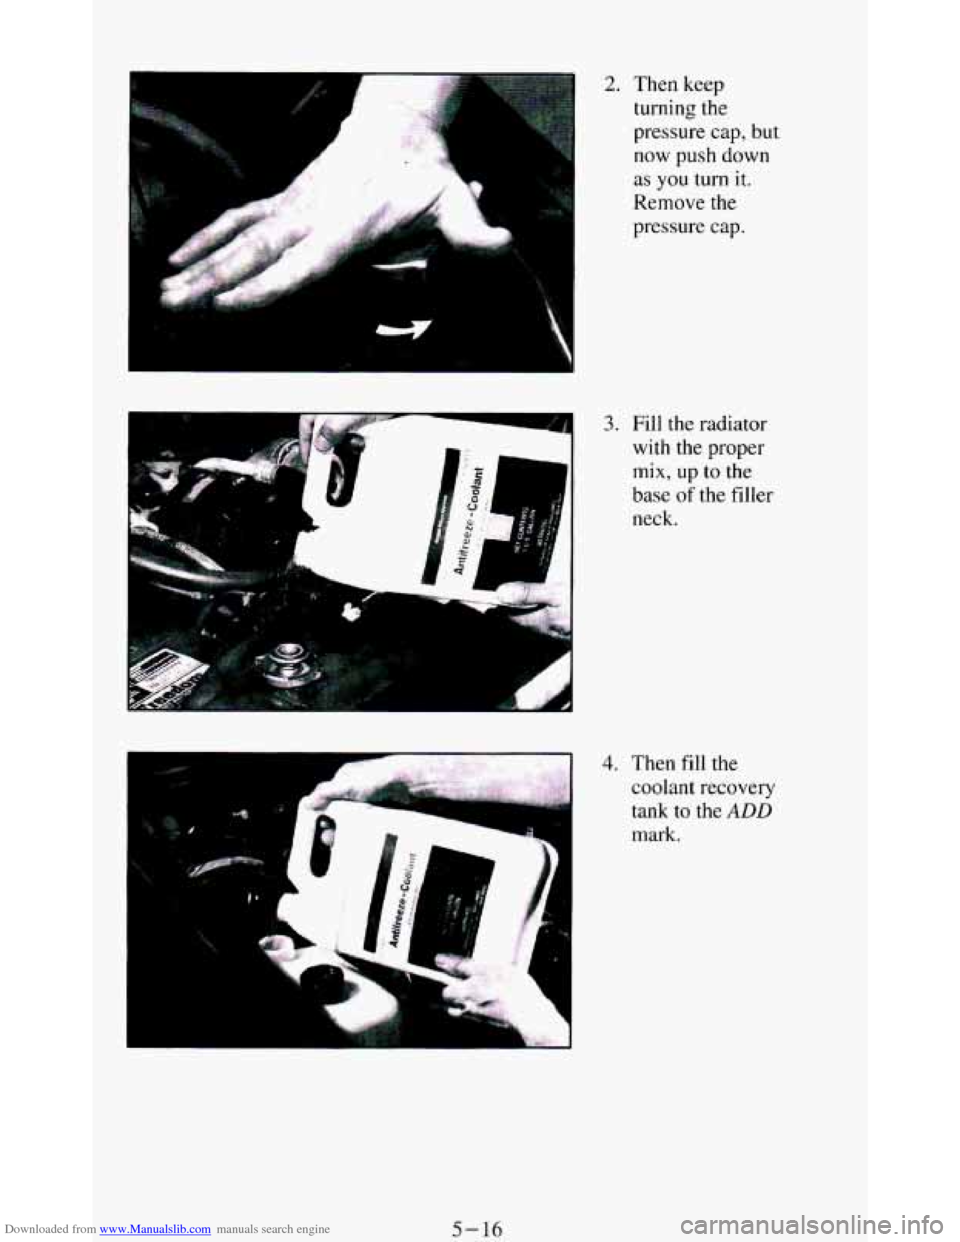
2. Then keep turning the
pressure cap, but
now push down
as
you turn it.
Remove the
pressure cap.
3. Fill the radiator
with the proper
mix, up to the
base
of the filler
neck.
4. Then fill the
coolant recovery
tank to
the ADD
mark.
5-16
Page 219 of 348
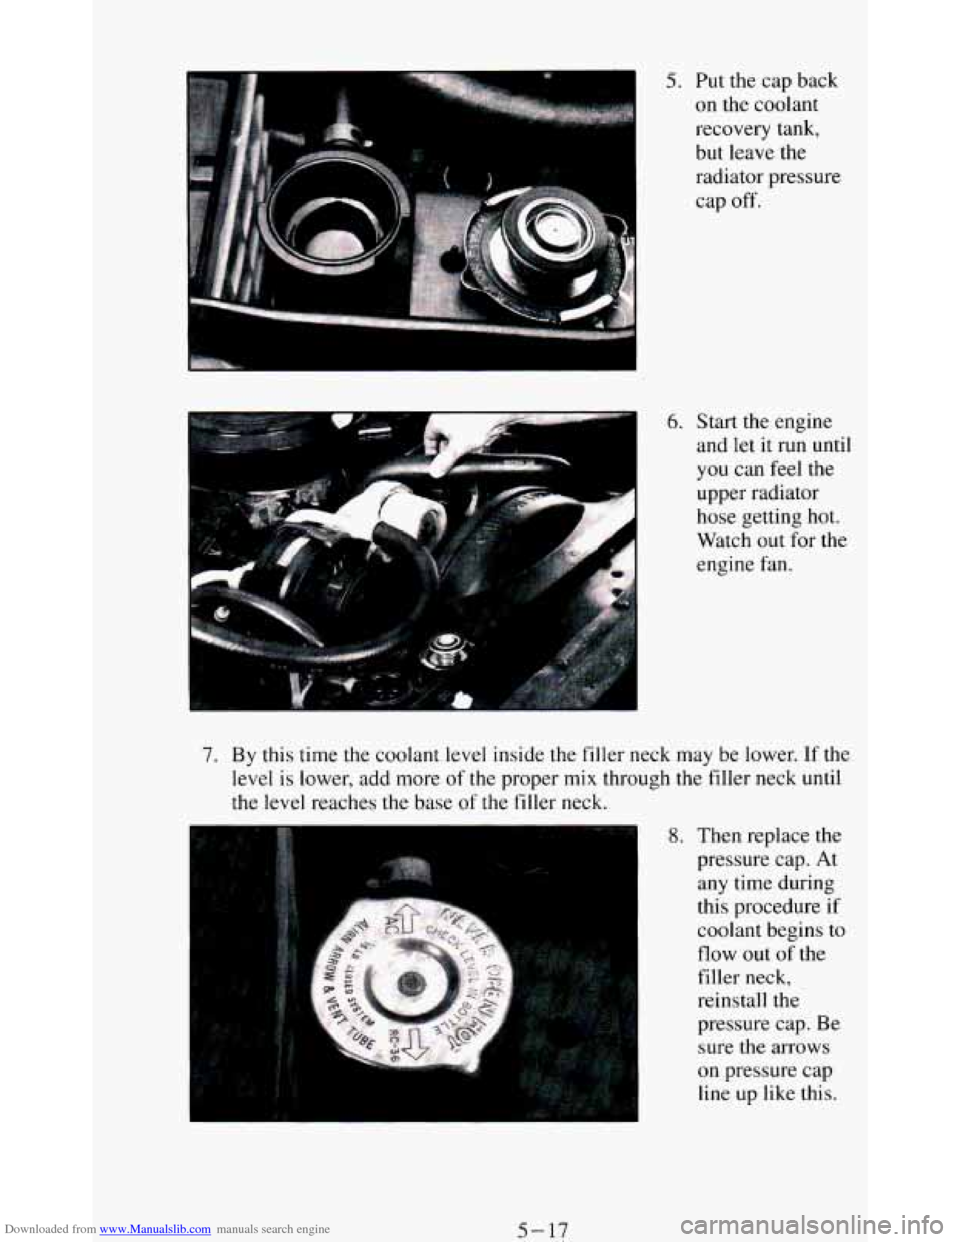
Downloaded from www.Manualslib.com manuals search engine 5. Put the cap back
on the coolant
recovery tank,
but leave the
radiator pressure
cap
off'.
6. Start the engine
and let it run until
you can feel the
upper radiator
hose getting hot.
Watch out for the
engine fan.
7. By this time the coolant level inside the filler neck may be lower. If the
level
is lower, add more of the proper mix through the filler neck until
the
level reaches the base of the filler neck.
8. Then replace the
pressure cap. At
any time during
this procedure if
coolant begins to
flow out of the
filler neck,
reinstall the
pressure cap. Be
sure the arrows
on pressure cap
line
up like this.
5-17
Page 261 of 348
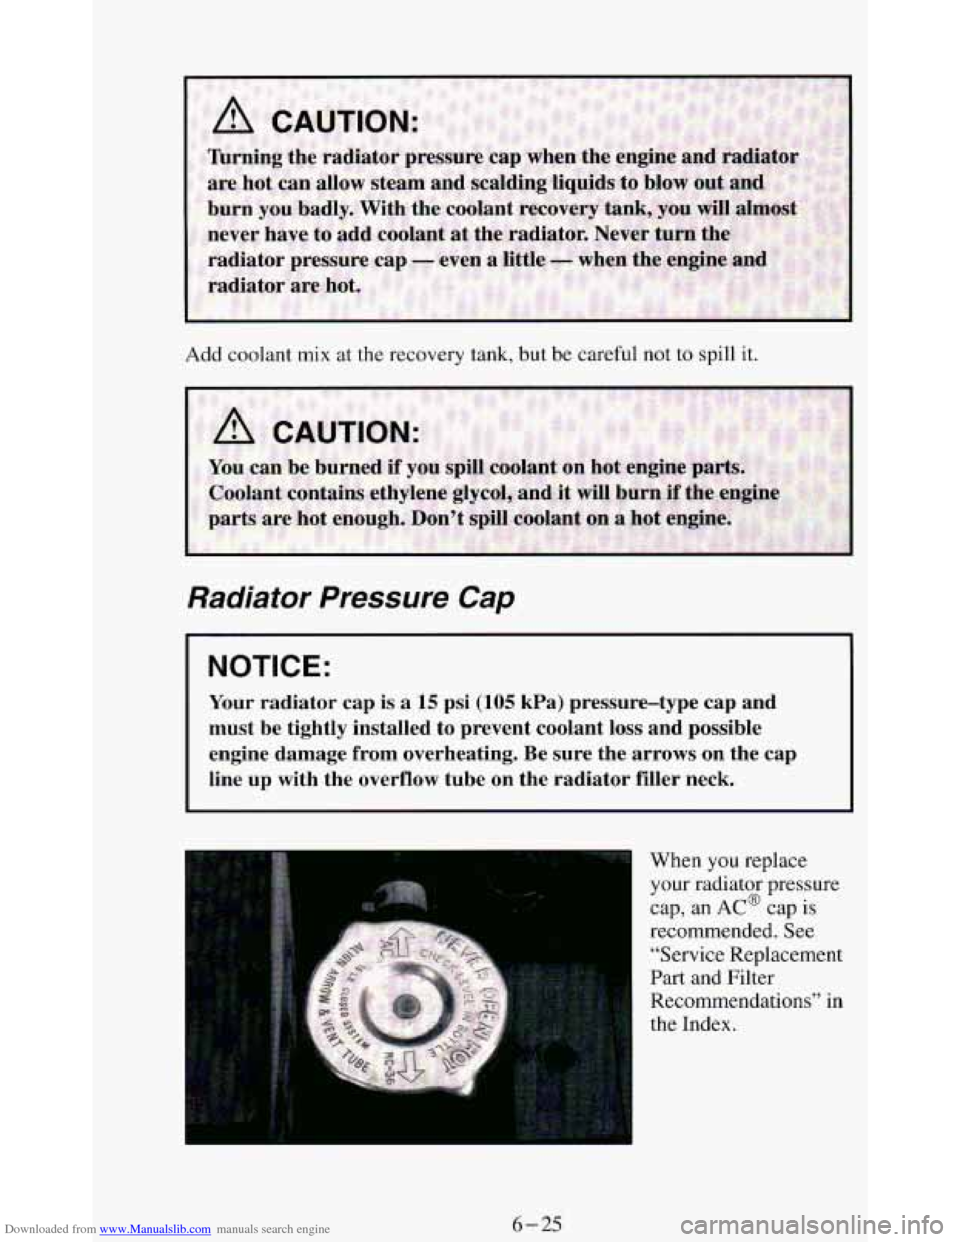
Downloaded from www.Manualslib.com manuals search engine Add coolant mix at the recovery tank, but be careful not to spill it.
Radiator Pressure Cap
NOTICE:
Your radiator cap is a 15 psi (105 kPa) pressure-type cap and
must be tightly installed to prevent coolant
loss and possible
engine damage from overheating.
Be sure the arrows on the cap
line
up with the overflow tube on the radiator filler neck.
When you replace
your radiator pressure
cap, an
AP cap is
recommended. See
“Service Replacement
Part and Filter
Recommendations” in
the Index.
6-25
Page 262 of 348
Downloaded from www.Manualslib.com manuals search engine Thermostat
Engine coolant temperature is controlled by a thermostat in the engine
coolant system. The thermostat stops the flow
of coolant through the
radiator until the coolant reaches
a preset temperature.
When you replace your thermostat, an
AC@ thermostat is recommended.
Power Steering Fluid
NOTICE:
Always turn the engine off before checking or adding power
steering fluid. The power steering cap is close to the fan and
other moving parts.
P
i
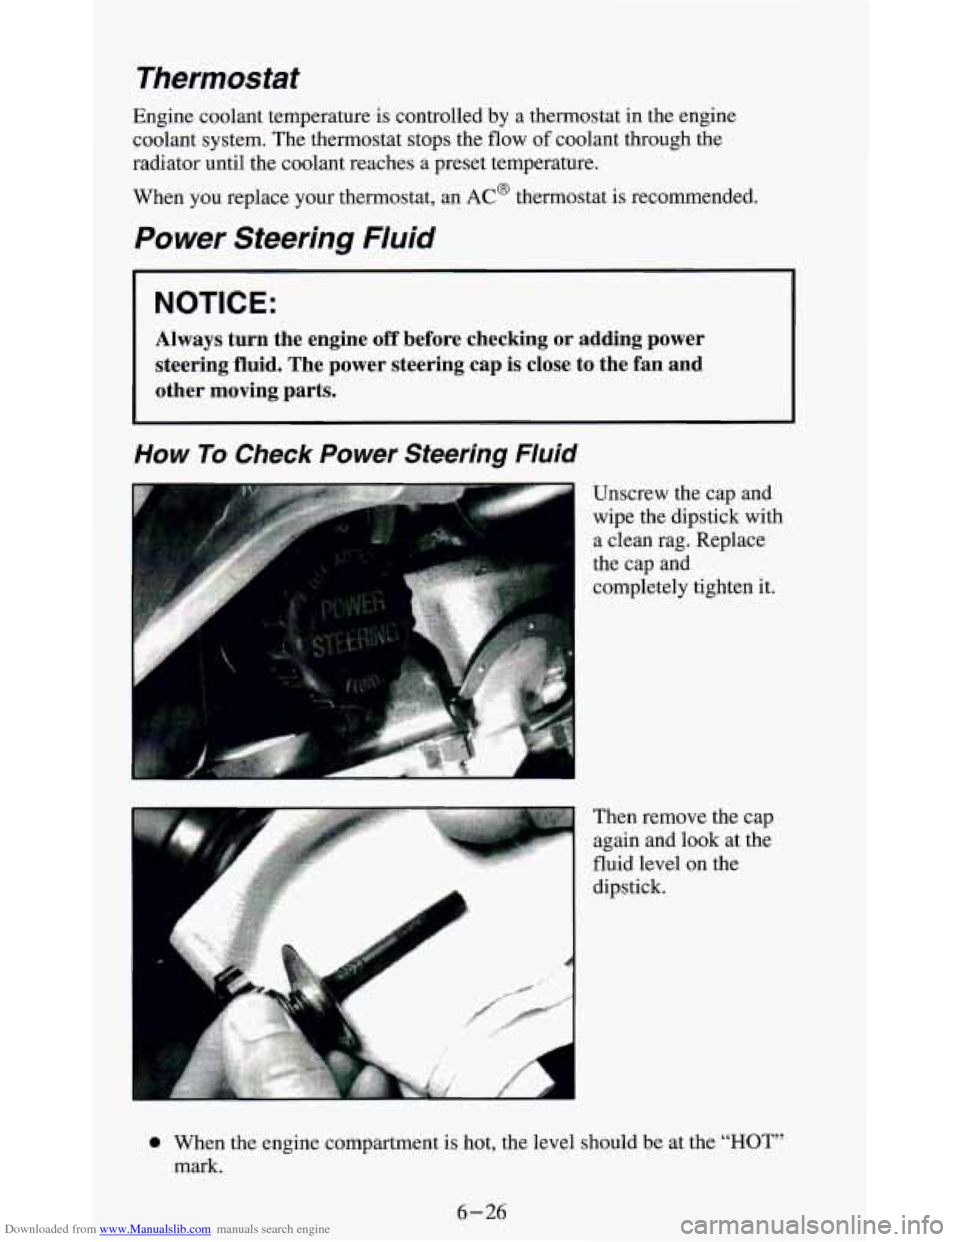
Unscrew the cap and
wipe the dipstick with
a clean rag. Replace
the cap and
completely tighten it.
Then remove the cap
again and look at the
fluid level on the
dipstick.
0 When the engine compartment is hot, the level should be at the “HOT”
mark.
6-26
Page 263 of 348
Downloaded from www.Manualslib.com manuals search engine 0 When the engine compartment is cool, the level should be at the
“FULL COLD” mark.
What to Add
Refer to the Maintenance Schedule to determine what kind of fluid to use.
See “Recommended Fluids and Lubricants”
in the Index.
NOTICE:
When adding power steering fluid or making a complete fluid
change, always use the proper fluid. Failure to use the proper
fluid can cause leaks and damage hoses and seals.
Windshield Washer Fluid
To Add
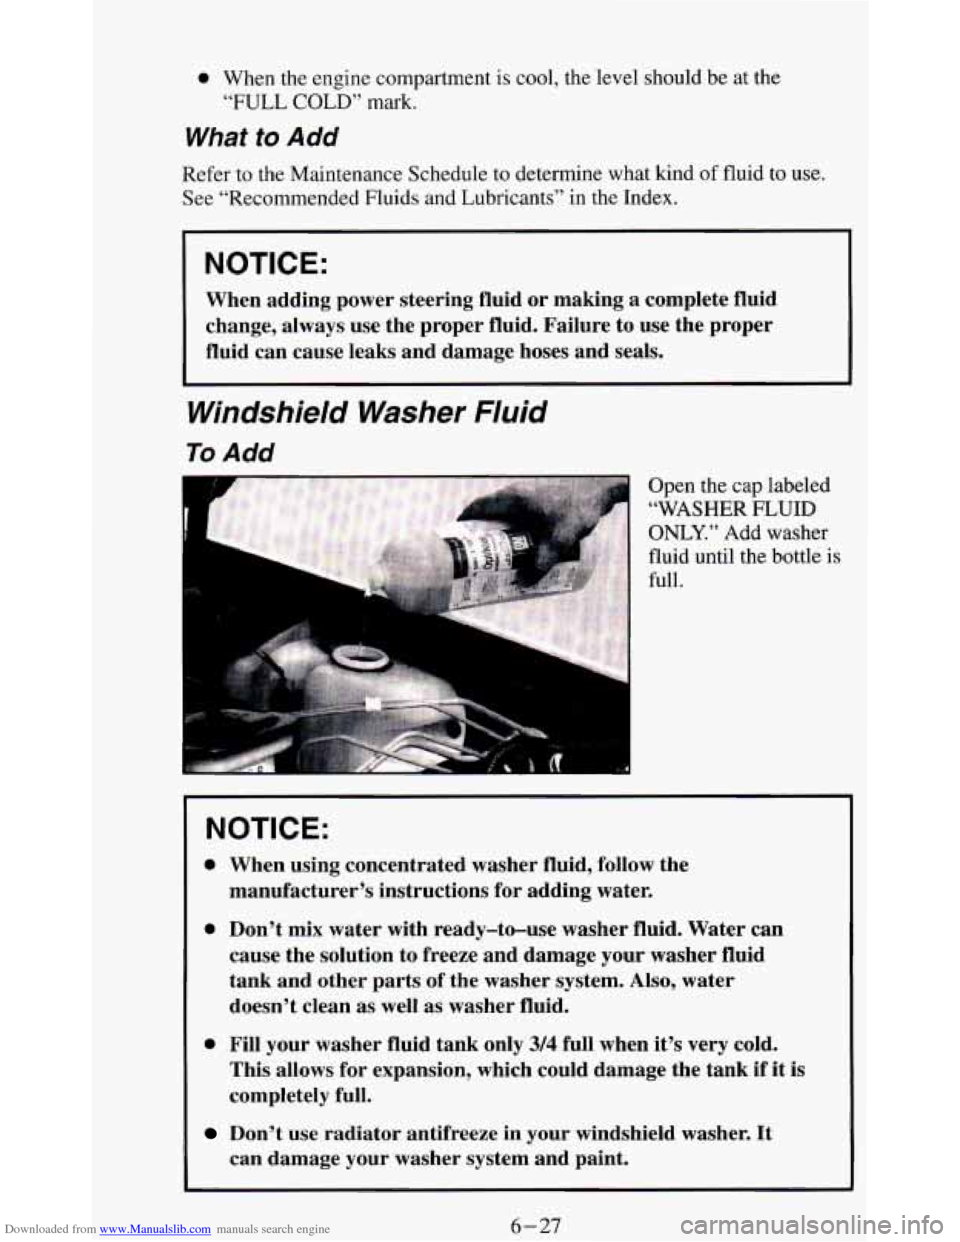
Open the cap labeled
“WASHER FLUID
ONLY.” Add washer
fluid until the
bottle is
full.
NOTICE:
0 When using concentrated washer fluid, follow the
manufacturer’s instructions for adding water.
0 Don’t mix water with ready-to-use washer fluid, Water can
cause the solution to freeze and damage your washer fluid
tank and other parts of the washer system.
Also, water
doesn’t clean as well as washer fluid.
0 Fill your washer fluid tank only 3/4 full when it’s very cold.
This allows for expansion, which could damage the tank if it
is
completely full.
Don’t use radiator antifreeze in your windshield washer. It
can damage your washer system and paint,
6-27
Page 304 of 348
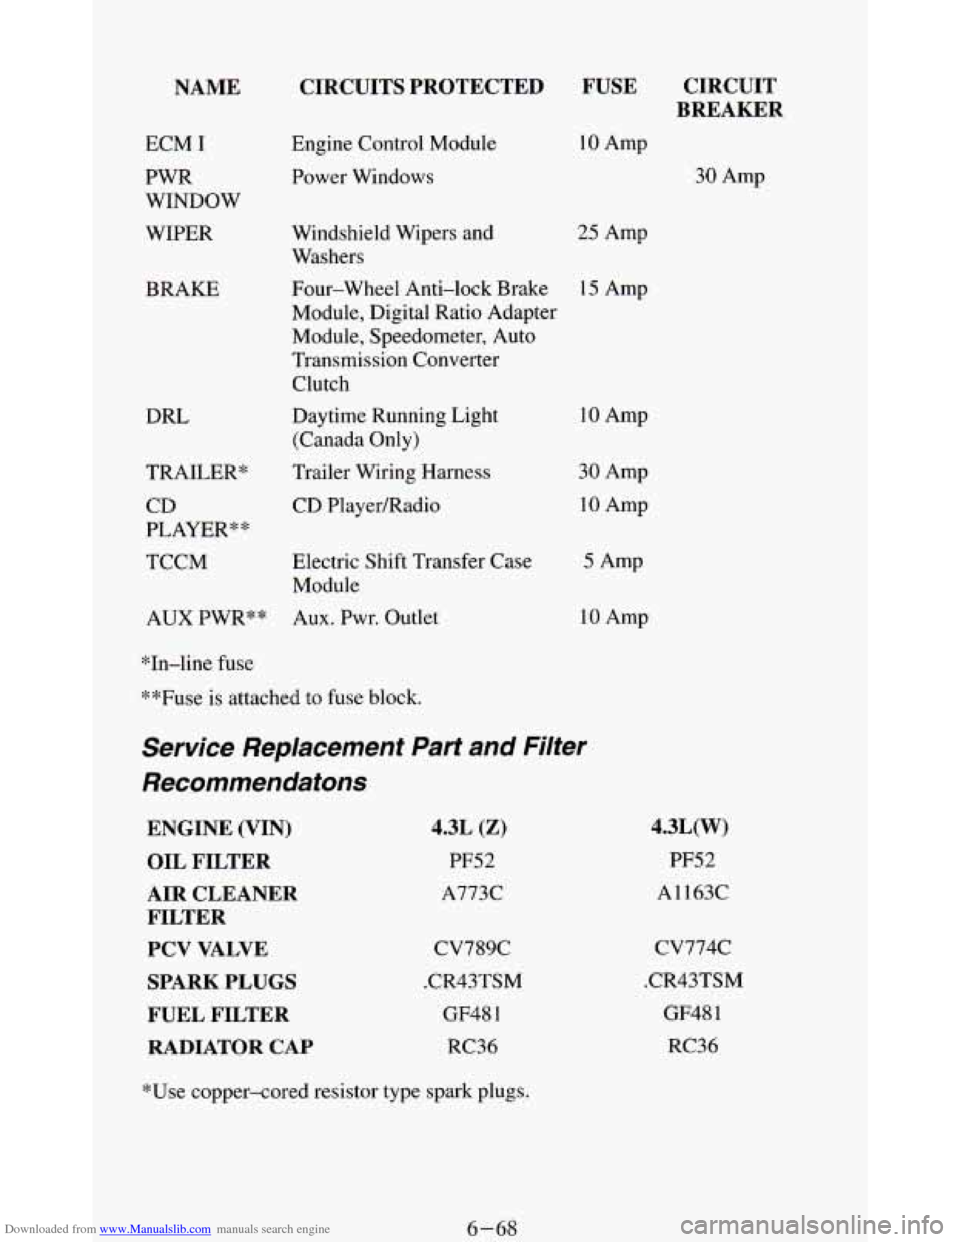
Downloaded from www.Manualslib.com manuals search engine NAME
ECM I
PWR
WINDOW
WIPER
BRAKE DRL
CIRCUITS PROTECTED FUSE
Engine Control Module Power Windows 10 Amp
Windshield Wipers and
25 Amp
Washers
Four-wheel Anti-lock Brake 15 Amp
Module, Digital Ratio Adapter
Module, Speedometer, Auto
Transmission Converter
Clutch
Daytime Running Light
(Canada Only)
Trailer Wiring
Harness
CD PlayedRadio
TRAILER*
CD
PLAYER**
TCCM
Electric Shift Transfer Case
Module
AUX PWR** Aux. Pwr. Outlet
10 Amp
30 Amp
10 Amp
5 Amp
10 Amp
*In-line fuse
**Fuse is attached
to fuse block.
Service Replacement Part and Filter
Recommendafons
ENGINE (VIN)
OIL FILTER
AIR CLEANER
FILTER PCV VALVE
SPARK PLUGS
FUEL FILTER
RADIATOR CAP 4.3L (2)
PF52
A773C
CV789C
.CR43TSM
GF48 1
RC36
CIRCUIT
BREAKER
30 Amp
4.3L(W)
PF52
A1163C
cv774c
.CR43TSM
GF48 1
RC36
*Use copper-cored resistor type spark plugs.
6-68
Page 313 of 348
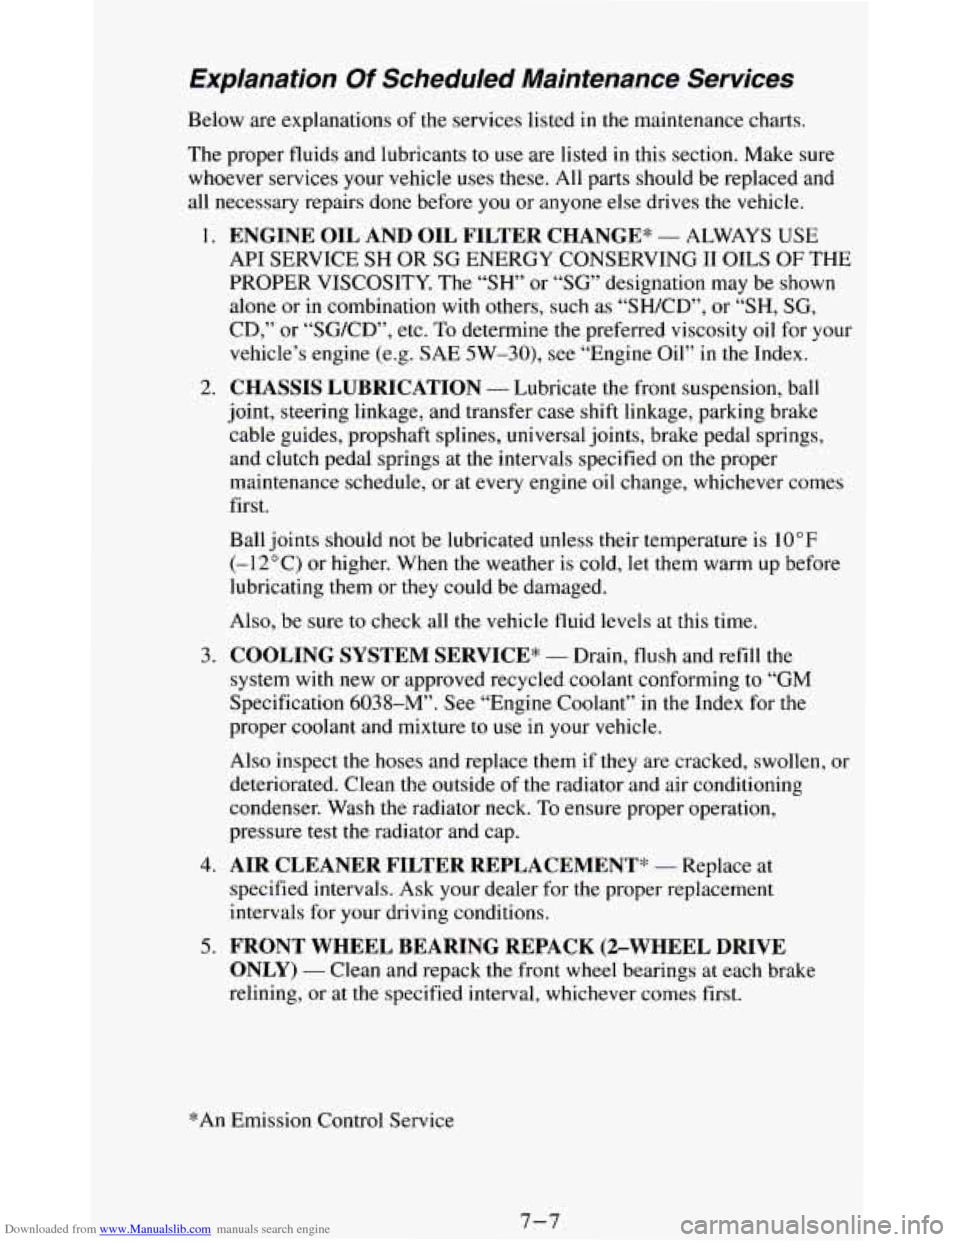
Downloaded from www.Manualslib.com manuals search engine Explanation Of Scheduled Maintenance Services
Below are explanations of the services listed in the maintenance charts.
The proper fluids and lubricants to use are listed in this section. Make sure
whoever services your vehicle
uses these. All parts should be replaced and
all necessary repairs done before you or anyone else drives the vehicle.
1.
2.
3.
4.
5.
ENGINE OIL AND OIL FILTER CHANGE* - ALWAYS USE
API SERVICE SH OR SG ENERGY CONSERVING I1 OILS OF THE
PROPER VISCOSITY. The “SH” or “SG” designation may be shown
alone or in combination with others, such as “SHKD”, or
“SH, SG,
CD,” or “SG/CD”, etc.
To determine the preferred viscosity oil for your
vehicle’s engine (e.g. SAE
5W-30), see “Engine Oil” in the Index.
CHASSIS LUBRICATION - Lubricate the front suspension, ball
joint, steering linkage, and transfer case shift linkage, parking brake
cable guides, propshaft splines, universal joints, brake pedal springs,
and clutch pedal springs at the intervals specified on the proper
maintenance schedule, or at every engine oil change, whichever comes
first.
Ball joints should
not be lubricated unless their temperature is 10°F
(-12°C) or higher. When the weather is cold, let them warm up before
lubricating them
or they could be damaged.
Also, be sure to check all the vehicle fluid levels at this time.
COOLING SYSTEM SERVICE* - Drain, flush and refill the
system with new or approved recycled coolant conforming to “GM
Specification
603%”’. See “Engine Coolant” in the Index for the
proper coolant and mixture to use in your vehicle.
Also inspect
the hoses and replace them if they are cracked, swollen, or
deteriorated. Clean the outside of the radiator and air conditioning
condenser. Wash the radiator neck. To ensure proper operation,
pressure test the radiator and cap.
AIR CLEANER FILTER REPLACEMENT” - Replace at
specified intervals. Ask your dealer for the proper replacement
intervals for your driving conditions.
FRONT WHEEL BEARING REPACK (2-WHEEL DRIVE
ONLY) - Clean and repack the front wheel bearings at each brake
relining,
or at the specified interval, whichever comes first.
*An Emission Control Service
7-7
Page 340 of 348
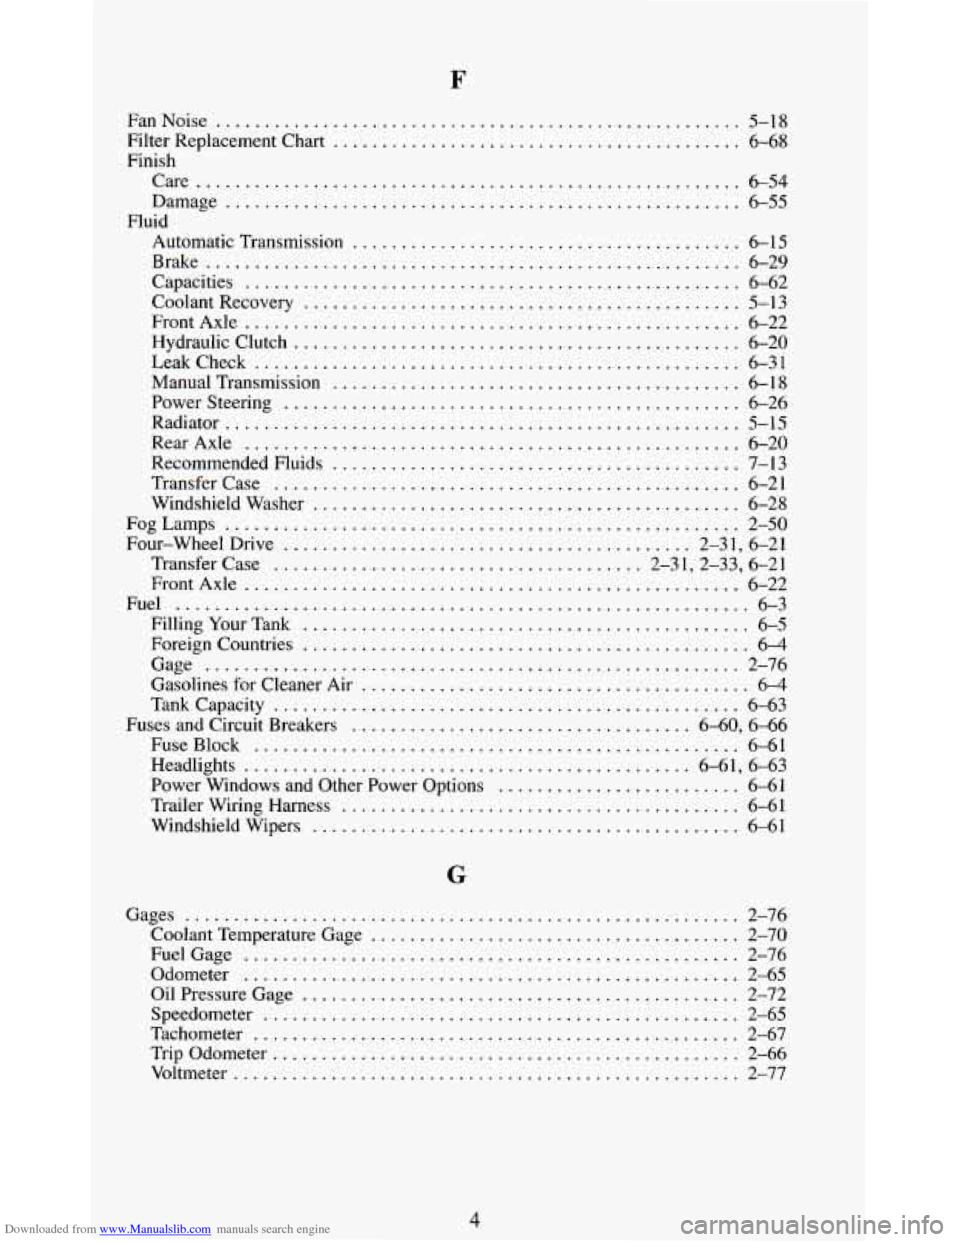
Downloaded from www.Manualslib.com manuals search engine FanNoise ...................................................... 5-18
Finish
Filter
Replacement Chart
.......................................... 6-68
Care
........................................................ 6-54
Damage ..................................................... 6-55
Automatic Transmission
........................................ 6-15
Brake
....................................................... 6-29
Capacities
................................................... 6-62
CoolantRecovery
............................................. 5-13
FrontAxle
................................................... 6-22
Leakcheck
.................................................. 6-31
ManualTransmission
.......................................... 6-18
Powersteering
............................................... 6-26
Radiator
..................................................... 5-15
RearAxle
................................................... 6-20
Recommended Fluids
.......................................... 7-13
Transfercase
................................................ 6-21
Windshield Washer ............................................ 6-28
FogLamps
..................................................... 2-50
Four-WheelDrive
.......................................... 2-31, 6-21
Transfer Case
...................................... 2-3 1,2-33, 6-21
FrontAxle
................................................... 6-22
Fuel
........................................................... 6-3
FillingYourTank
.............................................. 6-5
Fluid
Hydraulicclutch
.............................................. 6-20
Foreign Countries
.............................................. 6-4
Gage
....................................................... 2-76
Gasolines for Cleaner Air
........................................ 6-4
Tankcapacity
................................................ 6-63
Fuses and Circuit Breakers
................................... 6-60, 6-66
FuseBlock
.................................................. 6-61
Headlights
.............................................. 6-61, 6-63
Power Windows and Other Power Options
......................... 6-61
Trailer Wiring Harness
......................................... 6-61
Windshield Wipers
............................................ 6-61
Gages
......................................................... 2-76
FuelGage
................................................... 2-76
Odometer ................................................... 2-65
OilPressureGage
............................................. 2-72
Speedometer
................................................. 2-65
Tachometer
.................................................. 2-67
Trip Odometer
................................................ 2-66
Voltmeter
.................................................... 2-77
Coolant Temperature Gage ...................................... 2-70
4