spare wheel CHEVROLET BLAZER 1995 2.G Owners Manual
[x] Cancel search | Manufacturer: CHEVROLET, Model Year: 1995, Model line: BLAZER, Model: CHEVROLET BLAZER 1995 2.GPages: 380, PDF Size: 20.04 MB
Page 166 of 380
Downloaded from www.Manualslib.com manuals search engine Driving Guidelines
This multipurpose passenger vehicle is defined as a utility vehicle in
Consumer Information Regulations issued by the National Highway Traffic
Safety Administration (NHTSA) of the United States Department
of
Transportation. Utility vehicles have higher ground clearance and\
a
narrower track to make them capable of performing
in a wide variety of
off-road applications. Specific design characteristics give them a higher
center of gravity than ordinary cars. An advantage of the higher ground
clearance is
a better view of the road allowing you to anticipate problems.
They are
not designed for cornering at the same speeds as conventional
2-wheel drive vehicles any more than low-slung sports cars are designed\
to
perform satisfactorily under off-road conditions. If
at all possible, avoid
sharp turns or abrupt maneuvers. As with other vehicles of this type, failure
to operate this vehicle correctly may result in loss
of control or vehicle
rollover.
Off-Road Driving with Your Four-wheel Drive Vehicle
This off-road guide is for vehicles that have four-wheel drive.
Also, see “Anti-Lock Brakes” in the Index.
If your vehicle doesn’t have four-wheel drive,
you shouldn’t drive off-road
unless you’re
on a level, solid surface.
Off-road driving can be great
fun. But it does have some definite hazards.
The greatest
of these is the terrain itself.
“Off-roading” means you’ve left the great North American\
road system
behind. Traffic lanes aren’t marked. Curves aren’t banked. There are
no
road signs. Surfaces can be slippery, rough, uphill or downhill. In short,
you’ve gone right
back to nature.
Off-road driving involves some new skills. And that’s why it’s very
important that
you read this guide. You’ll find many driving tips and
suggestions. These will help make your off-road driving safer and more
enjoyable.
Before You Go Off-Roading
There are some things to do before you go out. For example, be sure to have
all necessary maintenance and service work done. Check to make sure all
underbody shields (if
so equipped) are properly attached. Be sure you read
all the information about your four-wheel drive vehicle in this manual.
Is
there enough fuel? Is the spare tire fully inflated? Are the fluid levels up
where they should be? What are the local laws that apply to off-roading
where you’ll be driving?
If you don’t know, you should check with law
enforcement people in the area. Will you be on someone’s private land? If
so, be sure to get the necessary permission.
4- 12
Page 224 of 380
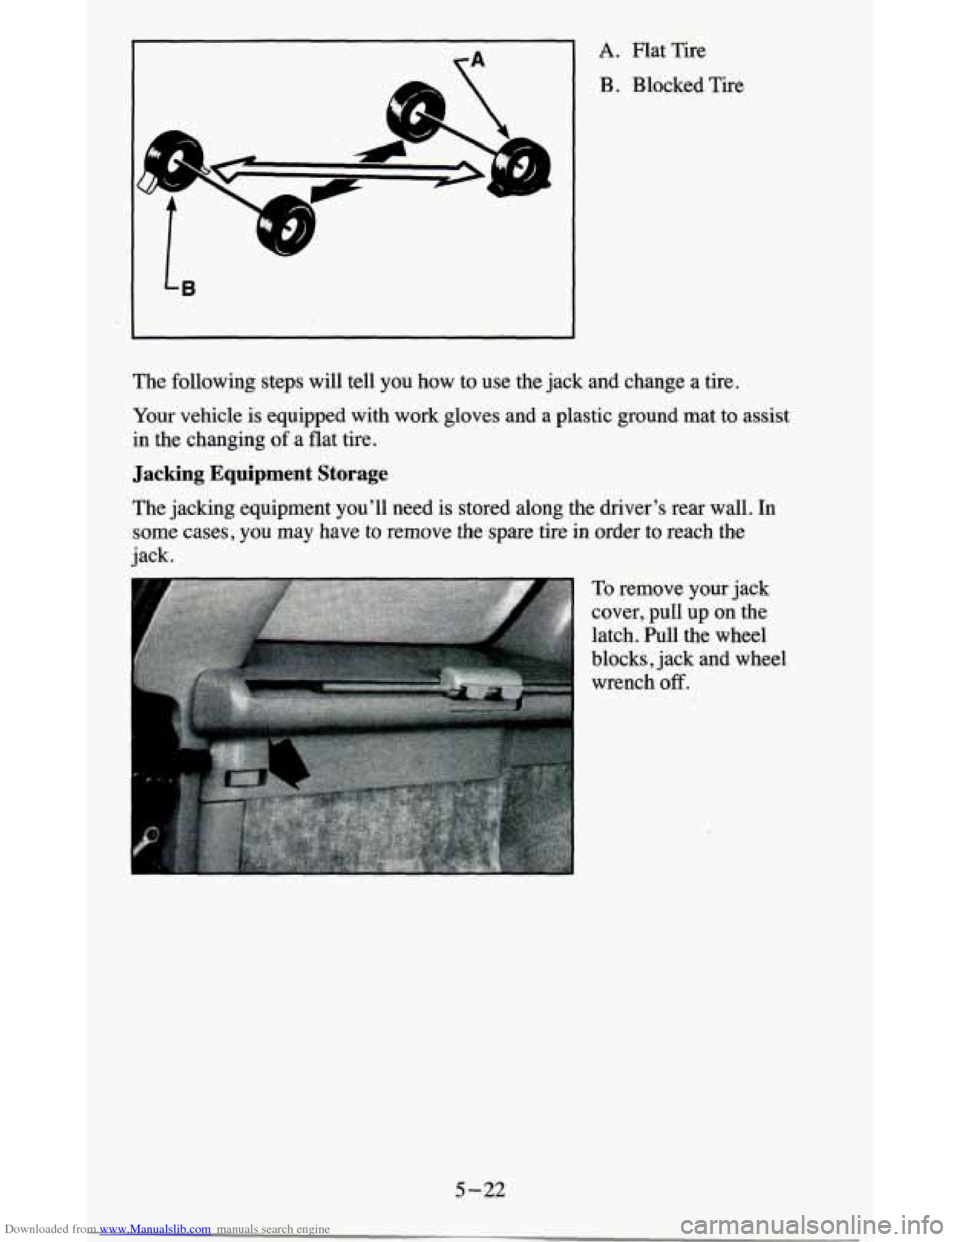
Downloaded from www.Manualslib.com manuals search engine A. Flat Tire
B . Blocked Tire
t
The following steps will tell you how to use the jack and change a tire.
Your vehicle is equipped with work gloves and a plastic ground mat to assist
in the changing of a flat tire.
Jacking Equipment Storage
The jacking equipment you’ll need is stored along the driver’s rear wall. In
some cases,
you may have to remove the spare tire in order to reach the
jack.
To remove your jack
cover, pull
up on the
latch. Pull the wheel
blocks, jack and wheel
wrench
off.
5-22
Page 225 of 380
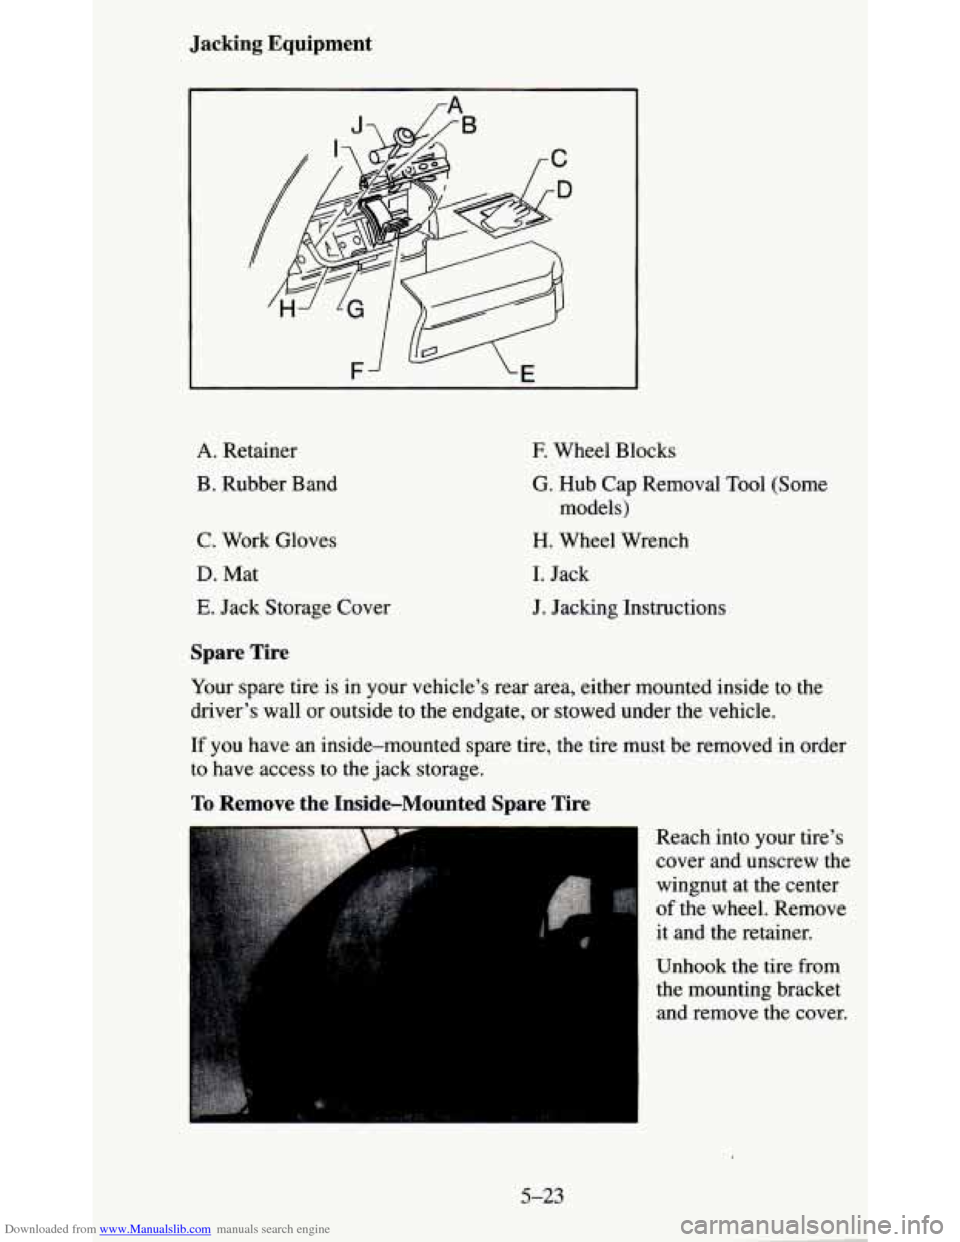
Downloaded from www.Manualslib.com manuals search engine Jacking Equipment
rA
A. Retainer
B. Rubber Band
C. Work Gloves
D. Mat
E. Jack Storage Cover
E Wheel Blocks
G. Hub Cap Removal Tool (Some
H. Wheel Wrench
I. Jack models)
J. Jacking Instructions
Spare Tire
Your spare tire is in your vehicle's rear area, either mounted inside to the
driver's wall or outside to the endgate, or stowed under the vehicle.
If you have an inside-mounted spare tire, the tire must be removed in order
to have access to the jack storage.
To Remove the Inside-Mounted Spare Tire
Reach into your tire's
cover and unscrew the
wingnut at the center
of the wheel. Remove
it and the retainer.
Unhook the tire from
the mounting bracket and remove the cover.
5-23
Page 226 of 380
Downloaded from www.Manualslib.com manuals search engine To Remove the Rear-Mounted Spare Tire
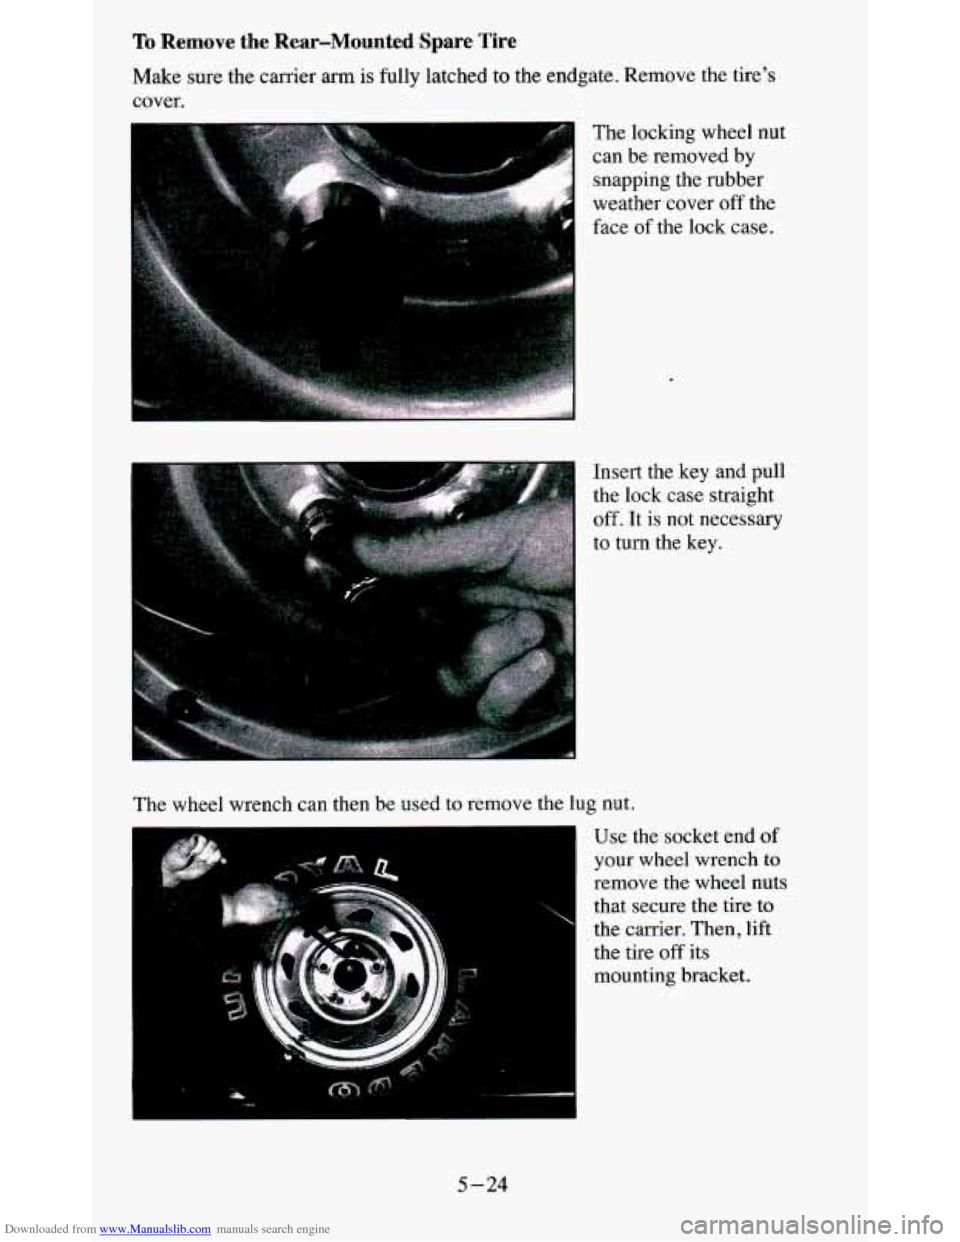
Make sure the carrier arm is fully latched to the endgate. Remove the tire's
cover.
The locking wheel nut
can be removed by snapping the rubber
weather cover off the
face
of the lock case.
Insert the key and pull
the lock case straight
off. It is not necessary
to turn the key.
The wheel wrench can then be used to remove the lug nut.
"
Use the socket end of
your wheel wrench to
remove the wheel nuts
that secure the tire
to
the carrier. Then, lift
the tire
off its
mounting bracket.
5-24
Page 227 of 380
Downloaded from www.Manualslib.com manuals search engine To Remove the Underbody-Mounted Spare Tire (&Door Only)
NOTICE:
Never remove or restow a tire frodto a stowage position under
the vehicle while the vehicle is supported by a jack. Always
tighten the tire fully against the underside
of the vehicle when
restowing.
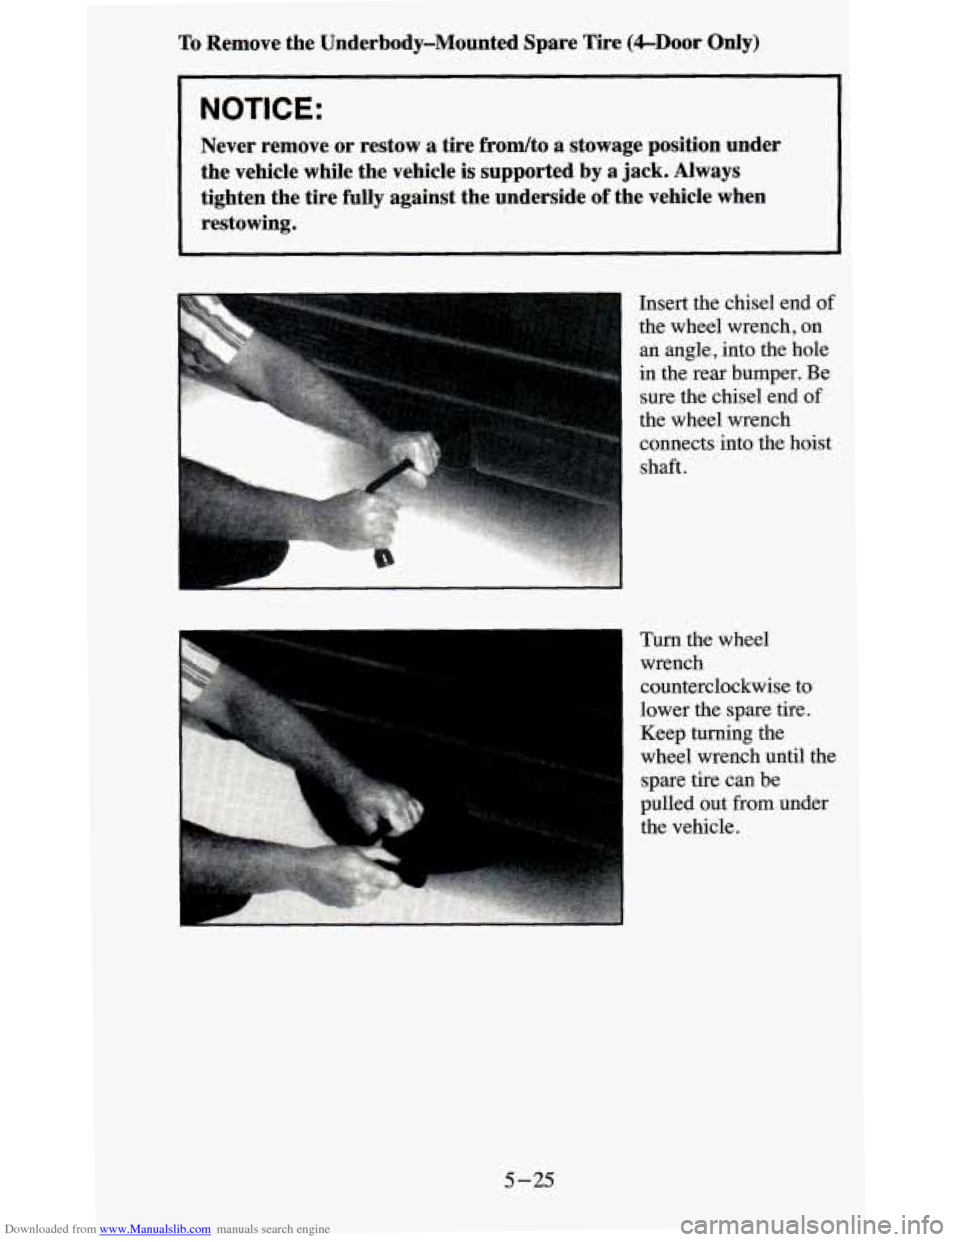
Insert the chisel end of
the wheel wrench, on
an angle, into the hole
in the rear bumper. Be
sure the chisel end
of
the wheel wrench
connects into the hoist
shaft.
Turn the wheel wrench
counterclockwise to
lower the spare tire.
i Keep turning the
wheel wrench until the
spare tire can be
pulled out from under
the vehicle.
5-25
Page 228 of 380
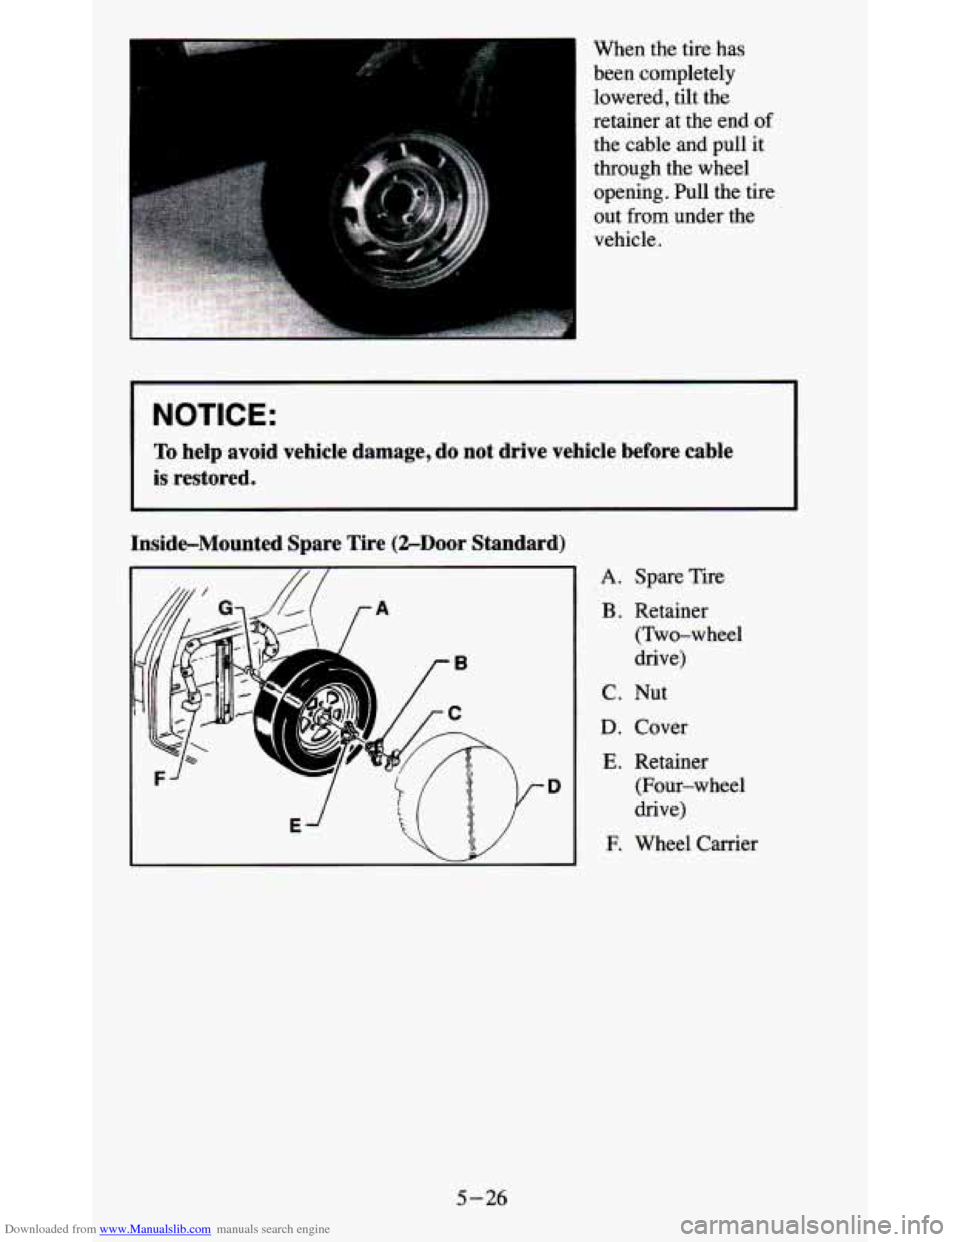
Downloaded from www.Manualslib.com manuals search engine When the tire has been completely
lowered, tilt the
retainer at the end
of
the cable and pull it
through the wheel
opening. Pull the tire
out from under the
vehicle.
NOTICE:
To help avoid vehicle damage, do not drive vehicle before cable
is restored.
~~~ ~ ~~~ ~
Inside-Mounted Spare Tire (%Door Standard)
A. Spare Tire
B . Retainer
(Two-wheel
drive)
C. Nut
D. Cover
E. Retainer (Four-wheel
drive)
F. Wheel Carrier
5-26
Page 229 of 380
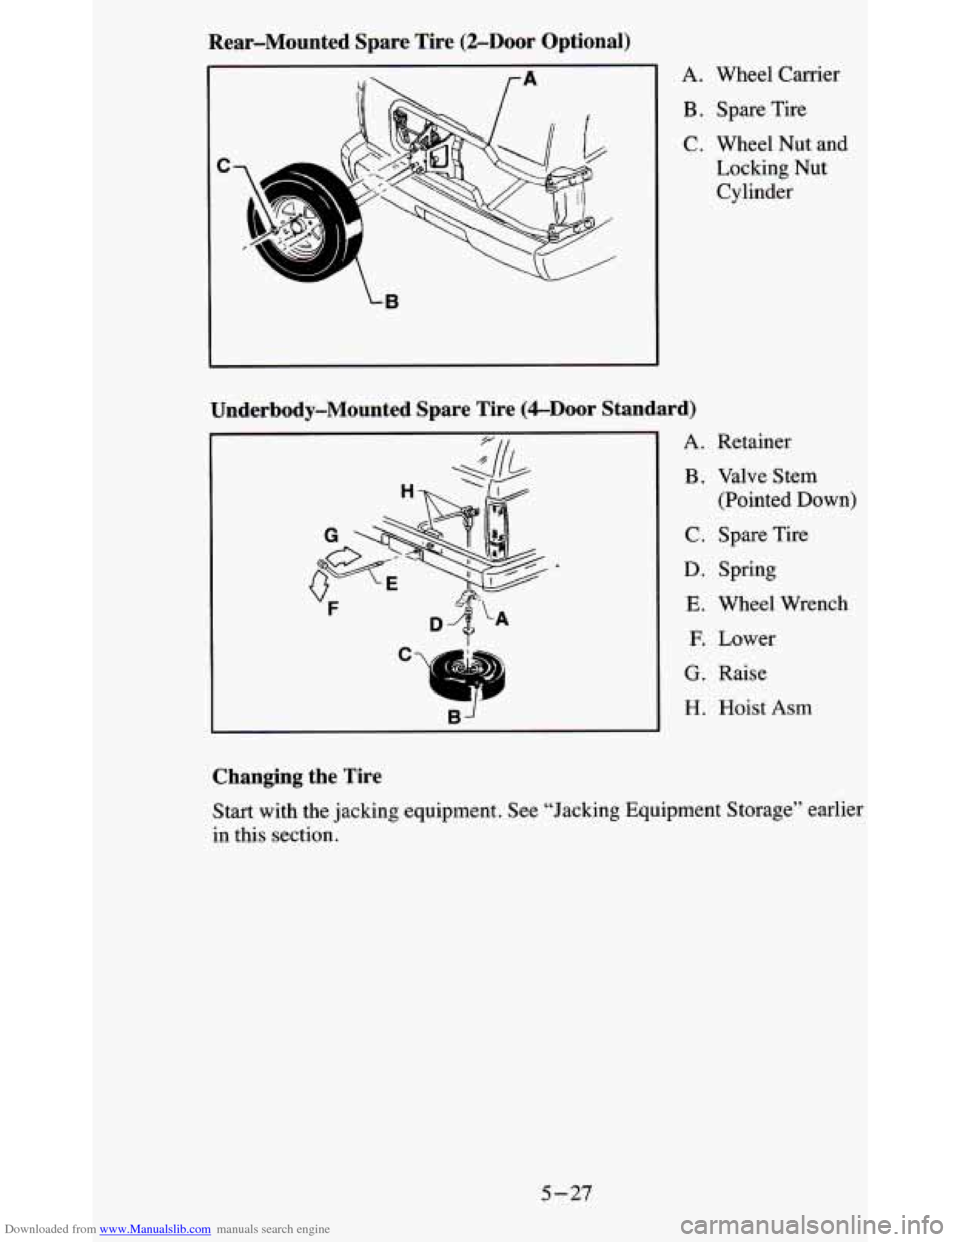
Downloaded from www.Manualslib.com manuals search engine Rear-Mounted Spare Tire (%Door Optional)
A. Wheel Carrier
B. Spare Tire
C. Wheel Nut and
Locking Nut
Cylinder
Underbody-Mounted Spare Tire (&Door Standard)
A. Retainer
B . Valve Stem
(Pointed Down)
C. Spare Tire
D. Spring
E. Wheel Wrench
F. Lower
G. Raise
H. Hoist Asm
Changing the Tire
Start with the jacking equipment. See “Jacking Equipment Storage” earlier
in this section.
5-27
Page 233 of 380
Downloaded from www.Manualslib.com manuals search engine NOTICE:
Raising your vehicle with the jack improperly positioned will
damage the vehicle or may allow the vehicle to fall
off the jack.
Be sure to
fit the jack lift head into the proper location before
raising your vehicle.
A M
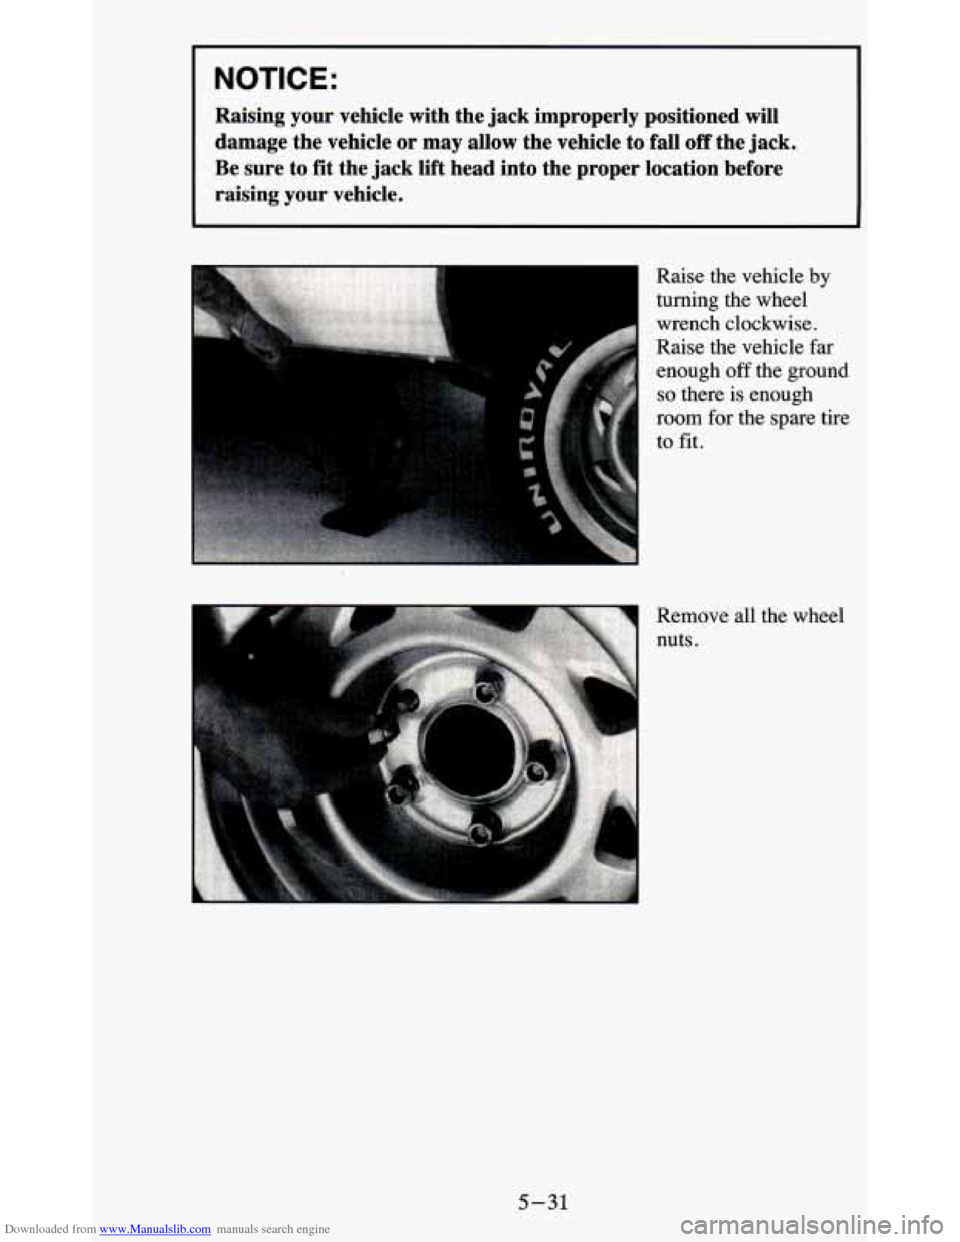
Raise the vehicle by
turning the wheel
wench clockwise.
Raise the vehicle far
enough off the ground
so there is enough
room for the spare tire
to fit.
5-31
Page 234 of 380
Downloaded from www.Manualslib.com manuals search engine f, : i
I
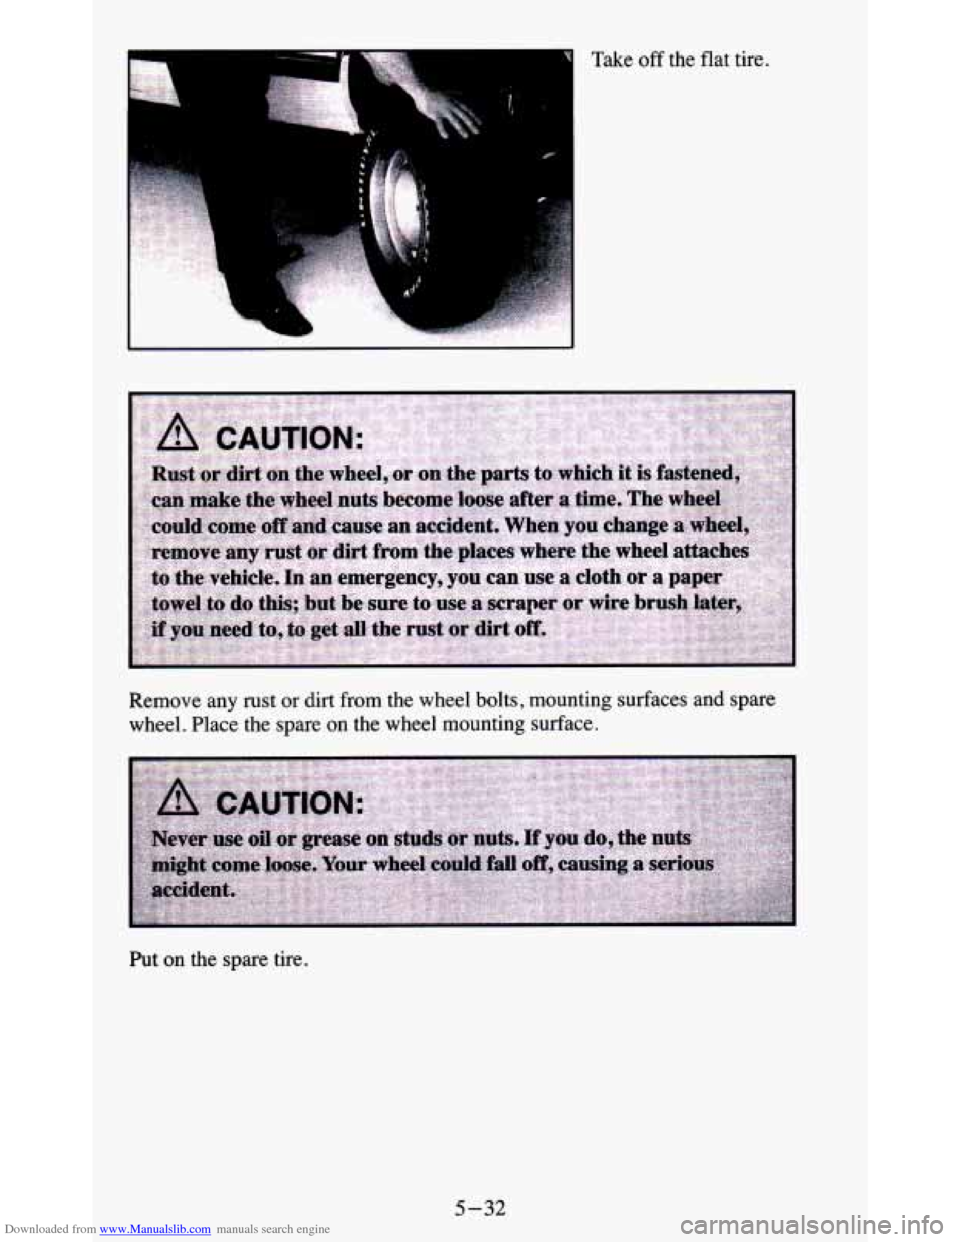
Take off the flat tire.
Remove any rust
or dirt from the wheel bolts, mounting surfaces and spare
wheel. Place the spare on the wheel mounting surface.
Put on the spare tire.
5-32
Page 236 of 380
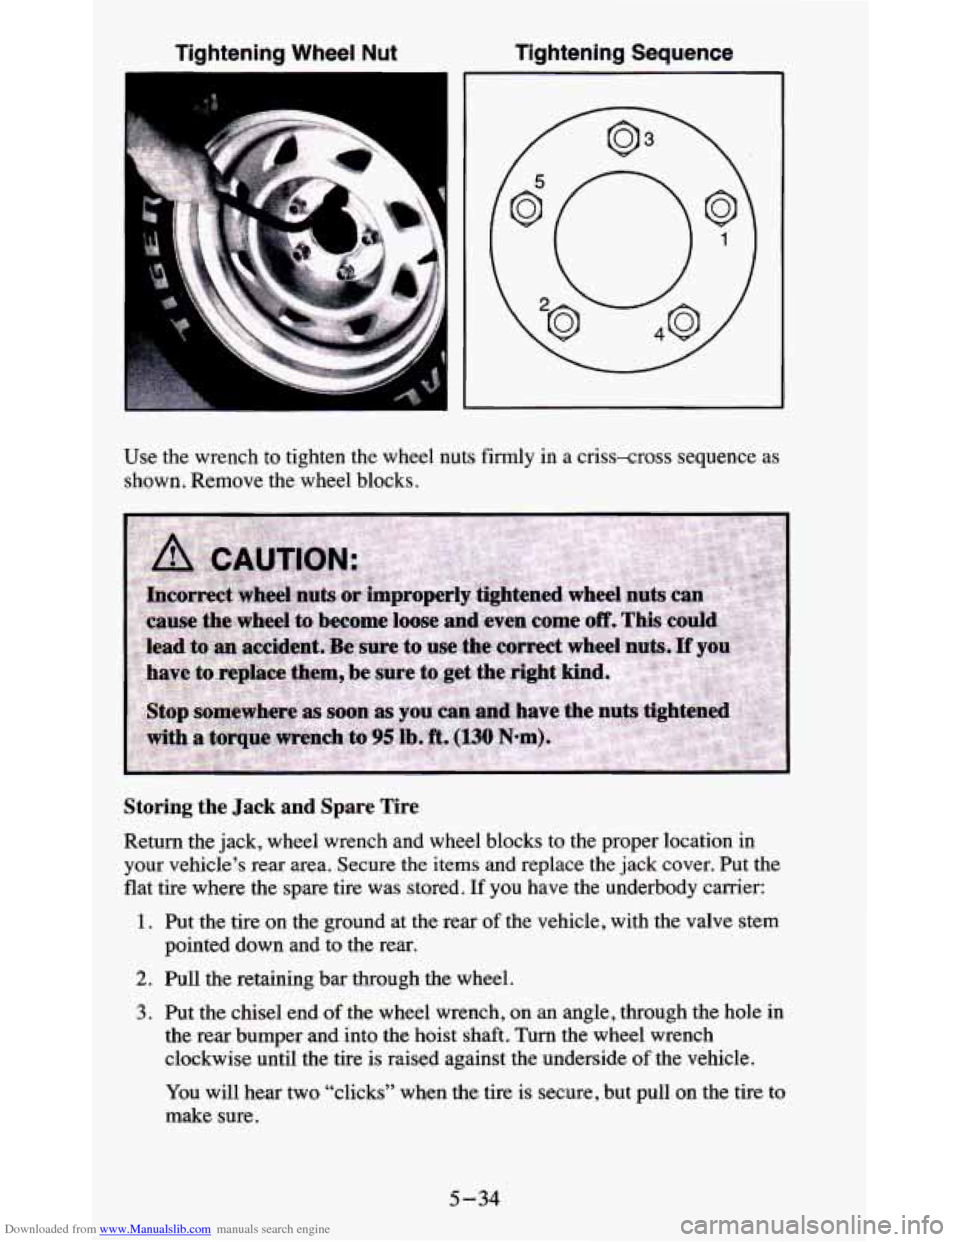
Downloaded from www.Manualslib.com manuals search engine Tightening Wheel Nut Tightening Sequence
Use
the wrench to tighten the wheel nuts firmly in a criss-cross sequence as
shown. Remove the wheel blocks.
Storing the Jack and Spare Tire
Return the jack, wheel wrench and wheel blocks to the proper location in
your vehicle’s rear area. Secure
the items and replace the jack cover. Put the
flat tire where the spare tire was stored. If you have the underbody carrier:
1. Put the tire on the ground at the rear of the vehicle, with the valve stem
pointed down and to the rear.
2. Pull the retaining bar through the wheel.
3. Put the chisel end of the wheel wrench, on an angle, through the hole in
the rear bumper and into the hoist shaft. Turn the wheel wrench
clockwise until the tire is raised against the underside
of the vehicle.
You will hear two “clicks” when the tire is secure, but pull
on the tire to
make sure.
5-34