bulb CHEVROLET BLAZER 1997 2.G Owners Manual
[x] Cancel search | Manufacturer: CHEVROLET, Model Year: 1997, Model line: BLAZER, Model: CHEVROLET BLAZER 1997 2.GPages: 402, PDF Size: 21.93 MB
Page 96 of 402
Downloaded from www.Manualslib.com manuals search engine ’krn and Lane Change Signals
The turn signal has two upward (for right) and two
downward (for left) positions.
These positions allow you
to signal a turn or a lane change.
To signal a turn, move the lever all the way up or down.
When
the turn is finished, the lever will return automatically.
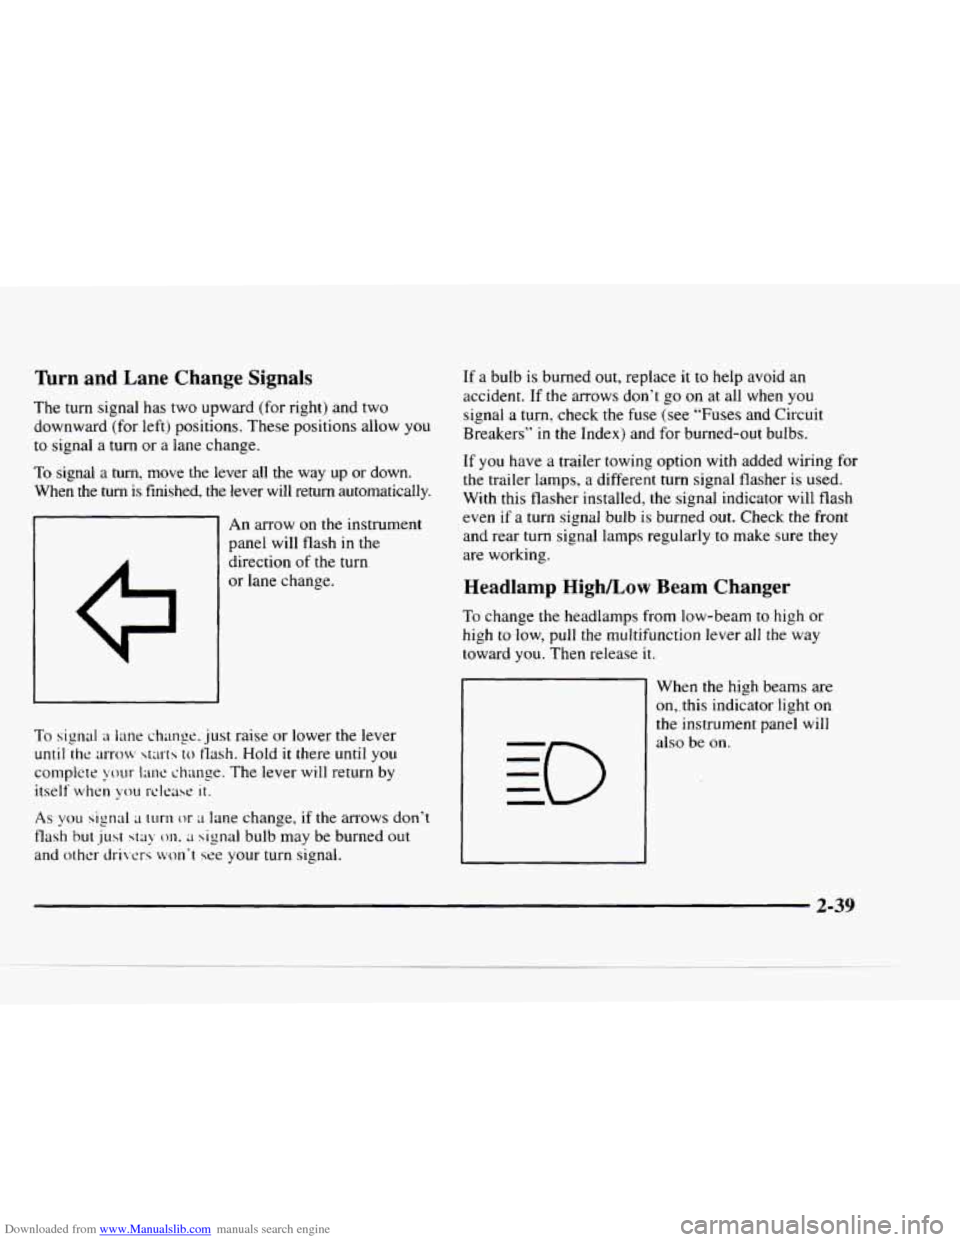
An arrow on the instrument
panel will flash in the
direction
of the turn
or lane change.
To signal a lane change. just raise or lower the lever
until the ;lrrocv starts to tlash. Hold it there until you
complete your
1mc change. The lever will return by
itself when you rclt.ast: it.
As you signal ;1 turn or LI lane change, if the arrows don’t
flash but just stay 011. ;I signal bulb may be burned out
and other drivers won‘t see your turn signal.
If a bulb is burned out, replace it to help avoid an
accident.
If the arrows don’t go on at all when you
signal a turn, check the fuse (see
“Fuses and Circuit
Breakers’’ in the Index) and for burned-out bulbs.
If
you have a trailer towing option with added wiring for
the trailer lamps, a different turn signal flasher is used.
With this flasher installed,
the signal indicator will flash
even
if a turn signal bulb is burned out. Check the front
and rear turn signal lamps regularly
to make sure they
are working.
Headlamp Highkow Beam Changer
To change the headlamps from low-beam to high or
high
to low, pull the multifunction lever all the way
toward
you. Then release it.
1
When the high beams are
on,. this indicator light on
the instrument panel will
also be
on.
2-39
Page 137 of 402
Downloaded from www.Manualslib.com manuals search engine Shift Light
-w
/fls 1
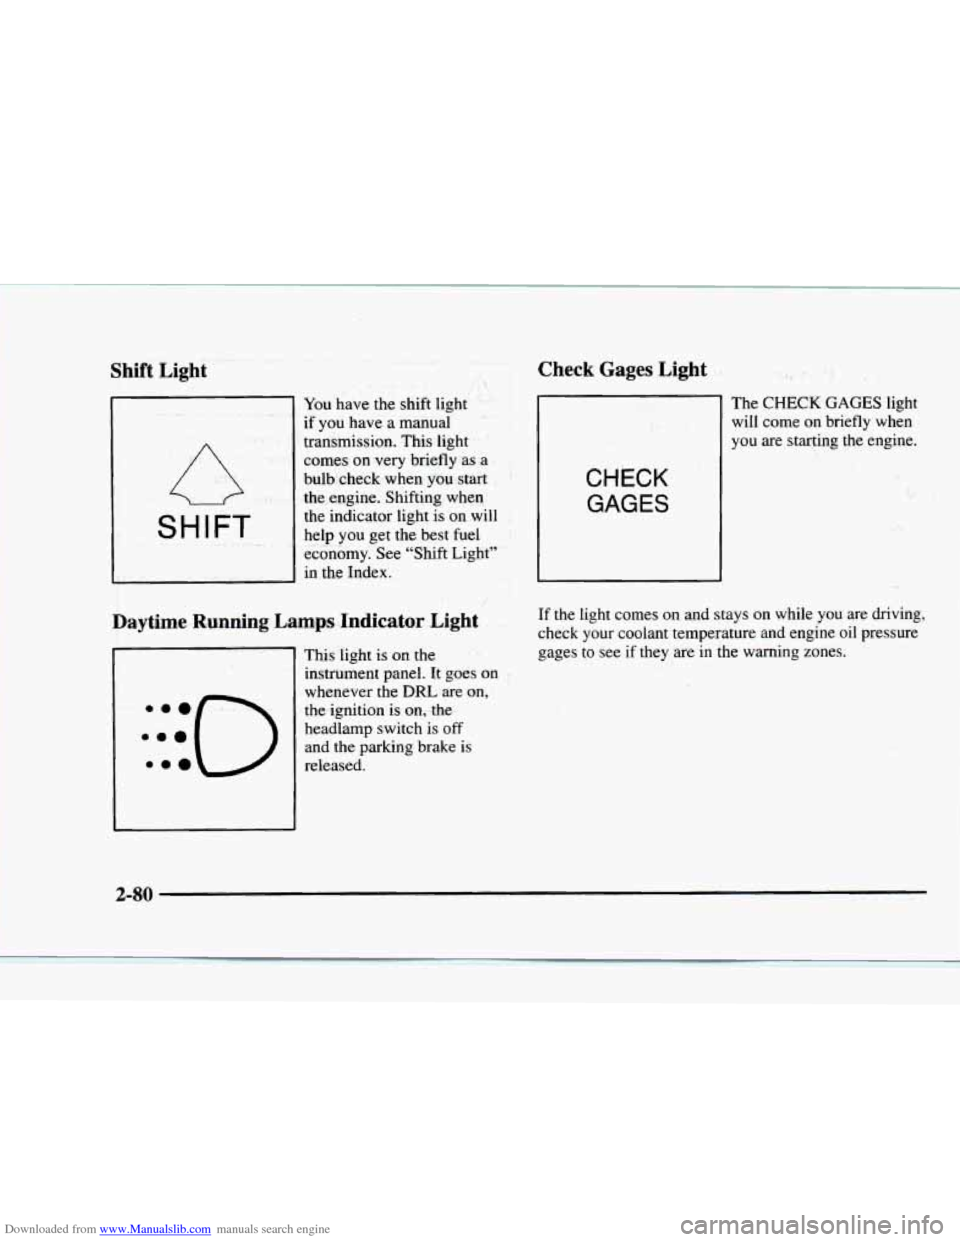
You have the shift light
if you have a manual
transmission. This light
comes
on very briefly as a
bulb check when
you start
the engine. Shifting when
the indicator light is on will
help you get
the best fuel
economy. See "Shift Light"
in the Index.
1 'd 8.
Daytime Running Lamps Indicator Light
This light is on the
instrument panel. It goes on
whenever the
DRL are on,
the ignition is on,.the
headlamp switch is
off
and the parking brake is
released.
Check Gages Light
CHECK GAGES
The CHECK GAGES light
will come on briefly when
you are starting the engine.
:
.. * ,. ,. , i ..3
I I.. -_. .
If the light comes on and stays on while you are driving,
check your coolant temperature and engine oil pressure
gages to see if they are in the warning zones.
1;
.I. ..
' , .;i ,- ..
"j
.. . .
2-80
Page 213 of 402
Downloaded from www.Manualslib.com manuals search engine When towing a trailer, the arrows on your instrument
panel
will flash for turns even if the bulbs on the trailer
are burned out. Thus, you may
think drivers behind you
are seeing your signal when they are not. It's important
to check occasionally to be sure the trailer bulbs are
still working.
Driving On Grades
Reduce speed and shift to a lower gear byfilw you start
down
a long or steep downgrade. If you don't shift
down. you might have to use your brakes
so much that
they would get hot and no longer work well.
On
a long uphill grade. shift down and reduce your
speed
to around 45 mph (70 km/h) to reduce the
possibility of engine and transmission overheating.
if
you have an automatic transmission. you should use
DRIVE (D) when towing a trailer. Operating your
vehicle in DRIVE (D) when towing a trailer will
minimize heat buildup and extend the life
of your
transmission. Or.
if you have a manual transmission. it's
better not to use
FIFTH (5 j gear. just drive in
FOURTH (4) gear (or. as you need to. a lower gear). When
towing
at high altitude on steep uphill grades.
consider the following: Engine coolant will boil at a
lower temperature than at normal altitudes.
If you turn
your engine off immediately after towing at high altitude
on steep uphill grades, your vehicle may show signs
similar to engine overheating.
To avoid this. let the
engine
run while parked (preferably on level ground)
with the automatic transmission in PARK (P) (or the
rnanual transmission out of gear and the parking brake
applied) for a few minutes before turning the engine off.
If you do get the overheat warning, see "Engine
Overheating"
in the Index.
Parking on Hills
You really should not park your vehicle. with a trailer
attached.
on ;I hill. If something goes wrong, your ris
could start to move. People can be injured, and both
your vehicle and the trailer
can be damaged.
4-52
Page 256 of 402
Downloaded from www.Manualslib.com manuals search engine Section 6 Service and Appearance Care
Here you will find information about the care of your vehicle. This section begins with service and fuel information,
and then
it shows how to check important fluid and lubricant levels. There is also technical information about your
vehicle, and a part devoted
to its appearance care.
6-3
6-4
6-5
6-6
6-9 6-
13
6- 14
6-18
6- 19
6-
20
6-2 1
6-23
6-26
6-26
6-26 6-27
Fuel
Fuels in Foreign Countries
Filling Your Tank
Checking Things Under the Hood
Engine Oil
Air Cleaner
Automatic Transmission Fluid
Manual Transmission Fluid
Hydraulic Clutch
Rear Axle
Four-wheel Drive and All-Wheel Drive
Engine Coolant Radiator Pressure Cap
Thermostat Power Steering Fluid
Windshield Washer Fluid 6-28
6-32
6-3 3 6-3 8
6-40 6-49
6-49
6-52
6-54
6-5
7
6-5 8
6-58
6-58
6-62
6-63
6-64
Brakes
Battery
Bulb Replacement
Windshield Wiper Blade Replacement
Tires
Appearance Care
Cleaning the Inside
of Your Vehicle
Care
of Safety Belts
Cleaning the Outside of Your Vehicle
Appearance Care Materials Chart
Vehicle Identification Number
(VIN)
Service Parts Identification Label
Electrical System
Replacement Bulbs
Capacities and Specifications
Air Conditioning Refrigerants
Page 288 of 402
Downloaded from www.Manualslib.com manuals search engine Vehicle Storage
If you’re not going to dnve your vehicle for 25 days or
more, take off the black, negative (-) cable from the battery.
This will help keep your battery fiom running down.
I A CAUTION:
Batteries have acid that can burn you and gas
that can explode. You can be badly hurt
if you
, aren’t careful. See “Jump Starting” in the Index
for tips
on working around a battery without
getting hurt.
Contact your dealer to learn how to prepare your vehicle
for longer storage periods.
Also, for your audio system, see “Theft-Deterrent
Feature”
in the Index.
Bulb Replacement
Before you replace any bulbs, be sure that all the lamps
are off and the engine isn’t running. See “Replacement
Bulbs”
in the Index.
Halogen Bulbs
I /d CAUTION:
Halogen bulbs have pressurized gas inside and
can burst if
you drop or scratch the bulb. You or
others could be injured. Be sure to read and
follow the instructions on the bulb package.
6-33
Page 290 of 402
Downloaded from www.Manualslib.com manuals search engine Composite Headlamps
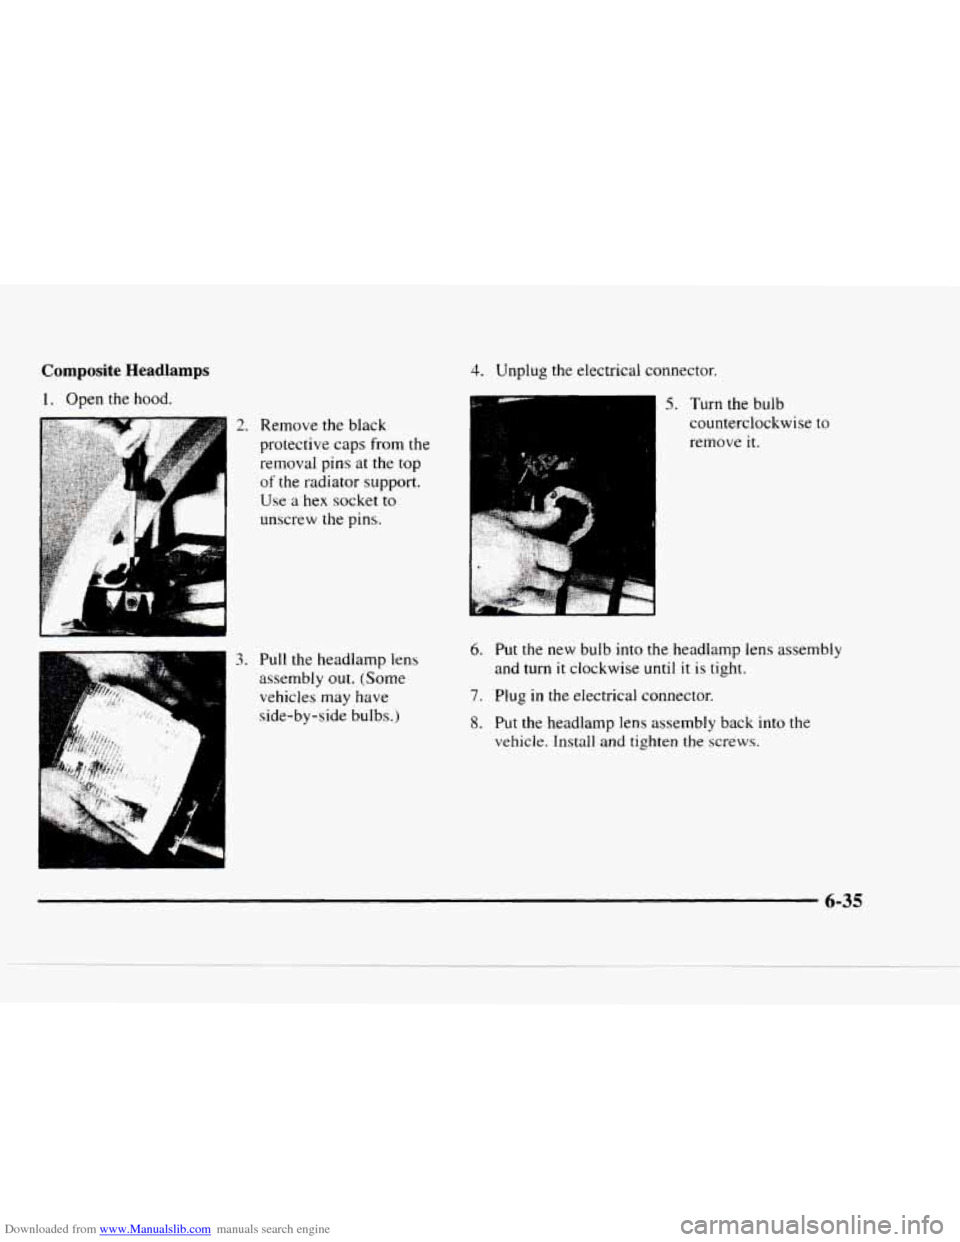
1. Open the hood.
c
2. Remove the black
protective caps from
the
removal pins at the top
of the radiator support.
Use a hex socket to
unscrew the pins.
3. Pull the headlamp lens
assembly
out. (Some
side-by-side bulbs.)
I,. .*::g> 1.21 , ' ..-g vehicles may have
.. '
4. Unplug the electrical connector.
5. Turn the bulb
counterclockwise
to
remove it.
6. Put the new bulb into the headlamp lens assembly
and turn
it clockwise until it is tight.
7. Plug in the electrical connector.
8. Put the headlamp lens assembly back into the
vehicle.
Install and tighten the screws.
Page 291 of 402
Downloaded from www.Manualslib.com manuals search engine Front Turn Signal Lamps
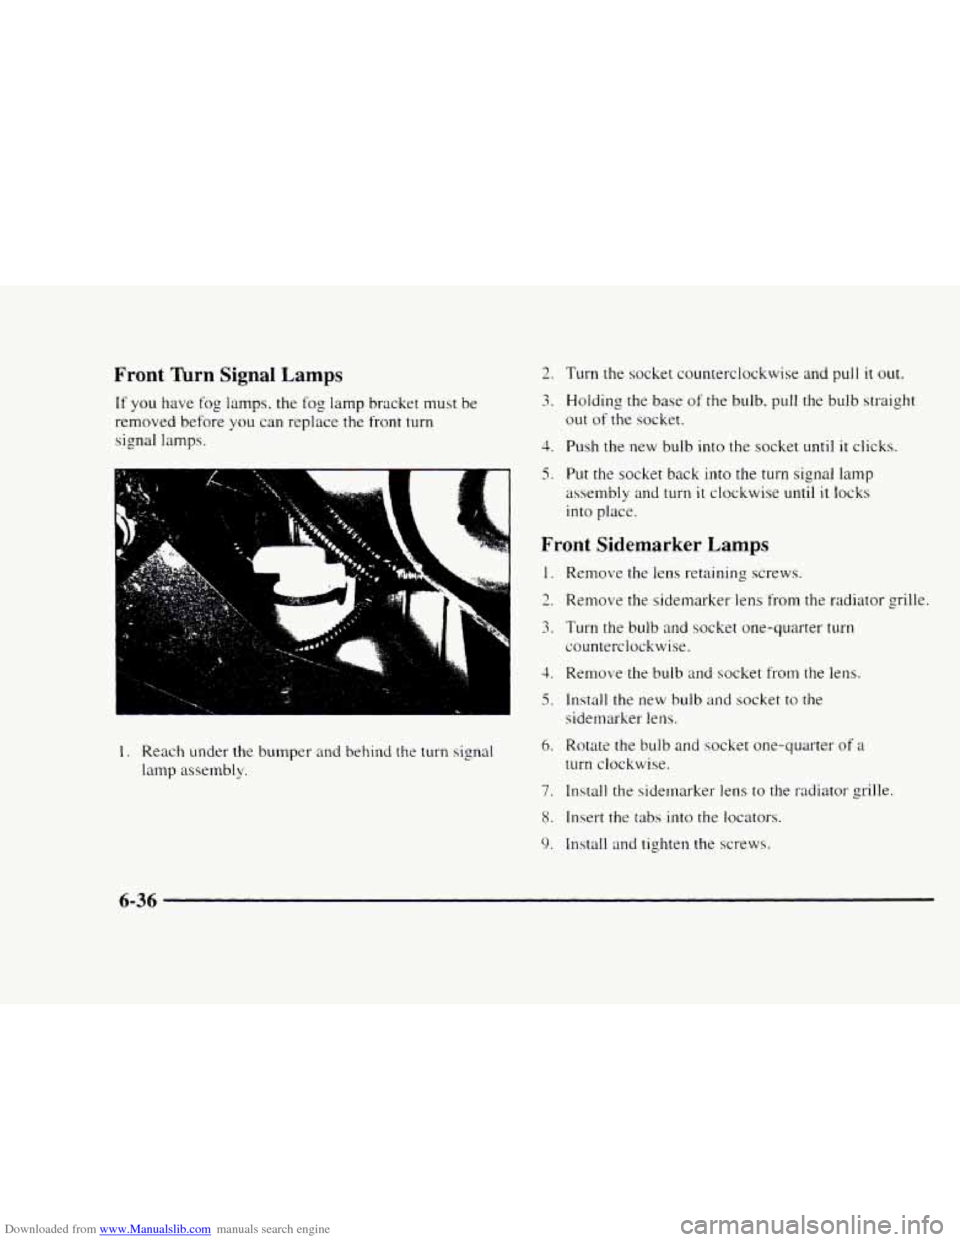
If you have fog lamps. the fog lamp bracket must be
removed before
you can replace the front turn
signal lamps.
U
L 1
2. Turn the socket counterclockwise and pull it out.
3. Holding the base of the bulb, pull the bulb straight
out of the socket.
4. Push the new bulb into the socket until it clicks.
5. Put the socket back into the turn signal lamp
assembly
and turn it clockwise until it locks
into place.
Front Sidemarker Lamps
1.
-. ?
3.
3.
5.
I. Reach under the bumper and behind the turn sipal
lamp assembly. 6.
7.
8.
9.
Remove the lens retaining screws.
Remove the sidemarker lens from the radiator grille.
Turn the bulb
and socket one-quarter turn
counterclockwise.
Remove the bulb
and socket from the lens.
Install the new bulb and socket to the
sidemarker lens.
Rotate the bulb and socket one-quarter
of a
turn clockwise.
Install the sidemarker lens
to the radiator grille.
Insert the tabs
into the locators.
Install
and tighten the screws.
6-36
Page 292 of 402
Downloaded from www.Manualslib.com manuals search engine Taillamps
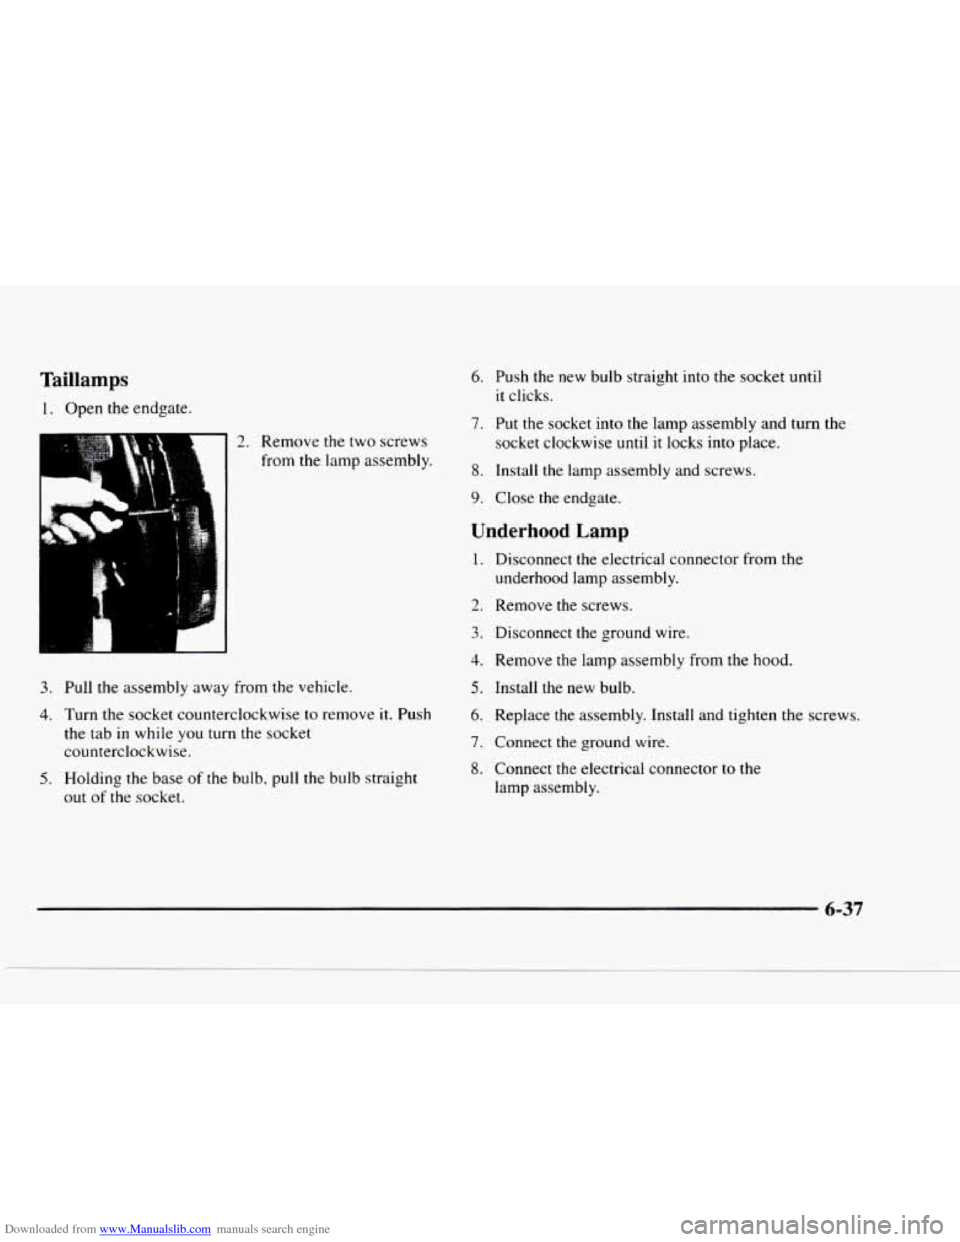
1. Open the endgate.
2. Remove the two screws
from the lamp assembly.
3. Pull the assembly away from the vehicle.
4. Turn the socket counterclockwise to remove it. Push
the tab in while
you turn the socket
counterclockwise.
5. Holding the base of the bulb, pull the bulb straight
out of the socket.
6. Push the new bulb straight into the socket until
it clicks.
7. Put the socket into the lamp assembly and turn the
socket clockwise until it locks into place.
8. Install the lamp assembly and screws.
9. Close the endgate.
Underhood Lamp
1.
2.
3.
4.
5.
6.
7.
8.
Disconnect the electrical connector from the
underhood lamp assembly.
Remove the screws.
Disconnect the ground wire.
Remove the lamp assembly from the hood.
Install the
new bulb.
Replace the assembly. Install and tighten the screws.
Connect
the ground wire.
Connect the electrical connector
to the
lamp assembly.
Page 293 of 402
Downloaded from www.Manualslib.com manuals search engine Front Reading Lamps
1. Use a coin or small screwdriver to unscrew the
center of the overhead console lamp lens while
pressing in
on the lamp assembly.
2. Remove the lamp assembly from the console.
3. Remove the bulb assembly from the lamp assembly.
4. Pull the bulb straight out of the base.
5. Put a new bulb into the bulb base.
6. Install the bulb assembly into the lamp assembly.
7. Place the lamp assembly into the console, turning it
to latch it in place.
8. Install the lens.
Vanity Mirror Lamps
1. Insert the blade of a small screwdriver into the center
slot
at the bottom of the lens.
2. Gently pry the screwdriver down in order to lift out
the lens.
3. Pry out the bulb.
4. Press the new bulb into place.
5. Slide the side tabs of the lens under the side of the
vanity assembly frame.
6. Rotate the lens downward.
7. Snap the lens into the frame.
Windshield Wiper Blade Replacement
See "Normal Maintenance Replacement Parts" in the
Index for the proper type
of replacement blade.
I 1
NOTICE:
Use care when removing or installing a blade
assembly. Accidental bumping can cause the arm
to fall back and strike the windshield.
1. To remove the old wiper blades. lift the wiper arm
until it locks into a vertical position.
6-38
Page 317 of 402
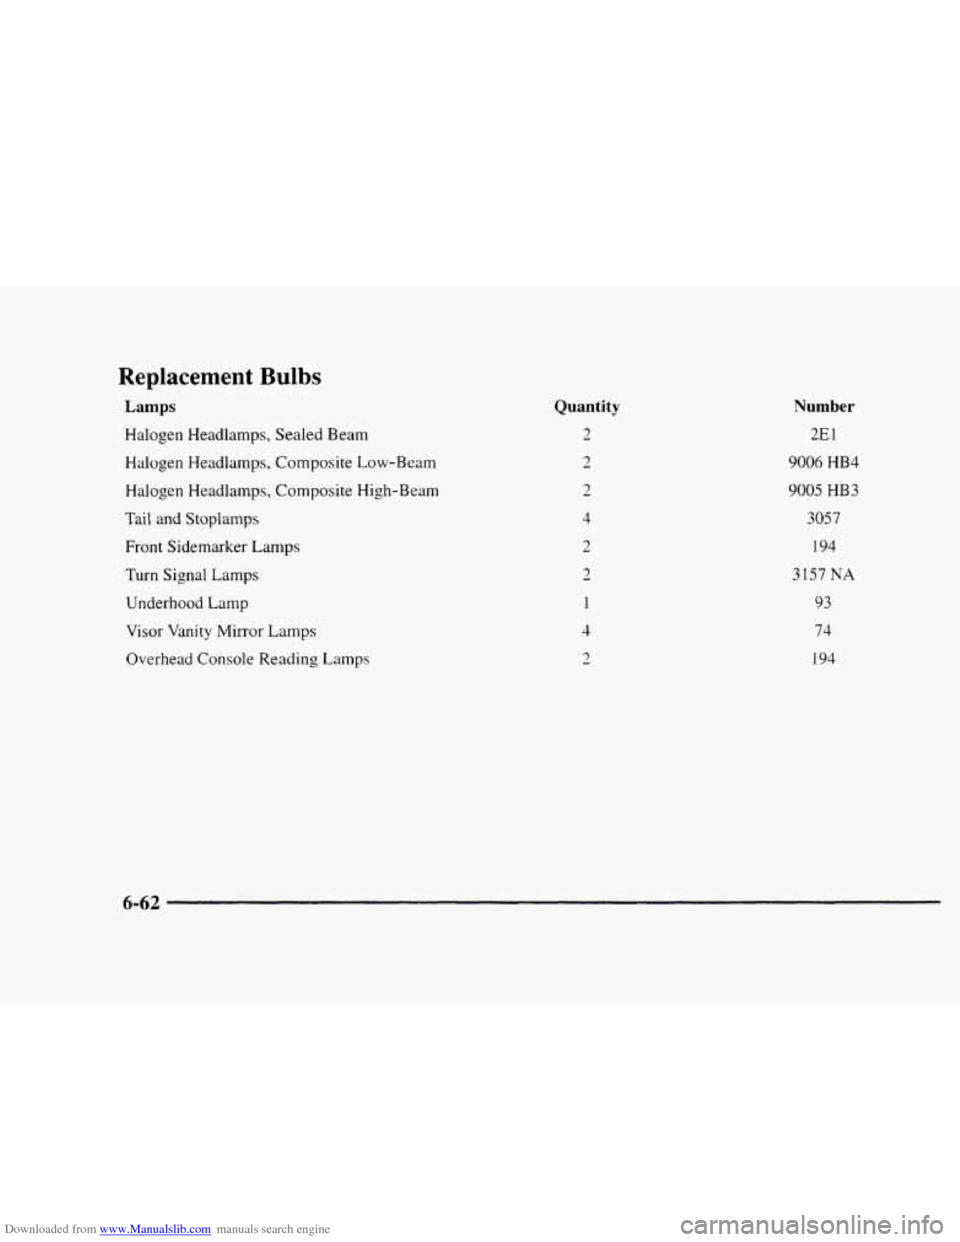
Downloaded from www.Manualslib.com manuals search engine Replacement Bulbs
Lamps
Halogen Headlamps, Sealed Beam
Halogen Headlamps, Composite Low-Beam
Halogen Headlamps, Composite High-Beam
Tail and
Stoplamps
Front Sidemarker Lamps
Turn Signal Lamps
Underhood Lamp
Visor Vanity Mirror Lamps
Overhead Console Reading Lamps
Quantity
2
3
2
4
2
- 3
1
4
- 3
Number
2E
1
9006 HB4
9005 HB3
3057
194
3157 NA
93
74
194
6-62