fuel pressure CHEVROLET BLAZER 1998 2.G Owners Manual
[x] Cancel search | Manufacturer: CHEVROLET, Model Year: 1998, Model line: BLAZER, Model: CHEVROLET BLAZER 1998 2.GPages: 416, PDF Size: 22.4 MB
Page 15 of 416
Downloaded from www.Manualslib.com manuals search engine Vehicle Symbols
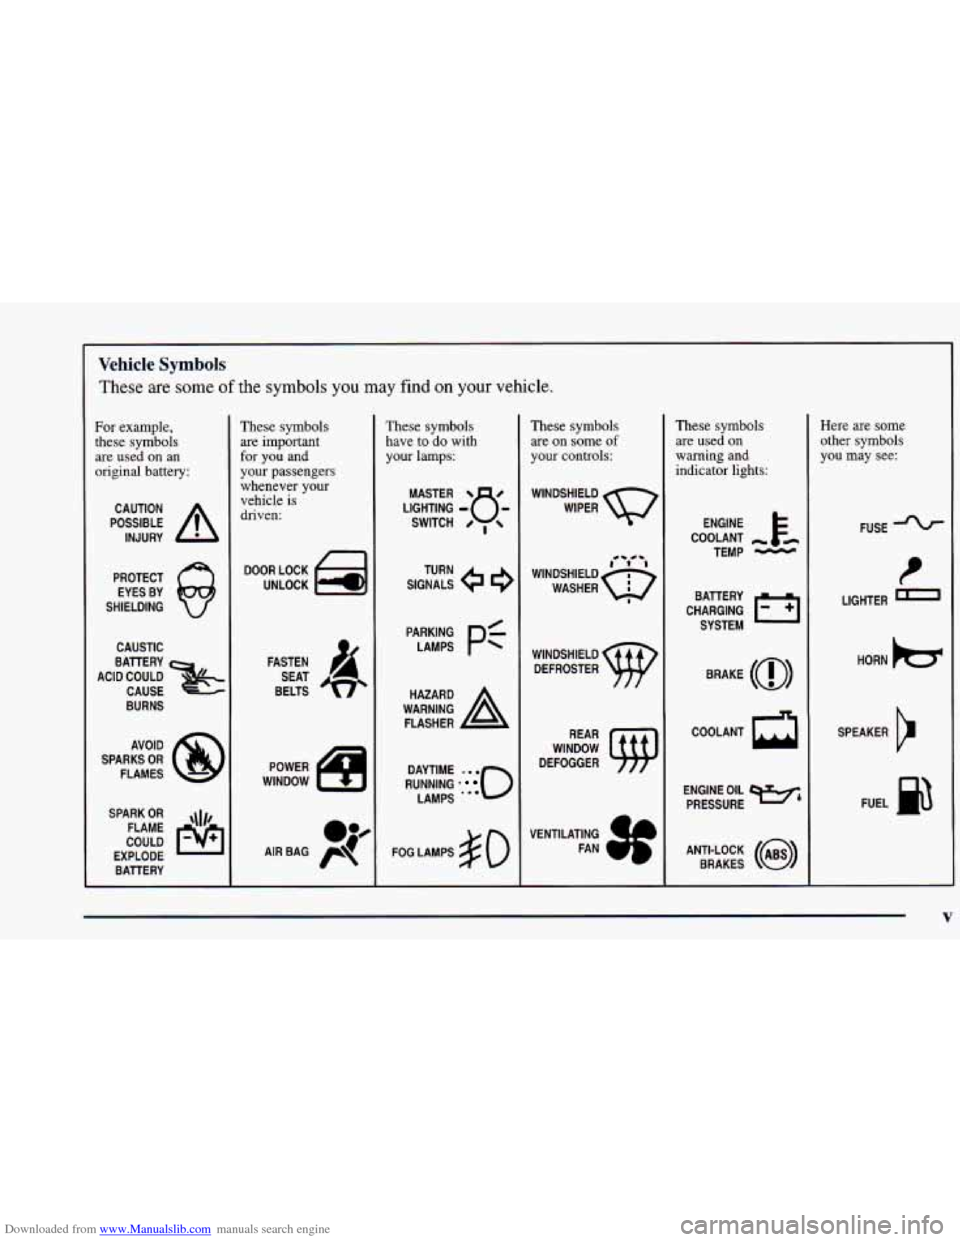
These are some of the symbols you may find on your vehicle.
For example,
these symbols
are used on an
original battery:
POSSIBLE A
CAUTION
INJURY
PROTECT EYES BY
SHIELDING
CAUSTIC
BURNS
SPARK
OR ,111,
COULD FLAME
EXPLODE BATTERY
These symbols
are important
for you and
your passengers
whenever your vehicle is
driven:
FASTEN
SEAT
BELTS
POWER
WINDOW
These symbols have
to do with
your lamps:
SIGNALS e
TURN
RUNNING
* 0
DAYTIME . . .
LAMPS "'
FOG LAMPS # 0
These symbols
are on some
of
your controls:
WINDSHIELD
DEFROSTER
WINDOW
DEFOGGER
VENTILATING FAN
These symbols
are used on
warning and
indicator lights:
COOLANT -
TEMP -
BRAKE (a)
h COOLANT
ENGINE OIL
e,
PRESSURE
ANTI-LOCK
(@)
BRAKES
Here are some
other symbols
you may see:
FUSE -%-
I
LIGHTER m
HORN b
SPEAKER
b
FUEL 93
J
V
Page 149 of 416
Downloaded from www.Manualslib.com manuals search engine Have you recently changed brands of fu.el?
If so, be sure to fuel your vehicle with quality fuel (see
“Fuel” in the Index). Poor fuel quality will cause your
engine not to run as efficiently as designed. You may
notice this as stalling after start-up, stalling when you
put the vehicle into gear, misfiring, hesitation on
acceleration or stumbling on acceleration. (These
conditions may go away once the engine is warmed up.)
This will be detected by the system and cause the light
to turn on.
If you experience one or more of these conditions,
change the fuel brand you use. It will require at least one
full tank of the proper fuel to turn the light off.
If none of the above steps have made the light
turn off,
have your dealer or qualified service center check the
vehicle. Your dealer has the proper test equipment and
diagnostic tools to fix
any mechanical or electrical
problems that may have developed.
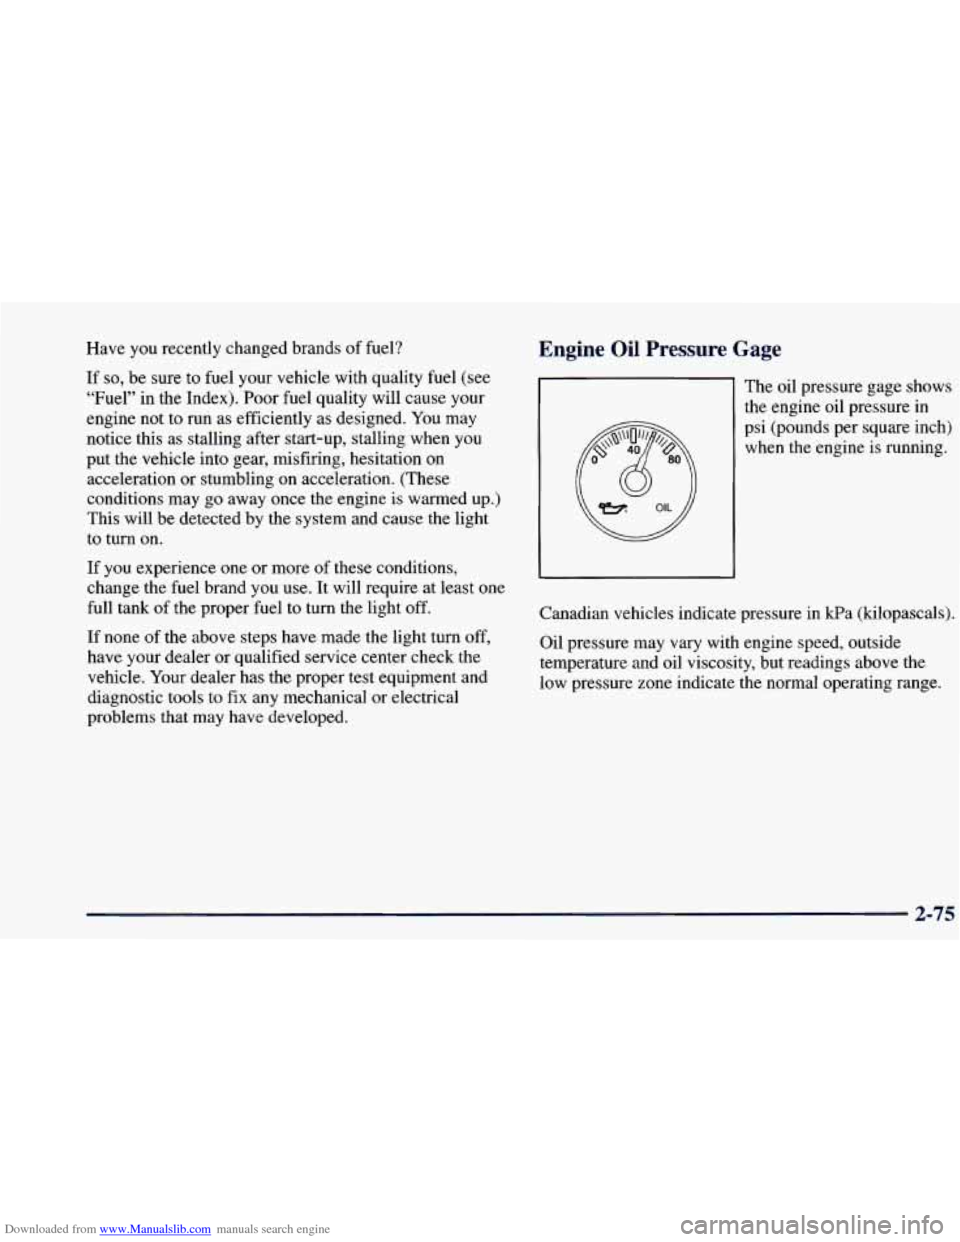
Engine Oil Pressure Gage
The oil pressure gage shows
the engine oil pressure in
psi (pounds per square inch)
when the engine is running.
Canadian vehicles indicate pressure in kPa (kilopascals).
Oil pressure may vary with engine speed, outside
temperature and oil viscosity, but readings above the
low pressure zone indicate the normal operating range.
2-75
Page 215 of 416
Downloaded from www.Manualslib.com manuals search engine The exit speed is usually posted.
Reduce your speed according to your speedometer,
not
to your sense of motion. After driving for any distance
at higher speeds,
you may tend to think you are going
slower than
you actually are.
Before Leaving on a Long Trip
Make sure you’re ready. Try to be well rested. If you
must start when you’re not fresh -- such as after a day’s
work
-- don’t plan to make too many miles that first part
of the journey. Wear comfortable clothing and shoes you
can easily drive in.
Is your vehicle ready for a long trip? If you keep it
serviced and maintained, it’s ready to go. If it needs
service, have it done before starting out. Of course,
you’ll find experienced and able service experts in GM
dealerships all across North America. They’ll be ready
and willing
to help if you need it. Here are
some things you can check before
a trip:
0
0
0
0
0
0
0
Windshield Washer Fluid: Is the reservoir full? Are
all windows clean inside and outside?
Wiper Blades: Are they in good shape?
Fuel, Engine Oil, Other Fluids: Have you checked
all levels?
Lamps: Are they all working? Are the lenses clean?
Tires: They are vitally important to a safe,
trouble-free trip.
Is the tread good enough for
long-distance driving? Are the tires all inflated to the
recommended pressure?
Weather Forecasts: What’s the weather outlook
along your route? Should
you delay your trip a short
time
to avoid a major storm system?
Maps: Do you have up-to-date maps?
4-33
Page 222 of 416
Downloaded from www.Manualslib.com manuals search engine Loading Your Vehicle
I, 1
COLD TIRE PRESSURE . - uu
on
00
\SEE FNER’S MANUAL FOR ADDITIONAL INFORMATION. TI I
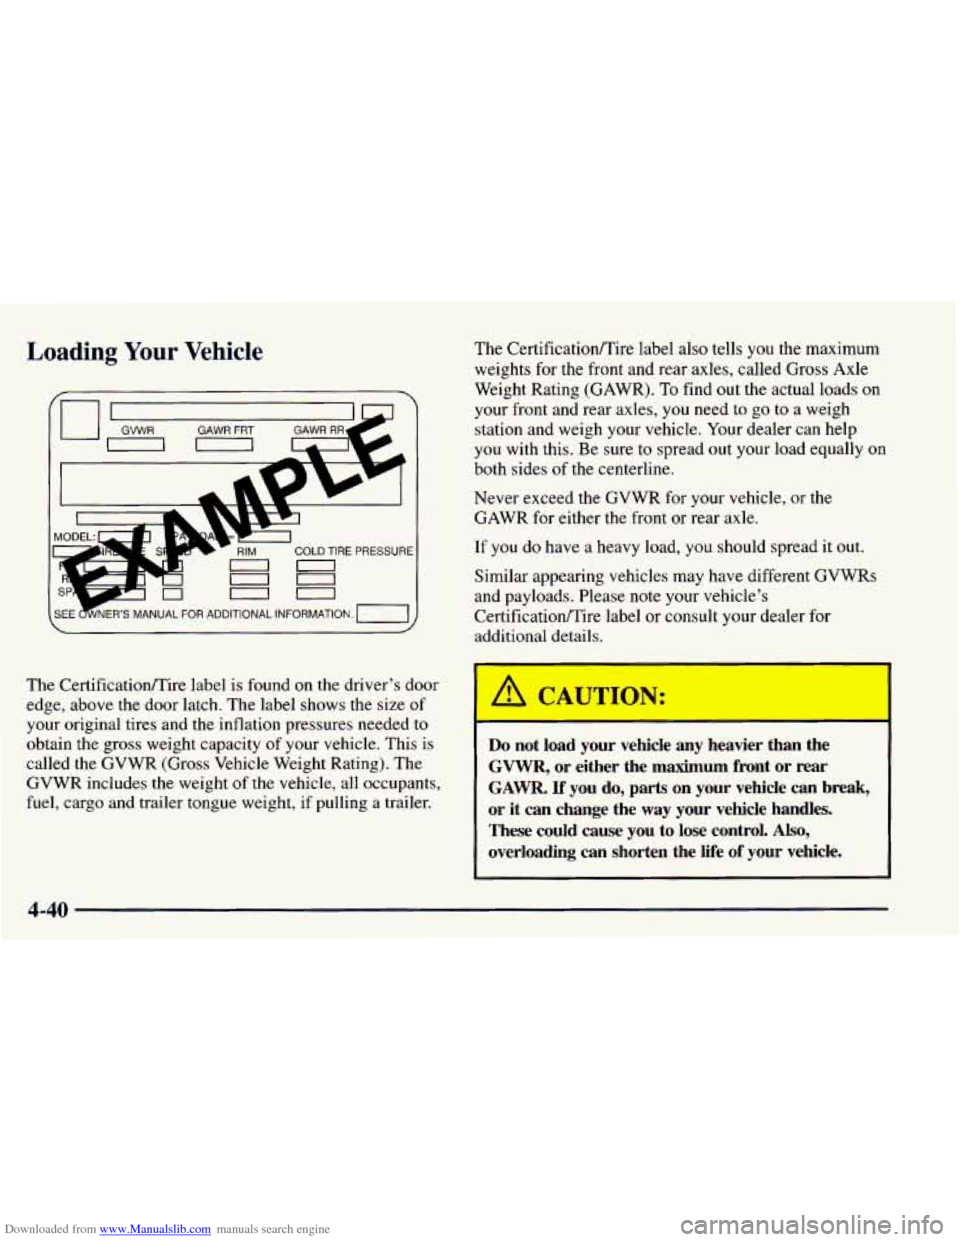
The Certification/Tire label is found on the driver’s door
edge, above the door latch. The label shows the size
of
your original tires and the inflation pressures needed to
obtain the gross weight capacity
of your vehicle. This is
called the GVWR (Gross Vehicle Weight Rating). The
GVWR includes the weight of the vehicle, all occupants,
fuel, cargo and trailer tongue weight, if pulling a trailer. The
Certificatioflire label
also tells you the maximum
weights for the front and rear axles, called Gross Axle
Weight Rating (GAWR).
To find out the actual loads on
your front and rear axles, you need to go to a weigh
station and weigh your vehicle. Your dealer can help
you with this. Be sure to spread out your load equally on
both sides of the centerline.
Never exceed
the GVWR for your vehicle, or the
GAWR for either the front
or rear axle.
If you do have a heavy load,
you should spread it out.
Similar appearing vehicles may have different GVWRs
and payloads. Please note your vehicle’s
CertificationjTire label or consult your dealer for
additional details.
/A CAULON:
Do not load your vehicle any heavier than the
GVWR, or either the maximum front or rear
GAWR. If you do, parts on your vehicle can break,
or it can change the way your vehicle handles.
These could cause you to lose control.
Also,
overloading can shorten the life of your vehicle.
4-40
Page 252 of 416
Downloaded from www.Manualslib.com manuals search engine 8. Then replace the pressure cap. At any time during
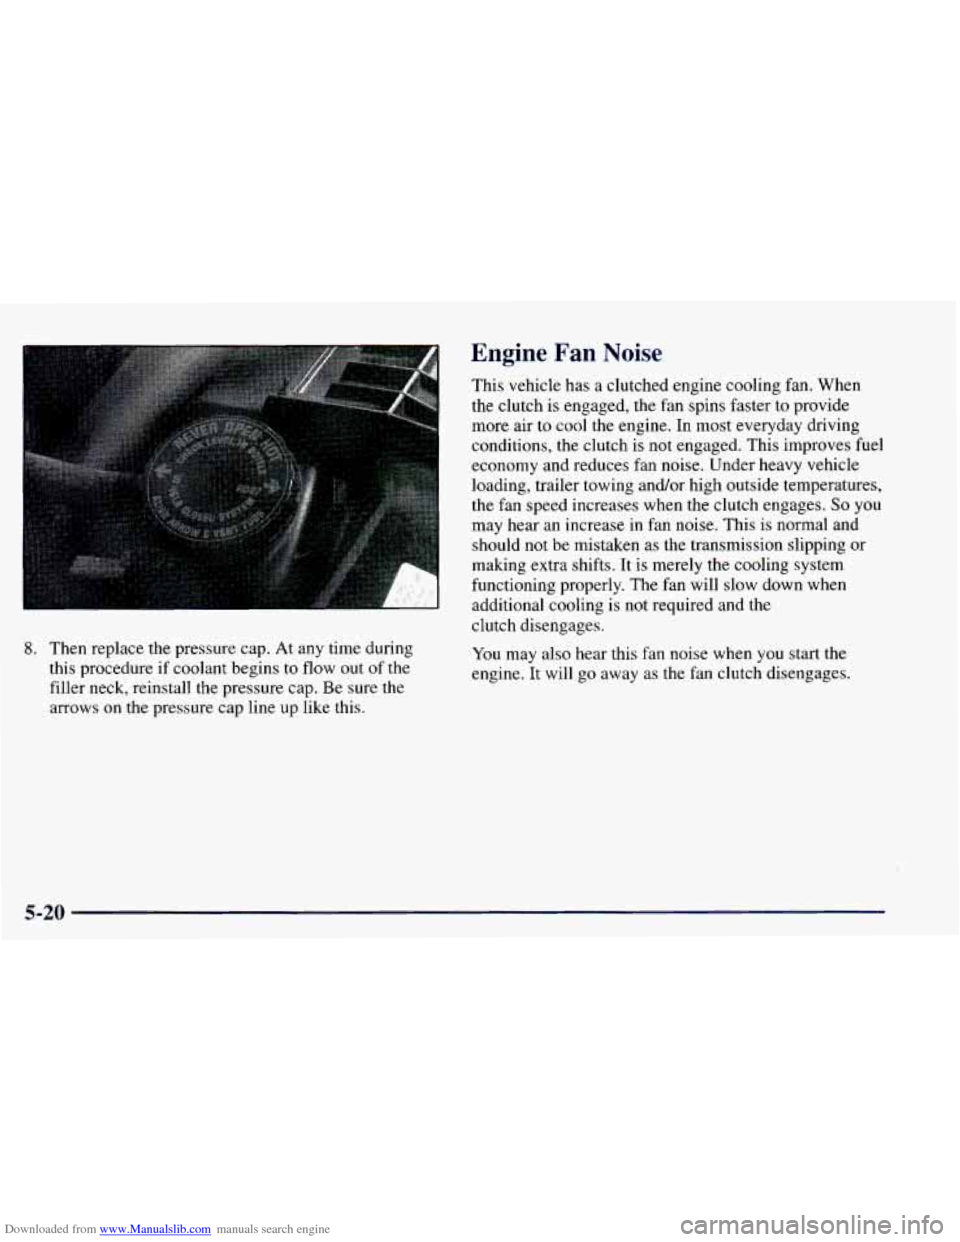
this procedure if coolant begins to flow out of the
filler neck, reinstall the pressure cap. Be sure the
arrows on the pressure cap line
up like this.
Engine Fan Noise
This vehicle has a clutched engine cooling fan. When
the clutch is engaged, the fan spins faster
to provide
more air to cool the engine.
In most everyday driving
conditions, the clutch is not engaged. This improves fuel
economy and reduces fan noise. Under heavy vehicle
loading, trailer towing and/or high outside temperatures,
the fan speed increases when the clutch engages.
So you
may hear an increase
in fan noise. This is normal and
should
not be mistaken as the transmission slipping or
making extra shifts. It is merely the cooling system
functioning properly. The fan will slow down when
additional cooling is
not required and the
clutch disengages.
You may also hear this fan noise when you start the
engine. It will go away
as the fan clutch disengages.
5-20
Page 271 of 416
Downloaded from www.Manualslib.com manuals search engine Section 6 Service and Appnara-- ~2 Care
Here you will find information about the care of your vehicle. This section begins with service and fuel information,
and then it shows how to check important fluid and lubricant levels. There is also technical information about your
vehicle, and a part devoted to its appearance care.
6-2
6-3
6-5
6-5
6-7
6-8
6-10
6- 14
6-15
6-1 9
6-20
6-2
1
6-22 6-23
6-26 6-27
6-27
Service
Fuel
Fuels
in Foreign Countries
Filling Your Tank
Filling a Portable Fuel Container
Checking Things Under the Hood
Engine Oil
Air Cleaner
Automatic Transmission Fluid
Manual Transmission Fluid
Hydraulic Clutch
Rear Axle
Four-wheel Drive
Engine Coolant
Radiator Pressure Cap
Thermostat Power Steering Fluid 6-28
6-29
6-32
6-33
6-38
6-40
6-49
6-50
6-52
6-54
6-57
6-58
6-58
6-58
6-64 6-64
6-65 Windshield Washer Fluid
Brakes
Battery
Bulb Replacement
Windshield Wiper Blade Replacement
Tires
Appearance Care
Cleaning the Inside of Your Vehicle
Care
of Safety Belts
Cleaning the Outside
of Your Vehicle
Appearance Care Materials Chart
Vehicle Identification Number (VTN)
Service Parts Identification Label
Electrical System
Replacement Bulbs Capacities and Specifications
Air Conditioning Refrigerants
Page 280 of 416
Downloaded from www.Manualslib.com manuals search engine Before closing the hood, be sure all the filler caps are on
properly. Then lift the hood to relieve pressure
on the
hood prop.
Remove the hood prop from the slot in the hood and
return the prop to
its retainer.
Then just pull the hood down firmly to close. It
will
latch when dropped from 10 to12 inches (25 to 30 cm)
without pressing
on the hood.
Engine Oil
It’s a good idea to check your engine oil every time you
get fuel. In order to get an accurate reading, the oil must
be warm and the vehicle must be on level ground.
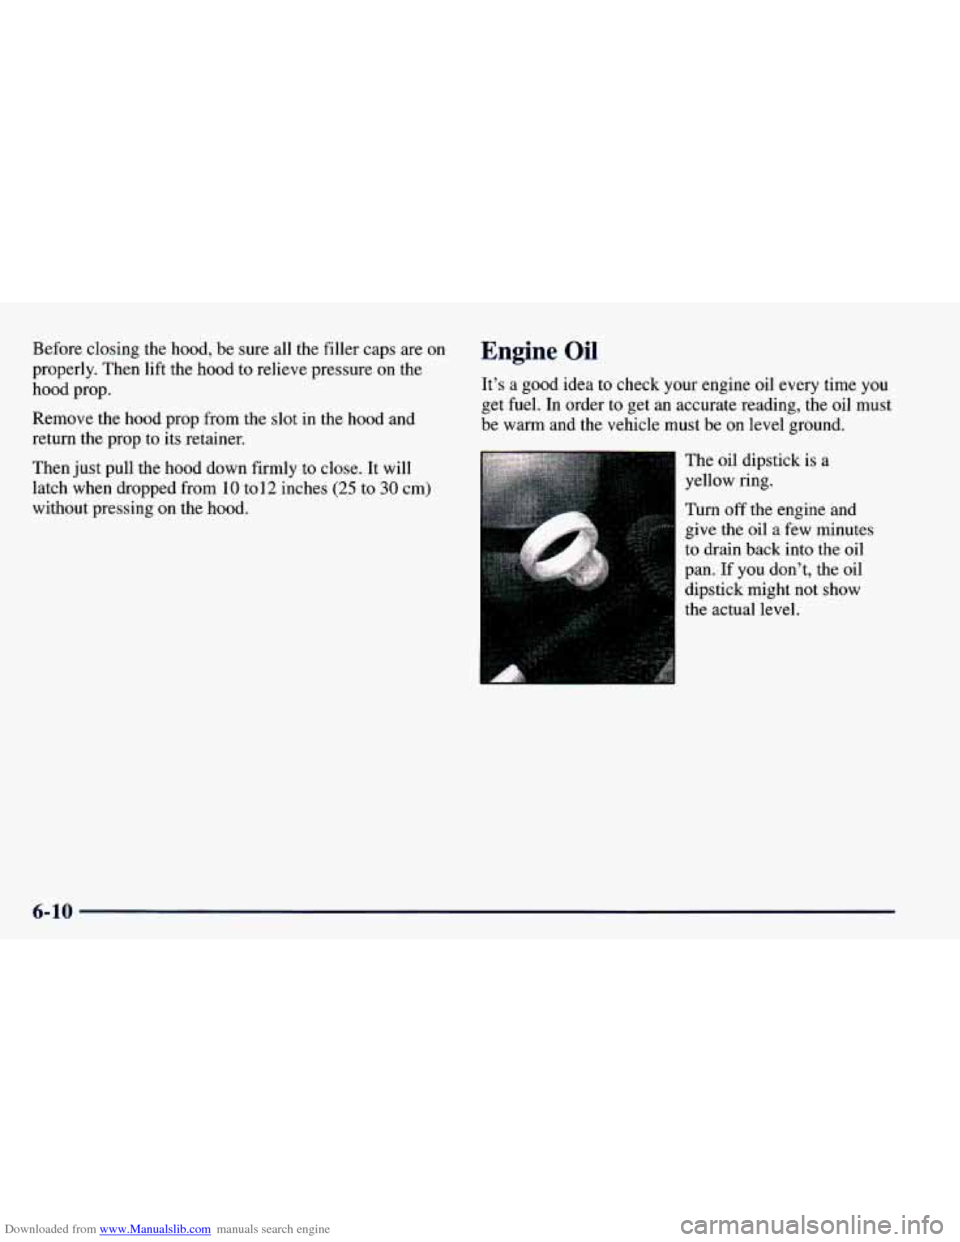
The oil dipstick is a
yellow ring.
Turn
off the engine and
give the oil
a few minutes
to drain back into the oil
pan.
If you don’t, the oil
dipstick might not show
the actual level.
6-10
Page 311 of 416
Downloaded from www.Manualslib.com manuals search engine I
Poorly maintained and improperly used tires are dangerous.
0
0
0
0
Overloading your tires can cause overheating
as a result of too much friction.
You could
have an airout and a serious accident.
See
“Loading Your Vehicle” in the Index.
Underinflated tires pose the same danger as
overloaded tires. The resulting accident
could cause serious injury. Check all tires
frequently to maintain the recommended pressure. Tire pressure should be checked when your tires are cold.
Overinflated tires are more likely to be
cut, punctured or broken by
a sudden
impact
-- such as when you hit a pothole.
Keep tires at the recommended pressure.
Worn, old tires can cause accidents.
If your
tread is badly worn, or if your tires have
been damaged, replace them.
Inflation -- Tire Pressure
The CertificatiodTire label, which is on the driver’s
door edge, above the door latch, shows the correct
inflation pressures for your tires when they’re cold.
“Cold” means your vehicle has been sitting
for at least
three hours or driven
no more than 1 mile (1.6 km).
NOTICE:
Don’t let anyone tell you that underinflation or
overinflation is all right. It’s not.
If your tires
don’t have enough air (underinflation), you can
get the following:
0 Too much flexing
0 Too much heat
Tire overloading
Bad wear
Bad handling
Bad fuel economy.
NOTICE: (Continued)
6-41
Page 333 of 416
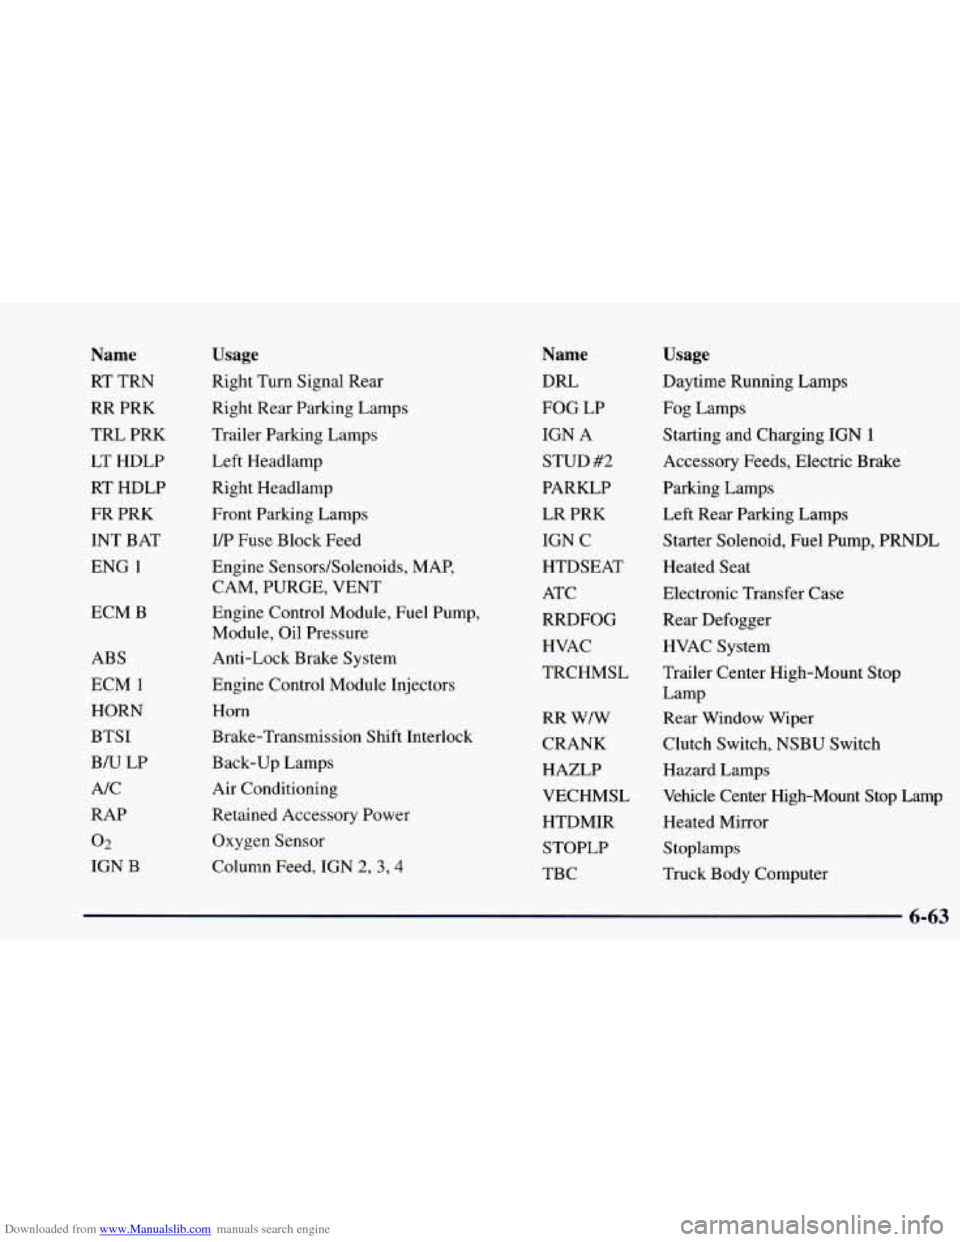
Downloaded from www.Manualslib.com manuals search engine Name
RT TRN
RR PRK
TRL PRK
LT HDLP
RT HDLP
FR PRK
INT BAT
ENG
1
ECM B
ABS
ECM
1
HORN
BTSI
BN LP
NC
RAP
02
IGN B
Usage
Right Turn Signal Rear
Right Rear Parking Lamps
Trailer Parking Lamps
Left Headlamp
Right Headlamp
Front Parking Lamps I/P Fuse Block Feed
Engine Sensors/Solenoids, MAP,
CAM, PURGE, VENT
Engine Control Module,
Fuel Pump,
Module, Oil Pressure
Anti-Lock Brake System
Engine Control Module Injectors
Horn
Brake-Transmission Shift Interlock
Back-up Lamps
Air Conditioning
Retained Accessory Power Oxygen Sensor
Column Feed, IGN
2, 3,4
Name
DRL
FOG LP
IGN A
STUD #2
PARKLP LR PRK
IGN C
HTDSEAT
ATC
RRDFOG
HVAC
TRCHMSL
RR WIW
CRANK
HAZLP
VECHMSL
HTDMIR STOPLP
TBC
Usage
Daytime Running Lamps
Fog Lamps Starting and Charging IGN
1
Accessory Feeds, Electric Brake
Parking Lamps
Left Rear Parking Lamps
Starter Solenoid, Fuel Pump, PRNDL
Heated Seat
Electronic Transfer Case
Rear Defogger HVAC System
Trailer Center High-Mount Stop
Lamp
Rear Window Wiper
Clutch Switch, NSBU Switch
Hazard Lamps
Vehicle Center High-Mount Stop Lamp
Heated Mirror
S toplamps
Truck Body Computer
6-63
Page 375 of 416
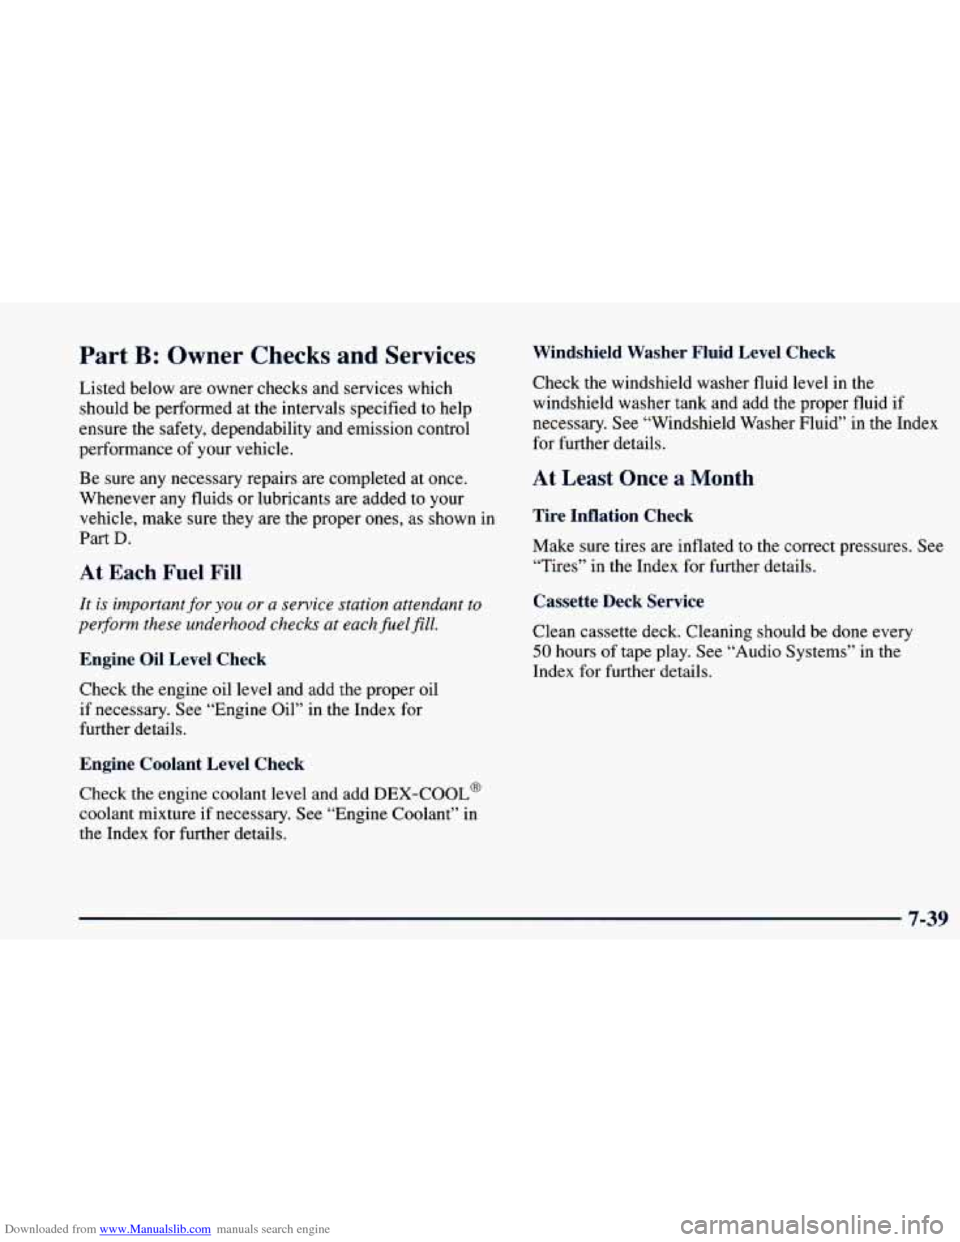
Downloaded from www.Manualslib.com manuals search engine Part B: Owner Checks and Services
Listed below are owner checks and services which
should be performed at the intervals specified to help
ensure the safety, dependability and emission control
performance of your vehicle.
Be sure any necessary repairs are completed at once.
Whenever any fluids
or lubricants are added to your
vehicle, make sure they are the proper ones, as shown in
Part
D.
At Each Fuel Fill
It is important for you or a service station attendant to
perform these underhood checks at each fuel
fill.
Engine Oil Level Check
Check the engine oil level and add the proper oil
if necessary. See “Engine Oil” in the Index for
further details.
Engine Coolant Level Check
Check the engine coolant level and add DEX-COOL@
coolant mixture if necessary. See “Engine Coolant” in
the Index for further details.
Windshield Washer Fluid Level Check
Check the windshield washer fluid level in the
windshield washer tank and add the proper fluid if
necessary. See “Windshield Washer Fluid” in the Index
for further details.
At Least Once a Month
Tin - ation Check
Make sure tires are inflated to the correa pressures. See
“Tires” in the Index for further details.
Cassette Deck Service
Clean cassette deck. Cleaning should be done every
50 hours of tape play. See “Audio Systems” in the
Index for further details.
7-39