CHEVROLET BLAZER 2003 2.G Owners Manual
Manufacturer: CHEVROLET, Model Year: 2003, Model line: BLAZER, Model: CHEVROLET BLAZER 2003 2.GPages: 420, PDF Size: 2.94 MB
Page 311 of 420

If the level is below the bottom of the ®ller plug hole,
you may need to add some lubricant.
When the differential is cold, add enough lubricant to
raise the level to 1/2 inch (12 mm) below the ®ller
plug hole.
When the differential is at operating temperature
(warm), add enough lubricant to raise the level to the
bottom of the ®ller plug hole.
What to Use
Refer to the Maintenance Schedule to determine what
kind of lubricant to use. SeePart D: Recommended
Fluids and Lubricants on page 6-33.
Bulb Replacement
SeeReplacement Bulbs on page 5-52for the proper
types of bulbs to use. For any bulb changing procedure
not listed in this section, contact your GM dealer.
Halogen Bulbs
{CAUTION:
Halogen bulbs have pressurized gas inside
and can burst if you drop or scratch the bulb.
You or others could be injured. Be sure to read
and follow the instructions on the bulb
package.
5-47
Page 312 of 420
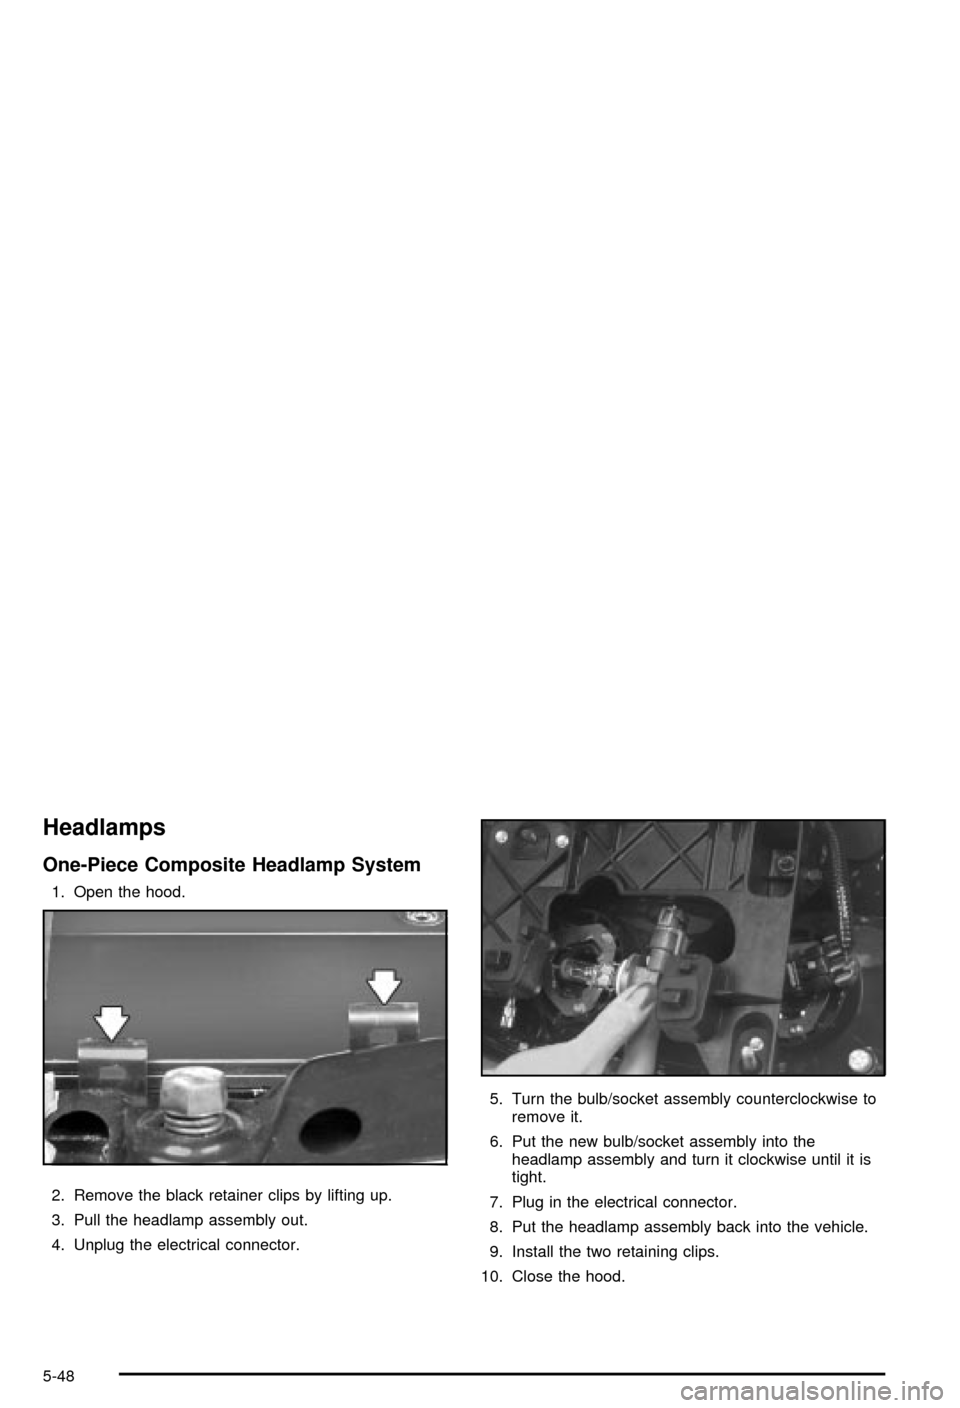
Headlamps
One-Piece Composite Headlamp System
1. Open the hood.
2. Remove the black retainer clips by lifting up.
3. Pull the headlamp assembly out.
4. Unplug the electrical connector.5. Turn the bulb/socket assembly counterclockwise to
remove it.
6. Put the new bulb/socket assembly into the
headlamp assembly and turn it clockwise until it is
tight.
7. Plug in the electrical connector.
8. Put the headlamp assembly back into the vehicle.
9. Install the two retaining clips.
10. Close the hood.
5-48
Page 313 of 420
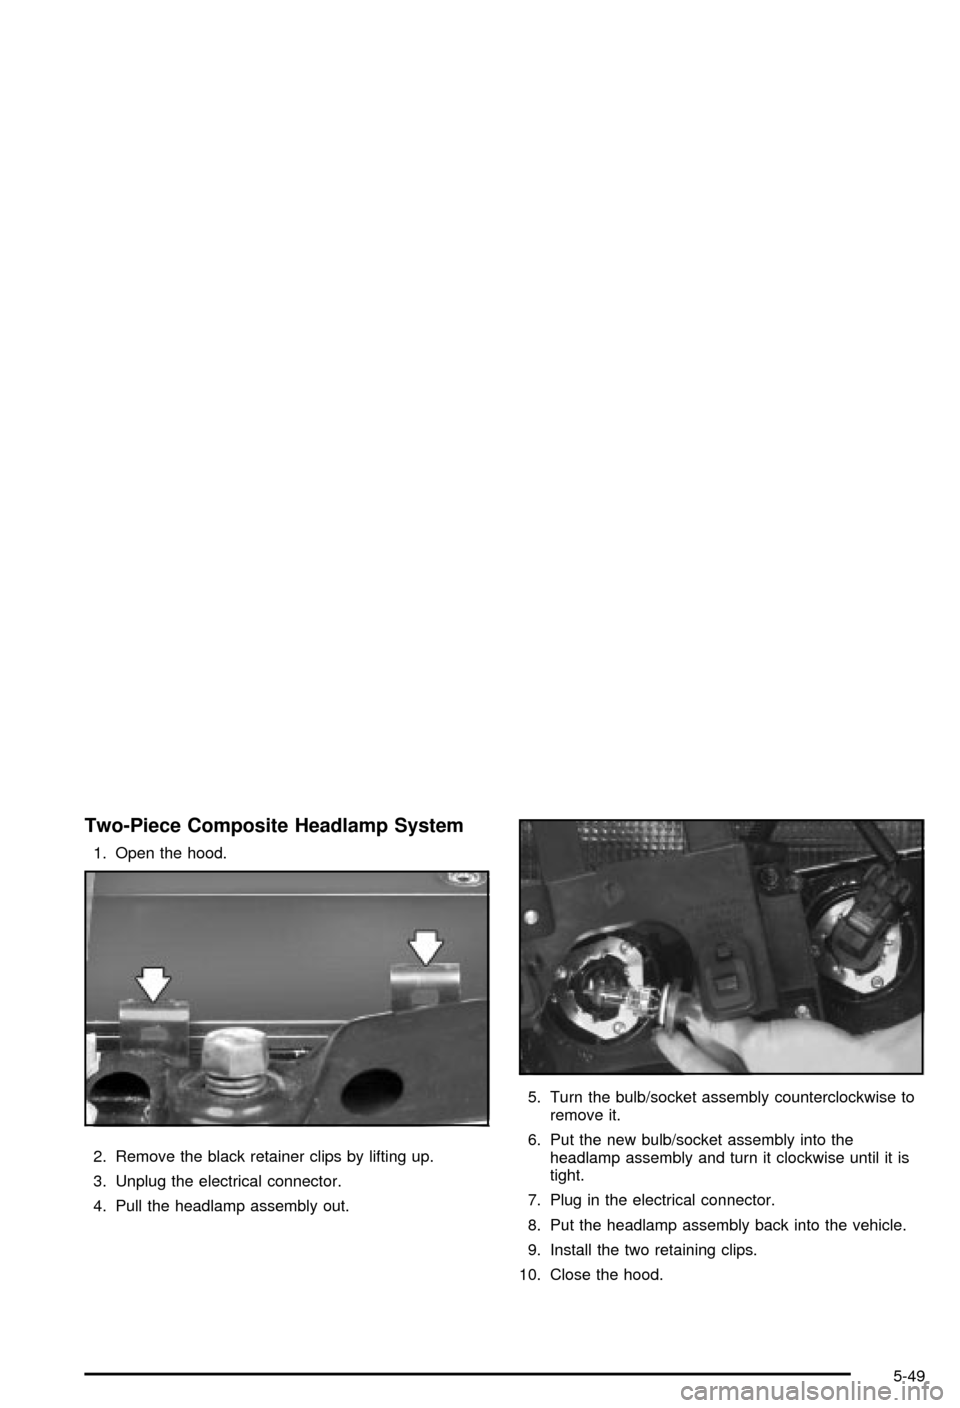
Two-Piece Composite Headlamp System
1. Open the hood.
2. Remove the black retainer clips by lifting up.
3. Unplug the electrical connector.
4. Pull the headlamp assembly out.5. Turn the bulb/socket assembly counterclockwise to
remove it.
6. Put the new bulb/socket assembly into the
headlamp assembly and turn it clockwise until it is
tight.
7. Plug in the electrical connector.
8. Put the headlamp assembly back into the vehicle.
9. Install the two retaining clips.
10. Close the hood.
5-49
Page 314 of 420
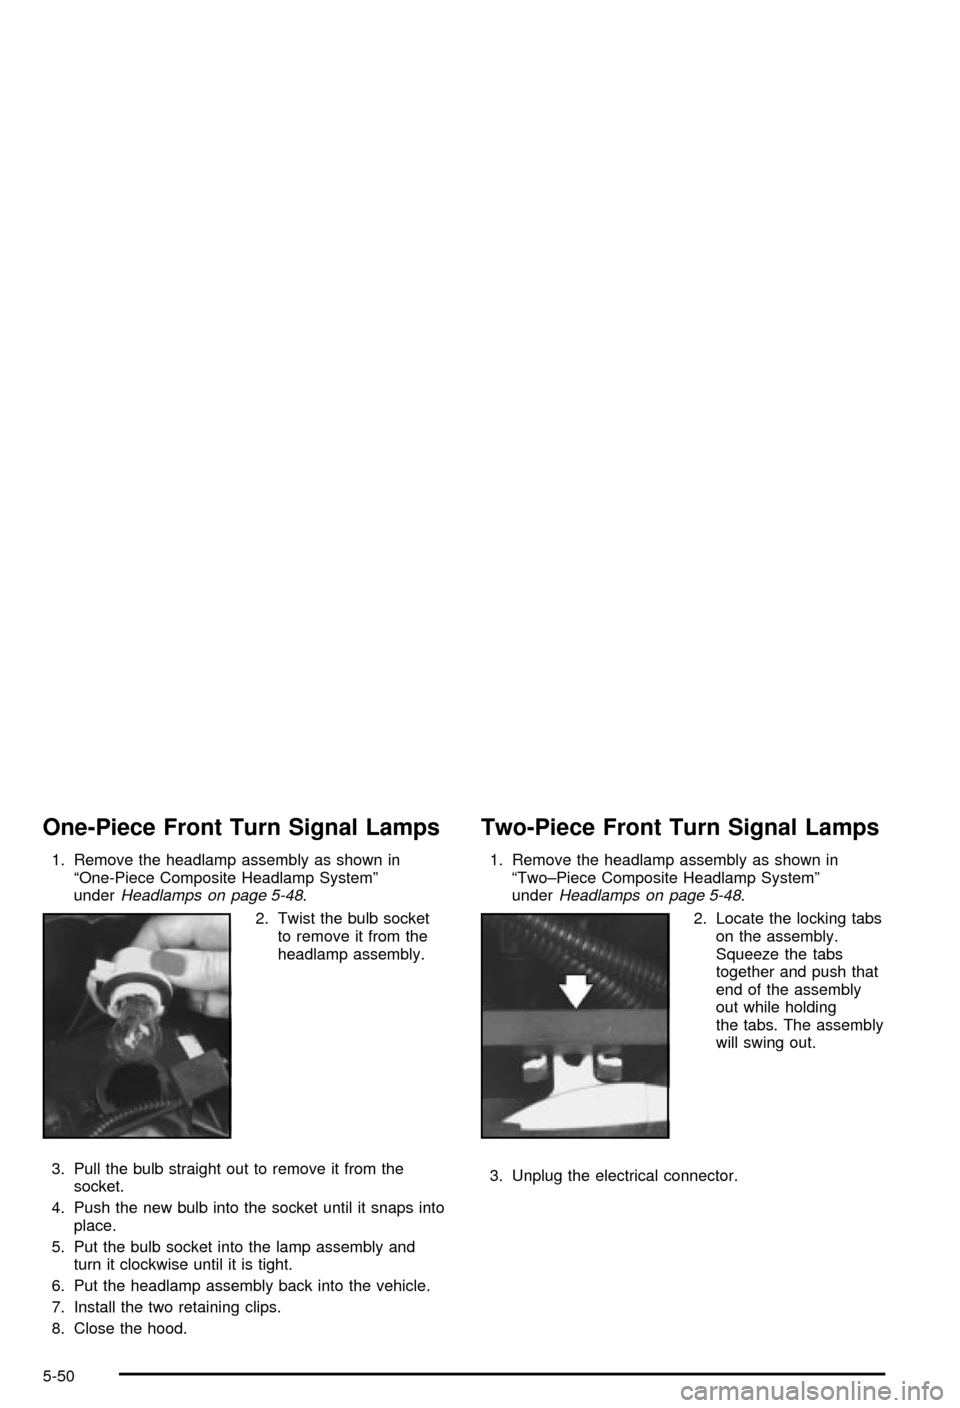
One-Piece Front Turn Signal Lamps
1. Remove the headlamp assembly as shown in
ªOne-Piece Composite Headlamp Systemº
under
Headlamps on page 5-48.
2. Twist the bulb socket
to remove it from the
headlamp assembly.
3. Pull the bulb straight out to remove it from the
socket.
4. Push the new bulb into the socket until it snaps into
place.
5. Put the bulb socket into the lamp assembly and
turn it clockwise until it is tight.
6. Put the headlamp assembly back into the vehicle.
7. Install the two retaining clips.
8. Close the hood.
Two-Piece Front Turn Signal Lamps
1. Remove the headlamp assembly as shown in
ªTwo±Piece Composite Headlamp Systemº
under
Headlamps on page 5-48.
2. Locate the locking tabs
on the assembly.
Squeeze the tabs
together and push that
end of the assembly
out while holding
the tabs. The assembly
will swing out.
3. Unplug the electrical connector.
5-50
Page 315 of 420
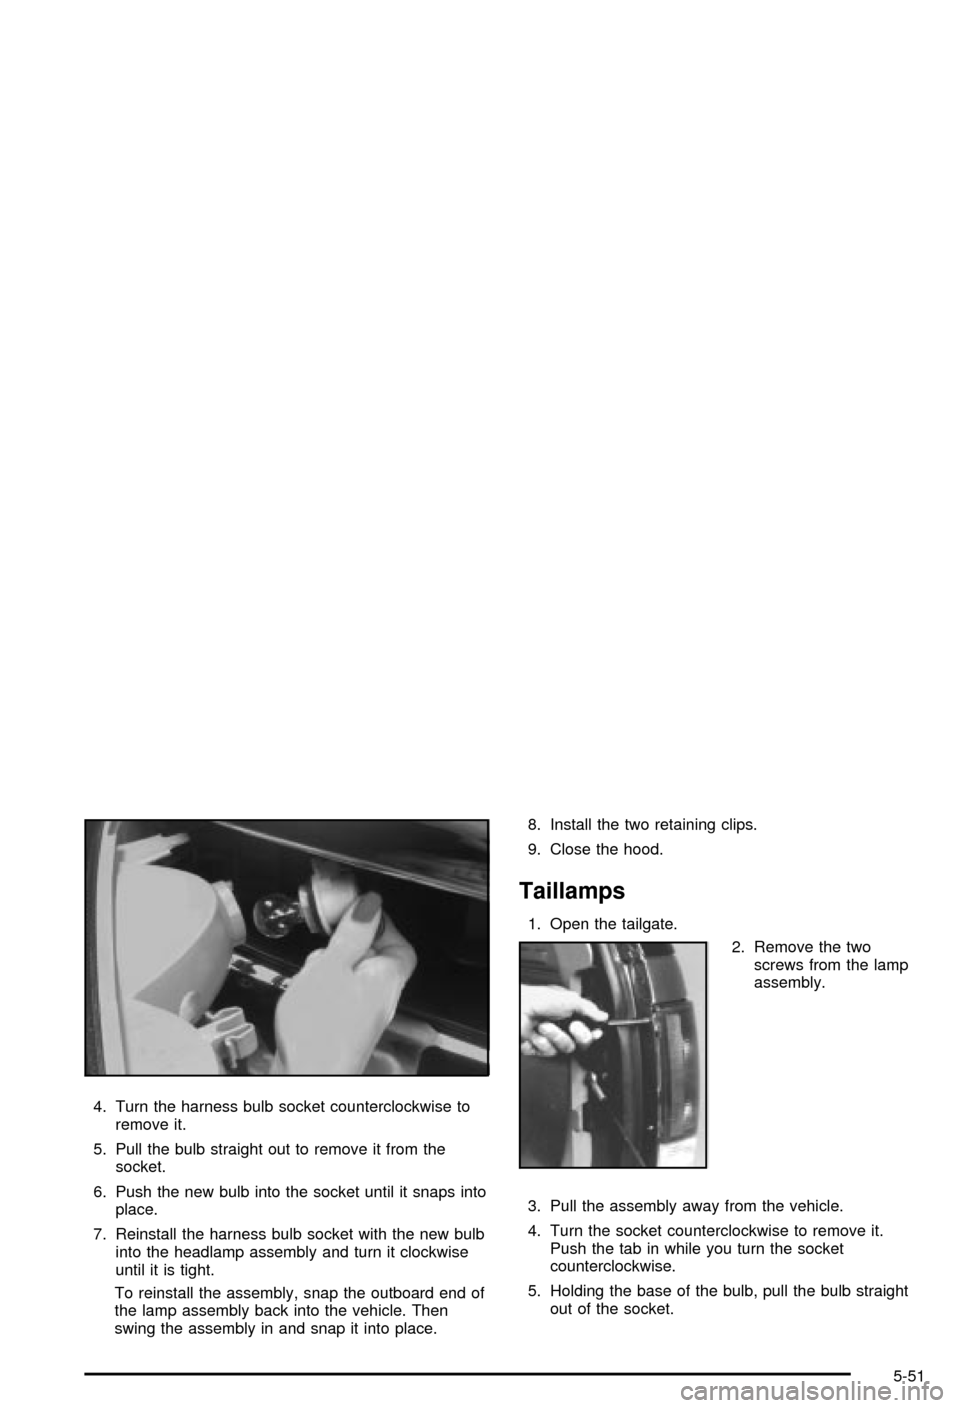
4. Turn the harness bulb socket counterclockwise to
remove it.
5. Pull the bulb straight out to remove it from the
socket.
6. Push the new bulb into the socket until it snaps into
place.
7. Reinstall the harness bulb socket with the new bulb
into the headlamp assembly and turn it clockwise
until it is tight.
To reinstall the assembly, snap the outboard end of
the lamp assembly back into the vehicle. Then
swing the assembly in and snap it into place.8. Install the two retaining clips.
9. Close the hood.
Taillamps
1. Open the tailgate.
2. Remove the two
screws from the lamp
assembly.
3. Pull the assembly away from the vehicle.
4. Turn the socket counterclockwise to remove it.
Push the tab in while you turn the socket
counterclockwise.
5. Holding the base of the bulb, pull the bulb straight
out of the socket.
5-51
Page 316 of 420

6. Push the new bulb straight into the socket until it
clicks.
7. Put the socket into the assembly and turn the
socket clockwise until it locks in place.
8. Install the lamp assembly and tighten the screws.
9. Close the tailgate.
Replacement Bulbs
Lamp Number
Halogen Headlamps, Composite
Low Beam9006 HB4 or
9006LL
Halogen Headlamps, Composite
High Beam9005 HB3
Taillamps 3057
Turn Signal Lamps 3457A
*For replacement bulbs not listed here, please consult
your dealer.
Windshield Wiper Blade
Replacement
Windshield wiper blades should be inspected at least
twice a year for wear and cracking. See ªWiper
Blade Checkº under
Cleaning the Outside of Your
Vehicle on page 5-79for more information.
Replacement blades come in different types and are
removed in different ways. For proper type and length,
see
Normal Maintenance Replacement Parts on
page 5-92.
Notice:Use care when removing or installing a
blade assembly. Accidental bumping can cause the
arm to fall back and strike the windshield.
1. To remove the old wiper blades, lift the wiper arm
until it locks into a vertical position.
5-52
Page 317 of 420

A. Blade Assembly
B. Arm Assembly
C. Locking TabD. Blade Pivot
E. Hook Slot
F. Arm Hook
2. Press down on the blade assembly pivot locking
tab. Pull down on the blade assembly to release it
from the wiper arm hook.3. Remove the insert from the blade assembly. The
insert has two notches at one end that are locked
by bottom claws of the blade assembly. At the
notched end, pull the insert from the blade
assembly.
4. To install the new wiper insert, slide the insert (D),
notched end last, into the end with two blade
claws (A). Slide the insert all the way through the
blade claws at the opposite end (B). The plastic
caps (C) will be forced off as the insert is fully
inserted.
5. Be sure that the notches are locked by the bottom
claws. Make sure that all other claws are properly
locked on both sides of the insert slots.
5-53
Page 318 of 420

A. Claw in Notch
B. Correct Installation
C. Incorrect Installation
6. Put the blade assembly pivot in the wiper arm
hook. Pull up until the pivot locking tab locks in
the hook slot.
7. Carefully lower the wiper arm and blade assembly
onto the windshield.
Backglass Wiper Blade Replacement
The backglass wiper blade will not lock in a vertical
position like the windshield wiper blade, so care should
be used when pulling it away from the vehicle.
Tires
Your new vehicle comes with high-quality tires made by
a leading tire manufacturer. If you ever have questions
about your tire warranty and where to obtain service,
see your Chevrolet Warranty booklet for details.
5-54
Page 319 of 420
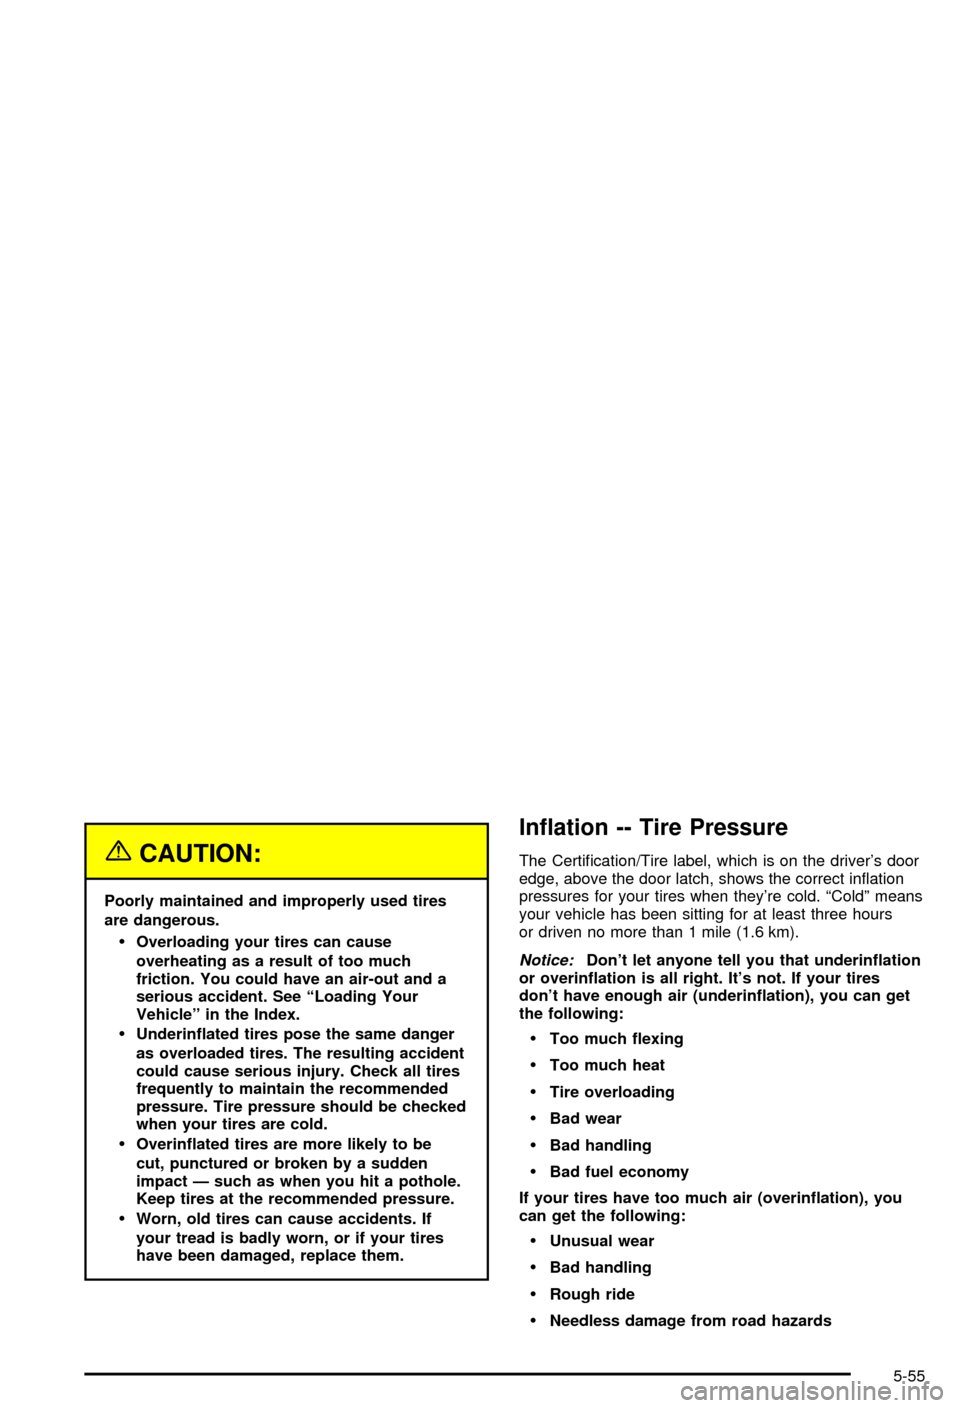
{CAUTION:
Poorly maintained and improperly used tires
are dangerous.
·Overloading your tires can cause
overheating as a result of too much
friction. You could have an air-out and a
serious accident. See ªLoading Your
Vehicleº in the Index.
·Underin¯ated tires pose the same danger
as overloaded tires. The resulting accident
could cause serious injury. Check all tires
frequently to maintain the recommended
pressure. Tire pressure should be checked
when your tires are cold.
·Overin¯ated tires are more likely to be
cut, punctured or broken by a sudden
impact Ð such as when you hit a pothole.
Keep tires at the recommended pressure.
·Worn, old tires can cause accidents. If
your tread is badly worn, or if your tires
have been damaged, replace them.
In¯ation -- Tire Pressure
The Certi®cation/Tire label, which is on the driver's door
edge, above the door latch, shows the correct in¯ation
pressures for your tires when they're cold. ªColdº means
your vehicle has been sitting for at least three hours
or driven no more than 1 mile (1.6 km).
Notice:Don't let anyone tell you that underin¯ation
or overin¯ation is all right. It's not. If your tires
don't have enough air (underin¯ation), you can get
the following:
·Too much ¯exing
·Too much heat
·Tire overloading
·Bad wear
·Bad handling
·Bad fuel economy
If your tires have too much air (overin¯ation), you
can get the following:
·Unusual wear
·Bad handling
·Rough ride
·Needless damage from road hazards
5-55
Page 320 of 420

When to Check
Check your tires once a month or more.
Also, check the tire pressure of the spare tire.
If you have a compact spare tire, it should be at
60 psi (420 kPa).
How to Check
Use a good quality pocket-type gage to check tire
pressure. You can't tell if your tires are properly in¯ated
simply by looking at them. Radial tires may look
properly in¯ated even when they're underin¯ated.
Be sure to put the valve caps back on the valve stems.
They help prevent leaks by keeping out dirt and
moisture.
Tire Inspection and Rotation
Tires should be rotated every 6,000 to 8,000 miles
(10 000 to 13 000 km).
Any time you notice unusual wear, rotate your tires as
soon as possible and check wheel alignment. Also
check for damaged tires or wheels. See
When It Is Time
for New Tires on page 5-57andWheel Replacement
on page 5-60for more information.Make sure the spare tire is stored securely. Push, pull,
and then try to rotate or turn the tire. If it moves,
use the wheel wrench to tighten the cable. See
Changing a Flat Tire on page 5-63.
The purpose of regular rotation is to achieve more
uniform wear for all tires on the vehicle. The ®rst rotation
is the most important. See ªPart A: Scheduled
Maintenance Services,º in Section 6, for scheduled
rotation intervals.
When rotating your tires, always use one of the correct
rotation patterns shown here.
If your vehicle has a compact spare tire or a spare tire
that does not match your vehicle's regular road tires
and wheels in size and type, do not include the spare in
the tire rotation.
5-56