garage door opener CHEVROLET BLAZER 2003 2.G Owners Manual
[x] Cancel search | Manufacturer: CHEVROLET, Model Year: 2003, Model line: BLAZER, Model: CHEVROLET BLAZER 2003 2.GPages: 420, PDF Size: 2.94 MB
Page 110 of 420

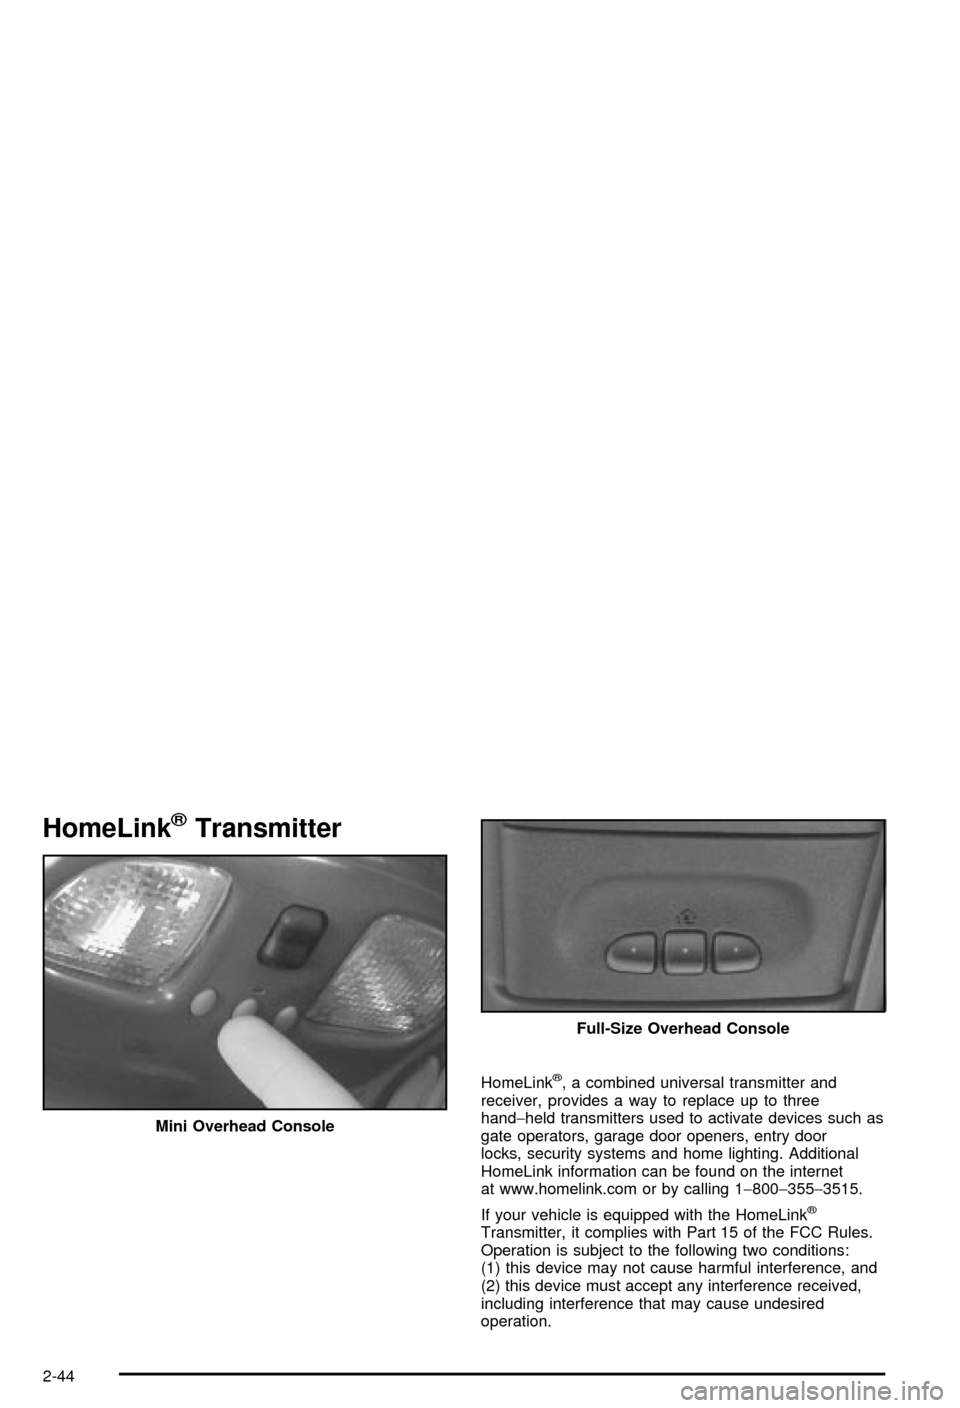
HomeLinkžTransmitter
HomeLinkž, a combined universal transmitter and
receiver, provides a way to replace up to three
hand-held transmitters used to activate devices such as
gate operators, garage door openers, entry door
locks, security systems and home lighting. Additional
HomeLink information can be found on the internet
at www.homelink.com or by calling 1-800-355-3515.
If your vehicle is equipped with the HomeLink
ž
Transmitter, it complies with Part 15 of the FCC Rules.
Operation is subject to the following two conditions:
(1) this device may not cause harmful interference, and
(2) this device must accept any interference received,
including interference that may cause undesired
operation. Mini Overhead Console
Full-Size Overhead Console
2-44
Page 111 of 420

This device complies with RSS-210 of Industry Canada.
Operation is subject to the following two conditions:
(1) this device may not cause interference, and
(2) this device must accept any interference, including
interference that may cause undesired operation of
the device.
Changes and modi®cations to this system by other than
an authorized service facility could void authorization
to use this equipment.
Programming the HomeLinkž
Transmitter
Do not use the HomeLinkžTransmitter with any garage
door opener that does not have the ªstop and reverseº
feature. This includes any garage door opener model
manufactured before April 1, 1982. If you have a newer
garage door opener with rolling codes, please be
sure to follow steps 6 through 8 to complete the
programming of your HomeLink
žTransmitter.
Read the instructions completely before attempting to
program the HomeLink
žTransmitter. Because of
the steps involved, it may be helpful to have another
person available to assist you in programming the
transmitter.Keep the original transmitter for use in other vehicles as
well as for future HomeLink
žprogramming. It is also
recommended that upon the sale of the vehicle,
the programmed HomeLink
žbuttons should be erased
for security purposes. Refer to ªErasing HomeLinkž
Buttonsº or, for assistance, contact HomeLinkžon the
internet at: www.homelink.com or by calling
1-800-355-3515.
Be sure that people and objects are clear of the garage
door or gate operator you are programming. When
programming a garage door, it is advised to park outside
of the garage.
It is recommended that a new battery be installed in
your hand-held transmitter for quicker and more
accurate transmission of the radio frequency.
Your vehicle's engine should be turned off while
programming the transmitter. Follow these steps to
program up to three channels:
1. Press and hold down the two outside buttons,
releasing only when the indicator light begins to
¯ash, after 20 seconds. Do not hold down the
buttons for longer than 30 seconds and do not
repeat this step to program a second and/or third
transmitter to the remaining two HomeLink
žbuttons.
2. Position the end of your hand-held transmitter about
1 to 3 inches (3 to 8 cm) away from the HomeLink
ž
buttons while keeping the indicator light in view.
2-45
Page 112 of 420

3. Simultaneously press and hold both the desired
button on HomeLinkžand the hand-held transmitter
button. Do not release the buttons until Step 4
has been completed.
Some entry gates and garage door openers may
require you to substitute Step 3 with the procedure
noted in ªGate Operator and Canadian
Programmingº later in this section.
4. The indicator light will ¯ash slowly at ®rst and then
rapidly after HomeLink
žsuccessfully receives the
frequency signal from the hand-held transmitter.
Release both buttons.
5. Press and hold the newly-trained HomeLink
žbutton
and observe the indicator light.
If the indicator light stays on constantly,
programming is complete and your device should
activate when the HomeLink
žbutton is pressed and
released.
To program the remaining two HomeLink
žbuttons,
begin with Step 2 under ªProgramming HomeLinkž.º
Do not repeat Step 1 as this will erase all of the
programmed channels.
If the indicator light blinks rapidly for two seconds
and then turns to a constant light, continue with
Steps 6 through 8 following to complete the
programming of a rolling-code equipped device
(most commonly, a garage door opener).6. Locate in the garage, the garage door opener
receiver (motor-head unit). Locate the ªLearnº
or ªSmartº button. This can usually be found where
the hanging antenna wire is attached to the
motor-head unit.
7. Firmly press and release the ªLearnº or ªSmartº
button. The name and color of the button may
vary by manufacturer.
You will have 30 seconds to start Step 8.
8. Return to the vehicle. Firmly press and hold the
programmed HomeLink
žbutton for two seconds,
then release. Repeat the press/hold/release
sequence a second time, and depending on the
brand of the garage door opener (or other rolling
code device), repeat this sequence a third time
to complete the programming.
HomeLink
žshould now activate your rolling-code
equipped device.
To program the remaining two HomeLink
žbuttons,
begin with Step 2 of ªProgramming HomeLinkž.º Do not
repeat Step 1.
2-46
Page 114 of 420

Resetting Defaults
To reset HomeLinkžto default settings do the following:
1. Hold down the two outside buttons for about
20 seconds until the indicator light begins to ¯ash.
2. Continue to hold both buttons until the HomeLink
ž
indicator light turns off.
3. Release both buttons.
For questions or comments, contact HomeLink
žat
1-800-355-3515, or on the internet at
www.homelink.com.
Storage Areas
Glove Box
To open your glove box, lift the lever on the front of the
glove box and lower the door. The glove box should
not be open while you are driving.
Overhead Console
If your vehicle has this feature, the overhead console
includes reading lamps, a compartment for a garage
door opener, a temperature and compass display and a
storage compartment for sunglasses.
2-48
Page 115 of 420

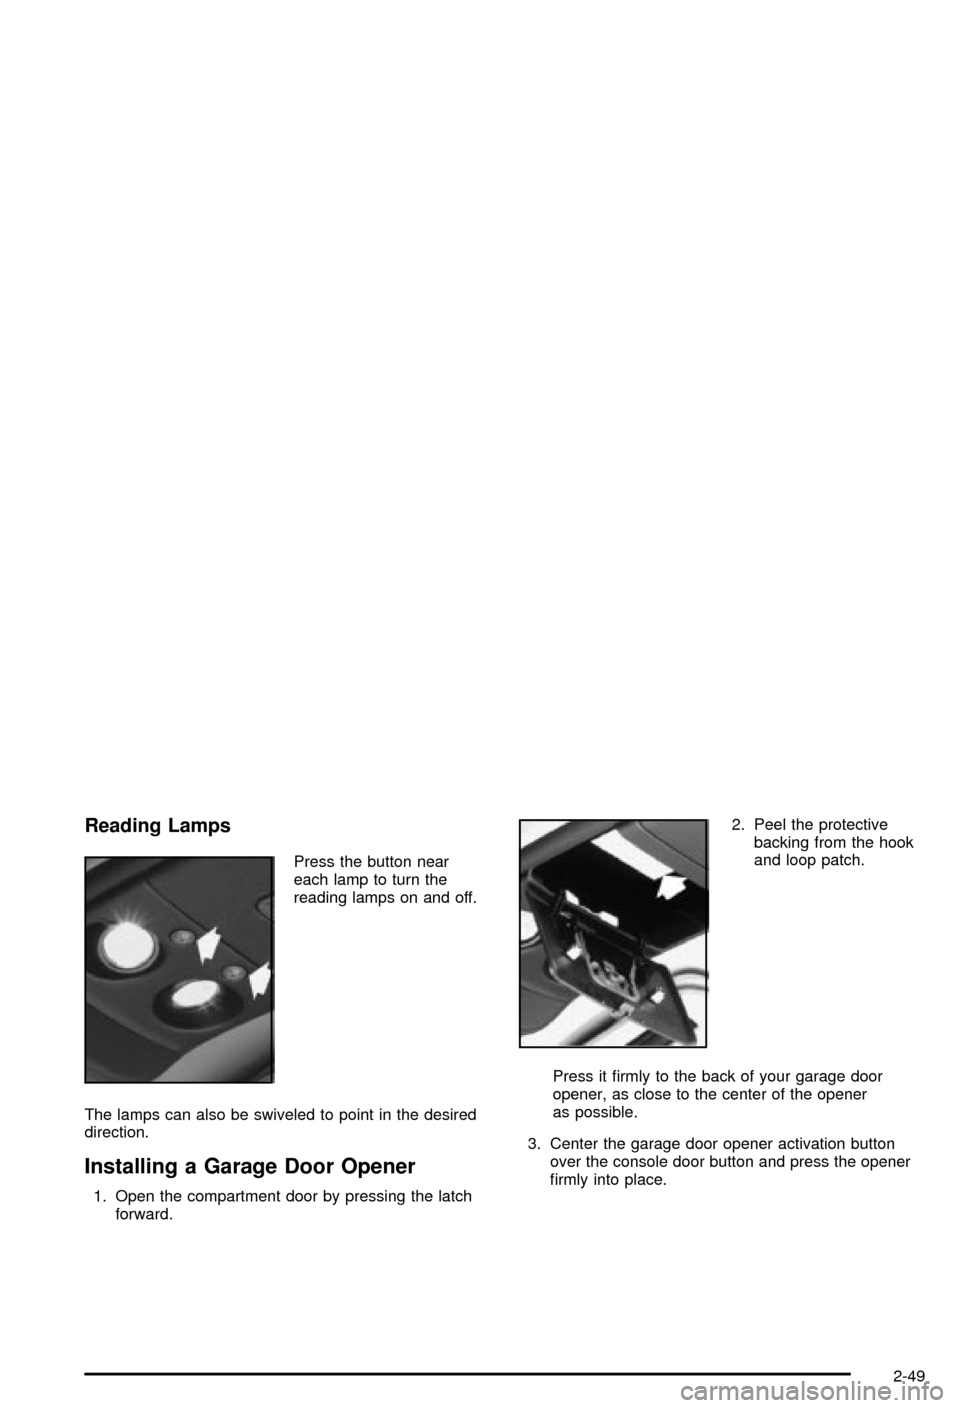
Reading Lamps
Press the button near
each lamp to turn the
reading lamps on and off.
The lamps can also be swiveled to point in the desired
direction.
Installing a Garage Door Opener
1. Open the compartment door by pressing the latch
forward.2. Peel the protective
backing from the hook
and loop patch.
Press it ®rmly to the back of your garage door
opener, as close to the center of the opener
as possible.
3. Center the garage door opener activation button
over the console door button and press the opener
®rmly into place.
2-49
Page 116 of 420

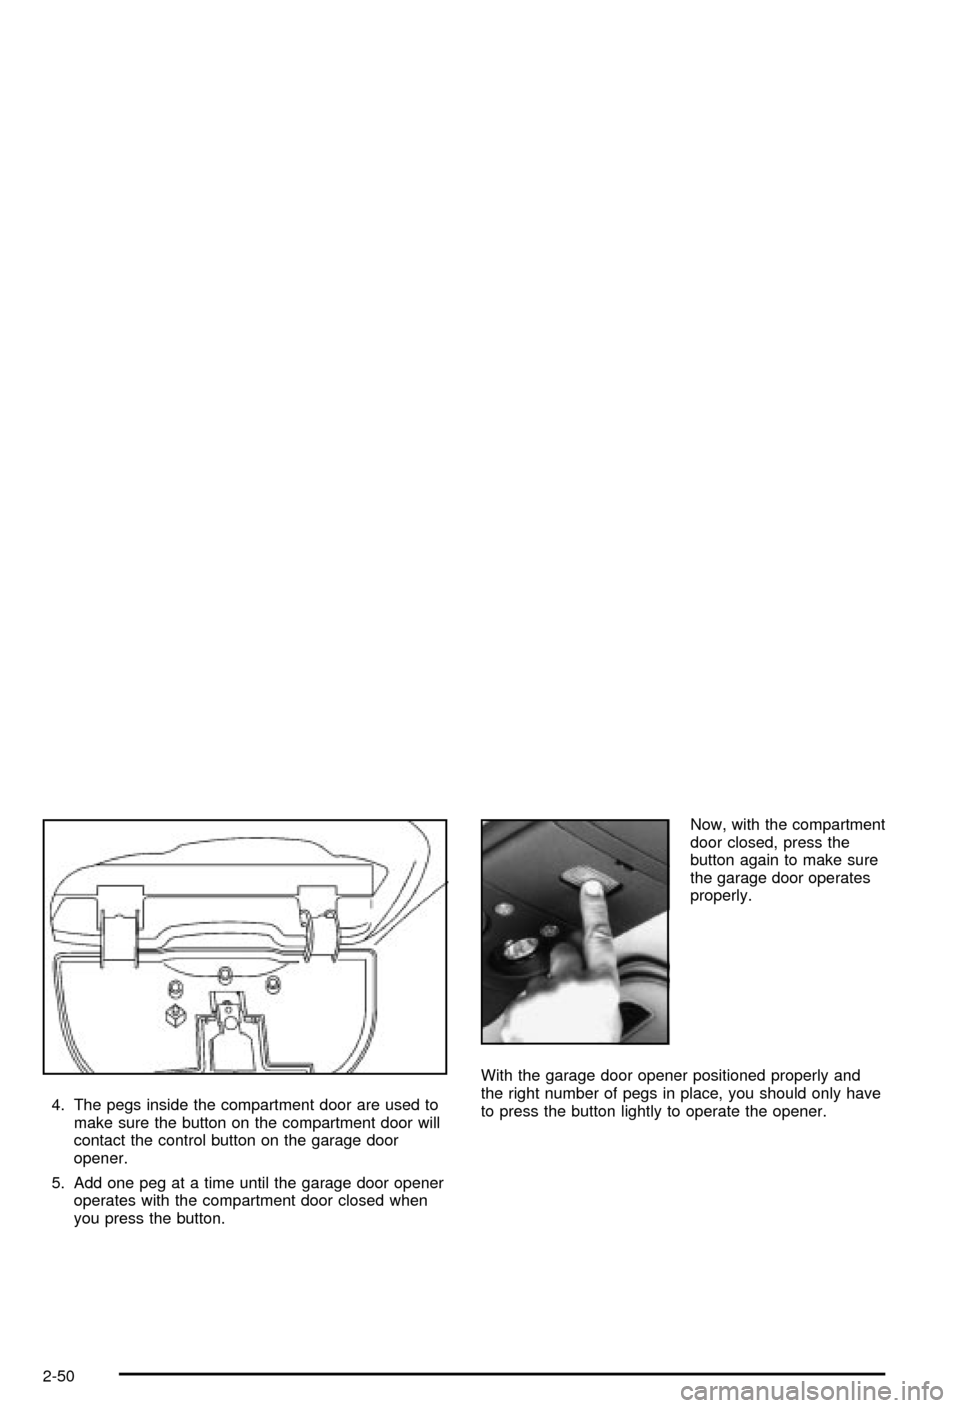
4. The pegs inside the compartment door are used to
make sure the button on the compartment door will
contact the control button on the garage door
opener.
5. Add one peg at a time until the garage door opener
operates with the compartment door closed when
you press the button.Now, with the compartment
door closed, press the
button again to make sure
the garage door operates
properly.
With the garage door opener positioned properly and
the right number of pegs in place, you should only have
to press the button lightly to operate the opener.
2-50
Page 410 of 420

F
Filter.............................................................5-15
Engine Air Cleaner......................................5-15
Finding a PTY Station.....................3-44, 3-51, 3-61
Finding a Station....................3-39, 3-41, 3-49, 3-58
Finish Care....................................................5-79
Finish Damage...............................................5-81
Five-Speed....................................................2-27
Fixed Mast Antenna........................................3-70
Flash-to-Pass Feature....................................... 3-6
Flat Tire, Changing.........................................5-63
Flat Tire........................................................5-62
Fluid.............................................................5-17
Automatic Transmission................................5-17
Manual Transmission....................................5-20
Power Steering...........................................5-35
Windshield Washer......................................5-36
FM ...............................................................3-69
Fog Lamps....................................................3-13
Following Distance..........................................4-61
Four Door Models...........................1-27, 1-29, 1-51
Four-Wheel Drive....................................2-28, 5-45
Front Axle......................................................5-46
Front Map Lamps...........................................3-14
Front Reading Lamps......................................3-14
Front Storage Area.........................................2-55
Fuel............................................................... 5-4
Additives...................................................... 5-5
California Fuel.............................................. 5-5Fuel (cont.)
Filling a Portable Fuel Container..................... 5-8
Filling Your Tank........................................... 5-6
Fuels in Foreign Countries.............................. 5-6
Gage.........................................................3-35
Gasoline Octane........................................... 5-4
Gasoline Speci®cations.................................. 5-5
Low Warning Light.......................................3-36
System Inspection.......................................6-31
Fuses...........................................................5-85
Fuses and Circuit Breakers...........................5-85
Windshield Wiper.........................................5-85
G
Gage............................................................3-35
Check Gages Warning Light..........................3-35
Engine Coolant Temperature.........................3-29
Fuel..........................................................3-35
Oil Pressure...............................................3-33
Speedometer..............................................3-24
Tachometer.................................................3-24
Voltmeter Gage...........................................3-27
Garage Door Opener.......................................2-44
Garment Hooks..............................................2-56
Gasoline......................................................... 5-4
Octane........................................................ 5-4
Speci®cations............................................... 5-5
Gate Ajar Light...............................................3-35
6
Page 412 of 420

Inspection......................................................6-32
Brake System.............................................6-32
Engine Cooling System................................6-31
Exhaust System..........................................6-31
Fuel System...............................................6-31
Part C - Periodic Maintenance.......................6-31
Steering, Suspension and Front Drive Axle
Boot and Seal.........................................6-31
Throttle System...........................................6-32
Transfer Case and Front Axle
(Four-Wheel Drive)...................................6-32
Installing a Garage Door Opener.......................2-49
Instrument Panel Fuse Block............................5-86
Instrument Panel.............................................3-22
Cluster.......................................................3-22
Overview..................................................... 3-2
Instrumental Panel Brightness...........................3-14
Interior Lamps................................................3-14
J
Jump Starting.................................................5-41
K
Key Lock Cylinders Service..............................6-28
Key Release Button........................................2-20
Keyless Entry System....................................... 2-4
Keys............................................................... 2-3
L
Lamps On Reminder.......................................3-12
Lamps...........................................................3-11
Exterior......................................................3-11
Interior.......................................................3-14
Lap Belt................................................1-22, 1-27
Lap-Shoulder Belt...........................................1-15
LATCH System...............................................1-44
Child Restraints...........................................1-44
Securing a Child Restraint Designed for the
LATCH System........................................1-46
Leaving Your Vehicle With the Engine Running . . . 2-37
Leaving Your Vehicle.......................................2-10
Light.............................................................3-25
Air Bag Readiness.......................................3-25
Anti-Lock Brake System Warning...................3-29
Brake System Warning.................................3-28
Charging System.........................................3-26
Check Gages Warning.................................3-35
8