front bumper CHEVROLET BLAZER 2020 Owner's Manual
[x] Cancel search | Manufacturer: CHEVROLET, Model Year: 2020, Model line: BLAZER, Model: CHEVROLET BLAZER 2020Pages: 390, PDF Size: 6.5 MB
Page 71 of 390
Chevrolet Blazer Owner Manual (GMNA-Localizing-U.S./Canada/Mexico-
13557845) - 2020 - CRC - 3/24/20
70 Seats and Restraints
Warning (Continued)
seatback may interfere with the
proper operation of the passenger
sensing system.
Servicing the
Airbag-Equipped Vehicle
Airbags affect how the vehicle
should be serviced. There are parts
of the airbag system in several
places around the vehicle. Your
dealer and the service manual have
information about servicing the
vehicle and the airbag system. To
purchase a service manual, see
Publication Ordering Information
0364.
{Warning
For up to 10 seconds after the
vehicle is turned off and the
battery is disconnected, an airbag
can still inflate during improper
service. You can be injured if you
(Continued)
Warning (Continued)
are close to an airbag when it
inflates. Avoid yellow connectors.
They are probably part of the
airbag system. Be sure to follow
proper service procedures, and
make sure the person performing
work for you is qualified to do so.
Adding Equipment to the
Airbag-Equipped Vehicle
Adding accessories that change the
vehicle's frame, bumper system,
height, front end, or side sheet
metal may keep the airbag system
from working properly.
The operation of the airbag system
can also be affected by changing,
including improperly repairing or
replacing, any parts of the following:
.Airbag system, including airbag
modules, front or side impact
sensors, sensing and diagnostic
module, or airbag wiring .
Front seats, including stitching,
seams or zippers
. Seat belts
. Steering wheel, instrument
panel, overhead console, ceiling
trim, or pillar garnish trim
. Inner door seals, including
speakers
Your dealer and the service manual
have information about the location
of the airbag modules and sensors,
sensing and diagnostic module, and
airbag wiring along with the proper
replacement procedures.
In addition, the vehicle has a
passenger sensing system for the
front outboard passenger position,
which includes sensors that are part
of the passenger seat. The
passenger sensing system may not
operate properly if the original seat
trim is replaced with non-GM
covers, upholstery, or trim; or with
GM covers, upholstery, or trim
designed for a different vehicle. Any
object, such as an aftermarket seat
heater or a comfort-enhancing pad
or device, installed under or on top
Page 140 of 390
Chevrolet Blazer Owner Manual (GMNA-Localizing-U.S./Canada/Mexico-
13557845) - 2020 - CRC - 3/24/20
Instruments and Controls 139
Chime Volume
This determines the chime volume
level.
Touch the controls on the
infotainment display to adjust the
volume.
Hands Free Liftgate/Trunk Control
The liftgate may be operated with a
kicking motion under the left side of
the rear bumper. SeeLiftgate021.
Touch Off, On-Open and Close,
or On-Open Only.
Reverse Tilt Mirror
When on, the driver and/or
passenger mirrors will tilt downward
when the vehicle is shifted to
R (Reverse) to improve visibility of
the ground near the rear wheels.
They will return to their previous
driving position when the vehicle is
shifted out of R (Reverse) or the
engine is turned off. See Reverse
Tilt Mirrors 031.
Touch Off, On - Driver and
Passenger, On - Driver, or On -
Passenger. Auto Wipe in Reverse Gear
When on and the front wiper is on,
the rear wiper will automatically
activate when the vehicle is shifted
to R (Reverse).
Touch Off or On.
Lighting
Touch and the following may
display:
.
Vehicle Locator Lights
. Exit Lighting
Vehicle Locator Lights
This feature will flash the exterior
lamps and allows some of the
exterior lamps and most of the
interior lamps to turn on briefly when
Kon the Remote Keyless Entry
(RKE) transmitter is pressed to
locate the vehicle.
Touch Off or On.
Exit Lighting
This allows the selection of how
long the exterior lamps stay on
when leaving the vehicle when it is
dark outside. Touch Off, 30 Seconds, 60 Seconds,
or 120 Seconds.
Power Door Locks
Touch and the following may
display:
.
Open Door Anti Lockout
. Auto Door Unlock
. Delayed Door Lock
Open Door Anti Lock Out
When on, this feature will keep the
driver door from locking when the
door is open. If Off is selected, the
Delayed Door Lock menu will be
available.
Touch Off or On.
Auto Door Unlock
This allows selection of which of the
doors will automatically unlock when
the vehicle is shifted into P (Park).
Touch Off, All Doors, or Driver Door.
Page 184 of 390
Chevrolet Blazer Owner Manual (GMNA-Localizing-U.S./Canada/Mexico-
13557845) - 2020 - CRC - 3/24/20
Driving and Operating 183
2. Check the heater cord fordamage. If it is damaged, do
not use it. See your dealer for
a replacement. Inspect the
cord for damage yearly.
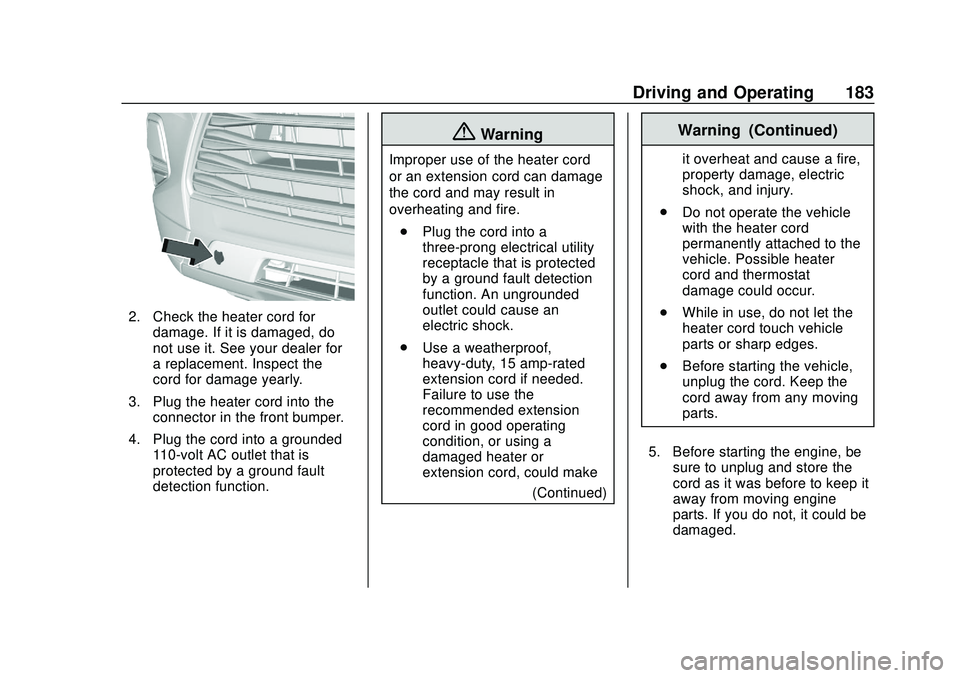
3. Plug the heater cord into the connector in the front bumper.
4. Plug the cord into a grounded 110-volt AC outlet that is
protected by a ground fault
detection function.
{Warning
Improper use of the heater cord
or an extension cord can damage
the cord and may result in
overheating and fire.
. Plug the cord into a
three-prong electrical utility
receptacle that is protected
by a ground fault detection
function. An ungrounded
outlet could cause an
electric shock.
. Use a weatherproof,
heavy-duty, 15 amp-rated
extension cord if needed.
Failure to use the
recommended extension
cord in good operating
condition, or using a
damaged heater or
extension cord, could make
(Continued)
Warning (Continued)
it overheat and cause a fire,
property damage, electric
shock, and injury.
. Do not operate the vehicle
with the heater cord
permanently attached to the
vehicle. Possible heater
cord and thermostat
damage could occur.
. While in use, do not let the
heater cord touch vehicle
parts or sharp edges.
. Before starting the vehicle,
unplug the cord. Keep the
cord away from any moving
parts.
5. Before starting the engine, be sure to unplug and store the
cord as it was before to keep it
away from moving engine
parts. If you do not, it could be
damaged.
Page 211 of 390
Chevrolet Blazer Owner Manual (GMNA-Localizing-U.S./Canada/Mexico-
13557845) - 2020 - CRC - 3/24/20
210 Driving and Operating
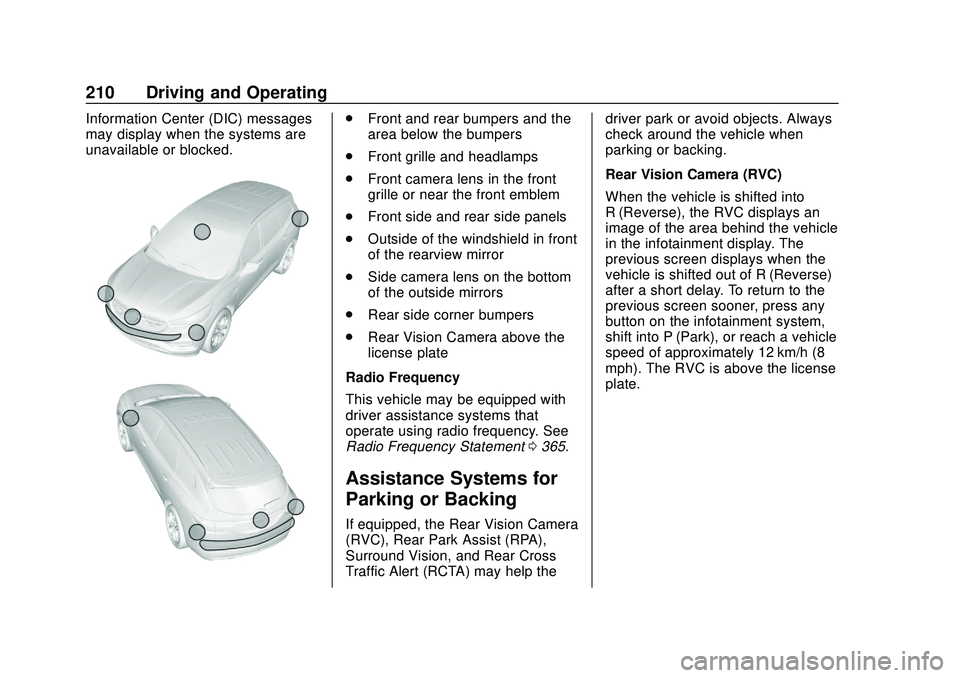
Information Center (DIC) messages
may display when the systems are
unavailable or blocked..Front and rear bumpers and the
area below the bumpers
. Front grille and headlamps
. Front camera lens in the front
grille or near the front emblem
. Front side and rear side panels
. Outside of the windshield in front
of the rearview mirror
. Side camera lens on the bottom
of the outside mirrors
. Rear side corner bumpers
. Rear Vision Camera above the
license plate
Radio Frequency
This vehicle may be equipped with
driver assistance systems that
operate using radio frequency. See
Radio Frequency Statement 0365.
Assistance Systems for
Parking or Backing
If equipped, the Rear Vision Camera
(RVC), Rear Park Assist (RPA),
Surround Vision, and Rear Cross
Traffic Alert (RCTA) may help the driver park or avoid objects. Always
check around the vehicle when
parking or backing.
Rear Vision Camera (RVC)
When the vehicle is shifted into
R (Reverse), the RVC displays an
image of the area behind the vehicle
in the infotainment display. The
previous screen displays when the
vehicle is shifted out of R (Reverse)
after a short delay. To return to the
previous screen sooner, press any
button on the infotainment system,
shift into P (Park), or reach a vehicle
speed of approximately 12 km/h (8
mph). The RVC is above the license
plate.
Page 212 of 390
Chevrolet Blazer Owner Manual (GMNA-Localizing-U.S./Canada/Mexico-
13557845) - 2020 - CRC - 3/24/20
Driving and Operating 211
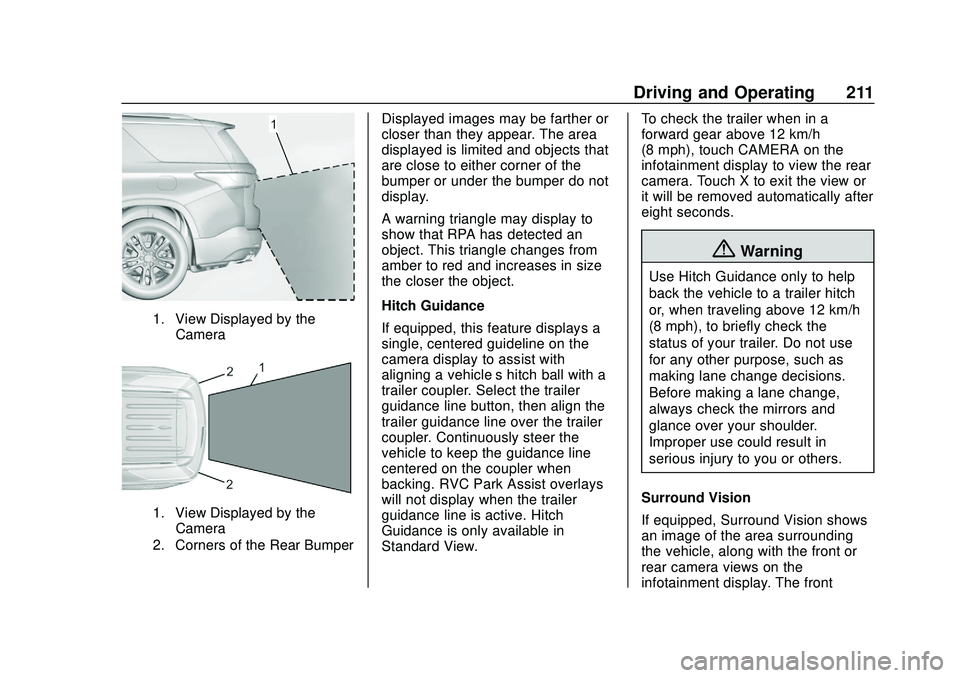
1. View Displayed by theCamera
1. View Displayed by theCamera
2. Corners of the Rear Bumper
Displayed images may be farther or
closer than they appear. The area
displayed is limited and objects that
are close to either corner of the
bumper or under the bumper do not
display.
A warning triangle may display to
show that RPA has detected an
object. This triangle changes from
amber to red and increases in size
the closer the object.
Hitch Guidance
If equipped, this feature displays a
single, centered guideline on the
camera display to assist with
aligning a vehicle’ s hitch ball with a
trailer coupler. Select the trailer
guidance line button, then align the
trailer guidance line over the trailer
coupler. Continuously steer the
vehicle to keep the guidance line
centered on the coupler when
backing. RVC Park Assist overlays
will not display when the trailer
guidance line is active. Hitch
Guidance is only available in
Standard View. To check the trailer when in a
forward gear above 12 km/h
(8 mph), touch CAMERA on the
infotainment display to view the rear
camera. Touch X to exit the view or
it will be removed automatically after
eight seconds.
{Warning
Use Hitch Guidance only to help
back the vehicle to a trailer hitch
or, when traveling above 12 km/h
(8 mph), to briefly check the
status of your trailer. Do not use
for any other purpose, such as
making lane change decisions.
Before making a lane change,
always check the mirrors and
glance over your shoulder.
Improper use could result in
serious injury to you or others.
Surround Vision
If equipped, Surround Vision shows
an image of the area surrounding
the vehicle, along with the front or
rear camera views on the
infotainment display. The front
Page 213 of 390
Chevrolet Blazer Owner Manual (GMNA-Localizing-U.S./Canada/Mexico-
13557845) - 2020 - CRC - 3/24/20
212 Driving and Operating
camera is in the grille or near the
front emblem, the side cameras are
on the bottom of the outside mirrors,
and the rear camera is above the
license plate.
The Surround Vision system can be
accessed by selecting CAMERA in
the infotainment display or when the
vehicle is shifted into R (Reverse).
To return to the previous screen
sooner, press any button on the
infotainment system, shift into
P (Park), or reach a vehicle speed
of approximately 12 km/h (8 mph).
{Warning
The Surround Vision cameras
have blind spots and will not
display all objects near the
corners of the vehicle. Folding
outside mirrors that are out of
position may not display surround
view correctly. Always check
around the vehicle when parking
or backing.
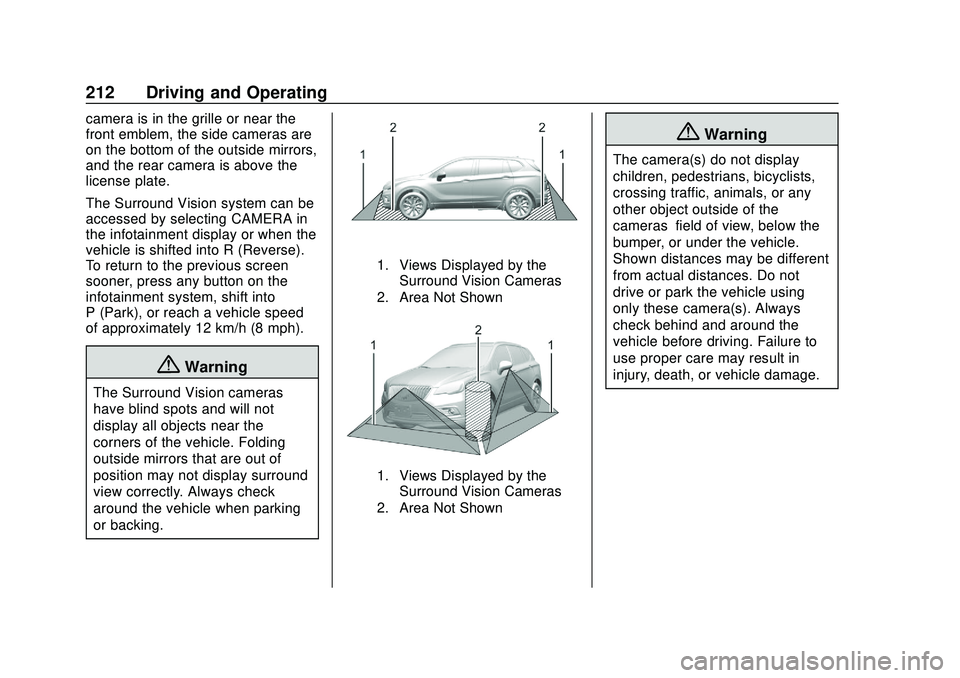
1. Views Displayed by theSurround Vision Cameras
2. Area Not Shown
1. Views Displayed by the Surround Vision Cameras
2. Area Not Shown
{Warning
The camera(s) do not display
children, pedestrians, bicyclists,
crossing traffic, animals, or any
other object outside of the
cameras’ field of view, below the
bumper, or under the vehicle.
Shown distances may be different
from actual distances. Do not
drive or park the vehicle using
only these camera(s). Always
check behind and around the
vehicle before driving. Failure to
use proper care may result in
injury, death, or vehicle damage.
Page 215 of 390
Chevrolet Blazer Owner Manual (GMNA-Localizing-U.S./Canada/Mexico-
13557845) - 2020 - CRC - 3/24/20
214 Driving and Operating
shifting from R (Reverse) to a
forward gear or when the vehicle is
moving forward slower than 12 km/h
(8 mph). This view can only be
enabled in Front/Rear Standard
View by touching the Top Down
View button when a camera view is
active.
Park Assist
With RPA, as the vehicle backs up
at speeds of less than 8 km/h
(5 mph), the sensors on the rear
bumper may detect objects up to
2.5m (8 ft) behind the vehicle within
a zone 25 cm (10 in) high off the
ground and below bumper level.
These detection distances may be
shorter during warmer or humid
weather.
Blocked sensors will not detect
objects and can also cause false
detections. Keep the sensors clean
of mud, dirt, snow, ice, and slush;
and clean sensors after a car wash
in freezing temperatures.
{Warning
The Park Assist system does not
detect children, pedestrians,
bicyclists, animals, or objects
below the bumper or that are too
close or too far from the vehicle.
It is not available at speeds
greater than 8 km/h (5 mph). To
prevent injury, death, or vehicle
damage, even with Park Assist,
always check the area around the
vehicle and check all mirrors
before backing.
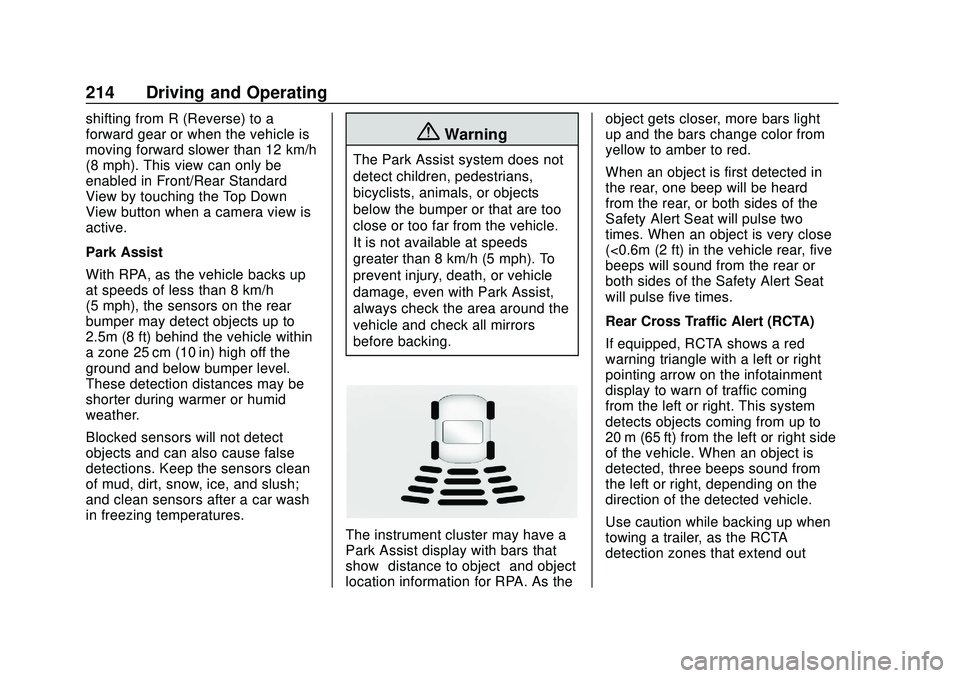
The instrument cluster may have a
Park Assist display with bars that
show“distance to object” and object
location information for RPA. As the object gets closer, more bars light
up and the bars change color from
yellow to amber to red.
When an object is first detected in
the rear, one beep will be heard
from the rear, or both sides of the
Safety Alert Seat will pulse two
times. When an object is very close
(<0.6m (2 ft) in the vehicle rear, five
beeps will sound from the rear or
both sides of the Safety Alert Seat
will pulse five times.
Rear Cross Traffic Alert (RCTA)
If equipped, RCTA shows a red
warning triangle with a left or right
pointing arrow on the infotainment
display to warn of traffic coming
from the left or right. This system
detects objects coming from up to
20 m (65 ft) from the left or right side
of the vehicle. When an object is
detected, three beeps sound from
the left or right, depending on the
direction of the detected vehicle.
Use caution while backing up when
towing a trailer, as the RCTA
detection zones that extend out
Page 239 of 390

Chevrolet Blazer Owner Manual (GMNA-Localizing-U.S./Canada/Mexico-
13557845) - 2020 - CRC - 3/24/20
238 Driving and Operating
Hitch Cover
To remove the hitch cover,
if equipped:1. Remove the four fasteners on the lower tabs.
2. Pull the lower edge of the cover to about a 45 degree
angle.
3. Pull the cover downward to disengage the upper
attachments. To reinstall the hitch cover:
1. Hold the cover at a 45 degree angle to the vehicle and push
the upper tabs into the slots in
the bumper.
2. Push the bottom of the cover forward until the lower tabs line
up with the lower slots.
3. Snap the hitch cover into place by pushing the upper corners
forward.
4. Reinstall the four fasteners on the lower tabs.
Consider using mechanical sway
controls with any trailer. Ask a
trailering professional about sway
controls or refer to the trailer
manufacturer's recommendations
and instructions.
Weight-Distributing Hitch
Adjustment
A weight-distributing hitch may be
useful with some trailers.
1. Front of the Vehicle
2. Body-to-Ground Distance
When using a weight-distributing
hitch, measure the front fender
height above the front axle
distance (2) before and after
connecting the trailer. Adjust the
spring bars until the front fender
height distance (2) is approximately
halfway between the first and
second measurements.
Tires
. Do not tow a trailer while using a
compact spare tire on the
vehicle.
Page 306 of 390
Chevrolet Blazer Owner Manual (GMNA-Localizing-U.S./Canada/Mexico-
13557845) - 2020 - CRC - 3/24/20
Vehicle Care 305
{Warning
Using the wrong replacement
wheels, wheel bolts, or wheel
nuts can be dangerous. It could
affect the braking and handling of
the vehicle. Tires can lose air,
and cause loss of control, causing
a crash. Always use the correct
wheel, wheel bolts, and wheel
nuts for replacement.
Caution
The wrong wheel can also cause
problems with bearing life, brake
cooling, speedometer or
odometer calibration, headlamp
aim, bumper height, vehicle
ground clearance, and tire or tire
chain clearance to the body and
chassis.
Used Replacement Wheels
{Warning
Replacing a wheel with a used
one is dangerous. How it has
been used or how far it has been
driven may be unknown. It could
fail suddenly and cause a crash.
When replacing wheels, use a
new GM original equipment
wheel.
Tire Chains
{Warning
If the vehicle has a tire size other
than 235/65R18, do not use tire
chains. There is not enough
clearance. Tire chains used on a
vehicle without the proper amount
of clearance can cause damage
to the brakes, suspension,
or other vehicle parts. The area
damaged by the tire chains could(Continued)
Warning (Continued)
cause loss of control and a crash.
Use another type of traction
device only if its manufacturer
recommends it for the vehicle's
tire size combination and road
conditions. Follow that
manufacturer's instructions. To
avoid vehicle damage, drive slow
and readjust or remove the
traction device if it contacts the
vehicle. Do not spin the wheels. If
traction devices are used, install
them on the front tires.
Caution
If the vehicle is equipped with
235/65R18 size tires, use tire
chains only where legal and only
when necessary. Use low profile
chains that add no more than
12 mm thickness to the tire tread
and inner sidewall. Use chains
(Continued)