tow CHEVROLET CAMARO 1973 2.G User Guide
[x] Cancel search | Manufacturer: CHEVROLET, Model Year: 1973, Model line: CAMARO, Model: CHEVROLET CAMARO 1973 2.GPages: 84, PDF Size: 32.64 MB
Page 43 of 84

Downloaded from www.Manualslib.com manuals search engine • Activate hazard warning flasher.
• Block both the front and back
of the wheel diagonally opposite
the jack position.
Remove
hubcap or wheel cover
with flat end of wheel
nut wrench
and loosen wheel nuts slightly.
Set
lever on jack to UP position.
Properly position load rest which
engages bumper by moving base of
NOTE: Base of jack column
should be slightly angled in toward
car since it will straighteri
as car is
raised.
jack slightly under car and engage
tang of
bracket in bumper notch,
then bring jack base back toward
upright position. Check that
l~ad
rest is positioned before operatmg
jack.
40
Jack Operation
After jack is positioned as noted
above use
wheel nut wrench as . ,
jack handle and raise car until tire
clears ground. Remove wheel nuts
and wheel, install spare and tighten
wheel nuts. Move jack lever to
DOWN and install hub cap or
wheel cover.
Page 45 of 84
Downloaded from www.Manualslib.com manuals search engine Cleaning Fabrics with
Cleaning
Fluid
This type of cleaner should be
used for cleaning stains containing
grease, oil or fats. Exces s stain
should be gently scraped off with
a clean dull knife
or scraper. Use
very little cleaner, light pressure,
and clean cloths (preferably cheese
cloths) . Cleaning action with cloth
should be from outside of stain to
wards center and constantly chang
ing to a clean section of cloth.
When stain
is cleaned from fabric,
immediately wipe
area briskly with
a clean absorbent towel or cheese
cloth to help dry area and prevent
a cleaning ring.
If ring forms, im
mediately clean entire area or panel
section of the trim assembly.
NOTE: Sometimes a difficult spot
may require a second application
of cleaning fluid followed immedi- ately
by a soft brush to completely
remove the spot.
Cleaning Fabrics with
Detergent Foam Cleaners
This type of cleaner is excellent
for cleaning general soilage from
fabrics and for cleaning a panel sec
tion where a minor cleaning ring
may be left from spot cleaning.
Vacuum area to remove excess
loose dirt. Always clean at least a
full trim panel or section of trim.
Mask adjacent trim along stitch or
weld lines. Mix detergent type foam
cleaners in strict accordance with
directions on label of container.
Use
foam only on a clean sponge or
soft bristle brush -Do not wet
fabric excessively or rub harshly
with brush. Wipe clean with a
slightly damp absorbent towel
or
cloth. Imm~diately after cleaning
fabric, dry fabric with a dry towel
42
or hair dryer. Rewipe fabric with
dry absorbent towel
or cloth to re
store the luster of the trim and to
eliminate any dried residue.
Seat Belt Care
• Clean only with mild soap solu
tion and lukewarm water.
• Do not bleach or dye belts since
this may severely weaken belts.
Removal of Specific Stains
Candy -Chocolate, use cloth
soaked in lukewarm water; other
than chocolate, use very hot water.
Dry.
If necessary, clean lightly with
fabric cleaning fluid.
Chewing Gum-Harden gum with
ice cube and scrape off with dull
knife. Moisten with fabric cleaning
fluid and scrape again.
Page 60 of 84
Downloaded from www.Manualslib.com manuals search engine and increased susceptibility to
damage by road impacts.
Tire pressures should be
checked when the tires are
"cold"
at least once a month (and pref
erably oftener) or before long
trips
or when heavily loaded. The
following points should be ob
served when checking and setting
tire pressures:
1. Cold tire pressure ratings are applic
able when a vehicle has been inopera
tive for 3 hours or more, or driven less than 1 mile.
2. Tire Inflation pressure may increase as
much as 6 pounds per square inch (psi)
when hot (after
vehicle has been driven 10 miles or at speeds of more than 60 miles per hour). Do not "bleed" or re
duce pressures when tires are hot from
driving.
3. For continuous high speed operation
(over 75 mph), Increase tire Inflation pressure 4 psi above the recommended
pressures up to a maximum of 32 psi cold pressure for load range B tires, or 40 psi for 0 load range tires. Sustained
speeds above 75 mph are not recommended when the 4 psi adjustment ,
would require pressures greater than
the above maximum pressures.
4. Always use a tire pressure gauge when
checking pressures as t,he appearance of a tire can be deceiving. For example,
radial ply fires, In comparison with bias ply tires at the same pressure, may have
the appearance of being under-inflated.
Vehicle Loading -Do not load
your vehicle beyond the vehicle
capacity (total pounds) shown on
the tire placard. This figure repre
sents the design capacity of the
ve
hicle, not merely of the tires.
When towing trailers, the allow
able pasenger and cargo load
must be reduced by an amount
equal to the trailer tongue load on
the trailer hitch.
(See "Trailer
Hauling"
in Section 1 of this man
ual.) Station wagon loads should
be distributed
as far forward as
possible. Vehicles equipped with
luggage racks do not have a
ve
hicle load capacity greater than
specified on the tire placard.
57
Tire Wear and Rotation -Un
even or abnormal tire wear is usu
ally the result of incorrect inflation
pressure, improper wheel align
ment, wheels being out-of-balance,
or poor driving habits. Underin
flation, incorrect toe or camber
and fast cornering produce differ
ent types of abnormal wear which
can be diagnosed by your dealer.
The original equipment tires in
corporate built-in tread wear
in
dicators to assist you in determin
ing when your tires ,have been
worn to the point of needing re
placement. These indicators ap
pear
as Ij2 inch wide bands when
tire tread depth
is 1/16 inch or
less. When the indicators appear
in two or more adjacent grooves,
tire replacement due to tread wear
is recommended.
To equalize wear, it
is recom
mended that the tires be rotated
every
6,000 miles (or sooner if
Page 63 of 84
Downloaded from www.Manualslib.com manuals search engine When driving on wet or slushy
roads, it
is possible for a wedge of
water to build up between the tire
and road surface. This phenom
enon, known
as hydroplaning.
may cause partial
or complete loss
of traction, which adversely affects
vehicle control and stopping abil
ity.
To reduce the possiblity of
traction loss, the following precau
tions should be observed:
1. Slow down during rainstorms or
when roads are slushy.
2. Slow down if road has standing
water
or puddles.
3. Replace tires when tread wear
indicators are visible .
4. Keep tires properly inflated.
For temporary assistance when
traction
is lost on ice or snow. the
use of AC Liquid Tire Chain is
recommended.
Inflation Instructions for
Space Saver Spare Tire
I. Install deflated space saver
spare
on car with valve stem at
the bottom and tighten all
five
lug nuts.
2. Remove valve qp and make
sure valve core is screwed tight
in valve stem.
3. Remove plastic cap from
in
flator.
4 . Place inflator over valve
stern
and push onto stem until sound
of gas entering tire can
be
heard .
5 . Keep pressure against valve and
hold can upright against wheel
to ensure complete draining of
fluid.
60
6 . Hold the inflator in position one
minute. After sound stops. then
remove inflator for disposal
in
proper receptacle.
7 . Replace valve cap.
NOTE: It is recommended that
the inflation pressure be checked
and adjusted to 28 psi
(Space
Saver Spare
only), as soon as pos
sible after installing tire on car.
To stow , deflate tire by remov
ing tire valve stem core with tool
on end of valve cap. Flatten tire
and replace core and cap. Do not
inhale gas.
Store tire in trunk com
partment. The
Space Saver Spare tire has
an approximate tread life of
2,000
miles; therefore, its continued use
other than for emergency purposes
is not recommended. The Space
Saver Spare
has the same warranty
as all original equipment tires.
Page 66 of 84
Downloaded from www.Manualslib.com manuals search engine The chart on the previous page, and the, information on the pages
which follow, contains information designed to aid the average
driver to discover, and possibly correct, conditions resulting in minor
mechanical difficulties
in his car. The chart, designed to point out
possible solutions to several
of the most common automotive malfunctions and point out a logical checking sequence, will lead step
by step to the most
likely causes and corrective procedures. If, after
making the checks and adjustments suggested, the source of the
trouble
has not been found and corrected, it is strongly recom
mended that an Authorized Chevrolet Dealer inspect the vehicle and make whatever repairs or adjustments are necessary.
FUEL SYSTEM AND ENGINE
If the ignition switch will cause the engine to "turn over" or
"crank" but the car will not start, check Steps A through 0 below.
NOTE: If continual ··f1ooding··, of the carburetor is evidenced by a
carburetor wet with fuel or black exhaust smoke, perform the
operation suggested in paragraph D only.
(A) The first and most obvious, and one of the most frequently
overlooked, items to check when
you have difficulty in starting your car is the amount of fuel in the
tank. Make it a habit to check the
FUEL GAUGE regularly and most
especially at a time when the engine will "turn over" but will not
start.
(8)
If the fuel tank is not empty,
you may check further to see
Checking Fuel Flow
63
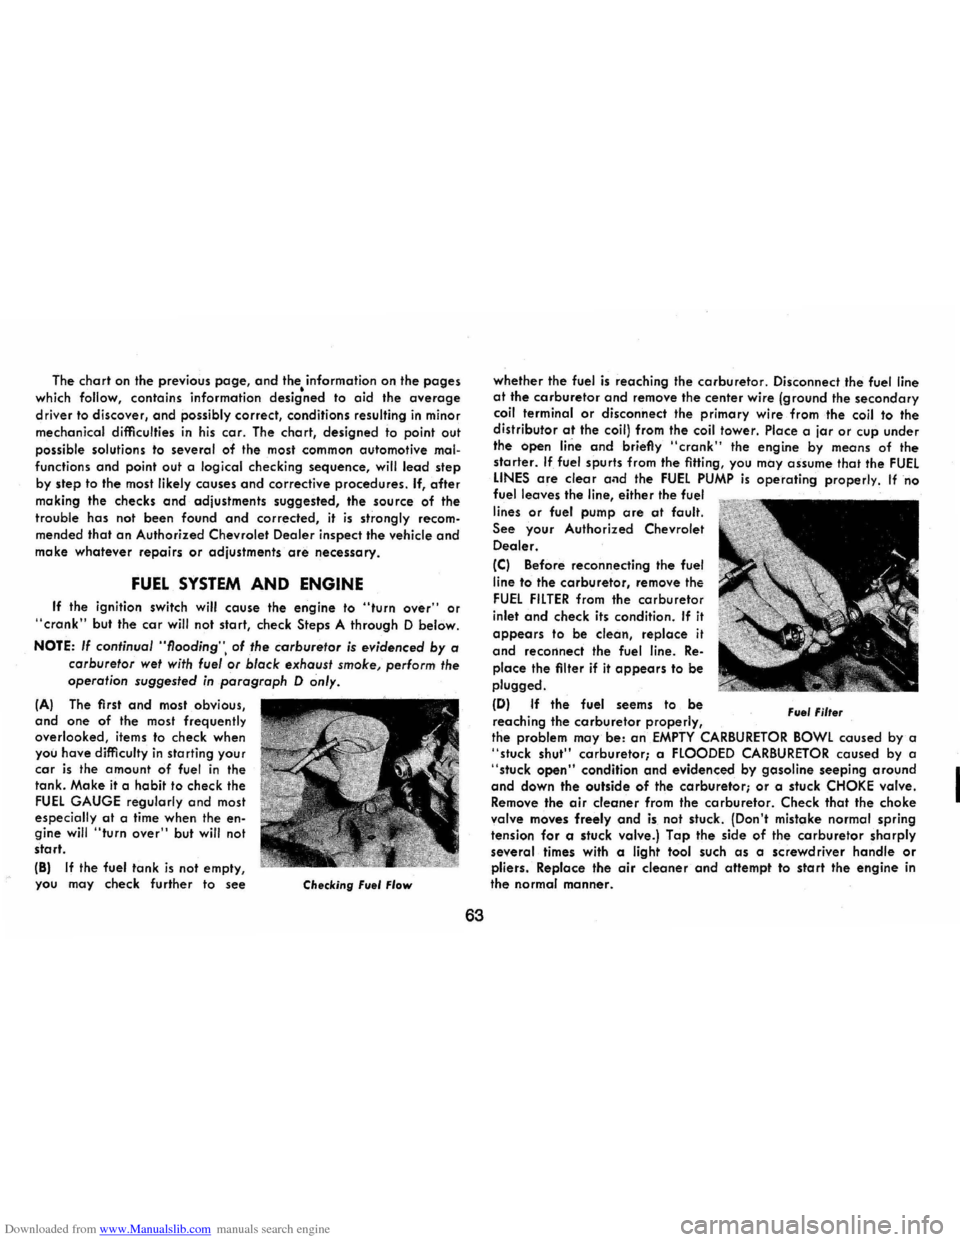
whether the fuel is reaching the carburetor. Disconnect .the fuel line at the carburetor and remove the center wire (ground the secondary coil terminal or disconnect the primary wire from the coil to the
distributor at the coil) from the coil tower. Place a jar or cup under
the open line and briefly "crank" the engine by means of the
starter. If fuel spurts from the fitting, you may assume that the FUEL LINES are clear and the FUEL PUMP is operating properly. If no
fuel leaves the line, either the fuel
lines
or fuel pump are at fault.
See your Authorized Chevrolet
Dealer.
(C) Before reconnecting the fuel
line to the carburetor, remove
the
FUEL FILTER from the carburetor
inlet and check its condition. If it
appears to be clean, replace it
and recorinect the fuel line. Re
place the filter if it appears to be
plugged.
(D) If the fuel seems to be
reaching the carburetor properly, Fuel Filter
the problem may be: an EMPTY CARBURETOR BOWL caused by a "stuck shut" carburetor; a FLOODED CARBURETOR caused by a "stuck open" condition and evidenced by gasoline seeping around and down the outside of the carburetor; or a stuck CHOKE valve.
Remove the air cleaner from the carburetor. Check that the choke
valve moves freely and is not stuck. (Don't mistake normal spring
tension for a stuck valve.) Tap the side of the carburetor sharply
several times with a light tool such as a screwdriver handle or pliers. Replace the air cleaner and attempt to start the engine in the normal manner.
I
Page 68 of 84
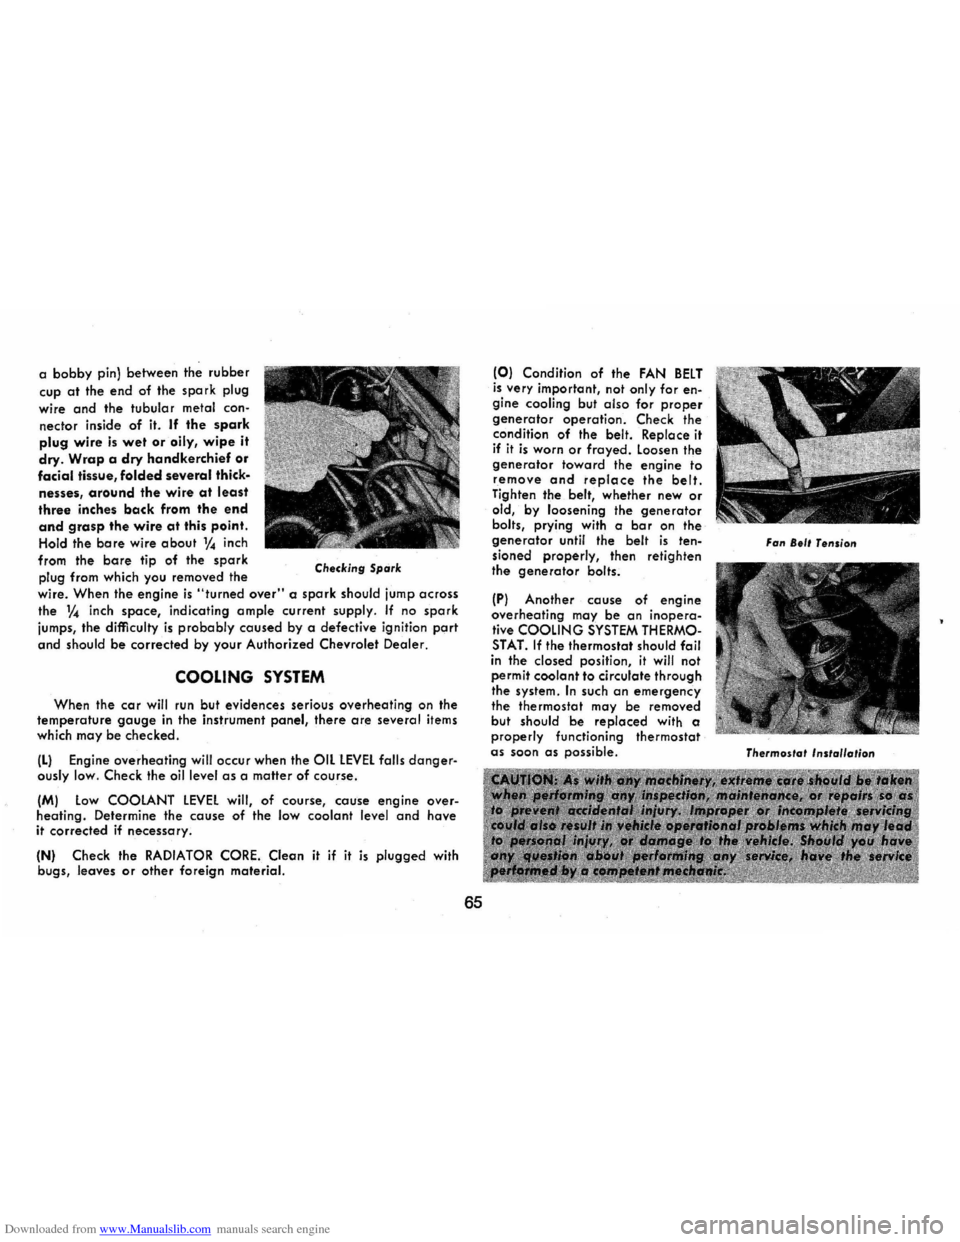
Downloaded from www.Manualslib.com manuals search engine a bobby pin) between the rubber
cup at the end of the spark plug
wire and the tubular metal con
nector inside of it. If the spark
plug wire is wet or oily, wipe it
dry. Wrap a dry handkerchief or facial tissue, folded several thick.
nesses, around the wire at least three inches back from the end
and grasp the wire at this point.
Hold the bare wire about 1f4 inch
from the
bare tip of the spark
plug from which you removed the Checking Spark
wire. When the engine is "turned over" a spark should jump across
the V" inch space, indicating ample current supply. If no spark
jumps, the difficulty is probably caused by a defective ignition port
and should be corrected by your Authorized Chevrolet Dealer.
COOLING SYSTEM
When the cor will run but evidences serious overheating on the temperature gauge in the instrument panel, there are several items
which may be checked .
(L) Engine overheating will occur when the OIL lEVEL falls dangerously low. Check the oil level as a matter of course.
(M) Low COOLANT LEVEL will , of course, couse engine overheating. Determine . the cause of the low coolant level and have
it corrected if necessary.
(N) Check the RADIATOR CORE. Clean it if it is plugged with
bugs, leaves or other foreign material.
65
(0) Condition of the FAN BELT is very important, not only for engine cooling but also for proper generator operation. Check the
condition of the belt. Replace it if it is worn or frayed. Loosen the generator toward the engine to remove and replace the belt. Tighten the belt, whether new or old, by loosening the generator bolts, prying with a bar on the generator until the belt is tensioned properly, then retighten
the generator bolts.
(PI Another couse of engine ove rheating may be on inopera
tive COOLING SYSTEM THERMOSTAT. If the thermostat should foil in the closed position, it will not
perm it coolant to circulate through
the system . In such on emergency the thermostat may be removed
but should be replaced with a properly functioning thermostat as soon as possible.
Fan 8.11 Tension
Thermoslal Inslollo/ion
Page 75 of 84
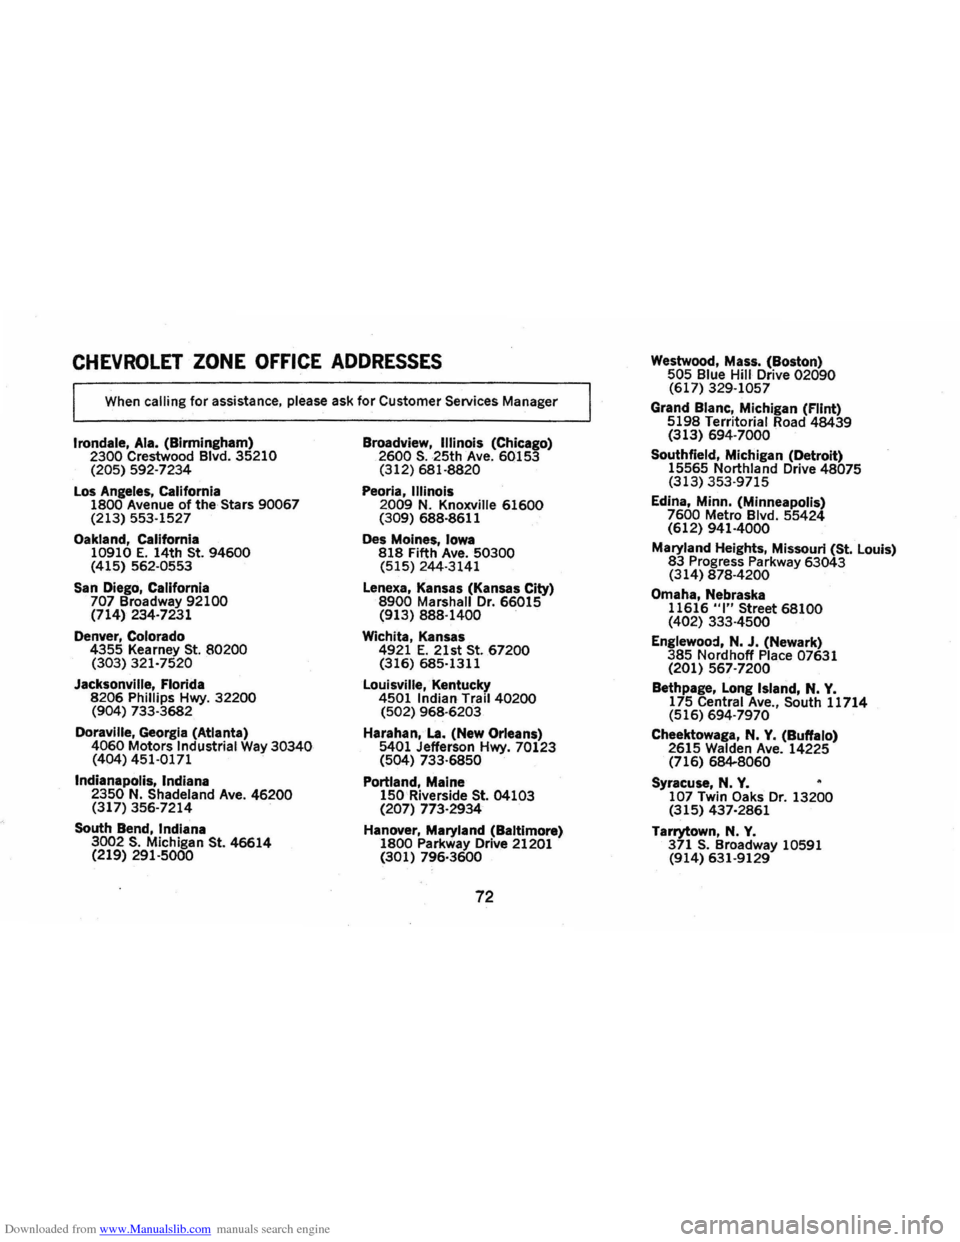
Downloaded from www.Manualslib.com manuals search engine CHEVROLET ZONE OFFICE ADDRESSES
When calling for assistance, please ask for Customer Services Manager
Irondale, Ala. (Birmingham) 2300 Crestwood Blvd. 35210
(205) 592-7234
Los Angeles,
California
1800 Avenue of the Stars 90067 (213) 553-1527
Oakland,
California
10910 E. 14th St. 94600 (415) 562·0553
San Diego, California
707 Broadway 92100 (714) 234-7231
Denver, Colorado
4355 Kearney
St. 80200
(303) 321-7520
Jacksonville, Florida 8206 Phillips Hwy. 32200
(904) 733-3682
Doraville, Georgia (Atlanta)
4060 Motors Industrial Way 30340 (404) 451-0171
Indianapolis, Indiana
2350
N. Shadeland Ave. 46200 (317) 356-7214
South Bend,
Indiana
3002 S. Michigan St. 46614
(219) 291-5000
Broadview, Illinois (Chicago) 2600 S. 25th Ave. 60153 (312) 681-8820
Peoria, Illinois
2009 N. Knoxville 61600 (309) 688-8611
Des Moines,
Iowa 818 Fifth Ave. 50300 (515) 244·3141
Lenexa, Kansas (Kansas City)
8900 Marshall Dr. 66015 (913) 888-1400
Wichita, Kansas
4921 E. 21st St .. 67200 (316) 685-1311
Louisville, Kentucky
4501 Indian Trail 40200
(502) 968-6203
Harahan,La. (New Orleans) 5401 Jefferson Hwy. 70123
(504) 733-6850
Portland, Maine 150 Riverside St. 04103
(207) 773-2934
Hanover, Maryland (Baltimore)
1800 Parkway Drive 21201
(301) 796·3600
72
Westwood, Mass. (Boston) 505 Blue Hill Drive 02090 (617) 329·1057
Grand Blanc, Michigan (Flint)
5198 Territorial Road 48439
(313)
694- 7000
Southfield,
Michigan (Detroit)
15565 Northland Drive 48075 (313) 353·9715
Edina, Minn. (Minneapolis)
7600 Metro Blvd. 55424
(612) 941-4000
Maryland Heights, Missouri (St. Louis)
83 Progress Parkway 63043 (314) 878·4200
Omaha, Nebraska
11616 "I" Street 68100
(402) 333·4500
Englewoo:t,
N. J. (Newark)
385 Nordhoff Place 07631
(201) 567·7200
Bethpage, Long Island, N. Y. 175 Central Ave., South 11714
(516) 694-7970
Cheektowaga, N. Y. (Buffalo) 2615 Walden Ave_ 14225
(716) 684--8060
Syracuse,
N. Y. 107 Twin Oaks Dr. 13200 (315) 437-2861
Tarrytown, N.
Y. 371 S. Broadway 10591 (914) 631·9129
Page 77 of 84
Downloaded from www.Manualslib.com manuals search engine INDEX
Accessory Drive Belts. . . . . . . . . . . . . . . .. 48 Accessory Position, Steering
Column Lock. .. . . . . .. . . .. . .. .. .... 13 Acrylic Lacquer. . . . . . . . . . . . . . . . . . . . .. 43 Adjusters, Automatic Brake ............ 21 Air Circulation . . . . . . . . . . . . . . . . . .. . ... 28 Air Cleaner. . . . . . . . . . . . . . . . . . . . . . . . .. 48 Air Conditioning
Maintenance. . . . . . . . . . . . . . . . . . . . . .. 52 Air Inlets, Ventilating System .......... 28 Ammeter ............................ 26 Antenna ................ ............. 33 Anti-freeze (See Cooling System). . . . . . .. 53 Anti-Spin Differential. . . . . . . . . . . . . . . .. 35 Anti-Theft Key Buzzer System .......... 13 Anti-Theft Steering Column Lock ....... 13 Appearance Care ..................... 41 Ash Trays. . . . . . . . . . . . . . . . . . . . . . . . . .. 22 Automatic Brake Adjusters. . . . . . . . . . .. 21 Automatic Transmissions
Fluid Check ........................ 49 Fluid Recommendations ............. 49 Maintenance. . . . . . . . . . . . . . . . . . . . . .. 49 Operation .......................... 15 Starter Safety Switch. . . . . . .. . . . . . ... 14 Axle Rear
Fluid Level. . . . . . . . . . . . . . . . . . . . . . .. 48 Maintenance. . . . . . . . . . . . . . . . . . . . . .. 48 Ball Joints ........................... 50 Battery
Emergency Starting. . . . . . . . . . . . . . . .. 37 Fluid Level. . . . . . . . . . . . . . . . . . . . . . .. 61 Gas Caution ....................... 37 Specifications. . . . . . . . . . . . . . . . . . . . . .. 66 Bearings,
Front Wheel.
................ 51 Before Driving Your Camaro . . . . . . . . . . 3
Belted Tires .......................... 55 Belts
Engine Drive. . . . . . . . . . . . . . . . . . . . . .. 48 Lap ................................ 5 Shoulder............ . .............. 7 Body Identification Number ............ 66 Brakes
D.riying Through Deep Water. . . . . . .. 20 Lmmgs ............................ 21 Maintenance ....................... 51 Master Cylinder Level. .............. 51 Parking Brake ...................... 20 Pedal Travel. . . . . . . . . . . . . . . . . . . . . .. 21 Power. .............. .............. 20 Self-Adjusting. . . . . . . . . . . . . . . . . . .. .. 21 Trailer ............................ 10 Warning Ljght. .. . . . . . . .. . . . . . . . . .. 24 Break-In Period Cars Pulling Trailers. . . . . . . . . . . . . . .. 10 New Car.......................... 2
Bright Metal Cleaning .......... '" .... 44 "Brights" Headlamp Indicator .......... 25 Buckles, Seat Belt.. . . . . . . . . . . . . . . . . . .. 6
Bulbs and Fuses . . . . . . . . . . . . . . . . . . . . .. 69 Bumper Jack
Operation ...... " .................. 40 Stowage ........................... 40 Buzzer Key Reminder.. .. .. .. .. .. . .. .. .. ... 13 Cap, Filler
Engine Oil. .................... 46, IBC
Gasoline .......................... IBC
Radiator. . . . . . . . . . . . . . . . . . . . . . . . . .. 39 Capacities. . . . . . . . . . . . . . . . . . . . . . . . . .. 66
Carbon Monoxide Caution ............. 12 Carpet Care .......................... 41
74
Carrier, Infant Safety.... . . . . . . .. .. . . .. 9
Changing Wheels and Tires. . . . . . . . . . .. 39 Charging System Indicator Light. . . . . . .. 24
Chassis Maintenance . . . . . . . . . . . . . . . . .. 50 Child Restraint
Cars Not Equipped With
Special Child Restraints. . . . . . . . . . 9
Child Safety Seat. . . . . . . . . . . . . . . . . . .
9 Infant Safety Carrier. . . . . . . . . . . . . . .. 9 Chrome Protection .................... 44
Cigarette Lighter. . . . . . . . . . . . . . . . . . . .. 27 Circuit Breakers, Headlamps. . . . . . . . . .. 69 Cleaning
Carpet Care. . . . . . . . . . . . . . . . . . . . . . .. 41 Exterior Finish and Trim. . . . . . . . . . .. 43 Fabric and Interior Trim ............ 42
Solvents Recommended .............. 41 Spot Removal. . . . . . . . . . . . . . . . . . . . .. 42 Vinyl Top ... , . . . . . . . . . . . . . . . . . . . .. 44
Clock ............................... 27 Clutch Maintenance. . . . . . . . . . . . . . . . . . . . . .. 49 Pedal Adjustment ................... 21 Coat Hooks........ ...... ........ .... 4
Cold Weather Starting ................. 14 Compartment
Glove ............................. 3
Luggage. .......... ................ 3
Complaint Procedure .................. 70 Conditioner, Air ...................... 30 Controlled Differential. . . . . . . . . . . . . . .. 35 Controls ............................. 13 Cooling System
Care ........... ................... 53 Coolant Recommendation. . . . . . . . . .. 53 Overheating Caution. . . . . . . . . . . . . . .. 39 Cowl Air Inlets ....................... 28
Page 81 of 84

Downloaded from www.Manualslib.com manuals search engine Steering Column Controls. . . . . . . . . . . . . . . . . .. 13 Column Lock. . . . . . . . . . . . . . . . . . . . .. 13 Gear Lubricant. .................... 51 Linkage Inspection. . . . . . . . . . . . . . . . .. 48 Maintenance. . . . . . . . . . . . . . . . . . . . . .. 48 Power ....................... ...... 18 Wheel, Tilt ......................... 19 Straps, Safety (See Seat Belts) Storage Of Items..... . .. . . . . . . . . . . . . .. 5 Suspension Maintenance. . . . . . . . . . . . . .. 50 Tape System, Stereo. . . . . . . . . . . . . . . . . .. 34 Temperature ........... ............ " 29 Control , Cooling.. . .. . . . . . . . . . . . . . .. 29 Control, Heating. . . . . . . . . . . . . . . . . . .. 29 Indicator Light/Gauge. . . . . . . . . . . . . .. 26 Thermostat ....... ................... 55 Tilt Steering Wheel.. . . . . . . . . . . . . . . . . .. 19 Tire
Belted .. ........................... 55 Care ........................ ...... 55 Changing ........................ " 39 Full Rated Load ............ ....... . 57 High Speed Operation ............... 56 Hydroplaning. . . . . . . . . . . . . .. . . . . . .. 58 Inflation Pressure ............. ... , .. 56 Inspection ............ ... ........ " 57 Load Limit. . . . . . . . . . . . . . . . . . . . . . .. 56 Rotation ..... ............ .......... 58 Space Saver ........................ 60 Traction ............. .............. 59 Tread Wear Indicators .... ... ....... 57 Usage and Options... . . . . . . . . . . . . . .. 55 Towing
Caution ........... ................ . 36
Disabled Vehicle .................... 36 To Start. .... ........ .............. 36 Toxic
Cleaning Solvents ................... 41 Exhaust Fumes ..................... 12 Traction, Wet Roads. . . . . . . . . . . . . . . . . . 5
Traffic Hazard Flasher. . . . . . . . . . . . . . .. 36 Trailer Hauling.. . . . . . . . . . . . .. . . . . .. .. 10 Break-In Period .................... 11 Cautions . . . . . . . . . . . . . . . . . . . . . . . . . .. 11 Equipment.. . . . . . . . . . . . . . . . . . . . . . .. 10 Special Maintenance ............. .... 10 Tire Inflation ......... .............. 10 Trailer Tongue Load. . . . . . . . . . . . . . .. 10 Transmission 3-Speed Manual. . . . . . . . . . . . . . . . . . .. 17 Automatic .................. ....... 15 Braking Effect On Hills .............. 16 Checking Fluid Level. . . . . . . . . . . . . . .. 49 Fluid And Strainer.. . . . . . . . . . . . . . . .. 49 Fluid Change Interval. . . . . . . . . . . . . . . 49 Maintenance. . . . . . . . . . . . . . . . . . . . . .. 49 Shift Controls.. . . . . . . .. .. . . . . . . . ... 50 Shift Indicator
Turbo Hydramatic .................. 50 Tread Wear Indicators ................ 57 Trim Care, Interior .................. , 41 Trunk
Driving With Trunk Open ........... 12 Turbo-Hydramatic . . . . . . . . . . . . . . . . . . .. 50 Maintenance. . . . . . . . . . . . . . . . . . . . . .. 50 Operation. . . . . . . . . . . . . . . . . . . . . . . . . . 15 Turn Signals and Lane Change
Feature ................. ........... 17 Underbody Maintenance. . . . . . . . . . . . . . . 61
78
Upholstery And Carpet Care ........... 41 Vehicle Identification Number .......... 66 Vehicle Loading ................... '" 57 Ventilating Blower .................... 26 Ventilating Grilles .................... 26 Vents Outside Air ..................... 26 Vinyl Fabric Care Interior ........... .. .... 41 Roof Care. . . . . . . . . . . . . . . . . . . . . . . .. 43 Volatile Cleaning Solvents. . . . . . . . . . . .. 41 Caution ........................... 41 Volume Control, Radio ................ 33 Warning Flasher, Hazard .............. 36 Warning Lights. . . . . . . . . . . . . . . . . . . . . .. 23 Brake ............................. 24 Engine Temperature ....... .......... 24 Generator .......................... 24 Oil Pressure.. . . . . . . . . . . . . . . . . . . . . .. 23 Warranty (See Warranty Folder)
Washers
Windshield
...................... '" 27 Washing ............................. 43 Waxing And Polishing.. .. . . . .. . . . . .. .. 43 Wheel Bearings , Front .... . . . . . . . . . . . .. 51 Wheel Changing. . . . . . . . . . . . . . . . . . . . .. 39 Wheel Discs, Replacement. . . . . . . . . . . .. 39 Wheel, Tilt Steering ................... 19 Windshield
Defrosting and
Defogging . . . . . . . . . . . . . . . . . . . . .
.. 29 Washer Use In Cold Weather ........ 27 Washer Solution ............ .......• 27 Wipers And Washers.. . . . . . . . . . . . . .. 27 Wrecker, Towing. . . . . . . . . . . . . . . . . . . .. 36 Zone Offices ......... ............ .. 72, 73