key CHEVROLET CAMARO 1996 4.G User Guide
[x] Cancel search | Manufacturer: CHEVROLET, Model Year: 1996, Model line: CAMARO, Model: CHEVROLET CAMARO 1996 4.GPages: 402, PDF Size: 21.38 MB
Page 70 of 402
Downloaded from www.Manualslib.com manuals search engine that there may have been a blow to the doors or the
hatch areas.
2. Turn the ignition to the RUN position with the
proper key.
For more information on customizing the features
mentioned here,
see “Feature Customization” in
the Index.
Turning Off the Alarm
If you started the alarm by pressing the panic button on
the Remote Lock Control transmitter, you must either
push that button again or turn the ignition switch to the
RUN position to stop the alarm. If
the alarm is sounding due to the shock sensor or a
door or hatch opening, it can be turned off by either
turning the ignition switch with
a proper key inserted or
by pressing any button on the Remote Lock Control
transmitter. If you
use your Remote Lock Control
transmitter
to silence the alarm, additional things will
happen depending upon which button you press.
Pressing the UNLOCK button will turn the
alarm off, will unlock the driver’s door and
disarm the system.
0 Pressing the LOCK button will turn the alarm off,
keep the doors locked and keep the system armed.
0 Pressing the trunk symbol button will turn the alarm
off and will unlock and disarm the hatch only.
0 Pressing the panic button will turn the alarm off,
keep the doors locked and keep the system armed.
If the alarm is sounding because an incorrect ignition
key was used, press any button on the Remote Lock
Control transmitter
to turn the alarm off.
The alarm
will stop by itself after two minutes.
2-15
Page 71 of 402
Downloaded from www.Manualslib.com manuals search engine PASS-Key@ I1
Your vehicle is equipped
with the PASS-Key
I1
(Personalized Automotive
Security System)
theft-deterrent system.
PASS-Key
I1 is a passive
theft-deterrent system.
It works when
you insert
or remove the key from
the ignition.
PASS-Key
I1 uses a resistor pellet in the ignition key
that matches a decoder in your vehicle.
When the PASS-Key
TI system senses that someone is
using the wrong key, it shuts down the vehicle’s starter and
fuel systems.
For about three minutes, the starter won’t
work and fuel won’t go to the engine.
If someone tries to
start your vehicle again or uses another key during this
time, the vehicle will not start.
This discourages someone
from randomly trying different keys with different resistor
pellets in an attempt to make a match.
The ignition key must be clean and
dry before it’s inserted in
the ignition or
the engine may not start. If the engine does not
start and the SECURITY light stays on when you try to start
the vehicle, the key may be dirty or wet. Turn the ignition off.
Clean and dry the key. Wait about three minutes and try
again. The SECURITY light will remain on during this
time. If the starter still won’t work, and the key appears
to be clean
and dry, wait about three minutes and try
another ignition key. At this time,
you may also want to
check the fuses (see
“Fuses and Circuit Breakers” in the
Index). If the starter won’t work with the .other key, your
vehicle needs service. If your vehicle does start, the first
ignition key may be faulty. See your Chevrolet dealer or
a locksmith who can service the PASS-Key
11.
If you accidentally use a key that has a damaged or
missing resistor pellet, the starter won’t work and the
SECURITY light will flash. But
you don’t have to wait
three minutes before trying another ignition key.
See your Chevrolet dealer or a locksmith who can
service the PASS-Key I1
to have a new key made.
If you’re ever driving and the SECURITY light comes on and
stays on, you will be able to restart your, engine if you
turn it
off. Your PASS-Key II system, however, is not working
properly and must
be serviced by your Chevrolet dealer. Your
vehicle is
not protected by the PASS-Key II system.
If you lose or damage a PASS-Key
I1 ignition key, see
your Chevrolet dealer or a locksmith who can service
PASS-Key
I1 to have a new key made. In an emergency,
call the Chevrolet Roadside Assistance Program at
1-800-CHEV-USA
(1 -800-243-8872).
2-16
Page 72 of 402
Downloaded from www.Manualslib.com manuals search engine Feature Customization (Option)
Your Chevrolet’s locks and lighting systems can be
programmed with several different features. The
features you can program depend upon the options that
came with your vehicle. The following list tells
you the
features that can be programmed. Listed next
to each
feature
is the option you need to have on your vehicle in
order
to be able to program that particular feature.
0
0
0
0
0
0
0
0
0
Exit Lighting (available for all)
Delayed Illumination (available for all)
Last Door Closed Locking (if equipped with power
door locks)
Lockout Prevention (if equipped with power door locks)
Remote Lock Control Verification (if equipped with
Vehicle and Content Theft-Deterrent/Alarm System)
Theft-Deterrent Arming Method (if equipped with
Vehicle and Content Theft-Deterrent/Alarm System)
Theft-Deterrent Arming Verification (if equipped with Vehicle and Content Theft-DeterrendAlarm System)
Driver’s Door Alarm Delay (if equipped with
Vehicle and Content Theft-DeterrentIAlarm System)
Shock Sensor Enable
(if equipped with Vehicle and
Content Theft-Detement/Alarm System) To
program features, your vehicle must be in the
programming mode. Follow these steps:
1. Put your key in the ignition.
2. Turn the ignition to the RUN position to disarm the
Vehicle and Content Theft-Deterrent/Alarm System.
3. Turn the ignition to the OFF position.
4. Remove the RADIO fuse. This fuse is in the main
fuse block, located on the left side
of your
instrument panel.
See “Fuses and Circuit Breakers’’
in the Index.
5. Put the ignition in the ACC position.
You should hear a chime
to verify that the system is
in programming mode. If the chime sounds once,
you will be able to program Exit Lighting, Delayed
Illumination, Last Door Closed Locking and Lockout
Prevention only. If the chime sounds twice and your
vehicle is equipped with the Vehicle and Content
Theft-Deterrent System, you will also be able to set
Remote Lock Control Verification, Arming Method,
Arming Verification, Driver’s Door Delay and Shock
Sensor Enable.
3-1 7
Page 73 of 402
Downloaded from www.Manualslib.com manuals search engine Exit Lighting and Delayed Illumination
Your vehicle comes with this feature set in Mode 4. This
means that your interior lamps will go on when the key
is removed from the ignition switch and stay on for
25 seconds after closing the doors to help in exiting the
vehicle. To change the factory setting, do the following:
1.
Turn the courtesy lamps ON by turning the instrument
panel brightness control knob all the way up.
2. Count the number of chimes you hear. The number of
chimes tells you which mode your vehicle is set for.
3. Turn the courtesy lamp switch to OFF.
4. Turn the courtesy lamp switch from ON to OFF until
you hear the number of chimes that correspond to the
mode selection you want.
Mode 1: Both Off (Interior lamps will turn on or off at
the same instant that a door is opened or closed).
Mode 2: Delayed Illumination Only (Interior lamps will
stay
on for 25 seconds after the doors are closed).
Mode 3: Exit Lighting Only (Interior lamps will come
on whenever you remove the ignition key).
Mode 4: Both On (This combines'Mode 2 and 3).
Last Door Closed Locking and
Lockout Prevention
Your vehicle comes with this feature set in Mode 2. This
means that your power door locks will not lock when
the keys are in the ignition and a door is open. To
change the factory setting, do the following:
1. Press the LOCK switch on the door.
2. Count the number of chimes you hear. The number of
chimes tells you which mode your vehicle is set for.
3. Press the LOCK switch on the door until you hear
the number of chimes that correspond to the mode
selection you want.
Mode 1: Both Off (Doors will locldunlock when you
press the power door lock switch).
Mode 2: Lockout Prevention Only (If you leave your keys
in
the ignition and get out the driver's door, you won't be
able to lock the doors with the power door lock switch).
Mode 3: Last Door Closed Locking Only (If the power
door lock switch is used to lock the vehicle while any
door
is open, you will hear three chimes. The doors will
not lock
until after all doors are closed).
Mode 4: Both On (This combines Mode 2 and 3).
2-18
Page 76 of 402
Downloaded from www.Manualslib.com manuals search engine Mode 3: Horn and LampdLamps (If you use the
transmitter to
arm the system, your parking lamps will
flash and your horn will chirp twice
to verify that the
system is armed. If
you use either the power door lock
switch or passive arming,
only your lamps will flash
for verification).
Mode 4: Lamps (When your vehicle arms, only your
parking lamps will flash for verificiition).
Driver’s Door Alarm Delay and Shock
Sensor Enable
Your vehicle comes with this feature set in Mode 4. This
means that if you open the driver’s door using
your key,
the alarm will not sound for eight seconds. Also the
shock sensor, able to detect sharp blows to your vehicle is
active. To change the factory setting, do the following:
1.
2.
3.
Turn the parking lamps on and off.
Count
the number of chimes you hear. The number of
chimes tells you which mode your vehicle is set for.
Turn the parking lamps on and off until you hear the
number
of chimes that correspond to the mode
selection you want.
Mode 1: Zero Delay and Shock Sensor Disabled (The
alarm will sound immediately if the driver’s door
is
opened with your key and the shock sensor will not be
available
to measure sharp blows to your vehicle).
Mode 2: Eight Second Delay and Shock Sensor
Disabled (The alarm will sound eight seconds after the
driver’s door is opened with your key and the shock
sensor will
not be available to measure sharp blows to
your vehicle).
Mode 3: Zero Delay and Shock Sensor Enabled (The
alarm will sound immediately after the driver’s door is
opened with your key and the shock sensor will be
available to measure sharp blows to your vehicle).
Mode 4: Eight Second Delay and Shock Sensor Enabled
(The alarm will sound eight seconds after the driver’s
door is opened with your key and the shock sensor will
be available to measure sharp blows
to your vehicle).
Leaving Programming Mode
When programming is done, turn the ignition switch to
the OFF position and replace the RADIO fuse.
2-21
Page 77 of 402
Downloaded from www.Manualslib.com manuals search engine New Vehicle “Break-In”
NOTICE:
Your modern Chevrolet doesn’t need an
elaborate “break-in.” But it will perform better
in the long run
if you follow these guidelines:
0
0
0
0
Keep your speed at 55 mph (88 km/h) or
less for the first
500 miles (804 km).
Don’t drive at any one speed
-- fast or
slow
-- for the first 500 miles (804 km).
Don’t make full-throttle starts.
Avoid making
hard stops for the first
200 miles (322 km) or so. During this time
your new brake linings aren’t yet broken
in. Hard stops with new linings can mean
premature wear and earlier replacement.
Follow this breaking-in guideline every
time you get new brake linings.
Don’t tow
a trailer during break-in.
See
“Towing a Trailer” in the Index for
more information.
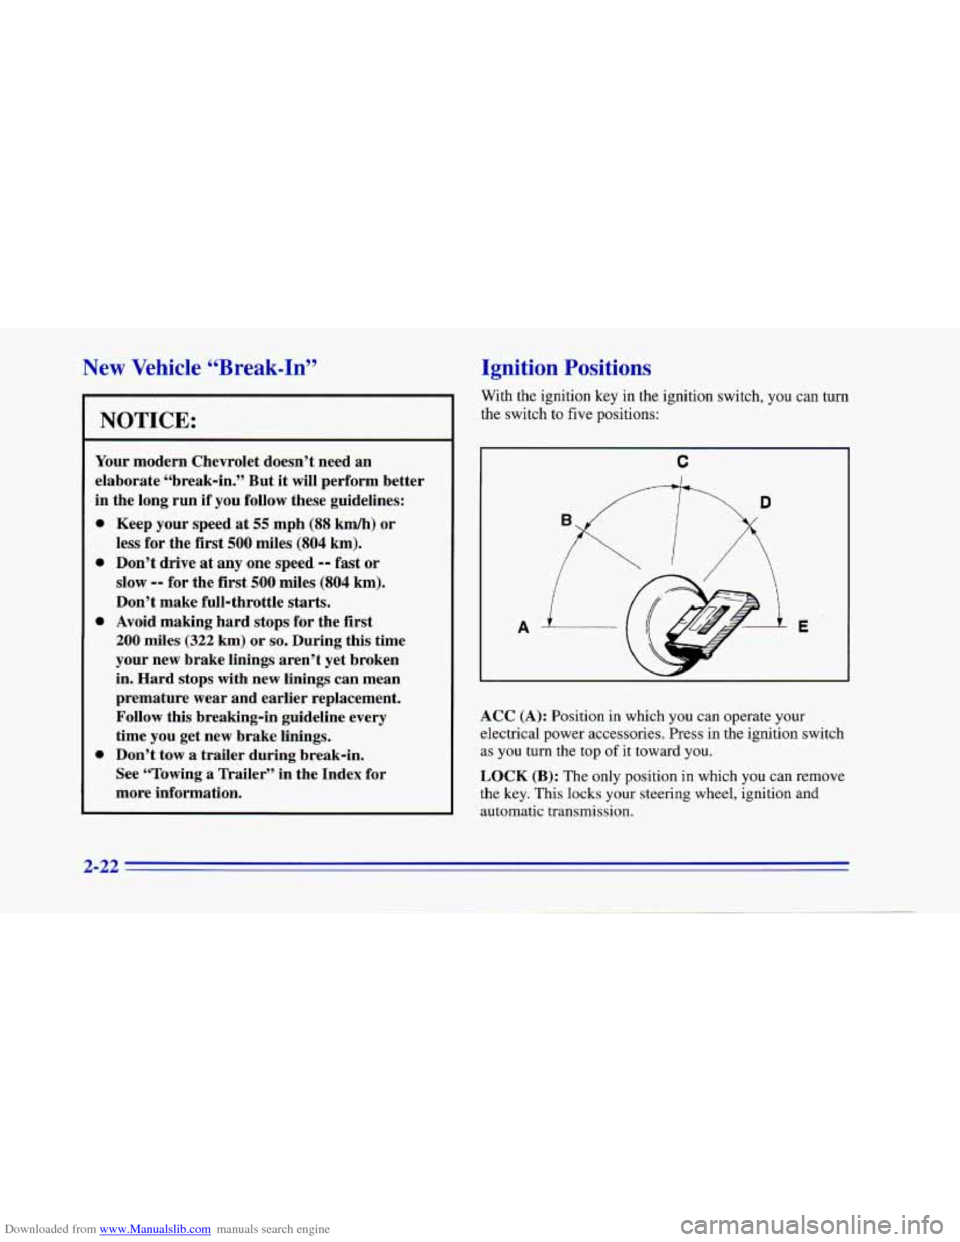
Ignition Positions
With the ignition key in the ignition switch, you can turn
the switch
to five positions:
C
A E
ACC (A): Position in which you can operate your
electrical power accessories. Press in the ignition switch
as you turn the top
of it toward you.
LOCK (B): The only position in which you can remove
the key. This locks your steering wheel, ignition and
automatic transmission.
2-22
Page 78 of 402
Downloaded from www.Manualslib.com manuals search engine If you have an automatic transmission, the ignition
switch can’t be turned
to LOCK unless the shift lever is
in the PARK
(P) position.
OFF (C): Unlocks the steering wheel, ignition and
automatic transmission, but does not send electrical
power to any accessories. Use this position if your
vehicle must be pushed or towed.
A warning tone will
sound if you open the driver’s door when the ignition is
in
OFF and the key is in the ignition.
RUN (D): Position to which the switch returns after
you start your engine and release the switch. The switch
stays
in the RUN position when the engine is running.
But even when the engine is
not running, you can
use RUN to operate your electrical power accessories
and to display some instrument panel warning and
indicator lights.
START (E): Starts the engine. When the engine starts,
release the key. The ignition switch will return
to RUN
for normal driving.
Note that even if the engine is not running,
ACC and
RUN allow you to operate your electrical accessories,
such as the radio and ventilation fan.
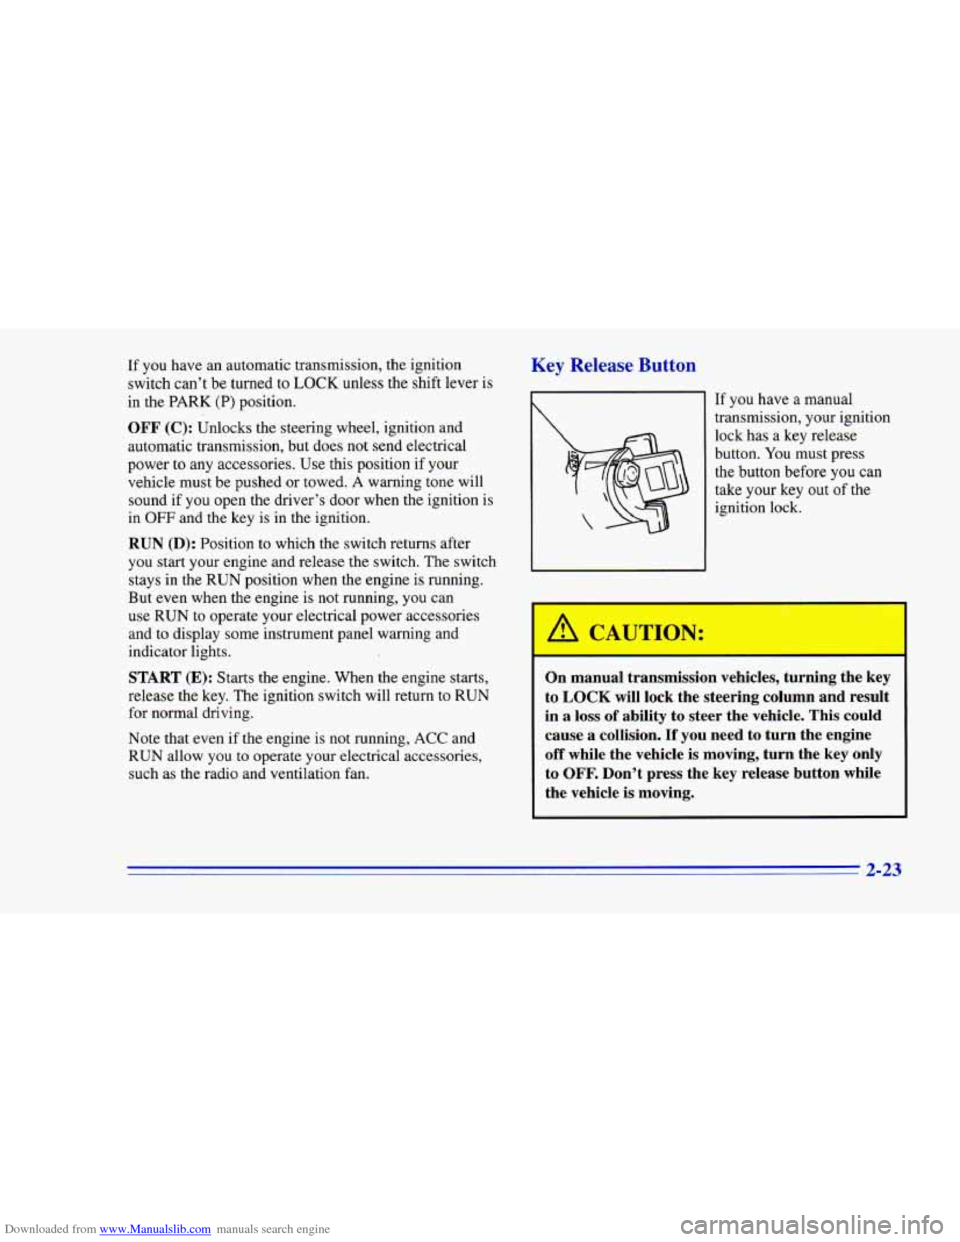
Key Release Button
If you have a manual
transmission, your ignition
lock has a key release
button.
You must press
the button before you
can
take your key out of the
ignition lock.
-1
On manual transmission vehicles, turning the key
to
LOCK will lock the steering column and result
in
a loss of ability to steer the vehicle. This could
cause
a collision. If you need to turn the engine
off while the vehicle is moving, turn the key only
to
OFF. Don’t press the key release button while
the vehicle is moving.
3-32
Page 79 of 402
Downloaded from www.Manualslib.com manuals search engine NOTICE:
If your key seems stuck in LOCK and you can’t
turn it, be sure it is all the way in.
If it is, then
turn the steering wheel left and right while you
turn the key hard. But turn the key only with
your hand.
Using a tool to force it could break
the key or the ignition switch.
If none of this
works, then your vehicle needs service.
Starting Your Engine
Engines start differently. The 8th digit of your Vehicle
Identification Number (VIN) shows
the code letter or
number for your engine. You will find the VIN at the top
left of your instrument panel. (See “Vehicle Identification
Number”
in the Index.) Follow the proper steps to start
the engine.
Automatic transmission
Move your shift lever to PARK (P) or NEUTRAL (N).
Your engine won’t start in any other position -- that’s a
safety feature. To restart when you’re already moving,
use NEUTRAL (N) only.
~
Don’t try to shift to PARK (P) if your Chevrolet
is moving.
If you do, you could damage the
transmission. Shift
to PARK (P) only when your
vehicle
is stopped.
Manual transmission
The gear selector should be in NEUTRAL (N). Hold the
clutch pedal to the floor and start the engine. Your
vehicle won’t start if the clutch pedal is not all the way
down
-- that’s a safety feature.
2-24
Page 80 of 402
Downloaded from www.Manualslib.com manuals search engine Starting Your 3.8 Liter Engine
1. Without pushing the accelerator pedal, turn your
ignition key to START. When the engine starts, let
go of the key. The idle speed will go down as your
engine gets warm.
NOTICE:
Holding your key in START for longer than
15 seconds at a time will cause your battery to be
drained much sooner. And the excessive heat can
damage your starter motor.
2. If it doesn’t start right away, hold your key in
START for about three to five seconds at a time until
your engine starts. Wait about
15 seconds between
each try to help avoid draining your battery.
3. If your engine still won’t start (or starts but then
stops),
it could be flooded with too much gasoline.
Try pushing your accelerator pedal all the way to the
floor and holding it there as you hold the key
in
START for about three seconds. If the vehicle starts
briefly but then stops again, do the same thing, but
this time keep the pedal down for five or six seconds.
This clears the extra gasoline from the engine.
After waiting about
15 seconds, repeat the normal
starting procedure.
NOTICE:
Your engine is designed to work with the
electronics in your vehicle.
If you add electrical
parts or accessories, you could change the way
the engine operates. Before adding electrical
equipment, check with your dealer.
If you don’t,
your engine might not perform properly.
If you ever have to have your vehicle towed, see
the part of this manual that tells how to do
it
without damaging your vehicle. See “Towing
Your Vehicle’’ in the Index.
2-25
Page 81 of 402
Downloaded from www.Manualslib.com manuals search engine Starting Your 5.7 Liter LTl -ngine
1. Without pushing the accelerator pedal, turn the
ignition key to
START. When the engine starts, let
go
of the key. The idle speed will go down as your
engine gets warm.
Holding your key in START for longer than
15 seconds at a time will‘cause your battery to be
drained much sooner. And the excessive heat can
damage your starter motor.
2. If it doesn’t start within 10 seconds, push the
accelerator pedal all the way to the floor, while
you
hold the ignition key in START. When the engine
starts, let
go of the key and let up on the accelerator
pedal. Wait about
15 seconds between each try to
help avoid draining your battery.
When starting your engine in very cold weather (below
0°F or -€8”C), do this:
1. With your foot off the accelerator pedal, turn the
ignition key to
START and hold it there. When the engine
starts, let
go of the key. Use the accelerator
pedal to maintain engine speed, if you have to, until
your engine has run
for a while.
stops), it could be flooded with too much gasoline.
Try pushing your accelerator pedal all the way to the
floor and holding it there as you hold the key in
START for about three seconds.
If the vehicle starts
briefly but then stops again, do the same thing, but
this time keep the pedal down for five or six seconds.
2. If your engine still won’t start (or starts but then
This clears the extra gasoline from the engine.
NOTICE:
Your engine is designed to work with the
electronics in your vehicle.
If you add electrical
parts or accessories, you could change the way
the engine operates. Before adding electrical
equipment, check with your dealer.
If you don’t,
your engine might not perform properly.
If you ever have to have your vehicle towed, see
the part
of this manual that tells how to do it
without damaging your vehicle. See “Towing
Your Vehicle” in the Index.
2-26