door lock CHEVROLET CAMARO 1997 4.G User Guide
[x] Cancel search | Manufacturer: CHEVROLET, Model Year: 1997, Model line: CAMARO, Model: CHEVROLET CAMARO 1997 4.GPages: 404, PDF Size: 20.96 MB
Page 60 of 404
Downloaded from www.Manualslib.com manuals search engine Have each transmitter you intend to match ready for the
next steps.
To match transmitters to your vehicle:
1.
2.
3.
4.
5.
6.
7.
Turn the ignition to the RUN position, then to the
OFF position. This will disarm the Vehicle and
Content Theft-DeterrendAlarm System (if your
vehicle has this option).
Remove the RADIO fuse. This fuse is located in the
main fuse block, located on the left side
of your main
instrument panel. See “Fuses and Circuit Breakers”
in the Index.
Turn the ignition switch from the
OFF to the RUN
position three times quickly (within five seconds).
The vehicle will respond by locking the doors,
unlocking the driver’s doors and releasing the hatch.
Your transmitter is now ready
to match the vehicle.
Press and hold the LOCK and UNLOCK buttons
on
the first transmitter for 15 seconds. The vehicle will
respond as in step
3.
Repeat Step 4 for the remaining transmitters.
When you have finished matching all
of your
transmitters, replace the
RADIO fuse.
Check that all transmitters work by pressing
their buttons.
If the transmitters don’t work, or if you’d rather not match
the transmitters yourself, see your Chevrolet dealer.
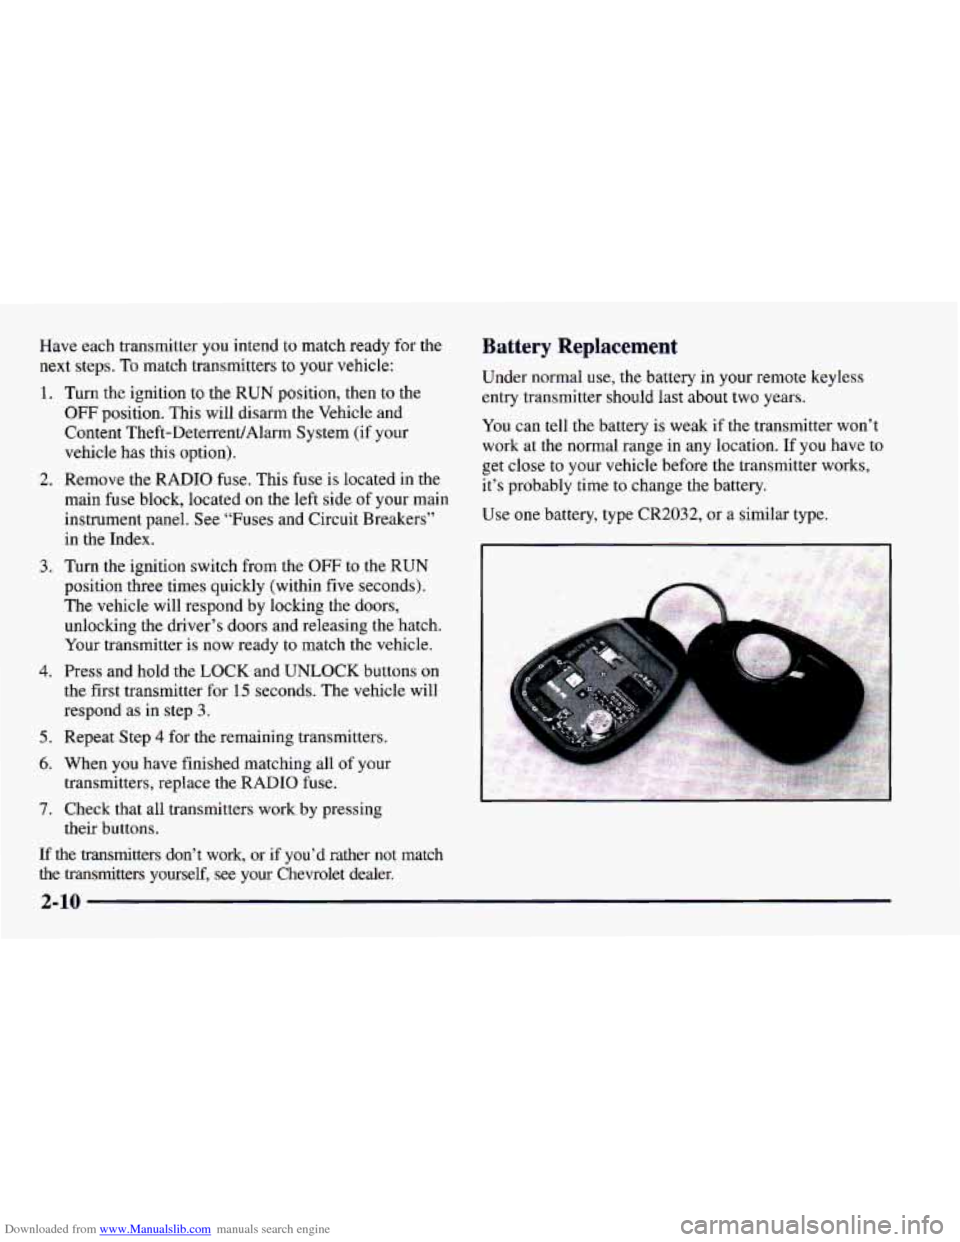
Battery Replacement
Under normal use, the battery in your remote keyless
entry transmitter should last about two years.
You can tell the battery is weak if the transmitter won’t
work at the normal range in any location. If
you have to
get close
to your vehicle before the transmitter works,
it’s probably time to change the battery.
Use one battery, type CR2032, or a similar type.
2-10
Page 62 of 404
Downloaded from www.Manualslib.com manuals search engine Hatch Release
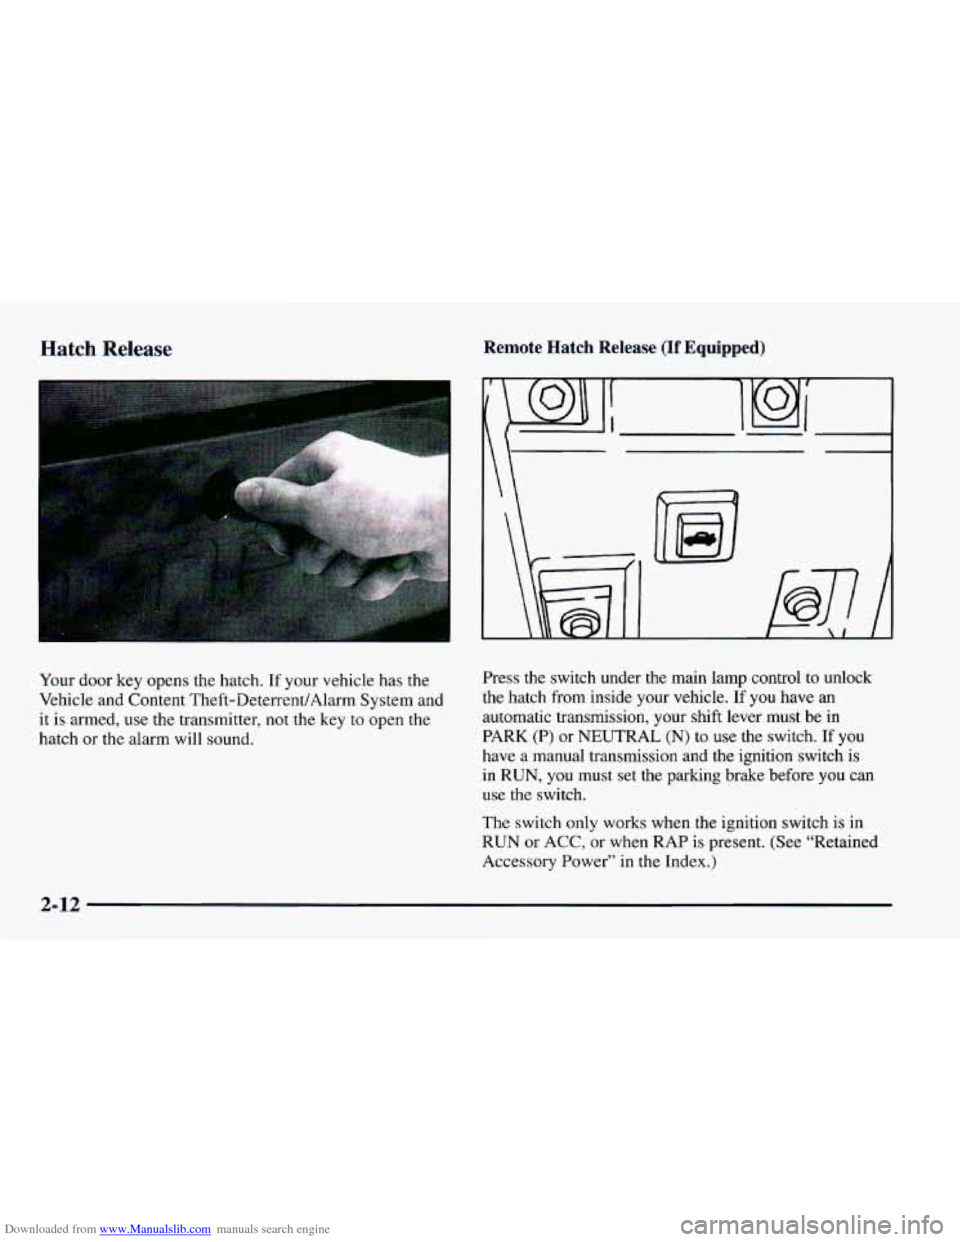
Your door key opens the hatch. If your vehicle has the
Vehicle and Content Theft-DeterrentlAlarm System and
it is armed, use the transmitter, not the key to open the
hatch or the alarm will sound.
Remote Hatch Release (If Equipped)
\ I
B
Press the switch under the main lamp control to unlock
the hatch from inside your vehicle.
If you have an
automatic transmission, your shift lever must be in
PARK (P) or NEUTRAL
(N) to use the switch. If you
have a manual transmission and the ignition switch is
in RUN, you must set the parking brake before you can
use
the switch.
The switch
only works when the ignition switch is in
RUN or
ACC, or when RAP is present. (See “Retained
Accessory Power”
in the Index.)
2-12
Page 63 of 404
Downloaded from www.Manualslib.com manuals search engine When you park your Chevrolet and open the driver’s
key from the ignition and take it with you. Always do
NOTICE: door, you’ll hear a chime reminding you to remove your
If you put things in the hatchback area, be sure
they won’t break the glass when you close it.
Never
slam the hatch down. You could break the
glass or damage the defogger grid (if equipped).
this. Your steering wheel will be locked, and so will
your ignition. If you have an automatic transmission,
taking your
key out also locks your transmission. And
remember
to lock the doors.
I I Parking at Night
On vehicles with the Vehicle and Content
Theft-DeterrenUAlarm System: The hatch switch will
not work while the system
is armed. See “Vehicle and
Content Theft-DeterrendAlarm System” in the Index.
Theft
Vehicle theft is big business, especially in some cities.
Although your Chevrolet
has a number of theft-deterrent
features, we know that nothing we put
on it can make it
impossible
to steal. However, there are ways you can help.
Key in the Ignition
If you leave your vehicle with the keys inside, it’s an
easy target for
joy riders or professional thieves -- so
don’t do it. Park
in a lighted spot, close all windows and lock your
vehicle. Remember to keep your valuables
out of sight.
Put them in a storage area, or take them with
you.
Parking Lots
If you park in a lot where someone will be watching
your vehicle, it’s best to lock
it up and take your keys.
But what if you have to leave your ignition key? What
if
you have to leave something valuable in your vehicle?
0 Put your valuables in a storage area, like your trunk
or glove box.
0 Lock the glove box.
@ Lock all the doors except the driver’s.
Then take the
door key with you.
2-13
Page 65 of 404
Downloaded from www.Manualslib.com manuals search engine Arming the System Remote Keyless Entry Transmitter Locking
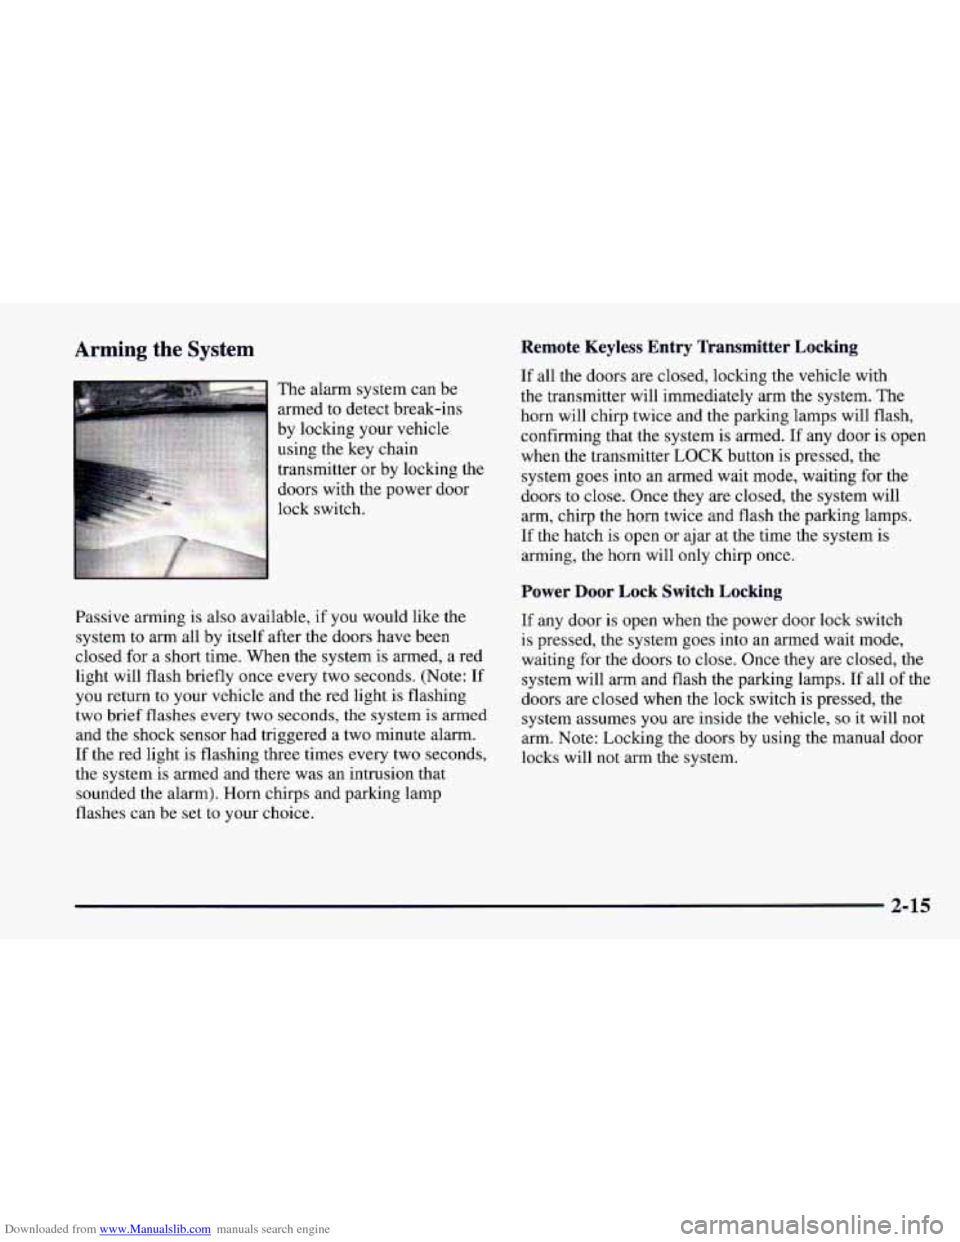
Passive arming is also available, if you would like the
system to arm all by itself after the doors have been
closed for a short time. When the system is armed, a red
light will flash briefly once every two seconds. (Note:
If
you return to your vehicle and the red light is flashing
two brief flashes every two seconds, the system is armed
and the shock sensor had triggered a two minute alarm.
If the red light is flashing three times every two seconds,
the system is armed and there was an intrusion that
sounded the alarm). Horn chirps and parking lamp
flashes can be set to your choice.
If all the doors are closed, locking the vehicle with
the transmitter will immediately arm the system. The
horn will chirp twice and the parking lamps will flash,
confirming that the system is armed.
If any door is open
when the transmitter
LOCK button is pressed, the
system goes into an armed wait mode, waiting for the
doors to close. Once they are closed, the system will
arm, chirp the horn twice and flash the parking lamps.
If the hatch is open or ajar at the time the system is
arming, the horn will only chirp once.
Power Door Lock Switch Locking
If any door is open when the power door lock switch
is pressed, the system goes into an armed wait mode,
waiting for the doors to close. Once they are closed, the
system will arm and flash the parking lamps.
If all of the
doors are closed when the lock switch is pressed, the
system assumes
you are inside the vehicle, so it will not
arm. Note: Locking the doors by using the manual door
locks will not arm the system.
2-15
Page 66 of 404
Downloaded from www.Manualslib.com manuals search engine Passive Arming
If the ignition was just turned off and a door was
opened, the system will arm
six seconds after all doors
are closed, whether or not you lock them. In all other
cases, the
system will wait 30 seconds after all doors are
closed before arming, allowing you time to get into the
vehicle and put the key in the ignition. The parking
lamps will flash when the system arms. Passive arming
is not enabled from the factory.
Disarming the System
There are two ways to disarm the system:
1. Press the UNLOCK button on the key chain transmitter.
If the horn chirps two or three times when you unlock the
car, the alarm sounded in your absence. Two chirps
means that the shock sensor was set
off and three chirps
means that a door
or the hatch was opened.
2. Turn the ignition to the RUN position with the
proper key.
For more information on customizing the features
mentioned here, see “Feature Customization”
in the Index.
lhrning Off the Alarm
If you started the alarm by pressing the panic button on
the key chain transmitter, you must either push that button again or
turn the ignition switch to the ON
position
to stop the alarm.
If the alarm is sounding due
to the shock sensor or a
door or hatch opening, it can be turned off by either
turning the ignition switch with a proper key inserted or
by pressing any button
on the key chain transmitter. If
you use your key chain transmitter to silence the alarm,
additional things will happen depending upon which
button
you press.
0
0
0
0
Pressing the UNLOCK button will turn the alarm
off, unlock the driver’s door and disarm the system.
Pressing the
LOCK button will turn the alarm off,
keep the doors locked and keep the system armed.
Pressing the trunk symbol button twice within five
seconds will turn the alarm off and will unlock and
disarm the hatch only.
Pressing the panic button will turn the alarm off,
keep the doors locked and keep the system armed.
If the alarm is sounding because an incorrect ignition
key was used, press any button on the key chain
transmitter
to turn the alarm off.
The alarm will stop by itself after two minutes.
2-16
Page 68 of 404
Downloaded from www.Manualslib.com manuals search engine If you’re ever driving and the SECURITY light comes
on and stays on, you will be able
to restart your engine if
you turn
it off. Your PASS-Key I1 system, however, is
not working properly and must be serviced by your
Chevrolet dealer. Your vehicle is not protected by the
PASS-Key
I1 system.
If you lose or damage a PASS-Key
I1 ignition key, see
your Chevrolet dealer
or a locksmith who can service
PASS-Key I1 to have a new key made. In an emergency,
call the Chevrolet Roadside Assistance Program at
1-800-CHEV-USA (1-800-243-8872).
Feature Customization (If Equipped)
Your Chevrolet’s locks and lighting systems can be
programmed with several different features. The
features you can program depend upon the options that
came with your vehicle. The following list tells
you the
features that can be programmed. Listed next to each
feature is the option you need
to have on your vehicle in
order to be able to program that particular feature.
Exit Lighting (available for all)
0 Delayed Illumination (available for all)
0 Last Door Closed Locking (if equipped with power
door locks)
Lockout Prevention (if equipped with power
door locks)
Remote Keyless Entry Verification (if equipped with
Vehicle and Content Theft-Deterrent/Alarm System)
Theft-Deterrent Arming Method (if equipped with
Vehicle and Content Theft-DeterrentIAlarm System)
Theft-Deterrent Arming Verification (if equipped
with Vehicle and Content Theft-DeterrendAlarm
System)
Driver’s Door Alarm Delay (if equipped with
Vehicle and Content Theft-DeterredAlarm System)
Shock Sensor Enable (if equipped with Vehicle and
Content Theft-DeterrenVAlarm System)
2-18
Page 69 of 404
Downloaded from www.Manualslib.com manuals search engine To program features, your vehicle must be in the
programming mode. Follow these steps:
1.
2.
3.
4.
5,
Put your key in the ignition.
Turn the ignition to the
RUN position to disarm the
Vehicle and Content Theft-DeterrentlAlarm System.
Turn the ignition to the
OFF position.
Remove
the RADIO fuse. This fuse is in the main
fuse block, located on the left side
of your
instrument panel. When the main fuse block is open,
the RADIO fuse is located in the lower right hand
corner of the fuse panel. See “Fuses and Circuit
Breakers’’ in the Index.
Turn the ignition
to the ACC position.
You should hear a chime to verify that the system is
in programming mode, If the chime sounds once,
you will be able to program Exit Lighting, Delayed
Illumination, Last
Door Closed Locking and Lockout
Prevention only. If the chime sounds twice and your
vehicle is equipped with the Vehicle and Content
Theft-Deterrent System,
you will also be able to set
Remote Keyless Entry Verification, Arming Method,
Arming Verification, Driver’s Door Delay and Shock
Sensor Enable.
Exit Lighting and Delayed Illumination
Exit Lighting: Your interior lights will come on for up
to 25 seconds when the key is removed from the
ignition switch.
Delayed Illumination: Your interior lights will come
on
and stay on for up to 25 seconds when entering the vehicle
and for up
to five seconds when leaving your vehicle.
Your vehicle comes with both features enabled. (Mode 4)
To change the factory setting, do the following:
1. Turn the courtesy la~nps on by turning the instrument
panel brightness control knob all the way up.
2. Count the number of chimes you hear. The number
of chimes tells you which mode your vehicle is
set for.
3. Turn the courtesy lamp switch to OFF.
4. Turn the courtesy lamp switch from ON to OFF until
you hear the number of chimes that correspond to the
mode selection you want.
Mode 1: Both Off
Mode 2: Delayed Illumination Only
Mode 3: Exit Lighting Only
Mode 4: Both On
2-19
Page 70 of 404
Downloaded from www.Manualslib.com manuals search engine Last Door Closed Locking and
Lockout Prevention
Your vehicle comes with this feature set in Mode 2. This
means that your power door locks will not lock when
the keys are in the ignition and a door is open. To
change the factory setting, do the following:
1. Press the LOCK switch on the door.
2. Count the number of chimes you hear. The number of
chimes tells
you which mode your vehicle is set for.
3. Press the LOCK switch on the door until you hear
the number
of chimes that correspond to the mode
selection you want.
Mode 1: Both Off (Doors will lockhnlock when you
press the power door lock switch).
Mode 2: Lockout Prevention Only (If you leave your
keys in the ignition and get out the driver’s door,
you
won’t be able to lock the doors with the power door
lock switch).
Mode 3: Last Door Closed Locking Only (If the power
door lock switch is used to lock the vehicle while any
door is open,
you will hear three chimes. The doors will
not lock until after all doors are closed).
Remote Keyless Entry Verification
Your vehicle comes with this feature set in Mode 5. This
means that when you use the key chain transmitter to
lockhnlock your vehicle, your parking lamps will flash
briefly upon the first push
on LOCK. Your horn will
sound briefly, your parking lamps will flash briefly upon
the second push
on LOCK and your parking lamps will
flash briefly upon
any push on UNLOCK. To change the
factory setting, do the following:
1. Press the UNLOCK switch on the Remote Keyless
Entry transmitter.
2. Count the number of chimes you hear. The number of
chimes tells
you which mode your vehicle is set for.
3. Press the UNLOCK switch on the Remote Keyless
Entry transmitter until
you hear the number of chimes
that correspond to the mode selection
you want.
Mode 1: All Off (The headlamps will not flash and the
horn will not sound to provide
you feedback that a
lockhnlock command has been received by the Remote
Keyless Entry transmitter).
Mode 4: Both On (This combines Mode 2 and 3).
Page 71 of 404
Downloaded from www.Manualslib.com manuals search engine Mode 2: Horn and Lamps/Lamps (Your horn will sound
briefly and your parlung lamps will flash when you
press LOCK
on the key chain transmitter. Only your
parking lamps will flash when you press UNLOCK).
Mode 3: Horn and Lamps (Your horn will sound briefly
and your parking lamps will flash every time you push
LOCK and UNLOCK).
Mode 4: Lamps (Your parking lamps will flash every
time you push LOCK and UNLOCK).
Mode 5: Lamps/Horn and LampsLamps (Your lamps
will flash upon the first push
on LOCK, your lamps
will flash and your horn will sound upon the second
push on LOCK and your lamps will flash upon any push
on UNLOCK).
Theft-Deterrent Arming Method
Your vehicle comes with this feature set in Mode 3. This
means that both your Remote Keyless Entry transmitter
and the power door lock switch will actively arm
the
system. To change the factory setting, do the following:
1. Press the UNLOCK switch on the door.
2. Count the number of chimes you hear. The number of
chimes tells
you which mode your vehicle is set for.
3. Press the UNLOCK switch on the door until you
hear the number of chimes that correspond to the
mode selection you want.
Mode 1: Alarm System Off (The system will not arm).
Mode 2: Remote Keyless Entry Transmitter Lock
(When
you lock your doors using the Key Chain
Transmitter, the system will arm itself).
Mode 3: Remote Keyless Entry Transmitter/Power
Door Lock Switch (If
you use either the Remote Keyless
Entry transmitter or the power door lock switch
to lock
the doors, the system will arm itself).
Mode 4: Passive arming and Remote Keyless Entry
Transmitter/Power Door Lock Switch Arming (The
system will arm itself after all doors are closed, plus
arming per mode
3).
2-21
Page 72 of 404
Downloaded from www.Manualslib.com manuals search engine Theft-Deterrent Arming Verification
Your vehicle comes with this feature set in Mode 3.
This means that if you arm the system using the key
chain transmitter, your parking lamps will flash and your
horn will chirp twice to verify that the system is armed.
If it only chirps once, the hatch is open or unlatched. If
you arm the system using either the power door lock
switch or by passive arming, only the parking lamps will
flash for verification. To change the factory setting, do
the following:
1. Press the LOCK switch on the Remote Keyless
Entry Transmitter.
2. Count the number of chimes you hear. The number of
chimes tells you which mode your vehicle is
set for.
3. Press the LOCK switch on the transmitter until you
hear the number of chimes that correspond to the
mode selection you want.
Mode 1: All Off (No horn chirps or parking lamp flash).
Mode 2: Horn and Lamps (Your parking lamps will
flash and your horn will chirp twice
to verify the system
is armed using any arming method).
Mode 3: Horn and LampsLamps (If you use the
transmitter to arm the system, your parking lamps will
flash and your horn will chirp twice to verify that the
system is armed. If you use either the power door lock
switch
or passive arming, only your lamps will flash
for verification).
Mode 4: Lamps (When your vehicle arms, only your
parking lamps will flash for verification).
Driver’s Door Alarm Delay and Shock
Sensor Enable
Your vehicle comes with this feature set in Mode 4. This
means that if you open the driver’s door using your key,
the alarm will not sound for eight seconds. Also the shock
sensor, able
to detect sharp blows to your vehicle is active.
To change the factory setting, do the following:
1. Turn the parking lamps on and off.
2. Count the number of chimes you hear. The number of
chimes tells you which mode your vehicle
is set for.
3. Turn the parking lamps on and off until you hear the
number of chimes that correspond to the mode
selection you want.
2-22