display CHEVROLET CAMARO 2011 5.G Owners Manual
[x] Cancel search | Manufacturer: CHEVROLET, Model Year: 2011, Model line: CAMARO, Model: CHEVROLET CAMARO 2011 5.GPages: 414, PDF Size: 6.24 MB
Page 1 of 414

Black plate (1,1)Chevrolet Camaro Owner Manual - 2011
2011 Chevrolet Camaro Owner ManualM
In Brief. . . . . . . . . . . . . . . . . . . . . . . . 1-1
Instrument Panel . . . . . . . . . . . . . . 1-2
Initial Drive Information . . . . . . . . 1-4
Vehicle Features . . . . . . . . . . . . . 1-12
Performance and Maintenance . . . . . . . . . . . . . . . . 1-18
Keys, Doors and Windows . . . 2-1
Keys and Locks . . . . . . . . . . . . . . . 2-2
Doors . . . . . . . . . . . . . . . . . . . . . . . . . . 2-9
Vehicle Security . . . . . . . . . . . . . . 2-10
Exterior Mirrors . . . . . . . . . . . . . . . 2-13
Interior Mirrors . . . . . . . . . . . . . . . . 2-14
Windows . . . . . . . . . . . . . . . . . . . . . 2-15
Roof . . . . . . . . . . . . . . . . . . . . . . . . . . 2-17
Seats and Restraints . . . . . . . . . 3-1
Head Restraints . . . . . . . . . . . . . . . 3-2
Front Seats . . . . . . . . . . . . . . . . . . . . 3-3
Rear Seats . . . . . . . . . . . . . . . . . . . . 3-7
Safety Belts . . . . . . . . . . . . . . . . . . . . 3-8
Airbag System . . . . . . . . . . . . . . . . 3-23
Child Restraints . . . . . . . . . . . . . . 3-39 Storage
. . . . . . . . . . . . . . . . . . . . . . . 4-1
Storage Compartments . . . . . . . . 4-1
Additional Storage Features . . . 4-1
Instruments and Controls . . . . 5-1
Controls . . . . . . . . . . . . . . . . . . . . . . . 5-2
Warning Lights, Gauges, and
Indicators . . . . . . . . . . . . . . . . . . . . 5-6
Information Displays . . . . . . . . . . 5-25
Vehicle Messages . . . . . . . . . . . . 5-34
Vehicle Personalization . . . . . . . 5-42
Universal Remote System . . . . 5-46
Lighting . . . . . . . . . . . . . . . . . . . . . . . 6-1
Exterior Lighting . . . . . . . . . . . . . . . 6-1
Interior Lighting . . . . . . . . . . . . . . . . 6-6
Lighting Features . . . . . . . . . . . . . . 6-6
Infotainment System . . . . . . . . . 7-1
Introduction . . . . . . . . . . . . . . . . . . . . 7-1
Radio . . . . . . . . . . . . . . . . . . . . . . . . . . 7-8
Audio Players . . . . . . . . . . . . . . . . 7-14
Phone . . . . . . . . . . . . . . . . . . . . . . . . 7-23
Climate Controls . . . . . . . . . . . . . 8-1
Climate Control Systems . . . . . . 8-1
Air Vents . . . . . . . . . . . . . . . . . . . . . . . 8-4 Driving and Operating
. . . . . . . . 9-1
Driving Information . . . . . . . . . . . . . 9-2
Starting and Operating . . . . . . . 9-18
Engine Exhaust . . . . . . . . . . . . . . 9-28
Automatic Transmission . . . . . . 9-30
Manual Transmission . . . . . . . . . 9-34
Brakes . . . . . . . . . . . . . . . . . . . . . . . 9-36
Ride Control Systems . . . . . . . . 9-38
Cruise Control . . . . . . . . . . . . . . . . 9-43
Object Detection Systems . . . . 9-46
Fuel . . . . . . . . . . . . . . . . . . . . . . . . . . 9-48
Towing . . . . . . . . . . . . . . . . . . . . . . . 9-53
Conversions and Add-Ons . . . 9-60
Vehicle Care . . . . . . . . . . . . . . . . . 10-1
General Information . . . . . . . . . . 10-2
Vehicle Checks . . . . . . . . . . . . . . . 10-4
Headlamp Aiming . . . . . . . . . . . 10-35
Bulb Replacement . . . . . . . . . . 10-38
Electrical System . . . . . . . . . . . . 10-43
Wheels and Tires . . . . . . . . . . . 10-50
Jump Starting . . . . . . . . . . . . . . . 10-91
Towing . . . . . . . . . . . . . . . . . . . . . . 10-95
Appearance Care . . . . . . . . . . . 10-95
Page 9 of 414

Black plate (3,1)Chevrolet Camaro Owner Manual - 2011
In Brief 1-3
A.Air Vents on page 8‑4.
B. Driver Shift Controls (If Equipped). See Automatic
Transmission on page 9‑30.
C. Instrument Cluster on page 5‑7.
D. Windshield Wiper/Washer on
page 5‑3.
E. Infotainment on page 7‑1.
F. Turn and Lane‐Change Lever. See Turn and Lane-Change
Signals on page 6‑5.
Headlamp High/Low-Beam
Changer on page 6‑2.
Flash-to-Pass on page 6‑3.
Driver Information Center
(DIC) Buttons (If Equipped).
See Driver Information Center
(DIC) on page 5‑25. G. Data Link Connector (DLC)
(Out of View). See Malfunction
Indicator Lamp on page 5‑18.
H. Cruise Control on page 9‑43.
I. Exterior Lamp Controls on
page 6‑1.
Front Fog Lamps on page 6‑5
(If Equipped).
Instrument Panel Illumination
Control on page 6‑6.
J. Steering Wheel Adjustment on
page 5‑2.
K. Horn on page 5‑3.
L. Steering Wheel Controls on
page 5‑2.
M. Head-Up Display (HUD) on
page 5‑29 (If Equipped). N.
Climate Control Systems on
page 8‑1.
O. Transmission Temperature
Gauge on page 5‑12.
Voltmeter Gauge on page 5‑13.
Engine Oil Temperature Gauge
on page 5‑11.
Engine Oil Pressure Gauge on
page 5‑9.
P. Shift Lever. See Shifting Into
Park (Automatic Transmission)
on page 9‑24.
Q. Power Outlets on page 5‑5.
R. Hazard Warning Flashers on
page 6‑5.
Power Door Locks on page 2‑8.
S. Glove Box on page 4‑1.
Page 18 of 414
Black plate (12,1)Chevrolet Camaro Owner Manual - 2011
1-12 In Brief
Manual Transmission
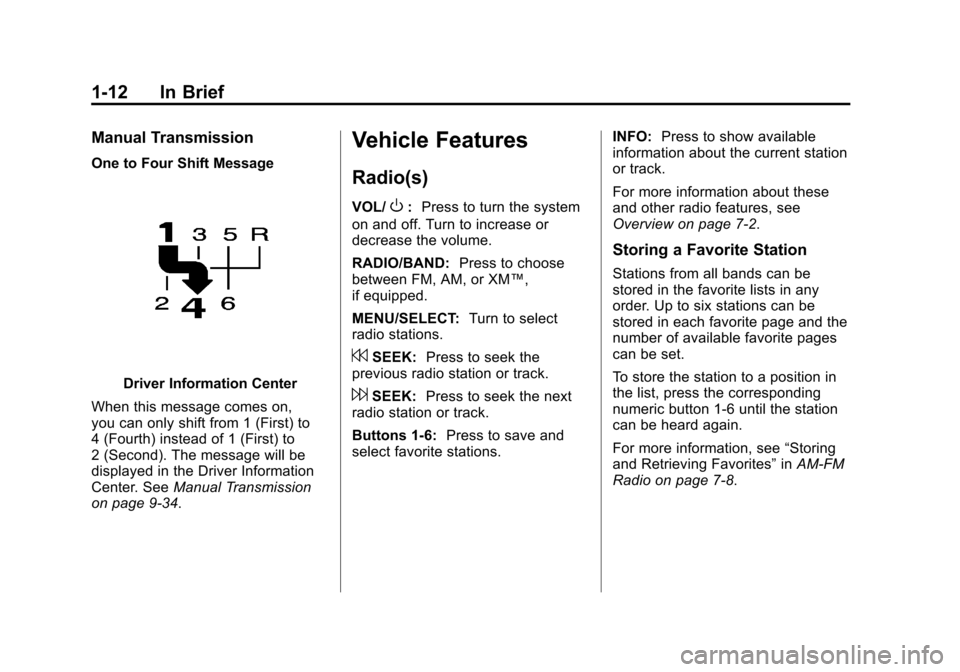
One to Four Shift Message
Driver Information Center
When this message comes on,
you can only shift from 1 (First) to
4 (Fourth) instead of 1 (First) to
2 (Second). The message will be
displayed in the Driver Information
Center. See Manual Transmission
on page 9‑34.
Vehicle Features
Radio(s)
VOL/O: Press to turn the system
on and off. Turn to increase or
decrease the volume.
RADIO/BAND: Press to choose
between FM, AM, or XM™,
if equipped.
MENU/SELECT: Turn to select
radio stations.
7SEEK: Press to seek the
previous radio station or track.
6SEEK: Press to seek the next
radio station or track.
Buttons 1‐6: Press to save and
select favorite stations. INFO:
Press to show available
information about the current station
or track.
For more information about these
and other radio features, see
Overview on page 7‑2.
Storing a Favorite Station
Stations from all bands can be
stored in the favorite lists in any
order. Up to six stations can be
stored in each favorite page and the
number of available favorite pages
can be set.
To store the station to a position in
the list, press the corresponding
numeric button 1‐6 until the station
can be heard again.
For more information, see “Storing
and Retrieving Favorites” inAM-FM
Radio on page 7‑8.
Page 19 of 414
Black plate (13,1)Chevrolet Camaro Owner Manual - 2011
In Brief 1-13
Setting the Clock
Adjusting the Time
1. Press the CONFIG button.
2. Select Time and Date Settings.
3. Select Set Time.
4. Turn the MENU/SELECT knob toadjust the highlighted value.
5. Press the MENU/SELECT knob to select the next value.
6. To save the time or date and return to the Time and
Date Settings menu, press
the
0BACK button at any time
or press the MENU/SELECT
knob after adjusting the minutes. Setting the 12/24 Hour Format
1. Press the CONFIG button.
2. Select Time and Date Settings.
3. Highlight 12/24 Hour Format.
4. Press the MENU/SELECT knob
to select the 12 hour or 24 hour
display format.
For detailed instructions on setting
the clock, see Clock on page 5‑4.
Satellite Radio
Vehicles with an XM™ Satellite
Radio tuner and a valid XM Satellite
Radio subscription can receive XM
programming.
XM Satellite Radio Service
XM is a satellite radio service based
in the 48 contiguous United States
and 10 Canadian provinces.
XM Satellite Radio has a wide
variety of programming and
commercial-free music, coast to
coast, and in digital-quality sound.
A fee is required to receive the
XM service.
For more information refer to:
.www.xmradio.com or call
1-800-929-2100 (U.S.).
.www.xmradio.ca or call
1-877-438-9677 (Canada).
For more information, see Satellite
Radio on page 7‑10.
Page 21 of 414
Black plate (15,1)Chevrolet Camaro Owner Manual - 2011
In Brief 1-15
Cruise Control
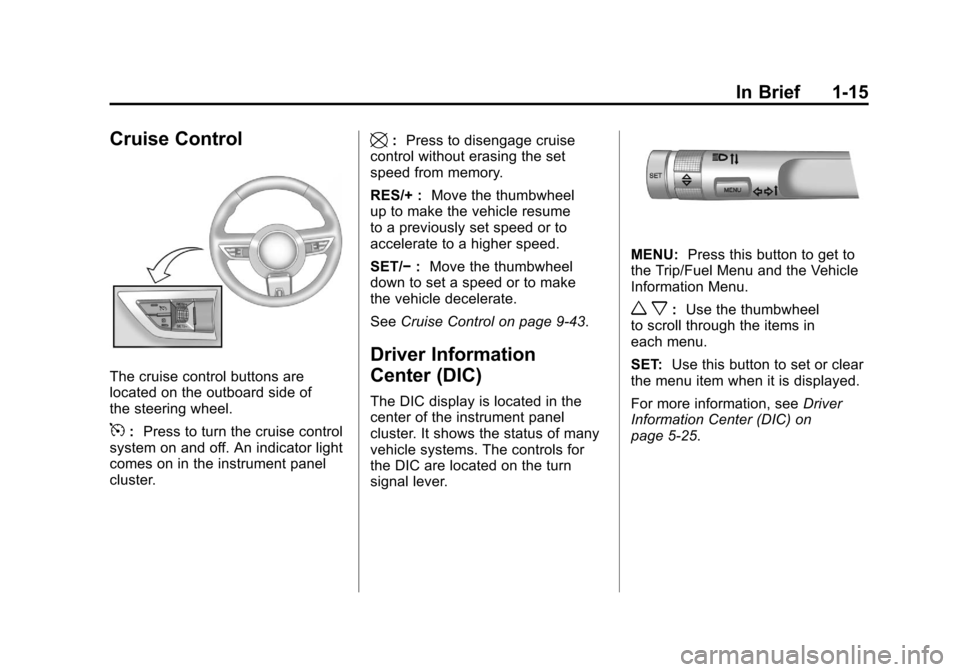
The cruise control buttons are
located on the outboard side of
the steering wheel.
5:Press to turn the cruise control
system on and off. An indicator light
comes on in the instrument panel
cluster.
\: Press to disengage cruise
control without erasing the set
speed from memory.
RES/+ : Move the thumbwheel
up to make the vehicle resume
to a previously set speed or to
accelerate to a higher speed.
SET/− :Move the thumbwheel
down to set a speed or to make
the vehicle decelerate.
See Cruise Control on page 9‑43.
Driver Information
Center (DIC)
The DIC display is located in the
center of the instrument panel
cluster. It shows the status of many
vehicle systems. The controls for
the DIC are located on the turn
signal lever.
MENU: Press this button to get to
the Trip/Fuel Menu and the Vehicle
Information Menu.
w x: Use the thumbwheel
to scroll through the items in
each menu.
SET: Use this button to set or clear
the menu item when it is displayed.
For more information, see Driver
Information Center (DIC) on
page 5‑25.
Page 24 of 414
Black plate (18,1)Chevrolet Camaro Owner Manual - 2011
1-18 In Brief
Performance and
Maintenance
Traction Control
System (TCS)
The traction control system limits
wheel spin. The system turns on
automatically every time the vehicle
is started.
.To turn off traction control, press
and release
glocated on the
console in front of the shift
lever.
iilluminates and the
appropriate DIC message is
displayed. See Ride Control
System Messages on page 5‑38.
.Press the button again to turn
traction control back on.
For more information, see Traction
Control System (TCS) on
page 9‑38.
StabiliTrak®System
StabiliTrak assists with directional
control of the vehicle in difficult
driving conditions. The system turns
on automatically every time the
vehicle is started.
.To turn off both traction control
and electronic stability control,
press and hold
guntildand
iilluminate and the appropriate
DIC message is displayed.
See Ride Control System
Messages on page 5‑38.
.Press the button again to turn on
both systems.
For more information, see
StabiliTrak
®System on page 9‑39.
Towing
The vehicle was neither designed
nor intended to be towed with any of
its wheels on the ground.
See Towing the Vehicle on
page 10‑95 andRecreational
Vehicle Towing on page 10‑95.
Tire Pressure Monitor
This vehicle may have a Tire
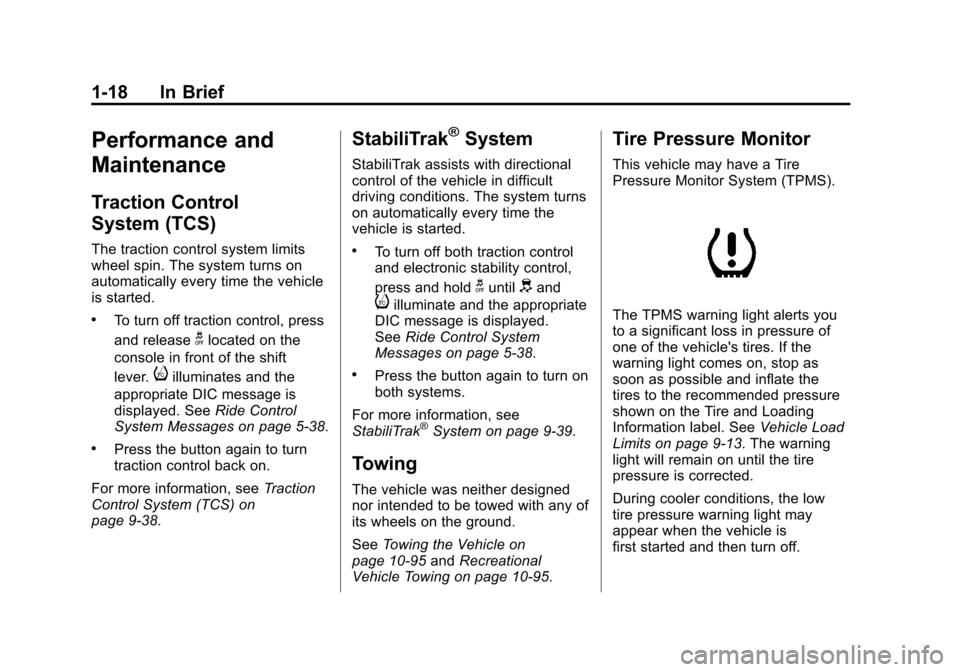
Pressure Monitor System (TPMS).
The TPMS warning light alerts you
to a significant loss in pressure of
one of the vehicle's tires. If the
warning light comes on, stop as
soon as possible and inflate the
tires to the recommended pressure
shown on the Tire and Loading
Information label. See Vehicle Load
Limits on page 9‑13. The warning
light will remain on until the tire
pressure is corrected.
During cooler conditions, the low
tire pressure warning light may
appear when the vehicle is
first started and then turn off.
Page 25 of 414
Black plate (19,1)Chevrolet Camaro Owner Manual - 2011
In Brief 1-19
This may be an early indicator that
the tire pressures are getting low
and the tires need to be inflated to
the proper pressure.
The TPMS does not replace normal
monthly tire maintenance. It is the
driver’s responsibility to maintain
correct tire pressures.
See Tire Pressure Monitor System
on page 10‑60.
Tire Sealant and
Compressor Kit
This vehicle may come with a jack
and spare tire or a tire sealant and
compressor kit. The kit can be used
to temporarily seal small punctures
in the tread area of the tire.
See Tire Sealant and Compressor
Kit on page 10‑78 for complete
operating information.
If the vehicle came with a jack and
spare tire, see If a Tire Goes Flat on
page 10‑75.
Engine Oil Life System
The engine oil life system calculates
engine oil life based on vehicle use
and displays the CHANGE ENGINE
OIL SOON message when it is time
to change the engine oil and filter.
The oil life system should be reset
to 100% only following an oil
change.
Resetting the Oil Life System
1. Turn the ignition to ON/RUN with the engine off.
2. Fully press and release the accelerator pedal three times
within five seconds.
See Engine Oil Life System on
page 10‑14.
Driving for Better Fuel
Economy
Driving habits can affect fuel
mileage. Here are some driving
tips to get the best fuel economy
possible.
.Avoid fast starts and accelerate
smoothly.
.Brake gradually and avoid
abrupt stops.
.Avoid idling the engine for long
periods of time.
.When road and weather
conditions are appropriate,
use cruise control.
.Always follow posted speed
limits or drive more slowly when
conditions require.
.Keep vehicle tires properly
inflated.
.Combine several trips into a
single trip.
Page 39 of 414
Black plate (11,1)Chevrolet Camaro Owner Manual - 2011
Keys, Doors and Windows 2-11
Arming the System
To arm the system, pressQon the
RKE transmitter.
The alarm automatically arms after
about 30 seconds. The security
light, located on the instrument
panel, flashes.
Disarming the System
To disarm the system, do one of the
following:
.PressKon the RKE transmitter.
.Turn the ignition to ON/RUN.
The security light stays on for
approximately one second when
the vehicle is disarming.
If the system is armed when there
are people inside of the vehicle,
pulling the door handle from the
inside one time will unlock the door.
Pulling the handle a second time
will unlatch the door.
How the System Alarm is
Activated
To activate the system if it is armed,
open any door, the trunk, or hood.
The horn will sound and the hazard
warning flashers will flash.
How to Turn Off the System
Alarm
To turn off the system alarm, do one
of the following:
.PressKon the RKE transmitter.
.Turn the ignition to ON/RUN.
The theft-deterrent system is
disarmed when the alarm is
turned off.
How to Detect a Tamper
Condition
If the horn sounds and the turn
signal lamps flash three times
when
Kis pressed, an attempted
break-in has occurred while the
system was armed. The vehicle
may also display a message on the
DIC. See Anti-Theft Alarm System
Messages on page 5‑39 for more
information.
Immobilizer
See Radio Frequency Statement on
page 13‑19 for information
regarding Part 15 of the Federal
Communications Commission
(FCC) rules and Industry Canada
Standards RSS-210/220/310.
Page 44 of 414
Black plate (16,1)Chevrolet Camaro Owner Manual - 2011
2-16 Keys, Doors and Windows
The switches work when
the ignition is in ON/RUN
or ACC/ACCESSORY, or in
Retained Accessory Power (RAP).
SeeRetained Accessory Power
(RAP) on page 9‑24.
Window Indexing
This automatically lowers the
window a small amount when the
door is opened. When the door is
closed, the window will raise fully.
If the vehicle loses power or the
window freezes, this feature may
not work. From outside the vehicle,
close the door and push the window
inward so that the glass goes under
the molding. If the OPEN, THEN CLOSE
DRIVER WINDOW or OPEN,
THEN CLOSE PASSENGER
WINDOW messages are
displayed on the Driver Information
Center (DIC), follow the procedure
for Programming the Power
Windows later in this section.
See also
Driver Information
Center (DIC) on page 5‑25.
Express Window Operation
The front window switches have
an express-up or down feature that
lowers or raises the window without
holding the switch. Pull the switch
up or press it down all the way and
release it. Stop the window by
pressing or pulling the switch.
Express Window Anti-Pinch
Feature
When express-up is active, the
window will auto-reverse if there
is an obstruction or severe icing.
The window returns to normal
operation after the obstruction
or condition is removed.
{WARNING
If express override is activated,
the window will not reverse
automatically. You or others could
be injured and the window could
be damaged. Before you use
express override, make sure that
all people and obstructions are
clear of the window path.
Page 107 of 414
Black plate (1,1)Chevrolet Camaro Owner Manual - 2011
Instruments and Controls 5-1
Instruments and
Controls
Controls
Steering Wheel Adjustment . . . 5-2
Steering Wheel Controls . . . . . . 5-2
Horn . . . . . . . . . . . . . . . . . . . . . . . . . . 5-3
Windshield Wiper/Washer . . . . . 5-3
Compass . . . . . . . . . . . . . . . . . . . . . 5-4
Clock . . . . . . . . . . . . . . . . . . . . . . . . . 5-4
Power Outlets . . . . . . . . . . . . . . . . . 5-5
Warning Lights, Gauges, and
Indicators
Warning Lights, Gauges, andIndicators . . . . . . . . . . . . . . . . . . . . 5-6
Instrument Cluster . . . . . . . . . . . . 5-7
Speedometer . . . . . . . . . . . . . . . . . 5-8
Odometer . . . . . . . . . . . . . . . . . . . . . 5-8
Trip Odometer . . . . . . . . . . . . . . . . . 5-8
Tachometer . . . . . . . . . . . . . . . . . . . 5-8
Fuel Gauge . . . . . . . . . . . . . . . . . . . 5-8
Engine Oil Pressure Gauge . . . 5-9
Engine Oil Temperature Gauge . . . . . . . . . . . . . . . . . . . . . . 5-11 Engine Coolant Temperature
Gauge . . . . . . . . . . . . . . . . . . . . . . 5-11
Transmission Temperature Gauge . . . . . . . . . . . . . . . . . . . . . . 5-12
Voltmeter Gauge . . . . . . . . . . . . . 5-13
Safety Belt Reminders . . . . . . . 5-14
Airbag Readiness Light . . . . . . 5-15
Passenger Airbag Status
Indicator . . . . . . . . . . . . . . . . . . . . 5-16
Charging System Light . . . . . . 5-17
Malfunction Indicator Lamp . . . . . . . . . . . . . 5-18
Brake System Warning Light . . . . . . . . . . . . . . . . . . . . . . . 5-20
Antilock Brake System (ABS) Warning Light . . . . . . . . . . . . . . 5-21
Traction Off Light . . . . . . . . . . . . 5-22
Traction Control System (TCS)/StabiliTrak
®Light . . . . 5-22
Traction Control System (TCS) OFF/StabiliTrak
®OFF
Light . . . . . . . . . . . . . . . . . . . . . . . 5-23
Tire Pressure Light . . . . . . . . . . 5-23
Engine Oil Pressure Light . . . . 5-24
Immobilizer Light . . . . . . . . . . . . 5-24
Front Fog Lamp Light . . . . . . . . 5-25
Taillamp Indicator Light . . . . . . 5-25
Cruise Control Light . . . . . . . . . 5-25
Information Displays
Driver Information Center (DIC) . . . . . . . . . . . . . . . 5-25
Head-Up Display (HUD) . . . . . 5-29
Vehicle Messages
Vehicle Messages . . . . . . . . . . . 5-34
Battery Voltage and Charging Messages . . . . . . . . . . . . . . . . . . 5-34
Brake System Messages . . . . 5-34
Compass Messages . . . . . . . . . 5-35
Cruise Control Messages . . . . 5-35
Door Ajar Messages . . . . . . . . . 5-35
Engine Cooling System Messages . . . . . . . . . . . . . . . . . . 5-35
Engine Oil Messages . . . . . . . . 5-36
Engine Power Messages . . . . 5-37
Fuel System Messages . . . . . . 5-37
Key and Lock Messages . . . . . 5-37
Lamp Messages . . . . . . . . . . . . . 5-37
Object Detection System Messages . . . . . . . . . . . . . . . . . . 5-38
Ride Control System Messages . . . . . . . . . . . . . . . . . . 5-38
Airbag System Messages . . . . 5-39
Safety Belt Messages . . . . . . . 5-39
Anti-Theft Alarm System Messages . . . . . . . . . . . . . . . . . . 5-39
Service Vehicle Messages . . . 5-39