CHEVROLET CAMARO 2014 5.G User Guide
Manufacturer: CHEVROLET, Model Year: 2014, Model line: CAMARO, Model: CHEVROLET CAMARO 2014 5.GPages: 432, PDF Size: 6.2 MB
Page 11 of 432
Black plate (5,1)Chevrolet Camaro Owner Manual (GMNA-Localizing-U.S./Canada/Mexico-
6042601) - 2014 - CRC - 1/21/14
In Brief 1-5
Press and release7to initiate
vehicle locator.
Press and hold
7for at least
three seconds to sound the panic
alarm.
Press
7again to cancel the panic
alarm.
See Keys on page 2-1 andRemote
Keyless Entry (RKE) System
Operation on page 2-3.
Remote Vehicle Start
If equipped, this feature allows the
engine to be started from outside
the vehicle.
Starting the Vehicle
1. Aim the RKE transmitter at the vehicle.
2. Press and release
Q.
3. Immediately after completing Step 2, press and hold
/for at
least four seconds or until the
turn signal lamps flash. When the engine starts, the parking
lamps will turn on and remain on as
long as the engine is running. The
doors will be locked and the climate
control system may come on.
The engine will continue to run for
10 minutes. Repeat the steps for a
10-minute time extension. Remote
start can be extended only once.
Canceling a Remote Start
To cancel a remote start, do one of
the following:
.Aim the RKE transmitter at the
vehicle and press and hold
/
until the parking lamps turn off.
.Turn on the hazard warning
flashers.
.Turn the vehicle on and then off.
See Remote Vehicle Start on
page 2-5.
Door Locks
To lock or unlock a door:
.To lock the door from the inside,
use the door lock knob on the
top of the door.
.To unlock the door from inside,
pull the handle once. Pulling the
handle again unlatches the door.
.From the outside turn the key
clockwise or counterclockwise,
or press
QorKon the Remote
Keyless Entry (RKE) transmitter.
See Door Locks on page 2-7 or
Remote Keyless Entry (RKE)
System Operation on page 2-3.
Power Door Locks
If equipped, there is a power door
lock switch on the instrument panel
and on the front door panels.
Q: Press to lock the doors.
K: Press to unlock the doors.
See Power Door Locks on page 2-8.
Page 12 of 432
Black plate (6,1)Chevrolet Camaro Owner Manual (GMNA-Localizing-U.S./Canada/Mexico-
6042601) - 2014 - CRC - 1/21/14
1-6 In Brief
Trunk Release
To open the trunk, press the trunk
release button on the lower portion
of the driver door, or press
V
orYon the Remote Keyless Entry
(RKE) transmitter. See Trunk on
page 2-9.
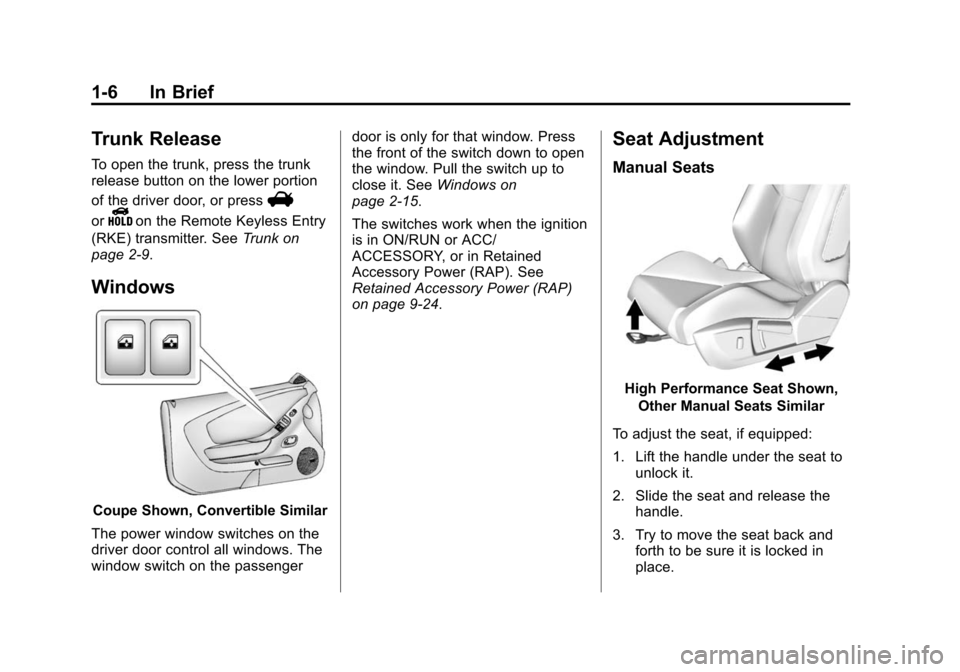
Windows
Coupe Shown, Convertible Similar
The power window switches on the
driver door control all windows. The
window switch on the passenger door is only for that window. Press
the front of the switch down to open
the window. Pull the switch up to
close it. See
Windows on
page 2-15.
The switches work when the ignition
is in ON/RUN or ACC/
ACCESSORY, or in Retained
Accessory Power (RAP). See
Retained Accessory Power (RAP)
on page 9-24.
Seat Adjustment
Manual Seats
High Performance Seat Shown,
Other Manual Seats Similar
To adjust the seat, if equipped:
1. Lift the handle under the seat to unlock it.
2. Slide the seat and release the handle.
3. Try to move the seat back and forth to be sure it is locked in
place.
Page 13 of 432
Black plate (7,1)Chevrolet Camaro Owner Manual (GMNA-Localizing-U.S./Canada/Mexico-
6042601) - 2014 - CRC - 1/21/14
In Brief 1-7
SeeSeat Adjustment on page 3-3.
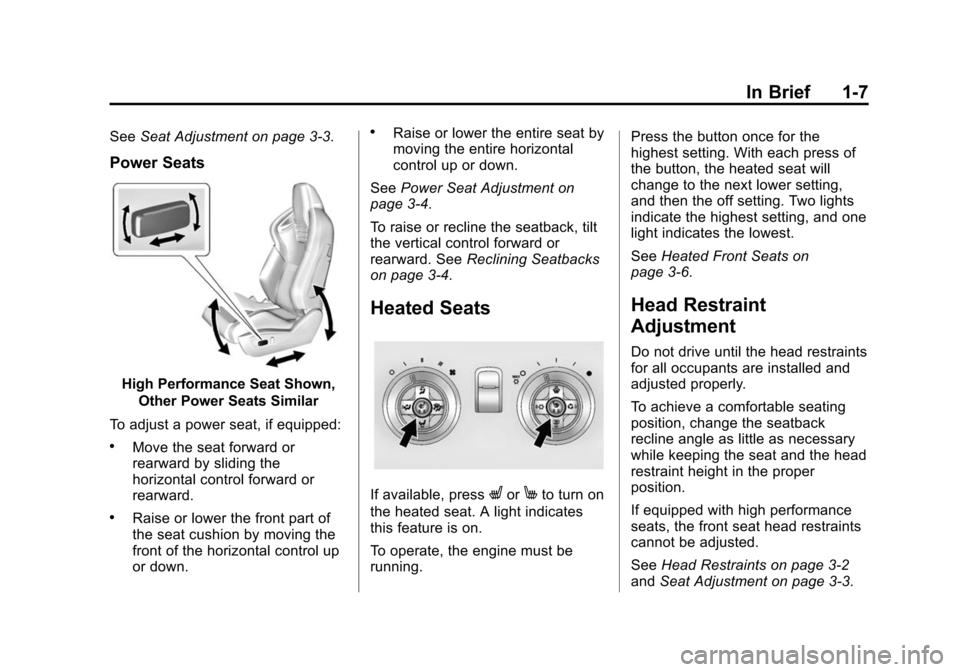
Power Seats
High Performance Seat Shown,
Other Power Seats Similar
To adjust a power seat, if equipped:
.Move the seat forward or
rearward by sliding the
horizontal control forward or
rearward.
.Raise or lower the front part of
the seat cushion by moving the
front of the horizontal control up
or down.
.Raise or lower the entire seat by
moving the entire horizontal
control up or down.
See Power Seat Adjustment on
page 3-4.
To raise or recline the seatback, tilt
the vertical control forward or
rearward. See Reclining Seatbacks
on page 3-4.
Heated Seats
If available, pressLorMto turn on
the heated seat. A light indicates
this feature is on.
To operate, the engine must be
running. Press the button once for the
highest setting. With each press of
the button, the heated seat will
change to the next lower setting,
and then the off setting. Two lights
indicate the highest setting, and one
light indicates the lowest.
See
Heated Front Seats on
page 3-6.
Head Restraint
Adjustment
Do not drive until the head restraints
for all occupants are installed and
adjusted properly.
To achieve a comfortable seating
position, change the seatback
recline angle as little as necessary
while keeping the seat and the head
restraint height in the proper
position.
If equipped with high performance
seats, the front seat head restraints
cannot be adjusted.
See Head Restraints on page 3-2
and Seat Adjustment on page 3-3.
Page 14 of 432
Black plate (8,1)Chevrolet Camaro Owner Manual (GMNA-Localizing-U.S./Canada/Mexico-
6042601) - 2014 - CRC - 1/21/14
1-8 In Brief
Safety Belts
Refer to the following sections for
important information on how to use
safety belts properly:
.Safety Belts on page 3-8.
.How to Wear Safety Belts
Properly on page 3-9.
.Lap-Shoulder Belt on page 3-10.
.Lower Anchors and Tethers for
Children (LATCH System) on
page 3-36.
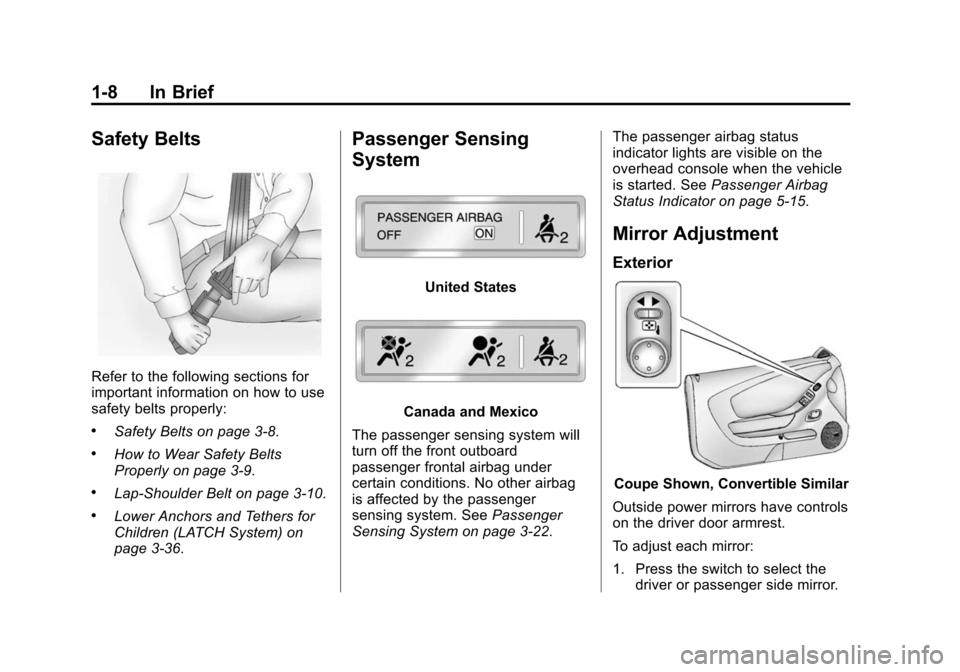
Passenger Sensing
System
United States
Canada and Mexico
The passenger sensing system will
turn off the front outboard
passenger frontal airbag under
certain conditions. No other airbag
is affected by the passenger
sensing system. See Passenger
Sensing System on page 3-22. The passenger airbag status
indicator lights are visible on the
overhead console when the vehicle
is started. See
Passenger Airbag
Status Indicator on page 5-15.
Mirror Adjustment
Exterior
Coupe Shown, Convertible Similar
Outside power mirrors have controls
on the driver door armrest.
To adjust each mirror:
1. Press the switch to select the driver or passenger side mirror.
Page 15 of 432
Black plate (9,1)Chevrolet Camaro Owner Manual (GMNA-Localizing-U.S./Canada/Mexico-
6042601) - 2014 - CRC - 1/21/14
In Brief 1-9
2. Press one of the four sides onthe
h(control pad) to adjust the
mirror.
3. Adjust each outside mirror so that a little of the vehicle and the
area behind it can be seen.
See Power Mirrors on page 2-14.
Interior
Adjust the inside rearview mirror for
a clear view of the area behind your
vehicle.
If equipped, push the tab forward for
daytime use and pull it for nighttime
use to avoid glare from the
headlamps from behind.
If equipped, automatic dimming
reduces the glare of the headlamps
from behind. The dimming feature
comes on when the vehicle is
started.
Cleaning the Mirror
Do not spray glass cleaner directly
on the mirror. Use a soft towel
dampened with water.
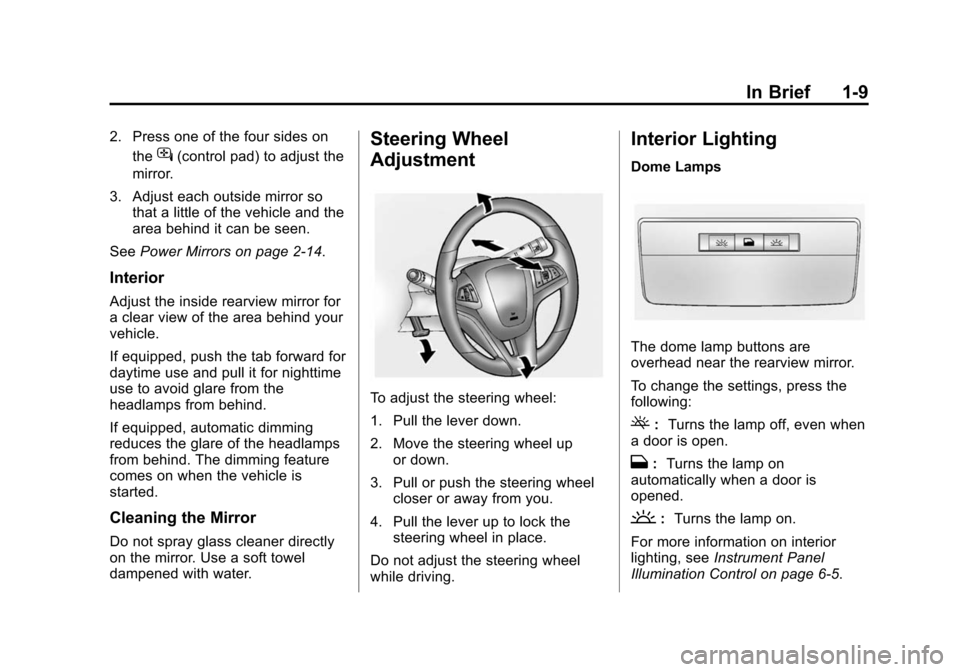
Steering Wheel
Adjustment
To adjust the steering wheel:
1. Pull the lever down.
2. Move the steering wheel up
or down.
3. Pull or push the steering wheel closer or away from you.
4. Pull the lever up to lock the steering wheel in place.
Do not adjust the steering wheel
while driving.
Interior Lighting
Dome Lamps
The dome lamp buttons are
overhead near the rearview mirror.
To change the settings, press the
following:
(: Turns the lamp off, even when
a door is open.
H: Turns the lamp on
automatically when a door is
opened.
': Turns the lamp on.
For more information on interior
lighting, see Instrument Panel
Illumination Control on page 6-5.
Page 16 of 432
Black plate (10,1)Chevrolet Camaro Owner Manual (GMNA-Localizing-U.S./Canada/Mexico-
6042601) - 2014 - CRC - 1/21/14
1-10 In Brief
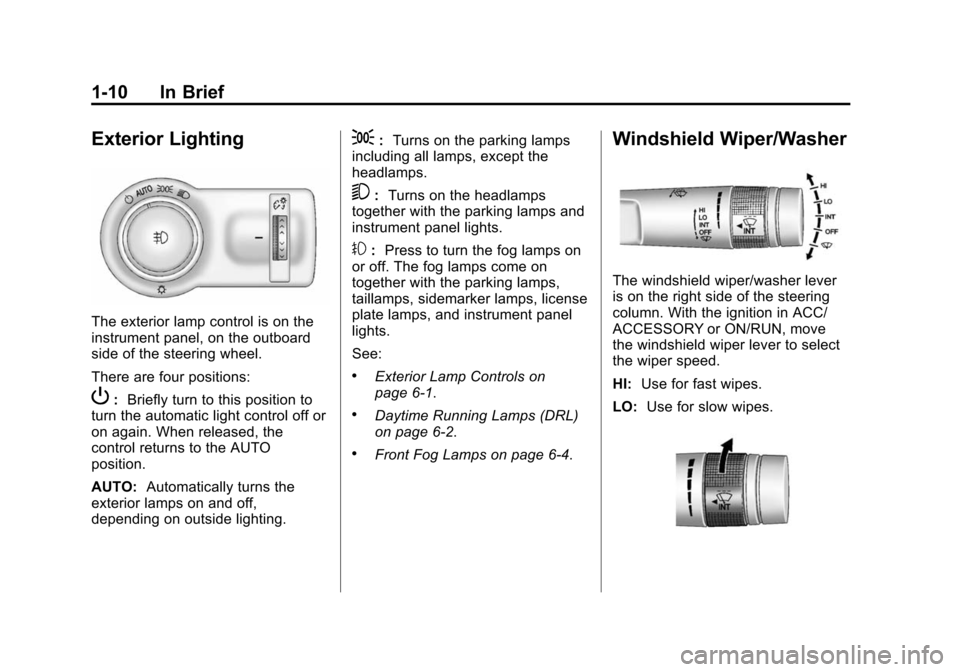
Exterior Lighting
The exterior lamp control is on the
instrument panel, on the outboard
side of the steering wheel.
There are four positions:
P:Briefly turn to this position to
turn the automatic light control off or
on again. When released, the
control returns to the AUTO
position.
AUTO: Automatically turns the
exterior lamps on and off,
depending on outside lighting.
;: Turns on the parking lamps
including all lamps, except the
headlamps.
5: Turns on the headlamps
together with the parking lamps and
instrument panel lights.
#: Press to turn the fog lamps on
or off. The fog lamps come on
together with the parking lamps,
taillamps, sidemarker lamps, license
plate lamps, and instrument panel
lights.
See:
.Exterior Lamp Controls on
page 6-1.
.Daytime Running Lamps (DRL)
on page 6-2.
.Front Fog Lamps on page 6-4.
Windshield Wiper/Washer
The windshield wiper/washer lever
is on the right side of the steering
column. With the ignition in ACC/
ACCESSORY or ON/RUN, move
the windshield wiper lever to select
the wiper speed.
HI: Use for fast wipes.
LO: Use for slow wipes.
Page 17 of 432
Black plate (11,1)Chevrolet Camaro Owner Manual (GMNA-Localizing-U.S./Canada/Mexico-
6042601) - 2014 - CRC - 1/21/14
In Brief 1-11
INT:Move the lever up to INT for
intermittent wipes, then turn
the
xINT band up for more
frequent wipes or down for less
frequent wipes.
OFF: Use to turn the wipers off.
8:For a single wipe, briefly move
the wiper lever down. For several
wipes, hold the wiper lever down.
n L: Pull the windshield wiper
lever toward you to spray windshield
washer fluid and activate the wipers.
See Windshield Wiper/Washer on
page 5-3.
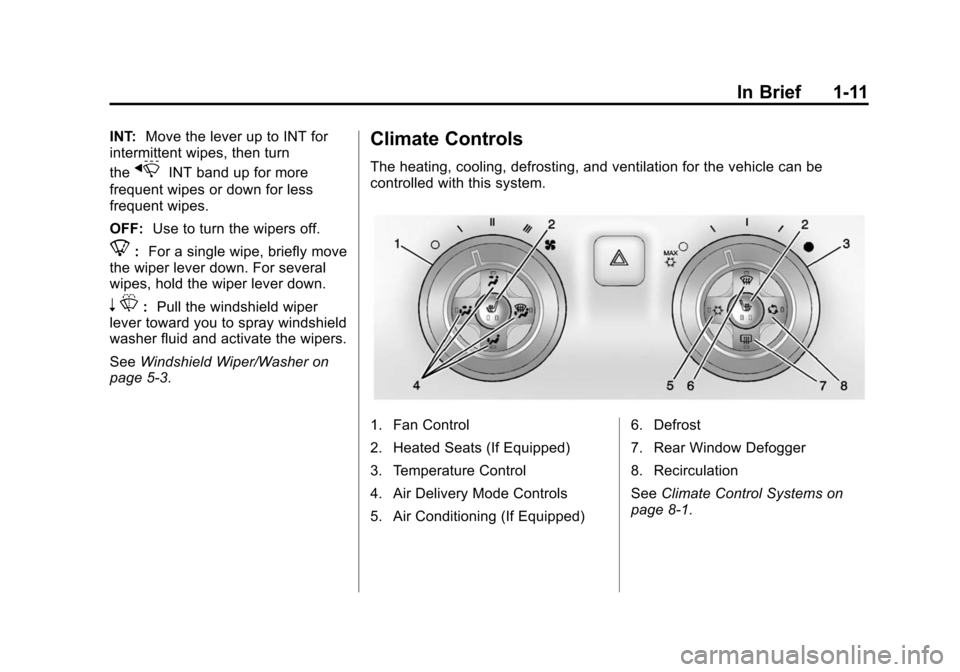
Climate Controls
The heating, cooling, defrosting, and ventilation for the vehicle can be
controlled with this system.
1. Fan Control
2. Heated Seats (If Equipped)
3. Temperature Control
4. Air Delivery Mode Controls
5. Air Conditioning (If Equipped) 6. Defrost
7. Rear Window Defogger
8. Recirculation
See
Climate Control Systems on
page 8-1.
Page 18 of 432
Black plate (12,1)Chevrolet Camaro Owner Manual (GMNA-Localizing-U.S./Canada/Mexico-
6042601) - 2014 - CRC - 1/21/14
1-12 In Brief
Transmission
Automatic Transmission
Tap Shift
Tap Shift allows the driver to
manually control the automatic
transmission. To use Tap Shift, the
shift lever must be in M (Manual
Mode) or D (Drive). Vehicles with
this feature have indicators on the
steering wheel. The controls are on
the back of the steering wheel. Tap
the left control to downshift, and the
right control to upshift. A Driver
Information Center (DIC) message
indicates the gear the vehicle is in.
Electronic Range Select
(ERS) Mode
Vehicles with axle code GW8 have
an ERS mode. ERS mode allows
you to choose the top-gear limit of
the transmission with fully automatic
gear selection. This can help controlthe vehicle's speed while driving
downhill or towing a trailer. The
vehicle has an electronic shift
position indicator within the
instrument cluster. When using the
ERS mode a number will display
next to the M, indicating the current
maximum gear allowed.
To use this feature:
1. Move the shift lever to
M (Manual Mode).
2. Press the plus/minus buttons on the back of the steering wheel,
to increase or decrease the gear
range available.
See Manual Mode on page 9-32.
Manual Transmission
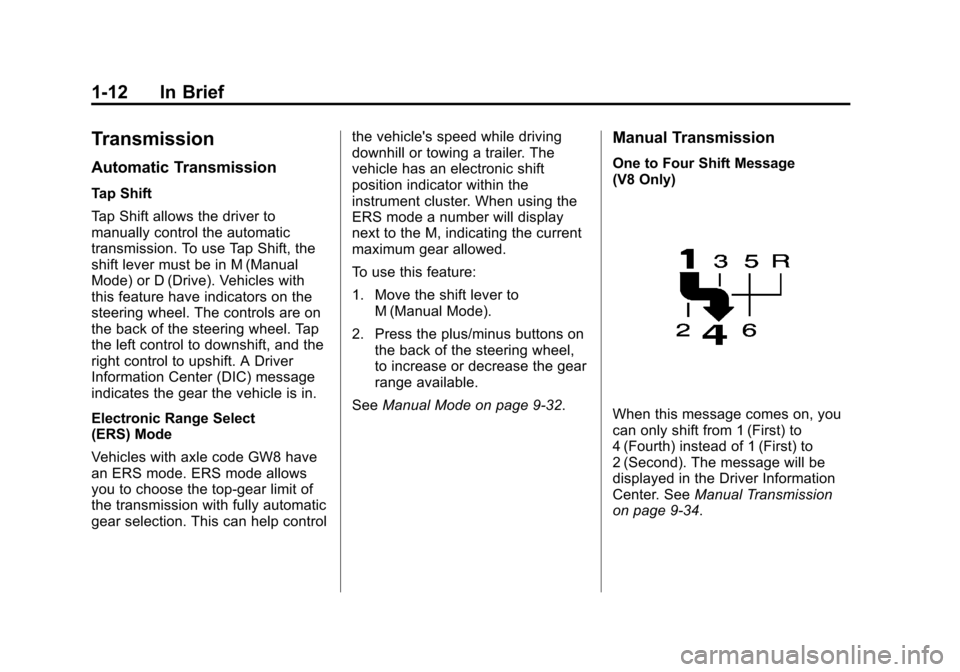
One to Four Shift Message
(V8 Only)
When this message comes on, you
can only shift from 1 (First) to
4 (Fourth) instead of 1 (First) to
2 (Second). The message will be
displayed in the Driver Information
Center. See Manual Transmission
on page 9-34.
Page 19 of 432
Black plate (13,1)Chevrolet Camaro Owner Manual (GMNA-Localizing-U.S./Canada/Mexico-
6042601) - 2014 - CRC - 1/21/14
In Brief 1-13
Vehicle Features
Radio(s)
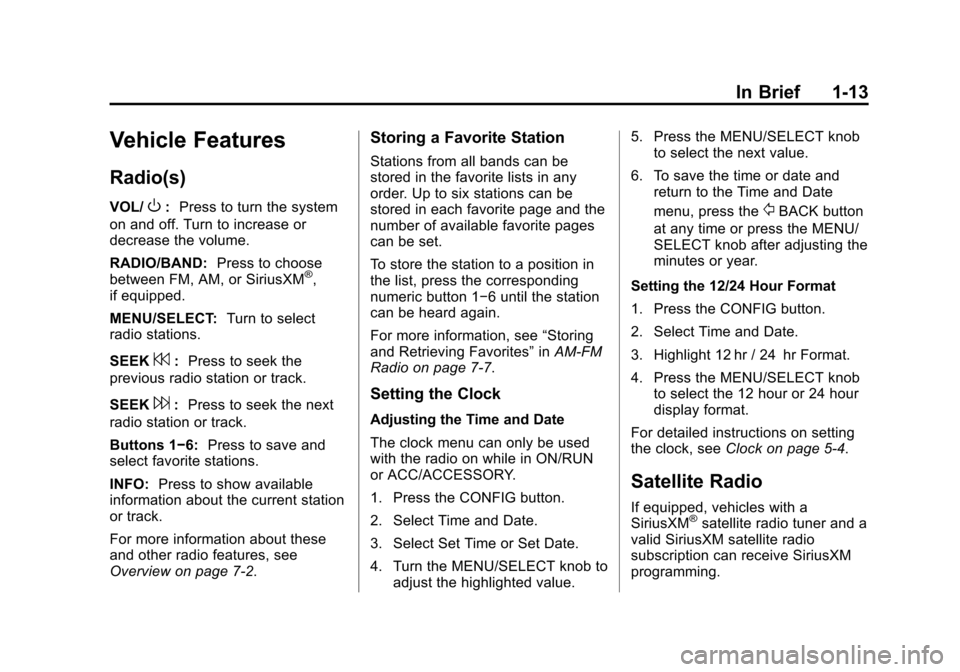
VOL/O:Press to turn the system
on and off. Turn to increase or
decrease the volume.
RADIO/BAND: Press to choose
between FM, AM, or SiriusXM
®,
if equipped.
MENU/SELECT: Turn to select
radio stations.
SEEK
7: Press to seek the
previous radio station or track.
SEEK
6: Press to seek the next
radio station or track.
Buttons 1−6: Press to save and
select favorite stations.
INFO: Press to show available
information about the current station
or track.
For more information about these
and other radio features, see
Overview on page 7-2.
Storing a Favorite Station
Stations from all bands can be
stored in the favorite lists in any
order. Up to six stations can be
stored in each favorite page and the
number of available favorite pages
can be set.
To store the station to a position in
the list, press the corresponding
numeric button 1−6 until the station
can be heard again.
For more information, see “Storing
and Retrieving Favorites” inAM-FM
Radio on page 7-7.
Setting the Clock
Adjusting the Time and Date
The clock menu can only be used
with the radio on while in ON/RUN
or ACC/ACCESSORY.
1. Press the CONFIG button.
2. Select Time and Date.
3. Select Set Time or Set Date.
4. Turn the MENU/SELECT knob to adjust the highlighted value. 5. Press the MENU/SELECT knob
to select the next value.
6. To save the time or date and return to the Time and Date
menu, press the
/BACK button
at any time or press the MENU/
SELECT knob after adjusting the
minutes or year.
Setting the 12/24 Hour Format
1. Press the CONFIG button.
2. Select Time and Date.
3. Highlight 12 hr / 24 hr Format.
4. Press the MENU/SELECT knob to select the 12 hour or 24 hour
display format.
For detailed instructions on setting
the clock, see Clock on page 5-4.
Satellite Radio
If equipped, vehicles with a
SiriusXM®satellite radio tuner and a
valid SiriusXM satellite radio
subscription can receive SiriusXM
programming.
Page 20 of 432
Black plate (14,1)Chevrolet Camaro Owner Manual (GMNA-Localizing-U.S./Canada/Mexico-
6042601) - 2014 - CRC - 1/21/14
1-14 In Brief
SiriusXM Satellite Radio
Service
SiriusXM is a satellite radio service
based in the 48 contiguous United
States and 10 Canadian provinces.
SiriusXM satellite radio has a wide
variety of programming and
commercial-free music, coast to
coast, and in digital-quality sound.
A fee is required to receive the
SiriusXM service.
Refer to:
.www.siriusxm.com or call
1-866-635-2349 (U.S.).
.www.xmradio.ca or call
1-877-209-0079 (Canada).
See Satellite Radio on page 7-9.
Portable Audio Devices
This vehicle may have a 3.5 mm
(1/8 in) auxiliary input and a USB
port in the center console bin.
External devices such as iPods
®, laptop computers, MP3 players, and
USB drives may be connected,
depending on the audio system.
See
Auxiliary Devices on page 7-14.
Bluetooth®
The Bluetooth®system allows users
with a Bluetooth-enabled mobile
phone to make and receive
hands-free calls using the vehicle
audio system and controls.
The Bluetooth-enabled mobile
phone must be paired with the
in-vehicle Bluetooth system before it
can be used in the vehicle. Not all
phones will support all functions.
See Bluetooth (Voice Recognition)
on page 7-25 orBluetooth
(Infotainment Controls) on
page 7-21 orBluetooth (Overview)
on page 7-20.
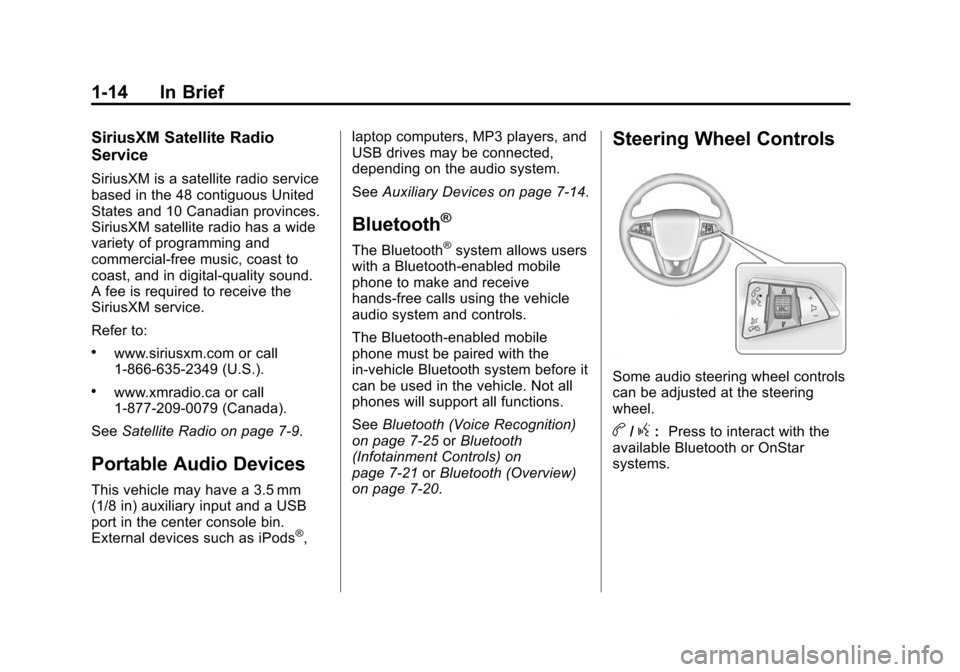
Steering Wheel Controls
Some audio steering wheel controls
can be adjusted at the steering
wheel.
b/g: Press to interact with the
available Bluetooth or OnStar
systems.