service CHEVROLET CAMARO 2020 Get To Know Guide
[x] Cancel search | Manufacturer: CHEVROLET, Model Year: 2020, Model line: CAMARO, Model: CHEVROLET CAMARO 2020Pages: 361, PDF Size: 3.27 MB
Page 236 of 361

Chevrolet Camaro Owner Manual (GMNA-Localizing-U.S./Canada/Mexico-
13556304) - 2020 - CRC - 9/3/19
Vehicle Care 235
the engine air filter is replaced. See
your dealer for service and to reset
the system.
How to Reset Engine Air Filter
Life System
Reset the system whenever the
engine air filter is replaced so that
the system can calculate the next
engine air filter change.
To reset:1. Place the vehicle in P (Park).
2. Select Engine Air Filter Life on the DIC menu. See Driver
Information Center (DIC) 0117.
3. Press
pto move to the Reset/
Disable display area. Select
Reset then press SEL. Then
press Yes to confirm the reset.
4. 100% Air Filter Life will be displayed when the Engine Air
Filter Life System is
successfully reset.
Engine Air Cleaner/Filter
If the vehicle has a 6.2L V8 LT4
engine, see the Camaro High
Performance supplement.
The engine air cleaner/filter is in the
engine compartment on the driver
side of the vehicle. See Engine
Compartment Overview 0224 for
location.
When to Inspect the Engine Air
Cleaner/Filter
. For intervals on changing and
inspecting the engine air filter,
see Maintenance Schedule
0 306.
. If equipped with Engine Air Filter
Life System, see Engine Air
Filter Life System (2.0L LTG and
3.6L LGX Engines Only) 0234.
. If driving in very dusty areas,
follow the engine air filter
inspecting and changing
intervals, see Maintenance
Schedule 0306.
How to Inspect the Engine Air
Cleaner/Filter
Do not start the engine or have the
engine running with the engine air
cleaner/filter housing open. Before
removing the engine air cleaner/
filter, make sure that the engine air
cleaner/filter housing and nearby
components are free of dirt and
debris. Remove the engine air
cleaner/filter. Lightly tap and shake
the engine air cleaner/filter (away
from the vehicle), to release loose
dust and dirt. Inspect the engine air
cleaner/filter for damage, and
replace if damaged. Do not clean
the engine air cleaner/filter or
components with water or
compressed air.
To inspect or replace the engine air
cleaner/filter:
Page 240 of 361

Chevrolet Camaro Owner Manual (GMNA-Localizing-U.S./Canada/Mexico-
13556304) - 2020 - CRC - 9/3/19
Vehicle Care 239
.Helps keep the proper engine
temperature
Caution
Do not use anything other than a
mix of DEX-COOL coolant that
meets GM Standard
GMW3420 and clean, drinkable
water. Anything else can cause
damage to the engine cooling
system and the vehicle, which
would not be covered by the
vehicle warranty.
Never dispose of engine coolant by
putting it in the trash, pouring it on
the ground, or into sewers, streams,
or bodies of water. Have the coolant
changed by an authorized service
center, familiar with legal
requirements regarding used
coolant disposal. This will help
protect the environment and your
health.
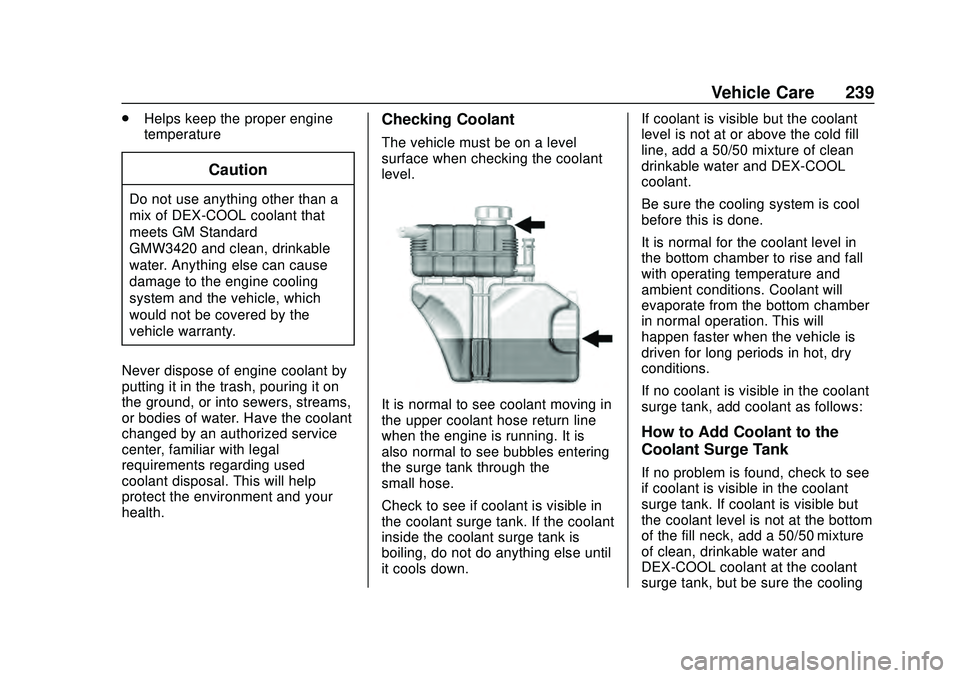
Checking Coolant
The vehicle must be on a level
surface when checking the coolant
level.
It is normal to see coolant moving in
the upper coolant hose return line
when the engine is running. It is
also normal to see bubbles entering
the surge tank through the
small hose.
Check to see if coolant is visible in
the coolant surge tank. If the coolant
inside the coolant surge tank is
boiling, do not do anything else until
it cools down. If coolant is visible but the coolant
level is not at or above the cold fill
line, add a 50/50 mixture of clean
drinkable water and DEX-COOL
coolant.
Be sure the cooling system is cool
before this is done.
It is normal for the coolant level in
the bottom chamber to rise and fall
with operating temperature and
ambient conditions. Coolant will
evaporate from the bottom chamber
in normal operation. This will
happen faster when the vehicle is
driven for long periods in hot, dry
conditions.
If no coolant is visible in the coolant
surge tank, add coolant as follows:
How to Add Coolant to the
Coolant Surge Tank
If no problem is found, check to see
if coolant is visible in the coolant
surge tank. If coolant is visible but
the coolant level is not at the bottom
of the fill neck, add a 50/50 mixture
of clean, drinkable water and
DEX-COOL coolant at the coolant
surge tank, but be sure the cooling
Page 241 of 361

Chevrolet Camaro Owner Manual (GMNA-Localizing-U.S./Canada/Mexico-
13556304) - 2020 - CRC - 9/3/19
240 Vehicle Care
system, including the coolant surge
tank pressure cap, is cool before
you do it.
{Warning
Steam and scalding liquids from a
hot cooling system are under
pressure. Turning the pressure
cap, even a little, can cause them
to come out at high speed and
you could be burned. Never turn
the cap when the cooling system,
including the pressure cap, is hot.
Wait for the cooling system and
pressure cap to cool.
{Warning
Plain water, or other liquids such
as alcohol, can boil before the
proper coolant mixture will. With
plain water or the wrong mixture,
the engine could get too hot but
there would not be an overheat(Continued)
Warning (Continued)
warning. The engine could catch
fire and you or others could be
burned.
{Warning
Spilling coolant on hot engine
parts can burn you. Coolant
contains ethylene glycol and it will
burn if the engine parts are hot
enough.
Caution
Failure to follow the specific
coolant fill procedure could cause
the engine to overheat and could
cause system damage. If coolant
is not visible in the surge tank,
contact your dealer.
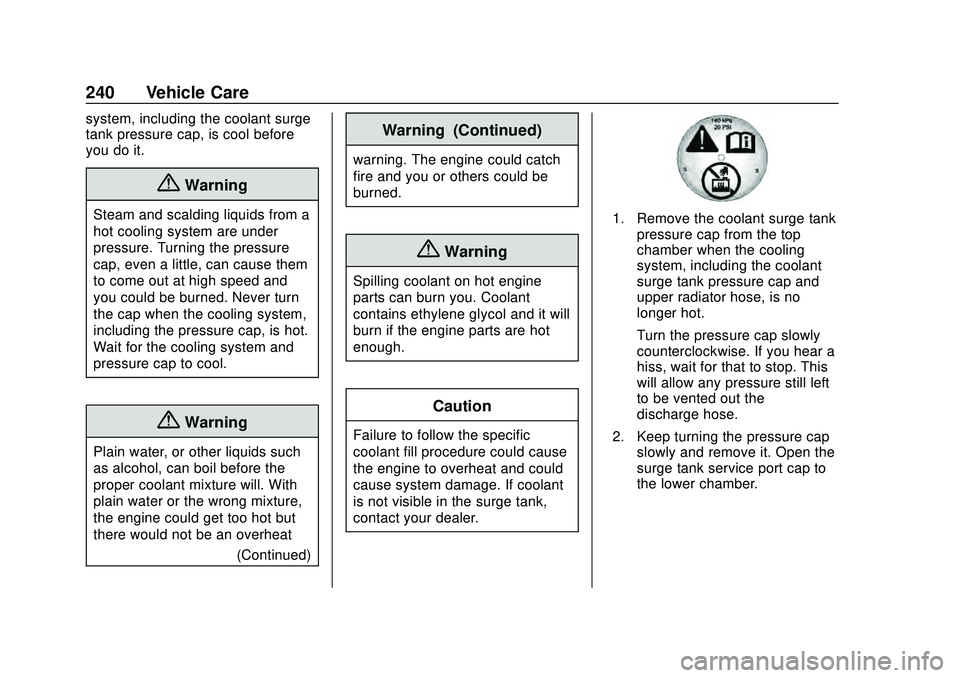
1. Remove the coolant surge tankpressure cap from the top
chamber when the cooling
system, including the coolant
surge tank pressure cap and
upper radiator hose, is no
longer hot.
Turn the pressure cap slowly
counterclockwise. If you hear a
hiss, wait for that to stop. This
will allow any pressure still left
to be vented out the
discharge hose.
2. Keep turning the pressure cap slowly and remove it. Open the
surge tank service port cap to
the lower chamber.
Page 242 of 361

Chevrolet Camaro Owner Manual (GMNA-Localizing-U.S./Canada/Mexico-
13556304) - 2020 - CRC - 9/3/19
Vehicle Care 241
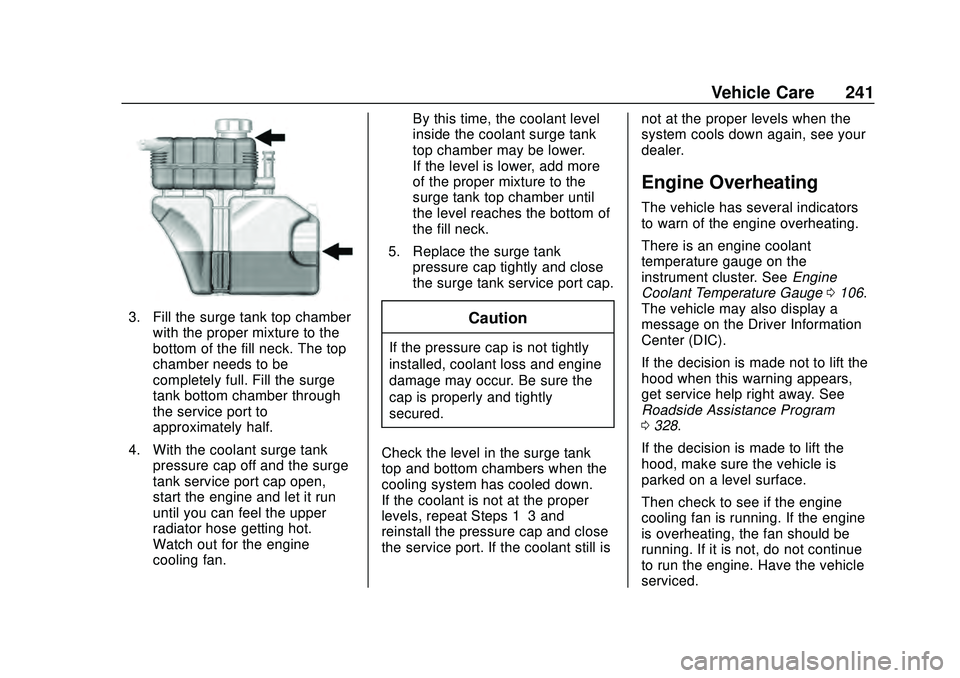
3. Fill the surge tank top chamberwith the proper mixture to the
bottom of the fill neck. The top
chamber needs to be
completely full. Fill the surge
tank bottom chamber through
the service port to
approximately half.
4. With the coolant surge tank pressure cap off and the surge
tank service port cap open,
start the engine and let it run
until you can feel the upper
radiator hose getting hot.
Watch out for the engine
cooling fan. By this time, the coolant level
inside the coolant surge tank
top chamber may be lower.
If the level is lower, add more
of the proper mixture to the
surge tank top chamber until
the level reaches the bottom of
the fill neck.
5. Replace the surge tank pressure cap tightly and close
the surge tank service port cap.Caution
If the pressure cap is not tightly
installed, coolant loss and engine
damage may occur. Be sure the
cap is properly and tightly
secured.
Check the level in the surge tank
top and bottom chambers when the
cooling system has cooled down.
If the coolant is not at the proper
levels, repeat Steps 1–3 and
reinstall the pressure cap and close
the service port. If the coolant still is not at the proper levels when the
system cools down again, see your
dealer.
Engine Overheating
The vehicle has several indicators
to warn of the engine overheating.
There is an engine coolant
temperature gauge on the
instrument cluster. See
Engine
Coolant Temperature Gauge 0106.
The vehicle may also display a
message on the Driver Information
Center (DIC).
If the decision is made not to lift the
hood when this warning appears,
get service help right away. See
Roadside Assistance Program
0 328.
If the decision is made to lift the
hood, make sure the vehicle is
parked on a level surface.
Then check to see if the engine
cooling fan is running. If the engine
is overheating, the fan should be
running. If it is not, do not continue
to run the engine. Have the vehicle
serviced.
Page 243 of 361

Chevrolet Camaro Owner Manual (GMNA-Localizing-U.S./Canada/Mexico-
13556304) - 2020 - CRC - 9/3/19
242 Vehicle Care
Caution
Do not run the engine if there is a
leak in the engine cooling system.
This can cause a loss of all
coolant and can damage the
system and vehicle. Have any
leaks fixed right away.
If Steam Is Coming from the
Engine Compartment
{Warning
Steam and scalding liquids from a
hot cooling system are under
pressure. Turning the pressure
cap, even a little, can cause them
to come out at high speed and
you could be burned. Never turn
the cap when the cooling system,
including the pressure cap, is hot.
Wait for the cooling system and
pressure cap to cool.
If Steam Is Coming from the
Engine Compartment with no
Overheat Warning
The hood extractor, if equipped, is
functional. It will allow water from
rain and car washes to enter the
engine compartment and contact
hot surfaces. If steam is coming
from the hood extractor with no
accompanying overheat warning, no
service is needed.
If No Steam Is Coming from
the Engine Compartment
If an engine overheat warning is
displayed but no steam can be seen
or heard, the problem may not be
too serious. Sometimes the engine
can get a little too hot when the
vehicle:
.Climbs a long hill on a hot day
. Stops after high-speed driving
. Idles for long periods in traffic
If the overheat warning is displayed
with no sign of steam: 1. Turn the air conditioning off. 2. Turn the heater on to the
highest temperature and to the
highest fan speed. Open the
windows as necessary.
3. When it is safe to do so, pull off the road, shift to P (Park) or
N (Neutral) for an automatic
transmission or Neutral for a
manual transmission, and let
the engine idle.
If the engine coolant temperature
gauge is no longer in the
overheated area, the vehicle can be
driven. Continue to drive the vehicle
slowly for about 10 minutes. Keep a
safe vehicle distance from the
vehicle in front. If the warning does
not come back on, continue to drive
normally and have the cooling
system checked for proper fill and
function.
If the warning continues, pull over,
stop, and park the vehicle
right away.
Page 245 of 361

Chevrolet Camaro Owner Manual (GMNA-Localizing-U.S./Canada/Mexico-
13556304) - 2020 - CRC - 9/3/19
244 Vehicle Care
{Warning
The brake wear warning sound
means that soon the brakes will
not work well. That could lead to
a crash. When the brake wear
warning sound is heard, have the
vehicle serviced.
Caution
Continuing to drive with worn-out
brake pads could result in costly
brake repair.
Some driving conditions or climates
can cause a brake squeal when the
brakes are first applied or lightly
applied. This does not mean
something is wrong with the brakes.
If equipped with high performance
brake linings, there could be an
increased build-up of brake dust as
well as minor noises as compared
to standard brake linings. Properly torqued wheel nuts are
necessary to help prevent brake
pulsation. When tires are rotated,
inspect brake pads for wear and
evenly tighten wheel nuts in the
proper sequence to torque
specifications. See
Capacities and
Specifications 0320.
Brake pads should be replaced as
complete sets.
Brake Pedal Travel
See your dealer if the brake pedal
does not return to normal height,
or if there is a rapid increase in
pedal travel. This could be a sign
that brake service may be required.
Replacing Brake System Parts
Always replace brake system parts
with new, approved replacement
parts. If this is not done, the brakes
may not work properly. The braking
performance expected can change
in many other ways if the wrong
replacement brake parts are
installed or if parts are improperly
installed.
Cold Weather Brake Operation
(SS Model)
High performance brake
components may bind and clunk
when moving the vehicle. This may
be noticeable after parking when the
brakes have been wet, such as
when driving in the rain or after a
car wash. This is normal for brakes
with high friction pads and does not
affect the operation of the brakes.
Apply the brakes several times until
the binding or clunking stops. Drive
the vehicle and apply the brakes
several times if it is washed before
long-term storage.
Brake Fluid
The brake/clutch master cylinder
reservoir is filled with GM approved
DOT 3 brake fluid as indicated on
Page 248 of 361

Chevrolet Camaro Owner Manual (GMNA-Localizing-U.S./Canada/Mexico-
13556304) - 2020 - CRC - 9/3/19
Vehicle Care 247
Starter Switch Check
{Warning
When you are doing this
inspection, the vehicle could
move suddenly. If the vehicle
moves, you or others could be
injured.
1. Before starting this check, be sure there is enough room
around the vehicle.
2. Apply both the parking brake and the regular brake.
Do not use the accelerator
pedal, and be ready to turn off
the engine immediately if it
starts.
3. For automatic transmission vehicles, try to start the engine
in each gear. The vehicle
should start only in P (Park) or
N (Neutral). If the vehicle starts
in any other position, contact
your dealer for service. For manual transmission
vehicles, put the shift lever in
Neutral, push the clutch pedal
down halfway, and try to start
the engine. The vehicle should
start only when the clutch
pedal is pushed down all the
way to the floor. If the vehicle
starts when the clutch pedal is
not pushed all the way down,
contact your dealer for service.
Automatic Transmission
Shift Lock Control
Function Check
{Warning
When you are doing this
inspection, the vehicle could
move suddenly. If the vehicle
moves, you or others could be
injured.
1. Before starting this check, be sure there is enough room
around the vehicle. It should be
parked on a level surface. 2. Apply the parking brake. Be
ready to apply the regular
brake immediately if the vehicle
begins to move.
3. With the engine off, turn the ignition on, but do not start the
engine. Without applying the
regular brake, try to move the
shift lever out of P (Park) with
normal effort. If the shift lever
moves out of P (Park), contact
your dealer for service.
Park Brake and P (Park)
Mechanism Check
{Warning
When you are doing this check,
the vehicle could begin to move.
You or others could be injured
and property could be damaged.
Make sure there is room in front
of the vehicle in case it begins to
roll. Be ready to apply the regular
brake at once should the vehicle
begin to move.
Page 249 of 361

Chevrolet Camaro Owner Manual (GMNA-Localizing-U.S./Canada/Mexico-
13556304) - 2020 - CRC - 9/3/19
248 Vehicle Care
Park on a fairly steep hill, with the
vehicle facing downhill. Keeping
your foot on the regular brake, set
the parking brake.
.To check the parking brake's
holding ability: With the engine
running and the transmission in
N (Neutral), slowly remove foot
pressure from the regular brake
pedal. Do this until the vehicle is
held by the parking brake only.
. To check the P (Park)
mechanism's holding ability:
With the engine running, shift to
P (Park). Then release the
parking brake followed by the
regular brake.
Contact your dealer if service is
required.
Wiper Blade Replacement
Windshield wiper blades should be
inspected for wear and cracking.
See Maintenance Schedule 0306. Replacement blades come in
different types and are removed in
different ways. For proper type and
length, see
Maintenance
Replacement Parts 0317.
To replace the windshield wiper
blade:
Caution
Keep the hood closed to avoid
damaging the paint.
1. Pull the windshield wiper assembly away from the
windshield.
2. Lift up on the latch in themiddle of the wiper blade
where the wiper arm attaches.
3. With the latch open, pull the wiper blade down toward the
windshield far enough to
release it from the J-hooked
end of the wiper arm.
4. Remove the wiper blade.
Caution
Allowing the wiper arm to touch
the windshield when no wiper
blade is installed could damage (Continued)
Page 250 of 361

Chevrolet Camaro Owner Manual (GMNA-Localizing-U.S./Canada/Mexico-
13556304) - 2020 - CRC - 9/3/19
Vehicle Care 249
Caution (Continued)
the windshield. Any damage that
occurs would not be covered by
the vehicle warranty. Do not allow
the wiper arm to touch the
windshield.
5. Reverse Steps 1–3 for wiper blade replacement.
Windshield Replacement
HUD System
The windshield is part of the HUD
system. If the windshield must be
replaced, get one that is designed
for HUD or the HUD image may
look out of focus.
Driver Assistance Systems
If the windshield needs to be
replaced and the vehicle is
equipped with a front camera sensor
for the Driver Assistance Systems, a
GM replacement windshield is
recommended. The replacement
windshield must be installed according to GM specifications for
proper alignment. If it is not, these
systems may not work properly, they
may display messages, or they may
not work at all. See your dealer for
proper windshield replacement.
Gas Strut(s)
This vehicle is equipped with gas
strut(s) to provide assistance in
lifting and holding open the hood/
trunk/liftgate system in full open
position.
{Warning
If the gas struts that hold open
the hood, trunk, and/or liftgate fail,
you or others could be seriously
injured. Take the vehicle to your
dealer for service immediately.
Visually inspect the gas struts for
signs of wear, cracks, or other
damage periodically. Check to
make sure the hood/trunk/liftgate
is held open with enough force.
If struts are failing to hold the
(Continued)
Warning (Continued)
hood/trunk/liftgate, do not
operate. Have the vehicle
serviced.
Caution
Do not apply tape or hang any
objects from gas struts. Also do
not push down or pull on gas
struts. This may cause damage to
the vehicle.
See Maintenance Schedule 0306.
Page 252 of 361

Chevrolet Camaro Owner Manual (GMNA-Localizing-U.S./Canada/Mexico-
13556304) - 2020 - CRC - 9/3/19
Vehicle Care 251
Bulb Replacement
For the proper type of replacement
bulbs, or any bulb changing
procedure not listed in this section,
contact your dealer.
Caution
Do not replace incandescent
bulbs with aftermarket LED
replacement bulbs. This can
cause damage to the vehicle
electrical system.
Halogen Bulbs
{Warning
Halogen bulbs have pressurized
gas inside and can burst if you
drop or scratch the bulb. You or
others could be injured. Be sure
to read and follow the instructions
on the bulb package.
High Intensity Discharge
(HID) Lighting
{Warning
The High Intensity Discharge
(HID) lighting system operates at
a very high voltage. If you try to
service any of the system
components, you could be
seriously injured. Have your
dealer or a qualified technician
service them.
After an HID headlamp bulb has
been replaced, the beam might be a
slightly different shade than it was
originally. This is normal.
LED Lighting
This vehicle has several LED lamps.
For replacement of any LED lighting
assembly, contact your dealer.
Back-Up Lamps
For the base and the uplevel
taillamp assembly, only the back-up
bulb is replaceable. Removal of the
taillamp assembly is not necessary
to change this bulb.
To replace one of these bulbs: 1. Open the trunk. See Trunk
0 22.
2. Remove the three pushpin fasteners and cover.
3. Turn the bulb socket counterclockwise to remove it.