center console CHEVROLET CAMARO 2020 Get To Know Guide
[x] Cancel search | Manufacturer: CHEVROLET, Model Year: 2020, Model line: CAMARO, Model: CHEVROLET CAMARO 2020Pages: 361, PDF Size: 3.27 MB
Page 13 of 361

Chevrolet Camaro Owner Manual (GMNA-Localizing-U.S./Canada/Mexico-
13556304) - 2020 - CRC - 9/3/19
12 Keys, Doors, and Windows
three chimes are heard. Passive
locking will then remain disabled
until
Qon the interior door is
pressed, or until the vehicle is
turned on.
Remote Left In Vehicle Alert
When the vehicle is turned off and
an RKE transmitter is left in the
vehicle, the horn will chirp three
times after all doors are closed. See
Vehicle Personalization 0125.
Remote No Longer In Vehicle Alert
If the vehicle is on with a door open,
and then all doors are closed, the
vehicle will check for RKE
transmitters inside. If an RKE
transmitter is not detected, the
Driver Information Center (DIC) will
display NO REMOTE DETECTED
and the horn will chirp three times.
This occurs only once each time the
vehicle is driven.
See Vehicle Personalization 0125. Keyless Trunk Opening
When the doors are locked, press
the touch pad to open the trunk if
the RKE transmitter is within
1 m (3 ft).
Key Access
To access a vehicle with a weak
transmitter battery, see
Door Locks
0 18.
Programming Transmitters to
the Vehicle
Only RKE transmitters programmed
to the vehicle will work. If a
transmitter is lost or stolen, a
replacement can be purchased and
programmed through your dealer.
The vehicle can be reprogrammed
so that lost or stolen transmitters no
longer work. Any remaining
transmitters will need to be
reprogrammed. Each vehicle can
have up to eight transmitters
matched to it. Programming with Recognized
Transmitters
A new transmitter can be
programmed to the vehicle when
there are two recognized
transmitters. To program, the vehicle
must be off and all of the
transmitters, both currently
recognized and new, must be
with you.
1. Remove the key from the RKE
transmitter.
2. Place the two recognized transmitters in the rear
cupholder in the center
console.
Page 14 of 361
Chevrolet Camaro Owner Manual (GMNA-Localizing-U.S./Canada/Mexico-
13556304) - 2020 - CRC - 9/3/19
Keys, Doors, and Windows 13
3. Remove the key lock cylindercap on the driver door handle.
See Door Locks 018. Insert
the vehicle key of the new
transmitter into the key lock
cylinder on the driver door
handle and turn the key to the
unlock position five times within
10 seconds.
4. The DIC displays READY FOR REMOTE #3, 4 or 5, 6,7, or 8.
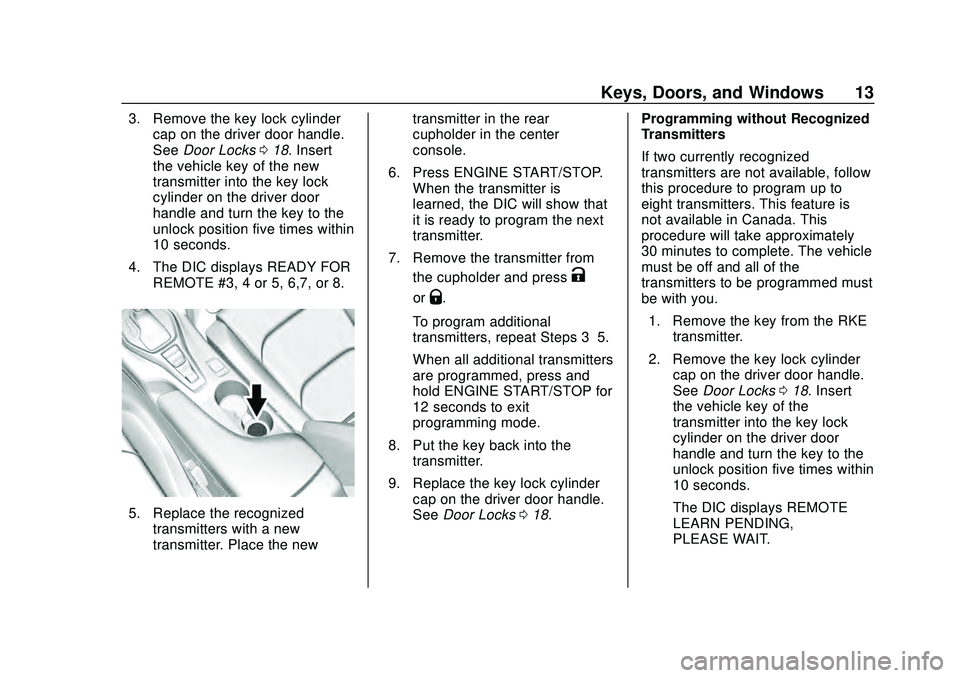
5. Replace the recognizedtransmitters with a new
transmitter. Place the new transmitter in the rear
cupholder in the center
console.
6. Press ENGINE START/STOP. When the transmitter is
learned, the DIC will show that
it is ready to program the next
transmitter.
7. Remove the transmitter from the cupholder and press
K
orQ.
To program additional
transmitters, repeat Steps 3–5.
When all additional transmitters
are programmed, press and
hold ENGINE START/STOP for
12 seconds to exit
programming mode.
8. Put the key back into the transmitter.
9. Replace the key lock cylinder cap on the driver door handle.
See Door Locks 018. Programming without Recognized
Transmitters
If two currently recognized
transmitters are not available, follow
this procedure to program up to
eight transmitters. This feature is
not available in Canada. This
procedure will take approximately
30 minutes to complete. The vehicle
must be off and all of the
transmitters to be programmed must
be with you.
1. Remove the key from the RKE transmitter.
2. Remove the key lock cylinder cap on the driver door handle.
See Door Locks 018. Insert
the vehicle key of the
transmitter into the key lock
cylinder on the driver door
handle and turn the key to the
unlock position five times within
10 seconds.
The DIC displays REMOTE
LEARN PENDING,
PLEASE WAIT.
Page 15 of 361
Chevrolet Camaro Owner Manual (GMNA-Localizing-U.S./Canada/Mexico-
13556304) - 2020 - CRC - 9/3/19
14 Keys, Doors, and Windows
3. Wait for 10 minutes until theDIC displays PRESS ENGINE
START BUTTON TO LEARN
and then press ENGINE
START/STOP.
The DIC display will again
show REMOTE LEARN
PENDING, PLEASE WAIT.
4. Repeat Step 2 two additional times. After the third time, all
previously known transmitters
will no longer work with the
vehicle. Remaining transmitters
can be relearned during the
next steps.
The DIC display should now
show READY FOR REMOTE
# 1.
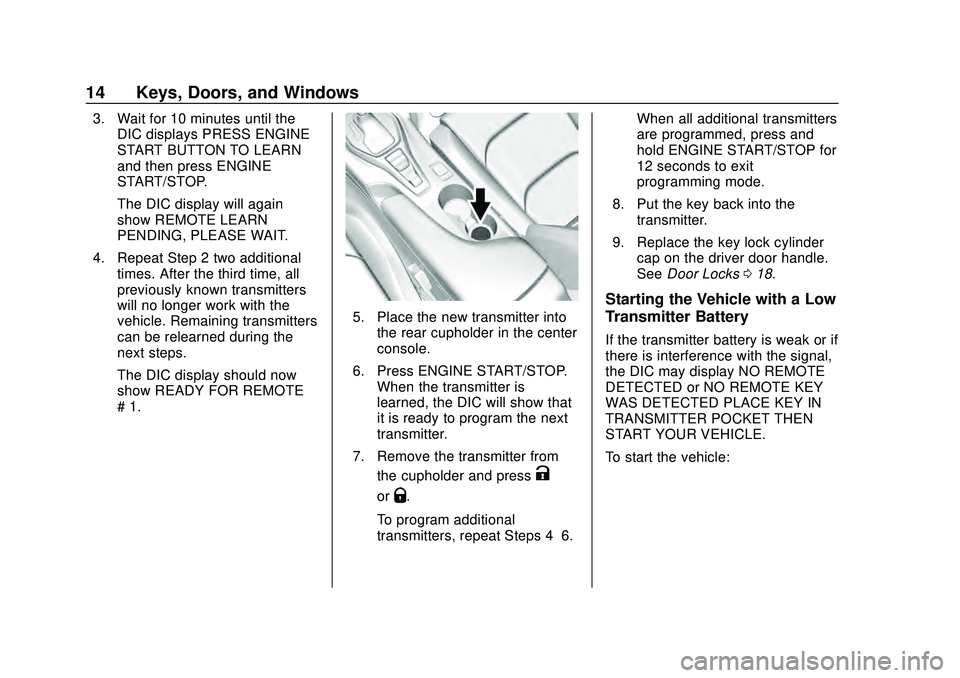
5. Place the new transmitter intothe rear cupholder in the center
console.
6. Press ENGINE START/STOP. When the transmitter is
learned, the DIC will show that
it is ready to program the next
transmitter.
7. Remove the transmitter from the cupholder and press
K
orQ.
To program additional
transmitters, repeat Steps 4–6. When all additional transmitters
are programmed, press and
hold ENGINE START/STOP for
12 seconds to exit
programming mode.
8. Put the key back into the transmitter.
9. Replace the key lock cylinder cap on the driver door handle.
See Door Locks 018.
Starting the Vehicle with a Low
Transmitter Battery
If the transmitter battery is weak or if
there is interference with the signal,
the DIC may display NO REMOTE
DETECTED or NO REMOTE KEY
WAS DETECTED PLACE KEY IN
TRANSMITTER POCKET THEN
START YOUR VEHICLE.
To start the vehicle:
Page 16 of 361
Chevrolet Camaro Owner Manual (GMNA-Localizing-U.S./Canada/Mexico-
13556304) - 2020 - CRC - 9/3/19
Keys, Doors, and Windows 15
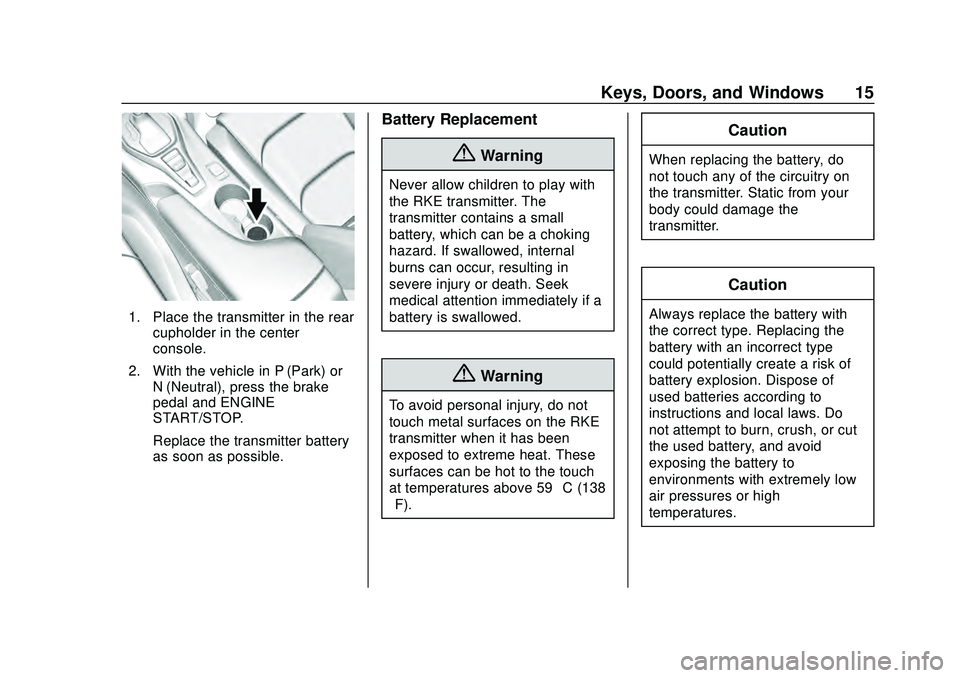
1. Place the transmitter in the rearcupholder in the center
console.
2. With the vehicle in P (Park) or N (Neutral), press the brake
pedal and ENGINE
START/STOP.
Replace the transmitter battery
as soon as possible.
Battery Replacement
{Warning
Never allow children to play with
the RKE transmitter. The
transmitter contains a small
battery, which can be a choking
hazard. If swallowed, internal
burns can occur, resulting in
severe injury or death. Seek
medical attention immediately if a
battery is swallowed.
{Warning
To avoid personal injury, do not
touch metal surfaces on the RKE
transmitter when it has been
exposed to extreme heat. These
surfaces can be hot to the touch
at temperatures above 59 °C (138
°F).
Caution
When replacing the battery, do
not touch any of the circuitry on
the transmitter. Static from your
body could damage the
transmitter.
Caution
Always replace the battery with
the correct type. Replacing the
battery with an incorrect type
could potentially create a risk of
battery explosion. Dispose of
used batteries according to
instructions and local laws. Do
not attempt to burn, crush, or cut
the used battery, and avoid
exposing the battery to
environments with extremely low
air pressures or high
temperatures.
Page 27 of 361
Chevrolet Camaro Owner Manual (GMNA-Localizing-U.S./Canada/Mexico-
13556304) - 2020 - CRC - 9/3/19
26 Keys, Doors, and Windows
The system does not have to be
manually armed or disarmed.
The vehicle is automatically
immobilized when the transmitter
leaves the vehicle.
The immobilization system is
disarmed when the ignition button is
pressed and a valid transmitter is
found in the vehicle.
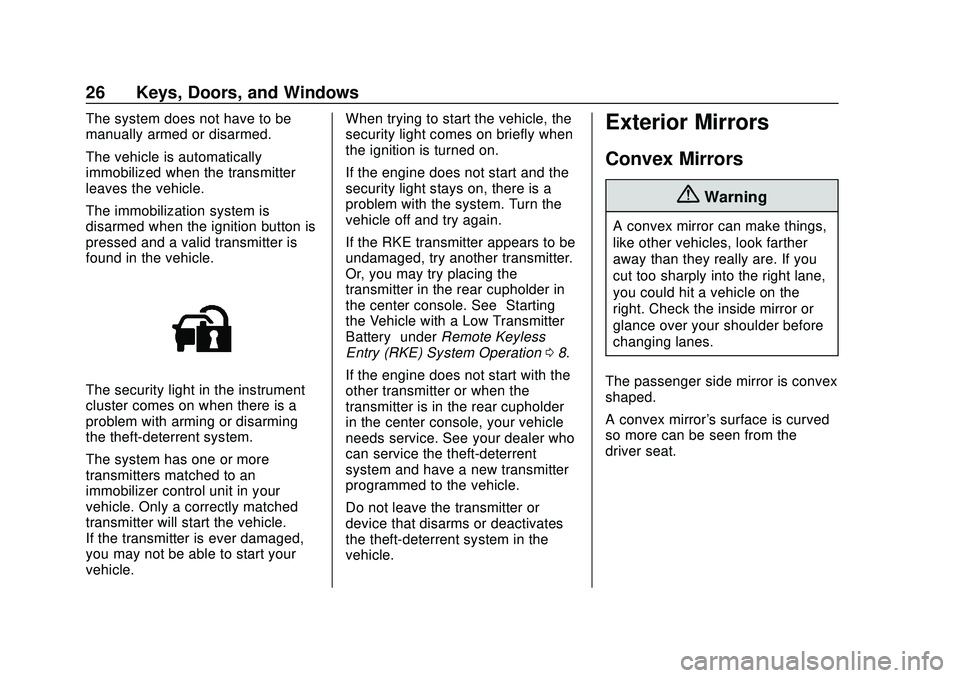
The security light in the instrument
cluster comes on when there is a
problem with arming or disarming
the theft-deterrent system.
The system has one or more
transmitters matched to an
immobilizer control unit in your
vehicle. Only a correctly matched
transmitter will start the vehicle.
If the transmitter is ever damaged,
you may not be able to start your
vehicle.When trying to start the vehicle, the
security light comes on briefly when
the ignition is turned on.
If the engine does not start and the
security light stays on, there is a
problem with the system. Turn the
vehicle off and try again.
If the RKE transmitter appears to be
undamaged, try another transmitter.
Or, you may try placing the
transmitter in the rear cupholder in
the center console. See
“Starting
the Vehicle with a Low Transmitter
Battery” underRemote Keyless
Entry (RKE) System Operation 08.
If the engine does not start with the
other transmitter or when the
transmitter is in the rear cupholder
in the center console, your vehicle
needs service. See your dealer who
can service the theft-deterrent
system and have a new transmitter
programmed to the vehicle.
Do not leave the transmitter or
device that disarms or deactivates
the theft-deterrent system in the
vehicle.
Exterior Mirrors
Convex Mirrors
{Warning
A convex mirror can make things,
like other vehicles, look farther
away than they really are. If you
cut too sharply into the right lane,
you could hit a vehicle on the
right. Check the inside mirror or
glance over your shoulder before
changing lanes.
The passenger side mirror is convex
shaped.
A convex mirror's surface is curved
so more can be seen from the
driver seat.
Page 37 of 361
Chevrolet Camaro Owner Manual (GMNA-Localizing-U.S./Canada/Mexico-
13556304) - 2020 - CRC - 9/3/19
36 Keys, Doors, and Windows
Caution
When the convertible top is open,
there are sliding covers next to
the rear seat on each side of the
vehicle. Do not press down on or
move these covers as damage
may occur to the covers or the
convertible top.
Opening the Convertible Top
Using the Overhead Console
Switch 1. Remove all objects from the top of the tonneau cover and
forward of the rear trunk
partition. Place the partition in
the rear storage area in the
upright position. Fasten both
sides of the partition to the
posts just below the tonneau
cover. See Rear Storage 089.
2. Close the trunk.
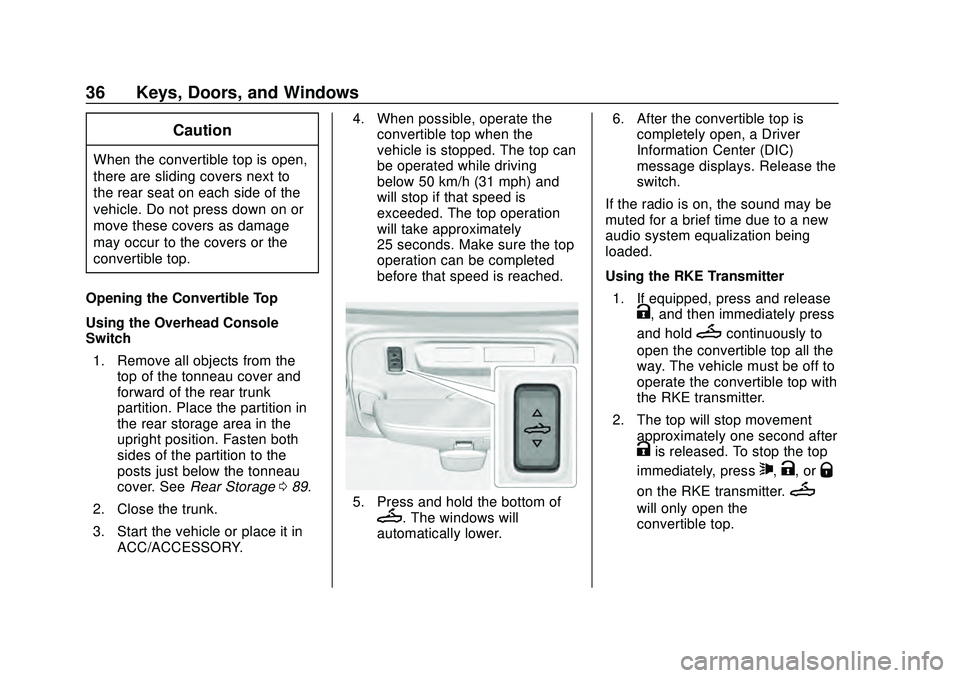
3. Start the vehicle or place it in ACC/ACCESSORY. 4. When possible, operate the
convertible top when the
vehicle is stopped. The top can
be operated while driving
below 50 km/h (31 mph) and
will stop if that speed is
exceeded. The top operation
will take approximately
25 seconds. Make sure the top
operation can be completed
before that speed is reached.
5. Press and hold the bottom ofM. The windows will
automatically lower. 6. After the convertible top is
completely open, a Driver
Information Center (DIC)
message displays. Release the
switch.
If the radio is on, the sound may be
muted for a brief time due to a new
audio system equalization being
loaded.
Using the RKE Transmitter 1. If equipped, press and release
K, and then immediately press
and hold
Mcontinuously to
open the convertible top all the
way. The vehicle must be off to
operate the convertible top with
the RKE transmitter.
2. The top will stop movement approximately one second after
Kis released. To stop the top
immediately, press
7,K, orQ
on the RKE transmitter.M
will only open the
convertible top.
Page 90 of 361
Chevrolet Camaro Owner Manual (GMNA-Localizing-U.S./Canada/Mexico-
13556304) - 2020 - CRC - 9/3/19
Storage 89
Storage
Storage Compartments
Storage Compartments . . . . . . . . 89
Glove Box . . . . . . . . . . . . . . . . . . . . . 89
Rear Storage . . . . . . . . . . . . . . . . . . 89
Center Console Storage . . . . . . . 90
Additional Storage Features
Convenience Net . . . . . . . . . . . . . . 90
Storage
Compartments
{Warning
Do not store heavy or sharp
objects in storage compartments.
In a crash, these objects may
cause the cover to open and
could result in injury.
Glove Box
Open the glove box by lifting up on
the lever. Use the key to lock and
unlock the glove box.
Rear Storage
Rear Seat Trunk Access
(Coupe)
If equipped, there is access to the
trunk from inside of the vehicle.
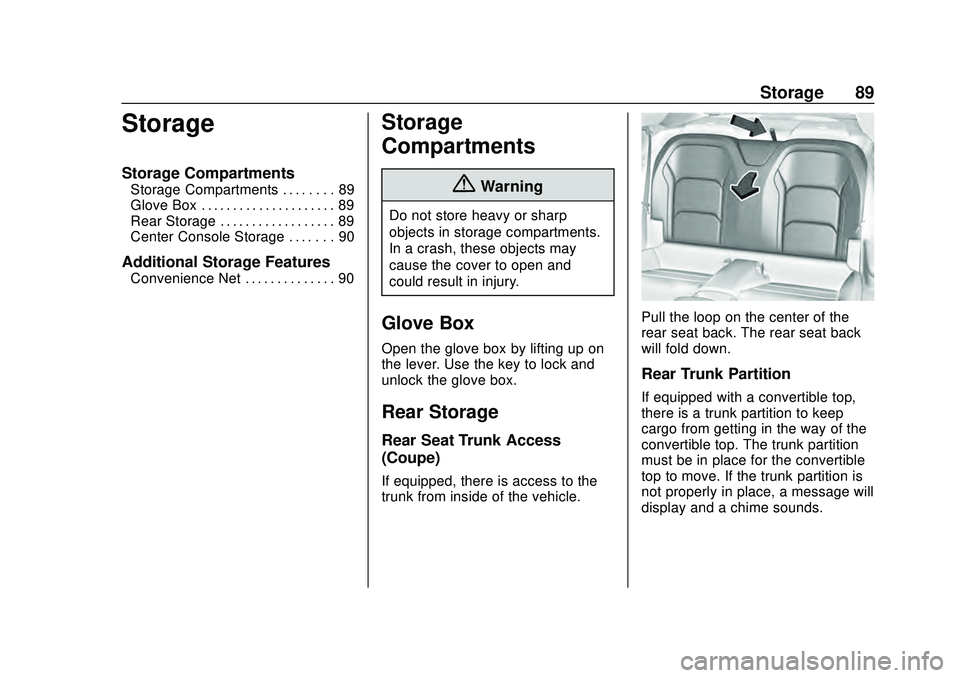
Pull the loop on the center of the
rear seat back. The rear seat back
will fold down.
Rear Trunk Partition
If equipped with a convertible top,
there is a trunk partition to keep
cargo from getting in the way of the
convertible top. The trunk partition
must be in place for the convertible
top to move. If the trunk partition is
not properly in place, a message will
display and a chime sounds.
Page 91 of 361
Chevrolet Camaro Owner Manual (GMNA-Localizing-U.S./Canada/Mexico-
13556304) - 2020 - CRC - 9/3/19
90 Storage
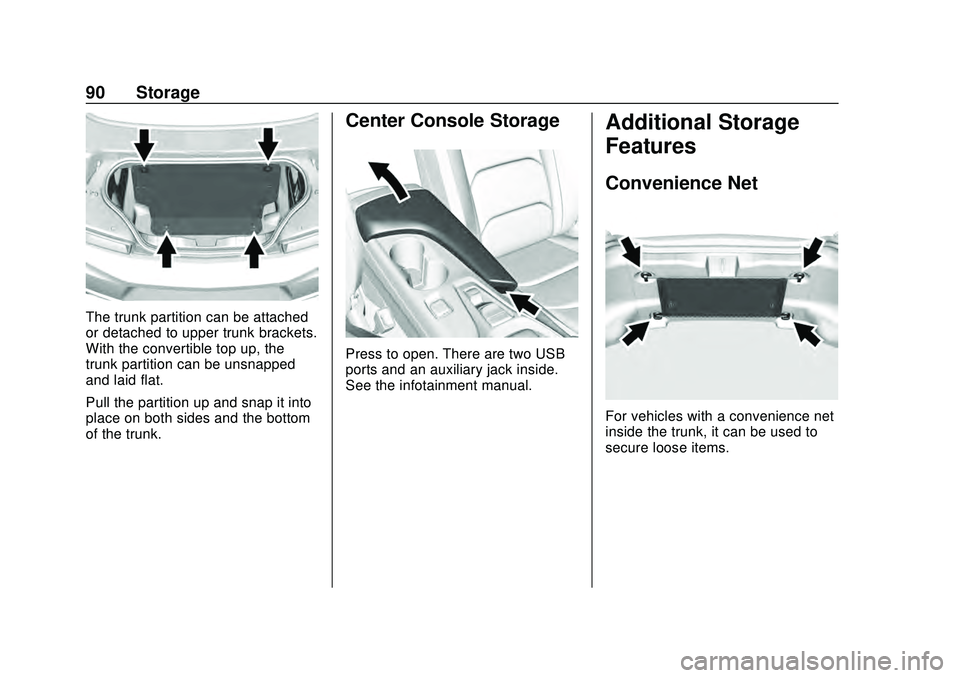
The trunk partition can be attached
or detached to upper trunk brackets.
With the convertible top up, the
trunk partition can be unsnapped
and laid flat.
Pull the partition up and snap it into
place on both sides and the bottom
of the trunk.
Center Console Storage
Press to open. There are two USB
ports and an auxiliary jack inside.
See the infotainment manual.
Additional Storage
Features
Convenience Net
For vehicles with a convenience net
inside the trunk, it can be used to
secure loose items.
Page 95 of 361
Chevrolet Camaro Owner Manual (GMNA-Localizing-U.S./Canada/Mexico-
13556304) - 2020 - CRC - 9/3/19
94 Instruments and Controls
Compass
The vehicle has a compass display
in the Driver Information
Center (DIC). The compass receives
its heading and other information
from the Global Positioning
System (GPS) antenna, StabiliTrak/
Electronic Stability Control (ESC),
and vehicle speed information.
Avoid covering the GPS antenna,
located on the roof, for long periods
of time with objects that may
interfere with the antenna's ability to
receive a satellite signal. The
compass system is designed to
operate for a certain number of
miles or degrees of turn before
needing a signal from the GPS
satellites. When the compass
display shows CAL, drive the
vehicle for a short distance in an
open area where it can receive a
GPS signal. The compass system
will automatically determine when
the GPS signal is restored and
provide a heading again.
Clock
The time and date for the clock can
be set using the infotainment
system. See“Time/Date”in
“System” under“Settings” in the
infotainment manual.
Power Outlets
The vehicle has an accessory
power outlet on the center floor
console in front of the cupholders.
It can be used to plug in electrical
equipment, such as a cell phone or
an MP3 player.
The accessory power outlet does
not work when the ignition is turned
off and the driver door is opened.
This helps to preserve the battery
life of the vehicle.
Certain power accessory plugs may
not be compatible with the
accessory power outlet and could
overload vehicle and adapter fuses.
If a problem is experienced, see
your dealer.
Caution
Adding any electrical equipment
to the vehicle may damage it or
keep other components from
working as they should. The
repairs would not be covered by
the vehicle warranty. Do not use
equipment exceeding
maximum amperage rating of
15 amperes. Check with your
dealer before adding electrical
equipment.
When adding electrical equipment,
be sure to follow the proper
installation instructions included with
the equipment. See Add-On
Electrical Equipment 0218.
Caution
Hanging heavy equipment from
the power outlet can cause
damage not covered by the
vehicle warranty. The power
(Continued)
Page 198 of 361
Chevrolet Camaro Owner Manual (GMNA-Localizing-U.S./Canada/Mexico-
13556304) - 2020 - CRC - 9/3/19
Driving and Operating 197
return to normal operation after a
short period when no spirited driving
is detected.
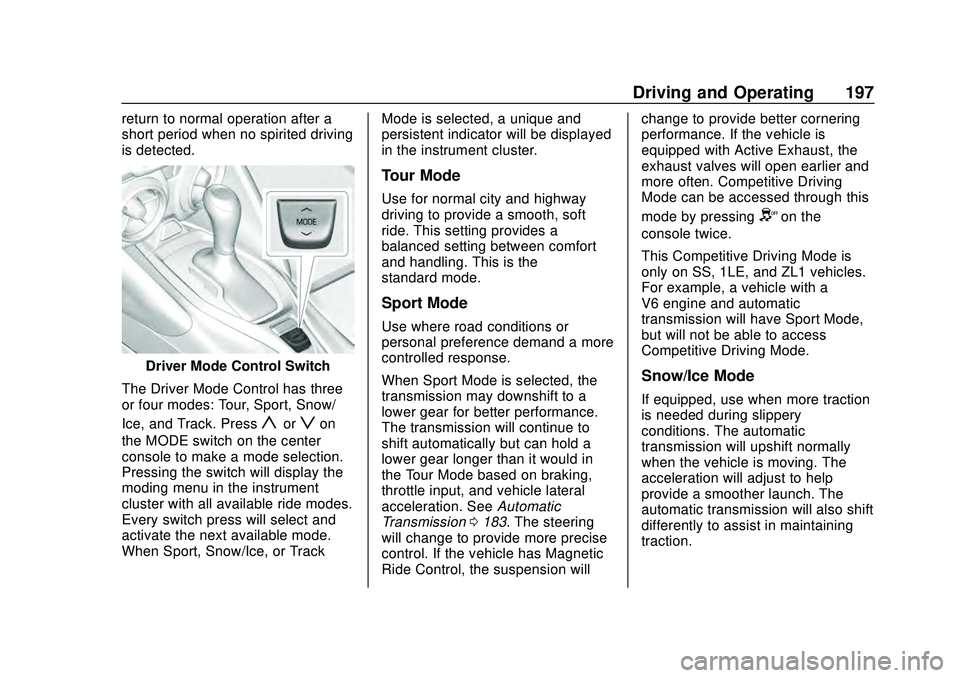
Driver Mode Control Switch
The Driver Mode Control has three
or four modes: Tour, Sport, Snow/
Ice, and Track. Press
yorzon
the MODE switch on the center
console to make a mode selection.
Pressing the switch will display the
moding menu in the instrument
cluster with all available ride modes.
Every switch press will select and
activate the next available mode.
When Sport, Snow/Ice, or Track Mode is selected, a unique and
persistent indicator will be displayed
in the instrument cluster.
Tour Mode
Use for normal city and highway
driving to provide a smooth, soft
ride. This setting provides a
balanced setting between comfort
and handling. This is the
standard mode.
Sport Mode
Use where road conditions or
personal preference demand a more
controlled response.
When Sport Mode is selected, the
transmission may downshift to a
lower gear for better performance.
The transmission will continue to
shift automatically but can hold a
lower gear longer than it would in
the Tour Mode based on braking,
throttle input, and vehicle lateral
acceleration. See
Automatic
Transmission 0183. The steering
will change to provide more precise
control. If the vehicle has Magnetic
Ride Control, the suspension will change to provide better cornering
performance. If the vehicle is
equipped with Active Exhaust, the
exhaust valves will open earlier and
more often. Competitive Driving
Mode can be accessed through this
mode by pressing
Yon the
console twice.
This Competitive Driving Mode is
only on SS, 1LE, and ZL1 vehicles.
For example, a vehicle with a
V6 engine and automatic
transmission will have Sport Mode,
but will not be able to access
Competitive Driving Mode.
Snow/Ice Mode
If equipped, use when more traction
is needed during slippery
conditions. The automatic
transmission will upshift normally
when the vehicle is moving. The
acceleration will adjust to help
provide a smoother launch. The
automatic transmission will also shift
differently to assist in maintaining
traction.