display CHEVROLET CAMARO SS 2010 Service Manual
[x] Cancel search | Manufacturer: CHEVROLET, Model Year: 2010, Model line: CAMARO SS, Model: CHEVROLET CAMARO SS 2010Pages: 372, PDF Size: 1.91 MB
Page 217 of 372

Object Detection
Systems
Ultrasonic Parking Assist
For vehicles with the Ultrasonic
Rear Parking Assist (URPA)
system, it assists the driver with
parking and avoiding objects while
in R (Reverse). URPA operates at
speeds less than 8 km/h (5 mph),
and the sensors on the rear bumper
detect objects up to 2.4m (8 feet)
behind the vehicle, and at least
20 cm (8 inches) off the ground.
{WARNING
The Ultrasonic Rear Parking
Assist (URPA) system does not
replace driver vision. It cannot
detect:
•objects that are below the
bumper, underneath the
vehicle, or if they are too
close or far from the vehicle
•children, pedestrians,
bicyclists, or pets.
If you do not use proper care
before and while backing; vehicle
damage, injury, or death could
occur. Even with URPA, always
check behind the vehicle before
backing up. While backing, be
sure to look for objects and check
the vehicle’s mirrors.The display is located in the center
of the rear seat back filler panel
trim and uses three color-coded
lights to provide distance and
system information.
Driving and Operating 8-41
Page 218 of 372
How the System Works
URPA comes on automatically
and the display briefly illuminates
to indicate the system is working
when the shift lever is moved into
R (Reverse).
If the vehicle is traveling faster
then 8 km/h (5 mph) in reverse,
the red light on the rear display
flashes.
Objects must be at least 20 cm
(8 inches) off the ground and below
trunk level, and within 2.4m (8 feet)
from the rear bumper to be detected.
The distance may be less during
warmer or humid weather.
A single beep sounds the first time
an object is detected between 1.0 m
(40 inches) and 2.4m (8 feet) away.
Beeping occurs continuously when
the vehicle is 0.6 m (23 inches) or
closer to an object.The following describes how the URPA display lights appear as the vehicle
gets closer to a detected object:
Description
MetricEnglish
amber light 2.4 m8 ft
amber/amber lights 1.0 m40 in
amber/amber/red lights
and continuous beeping for five seconds 0.6 m
23 in
amber/amber/red lights flashing and continuous beeping for five seconds 0.3 m
1 ft
PARK ASSIST OFF displays
on the Driver Information Center (DIC)
to indicate that URPA is off.
The message disappears after
a short period of time. See
Object Detection System
Messages on page 4-34 for other
URPA messages.
8-42 Driving and Operating
Page 219 of 372

When the System Does Not
Seem to Work Properly
If the URPA system does not
activate due to a temporary
condition, the message PARK
ASSIST OFF displays on the DIC
and a red light comes on the rear
URPA display when the shift lever is
moved into R (Reverse). This can
occur under the following conditions:
•The ultrasonic sensors are not
clean. Keep the vehicle’s rear
bumper free of mud, dirt, snow,
ice and slush. For cleaning
instructions, seeExterior Care
on page 9-88.
•A trailer was attached to the
vehicle, or an object was hanging
out of the trunk during the last
drive cycle, making the red light
come on in the rear display.
Once the attached object is
removed, URPA will return
to normal operation.
•A tow bar is attached to the
vehicle.
•The vehicle’s bumper is
damaged. Take the vehicle to
your dealer/retailer to repair the
system.
•Other conditions may affect
system performance, such as
vibrations from a jackhammer or
the compression of air brakes on
a very large truck that is near the
vehicle.
If the system is still disabled, after
driving forward at least 25 km/h
(15 mph), take the vehicle to your
dealer/retailer.
Fuel
Use of the recommended fuel
is an important part of the proper
maintenance of this vehicle. To help
keep the engine clean and maintain
optimum vehicle performance, we
recommend the use of gasoline
advertised as TOP TIER Detergent
Gasoline.
Look for the TOP TIER label on the
fuel pump to ensure gasoline meets
enhanced detergency standards
developed by auto companies. A list
of marketers providing TOP TIER
Detergent Gasoline can be found
at www.toptiergas.com.
Driving and Operating 8-43
Page 257 of 372
If No Steam Is Coming From
The Engine Compartment
If an engine overheat warning is
displayed but no steam can be seen
or heard, the problem may not be too
serious. Sometimes the engine can
get a little too hot when the vehicle:
•Climbs a long hill on a hot day.
•Stops after high-speed driving.
•Idles for long periods in traffic.
•Tows a trailer.
If the overheat warning is displayed
with no sign of steam:
1. Turn the air off.
2. Turn the heater on to the highest
temperature and to the highest
fan speed. Open the windows
as necessary.3. In heavy traffic, let the engine idle
in N (Neutral) while stopped. If it
is safe to do so, pull off the road,
shift to P (Park) or N (Neutral) and
let the engine idle.
If the temperature overheat gage is
no longer in the overheat zone or an
overheat warning no longer displays,
the vehicle can be driven. Continue
to drive the vehicle slow for about
10 minutes. Keep a safe vehicle
distance from the car in front of you.
If the warning does not come back
on, continue to drive normally.
If the warning continues, pull over,
stop, and park the vehicle right away.
If there is no sign of steam, idle
the engine for three minutes while
parked. If the warning is still
displayed, turn off the engine until it
cools down. Also, see “Overheated
Engine Protection Operating Mode”
later in this section.
Power Steering Fluid
The power steering fluid reservoir is
located under the engine cover on
the driver side toward the front of the
engine compartment. SeeEngine
Compartment Overview on page 9-6.
When to Check Power
Steering Fluid
It is not necessary to regularly
check power steering fluid unless
you suspect there is a leak in
the system or an unusual noise is
heard. A fluid loss in this system
could indicate a problem. Have the
system inspected and repaired.
Vehicle Care 9-25
Page 278 of 372

Fuses Usage
F10 Spare
F11 Spare
F12 Spare
F13 Display
F14OnStar
®Universal
Hands Free Phone
F15Body Control
Module 3
F16Body Control
Module 4
F17 Power Outlet 1
F18 Power Outlet 2
F19Steering Wheel
Controls Backlight
F20 Spare
F21 Spare
F22 Spare
F23 Trunk
F24Automatic Occupant
Sensing
Fuses Usage
F25Body Control
Module 1
F27Body Control
Module 8
F28 Spare
F29Body Control
Module 5
F30Body Control
Module 7
Circuit
BreakersUsage
CB7 Passenger Seat
CB26 Driver Seat
Relays Usage
K10Retained Accessory
Power
K605 Not Used
K609 Trunk
Rear Compartment
Fuse Block
The rear compartment fuse block is
located on the right side of the trunk
behind a cover. Remove the six
convenience net retainers, the rear
sill plate, and the two passenger side
trim retainers, then swing the trim out
of the way.
9-46 Vehicle Care
Page 289 of 372
Please note that the TPMS
is not a substitute for proper tire
maintenance, and it is the driver’s
responsibility to maintain correct tire
pressure, even if under-inflation
has not reached the level to trigger
illumination of the TPMS low tire
pressure telltale.
Your vehicle has also been
equipped with a TPMS malfunction
indicator to indicate when the system
is not operating properly. The TPMS
malfunction indicator is combined
with the low tire pressure telltale.
When the system detects a
malfunction, the telltale will flash
for approximately one minute and
then remain continuously illuminated.
This sequence will continue upon
subsequent vehicle start-ups as
long as the malfunction exists.
When the malfunction indicator is
illuminated, the system may not
be able to detect or signal low
tire pressure as intended. TPMS
malfunctions may occur for a varietyof reasons, including the installation
of replacement or alternate tires or
wheels on the vehicle that prevent
the TPMS from functioning properly.
Always check the TPMS malfunction
telltale after replacing one or more
tires or wheels on your vehicle to
ensure that the replacement or
alternate tires and wheels allow
the TPMS to continue to function
properly.
SeeTire Pressure Monitor
Operation on page 9-57for
additional information.
Federal Communications
Commission (FCC) and
Industry and Science Canada
SeeRadio Frequency Statement
(US, Can) on page 12-15for
information regarding Part 15
of the Federal Communications
Commission (FCC) Rules and
RSS-210/211 of Industry and
Science Canada.
Tire Pressure Monitor
Operation
This vehicle may have a Tire
Pressure Monitor System (TPMS).
The TPMS is designed to warn the
driver when a low tire pressure
condition exists. TPMS sensors are
mounted onto each tire and wheel
assembly, excluding the spare tire
and wheel assembly, if the vehicle
has one. The TPMS sensors monitor
the air pressure in the vehicle’s tires
and transmits the tire pressure
readings to a receiver located in
the vehicle.
Using the Driver Information
Center (DIC), the driver can also
check tire pressure levels using the
DIC. For additional information and
details about the DIC operation and
displays seeTire Messages on
page 4-36.
Vehicle Care 9-57
Page 290 of 372
When a low tire pressure condition
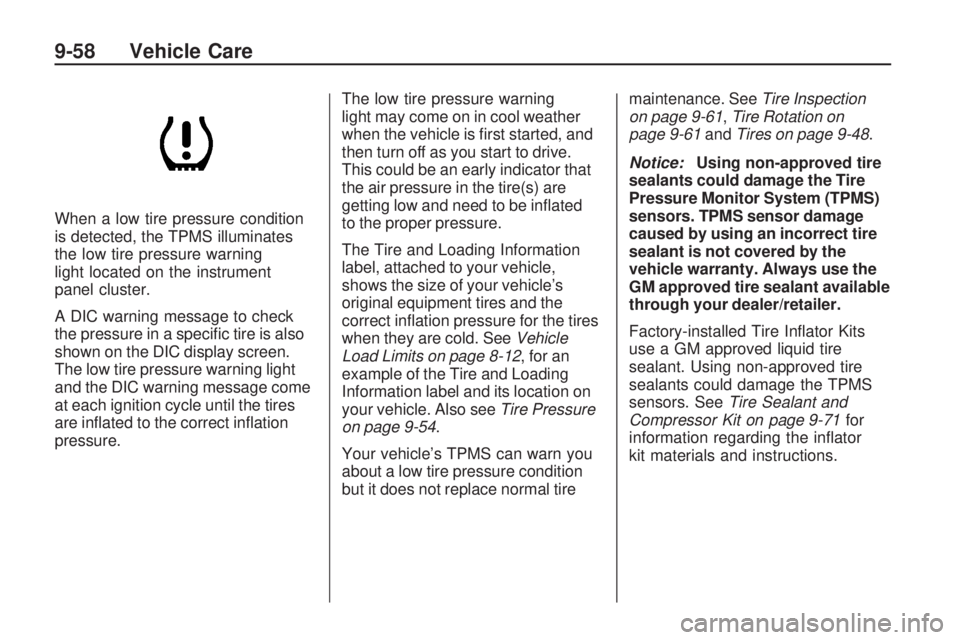
is detected, the TPMS illuminates
the low tire pressure warning
light located on the instrument
panel cluster.
A DIC warning message to check
the pressure in a specific tire is also
shown on the DIC display screen.
The low tire pressure warning light
and the DIC warning message come
at each ignition cycle until the tires
are inflated to the correct inflation
pressure.The low tire pressure warning
light may come on in cool weather
when the vehicle is first started, and
then turn off as you start to drive.
This could be an early indicator that
the air pressure in the tire(s) are
getting low and need to be inflated
to the proper pressure.
The Tire and Loading Information
label, attached to your vehicle,
shows the size of your vehicle’s
original equipment tires and the
correct inflation pressure for the tires
when they are cold. SeeVehicle
Load Limits on page 8-12, for an
example of the Tire and Loading
Information label and its location on
your vehicle. Also seeTire Pressure
on page 9-54.
Your vehicle’s TPMS can warn you
about a low tire pressure condition
but it does not replace normal tiremaintenance. SeeTire Inspection
on page 9-61,Tire Rotation on
page 9-61andTires on page 9-48.
Notice:Using non-approved tire
sealants could damage the Tire
Pressure Monitor System (TPMS)
sensors. TPMS sensor damage
caused by using an incorrect tire
sealant is not covered by the
vehicle warranty. Always use the
GM approved tire sealant available
through your dealer/retailer.
Factory-installed Tire Inflator Kits
use a GM approved liquid tire
sealant. Using non-approved tire
sealants could damage the TPMS
sensors. SeeTire Sealant and
Compressor Kit on page 9-71for
information regarding the inflator
kit materials and instructions.
9-58 Vehicle Care
Page 291 of 372
TPMS Malfunction Light and
Message
The TPMS will not function properly
if one or more of the TPMS sensors
are missing or inoperable. When the
system detects a malfunction, the
low tire warning light flashes for
about one minute and then stays
on for the remainder of the ignition
cycle. A DIC warning message is
also displayed. The low tire warning
light and DIC warning message
come on at each ignition cycle until
the problem is corrected. Some of
the conditions that can cause the
malfunction light and DIC message
to come on are:
•One of the road tires has been
replaced with the spare tire, if the
vehicle has one. The spare tire
does not have a TPMS sensor.
The DIC message should go off
once you re-install the road tire
containing the TPMS sensor.
•The TPMS sensor matching
process was not done or not
completed successfully after
rotating the vehicle’s tires.
The DIC message should go
off after successfully completing
the sensor matching process.
See “TPMS Sensor Matching
Process” later in this section.
•One or more TPMS sensors
are missing or damaged.
The DIC message and the
TPMS malfunction light should
go off when the TPMS sensors
are installed and the sensor
matching process is performed
successfully. See your dealer/
retailer for service.
•Replacement tires or wheels do
not match your vehicle’s original
equipment tires or wheels. Tires
and wheels other than those
recommended for your vehicle
could prevent the TPMS from
functioning properly. SeeBuying
New Tires on page 9-63.
•Operating electronic devices or
being near facilities using radio
wave frequencies similar to the
TPMS could cause the TPMS
sensors to malfunction.
If the TPMS is not functioning it
cannot detect or signal a low tire
condition. See your dealer/retailer for
service if the TPMS malfunction light
and DIC message comes on and
stays on.
Vehicle Care 9-59
Page 292 of 372

TPMS Sensor Matching
Process
Each TPMS sensor has a unique
identification code. Any time you
replace one or more of the TPMS
sensors or rotate your vehicle’s tires,
the identification codes need to be
matched to the new tire/wheel
position. The sensors are matched
to the tire/wheel positions in the
following order: driver side front tire,
passenger side front tire, passenger
side rear tire, and driver side rear
tire using a TPMS diagnostic tool.
See your dealer/retailer for service.
The TPMS sensors can also be
matched to each tire/wheel position
by increasing or decreasing the
tire’s air pressure. If increasing the
tire’s air pressure, do not exceed
the maximum inflation pressure
indicated on the tire’s sidewall.
To decrease the tire’s air-pressure
use the pointed end of the valve
cap, a pencil-style air pressure
gage, or a key.You have two minutes to match
the first tire/wheel position, and
five minutes overall, to match all
four tire/wheel positions. If it takes
longer than two minutes, to match
the first tire and wheel, or more than
five minutes to match all four tire
and wheel positions, the matching
process stops and you need to
start over.
The TPMS matching process is
outlined below:
1. Set the parking brake.
2. Turn the ignition switch to
ON/RUN with the engine off.
3. Go to the TPM vehicle
information screen on the DIC.
SeeDriver Information Center
(DIC) on page 4-27. Press set to
relearn the sensors. The horn
sounds twice to signal the
receiver is in relearn mode and
Tire Learning Active message
displays on the DIC screen.
4. Start with the driver side
front tire.5. Remove the valve cap from
the valve stem. Activate the
TPMS sensor by increasing or
decreasing the tire’s air pressure
for 10 seconds, or until a horn
chirp sounds. The horn chirp,
which can take up to 30 seconds
to sound, confirms that the TPMS
sensor identification code has
been matched to this tire position.
6. Proceed to the passenger
side front tire, and repeat
the procedure in Step 5.
7. Proceed to the passenger
side rear tire, and repeat
the procedure in Step 5.
8. Proceed to the driver side rear
tire, and repeat the procedure
in Step 5.
9. After hearing the confirming horn
chirp, for the driver side rear tire,
the horn sounds two more times
to signal the tire learning mode is
no longer active. Turn the ignition
switch to LOCK/OFF.
9-60 Vehicle Care
Page 330 of 372
At your General Motors dealer/
retailer, you can be certain that
you will receive the highest level
of service available. Your dealer
/retailer has specially trained service
technicians, uses genuine GM
replacement parts, as well as, up to
date tools and equipment to ensure
fast and accurate diagnostics.
The proper replacement parts,
fluids, and lubricants to use are
listed inRecommended Fluids
and Lubricants on page 10-7and
Maintenance Replacement Parts on
page 10-9. We recommend the use
of genuine parts from your dealer/
retailer.
Rotation of New Tires
Tire rotation is not recommended if
the vehicle has different size tires
on the front and rear wheels. If tire
rotation is recommended for the
vehicle, to maintain ride, handling,
and performance of the vehicle,
it is important that the first rotation
service for new tires be performed
when they have 8 000 to 13 000 km
(5,000 to 8,000 miles). SeeTire
Rotation on page 9-61.Scheduled
Maintenance
When the Change Engine Oil
Soon Message Displays
Change engine oil and filter.
SeeEngine Oil on page 9-10.
An Emission Control Service.
When the Change Engine Oil
Soon message displays, service is
required for the vehicle as soon as
possible, within the next 1 000 km/
600 miles. If driving under the best
conditions, the engine oil life system
might not indicate the need for
vehicle service for more than a year.
The engine oil and filter must be
changed at least once a year and the
oil life system must be reset. Your
dealer/retailer has trained service
technicians who will perform this
work and reset the system.If the engine oil life system is reset
accidentally, service the vehicle
within 5 000 km/3,000 miles since
the last service. Reset the oil life
system whenever the oil is changed.
SeeEngine Oil Life System on
page 9-13.
When the Change Engine Oil
Soon message displays, certain
services, checks, and inspections
are required. The services described
for MaintenanceIshould be
performed at every engine oil
change. The services described
for MaintenanceIIshould be
performed when:
•MaintenanceIwas performed
the last time the engine oil was
changed.
•It has been 10 months or more
since the Change Engine Oil
Soon message has displayed
or since the last service.
10-2 Service and Maintenance