fuel cap release CHEVROLET CAPTIVA SPORT 2014 Owner's Manual
[x] Cancel search | Manufacturer: CHEVROLET, Model Year: 2014, Model line: CAPTIVA SPORT, Model: CHEVROLET CAPTIVA SPORT 2014Pages: 382, PDF Size: 4.12 MB
Page 27 of 382
Black plate (21,1)Chevrolet Captiva Sport Owner Manual (GMNA-Localizing-U.S./Mexico-
6014141) - 2014 - crc - 8/13/13
In Brief 1-21
tire pressures are getting low and
the tires need to be inflated to the
proper pressure.
The TPMS does not replace normal
monthly tire maintenance. Maintain
the correct tire pressures.
SeeTire Pressure Monitor System
on page 10-46.
Engine Oil Life System
The engine oil life system calculates
engine oil life based on vehicle use
and displays a CHANGE ENGINE
OIL SOON message when it is time
to change the engine oil and filter.
Resetting the Oil Life System
Reset the system whenever the
engine oil is changed so that the
system can calculate the next
engine oil change. To reset the
system:
1. Display OIL LIFE REMAINING on the DIC. See Driver
Information Center (DIC) on
page 5-24 andEngine Oil
Messages on page 5-31. 2. Press
Vfor five seconds to
reset the oil life at 100%.
Be careful not to reset the oil life
display accidentally at any time
other than after the oil is
changed. It cannot be reset
accurately until the next oil
change.
The oil life system can also be reset
as follows:
1. Turn the ignition key to ON/RUN with the engine off.
2. Fully press and release the accelerator pedal three times
within five seconds.
If the OIL LIFE REMAINING
value is not 100%, the system
needs to be reset again.
See Engine Oil Life System on
page 10-10.E85 or FlexFuel
Vehicles with a yellow fuel cap can
use either unleaded gasoline or
ethanol fuel containing up to 85%
ethanol (E85). See E85 or FlexFuel
on page 9-37. For all other vehicles,
use only the unleaded gasoline
described under Recommended
Fuel on page 9-36.
Driving for Better Fuel
Economy
Driving habits can affect fuel
mileage. Here are some driving tips
to get the best fuel economy
possible.
.Avoid fast starts and accelerate
smoothly.
.Brake gradually and avoid
abrupt stops.
.Avoid idling the engine for long
periods of time.
.When road and weather
conditions are appropriate, use
cruise control.
Page 31 of 382
Black plate (3,1)Chevrolet Captiva Sport Owner Manual (GMNA-Localizing-U.S./Mexico-
6014141) - 2014 - crc - 8/13/13
Keys, Doors, and Windows 2-3
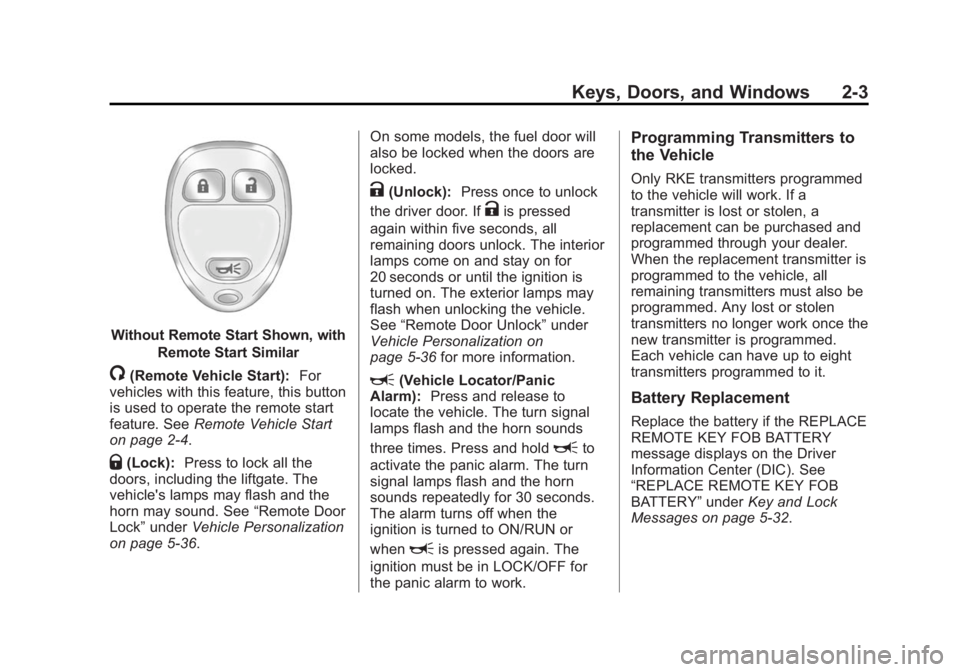
Without Remote Start Shown, withRemote Start Similar
/(Remote Vehicle Start): For
vehicles with this feature, this button
is used to operate the remote start
feature. See Remote Vehicle Start
on page 2-4.
Q(Lock): Press to lock all the
doors, including the liftgate. The
vehicle's lamps may flash and the
horn may sound. See “Remote Door
Lock” under Vehicle Personalization
on page 5-36. On some models, the fuel door will
also be locked when the doors are
locked.
K(Unlock):
Press once to unlock
the driver door. If
Kis pressed
again within five seconds, all
remaining doors unlock. The interior
lamps come on and stay on for
20 seconds or until the ignition is
turned on. The exterior lamps may
flash when unlocking the vehicle.
See “Remote Door Unlock” under
Vehicle Personalization on
page 5-36 for more information.
L(Vehicle Locator/Panic
Alarm): Press and release to
locate the vehicle. The turn signal
lamps flash and the horn sounds
three times. Press and hold
Lto
activate the panic alarm. The turn
signal lamps flash and the horn
sounds repeatedly for 30 seconds.
The alarm turns off when the
ignition is turned to ON/RUN or
when
Lis pressed again. The
ignition must be in LOCK/OFF for
the panic alarm to work.
Programming Transmitters to
the Vehicle
Only RKE transmitters programmed
to the vehicle will work. If a
transmitter is lost or stolen, a
replacement can be purchased and
programmed through your dealer.
When the replacement transmitter is
programmed to the vehicle, all
remaining transmitters must also be
programmed. Any lost or stolen
transmitters no longer work once the
new transmitter is programmed.
Each vehicle can have up to eight
transmitters programmed to it.
Battery Replacement
Replace the battery if the REPLACE
REMOTE KEY FOB BATTERY
message displays on the Driver
Information Center (DIC). See
“REPLACE REMOTE KEY FOB
BATTERY” underKey and Lock
Messages on page 5-32.
Page 32 of 382
Black plate (4,1)Chevrolet Captiva Sport Owner Manual (GMNA-Localizing-U.S./Mexico-
6014141) - 2014 - crc - 8/13/13
2-4 Keys, Doors, and Windows
{Caution
When replacing the battery, do
not touch any of the circuitry on
the transmitter. Static from your
body could damage the
transmitter.
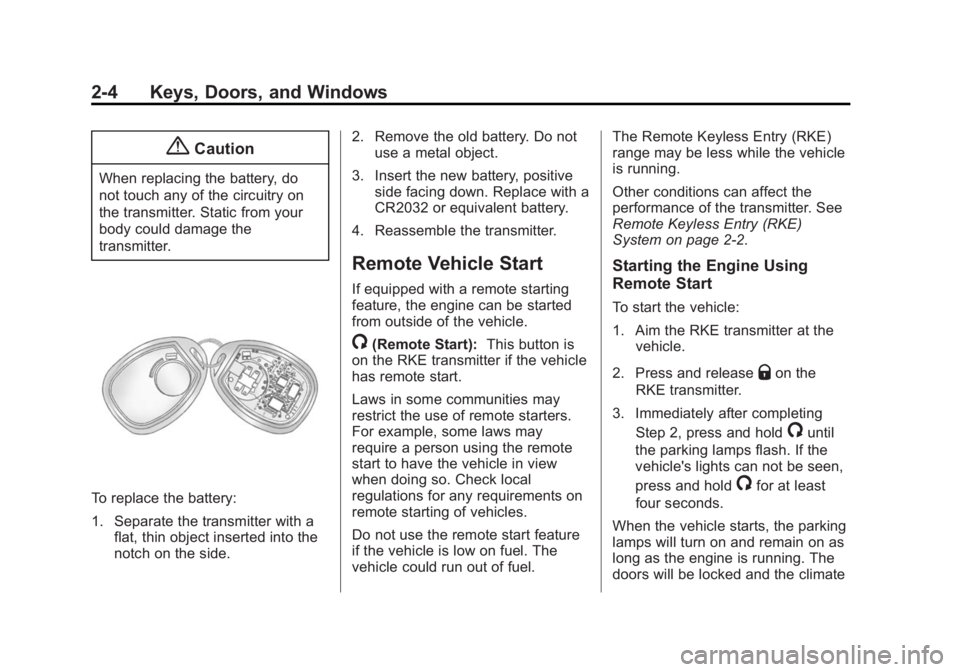
To replace the battery:
1. Separate the transmitter with aflat, thin object inserted into the
notch on the side. 2. Remove the old battery. Do not
use a metal object.
3. Insert the new battery, positive side facing down. Replace with a
CR2032 or equivalent battery.
4. Reassemble the transmitter.
Remote Vehicle Start
If equipped with a remote starting
feature, the engine can be started
from outside of the vehicle.
/(Remote Start): This button is
on the RKE transmitter if the vehicle
has remote start.
Laws in some communities may
restrict the use of remote starters.
For example, some laws may
require a person using the remote
start to have the vehicle in view
when doing so. Check local
regulations for any requirements on
remote starting of vehicles.
Do not use the remote start feature
if the vehicle is low on fuel. The
vehicle could run out of fuel. The Remote Keyless Entry (RKE)
range may be less while the vehicle
is running.
Other conditions can affect the
performance of the transmitter. See
Remote Keyless Entry (RKE)
System on page 2-2.
Starting the Engine Using
Remote Start
To start the vehicle:
1. Aim the RKE transmitter at the
vehicle.
2. Press and release
Qon the
RKE transmitter.
3. Immediately after completing Step 2, press and hold
/until
the parking lamps flash. If the
vehicle's lights can not be seen,
press and hold
/for at least
four seconds.
When the vehicle starts, the parking
lamps will turn on and remain on as
long as the engine is running. The
doors will be locked and the climate
Page 231 of 382
Black plate (39,1)Chevrolet Captiva Sport Owner Manual (GMNA-Localizing-U.S./Mexico-
6014141) - 2014 - crc - 8/13/13
Driving and Operating 9-39
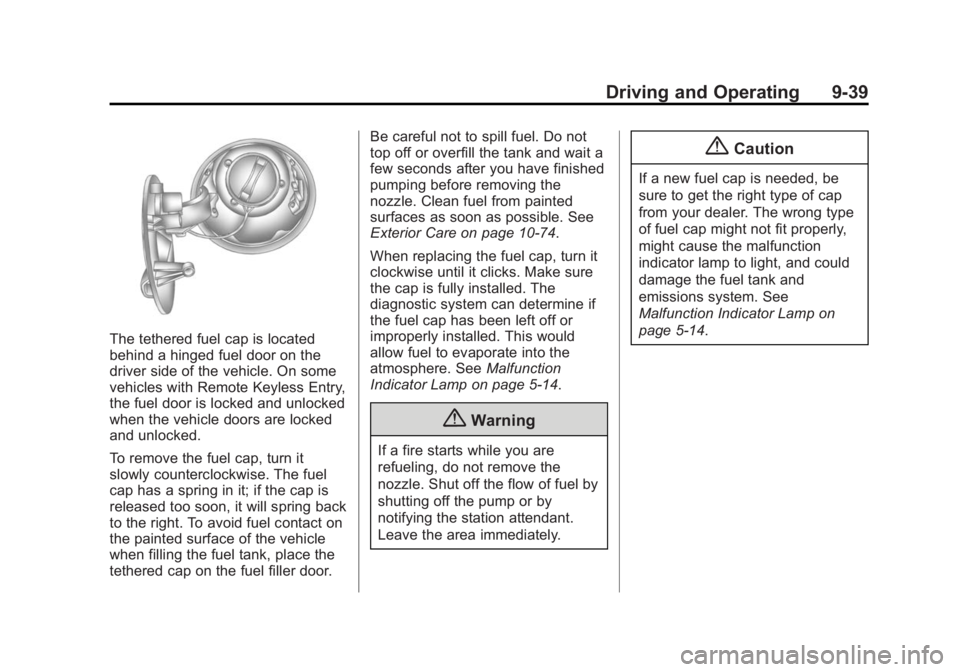
The tethered fuel cap is located
behind a hinged fuel door on the
driver side of the vehicle. On some
vehicles with Remote Keyless Entry,
the fuel door is locked and unlocked
when the vehicle doors are locked
and unlocked.
To remove the fuel cap, turn it
slowly counterclockwise. The fuel
cap has a spring in it; if the cap is
released too soon, it will spring back
to the right. To avoid fuel contact on
the painted surface of the vehicle
when filling the fuel tank, place the
tethered cap on the fuel filler door.Be careful not to spill fuel. Do not
top off or overfill the tank and wait a
few seconds after you have finished
pumping before removing the
nozzle. Clean fuel from painted
surfaces as soon as possible. See
Exterior Care on page 10-74.
When replacing the fuel cap, turn it
clockwise until it clicks. Make sure
the cap is fully installed. The
diagnostic system can determine if
the fuel cap has been left off or
improperly installed. This would
allow fuel to evaporate into the
atmosphere. See
Malfunction
Indicator Lamp on page 5-14.
{Warning
If a fire starts while you are
refueling, do not remove the
nozzle. Shut off the flow of fuel by
shutting off the pump or by
notifying the station attendant.
Leave the area immediately.
{Caution
If a new fuel cap is needed, be
sure to get the right type of cap
from your dealer. The wrong type
of fuel cap might not fit properly,
might cause the malfunction
indicator lamp to light, and could
damage the fuel tank and
emissions system. See
Malfunction Indicator Lamp on
page 5-14.
Page 285 of 382
Black plate (45,1)Chevrolet Captiva Sport Owner Manual (GMNA-Localizing-U.S./Mexico-
6014141) - 2014 - crc - 8/13/13
Vehicle Care 10-45
Caution (Continued)
.Reduced fuel economy.
Overinflated tires, or tires that
have too much air, can
result in:
.Unusual wear.
.Poor handling.
.Rough ride.
.Needless damage from
road hazards.
The Tire and Loading
Information label on the vehicle
indicates the original equipment
tires and the correct cold tire
inflation pressures. The
recommended pressure is the
minimum air pressure needed to
support the vehicle's maximum
load carrying capacity. See
Vehicle Load Limits on
page 9-10. How the vehicle is loaded
affects vehicle handling and ride
comfort. Never load the vehicle
with more weight than it was
designed to carry.
When to Check
Check the tires once a month or
more. Do not forget the compact
spare, if the vehicle has one.
The cold compact spare tire
pressure should be at 420 kPa
(60 psi). See
Compact Spare
Tire on page 10-65.
How to Check
Use a good quality pocket-type
gauge to check tire pressure.
Proper tire inflation cannot be
determined by looking at the tire.
Check the tire inflation pressure
when the tires are cold, meaning
the vehicle has not been driven
for at least three hours or no
more than 1.6 km (1 mi). Remove the valve cap from the
tire valve stem. Press the tire
gauge firmly onto the valve to
get a pressure measurement.
If the cold tire inflation pressure
matches the recommended
pressure on the Tire and
Loading Information label, no
further adjustment is necessary.
If the inflation pressure is low,
add air until the recommended
pressure is reached. If the
inflation pressure is high, press
on the metal stem in the center
of the tire valve to release air.
Recheck the tire pressure with
the tire gauge.
Return the valve caps on the
valve stems to prevent leaks
and keep out dirt and moisture.