CHEVROLET CAVALIER 1993 1.G Owners Manual
Manufacturer: CHEVROLET, Model Year: 1993, Model line: CAVALIER, Model: CHEVROLET CAVALIER 1993 1.GPages: 308, PDF Size: 15.62 MB
Page 181 of 308
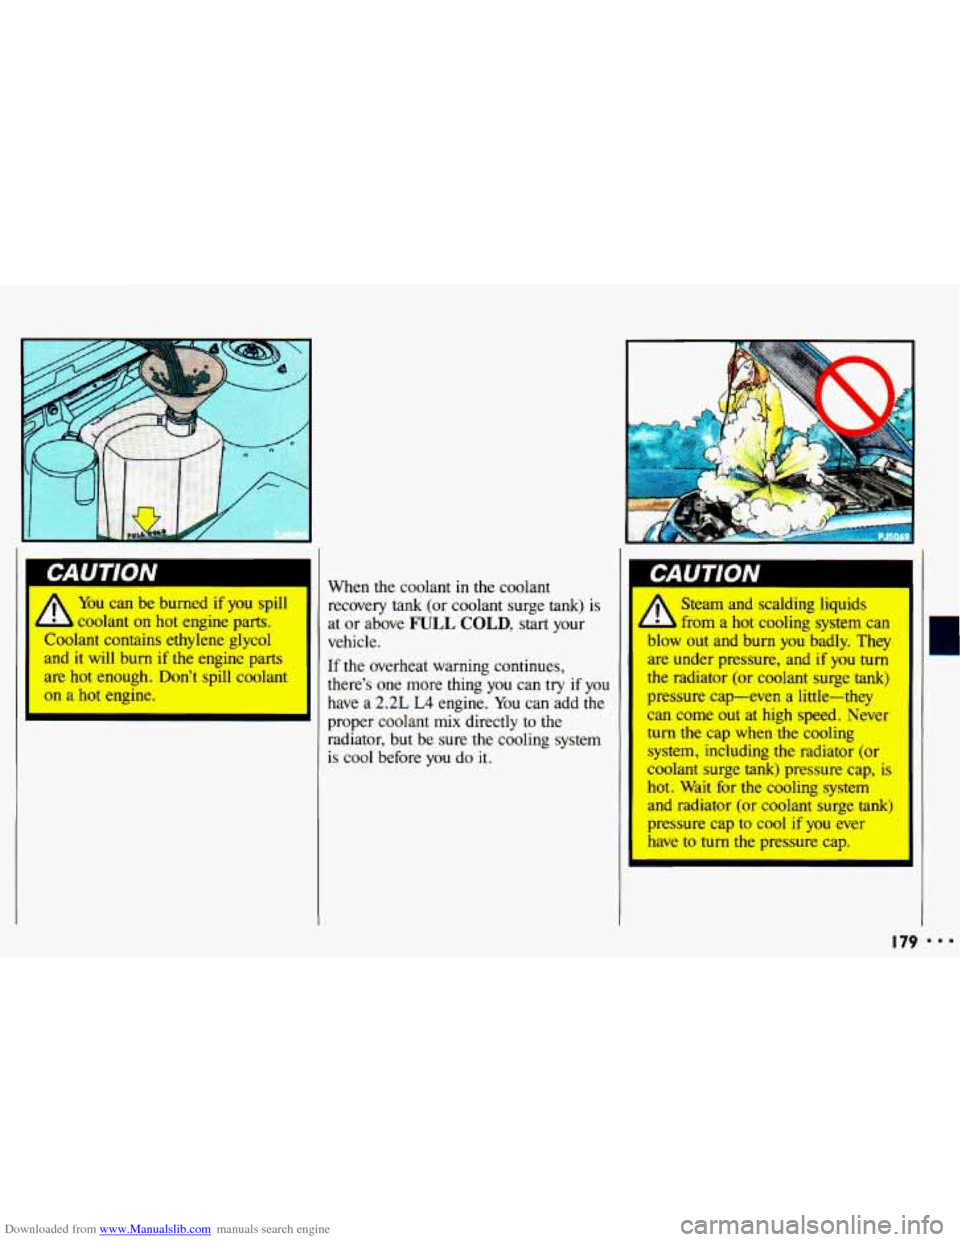
Downloaded from www.Manualslib.com manuals search engine A You can be burned if you spill
coolant on hot engine parts.
Coolant contains ethylene glycol
and
it will burn if the engine parts
are hot enough. Don't spill coolant
on a hot engine. When
the coolant
in the coolant
recovery
tank (or coolant surge tank) is
at or above
FULL COLD, start your
vehicle.
If the overheat warning continues,
there's one more thing you can
try if you
have a
2.2L L4 engine. You can add the
proper coolant mix directly to the
radiator, but be sure the cooling system
is cool before you do
it.
I
A
Steam and scalding liquids
from a hot cooling system can
blow out and burn you badly. They
are under pressure, and
if you turn
the radiator (or coolant surge
tank)
pressure cap-even a little-they
can come out at high speed. Never
turn the cap when the cooling
system, including the radiator (or
coolant surge tank) pressure cap, is
hot. Wait for the cooling system
and radiator (or coolant surge
tank)
pressure cap to cool if you ever
have to turn the pressure cap.
I I 79 I..
Page 182 of 308
Downloaded from www.Manualslib.com manuals search engine Problems on the Road
Engine Overheating (CONE)
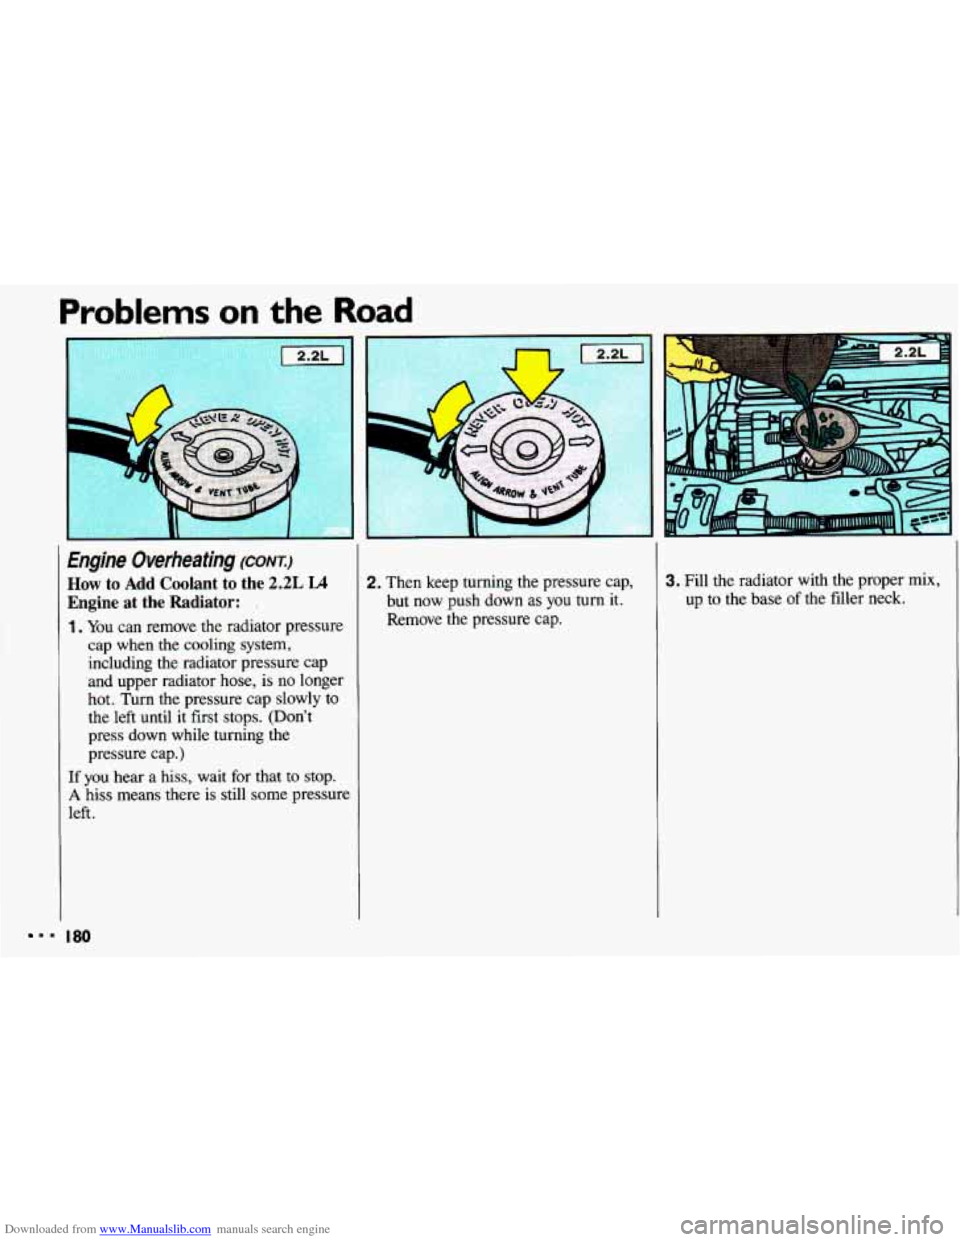
How to Add Coolant to the 2.2L LA
Engine at the Radiator: .
1. You can remove the radiator pressure
cap when
the cooling system,
including the radiator pressure cap
and upper radiator hose, is no longer
hot. Turn the pressure cap slowly to
the left until it first stops. (Don’t
press down while turning the
pressure cap.)
If you hear a hiss, wait for that to stop.
A hiss means there is still some pressure
left.
2. Then keep turning the pressure cap, 3. Fill the radiator with the proper mix,
but now push down as
you turn it. up to the base of the filler neck.
Remove the pressure cap.
== 180
Page 183 of 308
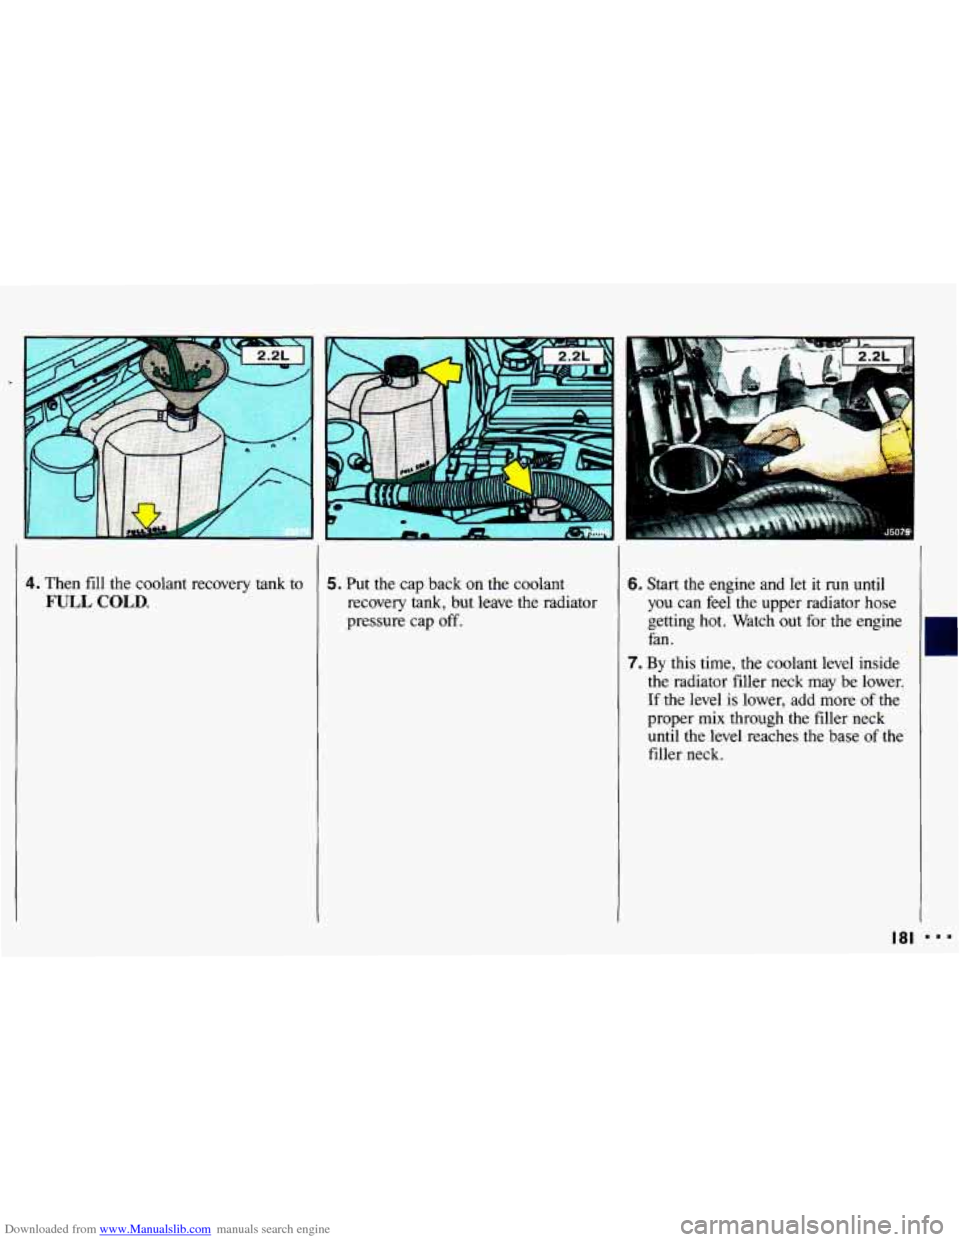
Downloaded from www.Manualslib.com manuals search engine 4. Then fill the coolant recovery tank to
FULL COLD.
5. Put the cap back on the coolant
recovery tank, but leave the radiator
pressure cap off. 6. Start the engine and let it run until
you can feel the upper radiator hose
getting hot. Watch
out for the engine
fan.
7. By this time, the coolant level inside
the radiator filler neck may be lower.
If the level is lower, add more of the
proper mix through
the filler neck
until the level reaches the base
of the
filler neck.
I81
Page 184 of 308
Downloaded from www.Manualslib.com manuals search engine Problems on the Road
Engine Overheating (CONT)
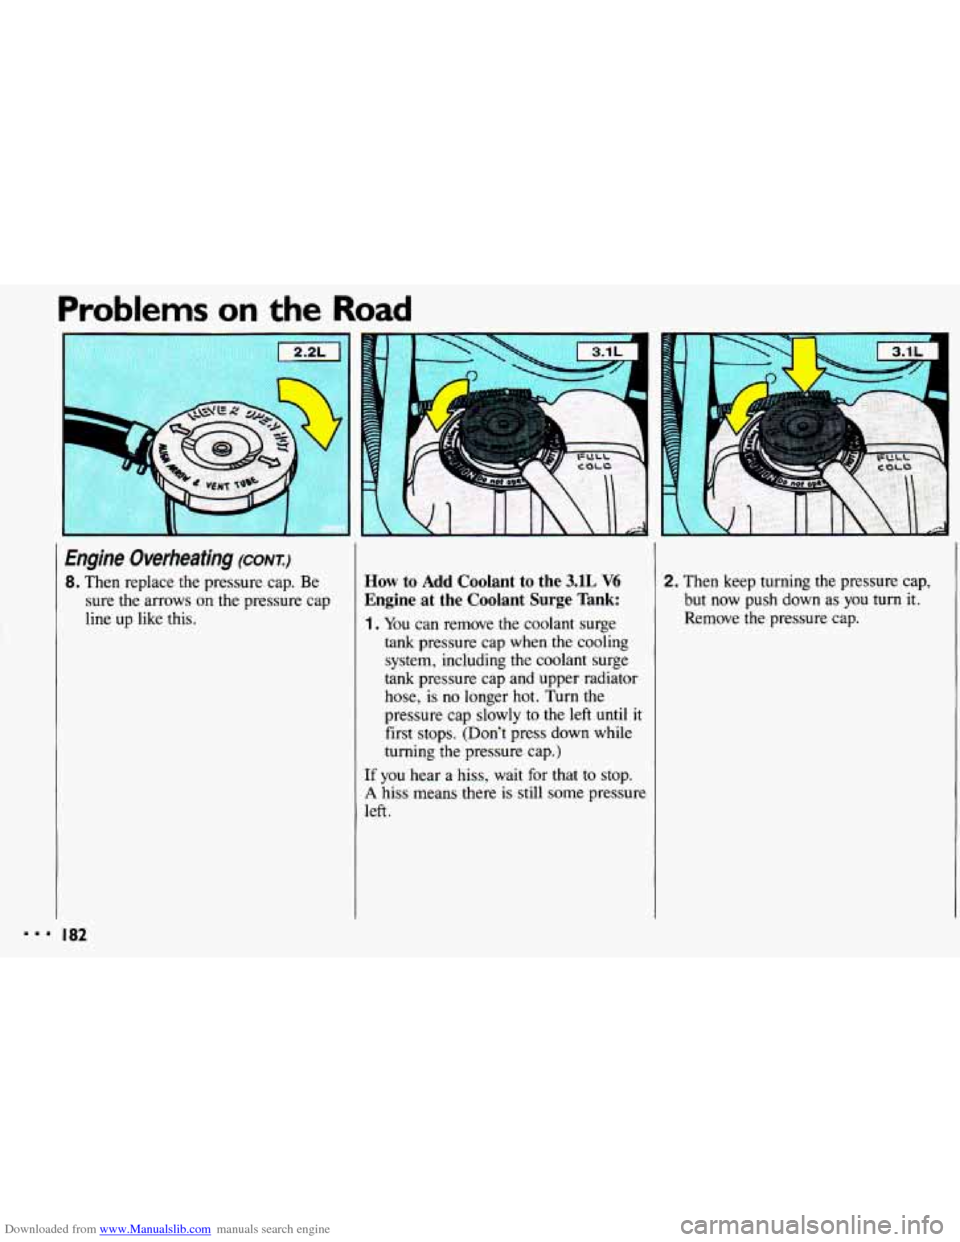
8. Then replace the pressure cap. Be
sure the arrows
on the pressure cap
line up like this.
How to Add Coolant to the 3.lL V6
Engine at the Coolant Surge Tank:
1. You can remove the coolant surge
tank pressure cap when the cooling
system, including the coolant surge
tank pressure cap and upper radiator
hose, is
no longer hot. Turn the
pressure cap slowly
to the left until it
first stops. (Don’t press down while
turning the pressure cap.)
If you hear a hiss, wait for that to stop.
A hiss means there is still some pressure
left.
2. Then keep turning the pressure cap,
but now push down
as you turn it.
Remove the pressure cap.
Page 185 of 308
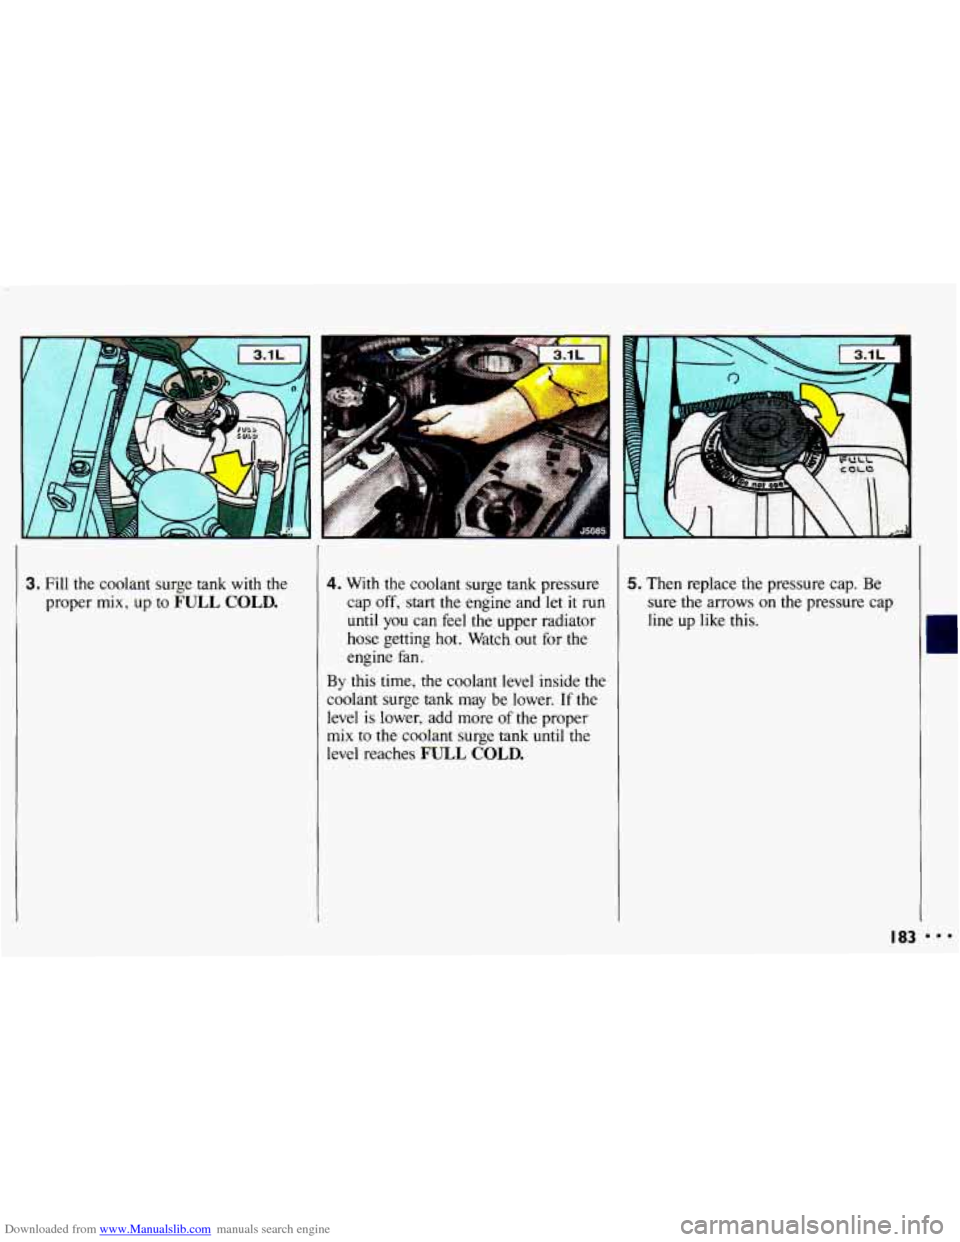
Downloaded from www.Manualslib.com manuals search engine 3. Fill the coolant surge tank with the
proper
mix, up to FULL COLD.
4. With the coolant surge tank pressure
cap
off, start the engine and let it run
until you can feel the upper radiator
hose getting hot. Watch out for
the
engine fan.
By this time, the coolant level inside the
coolant surge tank may be lower. If the
level
is lower, add more of the proper
mix to the coolant surge tank until the
level reaches
FULL COLD.
5. Then replace the pressure cap. Be
sure the arrows on the pressure cap
line up like this.
I83 ...
Page 186 of 308
Downloaded from www.Manualslib.com manuals search engine Problems on the Road
Zf a Tire Goes Flat
It’s unusual for a tire to “blow out”
while you’re driving, especially if you
maintain your tires properly.
If air goes
out of a tire, it’s much more likely
to
leak out slowly. But if you should ever
have a “blowout,” here are a few tips
about what to expect and what to do:
If a front tire fails, the flat tire will
create a drag that pulls the vehicle
toward that side. Take your foot off the accelerator pedal and grip the steering
wheel firmly. Steer to maintain lane
position, then gently brake
to a stop well
out of
the traffic lane.
I 84
A rear blowout, particularly on a curve,
acts much like a skid and may require
the same correction you’d use in a skid.
In any rear blowout, remove your foot
from the accelerator pedal. Get the
vehicle under control by steering the
way
you want the vehicle to go. It may
be very bumpy and noisy, but you can
still steer. Gently brake
to a stop, well
off the road
if possible.
If your tire goes flat, the next section
shows how
to use your jacking
equipment to change
a flat tire safely.
Changing a Flat Tire
If a tire goes flat, avoid further tire and
wheel damage by driving slowly to a
level place.
Turn on your hazard
warning flashers.
Page 187 of 308
Downloaded from www.Manualslib.com manuals search engine 1
I
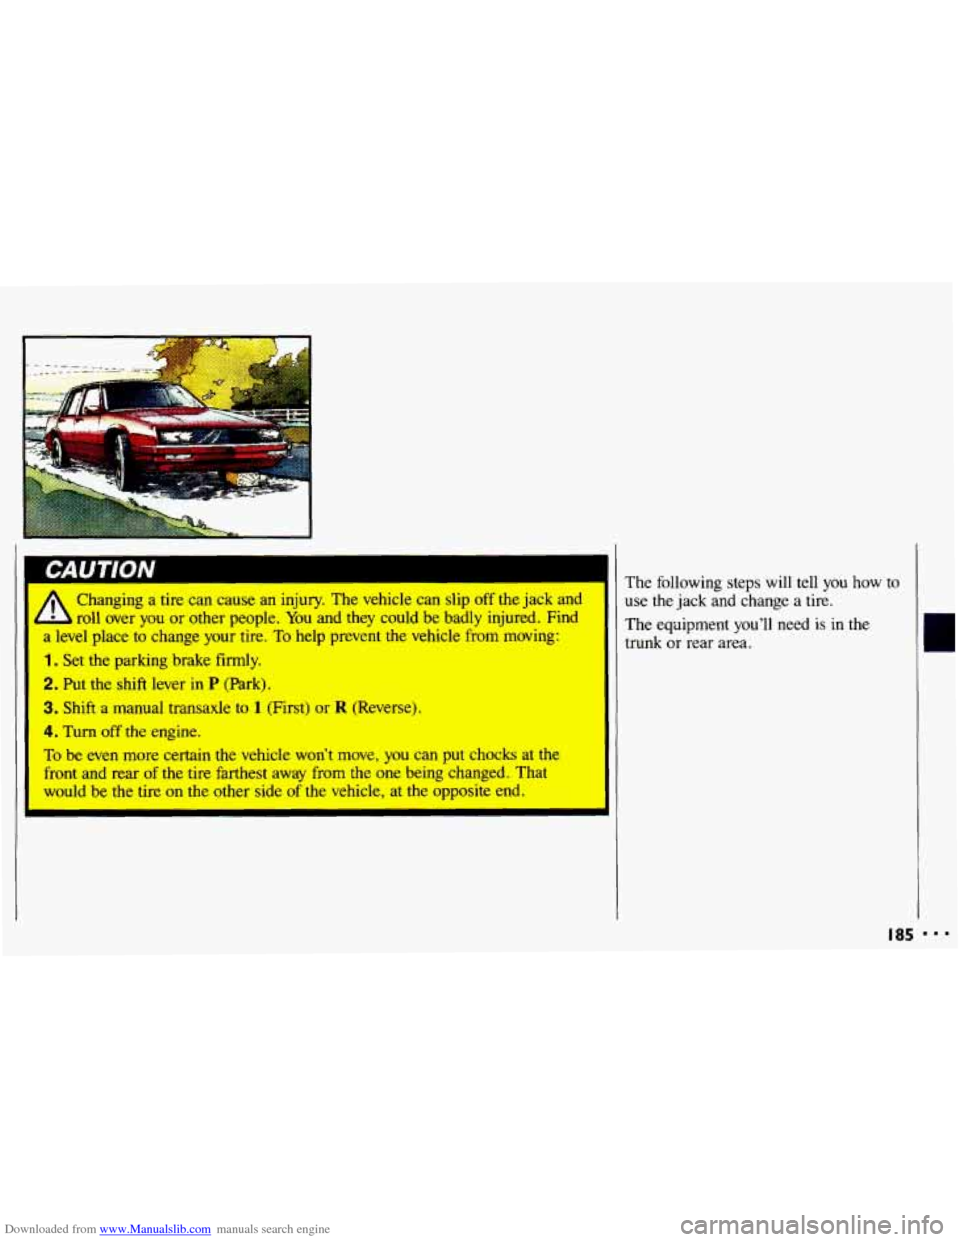
Changing a tire can cause an injury. The vehicle can slip off the jack and
roll over you or other people.
You and they could be badly injured. Find
a level place to change your tire.
To help prevent the vehicle from moving:
1. Set the parking brake firmly.
2. Put the shift lever in P (Park).
3. Shift a manual transaxle to 1 (First) or R (Reverse).
I 4. Turn off the engine.
To be even more certain the vehicle won’t move, you can put chocks at the
front and rear of the tire farthest away from the one being changed. That
would be the tire on the other side of the vehicle, at the opposite end. The
following steps will tell you how to
use the jack and change a tire.
The eqclipment you’ll need is in the
trunk or rear area.
I85
Page 188 of 308
Downloaded from www.Manualslib.com manuals search engine Problems on the R
Changing a Flat Tire (CONT:)
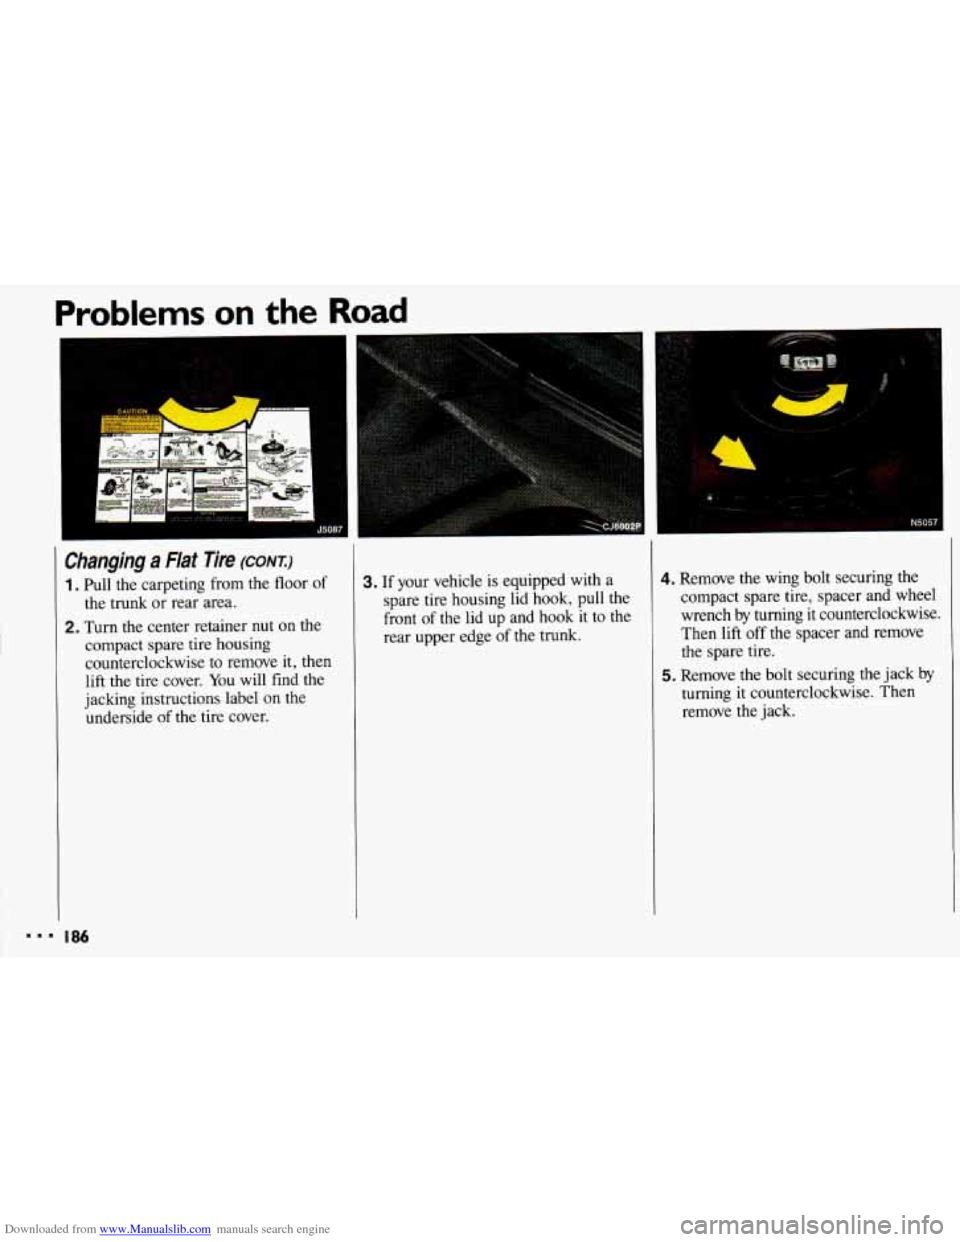
1 . Pull the carpeting from the floor of
2. Turn the center retainer nut on the
the trunk
or rear area.
compact spare tire housing
counterclockwise to remove it, then
lift the tire cover. You will find the
jacking instructions label on the underside
of the tire cover.
3. If your vehicle is equipped with a spare tire housing lid hook, pull the
front
of the lid up and hook it to the
rear upper edge of the trunk.
4. Remove the wing bolt securing the
compact spare tire, spacer and wheel
wrench
by turning it counterclockwise.
Then lift
off the spacer and remove
the spare tire.
5. Remove the bolt securing the jack by
turning it counterclockwise. Then
remove the jack.
... I a6
Page 189 of 308
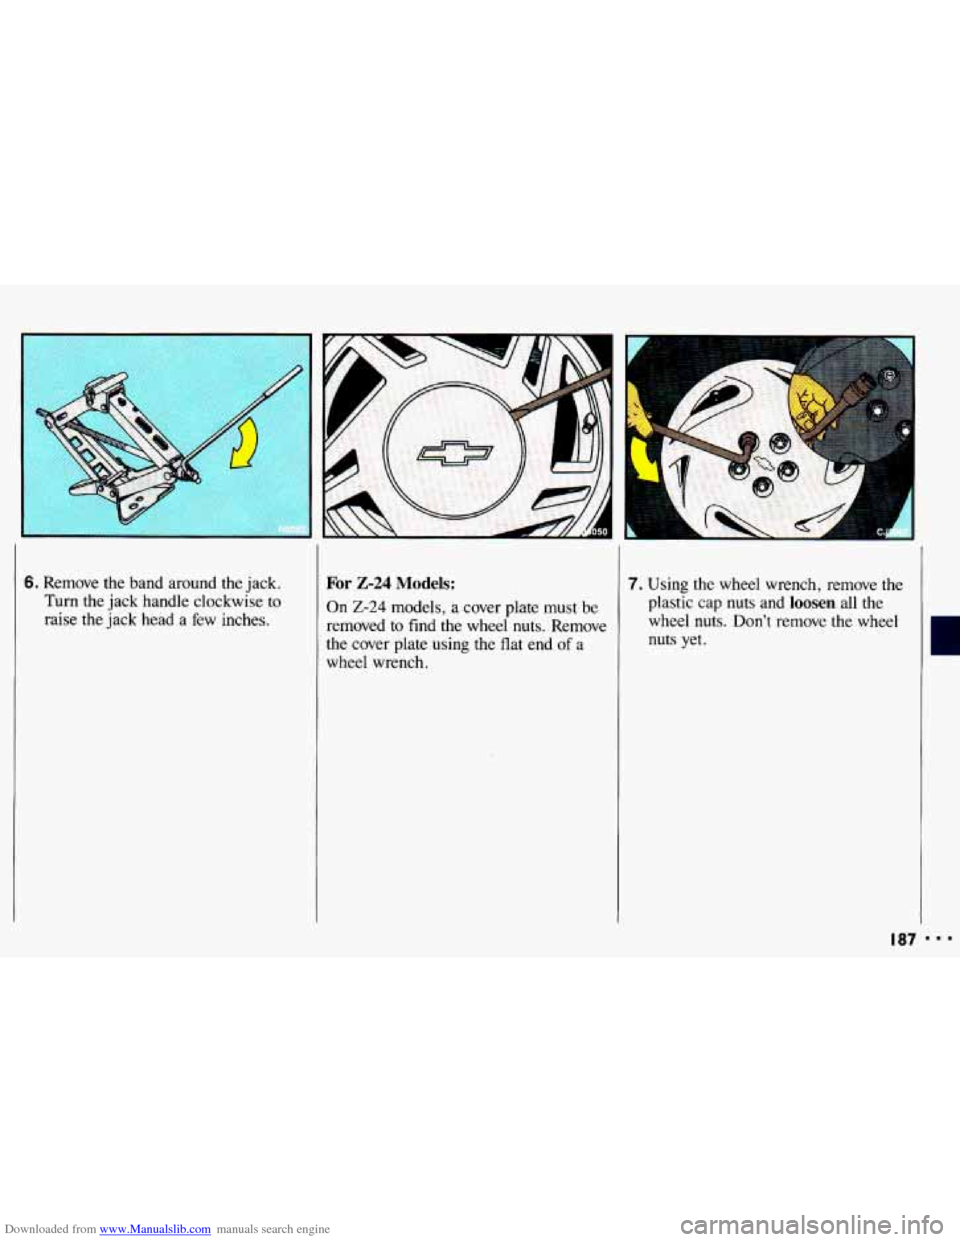
Downloaded from www.Manualslib.com manuals search engine 6. Remove the band around the jack.
Turn the jack handle clockwise
to
raise the jack head a few inches.
7. Using the wheel wrench, remove the
plastic cap nuts and loosen all the
wheel nuts. Don’t remove the wheel
nuts
yet.
For 2-24 Models:
On 2-24 models, a cover plate must be
removed to find the wheel nuts. Remove
the cover plate using
the flat end of a
wheel wrench.
I87
Page 190 of 308
Downloaded from www.Manualslib.com manuals search engine Problems on the Road
Changing a Flat Tire (CONT.)
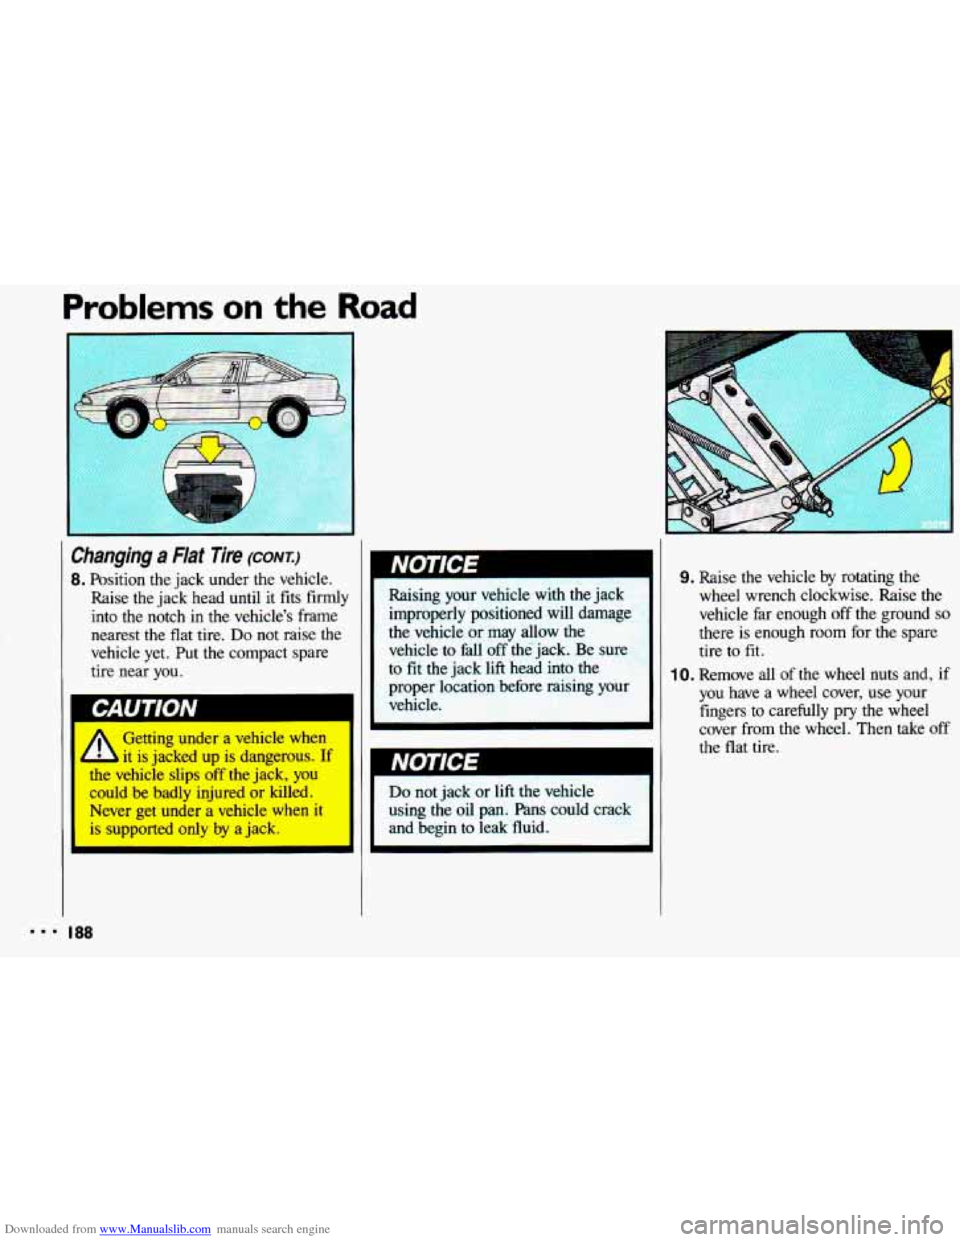
8. Position the jack under the vehicle.
Raise the jack head until it fits firmly
into the notch
in the vehicle’s frame
nearest the flat tire.
Do not raise the
vehicle yet. Put the compact spare
tire near you. Raising your vehicle with
the jack
improperly positioned will damage
the vehicle or may allow the
vehicle to fall off
the jack. Be sure
to fit the jack lift head into the
proper location before raising your
vehicle.
Getting under a vehicle when
it is jacked
up is dangerous. If I II NOTICE the vehicie slips off the jack, you I could be badly injured or killed.
Never get under
a vehicle when it
is supported only by a jack.
I88
9. Raise the vehicle by rotating the
wheel wrench clockwise. Raise the
vehicle far enough off the ground
so
there is enough room for the spare
tire
to fit.
1 0. Remove all of the wheel nuts and, if
you have a wheel cover, use your
fingers to carefully pry the wheel
cover from the wheel. Then
take off
the flat tire.