bulb CHEVROLET CAVALIER 1994 1.G Owners Manual
[x] Cancel search | Manufacturer: CHEVROLET, Model Year: 1994, Model line: CAVALIER, Model: CHEVROLET CAVALIER 1994 1.GPages: 243, PDF Size: 15.06 MB
Page 65 of 243
Downloaded from www.Manualslib.com manuals search engine Features & Controls
Operation of Lights
Although your vehicle’s lighting system
(headlights, parking lights, fog lamps,
side marker lights and taillights) meets
all applicable federal lighting
requirements, certain states and
provinces may apply their own lighting
regulations that may require special
attention before you operate these lights,
For example, some jurisdictions may
require that you operate your lower
beam lights with fog lamps at all times,
or that headlights be turned on
whenever you must use your windshield
wipers. In addition, most jurisdictions
prohibit driving solely with parking
lights, especially at dawn or dusk.
It is
recommended that you check with your
own state or provincial highway
authority for applicable lighting
regulations.
LLJ’ n
-
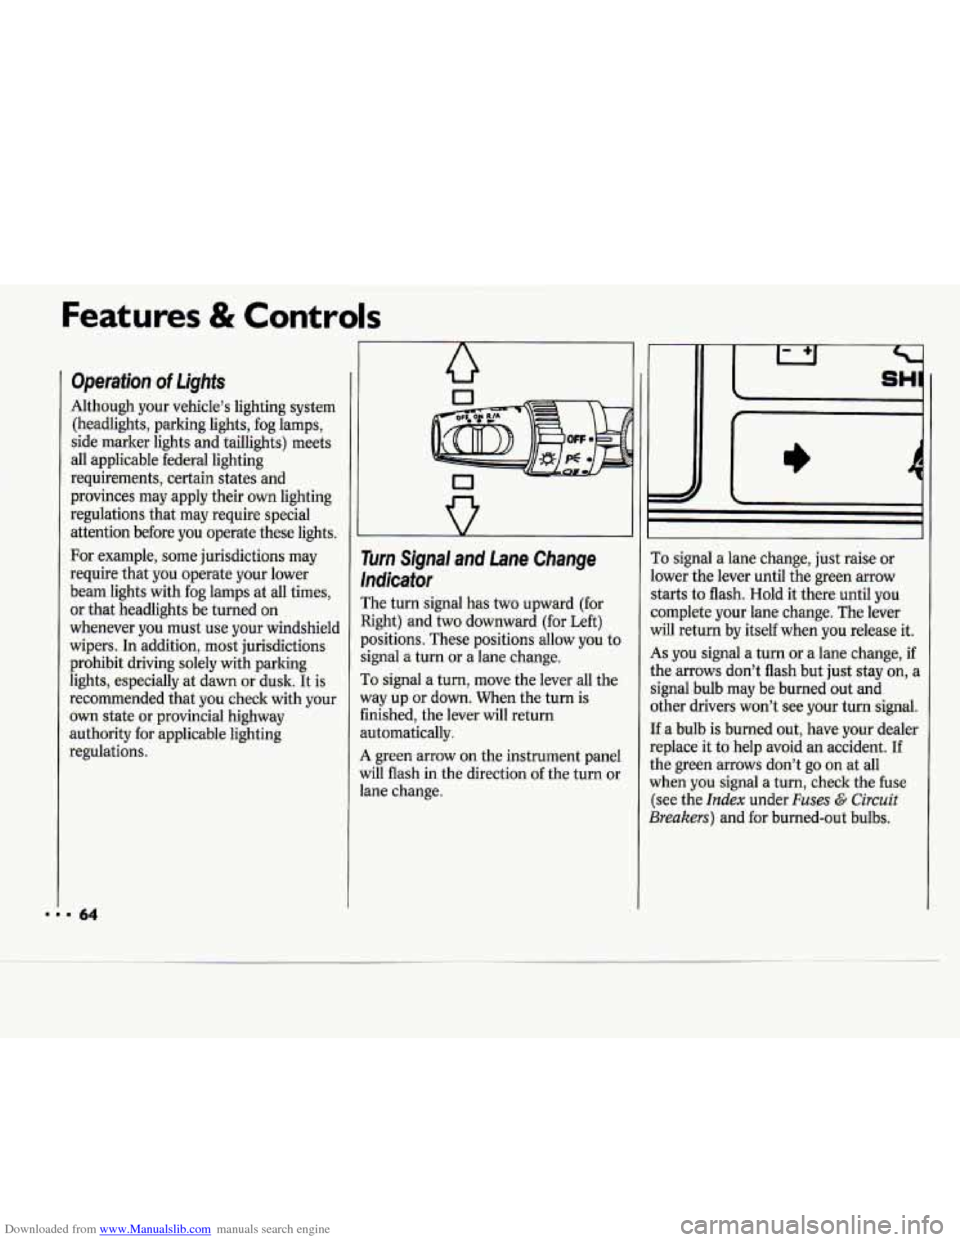
Turn Signal and Lane Change
Indicator
The turn signal has two upward (for
Right) and two downward (for Left)
positions. These positions allow you to
signal a turn or
a lane change.
To signal a turn, move the lever all the
way up or down. When the turn is
finished, the lever will return
automatically.
A green arrow on the instrument panel
will flash in the direction of the turn or
lane change.
I)
To signal a lane change, just raise or
lower the lever until the green arrow
starts to flash. Hold it there until you
complete your lane change. The lever
will return by itself when you release it.
As you signal a turn or a lane change, if
the arrows don’t flash but just stay on, a
signal bulb may be burned out and
other drivers won’t see your turn signal.
If a bulb is burned out, have your dealer
replace
it to help avoid an accident. If
the green arrows don’t go on at all
when
you signal a turn, check the fuse
(see the
Index under Fuses G Circuit
Breakers) and for burned-out bulbs.
Page 68 of 243
Downloaded from www.Manualslib.com manuals search engine
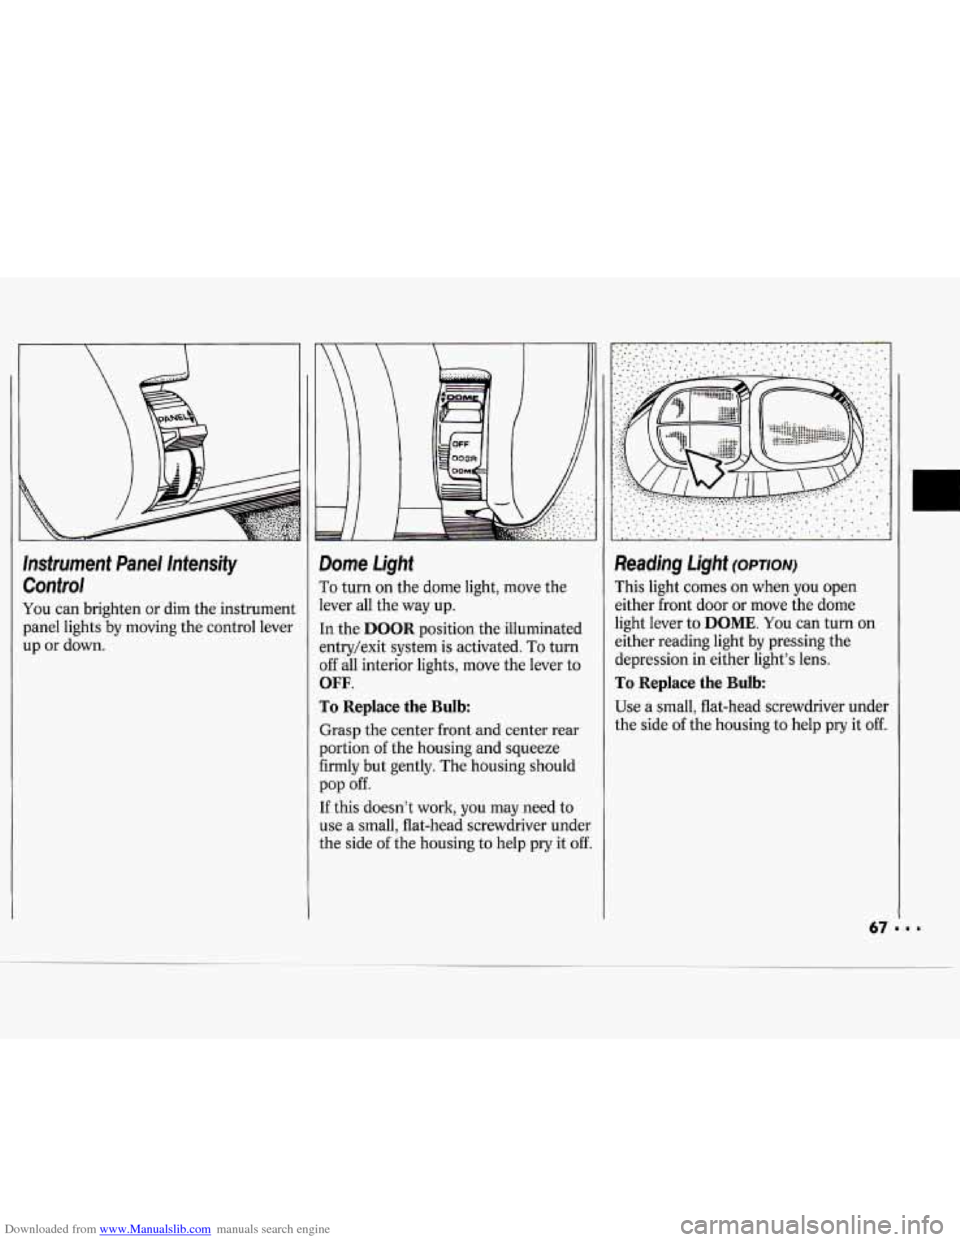
Instrument Panel Intensity Control
You can brighten or dim the instrument
panel lights by moving the control lever
up
or down.
-
- E
1
1
1
I
1
j
1
1
1
1
Dome Light
To turn on the dome light, move the
lever all the way up.
[n the
DOOR position the illuminated
:ntry/exit system is activated.
To turn
3ff all interior lights, move the lever to
OFF.
ro Replace the Bulb:
Grasp the center front and center rear
portion
of the housing and squeeze
Firmly but gently. The housing should
[f this doesn’t work, you may need to
use a small, flat-head screwdriver under
the side
of the housing to help pry it off.
pop off.
Reading Light (OPTION)
This light comes on when you open
either front door
or move the dome
light lever to
DOME. You can turn on
either reading light by pressing the
depression in either light’s lens.
To Replace the Bulb
Use a small, flat-head screwdriver under
the side
of the housing to help pry it off.
Page 69 of 243
Downloaded from www.Manualslib.com manuals search engine Features & Controls
.. .. .... :. .a ....... ....... .. .a1 . . ... ...... .' .. .. . ._
.. .,
...
.1
_. .. ... ..
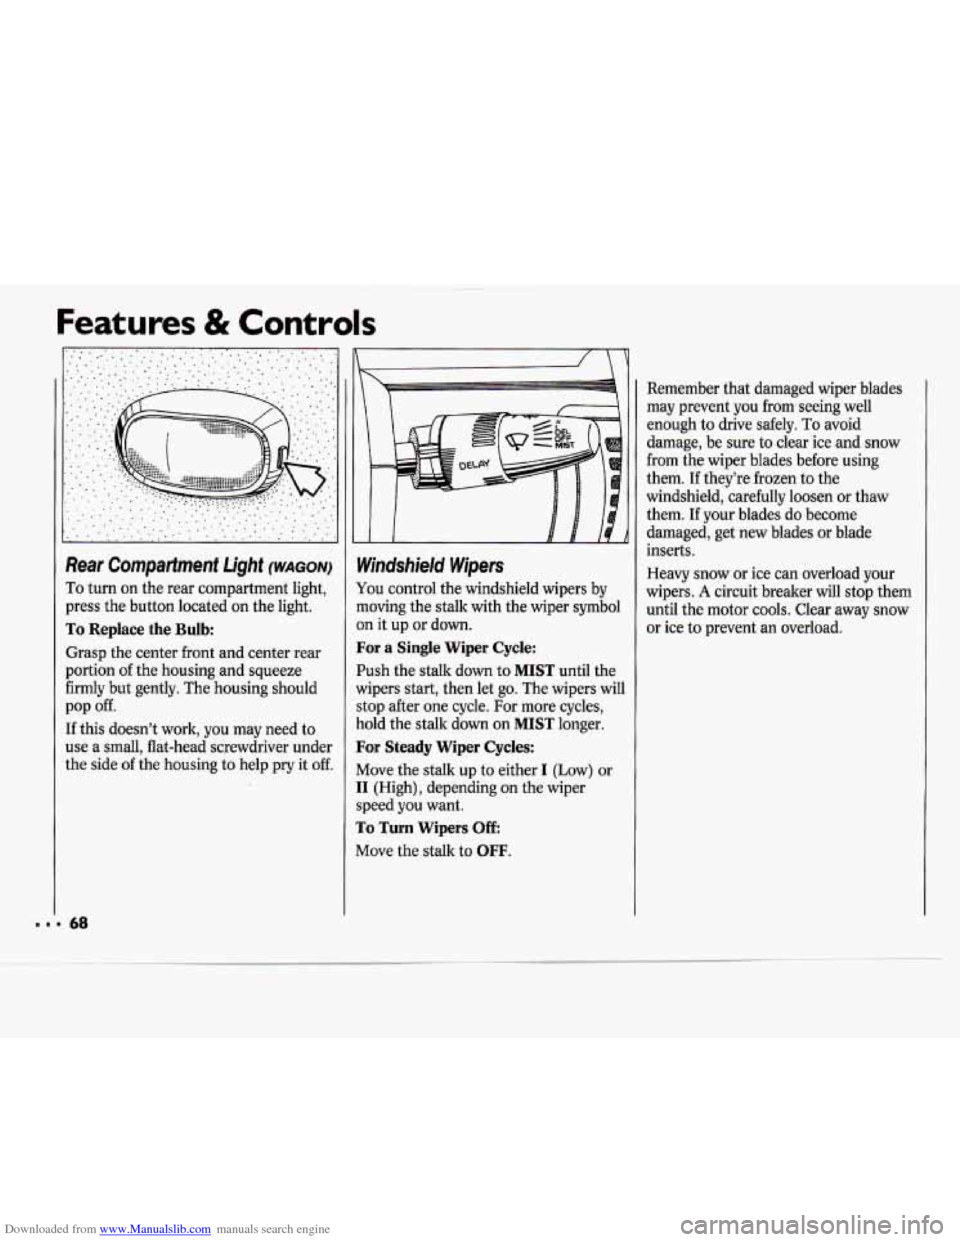
Rear Compartment Light (WAGON)
To turn on the rear compartment light,
press the button located on the light.
To Replace the Bulb
Grasp the center front and center rear
portion of the housing and squeeze
firmly but gently. The housing should
pop
off.
If this doesn't work, you may need to
use a small, flat-head screwdriver under
the side
of the housing to help pry it off.
Mindshield Wipers
fou control the windshield wipers by
noving the stalk with the wiper symbol
In it up or down.
For a Single Wiper Cycle:
?ush the stalk down to MIST until the
vipers start, then let go. The wipers will
;top after one cycle. For more cycles,
lold the stalk down on
MIST longer.
For Steady Wiper Cycles:
vlove the stalk up to either I (Low) or
[I (High), depending on the wiper
;peed you want.
To Turn Wipers Off:
vlove the stalk to OFF.
Remember that damaged wiper blades
may prevent you from seeing well
enough to drive safely. To avoid
damage, be sure to clear ice and snow
from the wiper blades before using
them. If they're frozen
to the
windshield, carefully loosen or thaw
them. If your blades do become
damaged, get new blades or blade
inserts.
Heavy snow or ice can overload your
wipers.
A circuit breaker will stop them
until the motor cools. Clear away snow
or ice
to prevent an overload.
Page 90 of 243
Downloaded from www.Manualslib.com manuals search engine r
c
CHECK ’
OAGES
NOLANT J
D)(8,
I
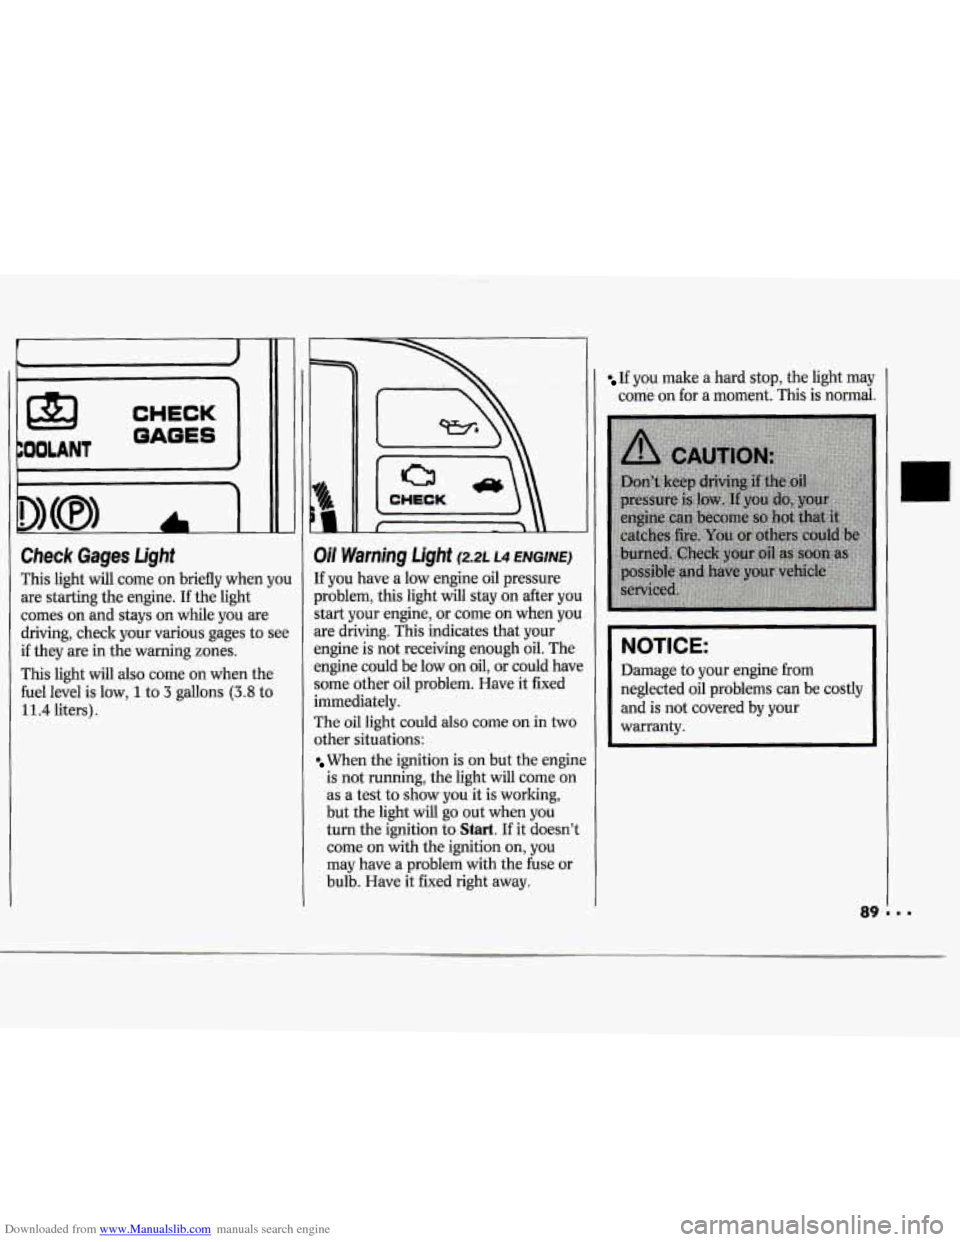
Check Gages Light
This light will come on briefly when yo1
are starting the engine. If the light
comes on and stays on while you are
driving, check your various gages to see
if they are in the warning zones.
This light will also come on when the
fuel level is low,
1 to 3 gallons (3.8 to
liters)
Oil Warning Light (2.2~ ~4 ENGINE)
If you have a low engine oil pressure
Iroblem, this light will stay on after yob
start your engine, or come on when you
ue driving. This indicates that your
mgine is not receiving enough oil. The
mgine could be low on
oil, or could haw
some other oil problem. Have it fixed
immediately.
The oil light could
also come on in two
other situations:
When the ignition is on but the engin
is not running, the light will come on
as a test to show you it is working,
but the light will go out when you
turn the ignition to
Start. If it doesn’l
come on with the ignition on, you
may have a problem with the fuse or
bulb. Have it fixed right away.
If you make a hard stop, the light may
come on for a moment.
This is normal.
NOTICE:
Damage to your engine from
neglected oil problems can be costly and is not covered by your
warranty.
Page 154 of 243
Downloaded from www.Manualslib.com manuals search engine Here you will find information
about the care of your Chevrolet
.
This part begins with service and
fuel information. and then it shows how to check important fluid and
lubricant levels
. There is also
technical information about your
vehicle. and a section devoted to
its appearance care
.
Part 6
Service and Appearance Care
Service ........................................................................\
............................................. 154
Fuel ........................................................................\
.................................................. 154
Hood Release ........................................................................\
................................... 158
Engine Oil ........................................................................\
........................................ 162
Air Cleaner ........................................................................\
...................................... 165
Automatic Transaxle Fluid ........................................................................\
............. 167
Manual Transaxle Fluid ........................................................................\
.................. 169
Power Steering Fluid ........................................................................\
....................... i73
Windshield Washer Fluid ........................................................................\
................ 173
Brakes ........................................................................\
.............................................. 174
Engine Coolant ........................................................................\
................................ 170
Battery ........................................................................\
............................................. 176
Bulb Replacement ........................................................................\
............................ 176
Loading Your Vehicle ........................................................................\
..................... 180
Windshield Wiper Blade Replacement ................................................................... 179
Tires ........................................................................\
................................................. 181
Appearance Care ........................................................................\
............................. 187
Vehicle Identification Number (VIN) .................................................................... 194
Add-on Electrical Equipment ........................................................................\
........ 195
Fuses 8I Circuit Breakers ........................................................................\
................ 195
Fluids 81 Lubricants ........................................................................\
........................ 199
Capacities 81 Specifications ........................................................................\
............ 198
Replacement Bulbs ........................................................................\
.......................... 200
Engine Specifications ........................................................................\
...................... 202
Normal Maintenance Replacement Parts ............................................................... f!B
Page 177 of 243
Downloaded from www.Manualslib.com manuals search engine Service & Appearance Care
If your brake pedal goes down farther
than normal, your rear drum brakes
may need adjustment. Adjust them by
backing up and firmly applying the
brakes a few times.
Replacing Brake System Pa&
The braking system on a modern
vehicle is complex. Its many parts ha
to be
of top quality and work well we
together
if the vehicle is to have really
good braking. Vehicles we design and
test have top-quality GM brake parts in
them, as your Chevrolet does when it is
new. When you replace parts
of your
braking system
- for example, when
your brake linings wear down and you
have to have new ones put in
- be sure
you get new genuine
GM replacement
parts. If
you don’t, your brakes may no
longer work properly. For example, if
someone puts in brake linings th,at are
wrong for your vehicle, the balance
between your front and rear brakes can
change, for the worse. The braking
performance you’ve come to expect can
change in many other ways
if someone
puts in the wrong replacement brake
parts.
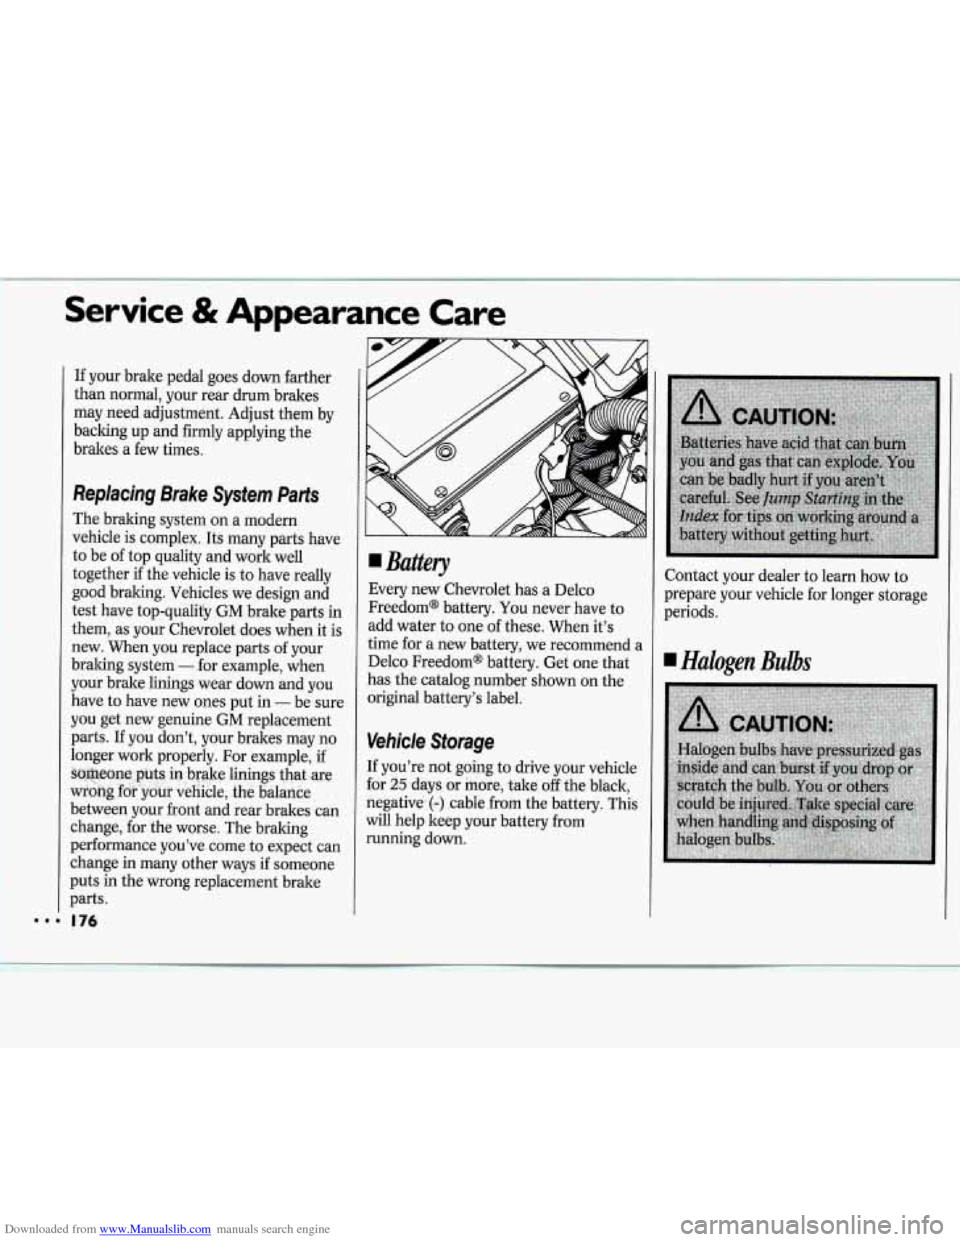
Battery
Every new Chevrolet has a Delco
Freedom* battery.
You never have to
add water to one of these. When it’s
time for a new battery, we recommend a
Delco Freedom* battery. Get one that
has the catalog number shown on the
original battery’s label.
Vehicle Storage
If you’re not going to drive your vehicle
for
25 days or more, take off the black,
negative
(-) cable from the battery. This
will help keep your battery
from
running down. Contact
your dealer to learn how to
prepare your vehicle for longer storage
periods.
Halogen Bulbs
Page 178 of 243
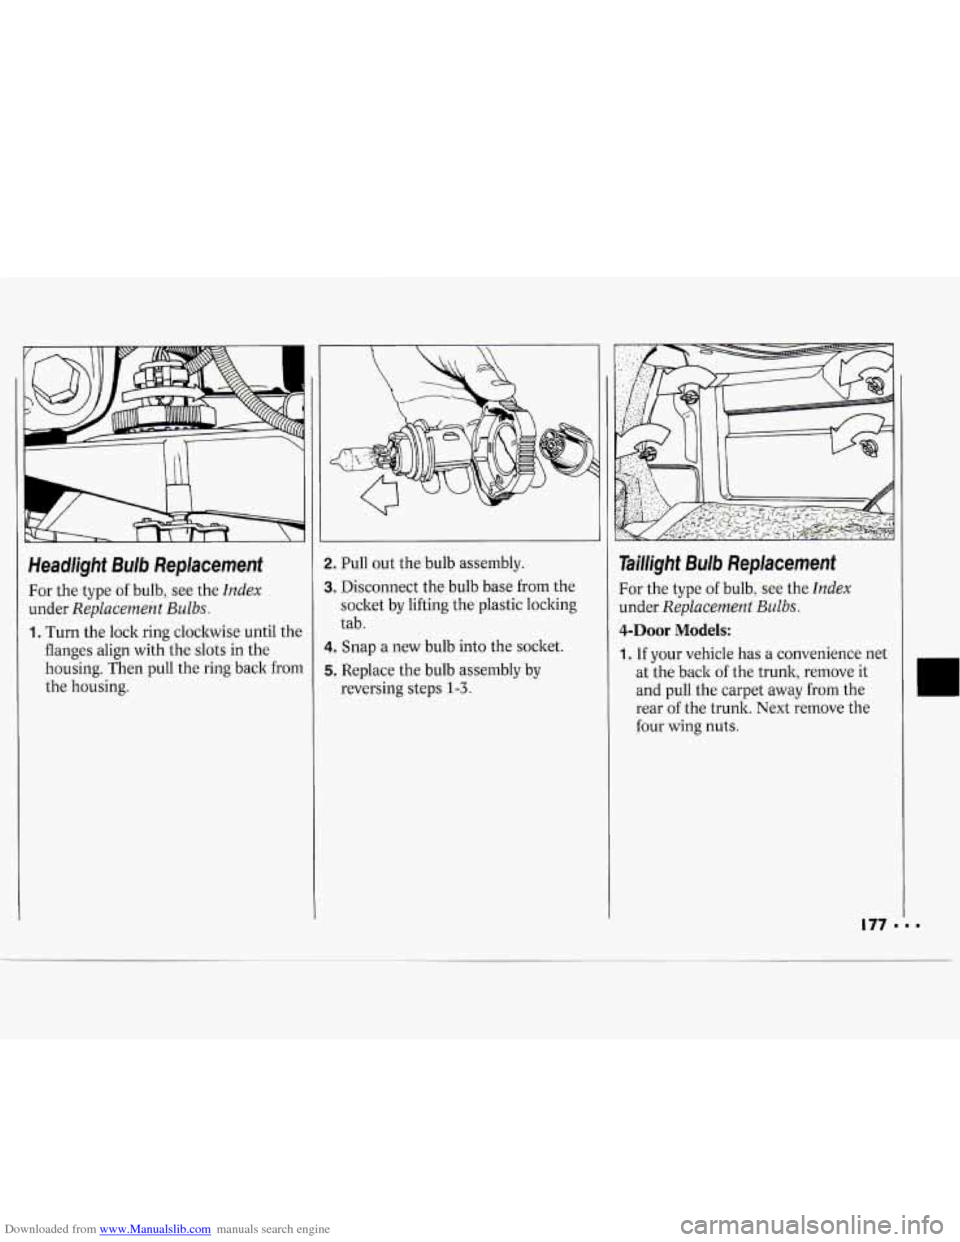
Downloaded from www.Manualslib.com manuals search engine Headlight Bulb Replacement
For the type of bulb, see the Index
under Replacement Bulbs.
1. Turn the lock ring clockwise until the
flanges align with the slots in the
housing. Then pull the ring back from
the housing.
2. Pull out the bulb assembly.
3. Disconnect the bulb base from the
socket by lifting the plastic locking
tab.
4. Snap a new bulb into the socltet.
5. Replace the bulb assembly by
reversing steps
1-3.
Taillight Bulb Replacement
For the type of bulb, see the Index
under Replacement Bulbs.
4-Door Models:
1, If your vehicle has a convenience net
at the back of the trunk, remove it
and pull the carpet away from the
rear of the trunk. Next remove the
four wing nuts.
177 1
Page 179 of 243
Downloaded from www.Manualslib.com manuals search engine __~
Service & Appearance Care
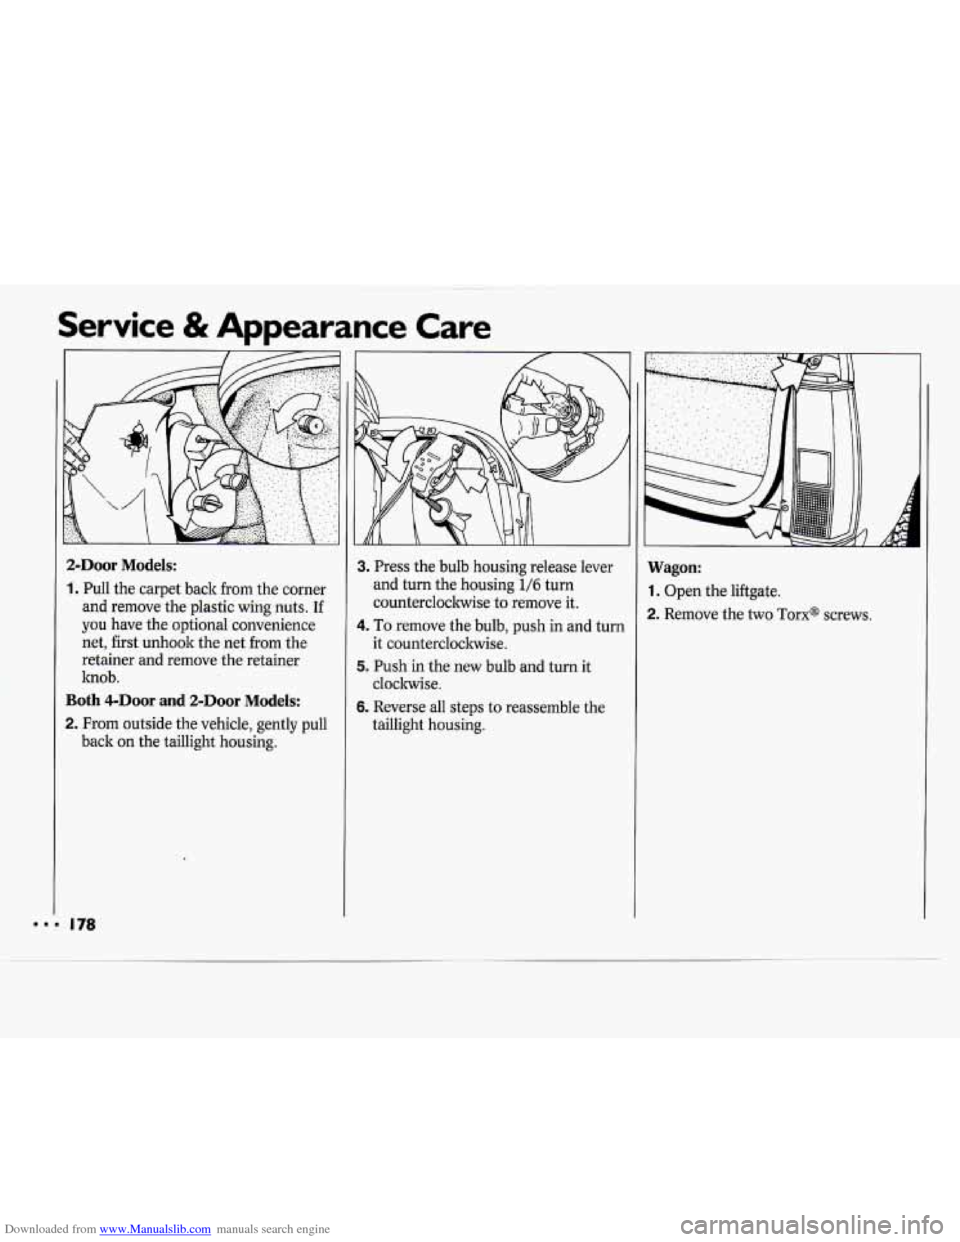
2-Door Models:
1. Pull the carpet back from the corner
and remove the plastic wing nuts.
If
you have the optional convenience
net, first unhook the net from the
retainer and remove the retainer
knob.
Both 4-DOOr and 2-Door Models:
2. From outside the vehicle, gently pull
back on the taillight housing.
3. Press the bulb housing release lever
and turn the housing
1/6 turn
countercloclnvise to remove it.
it countercloclnvise.
cloclnvise.
taillight housing.
4. To remove the bulb, push in and turn
5. Push in the new bulb and turn it
6. Reverse all steps to reassemble the
Wagon:
1. Open the liftgate.
2. Remove the two Torxs screws.
Page 180 of 243
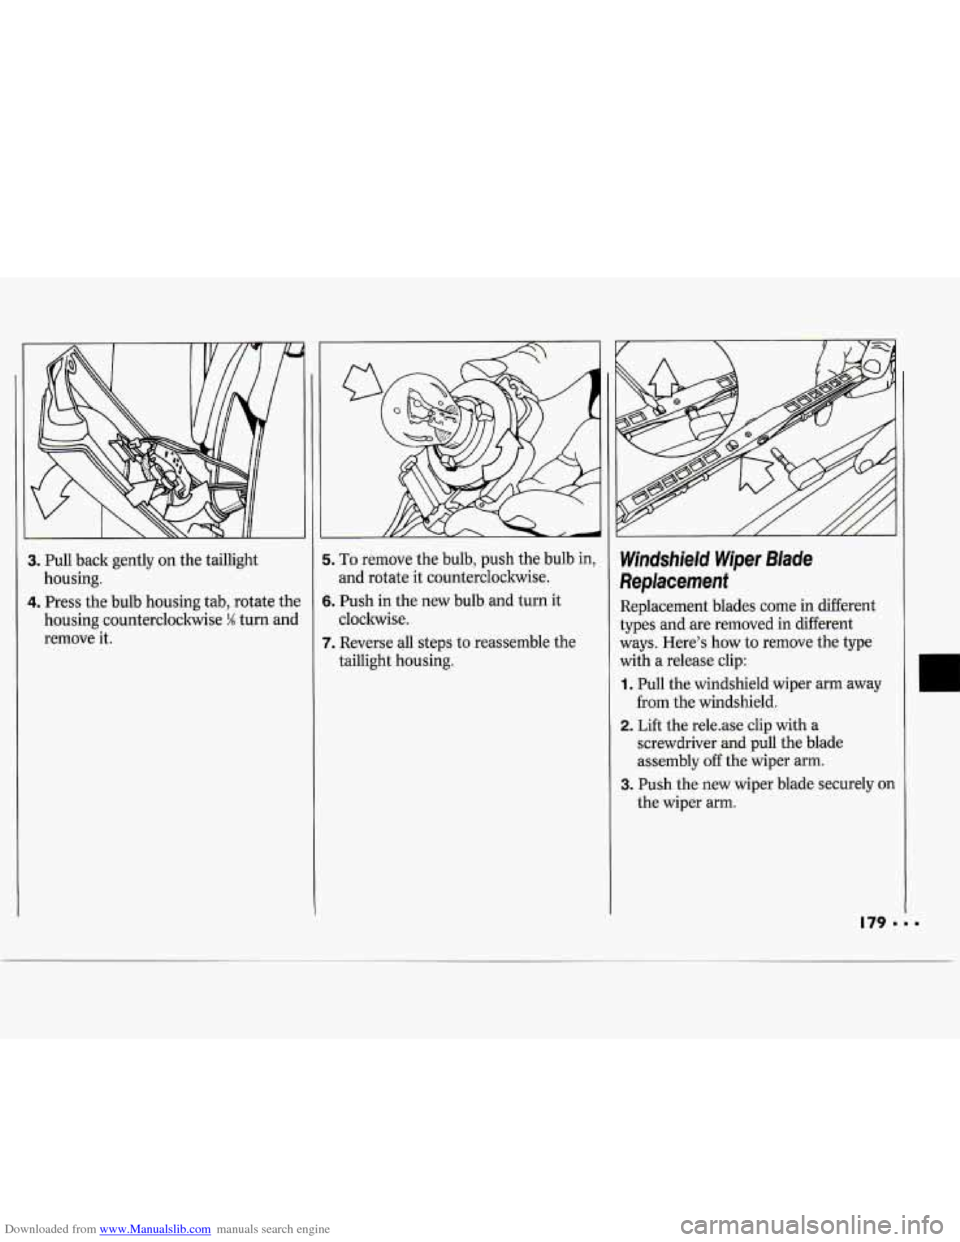
Downloaded from www.Manualslib.com manuals search engine 3. Pull back gently on the taillight
housing.
4. Press the bulb housing tab, rotate the
housing counterclockwise
% turn and
remove it.
i. To remove the bulb, push the bulb in,
and rotate it counterclockwise.
5. Push in the new bulb and turn it
cloclnvise.
7. Reverse all steps to reassemble the
taillight housing.
Windshield Wiper Blade
Replacement
Replacement blades come in different
types and are removed in different
ways. Here’s how to remove the type
with
a release clip:
1. Pull the windshield wiper arm away
from the windshield.
2. Lift the rele-ase clip with a
screwdriver and pull the blade
assembly off the wiper arm.
the wiper arm.
3. Push the new wiper blade securely on
Page 201 of 243
Downloaded from www.Manualslib.com manuals search engine .
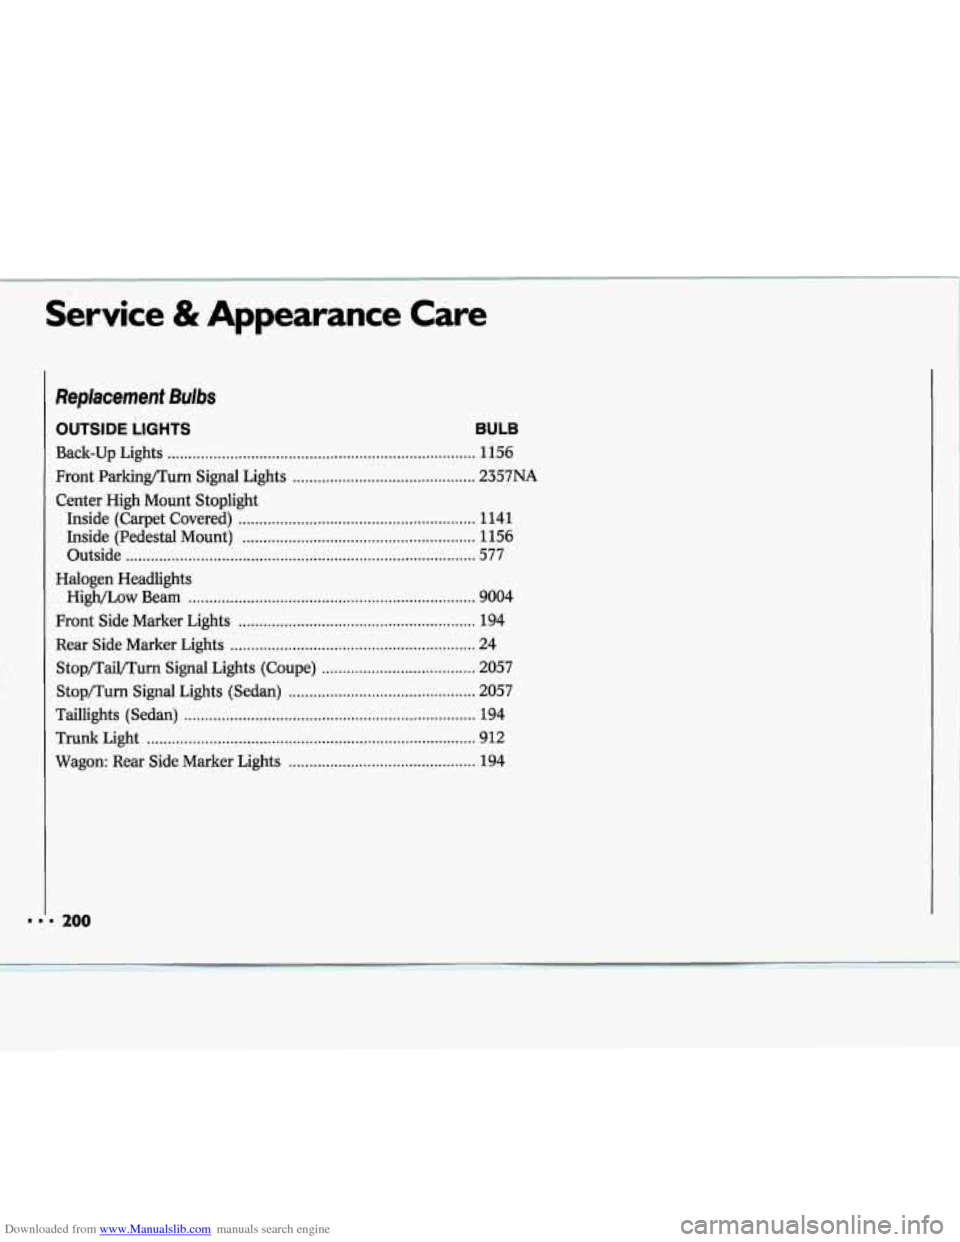
Replacement Bulbs
OUTSIDE LIGHTS BULB
Back-up Lights ........................................................................\
.. 1156
Front Parkinflurn Signal Lights
............................................ 2357NA
Inside (Carpet Covered)
......................................................... 1141
Center High Mount Stoplight
Inside (Pedestal Mount)
........................................................ 1156
Outside
........................................................................\
............ 577
Halogen Headlights HigWLow Beam
..................................................................... 9004
Front Side Marker Lights
......................................................... 194
Rear Side
Marker Lights ........................................................... 24
StopiTaiVTurn Signal Lights (Coupe)
..................................... 2057
Stopflurn Signal Lights (Sedan)
............................................. 2057
Taillights (Sedan)
...................................................................... 194
Trunk Light ........................................................................\
....... 912
Wagon: Rear Side Marker Lights
............................................. 194
200