clutch CHEVROLET CAVALIER 1994 1.G Owners Manual
[x] Cancel search | Manufacturer: CHEVROLET, Model Year: 1994, Model line: CAVALIER, Model: CHEVROLET CAVALIER 1994 1.GPages: 243, PDF Size: 15.06 MB
Page 52 of 243
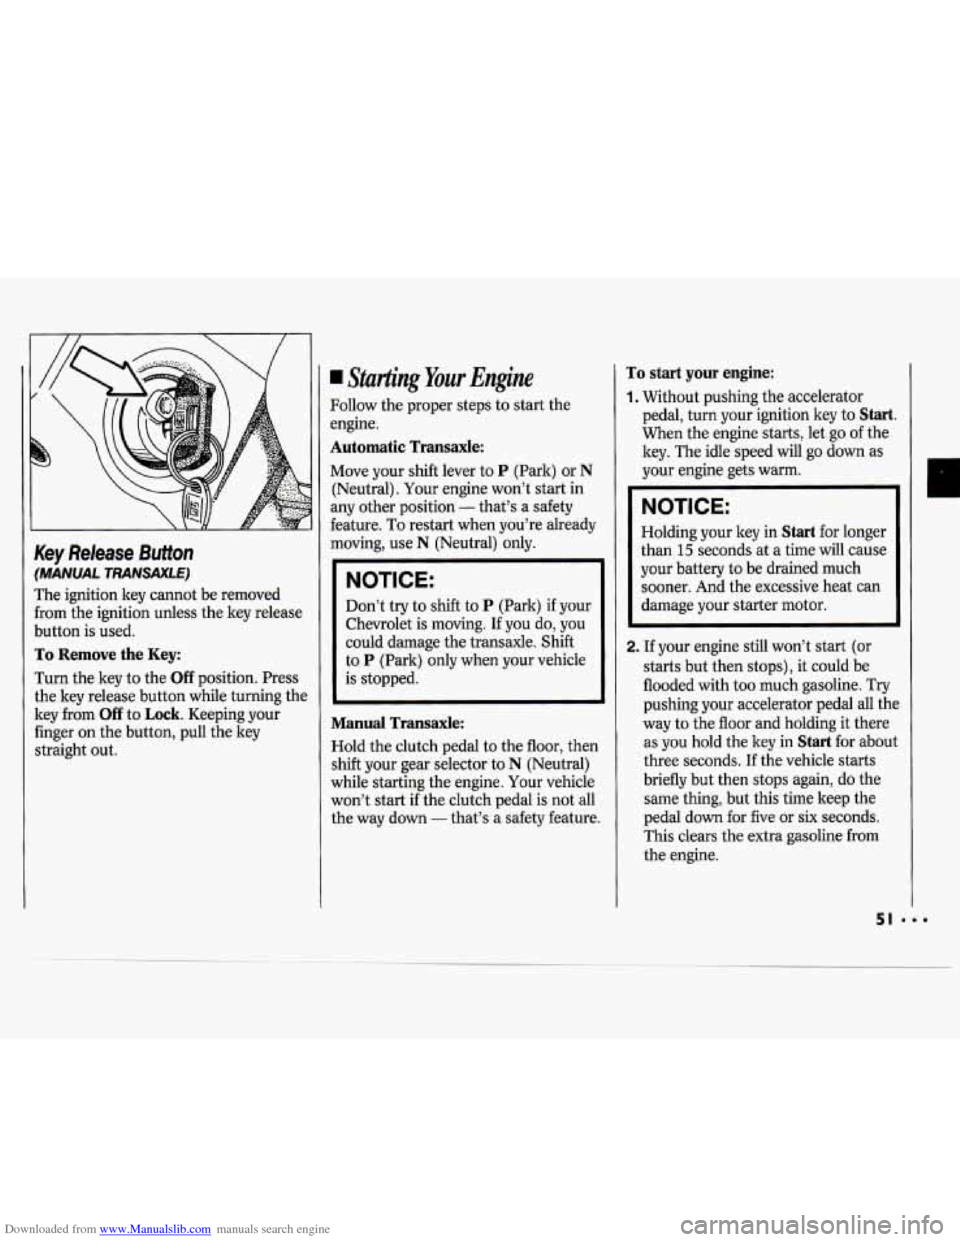
Downloaded from www.Manualslib.com manuals search engine Key Release Button
(MANUAL TRANSAXLE)
The ignition key cannot be removed
from the ignition unless the key release
button is used.
To Remove the Key:
Turn the key to the Off position. Press
the key release button while turning the
key from
Off to Lock. Keeping your
finger
on the button, pull the key
straight out.
Starting Your Engine
Follow the proper steps to start the
engine.
Automatic Transaxle:
Move your shift lever to P (Park) or N
(Neutral). Your engine won’t start in
any other position
- that’s a safety
feature.
To restart when you’re already
moving, use
N (Neutral) only.
NOTICE:
Don’t try to shift to P (Park) if your
Chevrolet is moving. If you do, you
could damage the transaxle.
Shift
to P (Park) only when your vehicle
is stopped.
Manual Transaxle:
Hold the clutch pedal to the floor, then
shift your gear selector to
N (Neutral)
while starting the engine. Your vehicle
won’t start if the clutch pedal is not all
the way down
- that’s a safety feature.
To start your engine:
1. Without pushing the accelerator
pedal, turn your ignition key to
Start.
When the engine starts, let go of the
key. The idle speed will go down as
your engine gets warm.
NOTICE:
Holding your key in Start for longer
than
15 seconds at a time will cause
your battery to be drained much
sooner. And the excessive heat can
damage your starter motor.
2. If your engine still won’t start (or
starts but then stops), it could be
flooded with too much gasoline. Try
pushing your accelerator pedal all the
way to the floor and holding it there
as you hold the key in
Start for about
three seconds.
If the vehicle starts
briefly but then stops again, do the
same thing, but this time keep the
pedal down for five or
six seconds.
This clears the extra gasoline from
the engine.
n
Page 57 of 243
Downloaded from www.Manualslib.com manuals search engine Features & Controls
1 (First Gear): This position gives you
even more power (but lower fuel
economy) than
2. You can use it on
very steep hills, or in deep snow or
mud.
If the selector lever is put in 1, the
transaxle won’t shift into first gear until
the vehicle is going slowly enough.
NOTICE:
If your front wheels can’t rotate,
don’t try to drive. This might
happen if you were stuck in very
deep sand or mud or were up
against
a solid object. You could
damage your transaxle.
Also, if you stop when going uphill,
don’t hold your vehicle there with
only the accelerator pedal. This
could overheat and damage the
transaxle. Use your brakes or shift
into
P (Park) to hold your vehicle
in position on a hill.
3.1L V6 Engine:
Maximum engine speed is limited to
protect driveline components from
improper operation.
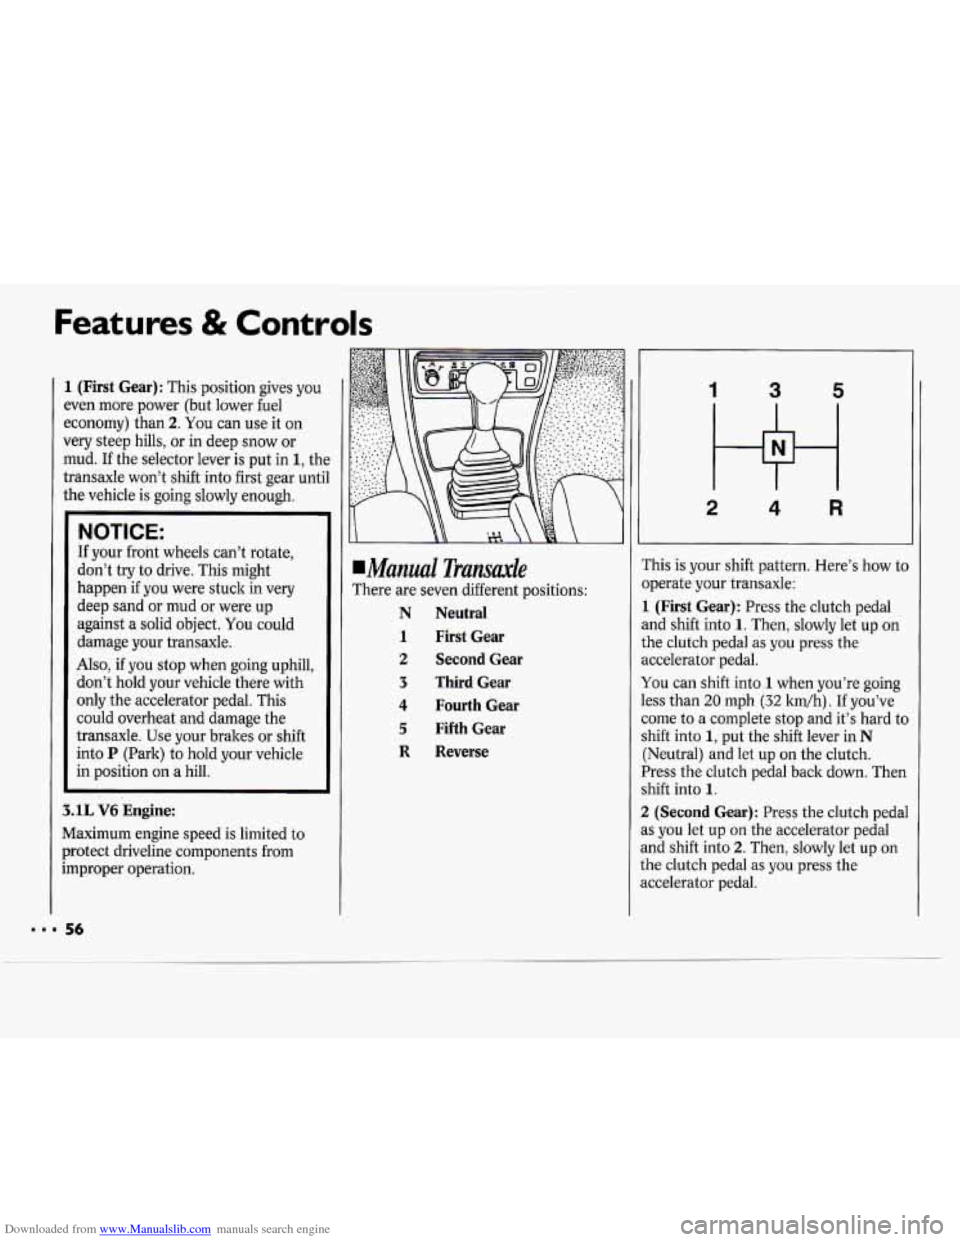
Manual Transale
There are seven different positions:
N Neutral
1 First Gear
2 Second Gear
3 Third Gear
4 Fourth Gear
5 Fifth Gear
R Reverse
1 3 5
2 4 R
This is your shift pattern. Here’s how to
operate your transaxle:
1 (First Gear): Press the clutch pedal
and shift into
1. Then, slowly let up on
the clutch pedal as
you press the
accelerator pedal.
You can shift into
1 when you’re going
less than
20 mph (32 km/h) . If you’ve
come to a complete stop and it’s hard to
shift into
1, put the shift lever in N
(Neutral) and let up on the clutch.
Press the clutch pedal back down. Then
shift into
1.
2
(Second Gear): Press the clutch pedal
as you let up on the accelerator pedal
and shift into
2. Then, slowly let up on
the clutch pedal as you press the
accelerator pedal.
Page 58 of 243
Downloaded from www.Manualslib.com manuals search engine 3,4 and 5 (Third, Fourth and Fifth
Gears):
Shift into 3,4 and 5 the same
way you do for
2. Slowly let up on the
clutch pedal as you press the
accelerator pedal.
To Stop: Let up on the accelerator
pedal and press the brake pedal.
Just
before the vehicle stops, press the
clutch pedal and the brake pedal, and
shift to
N (Neutral).
N (Neutral): Use this position when
you start or idle your engine.
R (Reverse): To back up, press down
the clutch pedal and shift into
R
(Reverse). Let up on the clutch pedal
slowly while pressing the accelerator
pedal.
NOTICE:
Shift to R (Reverse) only after your
vehicle is stopped. Shifting to
R
(Reverse) while your vehicle is
moving could damage your transaxle.
Also, use R (Reverse), along with the
parking brake, for parking your vehicle.
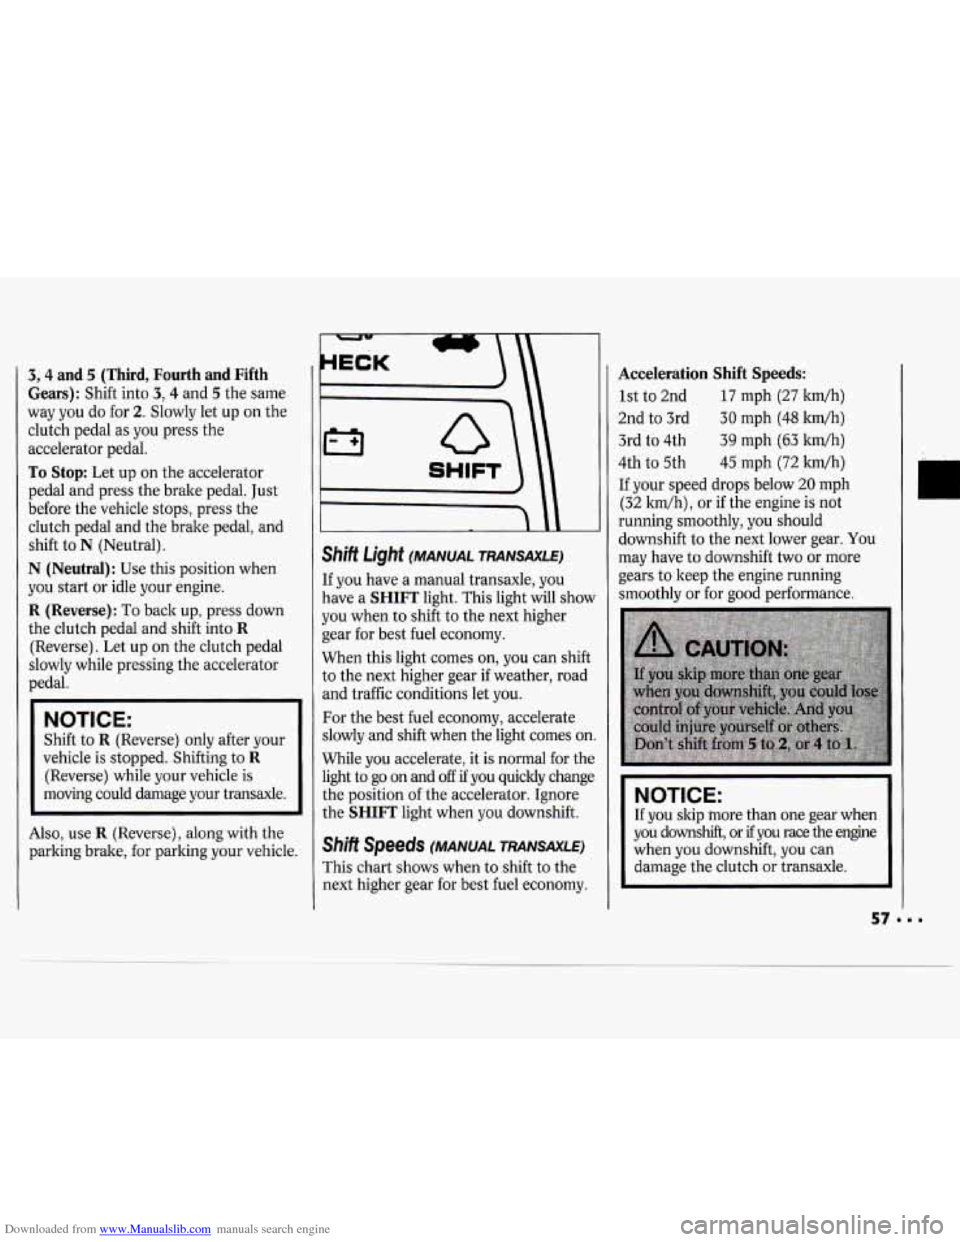
SHIFT
Shift Light (MANUAL TRANSAXLE)
If you have a manual transaxle, you
have a
SHIFT light. This light will show
you when to shift to the next higher
gear for best fuel economy.
When this light comes on, you can shift
to the next higher gear
if weather, road
and traffic conditions let you.
For the best fuel economy, accelerate
slowly and shift when the light comes on
While you accelerate, it is normal for the
light to go on and
off if you quickly change
the position of the accelerator. Ignore
the
SHIFT light when you downshift.
Shift Speeds (MANUAL TRANSAXLE)
This chart shows when to shift to the
next higher gear for best fuel economy.
Acceleration Shift Speeds:
1st to 2nd 17 mph (27 kwh)
2nd to 3rd
30 mph (48 km/h)
3rd
to 4th 39 mph (63 ltm/h)
4th
to 5th 45 mph (72 ltm/h)
If your speed drops below 20 mph
(32 ldh), or if the engine is not
running smoothly, you should
downshift to the next lower gear.
You
may have to downshift two or more
gears to keep the engine running
smoothly or for good performance.
NOTICE:
If you skip more than one gear when
you downshift, or
if you race the engine
when you downshift, you can
damage the clutch
or transaxle.
Page 71 of 243
Downloaded from www.Manualslib.com manuals search engine Features & Controls
NOTICE:
When using concentrated washer
fluid, follow the manufacturer’s
instructions for adding water.
Don’t mix water with ready-to-
use washer fluid. Water can cause
the solution
to freeze and damage
your washer fluid tank and other
parts
of the washer system. Also,
water doesn’t clean as well as
washer fluid.
*Fill your washer fluid tank only
%
full when it’s very cold. This
allows for expansion, which could
damage the tank if it is
completely
full.
*Don’t use radiator antifreeze in
your windshield washer. It can
damage your washer system and
paint.
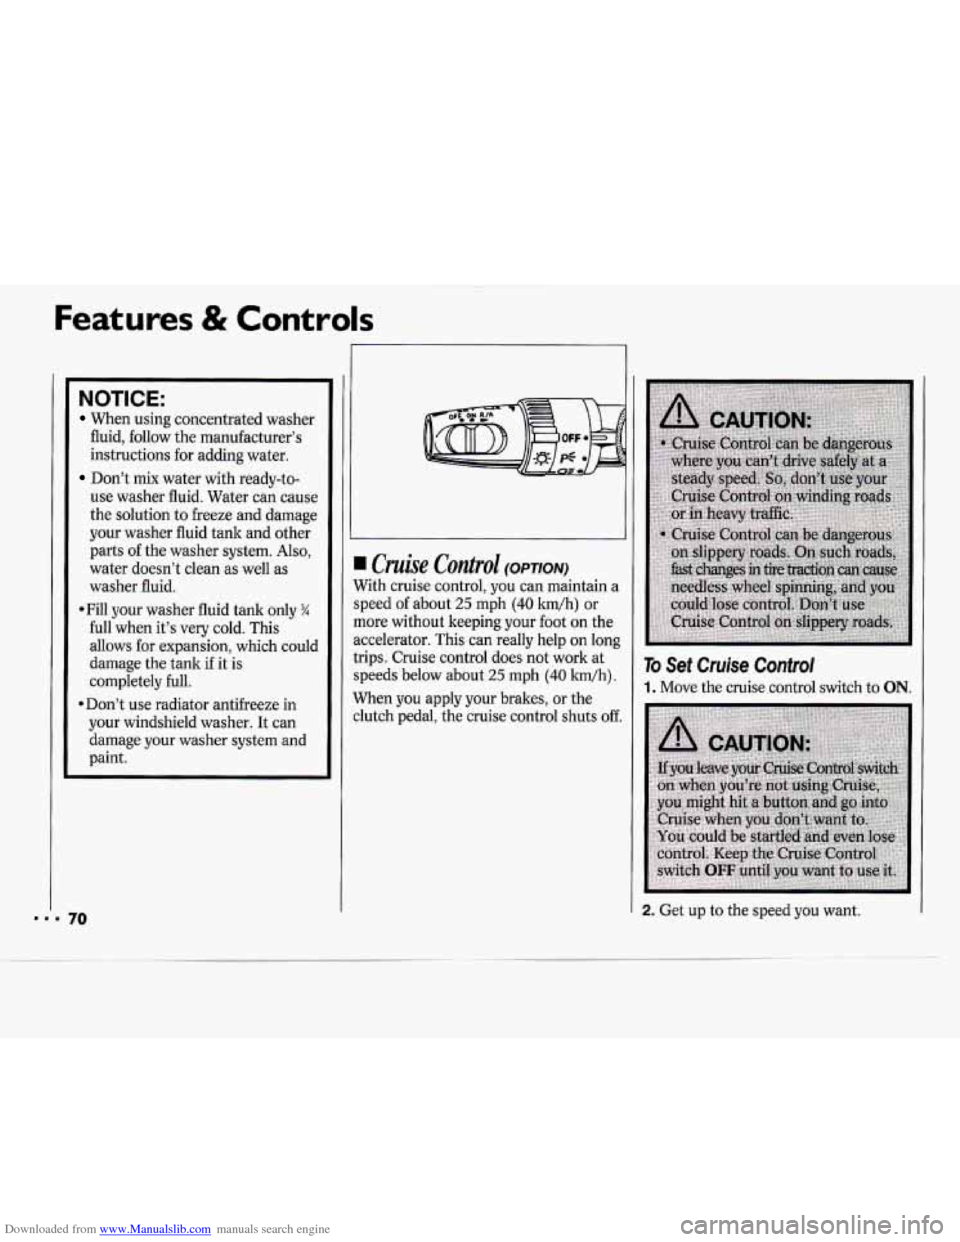
&&? co&ol (OPTION)
With cruise control, you can maintain a
speed of about
25 mph (40 km/h) or
more without keeping your foot on the
accelerator. This can really help
on long
trips. Cruise control does not work at
speeds below about
25 mph (40 km/h).
When you apply your brakes, or the
clutch pedal, the cruise control shuts
off.
To Set Cruise Control
1. Move the cruise control switch to ON.
2. Get up to the speed you want.
Page 72 of 243
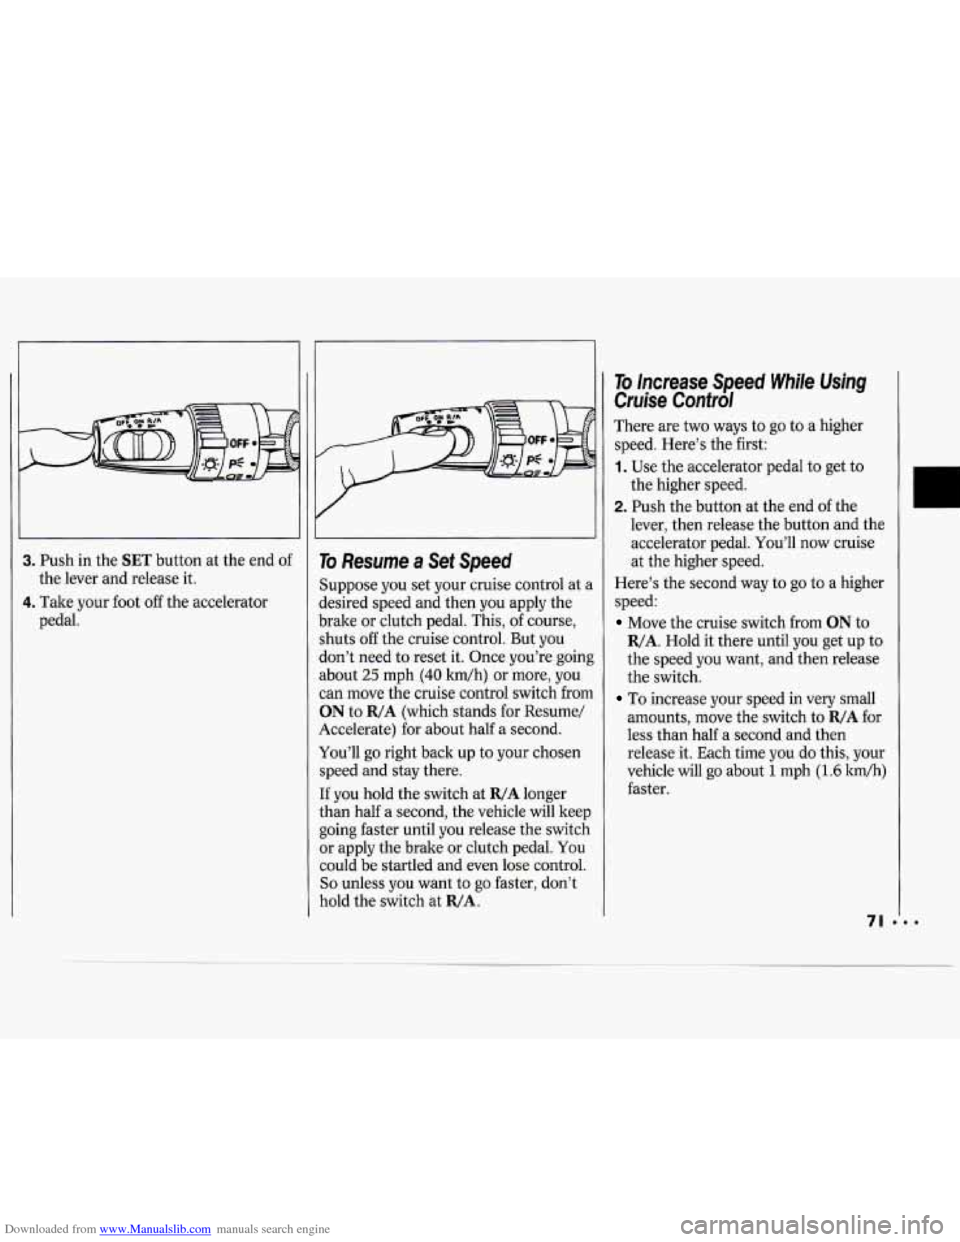
Downloaded from www.Manualslib.com manuals search engine 3. Push in the SET button at the end of
4. Take your foot off the accelerator
the
lever and release it.
pedal.
I I
To Resume a Set Speed
Suppose you set your cruise control at a
desired speed and then you apply the
brake or clutch pedal. This, of course,
shuts
off the cruise control. But you
don’t need to reset it. Once you’re going
about
25 mph (40 kwh) or more, you
can move the cruise control switch from
ON to R/A (which stands for Resume/
Accelerate) for about half a second.
You’ll go right back up to your chosen
speed and stay there.
If you hold the switch
at R/A longer
than half a second, the vehicle
will keep
going faster until you release the switch
or apply the brake or clutch pedal. You
could be startled and even lose control.
So unless you want to go faster, don’t
hold the switch at
R/A.
To Increase speed While Using
Cruise Control
There are two ways to go to a higher
speed. Here’s the first:
1. Use the accelerator pedal to get to
the higher speed.
2. Push the button at the end of the
lever, then release the button and the
accelerator pedal. You’ll now cruise
at the higher speed.
Here’s the second way
to go to a higher
speed:
Move the cruise switch from ON to
R/A. Hold it there until you get up to
the speed you want, and then release
the switch.
To increase your speed in very small
amounts, move the switch to
R/A for
less than half a second and then
release it. Each time you do this, your
vehicle will go about
1 mph (1.6 km/h)
faster.
Page 73 of 243
Downloaded from www.Manualslib.com manuals search engine Features & Controls
To Reduce Speed While Using
Cruise Control
There are two ways to reduce your
speed while using cruise control:
Push in the button at the end of the
lever until you reach the lower speed
you want, then release
it.
To slow down in very small amounts,
push the button for less than half a
second. Each time you do this, you’ll
go
1 mph (1.6 km/h) slower.
Passing Another Vehicle While Using Cruise Control
Use the accelerator pedal to increase
your speed. When you take your foot
off
the pedal, your vehicle will slow down
to the cruise control speed you set
earlier.
Using Cruise Control on Hills
How well your cruise control will work
on hills depends upon your speed, load,
and the steepness of the hills. When
going
up steep hills, you may have to step
on the accelerator pedal to
maintain your speed. When going
downhill, you may have to brake or
shift to a lower gear to keep your speed
down. Of course, applying the brake or
clutch pedal takes you out of cruise
control. Many drivers find this to be too,
much trouble and don’t use cruise
control on steep hills.
To Get Out of Cruise Control
There are several ways to turn off the
cruise control:
Step lightly on the brake pedal, or
push the clutch pedal,
if you have a
manual transaxle; OR
Move the cruise switch to OFF.
To Erase Cruise Speed Memory
When you turn off the cruise control or
the ignition, your cruise control set
speed memory is erased.
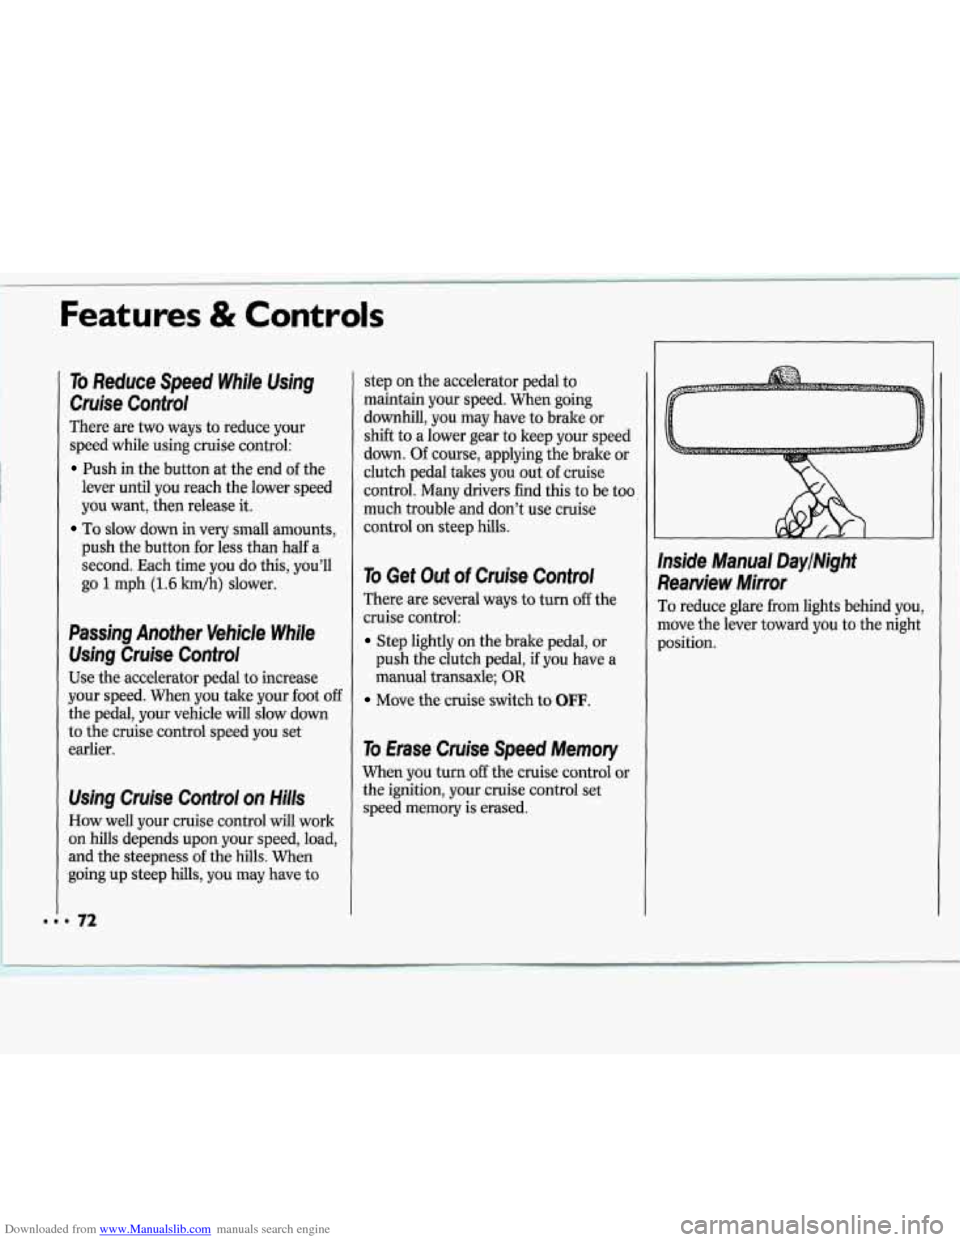
Inside Manual DaylNight
Rearview Mirror
To reduce glare from lights behind you,
move the lever toward you to the night
position.
Page 161 of 243
Downloaded from www.Manualslib.com manuals search engine Service & Appearance Care
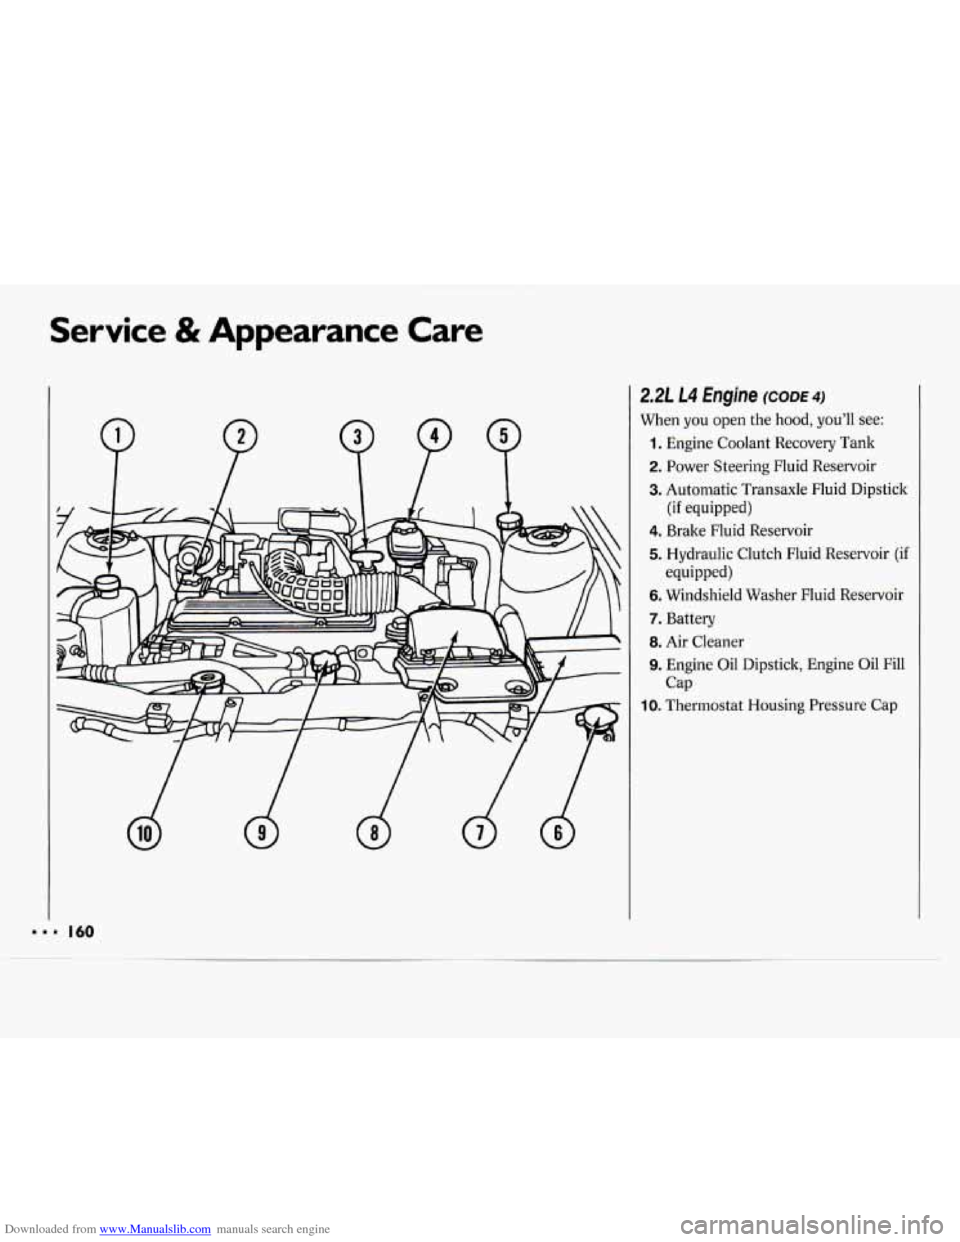
2.21 L4 Engine CODE^)
When you open the hood, you’ll see:
1. Engine Coolant Recovery Tank
2. Power Steering Fluid Reservoir
3. Automatic Transaxle Fluid Dipstick
4. Brake Fluid Reservoir
5. Hydraulic Clutch Fluid Reservoir (if
6. Windshield Washer Fluid Reservoir
7. Battery
8. Air Cleaner
9. Engine Oil Dipstick, Engine Oil Fill
(if equipped)
equipped)
Cap
IO. Thermostat Housing Pressure Cap
Page 162 of 243
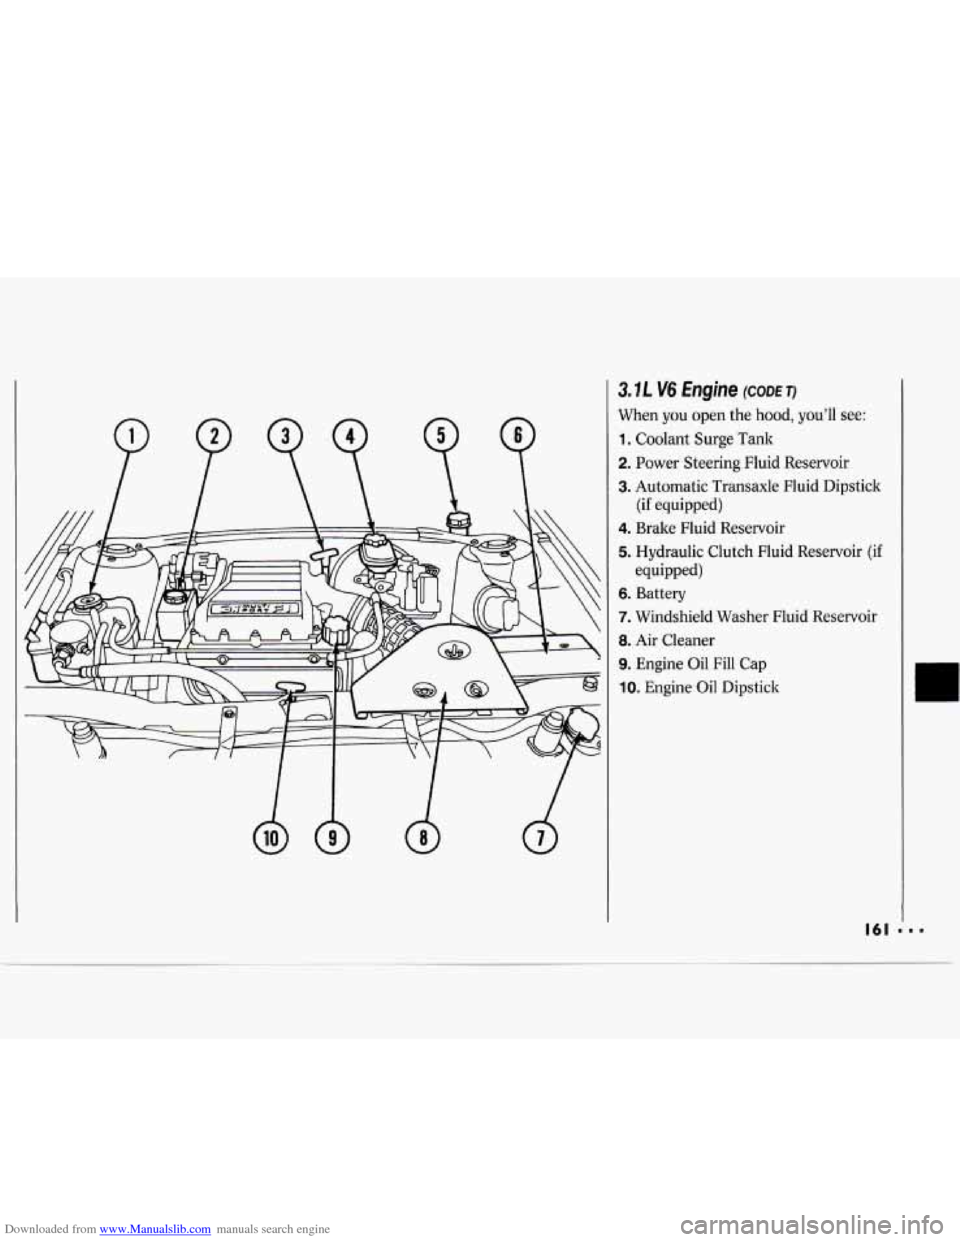
Downloaded from www.Manualslib.com manuals search engine 3.7L V6 Engine (CODE TI
When you open the hood, you’ll see:
1. Coolant Surge Tank
2. Power Steering Fluid Reservoir
3. Automatic Transaxle Fluid Dipstick
4. Brake Fluid Reservoir
5. Hydraulic Clutch Fluid Reservoir (if
6. Battery
7. Windshield Washer Fluid Reservoir
8. Air Cleaner
9. Engine Oil Fill Cap
IO. Engine Oil Dipstick
(if equipped)
equipped)
Page 171 of 243
Downloaded from www.Manualslib.com manuals search engine ~~ ~ Service & Appearance Care
170
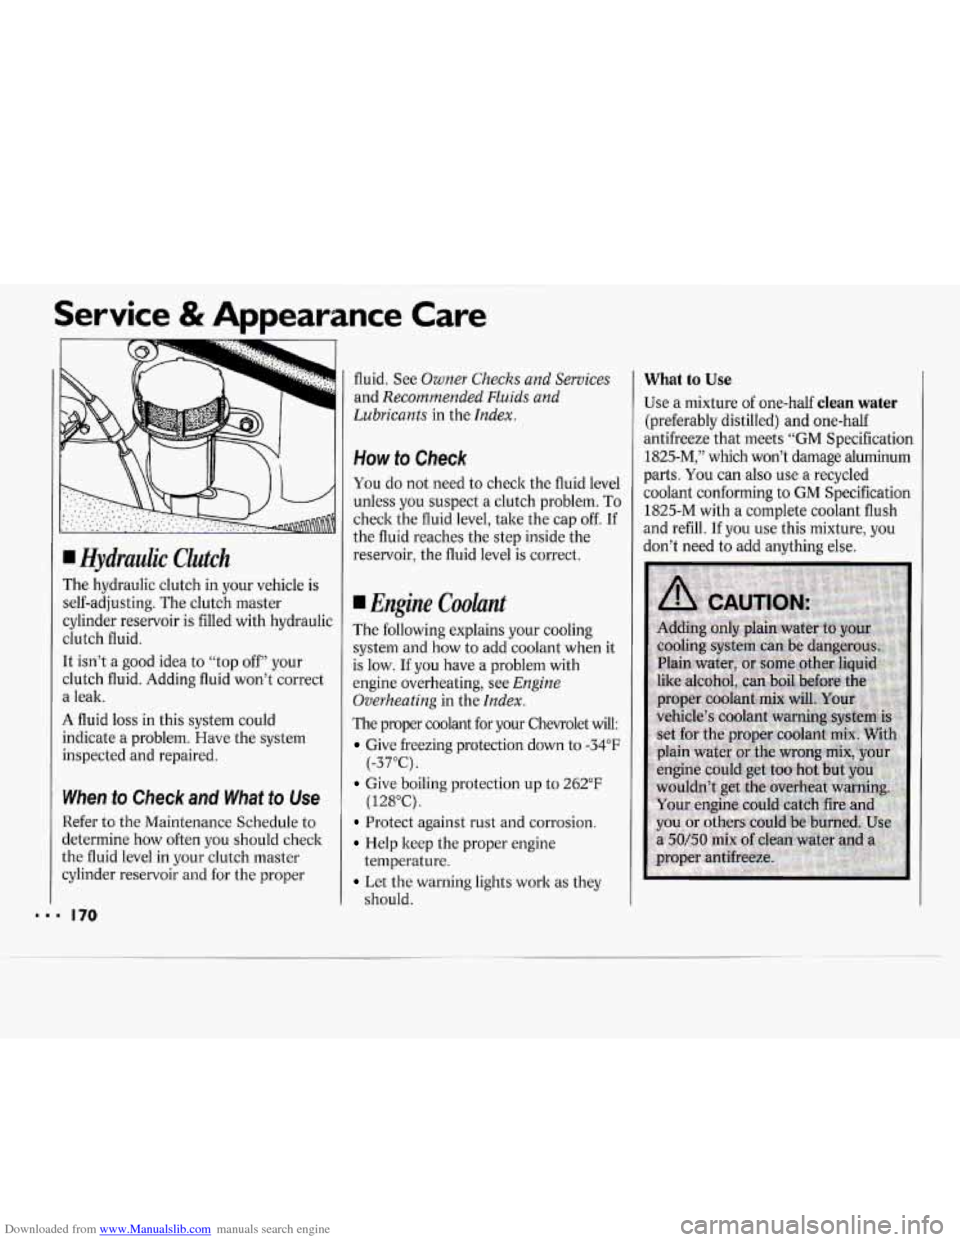
I Hydraulic Clutch
The hydraulic clutch
in your vehicle is
self-adjusting. The clutch master
cylinder reservoir is filled with hydraulic
clutch fluid.
It isn’t
a good idea to “top off” your
clutch fluid. Adding fluid won’t correct
a leak.
A fluid loss in this system could
indicate a problem. Have the system
inspected and repaired.
When to Check and What to Use
Refer to the Maintenance Schedule to
determine how often
you should check
the fluid level in your clutch master
cylinder reservoir and for the proper fluid. See
Owner Checks and
Services
and Recommended Fluids and
Lubricants
in the Index.
How to Check
You do not need to check the fluid level
unless you suspect a clutch problem.
To
check the fluid level, take the cap off. If
the fluid reaches the step inside the
reservoir, the fluid level is correct.
I Engine Coolunt
The following explains your cooling
system and how
to add coolant when it
is low.
If you have a problem with
engine overheating, see
Engine
Overheating
in the Index.
The proper coolant for your Chevrolet will:
Give freezing protection down to -34°F
Give boiling protection up to 262°F
Protect against rust and corrosion.
Help keep the proper engine
Let the warning lights work as they
(-37°C).
(128°C).
temperature.
should.
What to Use
Use a mixture
of one-half clean water
(preferably distilled) and one-half
antifreeze that meets “GM Specification
1825-M,” which won’t damage aluminum
parts. You can also use a recycled
coolant conforming to GM Specification
1825-M with
a complete coolant flush
and refill. If you use this mixture, you
don’t need to add anything else.
Page 200 of 243
Downloaded from www.Manualslib.com manuals search engine ,
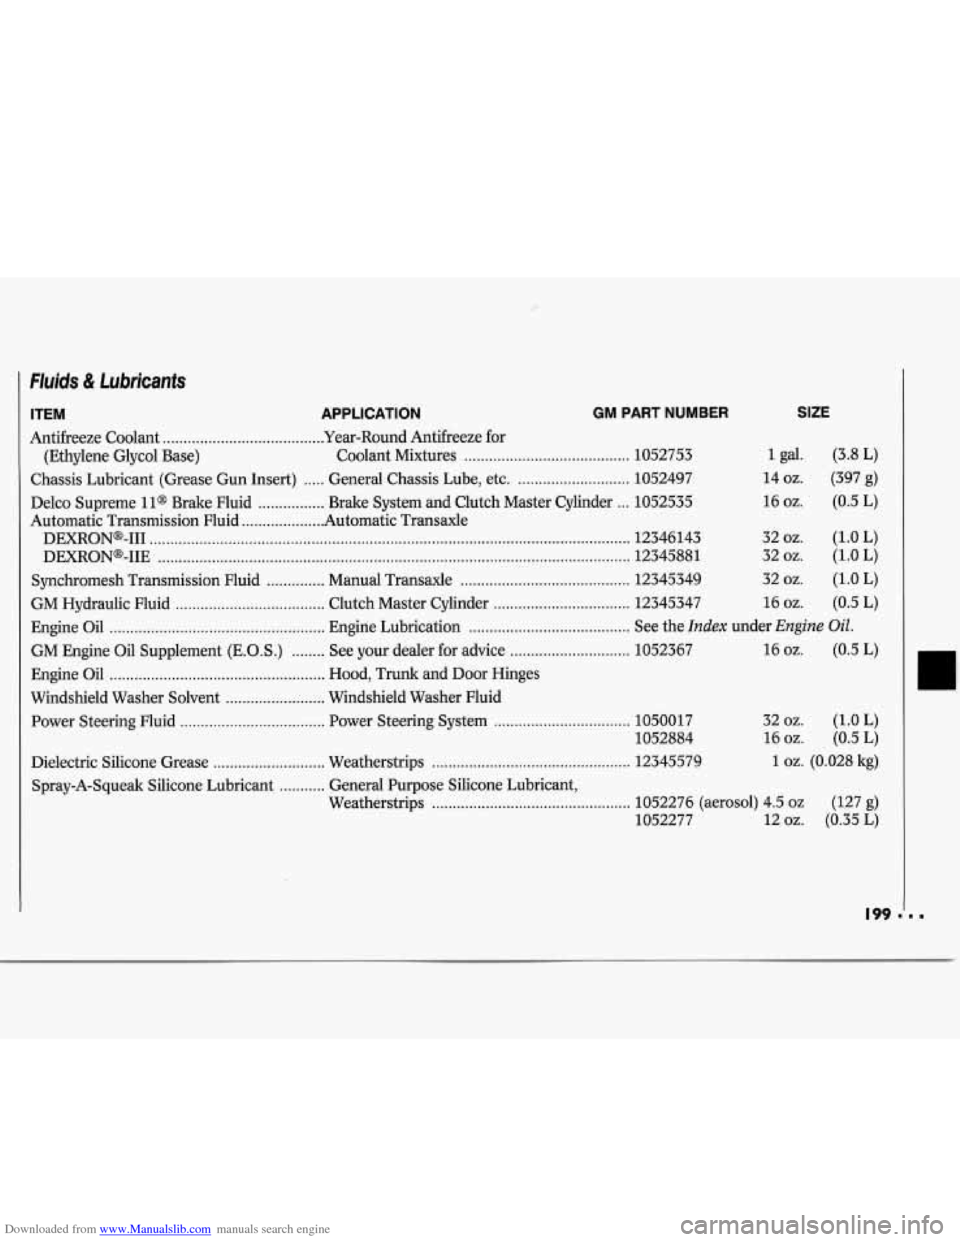
Fluids & Lubricants
ITEM APPLICATION GM PART NUMBER
Antifreeze Coolant ...................................... .Year-Round Antifreeze for
(Ethylene Glycol Base) Coolant Mixtures
........................................ 1052753
Chassis Lubricant (Grease Gun Insert)
..... General Chassis Lube, etc. ........................... 1052497
Delco Supreme
1 l@ Brake Fluid ................ Brake System and Clutch Master Cylinder ... 1052535
Automatic Transmission Fluid
.................... Automatic Transaxle
DEXRON@-I11
........................................................................\
............................................ 12346143
DEXRONa-IIE
........................................................................\
.......................................... 12345881
Synchromesh Transmission Fluid
.............. Manual Transaxle ......................................... 12345349
GM Hydraulic Fluid
.................................... Clutch Master Cylinder ................................. 12345347
SIZE
1 gal.
14 oz.
16 oz.
32 oz.
32 oz.
32 oz.
16 oz. (3.8 L)
(397
8)
(0.5 L)
(1.0
L)
(1.0 L)
(1.0 L)
(0.5 L)
Engine Oil
.................................................... Engine Lubrication ....................................... See the Index under Engine Oil.
GM Engine Oil Supplement (E.O.S.) ........ See your dealer for advice ............................. 1052367 16 oz. (0.5 L)
Engine Oil
.................................................... Hood, Trunk and Door Hinges
Windshield Washer Solvent
........................ Windshield Washer Fluid
Power Steering Fluid
................................... Power Steering System ................................. 1050017 32 oz. (1 .O L)
1052884 16 oz.
(0.5 L)
Dielectric Silicone Grease
........................... Weatherstrips ................................................ 12345579 1 oz. (0.028 kg)
Spray-A-Squeak Silicone Lubricant
........... General Purpose Silicone Lubricant,
Weatherstrips
................................................ 1052276 (aerosol) 4.5 oz (127 g)
1052277 12 02. (0.35 L)
I