engine oil CHEVROLET CAVALIER 1994 1.G Owners Manual
[x] Cancel search | Manufacturer: CHEVROLET, Model Year: 1994, Model line: CAVALIER, Model: CHEVROLET CAVALIER 1994 1.GPages: 243, PDF Size: 15.06 MB
Page 11 of 243
Downloaded from www.Manualslib.com manuals search engine How to Use this Manual
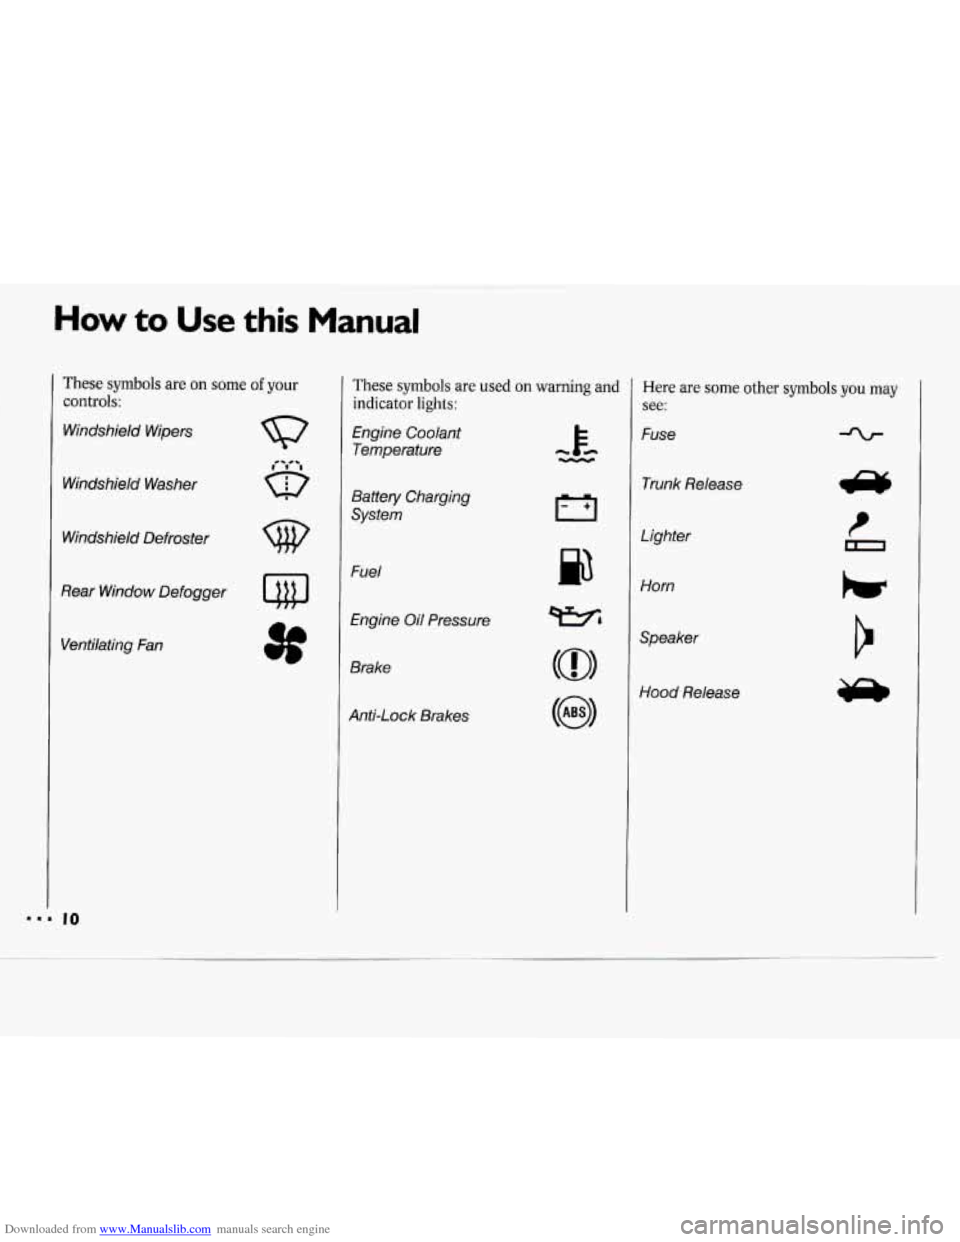
These symbols are on some of your
controls:
Windshield Wipers
Windshield Washer
Windshield Defroster
Rear Window Defogger
Ventilating Fan
These symbols are used on warning and
indicator
lights:
Engine Coolant
Temperature
Battery Charging
System
Fuel
Engine Oil Pressure
Brake
Anti-Lock Brakes
p3
Here are some other symbols you may
see:
Fuse
Trunk Release
Lighter
Horn
Speaker
Hood Release
Page 54 of 243
Downloaded from www.Manualslib.com manuals search engine How long should you keep the coolant
heater plugged in? The answer depends
on the weather, the kind of oil you
have, and some other things. Instead of
trying
to list everything here, we ask
that you contact a Chevrolet dealer in
the area where you’ll be parking your
vehicle. The dealer can give you the best
advice for that particular area.
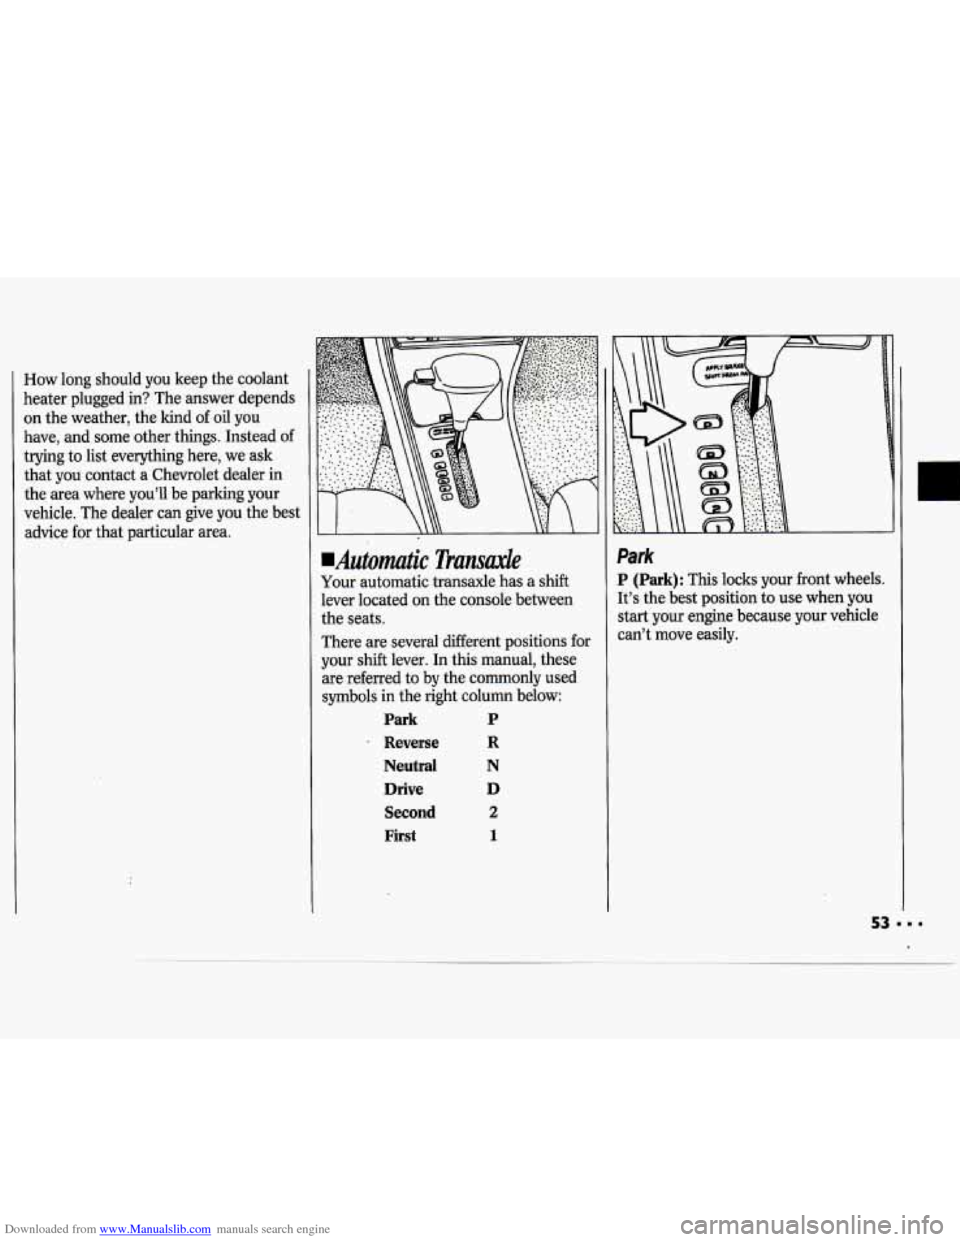
.Automatic Transaxle
Your automatic transaxle has a shift
lever located on the console between
the seats.
There are several different positions for
your shift lever. In this manual, these
are referred to by the commonly used
symbols in the right column below:
Park P
. Reverse R
Neutral N
Drive D
Second 2
First 1
Park
P (Park): This locks your front wheels.
It’s the best position to use when you
start your engine because your vehicle
can’t move easily.
.
Page 90 of 243
Downloaded from www.Manualslib.com manuals search engine r
c
CHECK ’
OAGES
NOLANT J
D)(8,
I
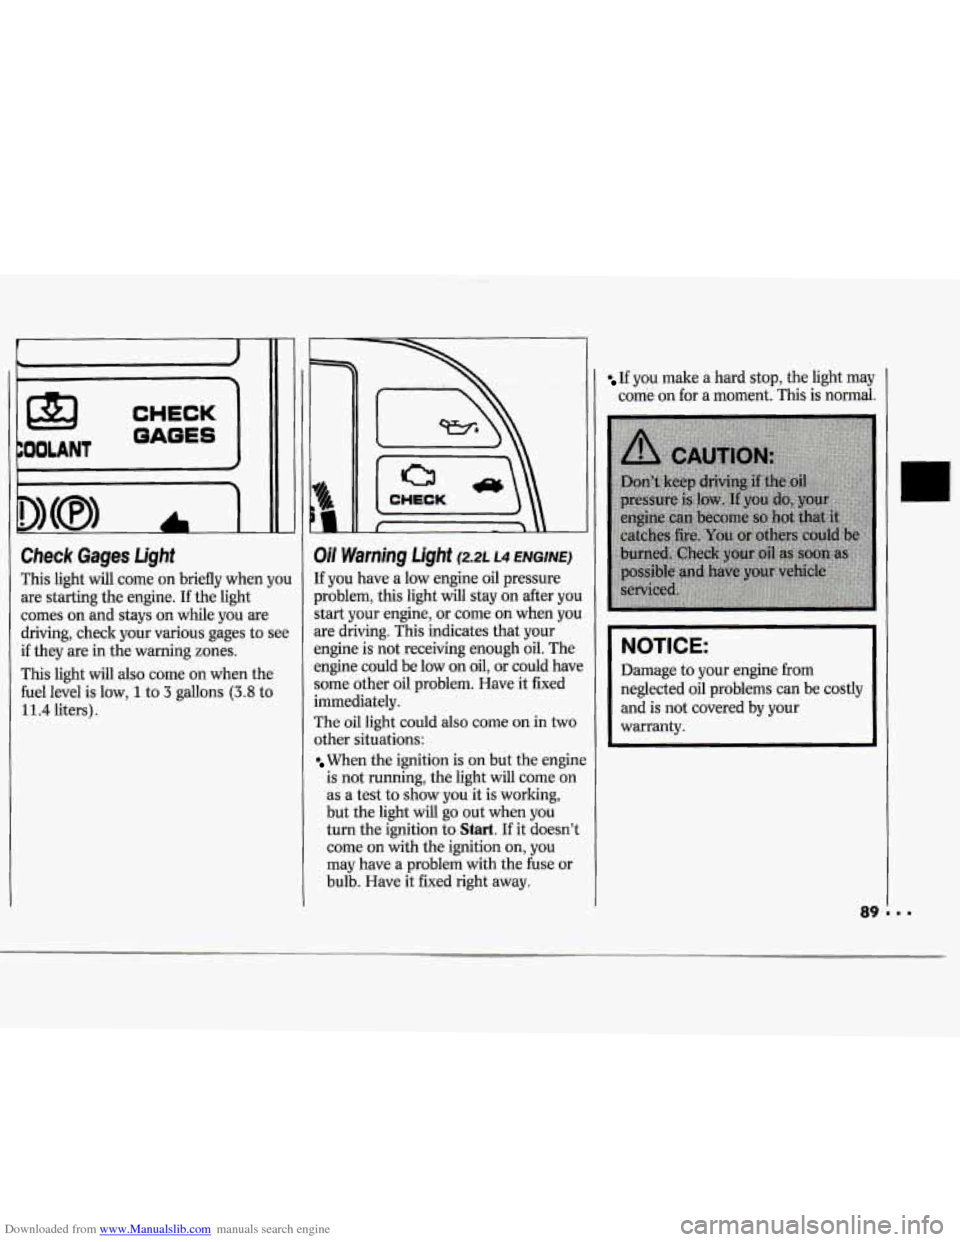
Check Gages Light
This light will come on briefly when yo1
are starting the engine. If the light
comes on and stays on while you are
driving, check your various gages to see
if they are in the warning zones.
This light will also come on when the
fuel level is low,
1 to 3 gallons (3.8 to
liters)
Oil Warning Light (2.2~ ~4 ENGINE)
If you have a low engine oil pressure
Iroblem, this light will stay on after yob
start your engine, or come on when you
ue driving. This indicates that your
mgine is not receiving enough oil. The
mgine could be low on
oil, or could haw
some other oil problem. Have it fixed
immediately.
The oil light could
also come on in two
other situations:
When the ignition is on but the engin
is not running, the light will come on
as a test to show you it is working,
but the light will go out when you
turn the ignition to
Start. If it doesn’l
come on with the ignition on, you
may have a problem with the fuse or
bulb. Have it fixed right away.
If you make a hard stop, the light may
come on for a moment.
This is normal.
NOTICE:
Damage to your engine from
neglected oil problems can be costly and is not covered by your
warranty.
Page 91 of 243
Downloaded from www.Manualslib.com manuals search engine Features & Controls
e
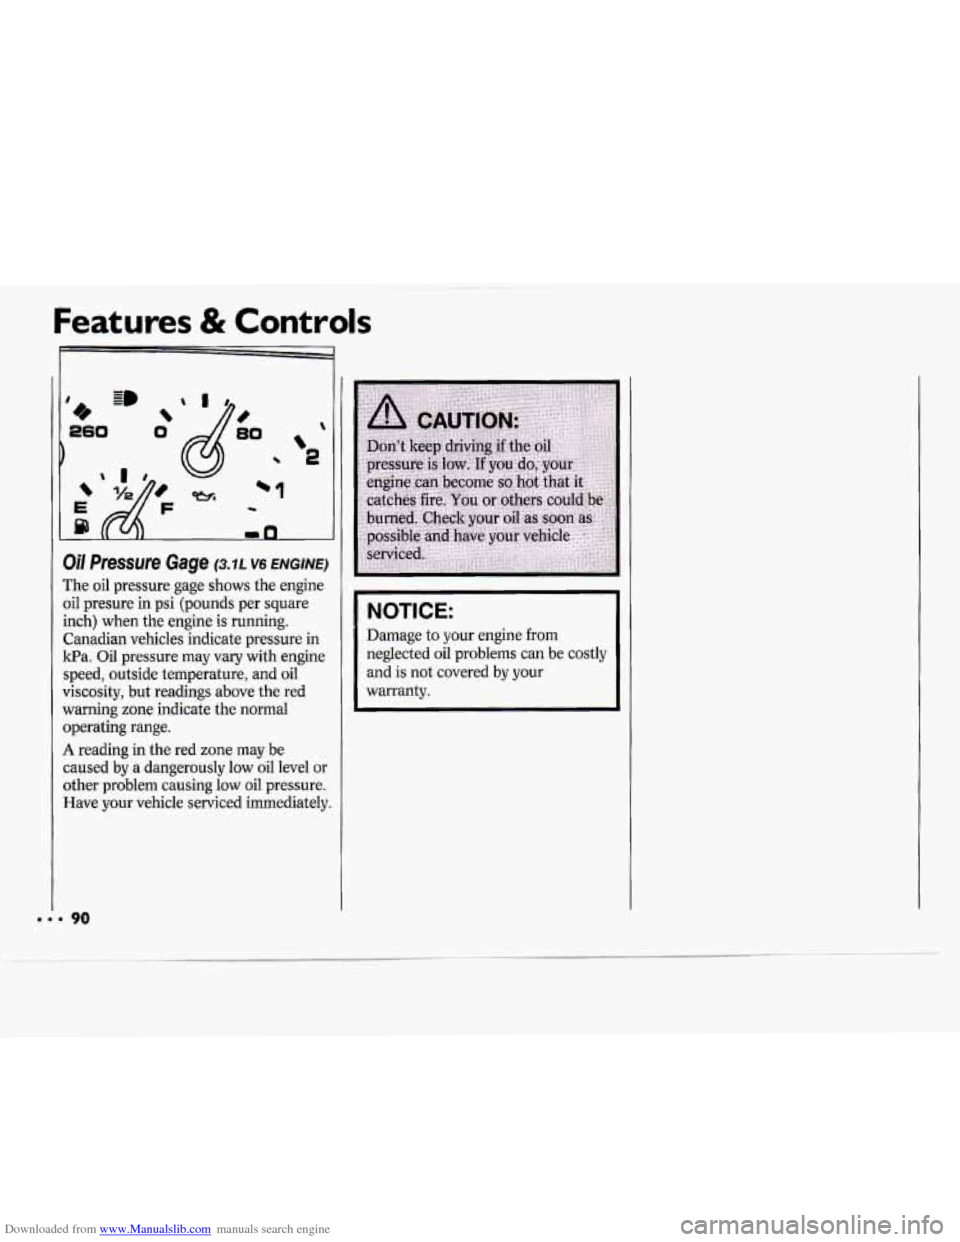
oil PfeSSUI'e Gage (3.7L V6 ENGINE)
The oil pressure gage shows the engine
oil presure in psi (pounds per square
inch) when the engine is running.
Canadian vehicles indicate pressure in
1tPa. Oil pressure may vary with engine
speed, outside temperature, and oil
viscosity, but readings above the red
warning zone indicate the
normal
operating range.
A reading in the red zone may be
caused by a dangerously low oil level or
other problem causing low oil pressure.
Have your vehicle serviced immediately.
NOTICE:
Damage to your engine from
neglected oil problems can be costly
and is not covered by your
warranty.
Page 106 of 243
Downloaded from www.Manualslib.com manuals search engine quality, try cleaning the tape player.
Proper tape player cleaning should be
done with
a wiping action nonabrasive
cleaner cassette.
To properly clean your
tape player, you should follow the
directions on the cleaning cassette.
Cassettes are subject to wear and the
sound quality may degrade over time.
Always verify that the cassette tape is in
good condition before obtaining service
on your tape player.
.," c.
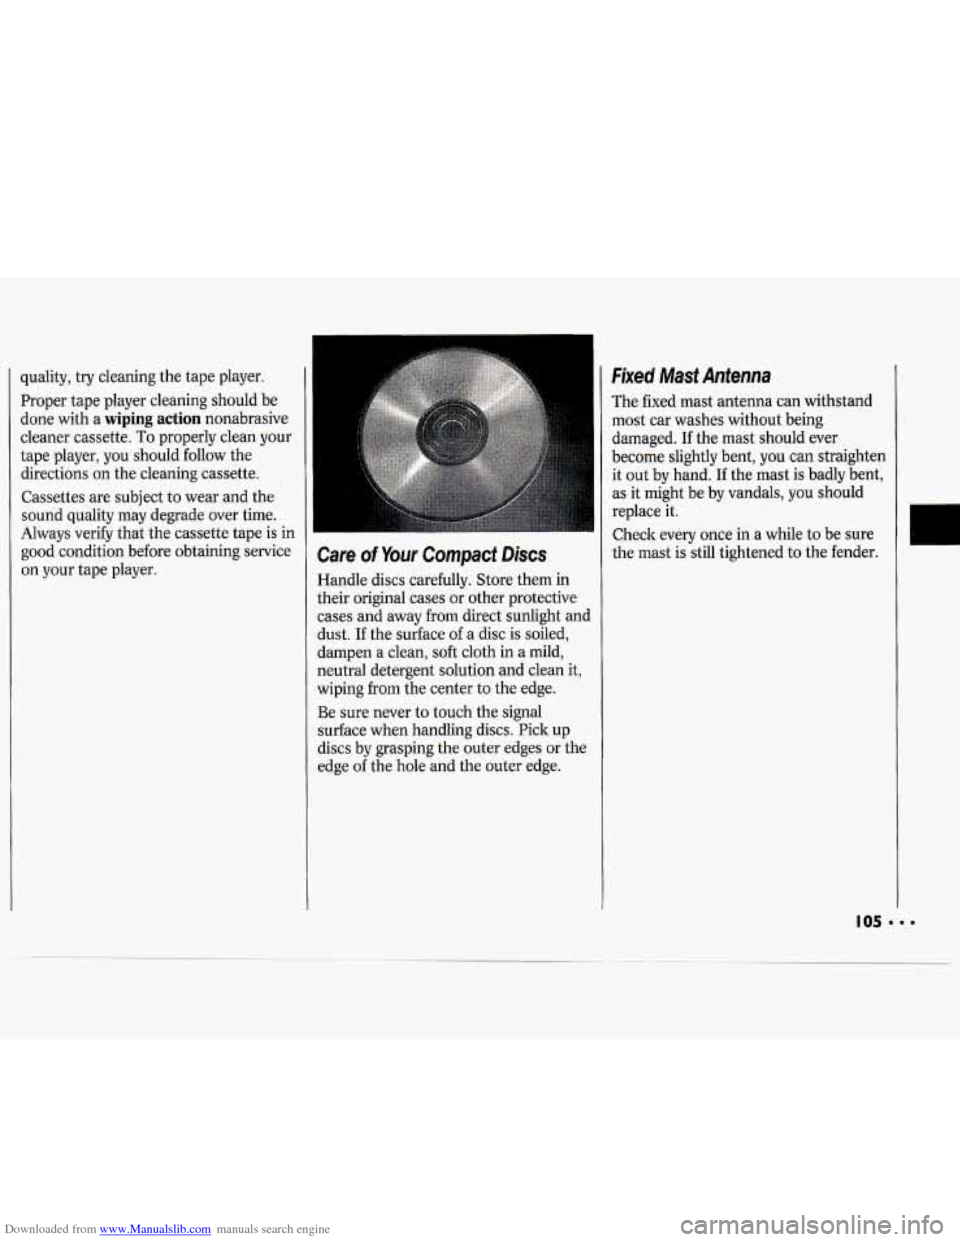
Care of Your Compact Discs
Handle discs carefully. Store them in
their original cases or other protective
cases and away from direct sunlight and
dust.
If the surface of a disc is soiled,
dampen a clean,
soft cloth in a mild,
neutral detergent solution and clean it,
wiping from the center to the edge.
Be sure never
to touch the signal
surface when handling discs. Pick up
discs by grasping the outer edges or the
edge
of the hole and the outer edge.
Fixed Mast Antenna
The fixed mast antenna can withstand
most car washes without being
damaged. If the mast should ever
become slightly bent, you can straighten
it out by hand. If the mast is badly bent,
as it might be by vandals,
you should
replace it.
Check every once in a while to be sure
the mast is still tightened to the fender.
Page 122 of 243
Downloaded from www.Manualslib.com manuals search engine Reduce your speed according to your
speedometer, not to your sense of motion.
After driving for any distance at higher
speeds, you may tend
to think you are
going slower than you actually are.
Before Leaving on a Long
Trip
Make sure you’re ready. Try to be well
rested.
If you must start when you’re
not fresh
- such as after a day’s work
- don’t plan to make too many miles
that first part
of the journey. Wear
comfortable clothing and shoes you can
easily drive in.
Is your vehicle ready for a long trip? If
you keep it serviced and maintained, it’s
ready to
go. If it needs service, have it
done before starting out. Of course,
you’ll find experienced and able service
experts in Chevrolet dealerships all
across North America. They’ll be ready
and willing to help
if you need it.
Here are some things you can check
before a trip:
Windshield Washer Fluid Is the
reservoir full? Are all windows clean
inside and outside?
Wiper Blades: Are they in good
shape?
Fuel, Engine Oil, Other Fluids: Have
you checked all levels?
Lights: Are they all working? Are the
lenses clean?
Tires: They are vitally important to a
safe, trouble-free trip.
Is the tread
good enough for long-distance
driving? Are the tires all inflated to
the recommended pressure?
weather outlook along your route?
Should you delay your trip a short
time to avoid a major storm system?
Maps: Do you have up-to-date maps?
Weather Forecasts: What’s the
Highway Hypnosis
Is there actually such a condition as
“highway hypnosis”? Or is it just plain
falling asleep at the wheel? Call it
highway hypnosis, lack
of awareness, or
whatever.
There is something about an easy
stretch of road with the same scenery,
along with the hum of the tires on the
road, the drone
of the engine, and the rush
of the wind against the vehicle that
can make you sleepy. Don’t let it
happen to you! If it does, your vehicle
can leave the road in
less than a
second,
and you could crash and be
injured.
What can you do about highway
hypnosis? First, be aware that it can
happen.
Then here are some tips:
Make sure your vehicle is well
ventilated, with a comfortably cool
interior.
Keep your eyes moving. Scan the road
ahead and to the. sides. Check your
rearview mirrors and your
instruments frequently.
If you get sleepy, pull off the road into
a rest, service, or parking area and
take a nap, get some exercise, or both.
For safety, treat drowsiness
on the
highway as an emergency.
a
Page 138 of 243
Downloaded from www.Manualslib.com manuals search engine I
NOTICE:
If your engine catches fire because
you keep driving with no coolant,
your vehicle can be badly damaged.
The costly repairs would not be
covered by your warranty.
If No Steam Is Coming From your
Engine
If you get the overheat warning but see
or hear no steam, the problem may not
be too serious. Sometimes the engine
can get a little too hot when you:
Climb a long hill on a hot day.
Stop after high speed driving.
Idle for long periods in traffic.
If you get the overheat warning with no
sign
of steam, try this for a minute or so:
1. If you have an air conditioner, turn it
2. Turn on your heater to full hot at the
Off.
highest fan speed and open the
windows as necessary.
3.
Try to keep your engine under load
(in
a drive gear where the engine
runs slower).
If you no longer have the overheat
warning, you can drive. Just
to be safe,
drive slower for about ten minutes.
If
the warning doesn’t come back on, you
can drive normally.
If the warning continues, pull over,
stop, and park your vehicle right away.
If there’s still no sign
of steam, you can
idle the engine for two or three minutes
while you’re parked, to see if the
warning stops. But then, if you still
have the warning, TURN
OFF THE
ENGINE AND
GET EVERYONE OUT
OF THE VEHICLE until it cools down.
You may decide not
to lift the hood but
to get service help right away.
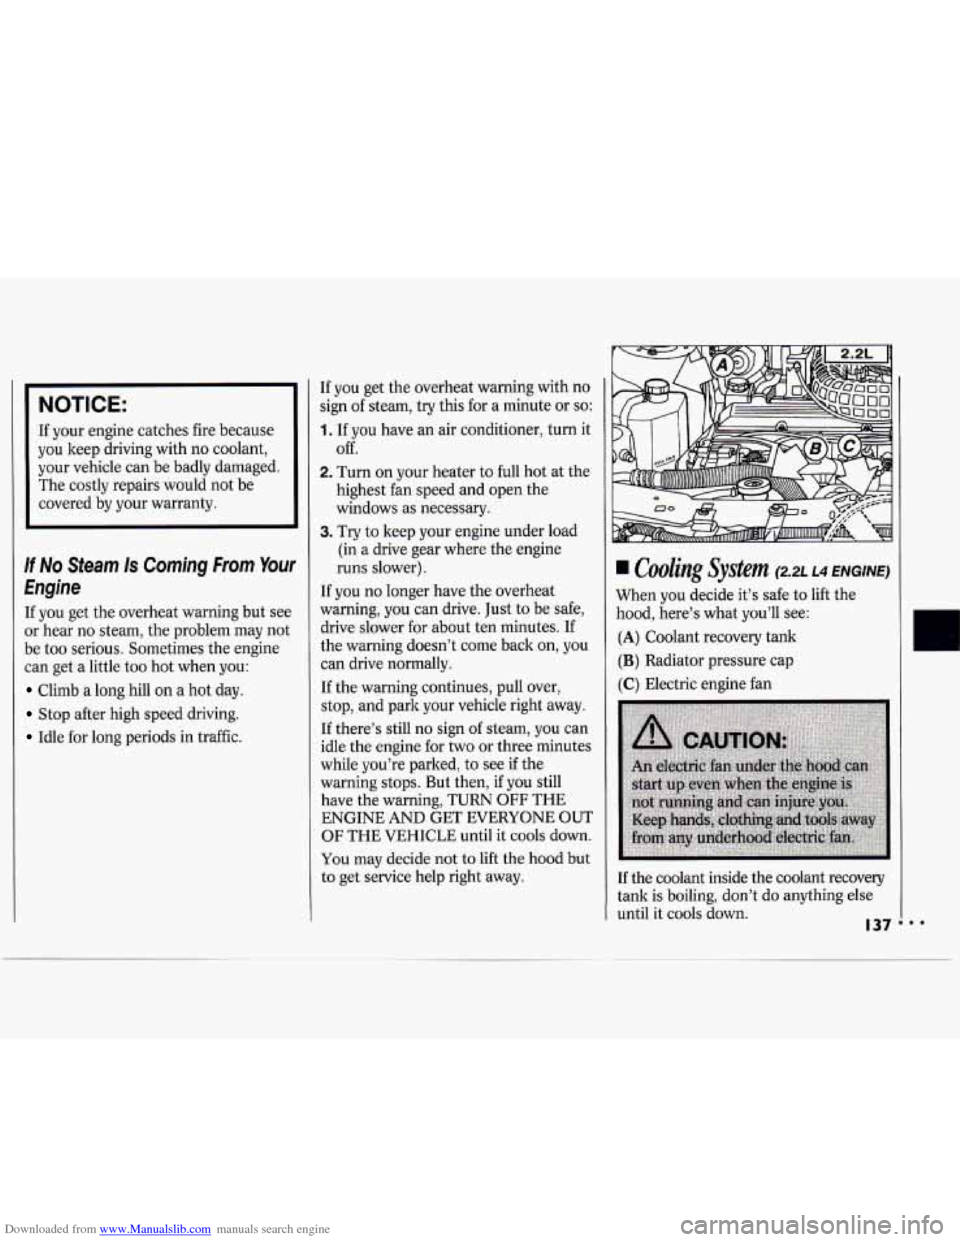
hdirtg system (2.2L L4 ENGINE)
When you decide it’s safe to lift the
hood, here’s what you’ll see:
(A) Coolant recovery tank
(B) Radiator pressure cap
(C) Electric engine fan
If the coolant inside the coolant recovery
tank is boiling, don’t do anything else
until
it cools down. I37
Page 139 of 243
Downloaded from www.Manualslib.com manuals search engine Problems on the Road
The coolant level should be at or above
FULL COLD. If it isn’t, you may have
a leak in the radiator hoses, heater
hoses, radiator, water pump or
somewhere else in the cooling system.
I.. ’ 138
NOTICE:
Engine damage from running your
engine without coolant isn’t
covered by your warranty.
If there seems to be no leak, check to
see if the electric engine fan is running.
If the engine is overheating, the fan
should be running. If it isn’t, your
vehicle needs service.
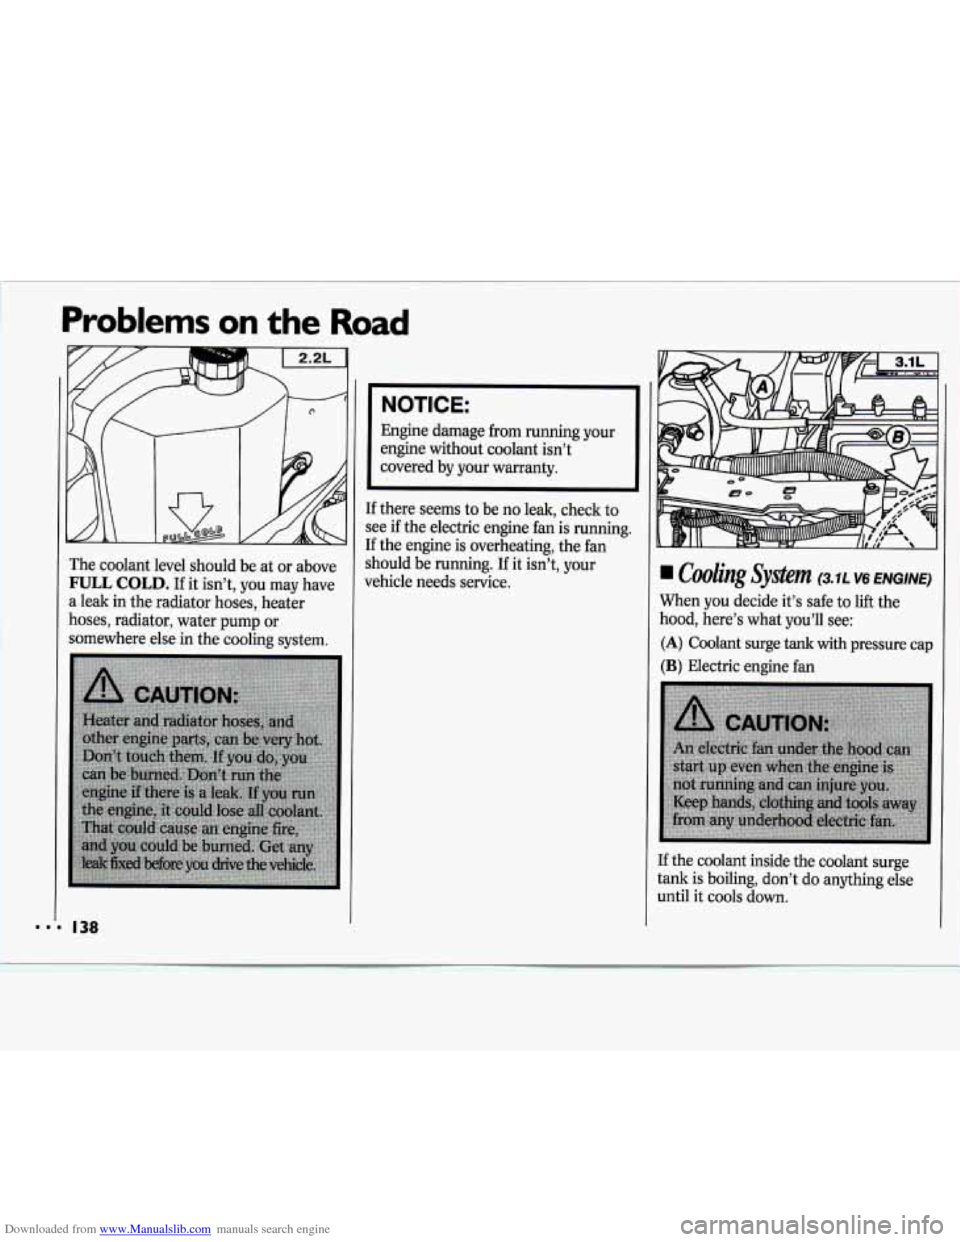
coohg Sy&n (3.1 L V6 ENGINE)
When you decide it’s safe to lift the
hood, here’s what you’ll see:
(A) Coolant surge tank with pressure cap
(B) Electric engine fan
If the coolant inside the coolant surge
tank
is boiling, don’t do anything else
until it cools down.
Page 150 of 243
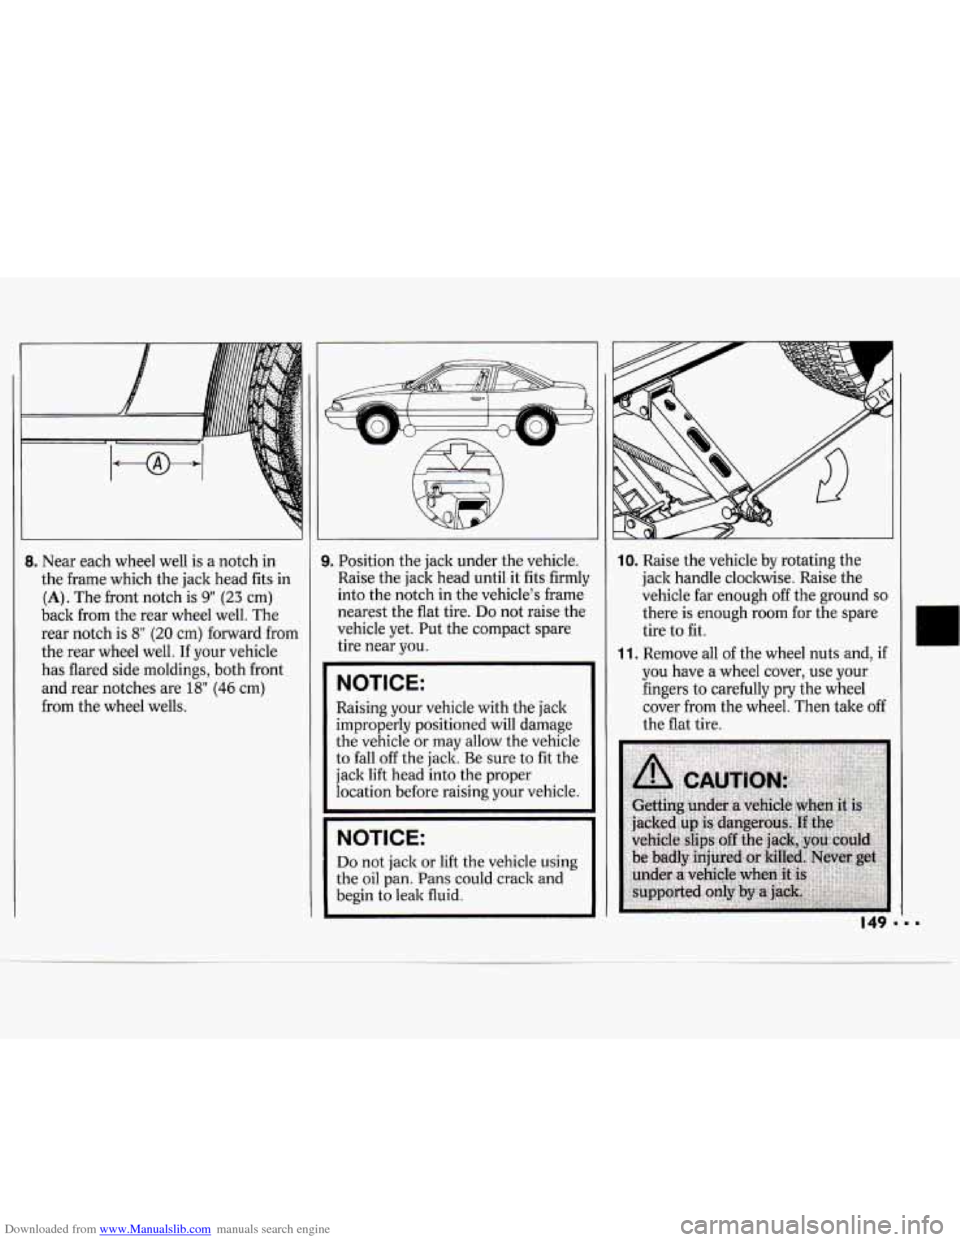
Downloaded from www.Manualslib.com manuals search engine 8. Near each wheel well is a notch in
the frame which the jack head fits in
(A). The front notch is 9" (23 cm)
back from the rear wheel well. The
rear notch is
8" (20 cm) forward from
the rear wheel well.
If your vehicle
has flared side moldings, both front
and rear notches are
18" (46 cm)
from the wheel wells.
I
~~ ~ ~~
9. Position the jack under the vehicle.
Raise the jack head until
it fits firmly
into the notch in the vehicle's frame
nearest the flat tire.
Do not raise the
vehicle yet. Put the compact spare
tire near you.
NOTICE:
Raising your vehicle with the jack
improperly positioned will damage
the vehicle or may allow the vehicle
to fall off the jack. Be sure to fit the
jack lift head into the proper
location before raising your vehicle.
NOTICE:
Do not jack or lift the vehicle using
the oil pan. Pans could crack and
begin to leak fluid.
10. Raise the vehicle by rotating the
jack handle cloclnvise. Raise the
vehicle far enough off the ground
so
there is enough room for the spare
tire to fit.
11. Remove all of the wheel nuts and, if
you have a wheel cover, use your
fingers to carefully pry the wheel
cover from the wheel. Then take off
the flat tire.
149 I
Page 154 of 243
Downloaded from www.Manualslib.com manuals search engine Here you will find information
about the care of your Chevrolet
.
This part begins with service and
fuel information. and then it shows how to check important fluid and
lubricant levels
. There is also
technical information about your
vehicle. and a section devoted to
its appearance care
.
Part 6
Service and Appearance Care
Service ........................................................................\
............................................. 154
Fuel ........................................................................\
.................................................. 154
Hood Release ........................................................................\
................................... 158
Engine Oil ........................................................................\
........................................ 162
Air Cleaner ........................................................................\
...................................... 165
Automatic Transaxle Fluid ........................................................................\
............. 167
Manual Transaxle Fluid ........................................................................\
.................. 169
Power Steering Fluid ........................................................................\
....................... i73
Windshield Washer Fluid ........................................................................\
................ 173
Brakes ........................................................................\
.............................................. 174
Engine Coolant ........................................................................\
................................ 170
Battery ........................................................................\
............................................. 176
Bulb Replacement ........................................................................\
............................ 176
Loading Your Vehicle ........................................................................\
..................... 180
Windshield Wiper Blade Replacement ................................................................... 179
Tires ........................................................................\
................................................. 181
Appearance Care ........................................................................\
............................. 187
Vehicle Identification Number (VIN) .................................................................... 194
Add-on Electrical Equipment ........................................................................\
........ 195
Fuses 8I Circuit Breakers ........................................................................\
................ 195
Fluids 81 Lubricants ........................................................................\
........................ 199
Capacities 81 Specifications ........................................................................\
............ 198
Replacement Bulbs ........................................................................\
.......................... 200
Engine Specifications ........................................................................\
...................... 202
Normal Maintenance Replacement Parts ............................................................... f!B