load capacity CHEVROLET CITATION 1980 1.G Owners Manual
[x] Cancel search | Manufacturer: CHEVROLET, Model Year: 1980, Model line: CITATION, Model: CHEVROLET CITATION 1980 1.GPages: 95, PDF Size: 21.48 MB
Page 16 of 95
Downloaded from www.Manualslib.com manuals search engine Tir,s
When lowing trailers using a dead-weight hitch, inflate tires to the "Cold Tire
Pressure" for ·'Max . Load" show n on the Tire Placard on the left front door.
The allowable passenger and cargo load for this car,
also sh o wn on· the Tire
Placard, is reduced by the trailer tongue weight whenever the trailer is attached
t o the car.
Maintenance
More frequen.t servic e is requi red when using your car to pull a trailer. See Section
A of the Maint enance Schedule folder for Tran saxle Fluid and Engine Oil chang e
requirement~ for traitering.
Now and then. check that all trailer hitch bolts an d nuts are tight. Also see
"the Maintenance Schedule rol_def, and the Index in this manual , for important facts
o n
belts, coo ling system care and brake adjustment.
Break-In Schedule
See the new car break~in instru ctions in this manual. Also,. we recommend you
drive your new car for
500 mil es (800 kilometer s) before trailer tOwing. At the
" end
of this 500 mile (800 kilome te r) break-in period, avoid speeds over 50 mph (80 km/h) and full throttl e start s during the first 500 miles (800 kilometers) of
trailer towing.
If a new engine or transaxle is ins talled in you r car, observe the
same
care.
CAUTIONS:
Brakes -To help avoid personal injury due to poor braking action:
• Trailer brakes of adequate size are required on trailer s over 450 kilograms
(1,000 pounds) loaded weight.
• If you use trailer brakes with this car, follow the installation and balan ce
instructi ons
of the trailer brake maker.
• Do nol lap into the car's brake system if the trailer brake system uses more than 0.3 cubic centimeter (0.02 cubic inch) of nuid from the ca r's master
cylinder. In this case, the car's brake fluid capacity will not be enough to
operate
both the car and trailer brakes under all kind s, of use.
• All brak e fluid parts must be able to stand 20 685 kPa (3,000 psi). The brake
fluid tap must be made al th e upper rear master cylinder port. Copper tubing is subject to fatigue failure and must no t be used.
• Before going down a sleep or long grade , reduce speed and shift the tran saxle
into a lower gear to control your car's speed.
Try not to hold the brake pedal
down too long or too often. This could cause the brake s to get hot and not
work
as well.
Hitches -To help avoid personal injury due to sway caused by such things as
c rosswind
s, big trucks passing or road roughn ess, or due to sepa ration of the
trailer :
• Keep the trailer tongue load at 10% of the loaded trailer weight for
dead-w eight hitches. Tongue loads can be adjusted by proper distribution of the load in the trailer. This can be checked by weighing separately the loaded
trailer and then the tongue,
• When you remove a frailer hitch, be sure to seal any mountin g h'oles in the
body . This will help prevent entry of exhaust fumes, dirt or water. (See
"Engine Exhaust Gas Caution (Carbon Monoxide) " at the beginning of "Starting and Operating," Section 2 of this manual.)
1-12
Page 46 of 95
Downloaded from www.Manualslib.com manuals search engine Insta"ation
To install the cargo cover:
1. Insert the left hinge pin in the bracket attached to the body of the car.
2. Slide the release lever to the right to engage hinge pin in the 'bracket. See figure
B.
3. Move the lever up to lock the cover in place.
4. Reconnect the rubber 'lifting cords.
STOWING THINGS IN (OR ON) THE CAR
CAUTION: luggage or other cergo should not be piled higher than the seatbacks, When at all possible, luggage or cargo should be C8rrifHj in the trunk area. The filler panel or cargo cover, between the rear 88atback and the rear window should not be used to carry objects-even those that are small and light. All nems should be secured in place. This will help keep such things from being thrown about and Injurying people in the car during an accident. Cargo weight whether inside or on the roof, should be positioned as evenly as possible from front to rear.
ROOF LUGGAGE CARRIER
The optional roof luggage carrier is designed to allow loading of items onto the
roof
of your car. The roof luggage carrier does not increase the total load carrying
capacity of th e car , as shown opposite "Max Load" on the Tire Placard located
on the left front door. Be sure the total weight of the cargo on the roof, plus the
weight
of the cargo and passe ngers inside the car, plus the tongue load of any
trailer you are towing does
,1;10t exc_eed this "Max Load" vehicle capacity weight. See Section 5, page "5-11 for more information on Vehicle Loading . Also see the
infonnation on Trailer Towing
in Section 1 of this manual . if needed .
NOTICE:To helpayoid pOSSible damage, do not exceed 70 kilograms (1 50 pounds), cargo weight on the roof. Position the cargo in the luggage carrier as evenly as: pOssible. If carrying long items, never exceed car length and fasten such loads securely at the front and rear of the car, as well as to the luggage rack.
The roof luggage carrier consists of: five roof slats bolted to the top of the car,
two crossrails with knobs at each end th~t allow the crossrails to be adjusted or removed, and six' adjustable tie-downs.
The operation
of each item is as follows: the crossrails are easily adjusted forward
or rearward in order to help position your load. To move the crossrails , rotate
the large adjustable knob, ··No. 3" in the figure above. counterclockwise to loosen
(or remove) the crossrails and 'clockwise to tighten down the cros srails. Attached
to the top
of the crossrails are two adjustable tie-downs, "No.4" in the figure.
Ther e is also one adjustable lie-down located in the center of each outer roof slat
assembly (also called
"No.4" in the figure) . The tie-downs may be easily moved
forward and rearward within the outer slat assembly and across the top
of the
crossrails to the desired position.
To move the tie-down . rotate it countetclockwise
to loosen and clockwise to tighten down. If needed to sec ure a certain type of lead,
the tie-downs on the
crossratls may be removed and repos itioned on the outer roof
slat assemblies. While underway, periodically check to make sure that
the crossrails and the tie-downs are securely fastened to help
prevent loss of cargo, or the roof rack equipment itself.
The crossrails may be removed when not in use and stowed in the trunk or behind
the second seat on the rear load floor (with the carg o cover installed) in hatchback
style
s. When stowing the cressrails, al5..1 attach the tie-downs from the outer roof
2-29
Page 67 of 95
Downloaded from www.Manualslib.com manuals search engine remOve tlie cap on the coolant ~ecove~y tank : Add to the tank enough of a 50 150 . mixture of w ater and a g ood quality eth)dene glycol antifreez e to bring the level
up to the .
proper mark. Put the cap bac k on the tank .
Certain
conditi ons; "Such as air trapped in the syste m, may affe ct the coolant level
in
the radiator. You sho uld ch ec k the co olant ·Ievel ·in the radiator while you
change the engine oil and the e ng ine is col d. Follow steps I , 8, 9 and 10 und er
"Coola nt Rep lacement" for the correct way to rt!move the radiator cap .an d add
. coolant.
If you have to add coola nt more than f our tim es a yea r (ei ther to th e recov ery
tank
or to the radiat or). see your dealer. for a. c oo lin g system chec k.
NOTICE: If the proper quality antifreeze is used, there is no .nee~ to add extra inhibltOf"s or additives which claim to improve the svstem .. They may be harmful to the proper operation. I)f the system.
Cooling System Service
The cooling syste m should be serviced at the intervals specifi ed inSection A of
the Maintenan ce Sch edule fold er as follows:
I. W ash the radiatqr cap .and filler neck with clean water. See step J of "Coolant
Replacement" to remove rapiator cap. .
2. C hec k the coolant level in the radiator and have it tes ted for freeze proteCtion . Add·· ethylene gly col antifreeze, if needed, to· m aintain freeze protecti on at -37'C(-34'F),
3~ Have ·the coOlin-g sys tem and radiat or cap tested fo r a press ure capacity of
105 kPa (15 psi) . If a repl acement cap is needed"Hse an AC ca'p,or an
equivalent · cap, designed fOl: coolant recovery system ·s and spe cified for your model;
4. Tighten all radiator hose clamps and heater hose clamps and inspect an hose s.
R
eplace the hose s if they are swollen, "checked" or otherwise worn .
NOTICE: Take care when tightenjng·the hose clemps at tMI radiator. Overtightening COUld. bend or collapse .the radiator fittings.
5. Clean the front. of the radiator core and air condit ioning condenser to re m ove
dirt and oth er·objects. Al so clean the auxiliary engine oil andlor transmission -fluid ' cooler if the vehicle has them.
Coolant, Replacement
At the interval s specified in Section A of the Maintenance Schedule folder, flu sh
a
nd refill the cool ing system as follows :
1. Remove the·radiat or·cap when the engin e is ·cool :
•
Turn . t he cap s lowly to the len until ·it reaches a " stop. " Do not press down while turning the cap.
• 'Wait until any rem aining press ure (indicated by a hissing sound) is
reliev ed. then press down on the cap an d continue turning it t(j the left.
CAUTION:· To help ~lVoid the danger of being ,burned, do not remove the radiator cap while the angine and radiator are still hot s.c.lding flutd and steam can be bk)wn out under pressure if the·cap is taken off.too soon.
2. Whe n the cap is re m oved, run the eng ine until the upper radiator hose is hot.
(This shows that the thermostat is open and the coola nt is flow ing through
the . system.)
5·6
•
Page 72 of 95
Downloaded from www.Manualslib.com manuals search engine LUGGAGE/CARGO LOAO CAPACITY
Maximum Luggage Compartment Load
Coupe 155 Pounds/70.2 Kilograms
Sedan 142 Pounds/64.5 Kilograms
NOTICE: Total combined weight of luggage compartment
load, luggage rack load (when-equipped) •. and passengers must not exceed the vehicle capacity weight (shown on the Tire Placard lOcated on the.left front door).
Inflation Pressure
The: cold inflation pressures listed on the Tire Placard provide for the best balance
of tire life, riding comfort. and vehicle handling under normal driving conditions.
If only one inflation pressure is recommended on the Tire Placard, this pressure
should be used for aU vehicle loading conditions. If your vehicle has two inflation
pressures listed on the placard, the "Max LDad" pressures can be used any time,
but must be used when you carry more passengers and cargo than is allowed in
the "Optional Pressures" section. The "Optional Pressures" can be used in lightly
loaded conditions by
'those who prefer the utmost in comfort. In all loading
conditions, use of the "Max Load" pressures will result in improved fuel economy.
Incorrect tire inflation pressures
can have adverse effects on tire life and_vehicle performance. Too Iowan" air pressure·"causes increased tire flexing and heat
build-up. This weakens the tire and increases the chance of damage or failure. It
can result in tire overloading, abnormal tire wear, adverse vehicle handling, and
reduced fuel mileage. 'I'oohigh
an air pressure can result in abnormal wear, harsh
ride, and also increase the chance of dar:nage from road hazards.
Tire inflation pressures should be checked (this includes the spare tire, unless it
is a stowaway spare) and whenever your vehicle is serviced. Always checJ<.,tire
inflation pressures when tires are "cold."
1. The "cold" tire inflation pressure applies to the tire pressure when a vehicle
has
not· been driven more than-one mile (1.6 kilometers) after sitting for three
hours or more.
2. It is normal for tire pressures to increase 30 to 60 kilopascals (4 to 8 pounds
per square inch)
or more when the tires become hot from driving. Do not "bleed" or reduce tire inflation pressures after driving your vehicle. Bleeding
reduces the
"cold" inflation pressure and increase tire flexing, which can
result in tire damage and failure.
3. FOr sustained driving at speeds of 75 mph to 85 mph (120 km/h to 140 km/h),in countries where such speeds are permitted by law, cold
inflation pressures must be increased
30 kPa (4 psi) above the cold inflation
pressures stated on the Tire Placard up to the maximum for each load
range stated in
the_ chart below.
Sustained speeds of 75 mph to 85 mph (120 km/h to 140 km/h) ARE
NOT ADVISED when the 30 kPa (4 psi) adjustment would require pressures greater than the maximum for each load range stated on the chart. Sustained
driving at speeds over 85 mph (140 km/h), where permitted by law. IS NOT ADVISED unless your vehicle is equipped with special high speed tires
available from many tire dealers.
4. Forproper inflation pressures when towing trailers, see page 1-11 in this
manuat
5-11
Page 75 of 95
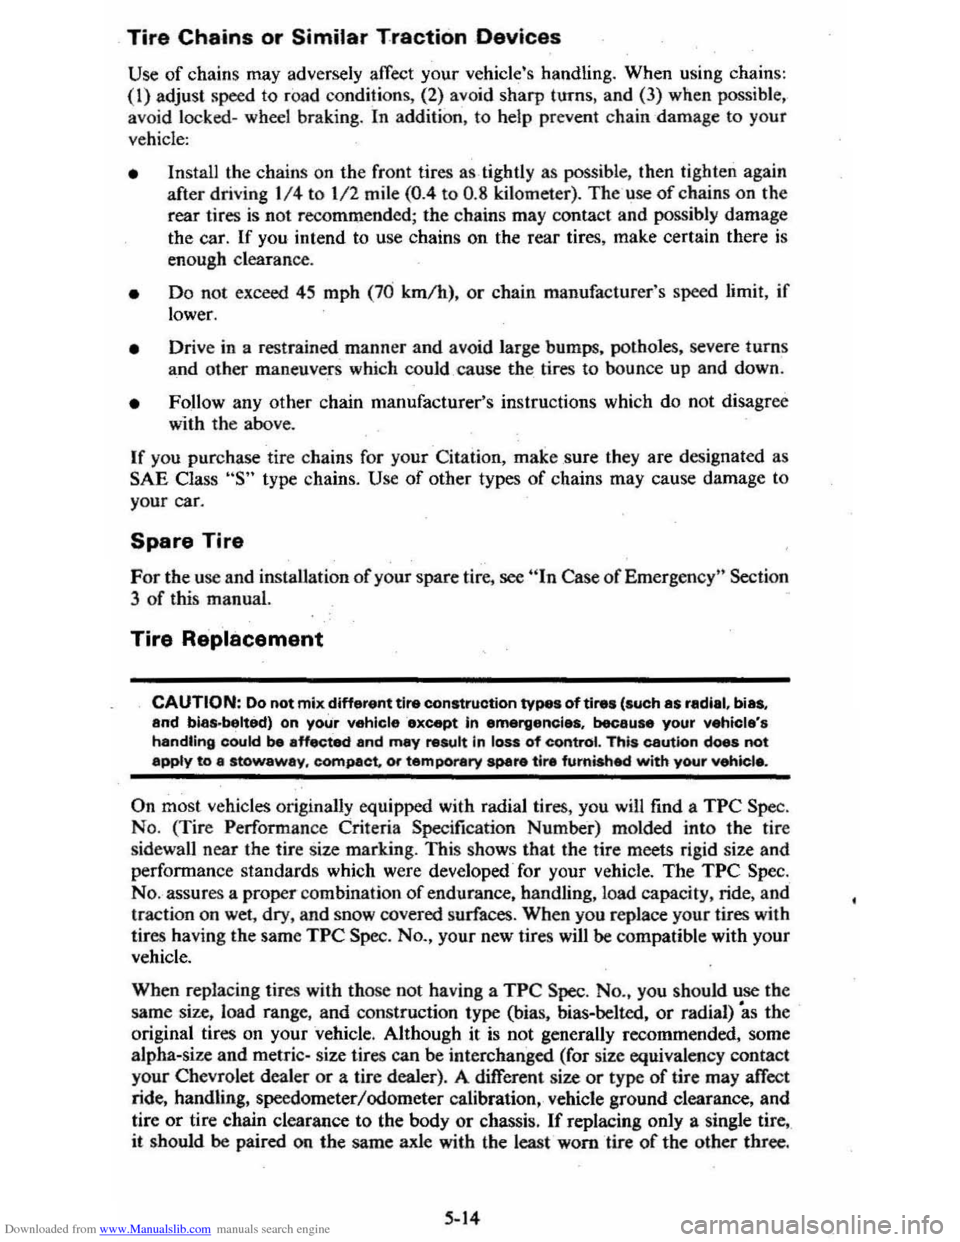
Downloaded from www.Manualslib.com manuals search engine Tire Chains or Similar Traction Devices
Use of chains may adversely affect your vehicle's handling. When using chains : (I) adjust speed to roa d conditions, (2) avoid sharp turns, and (3) when possible,
avoid
locked-wheel braking . In addition, to help preve nt chain -damage to your
vehicle:
• Install the chain s on the front tires as tightly as possible, then tighten again
after driving 114 to 1/2 mile (0 .4 to 0 .8 kilometer). The use of chains on the
rear tires is not recommended; the chains may contact and possibly damage
the
car. If you intend to use chains on the rear tires , m ake certain there is
enough clearance.
• Do not exceed 45 mph (76 km /h), or chain manufacturer's speed limit, jf
lower.
• Drive in a restrained manner and avoid large bumps. potholes, severe turns
and other maneuvers which could cause the tires to bounce up and down .
• Follow any other chain manufacturer's instructions which do no t disagre e
with the above.
If you purchase tire chains for your Citation, make sure they are designated as
SAE Class "S" type chains. U se of other types of chains may cause damage to
your car.
Spare Tire
For the use and installation of your spare tire, see "In Case of Emergency" Section
3
of this manual.
Tire Replacement
CAUTION: Do not mix different tire construction types of tires (such as rediel, bias, and bias.belted) on your vehieleexcept in emeruencies, because your vehicle's handling could be affected and may result In loss of contrOl. This caution does not a~y to 8 stowaway. compact,. or temporary spar. tlr. fumished with your vehtcle.
On most ve hicles originally equipped with radial tires, you will find a TPC Spec.
No. (Tir e Performan ce Criteria Specification Numbe-r) molded into the tire
sidewall ne
ar the tire size marking. This shows that the tire meets rigid size and
performanc e standards which were developed -for your vehicle. The TPC Spec.
No. assures a proper combination of endurance, handling, load capacity, ride, and
traction on wet , dry, and sn o w covered surfaces . When you re place your tires with
tires having the same
TPC Spec. No., your new tires will be co mpatible with your
vehicle.
When replacing tires with those not having a
TPC Spec. No., you should use the
same size, load range ,
and construction type (bias, bias-belted, or radial) "as the
original tires on your 'vehicle. Although it is not generally recommended. some
alpha-size and metri c- size tires can
be interchanged (for size equivalen cy contact
your Chevrolet dealer or a lire dealer). A different size or type of tire may affect
ride, handling, speedometer /odometer calibration, vehicle ground clearance, and
tire
or tire chain clearance to the body or chassis . If replacing only a single tire,
it should be paired on the same axle with the least worn tire of the other three.
5·14
Page 83 of 95
Downloaded from www.Manualslib.com manuals search engine . SECTION 7
SPECIFICATIONS
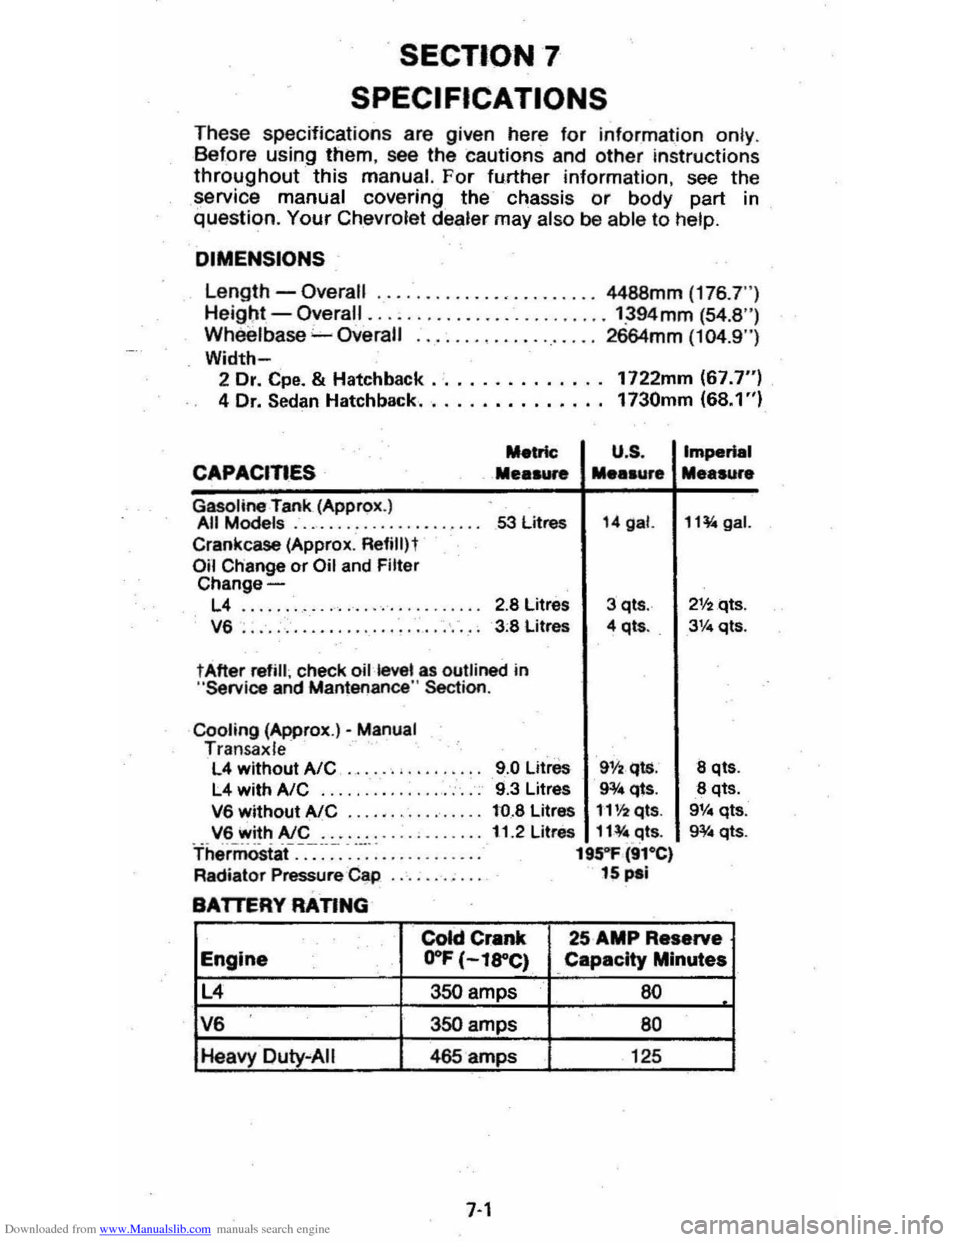
T hese specifications are given here for information on ly . B efore using them, see the cautions and other instructions
throughout this manual. For fu.rther information , see the
service manual covering the chassis or body part in question. Your Chevrol et dealer may also be abl e to help.
DIMENSIONS
Length -Overall ......... , •.... , •...... 4488mm (176 .7")
He igl;lt -Overall ......................... ':394mm (54.8 ") Wh eelbase "-Overall ................... 2664mm (104.9")
Width-2 Dr. Cpe. & Hatchback .· ............. 1722mm (67.7") 4 Dr. Sedan Hatchback.. . . . . . . . . . . . .. 1730mm (68.1 ")
Metric U .S .
CAPACITIES Mea .... .... .ur.
Gasoline rank (Approx.) All Models .................... 53 litres 14 gal.
Crankcase (Approx . Refililt Oil Change or Oil and Filter Change-
L4 ........ ........... '. ' .. ... 2.8 Litres 3 qts .
V6 . . . . . , . . . . . . . . . . . . . . . . . . . . . . 3 :8 Litres 4 qt • . .
t After refill ; check oil kwel as outlined in "Service and Mantenance " Section .
Cooling (Approx.)· Manual Tran sa x le L4 without AlC ..... . , .. .
L4 withA/C .... ... ........... .
V6 without AlC ...... ...•...... V6 with AlC ....... . Thermostaf.-.-:~-~-. -....... : ....... .
Radiator Pressure Cap
BATTERY RATING
9.0 Litre. 911 •. qls. 9.3 Litres 9¥4 qts.
to.8 Litres 1'1'12 qts.
11.2 Litres 11¥ " .c:Jts. 195"1' (91·e) 15 pal
Imperial
Me.sure
11~gal.
21f2qts .
3Ve qts.
8 qt •.
8 qts. 9V .. qts.
g¥ .. qts.
colci Crank 25 AMP Reserve
Engine .. O"F (-l8"C) Capacity Minutes
L4 350 amps 60
V6 350 amps 80
Heavy Duty "AIi 465 amps 125
7-1
Page 88 of 95
Downloaded from www.Manualslib.com manuals search engine Air Cleaner ...... . Air Conditioner
Automat ic ............ . Malnt.nance Air Pre •• ur •. Tire .... A ir Vents ..... Alternator (GEN) Light .. Aluminum Car •.. AM or AM·fM R.dios ..... Antifra.z . ..... ......... .......... . App.aranc. Car ...... Ashtrays & l ighters. Assi.tance. Owner .. Autom.tic DOOf lOCks
Autom.tic: Trann.l. Malnt.mimc. Operation .. Operating Tip$ ..... Axl. , Drive .. Sabies, Reatraint of . San Joints S.ttary
5-8
2 -
22 5·10 5·11 2·21 2·17 .-. 2·24 (S •• "Coolant") '-1 2-20 0-1 1-2
5-. ,-a 2 ·10 5-8 1·10 5-8
Em.rgency SIIHting.. 3-1 Fr •• dom .... 5·9 G •• Caution... 3-1 ; GEN Light ... 2·11 T •• t Indicator... 5·9 Befortl Oriylng Your V.hicle ,., Belt •. Seat .... M. (S .. "Seat Baits",
Blower, H.at.r &. Air Cond.... 2-20 Body Oamag... 4·4 Brak.s Adjustment P.dal Trav.l Traller 'Towing .. Warning Light Bre.ka,., Circuit
Break·ln Period, N.w V.hicl •... Bright Headlights .....
2-14 2·14 1 -11 2·17 7-4 2-' 2·7,2·14 4-4 1 -3.7·4 1-12 3-6 {S •• "Sound"l 2·18, 5-2
Bright Metal CI.aning ......... .. Bl,llbs lit Fu ••• Bumpe ... lit Hitch ••.. 81,1mper Jack Operetion Bun.r •.. C·4 Syst.m .. C •• Coolant RaeoV.ry Tenk .. FI,I.I. Powar St •• ring .... R.diator ..... . Cap.city. Cargo W.ight ... .•. Cap3Cme •. Fluid .. C.r Br.ak·ln Period , N.w ..... . C.r Chemic. I ......... .. C.rbon Monoxid. Caution
'-5 Inside Back Cover .-a '-7 6-12 7-1 2-' '-7 '-1 C.r. &. CI.aning, Appear.nce 4-1 C.rgo Capacity. 5-10 Cargo on Roof, C.rrying.. ......... ............... 1·3 CargoR.ck, Roof ..... 2·29 Cargo Coyer .. ................ ........... 2-27 CATALYST Indic.tor..... 2 ·18 C.t.lytic Conv.n.r C ·4 System ......... . Chains, Tir • ..... Ch.nging Whe.'s • Tiras .. Ch.rging Systam Indicator .... CHECK ENGINE light..
2·18,5--2 5·14 3-6 3-2 2-18, 5-2
7-6
Checklist. Driver ....... . Child Seats lit Ra.traint •.. Chrome Protection .. Cigarette lightar .... Circuit Breakars . Citizens Band Radio ... " .... " .... " .. M ••••••• Cleening .. Clock
Cloth Trim Car." .. Clutch Pedal Adjl,lstment.. .. Cold Welther Stlrting ..... Compla int Procedure ..
1-1 1-10 .-. 2·20 7-' 2·2 ~ 4-1 2·20 .-, 5-8 '-a 6-1
Conditionar, Air ....... (See "Air Conditi on.r") Con.umer Relations... 6-1
Cony.)! Mirror ... C ooling System Antifraet. ICoolant, .. Overheating .. Recovary Tank .. S.rvice .. Thermostat .. CorrOSion Protection Countries. Oper.ting in Foraign ..... Cruise Control .. Cu.tomer Sarvice .. Oamage. Sheet M.tal...-. D.fogger. Rear Window. Defro.hlT , Windshiflld .. Oalay Wipers .. Descend .ing a Grade Trail.ring .. Dimen.ion. Dimmer Switch, H.adlight Dipsticks
Engine Oil .. Power Staering .. Diractional Sign." .... . Oi.c Br~ ••.. Door lock ......
Drrve lOOe
1-3
'-5 3-3 5-S '-5 5-7 .-. 2 -3 2·12 6-1 '-5 2-21 2 -20, 2·23 '-7 '-8 1-11 7-1 2-14
'-3 .-a ,-u 2·1S 1-2 5-8 Driver Checklist.... 1·1 Driving Down Steep Gr.de........ 2·9 In Ou.ty Ar......... 5·3 on Slippery Surfaces ....... .......... ,.... 2·9 Ec;Gnomy Tips , Fu" 2·4 Electric-Powered Option...... (See "Power")
Ele<:tricel System 8IttMY ... ... .
Bulbs ...... .
Circuit Brlak.rs. , .... GEN (Glnerator) light ...... Jump Scarting .. .. Sparil Plugs .. Voltm.ter ... Erne:rg.ncy , In Ca •• of Brak. Warning Light Engine Hot light .. Freeing Vahicle When Stuck ... Hazard Warning Fla.h.r .... J.cking ..... Jump 51anlng._. Towing Clr. Emission Caution .................................. . Emi .. ion Control CAT AL YST Indicator
5-S 7-3 7-. 7-' 2·17 3-1
7-2
2·19
2·17 2·17 3-7
3-1
3 ·4 .3·5 3-1
3-7
'-1
2·19
,
Page 90 of 95
Downloaded from www.Manualslib.com manuals search engine Switch Headlights .... TEMP (Temperature) .. Locks Door ...
2~19 2-17 1-2
Ignition ............................................. .. 2-5 1-1 2-2
2-25 Keys .. Theft Protection .. Lowering Seats .. Love Seat, Child & Infant: .. Lugglige/Cargo Capacity ... Luggage Rack ... Maintenance Record .. Maintenance Schedule .. Manual Transaxle Clutch Adjustment. .. .
1-10 5-11 2·29 7-12 5-.1
Maintenance ........................................... . 5-8
5-8
2-11
2· 10 2-12 4-1 4-5
1-3
Operating Tips .. Operation .. Shift Speeds. Metal Cleaners .. Metal Damage, Body ... Mirrors, Rearview .. Mobile Radios-. Monoxide Caution, Carbon .. . 2-25 2-1
2-1 2-2
2-2
2-15 Muffler ............................................... . New Car Break-In Period Octane Rating, Gasoline ... Odometer Oil, Engine Capacity .. Change Interval.. Dipstick ... Filter ... PreSsure Gage .. Pressure Light... Recommendation (Gas) .. OIL Light.. Openings, Roof... Opening The Hatchback ... Hood .. Windows ..
6-.1 5-3 (inside Back Cover) 5-3,7·1 2·1-9 2-17
5-3
2-17 (See "Roofs")
2·26 (Inside Back Cover) 1-5 Operating Speeds, New Car... 2-2 Operating Tips Fuel Economy.. 2-4 Trailer Towing.. 1-13 Transaxle... 2-9 Ventilation System.. 2.20 Operation in Foreign Countries.. 2"3 Outside Rearview Mirror.. 1.3 Overheating, Engine.. 3-3 Overseas Operation.. 2.3 Owner Assistance.. 6-1 Owner's Record... 7-11 Oxygen Sensor., 5.2 Paint Care.. 4-4
Paint Damage .. Parking;. Parking Brake .. Parking Lights .. PCV Valve & Filter .. Peda'·TI"avel, Brake ... Pedal Travel, Clutch .. Polishing & Waxing .. Pollution Control Power
4-' 2-. 2-14 7-3 7·2 2-14 5~8
.-. (See "Emission Contron
7-8
Antennas Brakes .. Door Locks .... Seats ... Steering Pressure, Oil Light ... Pressure. Tire Inflation ... Pulse Wiper ...
2-25
2-14
1-2 1-' 2·12
2-15
5-11
2-7
Pushing to Start ................................ .. 5-2 Radiator Antifreeze (Coolant) .. Cap, Prassure .. Checking Level .. Overheating .. Thermostat...
Radios & Antennas ... Raising Seats ... Rear Cargo Cover ...................... .. Compartment .. . Window Defogger .. Trailering .. Rearview Mirrors .. Reclining Seats .. Recovery Tank, Coolant .. Release
Hatc.hback
Hood .. Seatback Latch ... Reminder Lights ....
Replacement Fasteners
5-5 5-. 5-5 3-3 5-7
2-23 -2-25
2-25
2-:27
2-2,2-28 2-21 '·11 1-3 1-' 5-5
2-25 (Inside Back Cover)
1-' (See "Lights") 5-1
5-1 Replacement Maintenance Schedule .. Raplacement Owner's·Manual... 7-13 Replacement Parts ............. ....................... 7-2 Restraints .. Rocking Car When Stuck .. Roofs Carrying Cargo On ... Luggage Carrier .. Rack .. Vinyl .. Vista-Vent. ... Rotation, Tire .. Rustproofing .. Rust Protection ... Sefety Belts .. Seats (See
"Seat Belts") 3-7
1-3,2-2,9 2·29 2·29
'-5 2-26 5-12
'-5 '-5 (See "Seat Belts")
Adjustment.. 1-4 Child... 1-10 Folding.. 2-25 Latches..
1-5 Reclining.... . '-4 Seat Belts Care.. 4.3 Child Restraint ............................................ 1.10 Inspection.. 1-10 Lap/Shoulder.. 1-6 Light/Buzzer Reminder... 1;8 Pregn~nt Women .. Rear Seat. ... Self-Adjusting Brakes .. SENSOR Indicator ..
1-8 2-25 2-14 2-18,5-2 Sensor, Oxygen.... 2-18,5-2 Service & Maintenance.. 5-1 Service Station Information (InSide Back Cover) Sheet Metlll Damage... 4-5
Page 91 of 95
Downloaded from www.Manualslib.com manuals search engine ,
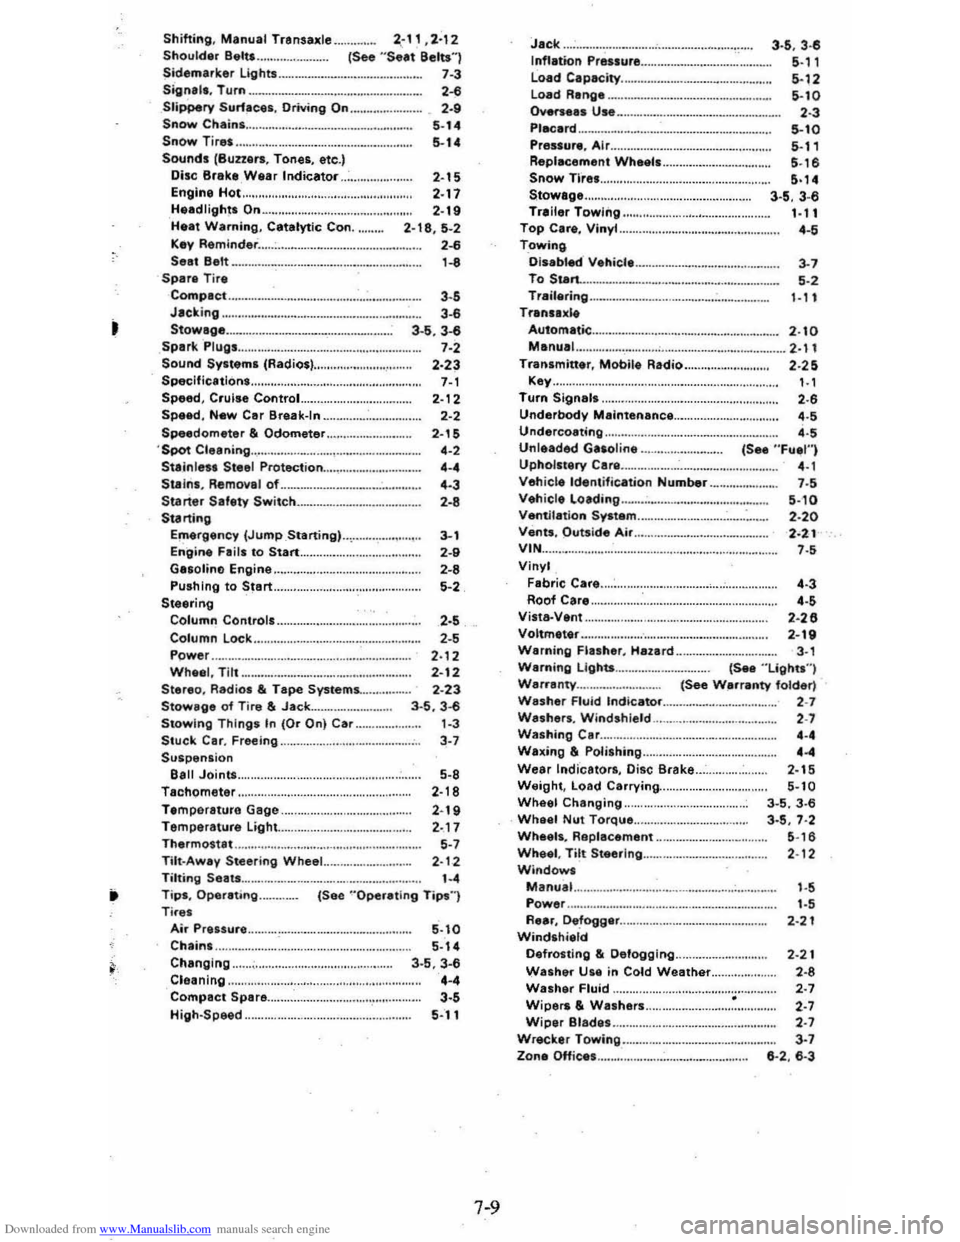
Shifting, Manual Transaxle .. Shoulder Beltt .. 2~1 1 ,2'12 (See "Seat Belt$"J Sidematker lights Signala, Turn ...................... 7·3 ......... ... . . ..........•...•. 2-6 Slippery SUffices. Driving On .. Snow Chains Snow Tires Sounds (Buzzers, Tones, etc.)
, .. 5·14 5-14
Disc Brake Wear Indicator .... 2-15 Engine Hot... 2-17 Headlights On ................. ....................... .... 2-19 H .. t Warning, Catalytic Con. 2·18 ,5-2 Kay Reminder . .................................. ...... 2-6 Sell eelt 1-8 Spar. Tire Compact .......................... 3 .5 Jaeking .... ............................. .. . 3-6 Stowage ...................... _ ....... ........ .......... 3·5. 3-6 Spark Plugs .. .......... .......................... ........... 7-2 Sound Systems (Radios). 2.23 Speclficllions.. ...................... 7-1 Speed, Cruise Control.................... . 2-I 2 Sp .. d, New Car Break-In ............................. 2-2 Speedometar & Odometar ... 'Spot Cleaning
Staln le .. Steal Prtltect ion ........ .. S .. ln •• Removel of Staner Safety Switch .............. _ ..... . Starting E",ergency (Jump Staning) Engine F.ill to Stan ................ .............. ..
2-15 ,.,
,.,
'·3 ' ·8
Ga.olino Engine.. . .......................... .
3·, , ..
'·8 5·' Pushing to Start .. Steering Column Contrail ..................... .................. . '·S '·5 2·12 2 -12 2·23
Column Lock .. Power ......................... . Whee l, Tilt ......... ........................ ....... .. Siereo, Radiol & Tape Systems. Stowage of Tire & Jack ... Stowing Things In (Or On) Car .. Stuck Car. Freeing .. Suspenlion eall Joints ................................ ....... .. Tachometer ........ ................................ ....... .
3 ·5 . 3-6 ,·3 3·'
5·8 2·18 Temperature Gage .................. ............... 2-19 Temperature Light. .. 2 ·17 Thermostat ......... ....... ....... 5-7 TiIt·Away Steering Wheel.. 2 ·12 Tilting Seats... '·4 T ip', Operating.. (See "Oper.tlng Tips ") Tire.
Air Preuure ..... ......... ................................ . Ch.in •... Ch.nglng .. Cle.nlng .. Compacl Spara ......................... ....... . High·Speed ..
5·10 5-14 3·5,3-6 '·4 3·S 5-11
7-9
Jack 3-5 , 3·~ Inflation Pre .. ure ................. .... ......... ........ 5·" Load Capacity ............................. 5-12 Load Range 5-10 Overse •• Use ... 2-3 Placard ... Pres.u,., A ir ..................... ....................... . Repl.cement Wh.ell ............................ . . Snow nte ........... . Stow.ge ............... . Trailer Towing .. Top C.r., Vinyl ..
TowinQ
Disabl-.:t V.hicle To S .. rt. Tr.il.ring ....... . Tr.n.ax'"
5·10 5 ·1, 5,,6 5·14 3·$ ,3-6 1 ·11 4.'
3·'
S ·'
1·11
Autom.tic...... .......... .. .............. ....... 2.10 Manu.l.. . ...... ; . ................... .................. 2 .' 1 Tr.nlmitt.r, Mobile Radio 2 .25 Key. . ..................................... . ..... 1.1 Turn Signall.... ................................................. 2.6 Underbody Maintenance ............................... 4.5
Undercoating... ... ................................. ............ 4.5 Unleaded G •• oline (See "Fu~1") Uphollt.ry Care ................... ... 4 .1 Vehicle ldentifi~tion Number ._............. 7 .5 Vehicl. Lo.ding .. _ Ventil.tion System .. Vents , Outside Air ... V'N Vinyl F.bric C.r •.
5·10 2·20 2 .21 ' ·S
Roof Care ................. ................................. ..... . '·3 ,., Vilta-V.nt ....... . Voltm.t.r .. 2 ·26 2·'V 3 ·' Warning Flasher , Hazard .. Warning Lights ... W.rr.nty .... (See "Light.")
Washer Fluid Indicator W.shers. W indshield. Washing C.r ....
(See W.rranty folder) ,.,
, .,
, ., W.xing & P olilhing .. Wear lndi'c.tor., Disc Srake .. Weight, Load Carrying ... Wheel Changing .. Whaal Nut Torque .. Wh.el., Repllcement ........................ _ .. Wheal, Tilt Sleerlng ... Windows M.nu. 1 Power , ... , ............................. ..................... . . RUr, De.fogg.r .. . Windshi.ld Defrosting &; Defogging .. W.sher Ule in Cold Weather ... Walh.r Fluid .. Wipers & Wa.hers .. Wiper Blades .. Wreck.r Towing .. Zona OHic.s ......... " ............... ....... .
'·4 2·15 5 ·10 3 ·5 ,3 ·6 3 ·5 , 7·2 5 ·16
2 ·12
'·S
' ·S
2 ·2t
2·21
2 ·8
,., , ., , .,
3 ·' 6 ·2 . 6·3