trunk CHEVROLET CLASSIC 2004 Owners Manual
[x] Cancel search | Manufacturer: CHEVROLET, Model Year: 2004, Model line: CLASSIC, Model: CHEVROLET CLASSIC 2004Pages: 348, PDF Size: 5.32 MB
Page 12 of 348
Head Restraints
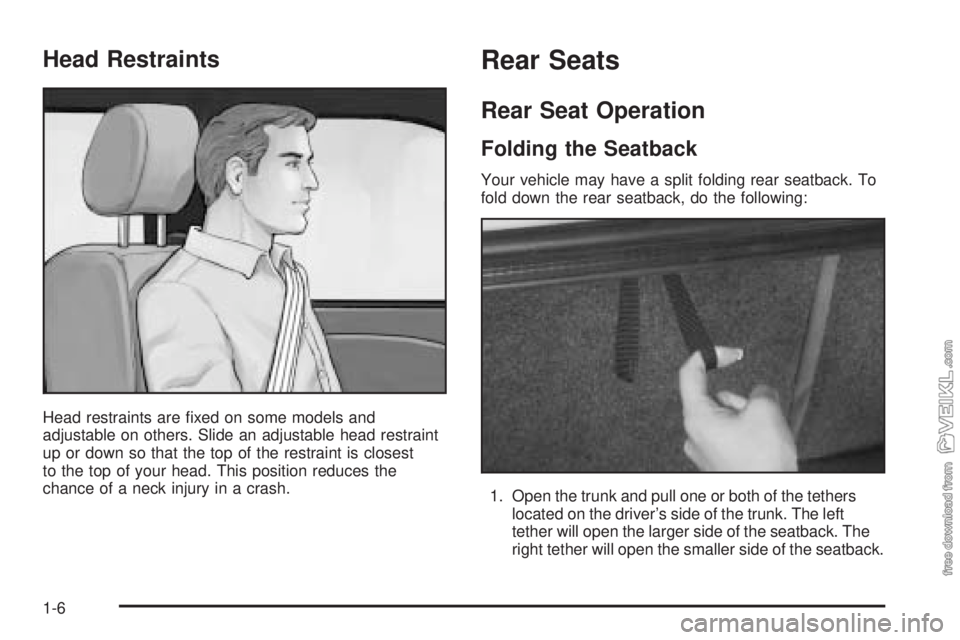
Head restraints are fixed on some models and
adjustable on others. Slide an adjustable head restraint
up or down so that the top of the restraint is closest
to the top of your head. This position reduces the
chance of a neck injury in a crash.
Rear Seats
Rear Seat Operation
Folding the Seatback
Your vehicle may have a split folding rear seatback. To
fold down the rear seatback, do the following:
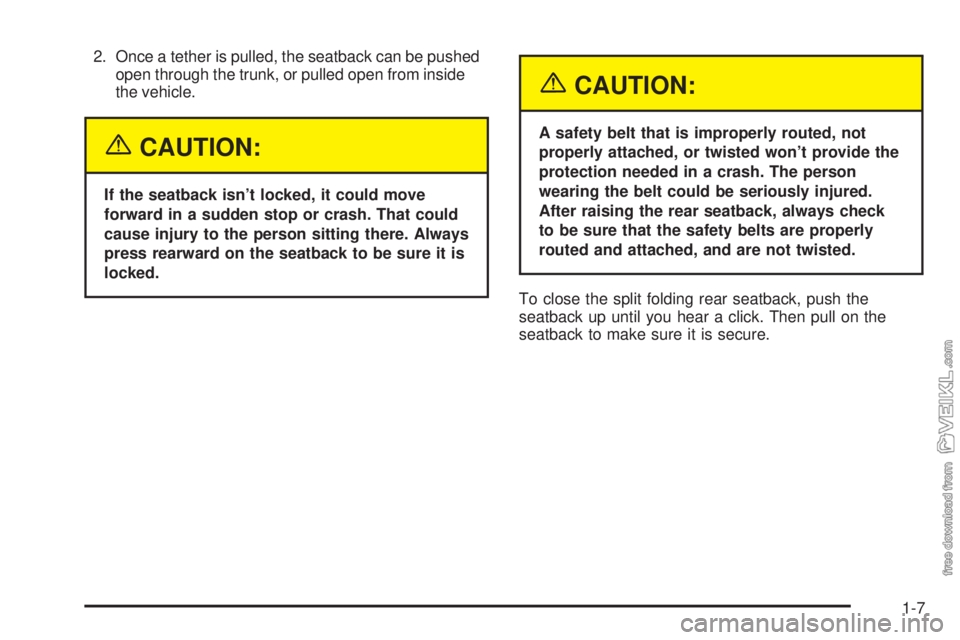
1. Open the trunk and pull one or both of the tethers
located on the driver’s side of the trunk. The left
tether will open the larger side of the seatback. The
right tether will open the smaller side of the seatback.
1-6
Page 13 of 348
2. Once a tether is pulled, the seatback can be pushed
open through the trunk, or pulled open from inside
the vehicle.
{CAUTION:
If the seatback isn’t locked, it could move
forward in a sudden stop or crash. That could
cause injury to the person sitting there. Always
press rearward on the seatback to be sure it is
locked.
{CAUTION:
A safety belt that is improperly routed, not
properly attached, or twisted won’t provide the
protection needed in a crash. The person
wearing the belt could be seriously injured.
After raising the rear seatback, always check
to be sure that the safety belts are properly
routed and attached, and are not twisted.
To close the split folding rear seatback, push the
seatback up until you hear a click. Then pull on the
seatback to make sure it is secure.
1-7
Page 71 of 348
Keys...............................................................2-2
Remote Keyless Entry System.........................2-3
Remote Keyless Entry System Operation...........2-4
Doors and Locks.............................................2-7
Door Locks....................................................2-7
Power Door Locks..........................................2-8
Door Ajar Reminder........................................2-8
Delayed Locking.............................................2-8
Programmable Automatic Door Locks................2-9
Rear Door Security Locks..............................2-10
Lockout Protection........................................2-11
Leaving Your Vehicle....................................2-11
Trunk..........................................................2-11
Windows........................................................2-14
Power Windows............................................2-15
Sun Visors...................................................2-15
Theft-Deterrent Systems..................................2-16
Passlock
®....................................................2-16
Starting and Operating Your Vehicle................2-16
New Vehicle Break-In....................................2-16
Ignition Positions..........................................2-17Starting Your Engine.....................................2-18
Engine Coolant Heater..................................2-19
Automatic Transaxle Operation.......................2-20
Parking Brake..............................................2-23
Shifting Into Park (P).....................................2-24
Shifting Out of Park (P).................................2-26
Parking Over Things That Burn.......................2-26
Engine Exhaust............................................2-27
Running Your Engine While You Are Parked.......2-28
Mirrors...........................................................2-29
Manual Rearview Mirror.................................2-29
Outside Remote Control Mirrors......................2-29
Outside Power Mirrors...................................2-30
Outside Convex Mirror...................................2-30
Storage Areas................................................2-31
Glove Box...................................................2-31
Cupholder(s)................................................2-31
Center Console Storage Area.........................2-31
Garment Hooks............................................2-31
Section 2 Features and Controls
2-1
Page 75 of 348
V(Remote Trunk Release):Press the remote trunk
release button to unlock and release the trunk lid.
You can open the trunk with the transmitter when the
vehicle speed is less than 2 mph (3 km/h), when
the parking brake is engaged, or when the ignition is off.
The interior lamps will come on for 10 seconds or
until the ignition is turned to ON.
L(Remote Alarm):Press this button for the horn to
sound and the headlamps and the parking lamps to flash
for up to two minutes. The interior lamps will come on and
remain on while the horn is sounding and the lamps are
flashing. Press the remote alarm button again, or turn the
ignition to ON, to turn off the horn and lamps.
Programmable Horn Chirp
When you use the remote keyless entry transmitter to
lock the doors or use the delayed locking feature
the parking lamps will flash and the horn will chirp.
The programmable horn chirp can be disabled by
pressing and holding either of the door lock switches in
the unlock position for 10 seconds with the ignition
ON and all of the doors closed. When you hear the horn
chirp, programming is complete.
To reactivate the horn chirp feature, repeat the above
procedure.
Matching Transmitter(s) to Your
Vehicle
Each remote keyless entry transmitter is coded to
prevent another transmitter from unlocking your vehicle.
If a transmitter is lost or stolen, a replacement can
be purchased through your dealer. Remember to bring
any remaining transmitters with you when you go to
your dealer. When the dealer matches the replacement
transmitter to your vehicle, any remaining transmitters
must also be matched. Once your dealer has coded the
new transmitter, the lost transmitter will not unlock
your vehicle. Each vehicle can have a maximum of four
transmitters matched to it.
2-5
Page 81 of 348
Lockout Protection
Lockout protection is intended to provide additional
security and convenience. While any door is open and
the key is in the ignition, the doors cannot be locked
by using the power door locks.
To override this feature, while the key is in the ignition
and any door is open, press and hold down the
power door lock switch for three seconds.
This feature cannot guarantee that you will never be
locked out of your vehicle. If the key is not in the ignition,
or if you use the manual door lock or the remote
keyless entry transmitter, you could still lock your key
inside your vehicle. Always remember to take your
key with you.
Leaving Your Vehicle
If you are leaving your vehicle, open your door and set
the locks from the inside, then get out and close the door.
Trunk
To unlock the trunk from the outside, insert the key and
turn the trunk lock cylinder. When closing the trunk
lid, push the truck lid in the center to ensure that the lock
fully latches.
{CAUTION:
It can be dangerous to drive with the trunk lid
open because carbon monoxide (CO) gas can
come into your vehicle. You can’t see or smell
CO. It can cause unconsciousness and even
death. If you must drive with the trunk lid open
or if electrical wiring or other cable
connections must pass through the seal
between the body and the trunk lid:
Make sure all other windows are shut.
Turn the fan on your heating or cooling
system to its highest speed and select the
control setting that will force outside air
into your vehicle. See “Climate Control
System” in the Index.
If you have air outlets on or under the
instrument panel, open them all the way.
See “Engine Exhaust” in the Index.
2-11
Page 82 of 348
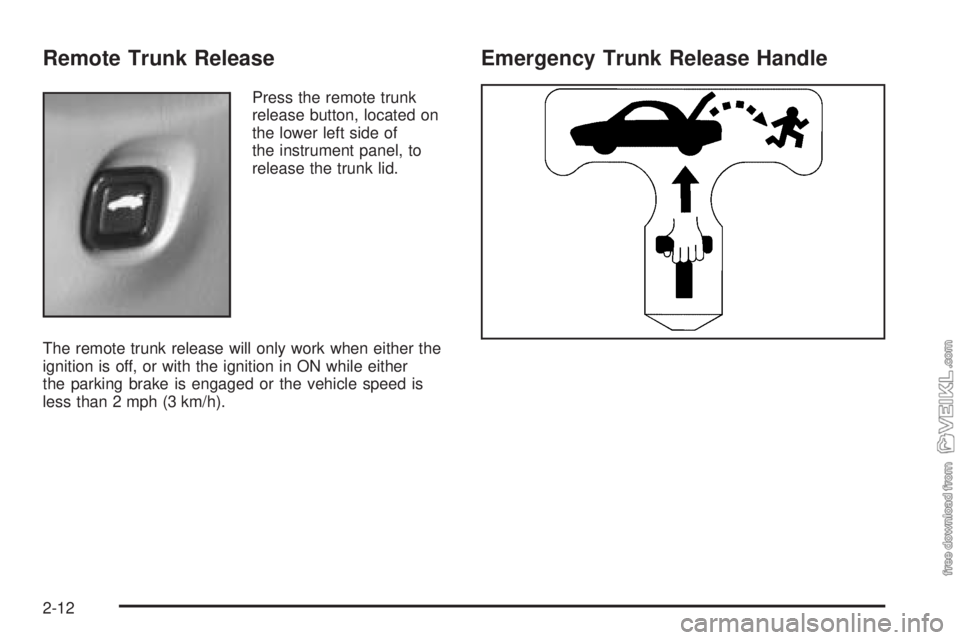
Remote Trunk Release
Press the remote trunk
release button, located on
the lower left side of
the instrument panel, to
release the trunk lid.
The remote trunk release will only work when either the
ignition is off, or with the ignition in ON while either
the parking brake is engaged or the vehicle speed is
less than 2 mph (3 km/h).
Emergency Trunk Release Handle
2-12
Page 83 of 348
Notice:Using the emergency trunk release handle
as a tie-down or anchor point when securing
items in the trunk may damage it. Use the
emergency trunk release handle only to help you
open the trunk lid.
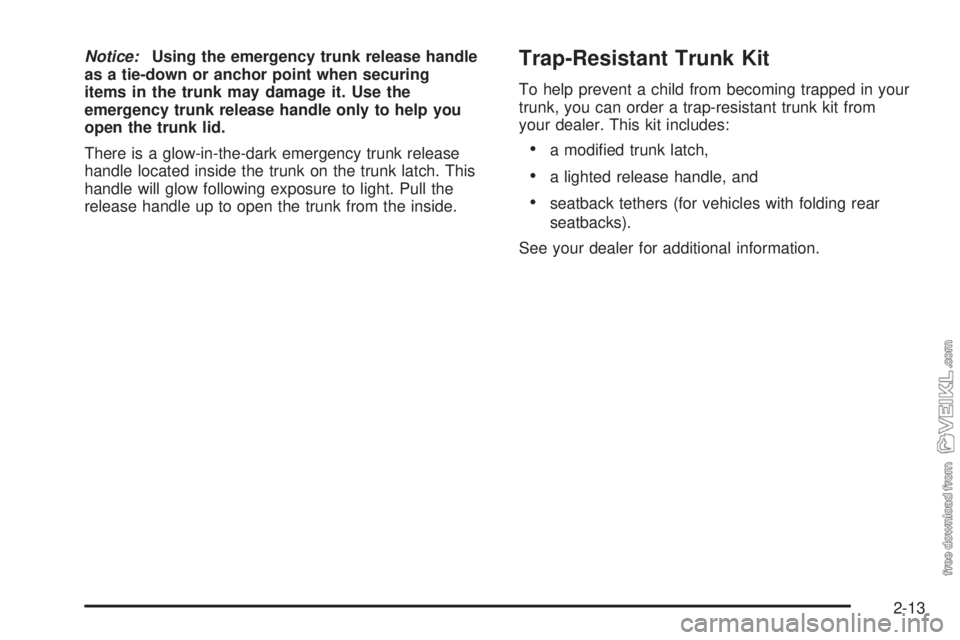
There is a glow-in-the-dark emergency trunk release
handle located inside the trunk on the trunk latch. This
handle will glow following exposure to light. Pull the
release handle up to open the trunk from the inside.Trap-Resistant Trunk Kit
To help prevent a child from becoming trapped in your
trunk, you can order a trap-resistant trunk kit from
your dealer. This kit includes:
•a modified trunk latch,
•a lighted release handle, and
•seatback tethers (for vehicles with folding rear
seatbacks).
See your dealer for additional information.
2-13
Page 105 of 348
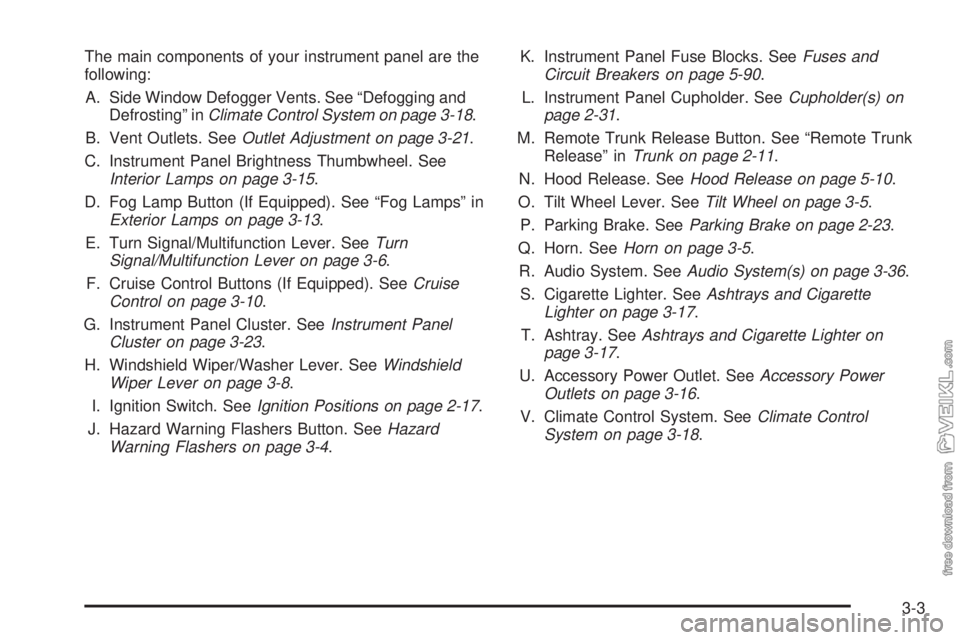
The main components of your instrument panel are the
following:
A. Side Window Defogger Vents. See “Defogging and
Defrosting” inClimate Control System on page 3-18.
B. Vent Outlets. SeeOutlet Adjustment on page 3-21.
C. Instrument Panel Brightness Thumbwheel. See
Interior Lamps on page 3-15.
D. Fog Lamp Button (If Equipped). See “Fog Lamps” in
Exterior Lamps on page 3-13.
E. Turn Signal/Multifunction Lever. SeeTurn
Signal/Multifunction Lever on page 3-6.
F. Cruise Control Buttons (If Equipped). SeeCruise
Control on page 3-10.
G. Instrument Panel Cluster. SeeInstrument Panel
Cluster on page 3-23.
H. Windshield Wiper/Washer Lever. SeeWindshield
Wiper Lever on page 3-8.
I. Ignition Switch. SeeIgnition Positions on page 2-17.
J. Hazard Warning Flashers Button. SeeHazard
Warning Flashers on page 3-4.K. Instrument Panel Fuse Blocks. SeeFuses and
Circuit Breakers on page 5-90.
L. Instrument Panel Cupholder. SeeCupholder(s) on
page 2-31.
M. Remote Trunk Release Button. See “Remote Trunk
Release” inTrunk on page 2-11.
N. Hood Release. SeeHood Release on page 5-10.
O. Tilt Wheel Lever. SeeTilt Wheel on page 3-5.
P. Parking Brake. SeeParking Brake on page 2-23.
Q. Horn. SeeHorn on page 3-5.
R. Audio System. SeeAudio System(s) on page 3-36.
S. Cigarette Lighter. SeeAshtrays and Cigarette
Lighter on page 3-17.
T. Ashtray. SeeAshtrays and Cigarette Lighter on
page 3-17.
U. Accessory Power Outlet. SeeAccessory Power
Outlets on page 3-16.
V. Climate Control System. SeeClimate Control
System on page 3-18.
3-3
Page 117 of 348
Interior Lamps
Instrument Panel Brightness
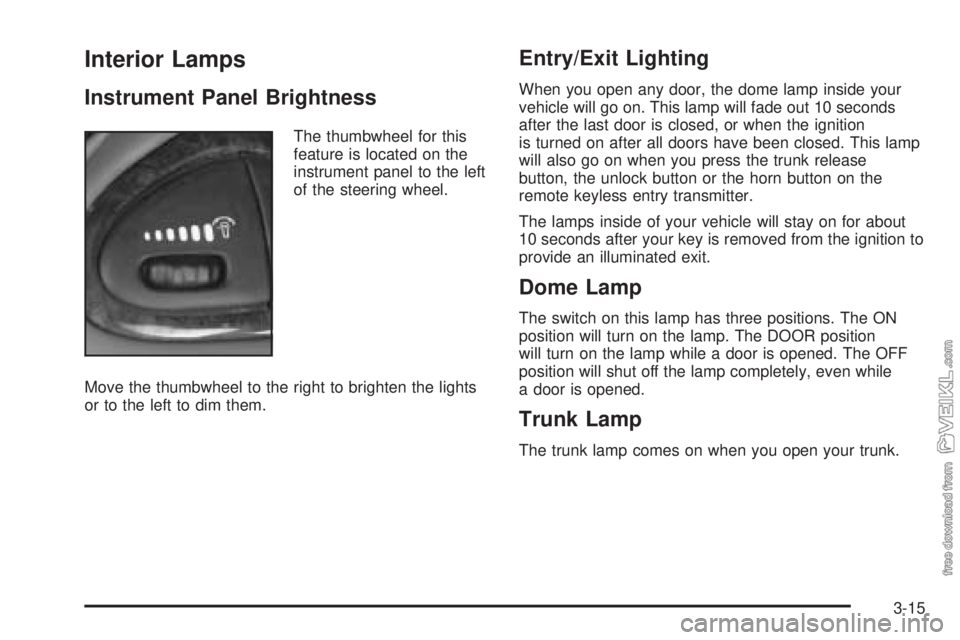
The thumbwheel for this
feature is located on the
instrument panel to the left
of the steering wheel.
Move the thumbwheel to the right to brighten the lights
or to the left to dim them.
Entry/Exit Lighting
When you open any door, the dome lamp inside your
vehicle will go on. This lamp will fade out 10 seconds
after the last door is closed, or when the ignition
is turned on after all doors have been closed. This lamp
will also go on when you press the trunk release
button, the unlock button or the horn button on the
remote keyless entry transmitter.
The lamps inside of your vehicle will stay on for about
10 seconds after your key is removed from the ignition to
provide an illuminated exit.
Dome Lamp
The switch on this lamp has three positions. The ON
position will turn on the lamp. The DOOR position
will turn on the lamp while a door is opened. The OFF
position will shut off the lamp completely, even while
a door is opened.
Trunk Lamp
The trunk lamp comes on when you open your trunk.
3-15
Page 118 of 348
Battery Run-Down Protection
Your vehicle has a battery run-down protection feature
designed to protect your vehicle’s battery.
When any interior lamp (trunk, reading, footwell, visor
vanity or glove box) is left on when the ignition is turned
off, the battery run-down protection system will
automatically shut the lamp(s) off after 20 minutes. This
will avoid draining the battery.
To reactivate the interior lamps, do one of the following:
•Turn on the ignition,
•turn the exterior lamp control off and then on,
•open a door,
•press any remote keyless entry transmitter button
(if equipped),
•press the remote trunk release button, or
•press the power door lock switch.
The battery run-down feature will also be activated
when any door on the vehicle is left open and the
ignition is in OFF.
Accessory Power Outlets
With accessory power outlets you can plug in auxiliary
electrical equipment such as a cellular telephone or
CB radio.
The accessory power outlet is located to the right of the
ashtray.
Notice:Leaving electrical equipment on for
extended periods will drain the battery. Always turn
off electrical equipment when not in use and do
not plug in equipment that exceeds the maximum
amperage rating.
Certain electrical accessories may not be compatible
with the accessory power outlet and could result
in blown vehicle or adapter fuses. If you experience a
problem see your dealer for additional information
on accessory power outlets.
3-16