CHEVROLET CLASSIC 2005 Owners Manual
CLASSIC 2005
CHEVROLET
CHEVROLET
https://www.carmanualsonline.info/img/24/55871/w960_55871-0.png
CHEVROLET CLASSIC 2005 Owners Manual
Trending: open gas tank, service reset, trunk, manual transmission, ECO mode, seats, manual radio set
Page 221 of 320
{CAUTION:
Fans or other moving engine parts can injure
you badly. Keep your hands away from moving
parts once the engine is running.
5. Check that the jumper cables do not have loose or
missing insulation. If they do, you could get a
shock. The vehicles could be damaged too.
Before you connect the cables, here are some
things you should know. Positive (+) will go
to positive (+) or to a remote positive (+) terminal
if the vehicle has one. Negative (−) will go to a
heavy, unpainted metal engine part or to a remote
negative (−) terminal if the vehicle with the dead
battery has one.
Do not connect positive (+) to negative (−)oryou
will get a short that would damage the battery
and maybe other parts too. And do not connect the
negative (−) cable to the negative (−) terminal on
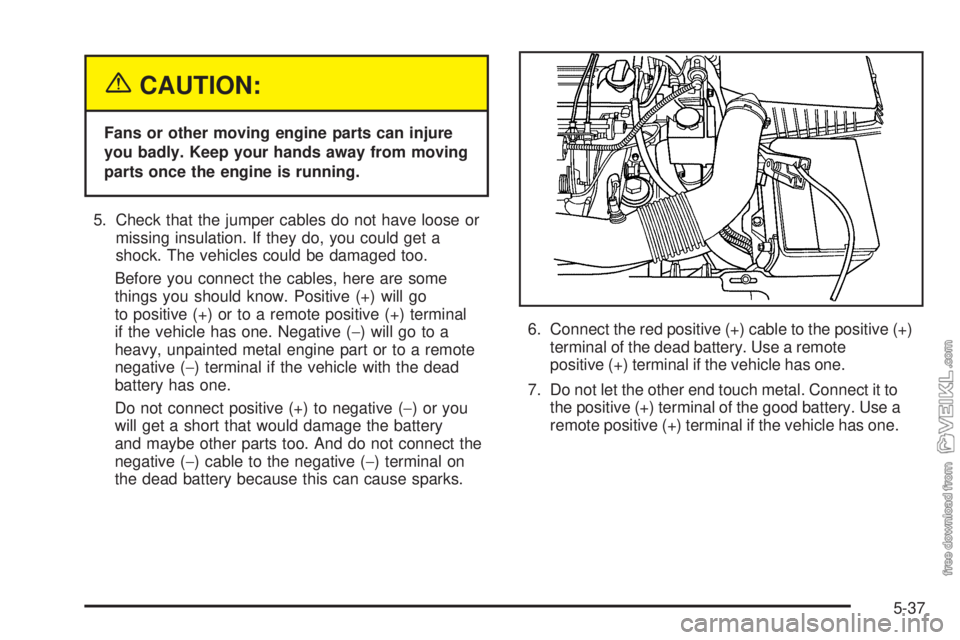
the dead battery because this can cause sparks.6. Connect the red positive (+) cable to the positive (+)
terminal of the dead battery. Use a remote
positive (+) terminal if the vehicle has one.
7. Do not let the other end touch metal. Connect it to
the positive (+) terminal of the good battery. Use a
remote positive (+) terminal if the vehicle has one.
5-37
Page 222 of 320
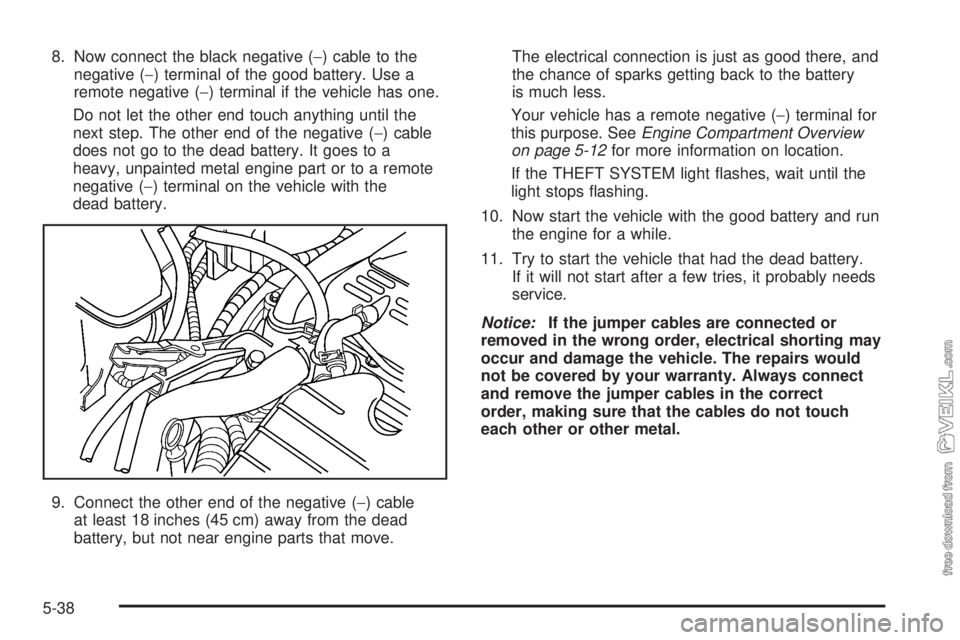
8. Now connect the black negative (−) cable to the
negative (−) terminal of the good battery. Use a
remote negative (−) terminal if the vehicle has one.
Do not let the other end touch anything until the
next step. The other end of the negative (−) cable
does not go to the dead battery. It goes to a
heavy, unpainted metal engine part or to a remote
negative (−) terminal on the vehicle with the
dead battery.
9. Connect the other end of the negative (−) cable
at least 18 inches (45 cm) away from the dead
battery, but not near engine parts that move.The electrical connection is just as good there, and
the chance of sparks getting back to the battery
is much less.
Your vehicle has a remote negative (−) terminal for
this purpose. SeeEngine Compartment Overview
on page 5-12for more information on location.
If the THEFT SYSTEM light flashes, wait until the
light stops flashing.
10. Now start the vehicle with the good battery and run
the engine for a while.
11. Try to start the vehicle that had the dead battery.
If it will not start after a few tries, it probably needs
service.
Notice:If the jumper cables are connected or
removed in the wrong order, electrical shorting may
occur and damage the vehicle. The repairs would
not be covered by your warranty. Always connect
and remove the jumper cables in the correct
order, making sure that the cables do not touch
each other or other metal.
5-38
Page 223 of 320
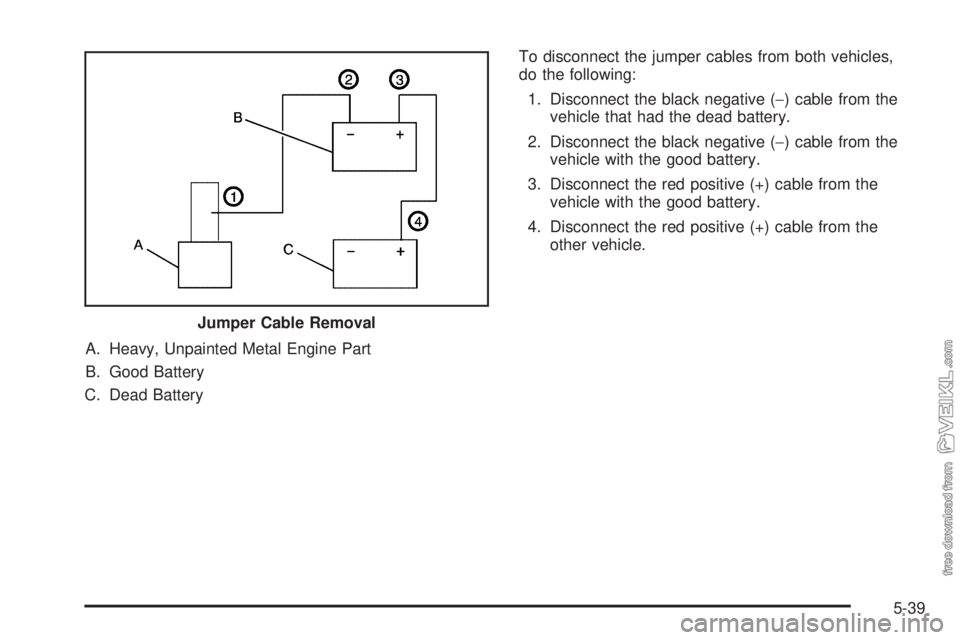
A. Heavy, Unpainted Metal Engine Part
B. Good Battery
C. Dead BatteryTo disconnect the jumper cables from both vehicles,
do the following:
1. Disconnect the black negative (−) cable from the
vehicle that had the dead battery.
2. Disconnect the black negative (−) cable from the
vehicle with the good battery.
3. Disconnect the red positive (+) cable from the
vehicle with the good battery.
4. Disconnect the red positive (+) cable from the
other vehicle.
Jumper Cable Removal
5-39
Page 224 of 320
Bulb Replacement
For the proper type of replacement bulbs, see
Replacement Bulbs on page 5-45.
For any bulb changing procedure not listed in this
section, contact your dealer.
Halogen Bulbs
{CAUTION:
Halogen bulbs have pressurized gas inside
and can burst if you drop or scratch the bulb.
You or others could be injured. Be sure to
read and follow the instructions on the bulb
package.
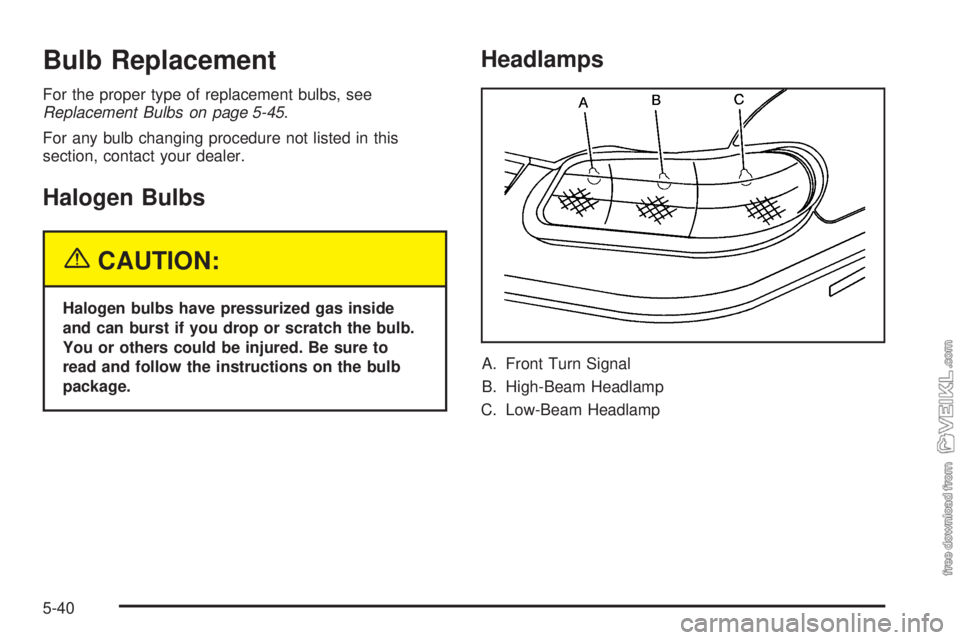
Headlamps
A. Front Turn Signal
B. High-Beam Headlamp
C. Low-Beam Headlamp
5-40
Page 225 of 320
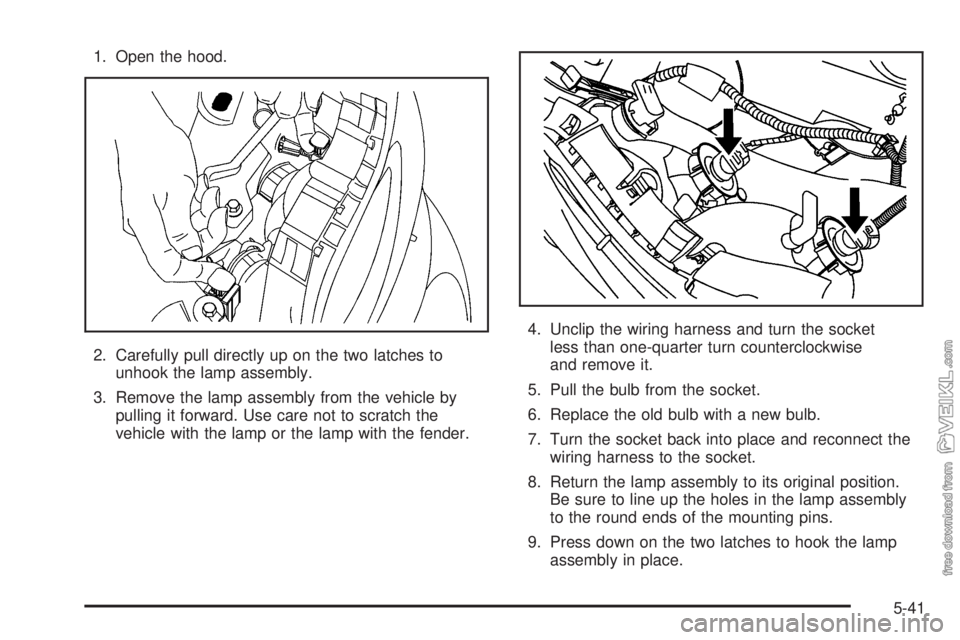
1. Open the hood.
2. Carefully pull directly up on the two latches to
unhook the lamp assembly.
3. Remove the lamp assembly from the vehicle by
pulling it forward. Use care not to scratch the
vehicle with the lamp or the lamp with the fender.4. Unclip the wiring harness and turn the socket
less than one-quarter turn counterclockwise
and remove it.
5. Pull the bulb from the socket.
6. Replace the old bulb with a new bulb.
7. Turn the socket back into place and reconnect the
wiring harness to the socket.
8. Return the lamp assembly to its original position.
Be sure to line up the holes in the lamp assembly
to the round ends of the mounting pins.
9. Press down on the two latches to hook the lamp
assembly in place.
5-41
Page 226 of 320
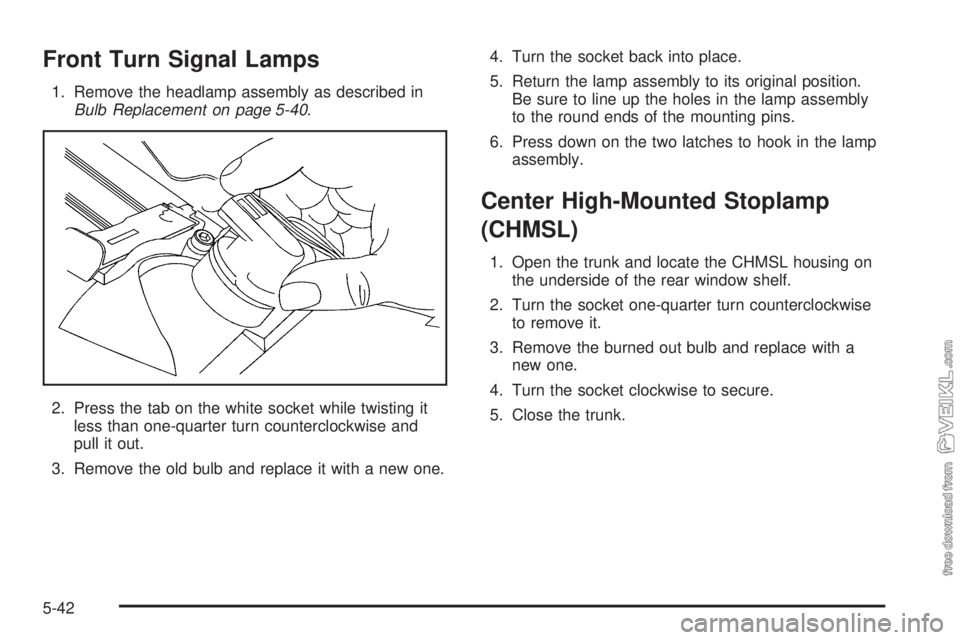
Front Turn Signal Lamps
1. Remove the headlamp assembly as described in
Bulb Replacement on page 5-40.
2. Press the tab on the white socket while twisting it
less than one-quarter turn counterclockwise and
pull it out.
3. Remove the old bulb and replace it with a new one.4. Turn the socket back into place.
5. Return the lamp assembly to its original position.
Be sure to line up the holes in the lamp assembly
to the round ends of the mounting pins.
6. Press down on the two latches to hook in the lamp
assembly.
Center High-Mounted Stoplamp
(CHMSL)
1. Open the trunk and locate the CHMSL housing on
the underside of the rear window shelf.
2. Turn the socket one-quarter turn counterclockwise
to remove it.
3. Remove the burned out bulb and replace with a
new one.
4. Turn the socket clockwise to secure.
5. Close the trunk.
5-42
Page 227 of 320
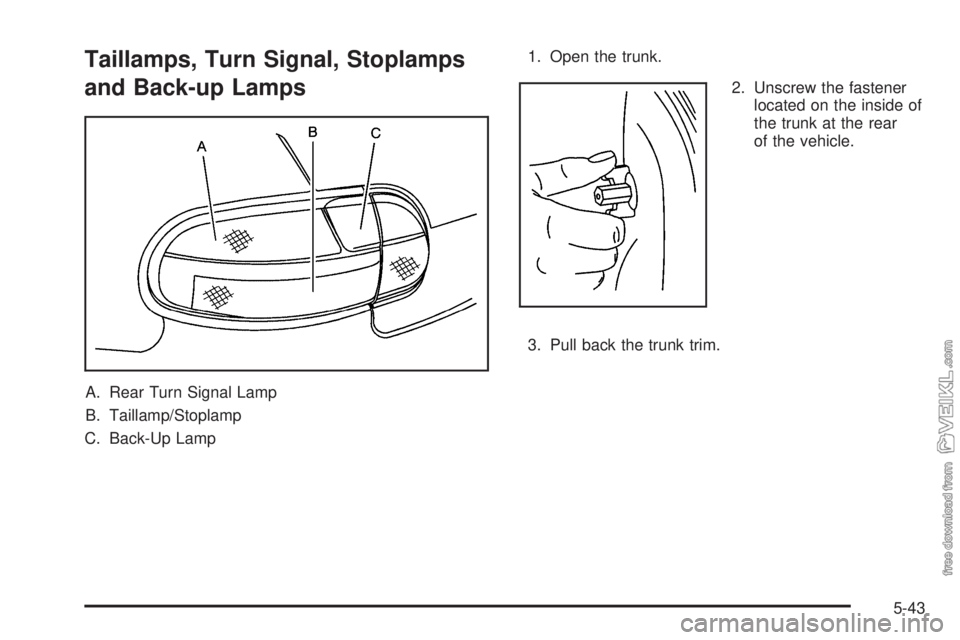
Taillamps, Turn Signal, Stoplamps
and Back-up Lamps
A. Rear Turn Signal Lamp
B. Taillamp/Stoplamp
C. Back-Up Lamp1. Open the trunk.
2. Unscrew the fastener
located on the inside of
the trunk at the rear
of the vehicle.
3. Pull back the trunk trim.
5-43
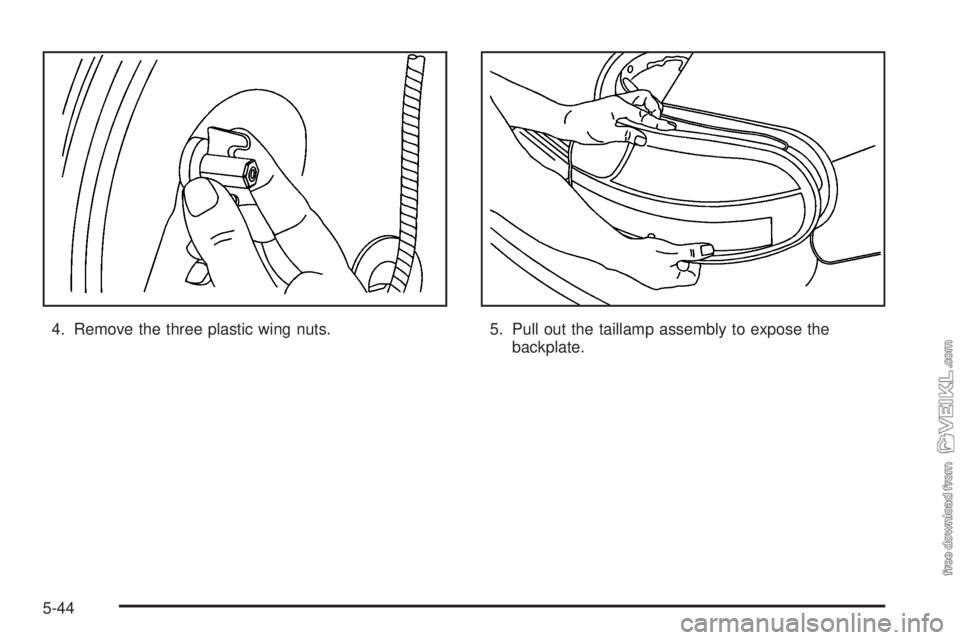
Page 228 of 320
4. Remove the three plastic wing nuts. 5. Pull out the taillamp assembly to expose the
backplate.
5-44
Page 229 of 320
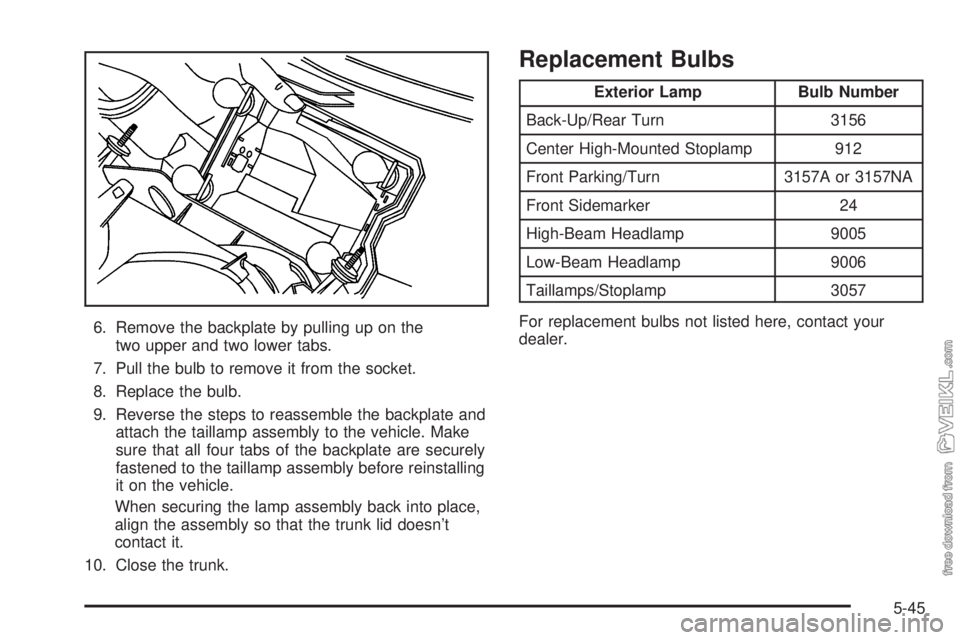
6. Remove the backplate by pulling up on the
two upper and two lower tabs.
7. Pull the bulb to remove it from the socket.
8. Replace the bulb.
9. Reverse the steps to reassemble the backplate and
attach the taillamp assembly to the vehicle. Make
sure that all four tabs of the backplate are securely
fastened to the taillamp assembly before reinstalling
it on the vehicle.
When securing the lamp assembly back into place,
align the assembly so that the trunk lid doesn’t
contact it.
10. Close the trunk.
Replacement Bulbs
Exterior Lamp Bulb Number
Back-Up/Rear Turn 3156
Center High-Mounted Stoplamp 912
Front Parking/Turn 3157A or 3157NA
Front Sidemarker 24
High-Beam Headlamp 9005
Low-Beam Headlamp 9006
Taillamps/Stoplamp 3057
For replacement bulbs not listed here, contact your
dealer.
5-45
Page 230 of 320
Windshield Wiper Blade
Replacement
Windshield wiper blades should be inspected for wear
and cracking. SeeAt Least Twice a Year on page 6-17
for more information. For the proper type and length,
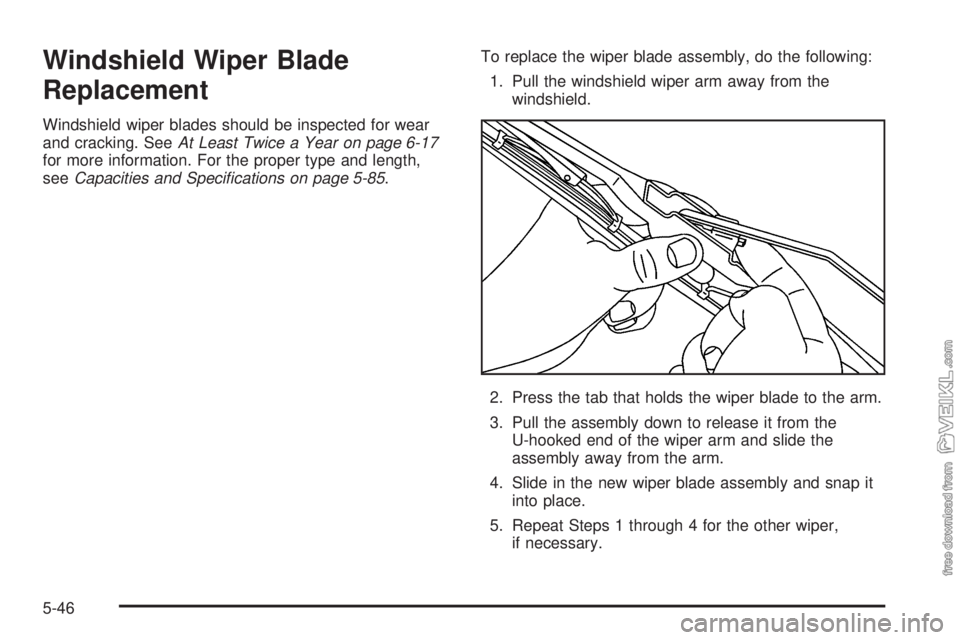
seeCapacities and Speci�cations on page 5-85.To replace the wiper blade assembly, do the following:
1. Pull the windshield wiper arm away from the
windshield.
2. Press the tab that holds the wiper blade to the arm.
3. Pull the assembly down to release it from the
U-hooked end of the wiper arm and slide the
assembly away from the arm.
4. Slide in the new wiper blade assembly and snap it
into place.
5. Repeat Steps 1 through 4 for the other wiper,
if necessary.
5-46
Trending: fuel filter, air filter, turn signal, window, washer fluid, gas mileage, charging


