center console CHEVROLET COBALT 2005 1.G Owners Manual
[x] Cancel search | Manufacturer: CHEVROLET, Model Year: 2005, Model line: COBALT, Model: CHEVROLET COBALT 2005 1.GPages: 362, PDF Size: 2.35 MB
Page 65 of 362
Keys...............................................................2-2
Remote Keyless Entry System.........................2-3
Remote Keyless Entry System Operation...........2-4
Doors and Locks.............................................2-7
Door Locks....................................................2-7
Power Door Locks..........................................2-8
Delayed Locking.............................................2-8
Automatic Door Locks.....................................2-9
Programmable Automatic Door Unlock...............2-9
Rear Door Security Locks................................2-9
Lockout Protection........................................2-10
Trunk..........................................................2-10
Windows........................................................2-12
Manual Windows..........................................2-12
Power Windows............................................2-13
Sun Visors...................................................2-14
Theft-Deterrent Systems..................................2-14
Content Theft-Deterrent.................................2-14
Passlock
®....................................................2-16
Starting and Operating Your Vehicle................2-16
New Vehicle Break-In....................................2-16
Ignition Positions..........................................2-17
Retained Accessory Power (RAP)...................2-19
Starting the Engine.......................................2-19
Engine Coolant Heater..................................2-20Automatic Transaxle Operation.......................2-22
Manual Transaxle Operation...........................2-24
Parking Brake..............................................2-26
Shifting Into Park (P) (Automatic Transaxle)......2-28
Shifting Out of Park (P)
(Automatic Transaxle)................................2-29
Parking Your Vehicle.....................................2-29
Parking Over Things That Burn.......................2-30
Engine Exhaust............................................2-30
Running the Engine While Parked...................2-31
Mirrors...........................................................2-32
Manual Rearview Mirror.................................2-32
Automatic Dimming Rearview Mirror................2-32
Outside Manual Mirror...................................2-32
Outside Remote Control Mirror.......................2-32
Outside Power Mirrors...................................2-33
Outside Convex Mirror...................................2-33
OnStar
®System.............................................2-34
Storage Areas................................................2-35
Glove Box...................................................2-35
Cupholder(s)................................................2-35
Center Console Storage Area.........................2-35
Driver’s Storage Compartment........................2-35
Convenience Net..........................................2-36
Sunroof.........................................................2-36
Section 2 Features and Controls
2-1
Page 99 of 362
OnStar®Personal Calling
As an OnStar®subscriber, the Personal Calling
capability is an available hands-free wireless phone that
is integrated into the vehicle. Calls can be placed
nationwide using simple voice commands with no
additional contracts and no additional roaming charges.
To �nd out more about OnStar
®Personal Calling,
refer to the OnStar®user’s guide in the vehicle’s glove
box or visit www.onstar.com or www.onstarcanada.com;
or speak with an OnStar
®advisor by pressing the
OnStar®button or by calling 1-888-4-ONSTAR
(1-888-466-7827).
OnStar®Virtual Advisor
Virtual Advisor is a feature of OnStar®Personal Calling
that uses minutes to access up-to-date weather and
traffic reports for your area, news and sports updates,
stock quotes, entertainment and more. Customize
your information pro�le at www.myonstar.com. See the
OnStar
®user’s guide for more information.
Storage Areas
Glove Box
Open the glove box by lifting up on the lever. Close the
glove box with a �rm push.
Cupholder(s)
There are two cupholders located at the front of the
center console, in front of the shift lever. There are also
cupholder for the rear seat passengers located at the
rear of the center console.
Center Console Storage Area
Your vehicle may have a center console armrest with
storage area. Use the lever on the front of the console to
open it.
Driver’s Storage Compartment
The driver’s storage compartment is located near the
left side of the steering column on the bottom of
the instrument panel. It can be used to store small items
and contains the remote trunk release switch. For
more information, see Remote Trunk Release under
Trunk on page 2-10.
2-35
Page 116 of 362
Entry/Exit Lighting
The lamps inside your vehicle will go on when you open
any door. These lamps will fade out after about
20 seconds after all of the doors have been closed or
when the ignition is turned to ON. These lamps will also
go on when you press the trunk release, unlock
symbol button or the horn symbol on the keyless entry
system transmitter.
The lamps inside your vehicle will stay on for about
20 seconds after your key is removed from the ignition
to provide an illuminated exit.
Mirror Reading Lamps
Your vehicle may have reading lamps on the rearview
mirror. Push the button to turn the reading lamps on
and off.
Battery Run-Down Protection
Your vehicle is equipped with a battery saver feature
designed to protect your vehicle’s battery.
When any interior lamp is left on and the ignition is
turned off, the battery rundown protection system will
automatically turn the lamp off after 20 minutes. This will
avoid draining the battery.
Accessory Power Outlets
Accessory power outlets can be used to connect
electrical equipment such as a cellular phone or CB
radio. The outlet can accept electrical equipment rated
at a maximum of 20 amps.
The accessory power outlet is located in the center
console, rearward of the shift lever.
To use the outlet, remove the cover. When not in use,
always cover the outlet with the protective cap.
Notice:Leaving electrical equipment on for
extended periods will drain the battery. Always turn
off electrical equipment when not in use and do
not plug in equipment that exceeds the maximum
amperage rating.
Certain electrical accessories may not be compatible
with the accessory power outlet and could result
in blown vehicle or adapter fuses. If you experience a
problem, see your dealer for additional information
on the accessory power outlet.
Notice:Adding any electrical equipment to your
vehicle may damage it or keep other components
from working as they should. The repairs would not
be covered by your warranty. Do not use equipment
exceeding maximum amperage rating. Check
with your dealer before adding electrical equipment.
3-16
Page 117 of 362
When adding electrical equipment, be sure to follow the
installation instructions included with the equipment.
Notice:Improper use of the power outlet can cause
damage not covered by your warranty. Do not
hang any type of accessory or accessory bracket
from the plug because the power outlets are
designed for accessory power plugs only.
Ashtrays and Cigarette Lighter
Your vehicle may have an ashtray and cigarette lighter.
To use the lighter, located on the instrument panel
below the climate controls, push it in all the way and let
go. When it is ready, it will pop back out by itself.
Notice:Holding a cigarette lighter in while it is
heating will not allow the lighter to back away from
the heating element when it is hot. Damage from
overheating may occur to the lighter or heating
element, or a fuse could be blown. Do not hold a
cigarette lighter in while it is heating.
To clean the center console ashtray, remove the entire
ashtray and empty it.
Notice:If you put papers, pins, or other �ammable
items in the ashtray, hot cigarettes or other
smoking materials could ignite them and possibly
damage your vehicle. Never put �ammable items in
the ashtray.
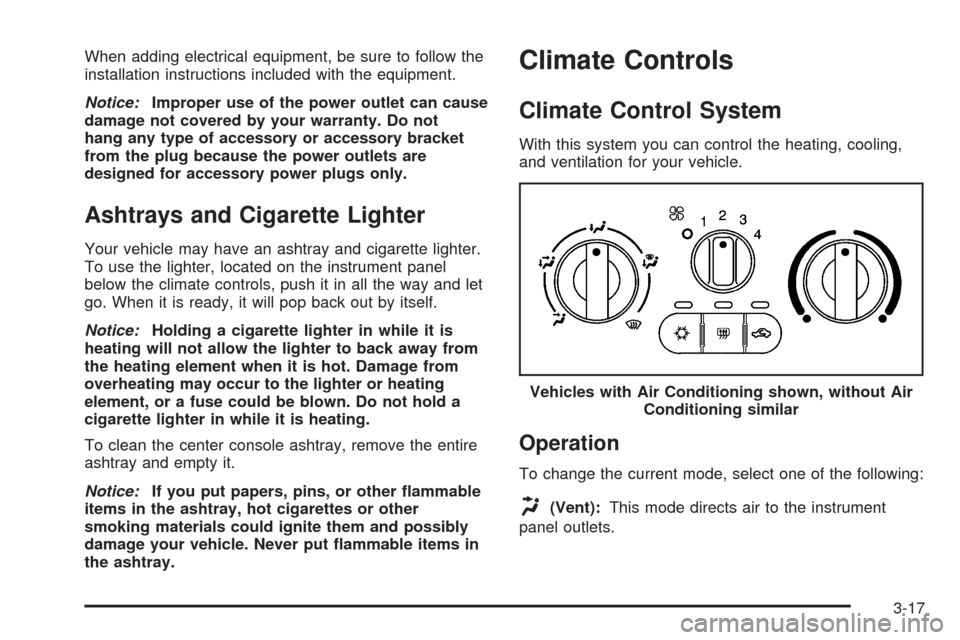
Climate Controls
Climate Control System
With this system you can control the heating, cooling,
and ventilation for your vehicle.
Operation
To change the current mode, select one of the following:
H(Vent):This mode directs air to the instrument
panel outlets.Vehicles with Air Conditioning shown, without Air
Conditioning similar
3-17
Page 350 of 362

Audio System(s) (cont.)
Setting the Time for Radios without
Radio Data Systems (RDS).......................3-45
Theft-Deterrent Feature................................3-74
Understanding Radio Reception.....................3-75
XM™ Satellite Radio Antenna System............3-76
Automatic Door Locks....................................... 2-9
Automatic Transaxle
Fluid..........................................................5-22
Operation...................................................2-22
B
Battery..........................................................5-39
Run-Down Protection...................................3-16
Before Leaving on a Long Trip.........................4-22
Boost Gage...................................................3-34
Brake
Anti-Lock Brake System (ABS)........................ 4-6
Emergencies................................................ 4-8
Parking......................................................2-26
System Warning Light..................................3-27
Brakes..........................................................5-36
Braking........................................................... 4-5
Braking in Emergencies..................................... 4-8
Break-In, New Vehicle.....................................2-16Bulb Replacement...........................................5-47
Back-Up Lamps...........................................5-52
Center High-Mounted Stoplamp (CHMSL)........5-49
Halogen Bulbs............................................5-47
Headlamp Aiming........................................5-44
Headlamps, Front Turn Signal, Sidemarker,
and Parking Lamps..................................5-48
Replacement Bulbs......................................5-53
Taillamps and Turn Signal Lamps..................5-50
Taillamps, Turn Signal, Stoplamps and
Back-up Lamps........................................5-51
Buying New Tires...........................................5-64C
California Fuel.................................................. 5-6
Canadian Owners................................................ ii
Capacities and Speci�cations............................5-97
Carbon Monoxide...........2-10, 2-30, 4-25, 4-37, 4-38
Care of
Safety Belts................................................5-84
Your CD Player...........................................3-76
Your CDs ...................................................3-76
Center Console Storage Area...........................2-35
Center High-Mounted Stoplamp (CHMSL)...........5-49
Chains, Tire...................................................5-68
2
Page 360 of 362
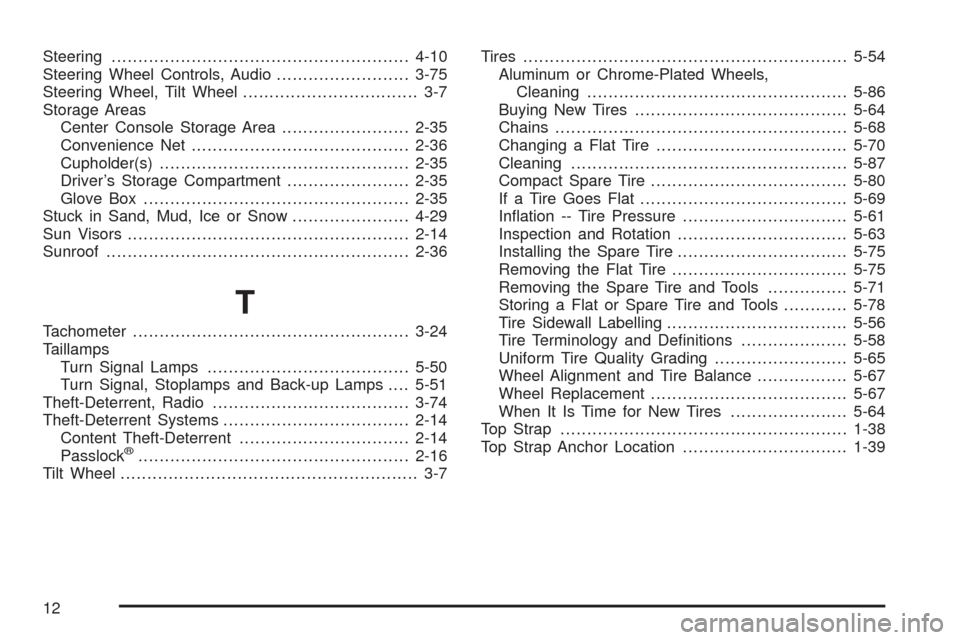
Steering........................................................4-10
Steering Wheel Controls, Audio.........................3-75
Steering Wheel, Tilt Wheel................................. 3-7
Storage Areas
Center Console Storage Area........................2-35
Convenience Net.........................................2-36
Cupholder(s)...............................................2-35
Driver’s Storage Compartment.......................2-35
Glove Box..................................................2-35
Stuck in Sand, Mud, Ice or Snow......................4-29
Sun Visors.....................................................2-14
Sunroof.........................................................2-36
T
Tachometer....................................................3-24
Taillamps
Turn Signal Lamps......................................5-50
Turn Signal, Stoplamps and Back-up Lamps....5-51
Theft-Deterrent, Radio.....................................3-74
Theft-Deterrent Systems...................................2-14
Content Theft-Deterrent................................2-14
Passlock
®...................................................2-16
Tilt Wheel........................................................ 3-7Tires.............................................................5-54
Aluminum or Chrome-Plated Wheels,
Cleaning.................................................5-86
Buying New Tires........................................5-64
Chains.......................................................5-68
Changing a Flat Tire....................................5-70
Cleaning....................................................5-87
Compact Spare Tire.....................................5-80
If a Tire Goes Flat.......................................5-69
In�ation -- Tire Pressure...............................5-61
Inspection and Rotation................................5-63
Installing the Spare Tire................................5-75
Removing the Flat Tire.................................5-75
Removing the Spare Tire and Tools...............5-71
Storing a Flat or Spare Tire and Tools............5-78
Tire Sidewall Labelling..................................5-56
Tire Terminology and De�nitions....................5-58
Uniform Tire Quality Grading.........................5-65
Wheel Alignment and Tire Balance.................5-67
Wheel Replacement.....................................5-67
When It Is Time for New Tires......................5-64
Top Strap......................................................1-38
Top Strap Anchor Location...............................1-39
12