CHEVROLET COLORADO 2011 1.G Owners Manual
Manufacturer: CHEVROLET, Model Year: 2011, Model line: COLORADO, Model: CHEVROLET COLORADO 2011 1.GPages: 392, PDF Size: 6.37 MB
Page 141 of 392
Black plate (3,1)Chevrolet Colorado Owner Manual - 2011
Lighting 6-3
The taillamps, sidemarkers, and
other lamps will not be on. The
instrument panel will not be lit up
either.
When it begins to get dark, the
headlamps will automatically switch
from DRL to the regular headlamps.
The regular headlamp system
should be turned on when needed.
Automatic Headlamp
System
When it is dark enough outside, the
automatic headlamp system will turn
on after the transmission has been
shifted from P (Park) to D (Drive).
The headlamps, taillamps,
sidemarker, parking lamps, roof
marker lamps, and the instrument
panel lights turn on at normal
brightness. The radio lights will
become dimmer when the
headlights are off compared to when
the headlights are on.The vehicle has a light sensor
located on the top of the instrument
panel. Do not cover the sensor,
or the system will be on whenever
the ignition is on.
The system can turn on the
headlamps when driving in a
parking garage, through a tunnel or
when there is overcast weather.
This is normal.
There is a delay in the transition
between the daytime and nighttime
operation of the Daytime Running
Lamps (DRL) and the automatic
headlamp system so that driving
under bridges or bright overhead
street lights does not affect the
system. The DRL and automatic
headlamp system will only be
affected when the light sensor
detects a change in lighting lasting
longer than the delay.
If the vehicle is started in a dark
garage, the automatic headlamp
system will come on immediately.Once the vehicle leaves the garage,
it will take about 1 minute for the
automatic headlamp system to
change to DRL if it is light outside.
During that delay, the instrument
panel cluster may not be as bright
as usual. Make sure the instrument
panel brightness control is in the full
bright position. See
Instrument
Panel Illumination Control on
page 6‑5.
Hazard Warning Flashers
|
(Hazard Warning Flasher):
Press this button located on the
instrument panel, to make the front
and rear turn signal lamps flash on
and off. This warns others that you
are having trouble.
Press
|again to turn the
flashers off.
The turn signals do not work while
the hazard warning flashers are on.
Page 142 of 392
Black plate (4,1)Chevrolet Colorado Owner Manual - 2011
6-4 Lighting
Turn and Lane-Change
Signals
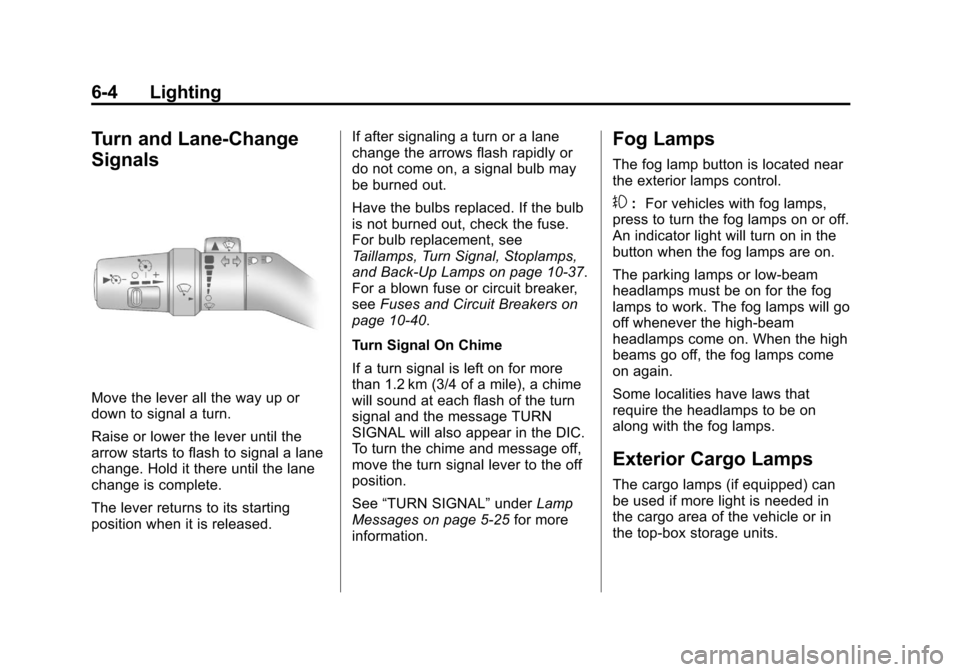
Move the lever all the way up or
down to signal a turn.
Raise or lower the lever until the
arrow starts to flash to signal a lane
change. Hold it there until the lane
change is complete.
The lever returns to its starting
position when it is released.If after signaling a turn or a lane
change the arrows flash rapidly or
do not come on, a signal bulb may
be burned out.
Have the bulbs replaced. If the bulb
is not burned out, check the fuse.
For bulb replacement, see
Taillamps, Turn Signal, Stoplamps,
and Back-Up Lamps on page 10‑37.
For a blown fuse or circuit breaker,
see
Fuses and Circuit Breakers on
page 10‑40.
Turn Signal On Chime
If a turn signal is left on for more
than 1.2 km (3/4 of a mile), a chime
will sound at each flash of the turn
signal and the message TURN
SIGNAL will also appear in the DIC.
To turn the chime and message off,
move the turn signal lever to the off
position.
See “TURN SIGNAL” underLamp
Messages on page 5‑25 for more
information.
Fog Lamps
The fog lamp button is located near
the exterior lamps control.
#: For vehicles with fog lamps,
press to turn the fog lamps on or off.
An indicator light will turn on in the
button when the fog lamps are on.
The parking lamps or low‐beam
headlamps must be on for the fog
lamps to work. The fog lamps will go
off whenever the high-beam
headlamps come on. When the high
beams go off, the fog lamps come
on again.
Some localities have laws that
require the headlamps to be on
along with the fog lamps.
Exterior Cargo Lamps
The cargo lamps (if equipped) can
be used if more light is needed in
the cargo area of the vehicle or in
the top-box storage units.
Page 143 of 392
Black plate (5,1)Chevrolet Colorado Owner Manual - 2011
Lighting 6-5
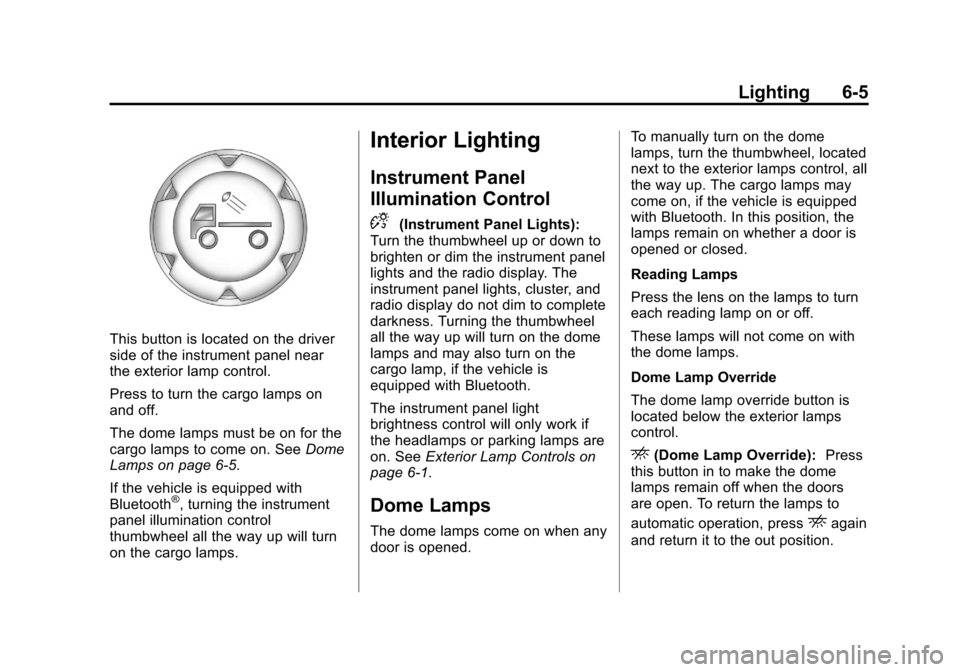
This button is located on the driver
side of the instrument panel near
the exterior lamp control.
Press to turn the cargo lamps on
and off.
The dome lamps must be on for the
cargo lamps to come on. SeeDome
Lamps on page 6‑5.
If the vehicle is equipped with
Bluetooth
®, turning the instrument
panel illumination control
thumbwheel all the way up will turn
on the cargo lamps.
Interior Lighting
Instrument Panel
Illumination Control
D
(Instrument Panel Lights):
Turn the thumbwheel up or down to
brighten or dim the instrument panel
lights and the radio display. The
instrument panel lights, cluster, and
radio display do not dim to complete
darkness. Turning the thumbwheel
all the way up will turn on the dome
lamps and may also turn on the
cargo lamp, if the vehicle is
equipped with Bluetooth.
The instrument panel light
brightness control will only work if
the headlamps or parking lamps are
on. See Exterior Lamp Controls on
page 6‑1.
Dome Lamps
The dome lamps come on when any
door is opened. To manually turn on the dome
lamps, turn the thumbwheel, located
next to the exterior lamps control, all
the way up. The cargo lamps may
come on, if the vehicle is equipped
with Bluetooth. In this position, the
lamps remain on whether a door is
opened or closed.
Reading Lamps
Press the lens on the lamps to turn
each reading lamp on or off.
These lamps will not come on with
the dome lamps.
Dome Lamp Override
The dome lamp override button is
located below the exterior lamps
control.
E(Dome Lamp Override):
Press
this button in to make the dome
lamps remain off when the doors
are open. To return the lamps to
automatic operation, press
Eagain
and return it to the out position.
Page 144 of 392
Black plate (6,1)Chevrolet Colorado Owner Manual - 2011
6-6 Lighting
Lighting Features
Exit Lighting
The interior lamps will come on
when the key is removed from the
ignition. The lamps will not come on
if the dome override button is
pressed in.
Battery Load
Management
The vehicle has Electric Power
Management (EPM) that estimates
the battery's temperature and state
of charge. It then adjusts the voltage
for best performance and extended
life of the battery.
When the battery's state of charge
is low, the voltage is raised slightly
to quickly bring the charge back up.
When the state of charge is high,
the voltage is lowered slightly to
prevent overcharging. If the vehicle
has a voltmeter gauge or a voltage
display on the Driver Information
Center (DIC), you may see thevoltage move up or down. This is
normal. If there is a problem, an
alert will be displayed.
The battery can be discharged at
idle if the electrical loads are very
high. This is true for all vehicles.
This is because the generator
(alternator) may not be spinning fast
enough at idle to produce all the
power that is needed for very high
electrical loads.
A high electrical load occurs when
several of the following are on, such
as: headlamps, high beams, fog
lamps, rear window defogger,
climate control fan at high speed,
heated seats, engine cooling fans,
trailer loads, and loads plugged into
accessory power outlets.
EPM works to prevent excessive
discharge of the battery. It does this
by balancing the generator's output
and the vehicle's electrical needs.
It can increase engine idle speed to
generate more power, whenever
needed. It can temporarily reduce
the power demands of some
accessories.
Normally, these actions occur in
steps or levels, without being
noticeable. In rare cases at the
highest levels of corrective action,
this action may be noticeable to the
driver. If so, a Driver Information
Center (DIC) message might be
displayed, such as BATTERY
SAVER ACTIVE, BATTERY
VOLTAGE LOW, or LOW BATTERY.
If one of these messages displays, it
is recommended that the driver
reduce the electrical loads as much
as possible. See
Driver Information
Center (DIC) on page 5‑19.
Battery Power Protection
This feature shuts off the dome
lamp if it is left on for more than
20 minutes when the ignition is in
LOCK/OFF. This helps to prevent
the battery from running down.
Page 145 of 392

Black plate (1,1)Chevrolet Colorado Owner Manual - 2011
Infotainment System 7-1
Infotainment
System
Introduction
Introduction . . . . . . . . . . . . . . . . . . . 7-1
Theft-Deterrent Feature . . . . . . . 7-2
Operation . . . . . . . . . . . . . . . . . . . . . 7-3
Radio
AM-FM Radio . . . . . . . . . . . . . . . . . 7-7
Satellite Radio . . . . . . . . . . . . . . . 7-11
Radio Reception . . . . . . . . . . . . . 7-13
Fixed Mast Antenna . . . . . . . . . 7-14
Satellite Radio Antenna . . . . . . 7-14
Audio Players
CD Player . . . . . . . . . . . . . . . . . . . 7-14
Phone
Bluetooth . . . . . . . . . . . . . . . . . . . . 7-20
Introduction
Determine which radio the vehicle
has and read the following pages to
become familiar with its features.
{WARNING
Taking your eyes off the road for
extended periods could cause a
crash resulting in injury or death
to you or others. Do not give
extended attention to
entertainment tasks while driving.
This system provides access to
many audio and non audio listings. To minimize taking your eyes off the
road while driving, do the following
while the vehicle is parked:
.Become familiar with the
operation and controls of the
audio system.
.Set up the tone, speaker
adjustments, and preset radio
stations.
For more information, see Defensive
Driving on page 9‑2.
Page 146 of 392
Black plate (2,1)Chevrolet Colorado Owner Manual - 2011
7-2 Infotainment System
Notice:Contact your dealer
before adding any equipment.
Adding audio or communication
equipment could interfere with
the operation of the vehicle's
engine, radio, or other systems,
and could damage them. Follow
federal rules covering mobile
radio and telephone equipment.
Notice: The chime signals related
to safety belts, parking brake, and
other functions of your vehicle
operate through the radio/
entertainment system. If that
equipment is replaced or
additional equipment is added to
your vehicle, the chimes may not
work. Make sure that replacement
or additional equipment is
compatible with your vehicle
before installing it. See
Accessories and Modifications on
page 10‑4. The vehicle has Retained
Accessory Power (RAP). With RAP,
the audio system can be played
even after the ignition is turned off.
See
Retained Accessory Power
(RAP) on page 9‑30 for more
information.
Theft-Deterrent Feature
Non-RDS Radios
TheftLock®is designed to
discourage theft of your vehicle's
radio. The feature works
automatically by learning a portion
of the Vehicle Identification
Number (VIN). If the radio is moved
to a different vehicle, it does not
operate and LOC displays.
With TheftLock activated, the radio
does not operate if stolen.
RDS Radios
TheftLock is designed to discourage
theft of your vehicle's radio. The
feature works automatically by
learning a portion of the Vehicle
Identification Number (VIN). If the
radio is moved to a different vehicle,
it does not operate and LOCKED
displays.
When the radio and vehicle are
turned off, the blinking red light
indicates that TheftLock is armed.
With TheftLock activated, the radio
does not operate if stolen.
Page 147 of 392
Black plate (3,1)Chevrolet Colorado Owner Manual - 2011
Infotainment System 7-3
Operation
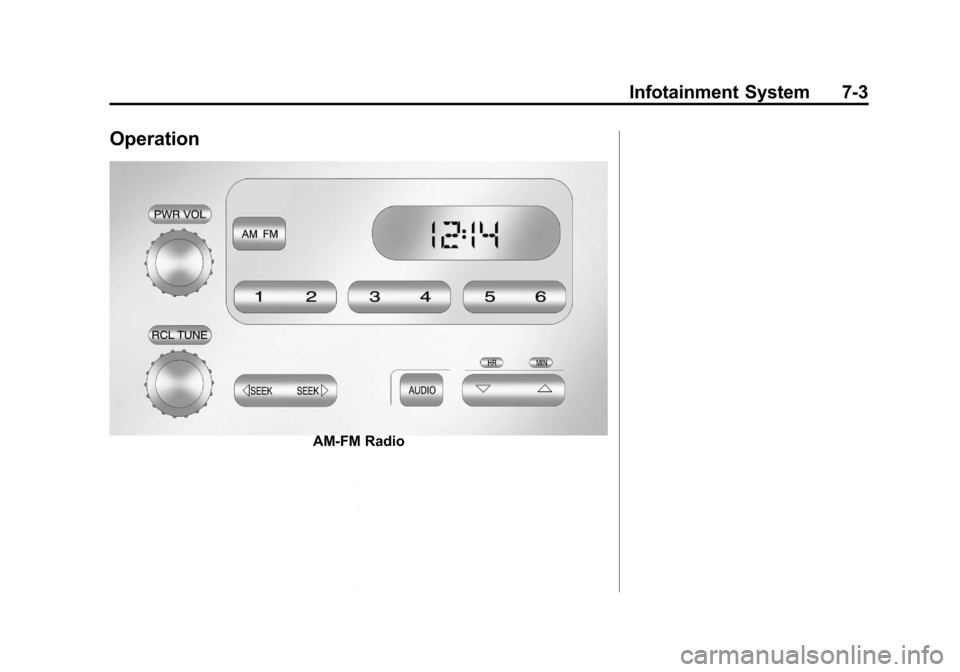
AM-FM Radio
Page 148 of 392
Black plate (4,1)Chevrolet Colorado Owner Manual - 2011
7-4 Infotainment System
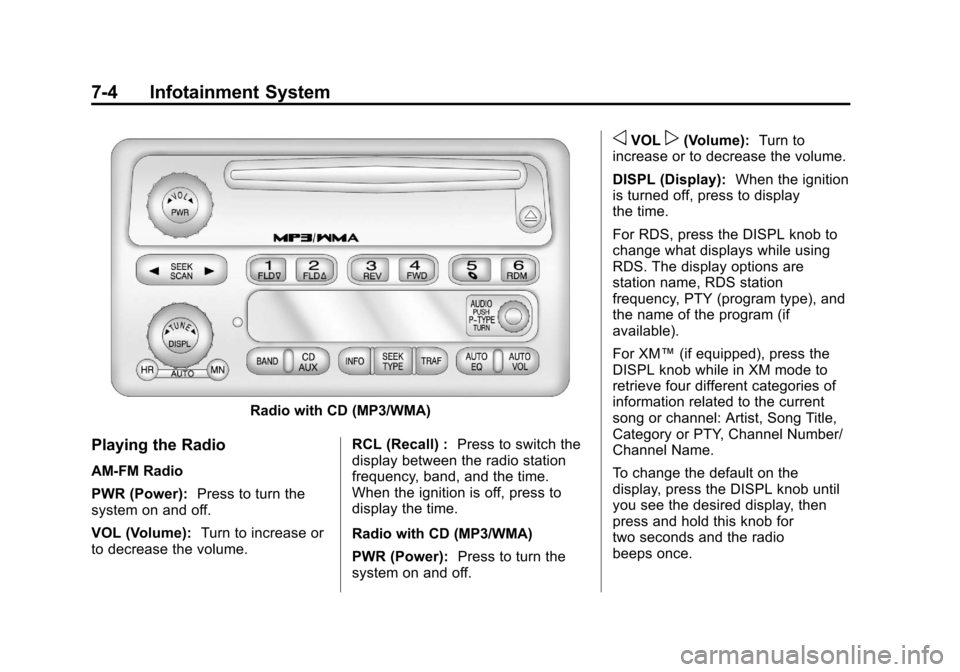
Radio with CD (MP3/WMA)
Playing the Radio
AM-FM Radio
PWR (Power):Press to turn the
system on and off.
VOL (Volume): Turn to increase or
to decrease the volume. RCL (Recall) :
Press to switch the
display between the radio station
frequency, band, and the time.
When the ignition is off, press to
display the time.
Radio with CD (MP3/WMA)
PWR (Power): Press to turn the
system on and off.
oVOLp(Volume): Turn to
increase or to decrease the volume.
DISPL (Display): When the ignition
is turned off, press to display
the time.
For RDS, press the DISPL knob to
change what displays while using
RDS. The display options are
station name, RDS station
frequency, PTY (program type), and
the name of the program (if
available).
For XM™ (if equipped), press the
DISPL knob while in XM mode to
retrieve four different categories of
information related to the current
song or channel: Artist, Song Title,
Category or PTY, Channel Number/
Channel Name.
To change the default on the
display, press the DISPL knob until
you see the desired display, then
press and hold this knob for
two seconds and the radio
beeps once.
Page 149 of 392
Black plate (5,1)Chevrolet Colorado Owner Manual - 2011
Infotainment System 7-5
AUTO VOL (Automatic Volume):
Automatic volume automatically
adjusts the audio system to make
up for road and wind noise while
driving. The volume level should
always sound the same while
driving.
Set the volume at the desired level.
Press to select LOW, MEDIUM, and
HIGH. AVOL displays. Each higher
setting allows for higher volume
compensation at faster vehicle
speeds.
NONE displays if the radio cannot
determine the vehicle speed. To turn
automatic volume off, press until
OFF displays.
Setting the Tone (Bass/Treble)
AM-FM Radio
To adjust the bass or treble:
1. Press and release the AUDIObutton until BAS (bass) or TRE
(treble) displays. 2. Press and hold the
worx
button to increase or to
decrease the tone.
To adjust the bass or treble to the
center position:
1. Press and release the AUDIO button until BAS (bass) or TRE
(treble) displays.
2. Press and hold the AUDIO button for more than
two seconds until a beep
sounds.
To adjust both tone controls and
both speaker controls to the middle
position:
1. Exit out of audio mode by pressing another button, causing
the radio to perform that function
or wait five seconds for the
display to return to time of day.
2. Press and hold AUDIO for more than two seconds until a beep
sounds. CEN (center) displays. Radio with CD (MP3/WMA)
To adjust the bass or treble:
1. Press and release the AUDIO
knob until BASS (bass) or TREB
(treble) displays.
2. Turn the AUDIO knob to increase or to decrease
the tone.
To adjust the bass/treble to the
middle position, press and hold the
AUDIO knob. The radio produces
one beep and adjusts the display
level to the middle position.
To adjust all tone and speaker
controls to the middle position, push
and hold the AUDIO knob when no
tone or speaker control displays.
ALL CENTERED displays and a
beep sounds.
AUTO EQ (Automatic
Equalization): Press to select
customized equalization settings
designed for country/western, jazz,
talk, pop, rock, and classical.
Page 150 of 392
Black plate (6,1)Chevrolet Colorado Owner Manual - 2011
7-6 Infotainment System
To return to the manual mode, press
the AUTO EQ button until CUSTOM
displays. Then manually adjust the
bass/treble, using the AUDIO knob.
Adjusting the Speakers
(Balance/Fade)
Fade may not be available if the
vehicle is a regular cab model.
AM-FM Radio
To adjust balance or fade:
1. Press and release the AUDIObutton until BAL (balance) or
FAD (fade) displays.
2. Press and hold the
worx
button to increase or to
decrease the level.
To adjust the balance or fade to the
center position:
1. Press and release the AUDIO button until BAL (balance) or
FAD (fade) displays. 2. Press and hold the AUDIO
button for more than
two seconds until a beep
sounds.
To adjust both speaker controls and
both tone controls to the middle
position:
1. Exit out of audio mode by pressing another button, causing
the radio to perform that function
or wait five seconds for the
display to return to time of day.
2. Press and hold AUDIO for more than two seconds until a beep
sounds. CEN (center) displays.
Radio with CD (MP3/WMA)
To adjust the balance or fade:
1. Press and release the AUDIO knob until BAL (balance) or
FADE (fade) displays.
2. Turn the AUDIO knob to increase or to decrease the
level. To adjust the balance or fade to the
middle position:
1. Press and release the AUDIO
knob until BAL (balance) or
FADE (fade) displays.
2. Press and hold the AUDIO knob until one beep sounds.
To adjust all tone and speaker
controls to the middle position, push
and hold the AUDIO knob when no
tone or speaker control displays.
ALL CENTERED displays and a
beep sounds.
Radio Messages
AM-FM Radio
CAL (Calibration Error): The
audio system has been calibrated
for the vehicle from the factory.
If CAL displays it means that the
radio has not been configured
properly for the vehicle and it must
be returned to your dealer for
service.