brake CHEVROLET COLORADO 2020 Owner's Manual
[x] Cancel search | Manufacturer: CHEVROLET, Model Year: 2020, Model line: COLORADO, Model: CHEVROLET COLORADO 2020Pages: 368, PDF Size: 5.67 MB
Page 4 of 368
Chevrolet Colorado Owner Manual (GMNA-Localizing-U.S./Canada/Mexico-
13566640) - 2020 - CRC - 9/30/19
Introduction 3
{Danger
Danger indicates a hazard with a
high level of risk which will result
in serious injury or death.
{Warning
Warning indicates a hazard that
could result in injury or death.
Caution
Caution indicates a hazard that
could result in property or vehicle
damage.
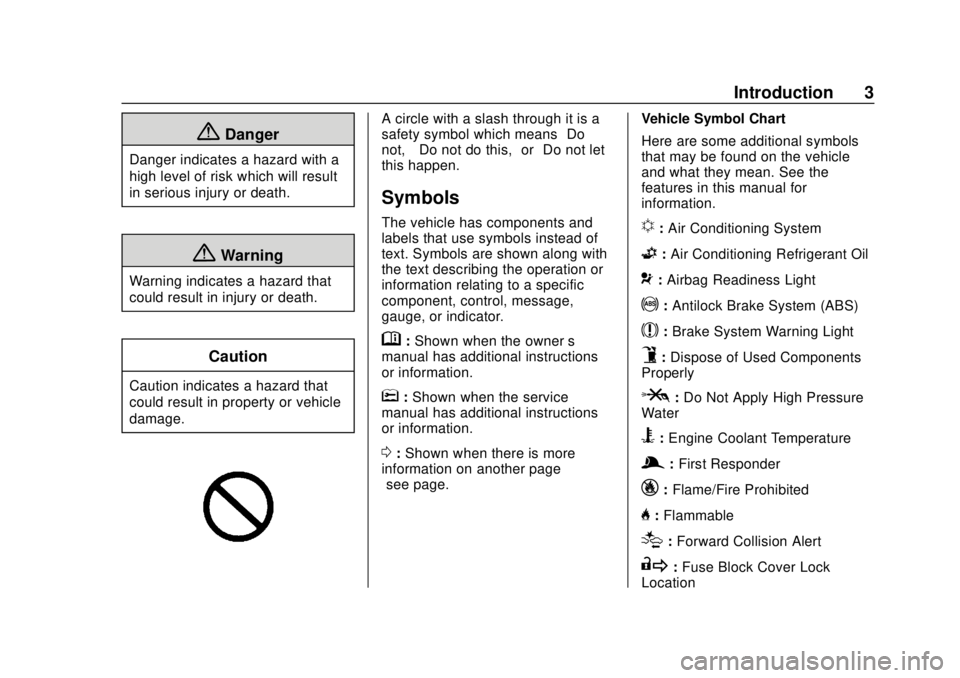
A circle with a slash through it is a
safety symbol which means“Do
not,” “Do not do this,” or“Do not let
this happen.”
Symbols
The vehicle has components and
labels that use symbols instead of
text. Symbols are shown along with
the text describing the operation or
information relating to a specific
component, control, message,
gauge, or indicator.
M: Shown when the owner ’s
manual has additional instructions
or information.
*: Shown when the service
manual has additional instructions
or information.
0: Shown when there is more
information on another page —
“see page.” Vehicle Symbol Chart
Here are some additional symbols
that may be found on the vehicle
and what they mean. See the
features in this manual for
information.
u:
Air Conditioning System
G: Air Conditioning Refrigerant Oil
9:Airbag Readiness Light
!: Antilock Brake System (ABS)
$:Brake System Warning Light
9:Dispose of Used Components
Properly
P: Do Not Apply High Pressure
Water
B: Engine Coolant Temperature
g: First Responder
_:Flame/Fire Prohibited
H:Flammable
[:Forward Collision Alert
R:Fuse Block Cover Lock
Location
Page 7 of 368

Chevrolet Colorado Owner Manual (GMNA-Localizing-U.S./Canada/Mexico-
13566640) - 2020 - CRC - 9/30/19
6 Introduction
1.Air Vents 0138.
2. Turn Signal Lever. See Turn
and Lane-Change Signals
0 127.
Driver Information Center (DIC)
(Base Level) Controls (If
Equipped). See Driver
Information Center (DIC) (Base
Level) 0114 or
Driver Information Center (DIC)
(Uplevel) 0116.
3. Instrument Cluster (Base
Level) 097 or
Instrument Cluster (Uplevel)
0 99.
4. Windshield Wiper/Washer 092.
5. Light Sensor. See Automatic
Headlamp System 0126.
Vehicle Alarm System Indicator
(If Equipped). See Vehicle
Alarm System 019.
6. Infotainment 0132.
7. Climate Control Systems 0133
(If Equipped).
Automatic Climate Control
System 0135 (If Equipped). 8.
Heated Front Seats 032 (If
Equipped).
9. Power Outlets 093 (If
Equipped).
10. Shift Lever. See Automatic
Transmission 0168 or
Manual Mode 0171.
11. Auxiliary Jack. See the infotainment manual.
USB Port. See the infotainment
manual.
12. Hazard Warning Flashers
0127.
Traction Control/Electronic
Stability Control 0182.
Exterior Cargo Lamps 0128.
Lane Departure Warning
(LDW) 0197 (If Equipped).
Hill Descent Control (HDC)
0 185 (If Equipped).
Tow/Haul Mode 0173 (If
Equipped).
Locking Front Axle 0187 (If
Equipped). Locking Rear Axle
0186 (If
Equipped).
13. Steering Wheel Controls 091
(If Equipped).
Driver Information Center (DIC)
(Uplevel) Controls (If
Equipped). See Driver
Information Center (DIC) (Base
Level) 0114 or
Driver Information Center (DIC)
(Uplevel) 0116.
14. Horn 092.
15. Steering Wheel Adjustment
091 (Out of View).
16. Cruise Control 0189.
Forward Collision Alert (FCA)
System 0195 (If Equipped).
17. Transfer Case Knob (If Equipped). See Four-Wheel
Drive 0173.
Driver Mode Control 0185 (If
Equipped).
18. Hood Release. See Hood
0 225.
19. Parking Brake 0181.
Page 18 of 368
Chevrolet Colorado Owner Manual (GMNA-Localizing-U.S./Canada/Mexico-
13566640) - 2020 - CRC - 9/30/19
Keys, Doors, and Windows 17
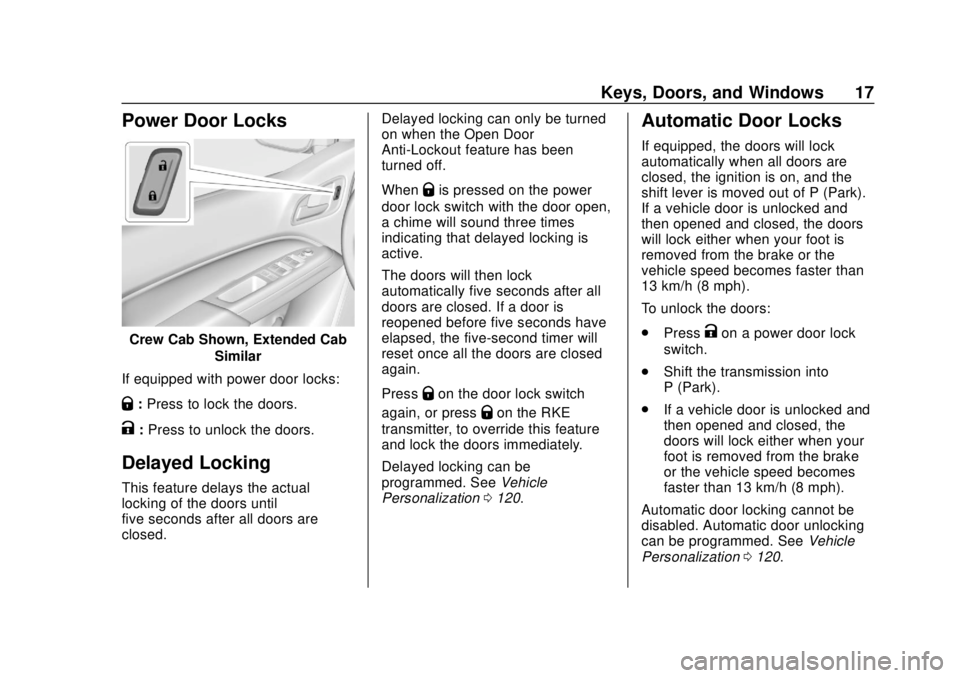
Power Door Locks
Crew Cab Shown, Extended CabSimilar
If equipped with power door locks:
Q: Press to lock the doors.
K:Press to unlock the doors.
Delayed Locking
This feature delays the actual
locking of the doors until
five seconds after all doors are
closed. Delayed locking can only be turned
on when the Open Door
Anti-Lockout feature has been
turned off.
When
Qis pressed on the power
door lock switch with the door open,
a chime will sound three times
indicating that delayed locking is
active.
The doors will then lock
automatically five seconds after all
doors are closed. If a door is
reopened before five seconds have
elapsed, the five-second timer will
reset once all the doors are closed
again.
Press
Qon the door lock switch
again, or press
Qon the RKE
transmitter, to override this feature
and lock the doors immediately.
Delayed locking can be
programmed. See Vehicle
Personalization 0120.
Automatic Door Locks
If equipped, the doors will lock
automatically when all doors are
closed, the ignition is on, and the
shift lever is moved out of P (Park).
If a vehicle door is unlocked and
then opened and closed, the doors
will lock either when your foot is
removed from the brake or the
vehicle speed becomes faster than
13 km/h (8 mph).
To unlock the doors:
.
Press
Kon a power door lock
switch.
. Shift the transmission into
P (Park).
. If a vehicle door is unlocked and
then opened and closed, the
doors will lock either when your
foot is removed from the brake
or the vehicle speed becomes
faster than 13 km/h (8 mph).
Automatic door locking cannot be
disabled. Automatic door unlocking
can be programmed. See Vehicle
Personalization 0120.
Page 36 of 368
Chevrolet Colorado Owner Manual (GMNA-Localizing-U.S./Canada/Mexico-
13566640) - 2020 - CRC - 9/30/19
Seats and Restraints 35
4. Reconnect the center seat beltlatch plate to the mini-buckle.
Make sure the seat belt is not
twisted.
5. Push and pull on the latch plate to be sure it is secure.
When the seatback is not in use, it
should be kept in the upright, locked
position.Seat Belts
This section describes how to use
seat belts properly, and some things
not to do.
{Warning
Do not let anyone ride where a
seat belt cannot be worn properly.
In a crash, if you or your
passenger(s) are not wearing
seat belts, injuries can be much
worse than if you are wearing
seat belts. You can be seriously
injured or killed by hitting things
inside the vehicle harder or by
being ejected from the vehicle. In
addition, anyone who is not
buckled up can strike other
passengers in the vehicle.
It is extremely dangerous to ride
in a cargo area, inside or outside
of a vehicle. In a collision,
passengers riding in these areas
are more likely to be seriously
injured or killed. Do not allow (Continued)
Warning (Continued)
passengers to ride in any area of
the vehicle that is not equipped
with seats and seat belts.
Always wear a seat belt, and
check that all passenger(s) are
restrained properly too.
This vehicle has indicators as a
reminder to buckle the seat belts.
See Seat Belt Reminders 0103.
Buckle to Drive Feature
If equipped, this feature prevents
the vehicle from shifting out of
P (Park) when Teen Driver is active
and the driver seat belt is not
buckled. See “Teen Driver”in the
infotainment manual. If the engine is
running, the driver seat belt is not
buckled, and the brake pedal is
pressed with the vehicle in P (Park),
a message displays in the Driver
Information Center (DIC). Buckle the
driver seat belt to shift out of
P (Park). Shifting from P (Park) will
be prevented once for each ignition
Page 50 of 368
Chevrolet Colorado Owner Manual (GMNA-Localizing-U.S./Canada/Mexico-
13566640) - 2020 - CRC - 9/30/19
Seats and Restraints 49
be some smoke and dust coming
from the vents in the deflated
airbags. Airbag inflation does not
prevent the driver from seeing out of
the windshield or being able to steer
the vehicle, nor does it prevent
people from leaving the vehicle.
{Warning
When an airbag inflates, there
may be dust in the air. This dust
could cause breathing problems
for people with a history of
asthma or other breathing trouble.
To avoid this, everyone in the
vehicle should get out as soon as
it is safe to do so. If you have
breathing problems but cannot
get out of the vehicle after an
airbag inflates, then get fresh air
by opening a window or a door.
If you experience breathing
problems following an airbag
deployment, you should seek
medical attention.The vehicle has a feature that may
automatically unlock the doors, turn
on the interior lamps and hazard
warning flashers, and shut off the
fuel system after the airbags inflate.
The feature may also activate,
without airbag inflation, after an
event that exceeds a predetermined
threshold. After turning the ignition
off and then on again, the fuel
system will return to normal
operation; the doors can be locked,
the interior lamps can be turned off,
and the hazard warning flashers can
be turned off using the controls for
those features. If any of these
systems are damaged in the crash
they may not operate as normal.
{Warning
A crash severe enough to inflate
the airbags may have also
damaged important functions in
the vehicle, such as the fuel
system, brake and steering
systems, etc. Even if the vehicle
appears to be drivable after a
(Continued)
Warning (Continued)
moderate crash, there may be
concealed damage that could
make it difficult to safely operate
the vehicle.
Use caution if you should attempt
to restart the engine after a crash
has occurred.
In many crashes severe enough to
inflate the airbag, windshields are
broken by vehicle deformation.
Additional windshield breakage may
also occur from the front outboard
passenger airbag.
. Airbags are designed to inflate
only once. After an airbag
inflates, you will need some new
parts for the airbag system.
If you do not get them, the
airbag system will not be there
to help protect you in another
crash. A new system will include
airbag modules and possibly
other parts. The service manual
for the vehicle covers the need
to replace other parts.
Page 91 of 368
Chevrolet Colorado Owner Manual (GMNA-Localizing-U.S./Canada/Mexico-
13566640) - 2020 - CRC - 9/30/19
90 Instruments and Controls
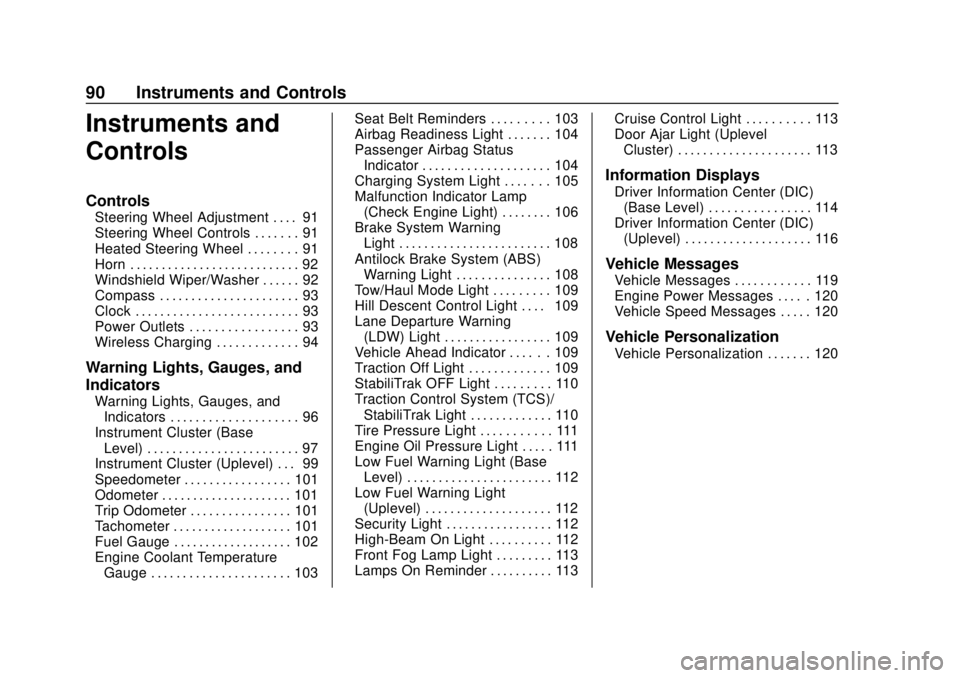
Instruments and
Controls
Controls
Steering Wheel Adjustment . . . . 91
Steering Wheel Controls . . . . . . . 91
Heated Steering Wheel . . . . . . . . 91
Horn . . . . . . . . . . . . . . . . . . . . . . . . . . . 92
Windshield Wiper/Washer . . . . . . 92
Compass . . . . . . . . . . . . . . . . . . . . . . 93
Clock . . . . . . . . . . . . . . . . . . . . . . . . . . 93
Power Outlets . . . . . . . . . . . . . . . . . 93
Wireless Charging . . . . . . . . . . . . . 94
Warning Lights, Gauges, and
Indicators
Warning Lights, Gauges, andIndicators . . . . . . . . . . . . . . . . . . . . 96
Instrument Cluster (Base Level) . . . . . . . . . . . . . . . . . . . . . . . . 97
Instrument Cluster (Uplevel) . . . 99
Speedometer . . . . . . . . . . . . . . . . . 101
Odometer . . . . . . . . . . . . . . . . . . . . . 101
Trip Odometer . . . . . . . . . . . . . . . . 101
Tachometer . . . . . . . . . . . . . . . . . . . 101
Fuel Gauge . . . . . . . . . . . . . . . . . . . 102
Engine Coolant Temperature
Gauge . . . . . . . . . . . . . . . . . . . . . . 103 Seat Belt Reminders . . . . . . . . . 103
Airbag Readiness Light . . . . . . . 104
Passenger Airbag Status
Indicator . . . . . . . . . . . . . . . . . . . . 104
Charging System Light . . . . . . . 105
Malfunction Indicator Lamp
(Check Engine Light) . . . . . . . . 106
Brake System Warning Light . . . . . . . . . . . . . . . . . . . . . . . . 108
Antilock Brake System (ABS) Warning Light . . . . . . . . . . . . . . . 108
Tow/Haul Mode Light . . . . . . . . . 109
Hill Descent Control Light . . . . 109
Lane Departure Warning (LDW) Light . . . . . . . . . . . . . . . . . 109
Vehicle Ahead Indicator . . . . . . 109
Traction Off Light . . . . . . . . . . . . . 109
StabiliTrak OFF Light . . . . . . . . . 110
Traction Control System (TCS)/ StabiliTrak Light . . . . . . . . . . . . . 110
Tire Pressure Light . . . . . . . . . . . 111
Engine Oil Pressure Light . . . . . 111
Low Fuel Warning Light (Base Level) . . . . . . . . . . . . . . . . . . . . . . . 112
Low Fuel Warning Light (Uplevel) . . . . . . . . . . . . . . . . . . . . 112
Security Light . . . . . . . . . . . . . . . . . 112
High-Beam On Light . . . . . . . . . . 112
Front Fog Lamp Light . . . . . . . . . 113
Lamps On Reminder . . . . . . . . . . 113 Cruise Control Light . . . . . . . . . . 113
Door Ajar Light (Uplevel
Cluster) . . . . . . . . . . . . . . . . . . . . . 113
Information Displays
Driver Information Center (DIC)(Base Level) . . . . . . . . . . . . . . . . 114
Driver Information Center (DIC) (Uplevel) . . . . . . . . . . . . . . . . . . . . 116
Vehicle Messages
Vehicle Messages . . . . . . . . . . . . 119
Engine Power Messages . . . . . 120
Vehicle Speed Messages . . . . . 120
Vehicle Personalization
Vehicle Personalization . . . . . . . 120
Page 109 of 368
Chevrolet Colorado Owner Manual (GMNA-Localizing-U.S./Canada/Mexico-
13566640) - 2020 - CRC - 9/30/19
108 Instruments and Controls
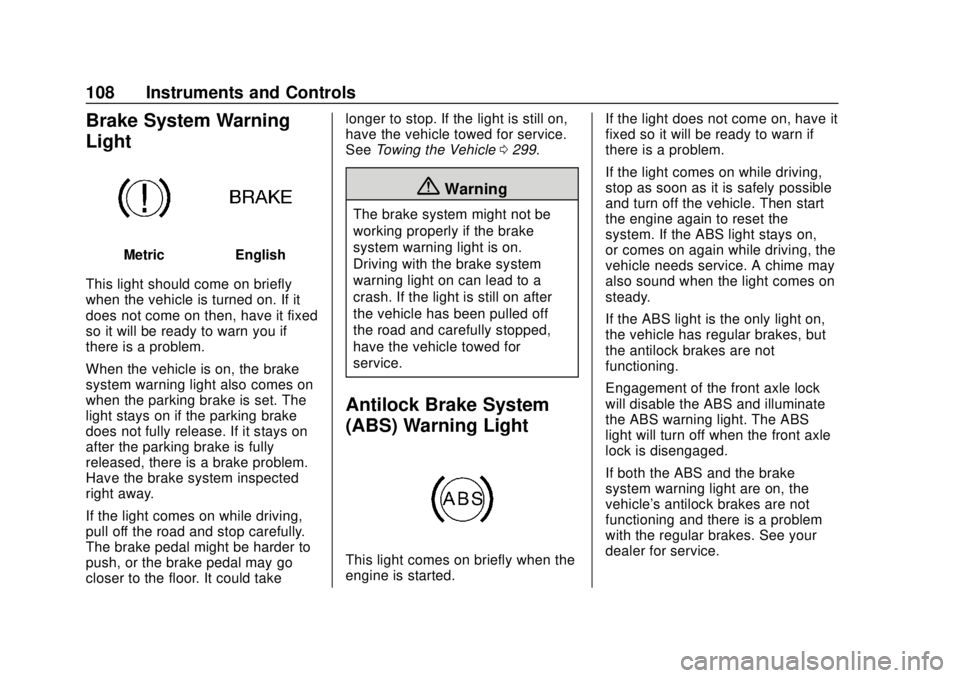
Brake System Warning
Light
MetricEnglish
This light should come on briefly
when the vehicle is turned on. If it
does not come on then, have it fixed
so it will be ready to warn you if
there is a problem.
When the vehicle is on, the brake
system warning light also comes on
when the parking brake is set. The
light stays on if the parking brake
does not fully release. If it stays on
after the parking brake is fully
released, there is a brake problem.
Have the brake system inspected
right away.
If the light comes on while driving,
pull off the road and stop carefully.
The brake pedal might be harder to
push, or the brake pedal may go
closer to the floor. It could take longer to stop. If the light is still on,
have the vehicle towed for service.
See
Towing the Vehicle 0299.
{Warning
The brake system might not be
working properly if the brake
system warning light is on.
Driving with the brake system
warning light on can lead to a
crash. If the light is still on after
the vehicle has been pulled off
the road and carefully stopped,
have the vehicle towed for
service.
Antilock Brake System
(ABS) Warning Light
This light comes on briefly when the
engine is started. If the light does not come on, have it
fixed so it will be ready to warn if
there is a problem.
If the light comes on while driving,
stop as soon as it is safely possible
and turn off the vehicle. Then start
the engine again to reset the
system. If the ABS light stays on,
or comes on again while driving, the
vehicle needs service. A chime may
also sound when the light comes on
steady.
If the ABS light is the only light on,
the vehicle has regular brakes, but
the antilock brakes are not
functioning.
Engagement of the front axle lock
will disable the ABS and illuminate
the ABS warning light. The ABS
light will turn off when the front axle
lock is disengaged.
If both the ABS and the brake
system warning light are on, the
vehicle's antilock brakes are not
functioning and there is a problem
with the regular brakes. See your
dealer for service.
Page 110 of 368
Chevrolet Colorado Owner Manual (GMNA-Localizing-U.S./Canada/Mexico-
13566640) - 2020 - CRC - 9/30/19
Instruments and Controls 109
SeeBrake System Warning Light
0 108.
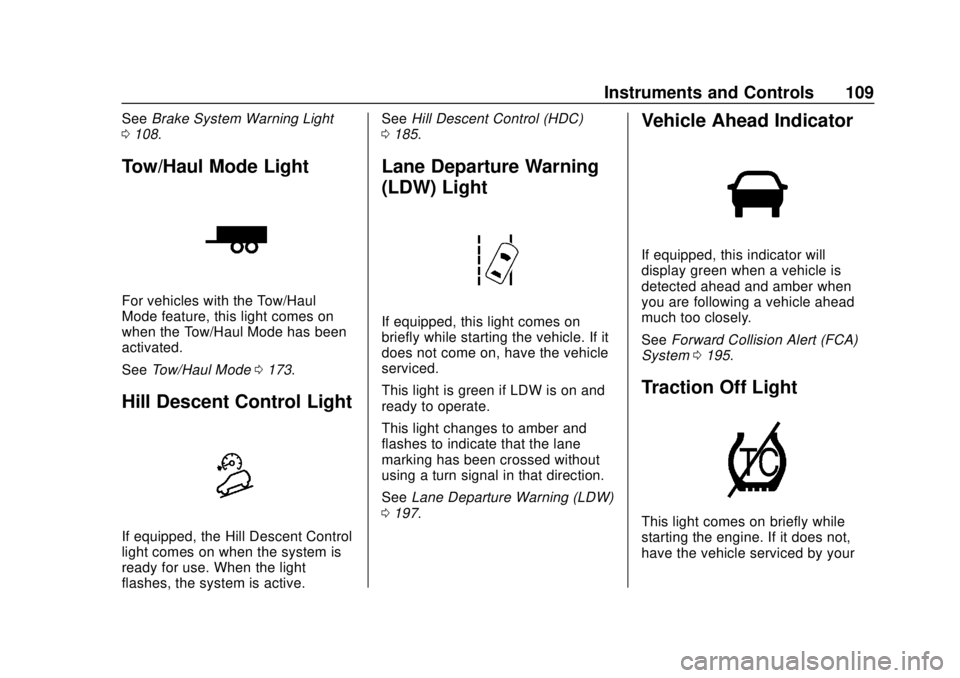
Tow/Haul Mode Light
For vehicles with the Tow/Haul
Mode feature, this light comes on
when the Tow/Haul Mode has been
activated.
See Tow/Haul Mode 0173.
Hill Descent Control Light
If equipped, the Hill Descent Control
light comes on when the system is
ready for use. When the light
flashes, the system is active. See
Hill Descent Control (HDC)
0 185.
Lane Departure Warning
(LDW) Light
If equipped, this light comes on
briefly while starting the vehicle. If it
does not come on, have the vehicle
serviced.
This light is green if LDW is on and
ready to operate.
This light changes to amber and
flashes to indicate that the lane
marking has been crossed without
using a turn signal in that direction.
See Lane Departure Warning (LDW)
0 197.
Vehicle Ahead Indicator
If equipped, this indicator will
display green when a vehicle is
detected ahead and amber when
you are following a vehicle ahead
much too closely.
See Forward Collision Alert (FCA)
System 0195.
Traction Off Light
This light comes on briefly while
starting the engine. If it does not,
have the vehicle serviced by your
Page 117 of 368
Chevrolet Colorado Owner Manual (GMNA-Localizing-U.S./Canada/Mexico-
13566640) - 2020 - CRC - 9/30/19
116 Instruments and Controls
Engine Hours :Shows the total
number of hours the engine has run.
Transmission Fluid
Temperature : Shows the
temperature of the automatic
transmission fluid in either degrees
Celsius (°C) or degrees
Fahrenheit (°F).
Trailer Brake (If Equipped) :
TRAILER GAIN shows the trailer
gain setting. This setting can be
adjusted from 0.0 to 10.0 with either
a trailer connected or disconnected.
OUTPUT shows the power output to
the trailer anytime a trailer with
electric brakes is connected. Output
is displayed as a bar graph. Dashes
may appear in the OUTPUT display
if a trailer is not connected.
Units : Move
w xto change
between Metric or US when the Unit
display is active. Press SET/CLR to
confirm the setting. This will change
the displays on the DIC to the type
of measurements you select.
ECO Drive Assist Menu (ECO)
Items
This menu is only available on some
vehicles. Press MENU on the turn
signal lever until the ECO menu is
displayed. Use
w xto scroll
through the menu items. Not all
items are available on every vehicle.
The following is a list of all possible
menu items:
Best Average Fuel Economy : The
bottom displays the best average
fuel economy (AFE) that is achieved
for a selected distance. The top
displays a running average of fuel
economy for the most recently
traveled selected distance. The
center bar graph displays the
instantaneous fuel economy.
Quickly press the SET/CLR button
to change the settings for the
distance options.
When viewing best AFE, a several
second press and hold of SET/CLR
will reset the best value. The best
value will show “- - -“until the
selected distance has been
traveled. The display provides feedback on
how current driving behavior in the
bar graph affects the running
average in the top display and how
well recent driving compares to the
best that has been achieved.
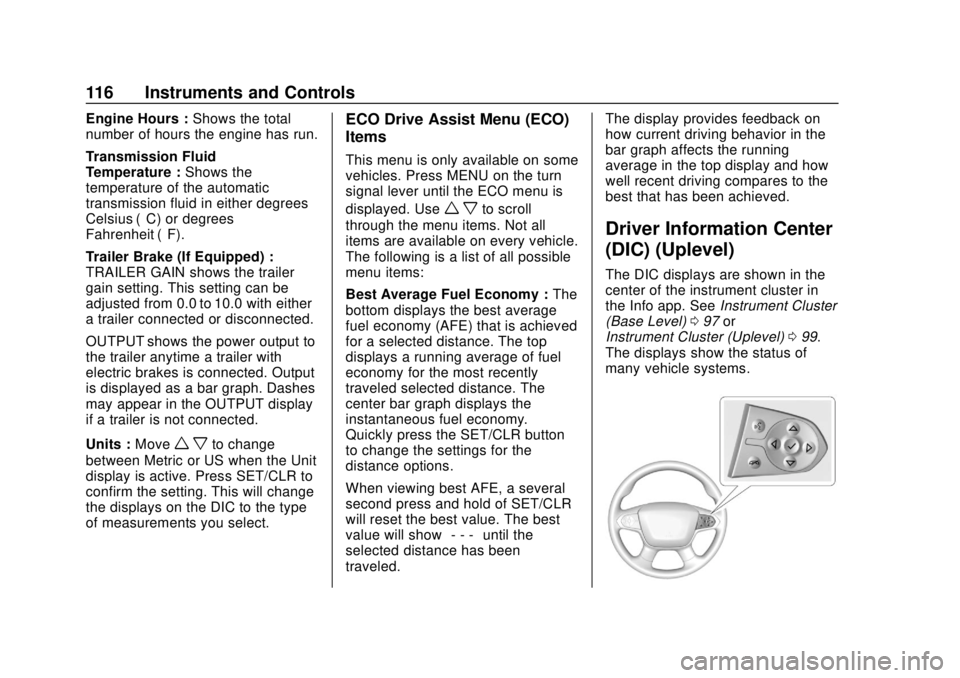
Driver Information Center
(DIC) (Uplevel)
The DIC displays are shown in the
center of the instrument cluster in
the Info app. See
Instrument Cluster
(Base Level) 097 or
Instrument Cluster (Uplevel) 099.
The displays show the status of
many vehicle systems.
Page 120 of 368
Chevrolet Colorado Owner Manual (GMNA-Localizing-U.S./Canada/Mexico-
13566640) - 2020 - CRC - 9/30/19
Instruments and Controls 119
Timer :This display can be used as
a timer. To start the timer, press
V
while this display is active. The
display will show the amount of time
that has passed since the timer was
last reset. To stop the timer, press
V
briefly while this display is active
and the timer is running. To reset
the timer to zero, press and hold
V
while this display is active.
Speed Limit : Shows sign
information, which comes from a
roadway database in the onboard
navigation, if equipped.
Battery Voltage : Displays the
current battery voltage, if equipped.
Battery voltage changes are normal
while driving. See Charging System
Light 0105. If there is a problem
with the battery charging system,
the DIC will display a message.
Oil Pressure : Oil pressure is
displayed in either kilopascal (kPa)
or in pounds per square inch (psi).
Engine Hours : Shows the total
number of hours the engine has run. Off Road Page :
This page shows
the traction, four wheel drive, and
steering angle states. When the
front or rear axles are locked, a lock
icon is displayed. See Off-Road
Driving 0145.
Transmission Fluid
Temperature : Shows the
temperature of the automatic
transmission fluid in either degrees
Celsius (°C) or degrees
Fahrenheit (°F).
Trailer Brake (If Equipped) :
TRAILER GAIN shows the trailer
gain setting. This setting can be
adjusted from 0.0 to 10.0 with either
a trailer connected or disconnected.
OUTPUT shows the power output to
the trailer anytime a trailer with
electric brakes is connected. Output
is displayed as a bar graph. Dashes
may appear in the OUTPUT display
if a trailer is not connected.
Blank Page : Shows no
information.
Vehicle Messages
Messages displayed on the DIC
indicate the status of the vehicle or
some action that may be needed to
correct a condition. Multiple
messages may appear one after
another.
The messages that do not require
immediate action can be
acknowledged and cleared by
pressing
V. The messages that
require immediate action cannot be
cleared until that action is
performed.
All messages should be taken
seriously; clearing the message
does not correct the problem.
If a SERVICE message appears,
see your dealer.
Follow the instructions given in the
messages. The system displays
messages regarding the following
topics:
. Service Messages
. Fluid Levels
. Vehicle Security