ECO mode CHEVROLET COLORADO 2022 Owner's Manual
[x] Cancel search | Manufacturer: CHEVROLET, Model Year: 2022, Model line: COLORADO, Model: CHEVROLET COLORADO 2022Pages: 362, PDF Size: 13.62 MB
Page 199 of 362
Chevrolet Colorado Owner Manual (GMNA-Localizing-U.S./Canada/Mexico-
15274222) - 2022 - CRC - 11/2/21
198 Driving and Operating
4. Turn the transfer case shift knob to 2m.
After the transfer case has shifted out of
N (Neutral), the N (Neutral) light will
go out.
5. Shift to P (Park).
Caution
Shifting the transmission into gear before
the requested mode indicator light has
stopped flashing could damage the
transfer case.
6. Release the parking brake.
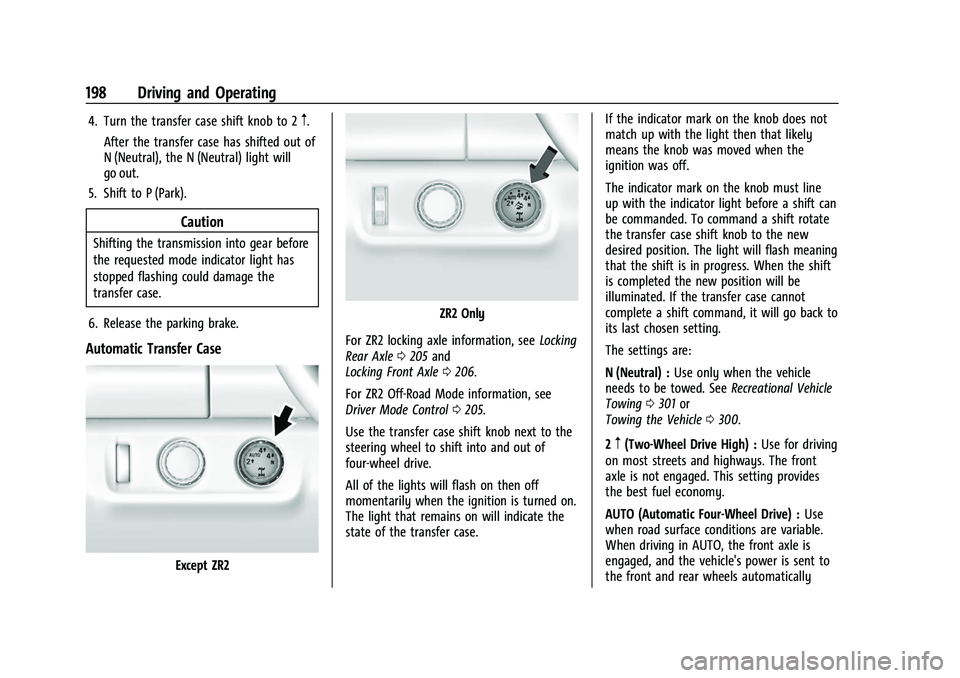
Automatic Transfer Case
Except ZR2
ZR2 Only
For ZR2 locking axle information, see Locking
Rear Axle 0205 and
Locking Front Axle 0206.
For ZR2 Off-Road Mode information, see
Driver Mode Control 0205.
Use the transfer case shift knob next to the
steering wheel to shift into and out of
four-wheel drive.
All of the lights will flash on then off
momentarily when the ignition is turned on.
The light that remains on will indicate the
state of the transfer case. If the indicator mark on the knob does not
match up with the light then that likely
means the knob was moved when the
ignition was off.
The indicator mark on the knob must line
up with the indicator light before a shift can
be commanded. To command a shift rotate
the transfer case shift knob to the new
desired position. The light will flash meaning
that the shift is in progress. When the shift
is completed the new position will be
illuminated. If the transfer case cannot
complete a shift command, it will go back to
its last chosen setting.
The settings are:
N (Neutral) :
Use only when the vehicle
needs to be towed. See Recreational Vehicle
Towing 0301 or
Towing the Vehicle 0300.
2
m(Two-Wheel Drive High) : Use for driving
on most streets and highways. The front
axle is not engaged. This setting provides
the best fuel economy.
AUTO (Automatic Four-Wheel Drive) : Use
when road surface conditions are variable.
When driving in AUTO, the front axle is
engaged, and the vehicle's power is sent to
the front and rear wheels automatically
Page 200 of 362
Chevrolet Colorado Owner Manual (GMNA-Localizing-U.S./Canada/Mexico-
15274222) - 2022 - CRC - 11/2/21
Driving and Operating 199
based on driving conditions. This setting
provides slightly lower fuel economy than
2
m.
Do not use AUTO mode, if equipped, to park
on a steep grade with poor traction such as
ice, snow, mud, or gravel. In AUTO mode
only the rear wheels will hold the vehicle
from sliding when parked. If parking on a
steep grade, use 4
mto keep all four wheels
engaged.
4
m(Four-Wheel Drive High) : This setting
engages the front axle. Use this position
when extra traction is needed, such as when
driving on snowy or icy roads, or when
off-roading.
4
n(Four-Wheel Drive Low) : This setting
engages the front axle and delivers extra
torque. Choose 4
nwhen driving off-road in
deep sand, deep mud, or deep snow, and
while climbing or descending steep hills.
Shifting into 4
nwill turn Traction Control
and StabiliTrak/ESC off. See Traction Control/
Electronic Stability Control 0202. Shifting Into 4
mor AUTO
Turn the knob to the 4
mor AUTO position
at any speed, except from 4
n. The indicator
light will flash while shifting and will remain
on when the shift is completed.
Shifting Into 2
m
Turn the knob to 2mat any speed, except
when shifting from 4
n. The indicator light
will flash while shifting and will remain on
when the shift is completed.
Shifting Into 4
n
When 4nis engaged, keep vehicle speed
below 72 km/h (45 mph).
To shift into 4
n:
1. The ignition must be on and the vehicle must be stopped or moving less than
5 km/h (3 mph) with the transmission in
N (Neutral). It is best for the vehicle to
be moving 1.6 to 3.2 km/h (1 to 2 mph).
2. Turn the knob to 4
n. Wait for the 4n
indicator light to stop flashing before
shifting the transmission into gear.
Caution
Shifting the transmission into gear before
the requested mode indicator light has
stopped flashing could damage the
transfer case.
If the transmission is in gear and/or moving
more than 5 km/h (3 mph), the 4
nindicator
light will flash for 30 seconds, but will not
complete the shift. After 30 seconds the
transfer case will shift to 4
m. Turn the knob
to 4
mto display the indicator. With the
vehicle moving less than 5 km/h (3 mph),
and the transmission in N (Neutral), attempt
the shift again.
Shifting Out of 4
n
To shift:
1. The vehicle must be stopped or moving less than 5 km/h (3 mph) with the
transmission in N (Neutral) and the
ignition on. It is best for the vehicle to
be moving 1.6 to 3.2 km/h (1 to 2 mph).
2. Turn the knob to 4
m, AUTO, or 2m. Wait
for the 4
m, AUTO, or 2mindicator light
to stop flashing before shifting the
transmission into gear.
Page 201 of 362
Chevrolet Colorado Owner Manual (GMNA-Localizing-U.S./Canada/Mexico-
15274222) - 2022 - CRC - 11/2/21
200 Driving and Operating
Caution
Shifting the transmission into gear before
the requested mode indicator light has
stopped flashing could damage the
transfer case.
If the transmission is in gear and/or moving
more than 5 km/h (3 mph), the 4
m, AUTO,
or 2
mindicator light will flash for
30 seconds but will not complete the shift.
With the vehicle moving less than 5 km/h
(3 mph), and the transmission in N (Neutral),
attempt the shift again.
Shifting Into N (Neutral)
To shift:
1. Park the vehicle on a level surface.
2. Set the parking brake and press and hold the brake pedal. See Parking Brake
0 201.
3. Start the vehicle or turn the ignition on.
4. Shift the transmission to N (Neutral).
5. Shift the transfer case to 2
m.
6. Turn the transfer case shift knob clockwise past the 4
ndetent to
N (Neutral) until it stops and hold it
there until the N (Neutral) light starts flashing. This will take at least
10 seconds. Then slowly release the knob
to the 4
nposition. The N (Neutral) light
will come on when the transfer case
shift to N (Neutral) is complete.
7. With the engine running, verify that the transfer case is in N (Neutral) by shifting
the transmission to R (Reverse), then
shift the transmission to D (Drive). There
should be no movement of the vehicle
while shifting the transmission.
8. Turn the engine off, and the ignition to ACC/ACCESSORY.
9. Place the transmission shift lever in P (Park).
Shifting Out of N (Neutral)
To shift: 1. Set the parking brake.
2. Turn the ignition on with the engine off.
3. Shift the transmission to N (Neutral).
4. Turn the transfer case shift knob to 2
m.
After the transfer case has shifted out of
N (Neutral), the N (Neutral) light will
go out and the new 2
mstate will be
displayed. 5. Place the transmission shift lever in
P (Park).
6. Release the parking brake.
Brakes
Antilock Brake System (ABS)
The Antilock Brake System (ABS) helps
prevent a braking skid and maintain steering
while braking hard.
ABS performs a system check when the
vehicle is first driven. A momentary motor
or clicking noise may be heard while this
test is going on, and the brake pedal may
move slightly. This is normal.
If there is a problem with ABS, this warning
light stays on. See Antilock Brake System
(ABS) Warning Light 089.
ABS does not change the time needed to
get a foot on the brake pedal and does not
always decrease stopping distance. If you
Page 205 of 362
Chevrolet Colorado Owner Manual (GMNA-Localizing-U.S./Canada/Mexico-
15274222) - 2022 - CRC - 11/2/21
204 Driving and Operating
To turn off both TCS and StabiliTrak/ESC,
press and hold
guntil the Traction Off light
iand StabiliTrak/ESC Off lightgcome on
and stay on in the instrument cluster. To
turn TCS and StabiliTrak/ESC on again, press
and release
g. The Traction Off lightiand
StabiliTrak/ESC Off light
gin the instrument
cluster turn off.
StabiliTrak/ESC will automatically turn on if
the vehicle exceeds 56 km/h (35 mph). TCS
will remain off until
gis pressed or until
the ignition is turned off and then back on.
Adding accessories can affect the vehicle
performance. See Accessories and
Modifications 0237.
Stability Control Interaction with
Off-Road Mode (ZR2 Only)
The TCS and StabiliTrak/ESC calibrations are
different while in Off-Road Mode. They
provide optimum performance in an off-road
environment.
Pressing and releasing
gwhile in Off-Road
Mode disables TCS and changes the
StabiliTrak/ESC calibration to allow a greater
difference between vehicle path and
intended path. This reduces the amount of correction StabiliTrak/ESC will provide in the
event the vehicle is not traveling on the
intended path.
To turn off both TCS and StabiliTrak/ESC,
press and hold
guntil a StabiliTrak/ESC off
message displays in the instrument cluster.
To turn TCS and StabiliTrak/ESC on again,
press and release
g.iandgin the
instrument cluster will turn off.
StabiliTrak/ESC will not automatically turn
on while in Off-Road Mode. TCS and
StabiliTrak/ESC will remain off in Off-Road
Mode until
gis pressed or the ignition is
turned off and then back on.
Hill Descent Control (HDC)
If equipped, HDC can be used when driving
downhill. It sets and maintains vehicle speed
while descending a very steep incline in a
forward or reverse gear.
The HDC switch is on the center stack,
below the climate controls.
Press
5to enable or disable HDC. Vehicle
speed must be below 60 km/h (37 mph).
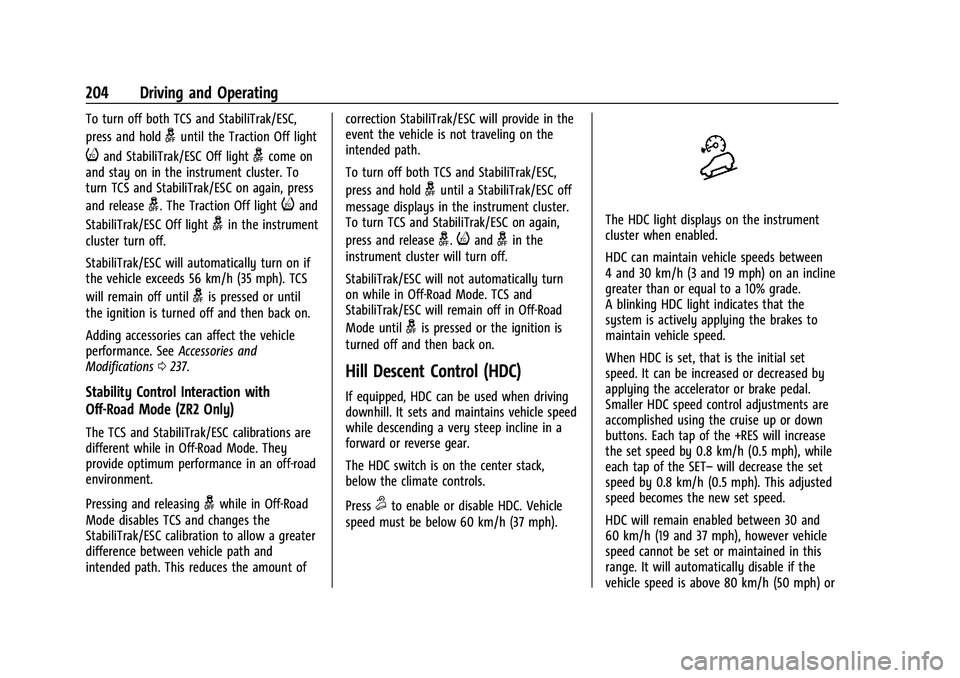
The HDC light displays on the instrument
cluster when enabled.
HDC can maintain vehicle speeds between
4 and 30 km/h (3 and 19 mph) on an incline
greater than or equal to a 10% grade.
A blinking HDC light indicates that the
system is actively applying the brakes to
maintain vehicle speed.
When HDC is set, that is the initial set
speed. It can be increased or decreased by
applying the accelerator or brake pedal.
Smaller HDC speed control adjustments are
accomplished using the cruise up or down
buttons. Each tap of the +RES will increase
the set speed by 0.8 km/h (0.5 mph), while
each tap of the SET– will decrease the set
speed by 0.8 km/h (0.5 mph). This adjusted
speed becomes the new set speed.
HDC will remain enabled between 30 and
60 km/h (19 and 37 mph), however vehicle
speed cannot be set or maintained in this
range. It will automatically disable if the
vehicle speed is above 80 km/h (50 mph) or
Page 206 of 362
Chevrolet Colorado Owner Manual (GMNA-Localizing-U.S./Canada/Mexico-
15274222) - 2022 - CRC - 11/2/21
Driving and Operating 205
above 60 km/h (37 mph) for at least
30 seconds.
5must be pressed again to
re-enable HDC.
When enabled, if the vehicle is at a speed
above 30 km/h (19 mph) and less than
60 km/h (37 mph), a DIC message will
display instructing the driver to reduce
speed for HDC operation.
Cruise control will not function while HDC is
enabled and vehicle speed is below 40 km/h
(25 mph).
Driver Mode Control
Driver Mode Control (DMC) allows the driver
to adjust the overall driving character to
better suit preference or specific driving
scenarios by adjusting multiple sub-system
calibrations simultaneously. Mode
availability is dependent upon vehicle trim
level, region, and optional features.
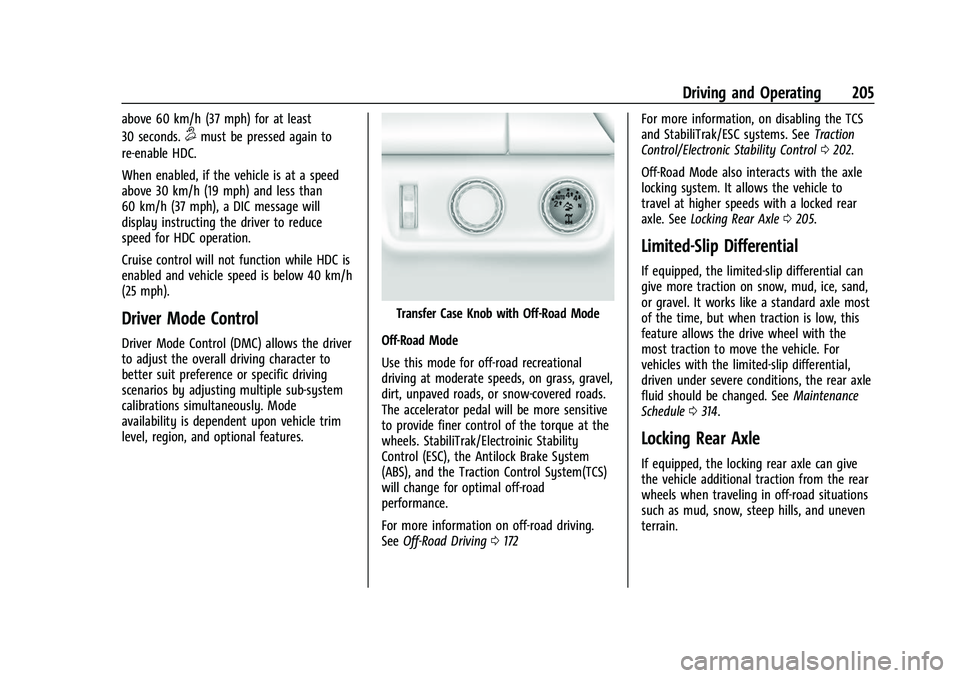
Transfer Case Knob with Off-Road Mode
Off-Road Mode
Use this mode for off-road recreational
driving at moderate speeds, on grass, gravel,
dirt, unpaved roads, or snow-covered roads.
The accelerator pedal will be more sensitive
to provide finer control of the torque at the
wheels. StabiliTrak/Electroinic Stability
Control (ESC), the Antilock Brake System
(ABS), and the Traction Control System(TCS)
will change for optimal off-road
performance.
For more information on off-road driving.
See Off-Road Driving 0172 For more information, on disabling the TCS
and StabiliTrak/ESC systems. See
Traction
Control/Electronic Stability Control 0202.
Off-Road Mode also interacts with the axle
locking system. It allows the vehicle to
travel at higher speeds with a locked rear
axle. See Locking Rear Axle 0205.
Limited-Slip Differential
If equipped, the limited-slip differential can
give more traction on snow, mud, ice, sand,
or gravel. It works like a standard axle most
of the time, but when traction is low, this
feature allows the drive wheel with the
most traction to move the vehicle. For
vehicles with the limited-slip differential,
driven under severe conditions, the rear axle
fluid should be changed. See Maintenance
Schedule 0314.
Locking Rear Axle
If equipped, the locking rear axle can give
the vehicle additional traction from the rear
wheels when traveling in off-road situations
such as mud, snow, steep hills, and uneven
terrain.
Page 207 of 362
Chevrolet Colorado Owner Manual (GMNA-Localizing-U.S./Canada/Mexico-
15274222) - 2022 - CRC - 11/2/21
206 Driving and Operating
Caution
If you try to lock the axle while the
vehicle is stuck and the tires are spinning,
the vehicle’s drivetrain could be damaged.
The repairs would not be covered by the
vehicle warranty. Always lock the axle
before attempting situations and/or
navigating terrain that could cause the
vehicle to become stuck.
Caution
If the vehicle’s axle is locked while driving
on pavement, the drivetrain could be
damaged. Repairs would not be covered
by the vehicle warranty. Do not use the
locking axle on pavement.
Before the front axle can be locked, the rear
axle must be locked and the transfer case
must be in 4
n.
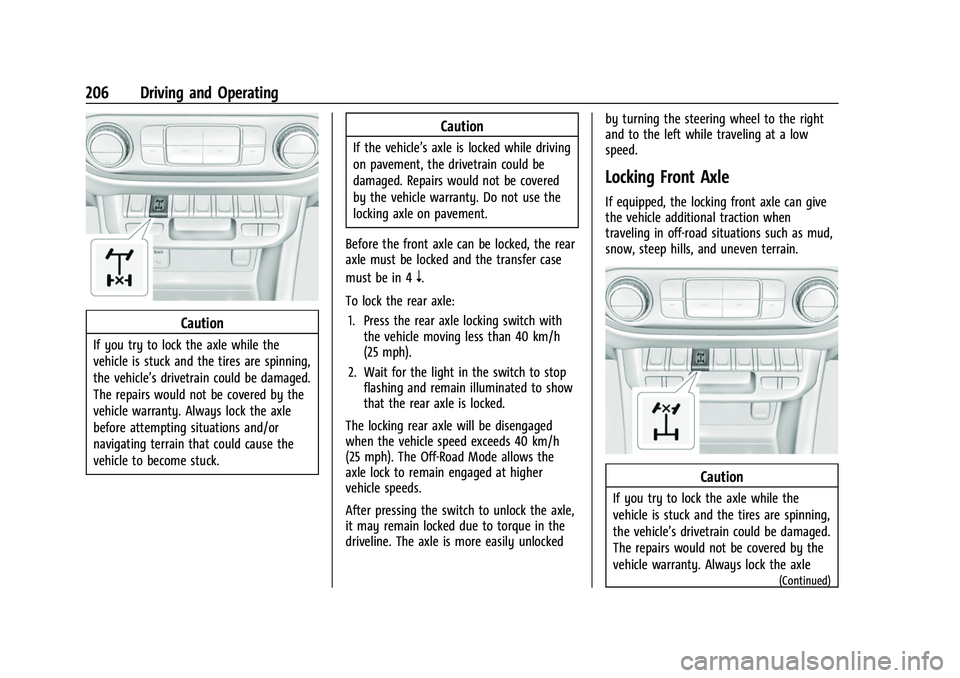
To lock the rear axle: 1. Press the rear axle locking switch with the vehicle moving less than 40 km/h
(25 mph).
2. Wait for the light in the switch to stop flashing and remain illuminated to show
that the rear axle is locked.
The locking rear axle will be disengaged
when the vehicle speed exceeds 40 km/h
(25 mph). The Off-Road Mode allows the
axle lock to remain engaged at higher
vehicle speeds.
After pressing the switch to unlock the axle,
it may remain locked due to torque in the
driveline. The axle is more easily unlocked by turning the steering wheel to the right
and to the left while traveling at a low
speed.
Locking Front Axle
If equipped, the locking front axle can give
the vehicle additional traction when
traveling in off-road situations such as mud,
snow, steep hills, and uneven terrain.
Caution
If you try to lock the axle while the
vehicle is stuck and the tires are spinning,
the vehicle’s drivetrain could be damaged.
The repairs would not be covered by the
vehicle warranty. Always lock the axle
(Continued)
Page 208 of 362
Chevrolet Colorado Owner Manual (GMNA-Localizing-U.S./Canada/Mexico-
15274222) - 2022 - CRC - 11/2/21
Driving and Operating 207
Caution (Continued)
before attempting situations and/or
navigating terrain that could cause the
vehicle to become stuck.
Caution
If the vehicle’s axle is locked while driving
on pavement, the drivetrain could be
damaged. Repairs would not be covered
by the vehicle warranty. Do not use the
locking axle on pavement.
Before the front axle can be locked, the rear
axle must be locked and the transfer case
must be in 4
n.
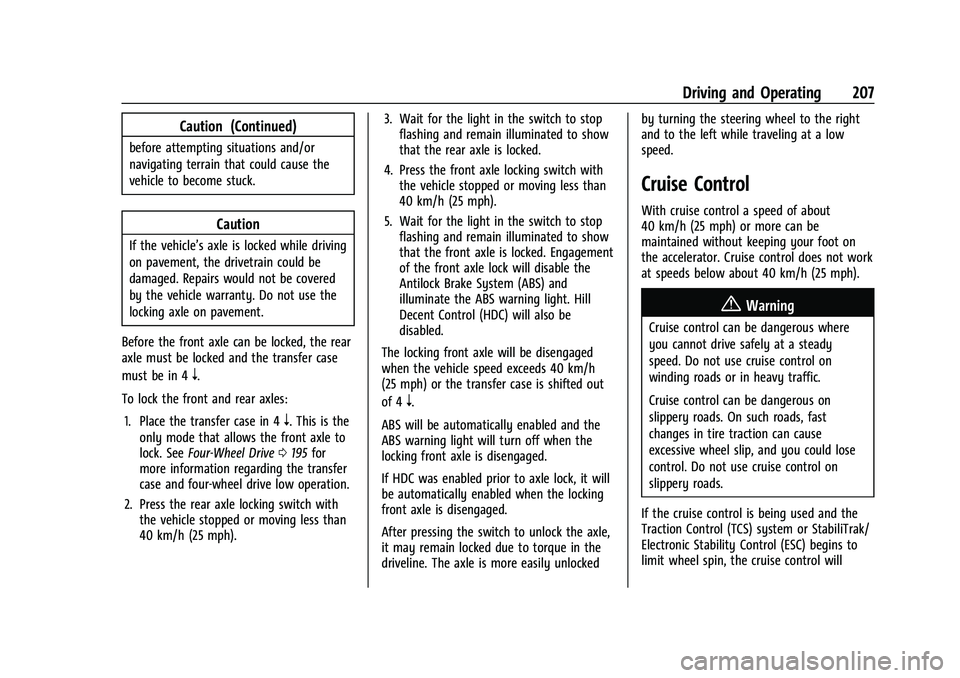
To lock the front and rear axles: 1. Place the transfer case in 4
n. This is the
only mode that allows the front axle to
lock. See Four-Wheel Drive 0195 for
more information regarding the transfer
case and four-wheel drive low operation.
2. Press the rear axle locking switch with the vehicle stopped or moving less than
40 km/h (25 mph). 3. Wait for the light in the switch to stop
flashing and remain illuminated to show
that the rear axle is locked.
4. Press the front axle locking switch with the vehicle stopped or moving less than
40 km/h (25 mph).
5. Wait for the light in the switch to stop flashing and remain illuminated to show
that the front axle is locked. Engagement
of the front axle lock will disable the
Antilock Brake System (ABS) and
illuminate the ABS warning light. Hill
Decent Control (HDC) will also be
disabled.
The locking front axle will be disengaged
when the vehicle speed exceeds 40 km/h
(25 mph) or the transfer case is shifted out
of 4
n.
ABS will be automatically enabled and the
ABS warning light will turn off when the
locking front axle is disengaged.
If HDC was enabled prior to axle lock, it will
be automatically enabled when the locking
front axle is disengaged.
After pressing the switch to unlock the axle,
it may remain locked due to torque in the
driveline. The axle is more easily unlocked by turning the steering wheel to the right
and to the left while traveling at a low
speed.
Cruise Control
With cruise control a speed of about
40 km/h (25 mph) or more can be
maintained without keeping your foot on
the accelerator. Cruise control does not work
at speeds below about 40 km/h (25 mph).
{Warning
Cruise control can be dangerous where
you cannot drive safely at a steady
speed. Do not use cruise control on
winding roads or in heavy traffic.
Cruise control can be dangerous on
slippery roads. On such roads, fast
changes in tire traction can cause
excessive wheel slip, and you could lose
control. Do not use cruise control on
slippery roads.
If the cruise control is being used and the
Traction Control (TCS) system or StabiliTrak/
Electronic Stability Control (ESC) begins to
limit wheel spin, the cruise control will
Page 221 of 362
Chevrolet Colorado Owner Manual (GMNA-Localizing-U.S./Canada/Mexico-
15274222) - 2022 - CRC - 11/2/21
220 Driving and Operating
and fuel economy. Successful, safe trailering
takes correct equipment, and it has to be
used properly.
The following information has many
time-tested, important trailering tips and
safety rules. Many of these are important
for your safety and that of your passengers.
Read this section carefully before pulling a
trailer.
When towing a trailer:
.Become familiar with and follow all state
and local laws that apply to trailer
towing. These requirements vary from
state to state.
.State laws may require the use of
extended side view mirrors. Even if not
required, you should install extended side
view mirrors if your visibility is limited or
restricted while towing.
.Do not tow a trailer during the first
800 km (500 mi) of vehicle use to prevent
damage to the engine, axle, or other
parts.
.It is recommended to perform the first oil
change before heavy towing.
.During the first 800 km (500 mi) of trailer
towing, do not drive over 80 km/h
(50 mph) and do not make starts at full
throttle.
.Vehicles can tow in D (Drive). Tow/Haul
Mode is recommended for heavier trailers.
SeeTow/Haul Mode 0194. If the
transmission downshifts too often, a
lower gear may be selected using Manual
Mode. See Manual Mode 0193.
If equipped, the following driver assistance
features should be turned off when towing
a trailer:
.Adaptive Cruise Control (ACC)
.Super Cruise Control
.Lane Keep Assist (LKA)
.Park Assist
.Reverse Automatic Braking (RAB)
If equipped, the following driver assistance
features should be turned to alert or off
when towing a trailer:
.Automatic Emergency Braking (AEB)
.Intelligent Brake Assist (IBA)
.Front Pedestrian Braking (FPB)
If equipped with Lane Change Alert (LCA),
the LCA detection zones that extend back
from the side of the vehicle do not move further back when a trailer is towed. Use
caution while changing lanes when towing a
trailer.
If equipped with Rear Cross Traffic Alert
(RCTA), use caution while backing up when
towing a trailer, as the RCTA detection zones
that extend out from the back of the vehicle
do not move further back when a trailer is
towed.
{Warning
To prevent serious injury or death from
carbon monoxide (CO), when towing a
trailer:
.Do not drive with the liftgate, trunk/
hatch, or rear-most window open.
.Fully open the air outlets on or under
the instrument panel.
.Adjust the climate control system to a
setting that brings in only outside air.
See
“Climate Control Systems” in the
Index.
For more information about carbon
monoxide, see Engine Exhaust 0190.
Towing a trailer requires experience. The
combination of the vehicle and trailer is
longer and not as responsive as the vehicle
Page 224 of 362
Chevrolet Colorado Owner Manual (GMNA-Localizing-U.S./Canada/Mexico-
15274222) - 2022 - CRC - 11/2/21
Driving and Operating 223
Disconnect the wiring to the trailer before
backing the trailer into the water to prevent
damage to the electrical circuits on the
trailer. Reconnect the wiring to the trailer
after removing the trailer from the water.
If the trailer has electric brakes that can
function when the trailer is submerged, it
might help to leave the electrical trailer
connector attached to maintain trailer brake
functionality while on the boat ramp.
To back the trailer into the water:1. If equipped, place the vehicle in four-wheel-drive high.
2. Slowly back down the boat ramp until the boat is floating, but no further than
necessary.
3. Press and hold the brake pedal, but do not shift into P (Park) yet.
4. Have someone place chocks under the front wheels of the vehicle.
5. Gradually release the brake pedal to allow the chocks to absorb the load of
the trailer.
6. Reapply the brake pedal. Then apply the parking brake and shift into P (Park).
7. Release the brake pedal. Pulling the Trailer from the Water
To pull the trailer of the water:
1. Press and hold the brake pedals.
2. Start the engine and shift into gear.
3. Release the parking brake.
4. Let up on the brake pedal.
5. Drive slowly until the tires are clear of the chocks.
6. Stop and have someone pick up and store the chocks.
7. Slowly pull the trailer from the water.
8. Once the vehicle and trailer have been driven from the sloped part of the boat
ramp, the vehicle can be shifted from
four-wheel-drive high. Shift into the drive
mode that is appropriate for the road
conditions.
Caution
If the vehicle tires begin to spin and the
vehicle begins to slide toward the water,
remove your foot from the accelerator
pedal and apply the brake pedal. Seek
help to have the vehicle towed up
the ramp.
Maintenance when Trailer Towing
The vehicle needs service more often when
used to tow trailers. See Maintenance
Schedule 0314. It is especially important to
check the automatic transmission fluid,
engine oil, axle lubricant, belts, cooling
system, and brake system before and during
each trip.
Check periodically to see that all nuts and
bolts on the trailer hitch are tight.
Engine Cooling When Trailer Towing
The cooling system may temporarily
overheat during severe operating conditions.
See Engine Overheating 0249.
Trailer Towing
If equipped with a diesel engine, see the
Duramax diesel supplement.
Caution
Towing a trailer improperly can damage
the vehicle and result in costly repairs
not covered by the vehicle warranty. To
tow a trailer correctly, follow the
directions in this section and see your
dealer for important information about
towing a trailer with the vehicle.
Page 230 of 362
Chevrolet Colorado Owner Manual (GMNA-Localizing-U.S./Canada/Mexico-
15274222) - 2022 - CRC - 11/2/21
Driving and Operating 229
Standards Association (CSA) requirement
CAN3-D313, or its equivalent, is
recommended.
State or local regulations may require
trailers to have their own braking system if
the loaded weight of the trailer exceeds
certain minimums that can vary from state
to state. Read and follow the instructions for
the trailer brakes so they are installed,
adjusted, and maintained properly. Never
attempt to tap into your vehicle's hydraulic
brake system. If you do, both the vehicle
anti-lock brakes and the trailer brakes may
not function, which could result in a crash.
Trailer Wiring Harness
For vehicles not equipped with heavy-duty
trailering, a harness is secured underneath
the left side of the vehicle, next to the spare
tire. The harness requires the installation of
a trailer connector, which is available
through your dealer. The seven-wire harness
contains the following trailer circuits:
.Yellow: Left stop/turn signal
.Green: Right stop/turn signal
.Brown: Taillamps/parking lamps
.Black: Ground
.Gray: Back-up lamps
.Orange: Battery feed
.Blue: Trailer brake
To help charge a remote (non-vehicle)
battery, press the Tow/Haul Mode button
on the center stack. If the trailer is too light
for Tow/Haul Mode, turn on the headlamps
to help charge the battery.
Trailer Brake Control Wiring Harness
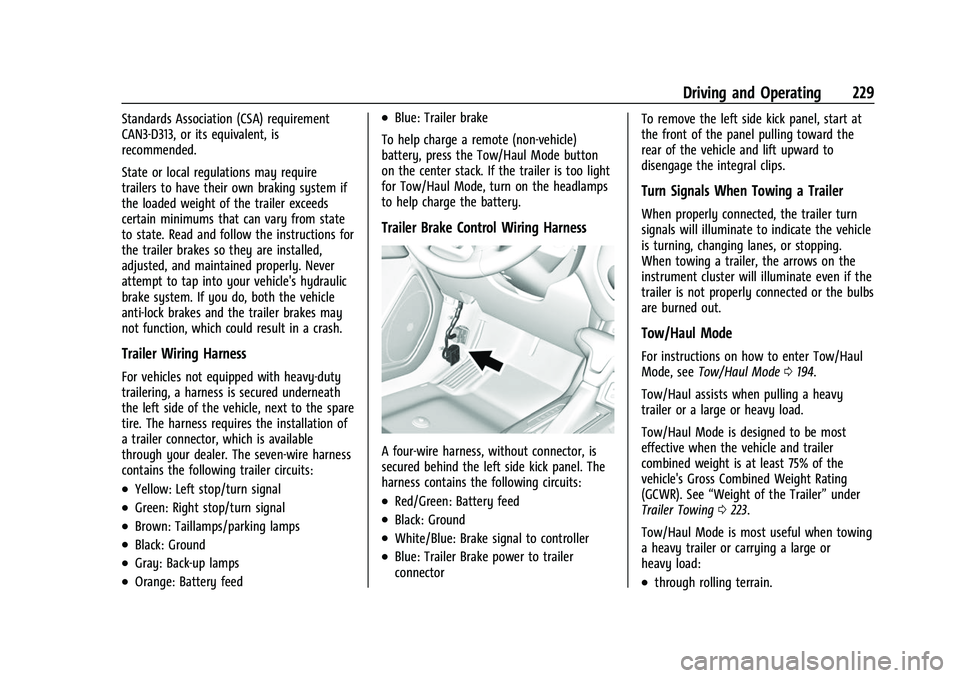
A four-wire harness, without connector, is
secured behind the left side kick panel. The
harness contains the following circuits:
.Red/Green: Battery feed
.Black: Ground
.White/Blue: Brake signal to controller
.Blue: Trailer Brake power to trailer
connector To remove the left side kick panel, start at
the front of the panel pulling toward the
rear of the vehicle and lift upward to
disengage the integral clips.
Turn Signals When Towing a Trailer
When properly connected, the trailer turn
signals will illuminate to indicate the vehicle
is turning, changing lanes, or stopping.
When towing a trailer, the arrows on the
instrument cluster will illuminate even if the
trailer is not properly connected or the bulbs
are burned out.
Tow/Haul Mode
For instructions on how to enter Tow/Haul
Mode, see
Tow/Haul Mode 0194.
Tow/Haul assists when pulling a heavy
trailer or a large or heavy load.
Tow/Haul Mode is designed to be most
effective when the vehicle and trailer
combined weight is at least 75% of the
vehicle's Gross Combined Weight Rating
(GCWR). See “Weight of the Trailer” under
Trailer Towing 0223.
Tow/Haul Mode is most useful when towing
a heavy trailer or carrying a large or
heavy load:
.through rolling terrain.