radio CHEVROLET CORVETTE 1998 5.G Owners Manual
[x] Cancel search | Manufacturer: CHEVROLET, Model Year: 1998, Model line: CORVETTE, Model: CHEVROLET CORVETTE 1998 5.GPages: 378, PDF Size: 19.91 MB
Page 58 of 378
Downloaded from www.Manualslib.com manuals search engine Power Door Locks
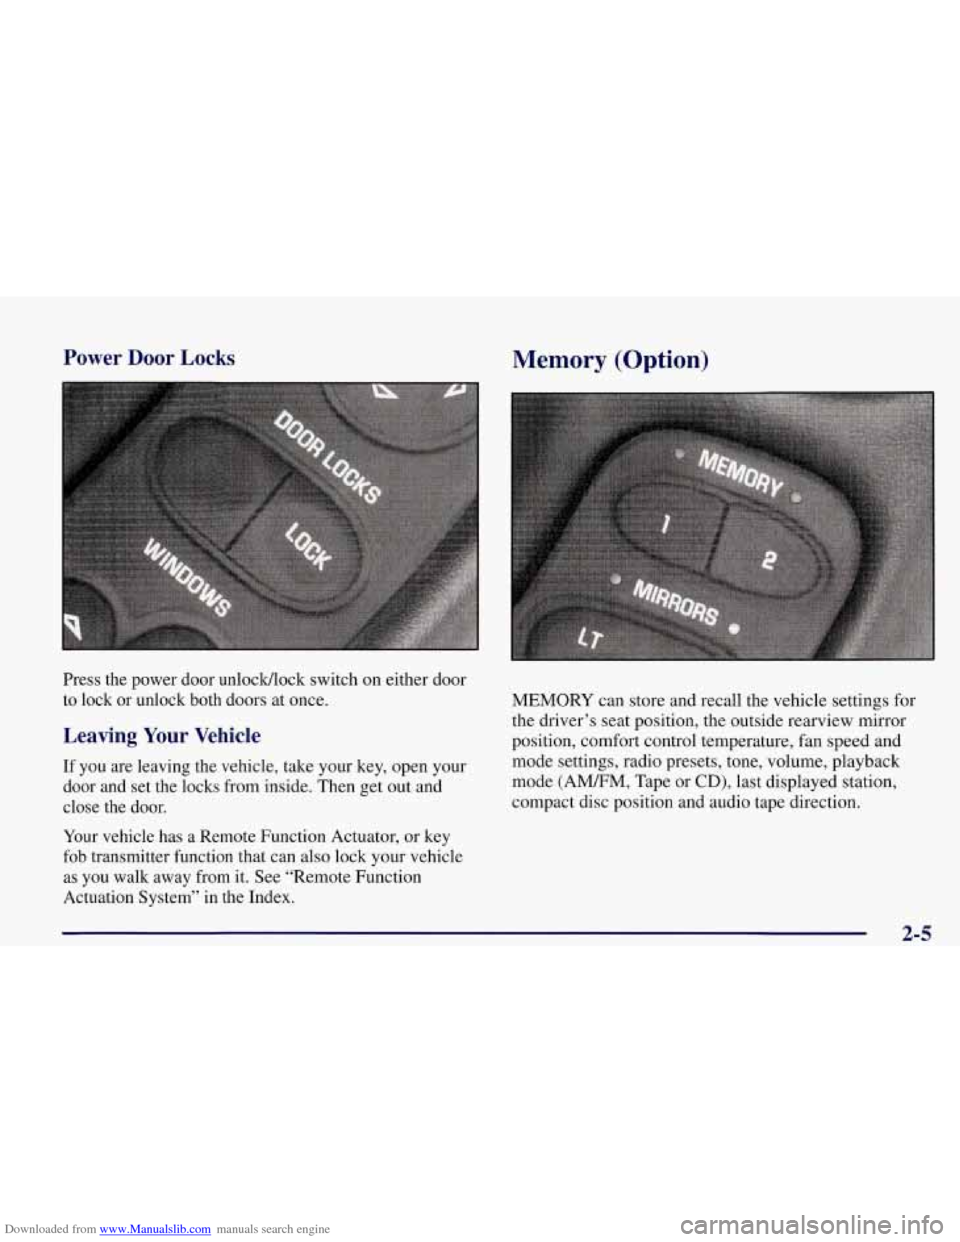
Press the power door unlocWlock switch on either door
to lock or unlock both doors at once.
Leaving Your Vehicle
If you are leaving the vehicle, take your key, open your
door and set the locks from inside. Then get out and
close the door.
Your vehicle has a Remote Function Actuator, or key
fob transmitter function that can also lock your vehicle
as you walk away from it. See “Remote Function
Actuation System’’ in
the Index.
Memory (Option)
MEMORY can store and recall the vehicle settings for
the driver’s seat position, the outside rearview mirror
position, comfort control temperature, fan speed and
mode settings, radio presets, tone, volume, playback
mode (AMEM, Tape or
CD), last displayed station,
compact disc position and audio tape direction.
2-5
Page 60 of 378
Downloaded from www.Manualslib.com manuals search engine Your RFA system operates on a radio frequency subject
to Federal Communications Commission (FCC) Rules
and with Industry Canada.
This device complies with Part
15 of the FCC Rules.
Operation is subject to the following two conditions:
(1) this device may not cause harmful interference,
and
(2) this device must accept any interference
received, including interference that may cause
undesired operation.
This device complies with RSS-210 of Industry Canada.
Operation is subject to the following two conditions:
(1) this device may not cause interference, and (2) this
device must accept
any interference received, including
interference that may cause undesired operation of
the device.
Changes or modifications to this system by other than an
authorized service facility could void authorization to
use this equipment. If
you ever notice a decrease in the key fob transmitter
range, try doing one of the following:
0
0
0
0
0
0
Check to determine if battery replacement is
necessary. See the instructions that follow.
Check the distance. You may be too far from your
vehicle. You may need to stand closer during rainy
or snowy weather.
Check the location. Other vehicles or objects may be
blocking the signal. Take a few steps to the left or
right, hold the transmitter higher, and
try again.
Check to make sure that an electronic device
such as a cellular phone or lap top computer is not
causing interference.
Try to resynchronize the transmitter by pressing
and holding the LOCK and UNLOCK buttons for
seven seconds when standing next to the vehicle.
If you’re still having trouble, see your dealer or a
qualified technician for service.
2-7
Page 74 of 378
Downloaded from www.Manualslib.com manuals search engine OFF: The only position from which you can remove the
key. Removing the key locks your steering wheel,
ignition and automatic transmission.
If you have an automatic transmission, the ignition
switch can’t be turned to
OFF unless the shift lever is in
PARK (P).
ACC: The position in which you can operate your
electrical power accessories. With the key in this
position, the automatic transmission and steering
column will unlock.
ON: The position to which the switch returns after you
start the engine and release the switch. The switch stays
in the
ON position when the engine is running. But even
when the engine is not running, you can use
ON to
operate your electrical power accessories and to display
some instrument panel messages and telltales.
START Starts the engine. When the engine starts,
release the key. The ignition switch will return to
ON for
normal driving.
When the engine is not running,
ACC and ON allow you
to operate your electrical accessories, such as the radio.
A warning tone will sound if you open the driver’s door
when the ignition is in
OFF or ACC and the key is in
the ignition.
Removing the key from the ignition switch will
lock the steering column and result in a loss of
ability to steer the vehicle. This could cause a
collision.
If you need to turn the engine off while
the vehicle
is moving, turn the key to ACC.
NOTICE:
If your key seems stuck in OFF and you can’t
turn
it, be sure you are using the correct key; if
so, is it all the way in? Turn the key only with
your hand. Using a tool to force
it could break
the key or the ignition switch.
If none of this
works, then your vehicle needs service.
2-21
Page 105 of 378
Downloaded from www.Manualslib.com manuals search engine Interior Lamps
Instrument Panel Brightness Control
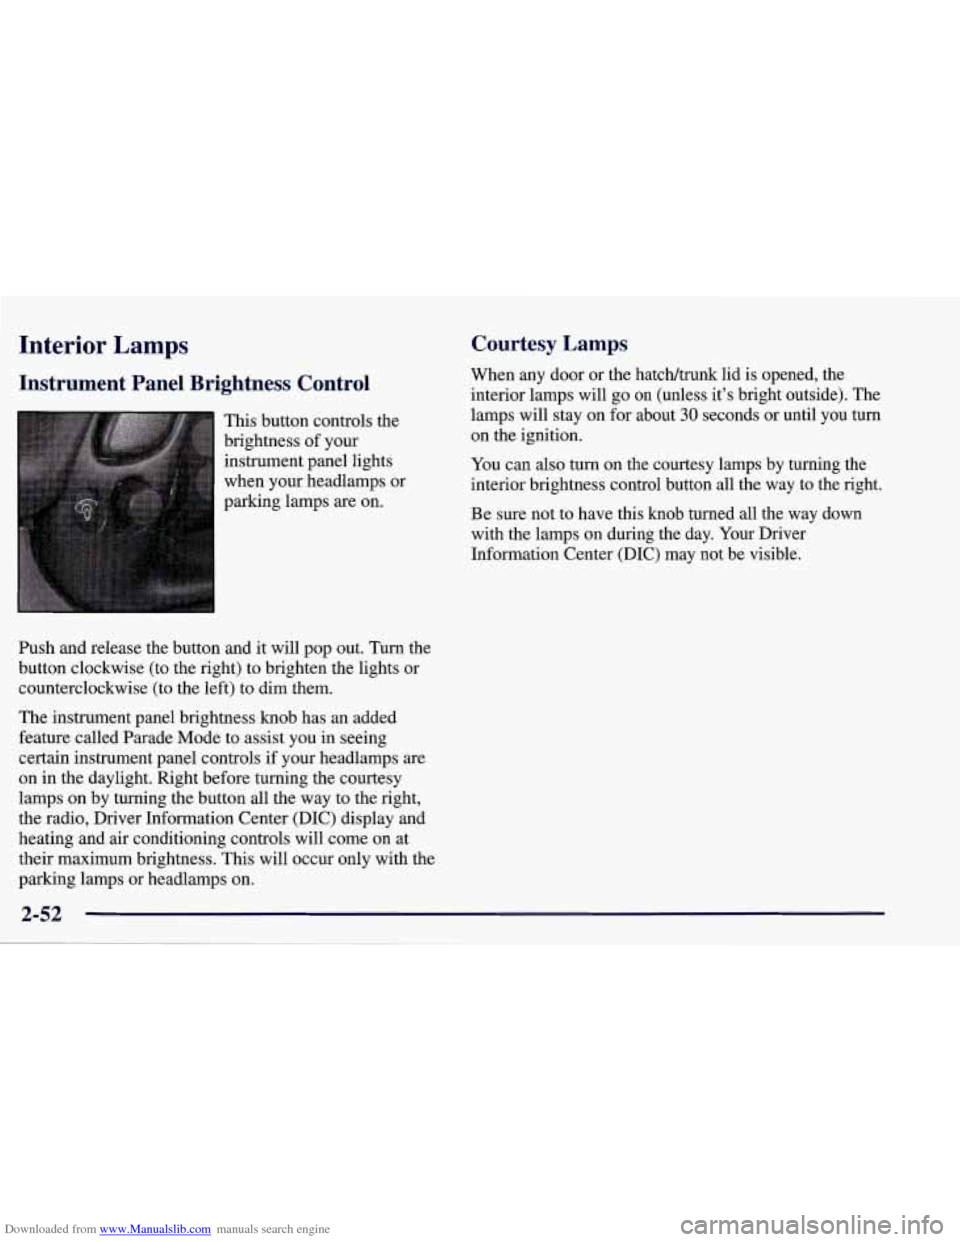
This button controls the
brightness of your
instrument panel lights
when your headlamps or
parking lamps
are on.
Ish and release the button and it will pop out. Turn the
button clockwise (to the right) to brighten the lights or
counterclockwise (to the left) to dim them.
The instrument panel brightness knob has an added
feature called Parade Mode to assist you in seeing
certain instrument panel controls if your headlamps
are
on in the daylight. Right before turning the courtesy
lamps on by turning the button all the way to the right,
the radio, Driver Information Center (DIC) display and
heating and air conditioning controls will come on at
their maximum brightness. This will occur only with the
parking lamps or headlamps on.
Courtesy Lamps
When any door or the hatch/trunk lid is opened, the
interior lamps will go
on (unless it’s bright outside). The
lamps will stay on for about
30 seconds or until you turn
on the ignition.
You can
also turn on the courtesy lamps by turning the
interior brightness control button all the way to the right.
Be sure not to have this knob turned all the way down
with the lamps on during the day. Your Driver
Information Center
(DIC) may not be visible.
2-52
Page 112 of 378
Downloaded from www.Manualslib.com manuals search engine Accessory Outlet
This outlet is located inside the center console, on the
forward left side. Remove the tethered cap to use the
outlet. The outlet can be used to connect electrical
equipment such as
a cellular phone or CB radio. Be sure
to follow the installation instructions included with the
equipment. Replace the cap when the outlet is not in use.
NOTICE:
When using the accessory outlet:
The maximum load of any electrical
equipment should not exceed
15 amps.
Be sure to turn off any electrical equipment
when not in use. Leaving electrical
equipment on for extended periods can
drain your battery.
We recommend that you see a qualified technician or your
dealer for the proper installation of your equipment.
Floor Mats (Option)
Your vehicle’s floor mats are specially designed to
remain in position under your feet and out of reach of
the accelerator pedal. The driver’s side floor mat is held
in place by two locator hooks and the passenger’s side is
held in place by one.
Be sure that the driver’s side floor mat is properly
placed on the floor
so that it does not block the
movement of the accelerator pedal.
2-59
Page 153 of 378
Downloaded from www.Manualslib.com manuals search engine If this message comes on while you are driving, you
may have a problem with the electrical charging system.
It could indicate that you have a loose or broken drive
belt
or another electrical problem. Have it checked right
away. Driving while this light is on could drain
your battery.
If you must drive a short distance with the message on,
be certain to turn
off your accessories, such as the radio
and air conditioner.
TRACTION SYS ACTIVE - : When your traction
control system is limiting wheel spin, the TRACTION
SYS ACTIVE message will be displayed. Slippery road
conditions may exist
if this message is displayed, so
adjust your driving accordingly. The message will stay
on for a few seconds after the traction control system
stops limiting wheel spin.
TRACTION SYSTEM-ON: This message is displayed
when you decide to turn on the TCS by pressing the
switch
on the console. This message will shut off
automatically on its own.
TRACTION SYSTEM-OFF: You will hear a single
quick tone when this message is displayed. This
message comes on and stays on when the TCS button on the console is pressed to turn the system
off. To
acknowledge this message, press
RESET.
SERVICE TRACTION SYSTEM - : If the SERVICE
TRACTION
SYS message is displayed when you are
driving, there is a problem with your Traction Control
System and your vehicle is in need
of service. When this
message is displayed, the system will not limit wheel
spin. Adjust your driving accordingly.
If you have the optional Active Handling System, the SERVICE ACTIVE
HNDLG message will also be
displayed and the instrument cluster car icon will also be
illuminated. The driver can acknowledge both messages
by pressing the reset button two times which
will also
turn
off the instrument cluster icon. When the service
messages are displayed, the computer controlled systems will not assist the driver in controlling the
vehicle. Have the system repaired as soon as possible.
Adjust your driving accordingly.
2-100
Page 160 of 378
Downloaded from www.Manualslib.com manuals search engine Section 3 Comfort Controls and Audio Systems
In this section, you’ll find out how to operate the comfort control and audio systems offered with your vehicle. Be
sure to read about the particular systems supplied with your vehicle.
3-2
3-2
3-4
3-9
3- 10
3-11 3-11
3- 12 3-12
3-12
3-17 Comfort Controls
Manual
Comfort Controls
Automatic Electronic Dual Climate Control
System (If Equipped)
Sensors
Air Conditioning
Heating
Defogging and Defrosting
Audio Systems Setting the Clock for
All Systems
AM-FM Stereo with Cassette Tape Player and
Automatic Tone Control
CD Adapter Kits
3- 17
3-2 1
3-25
3 -27
3-27
3-28
3-29
3-29
3-29
3-30 AM-FM Stereo with Compact Disc Player and
Automatic Tone Control
(If Equipped)
Trunk Mounted CD Changer Theft-Deterrent Feature
Understanding Radio Reception
Tips About Your Audio System
Care of Your Cassette Tape Player
Care of Your Compact Discs
Care
of Your Compact Disc Player
Power Mast Antenna (Option)
Integrated Windshield and Rear Window
Antennas (Option)
3-1
Page 172 of 378
Downloaded from www.Manualslib.com manuals search engine Playing the Radio
PWR-VOL: Press this knob to turn the system on and
off. To increase volume, turn the knob to the right. Turn
it to the left to decrease volume. The knob is capable of
rotating continuously.
RECALL: Press this button to recall the station being
played. If you press the button when the ignition is
off,
the clock will show for a few seconds.
SCV: Your system has a feature called
Speed-Compensated-Volume (SCV). With SCV, your
audio system adjusts automatically to make up for road
and wind noise as you drive. Set the volume at the
desired level. Move the control ring behind the upper
knob to the right to adjust the SCV. Then, as you drive,
SCV automatically increases the volume, as necessary,
to overcome noise at any particular speed. The volume
level should always sound the same to you as you drive.
If you don’t want to use SCV, turn the control all the
way down. Each notch on the control ring allows for
more volume compensation at faster vehicle speeds.
Finding a Station
AM-FM: Press this button to switch between AM, FM1
and FM2. The display shows your selection.
TUNE: Press this knob lightly so it extends. Turn it to
choose radio stations. Push the
knob back into its stored
position when you’re not using it.
SEEK: Press the right or left arrow to go to the
next higher
or lower station. The sound will mute
while seeking.
SCAN: Press one of the SEEK arrows for two seconds,
and SCAN will appear in the display. Use SCAN to
listen to stations for a few seconds. The radio will go to
a station, stop for a few seconds, then
go on to the next
station. Press SEEK again to stop scanning. The sound
will mute while scanning.
PUSHBUTTONS: The six numbered pushbuttons let
you return to your favorite stations. You can set up to
18 stations (six AM, six FM1 and six FM2). Just:
1. Turn the radio on.
2. Press AM-FM to select the band.
3. Tune in the desired station.
4. Press AUTO TONE to select the equalization that
best suits the type of station selected.
3-13
Page 173 of 378
Downloaded from www.Manualslib.com manuals search engine 5.
6.
Press and hold one of the six numbered buttons. The
sound will mute. When it returns, release the button.
Whenever you press that numbered button, the
station you set will return and the AUTO TONE
equalization that you selected will also be
automatically selected for that button.
Repeat the steps for each pushbutton.
P.SCAN: Press this button to listen to each of your
favorite stations stored on your pushbuttons for a few
seconds. The radio will scan through each of the stations
stored on your pushbuttons, except those stations with
weak reception. The AUTO TONE setting stored for
that pushbutton will be automatically chosen. Press
P.SCAN or one of the pushbuttons again to stop
scanning. P.SCAN will be displayed whenever the tuner
is in the P.SCAN mode. The channel number (PI-P6)
will appear momentarily just before the frequency is
displayed.
In FM mode, this function will scan through
both FM1 and
FM2 preset stations and FM 1 or €342 will
appear on the display.
Setting the Tone
BASS:
Press this knob lightly so it extends. Turn the
knob to the right to increase bass and to the left to
decrease bass. When you use this control, the radio’s
AUTO TONE setting will switch to manual and the
AUTO TONE display will
go blank.
TREB: Press this knob lightly so it extends. Turn the
knob to the right to increase treble and to the left to
decrease treble. When you use this control, the radio’s
AUTO TONE setting will switch to manual and the
AUTO TONE display will
go blank. If a station is weak
or noisy, you may want to decrease the treble.
Push these knobs back into their stored positions when
you’re not using them.
AUTO TONE: This feature allows you to choose preset
bass and treble equalization settings designed for
country/western, classical, news, rock, pop and jazz
stations. C/W will appear on the display when you first
press AUTO TONE. Each time you press it, another
setting will appear on the display. Press it again after
JAZZ appears and the AUTO TONE display will go
blank. Tone control will return to the BASS and TREB
knobs. Also, if you use the BASS and TREB knobs,
control will return to them and the AUTO
TONE
display will go blank.
Adjusting the Speakers
BAL:
Press this knob lightly so it extends. Turn the
knob to the right for the right speakers and to the left for
the left speakers. The middle position balances the
sound between the speakers.
Page 174 of 378
Downloaded from www.Manualslib.com manuals search engine FADE: Press this knob lightly so it extends. Turn the
knob to the right to adjust the sound to the front
speakers and to the left for the rear speakers. The middle
position balances the sound between the speakers.
Push these knobs back into their stored positions when
you’re not using them.
Playing a Cassette Tape
Your tape player is built to work best with tapes that are
30 to 45 minutes long on each side. Tapes longer than
that are
so thin they may not work well in this player. If
a tape is inserted when the ignition is on but the radio is
off, the tape
will begin playing. A tape symbol is shown
in the center of the graphic display whenever a tape is
inserted. When
a tape is active, the tape symbol will be
accompanied by a direction arrow.
While the tape is playing, use the VOL, AUTO TONE,
BAL, FADE, BASS and TREB controls just as you do
for the radio. Other controls may have different
functions when a tape is inserted. The display will show
the tape symbol and an arrow to show which side of the
tape is playing.
If you hear nothing or hear just a garbled sound, it may
not be in squarely. Press EJECT to remove the tape and
start over.
The player is able to detect a tight or broken tape, and
will eject the tape. The radio will go back to playing the
last station selected.
The player automatically senses the cassette for metal or
Cr02 and sets the pre-emphasis. Anytime a tape is
inserted, the top side is selected to play first.
PREV (1): Press this button or the left SEEK arrow to
go to the previous selection on the tape if the current
selection has been playing for less than eight seconds.
If
the PREV button is pressed and the current selection has
been playing for more than eight seconds, it will
go to
the beginning of the current selection. Your tape must
have at least three seconds of silence between each
selection for PREV or SEEK to work. The tape direction
arrow blinks during PREV or SEEK operation. The
sound will mute during PREV or SEEK operation. Press
this button or one of the SEEK arrows again to return to
normal play.
3-15