display CHEVROLET CORVETTE 2003 5.G Repair Manual
[x] Cancel search | Manufacturer: CHEVROLET, Model Year: 2003, Model line: CORVETTE, Model: CHEVROLET CORVETTE 2003 5.GPages: 368, PDF Size: 2.55 MB
Page 204 of 368

Selective Ride Control
You may have a ride control system on your vehicle
called Selective Ride Control. The system provides the
following performance bene®ts:
·Reduced Impact Harshness
·Improved Road Isolation
·Improved High-Speed Stability
·Improved Handling Response
·Better Control of Body Ride MotionsThis knob is located on the center console. Turn it to
select the suspension of your choice.
TOUR:Use for normal city and highway driving. This
setting provides a smooth, soft ride.
SPORT:Use where road conditions or personal
preference demand more control. This setting provides
more ªfeelº, or response to the road conditions.
You can select a setting at any time. Based on road
conditions, steering wheel angle and your vehicle speed,
the system automatically adjusts to provide the best
ride and handling. Select a new setting whenever driving
conditions change.
There are three Driver Information Center (DIC)
messages that are displayed when a malfunction occurs
with the Selective Ride Control system. Refer to DIC
Warnings and Messages on page 3-53.
4-12
Page 245 of 368

How to Reset the Change Oil
Soon Message
The GM Oil Life System calculates when to change
your engine oil and ®lter based on vehicle use. Anytime
your oil is changed, reset the system so it can
calculate when the next oil change is required. If a
situation occurs where you change your oil prior to a
CHANGE OIL SOON message being turned on,
reset the system.
To reset the CHANGE OIL SOON message after an oil
change, do the following:
1. Turn the ignition to ON, with the engine off.
2. Press the TRIP button so the OIL LIFE percentage
is displayed.
3. Press RESET and hold for two seconds. OIL LIFE
REMAIN 100% will appear.
What to Do with Used Oil
Used engine oil contains certain elements that may be
unhealthy for your skin and could even cause cancer.
Don't let used oil stay on your skin for very long. Clean
your skin and nails with soap and water, or a good
hand cleaner. Wash or properly dispose of clothing or
rags containing used engine oil. See the manufacturer's
warnings about the use and disposal of oil products.
Used oil can be a threat to the environment. If you
change your own oil, be sure to drain all the oil from the
®lter before disposal. Never dispose of oil by putting it
in the trash, pouring it on the ground, into sewers, or into
streams or bodies of water. Instead, recycle it by
taking it to a place that collects used oil. If you have a
problem properly disposing of your used oil, ask
your dealer, a service station or a local recycling center
for help.
5-17
Page 254 of 368

Adding Coolant
If you need more coolant, add the proper DEX-COOLž
coolant mixtureat the surge tank,but only when the
engine is cool.
{CAUTION:
You can be burned if you spill coolant on hot
engine parts. Coolant contains ethylene glycol,
and it will burn if the engine parts are hot
enough. Don't spill coolant on a hot engine.
When replacing the pressure cap, make sure it is
hand-tight.
Coolant Surge Tank Pressure Cap
Notice:Your pressure cap is a pressure-type
cap and must be tightly installed to prevent coolant
loss and possible engine damage from overheating.
See ªCapacities and Speci®cationsº for more
information.
See
Engine Compartment Overview on page 5-12for
information on location.
Engine Overheating
You will ®nd an engine coolant temperature gage on the
instrument panel cluster and a COOLANT OVER
TEMP message on the Driver Information Center (DIC).
See
Engine Coolant Temperature Gage on page 3-38andDIC Warnings and Messages on page 3-53.
Overheated Engine Protection
Operating Mode
If an overheated engine condition exists and the
messages COOLANT OVER TEMP and REDUCED
ENGINE POWER are displayed, along with the Check
Engine light, an overheat protection mode which
alternates ®ring groups of cylinders helps prevent engine
damage. In this mode, you will notice a loss in power
and engine performance. This operating mode
allows your vehicle to be driven to a safe place in an
emergency; you may drive up to 50 miles (80 km).
Notice:After driving in the overheated engine
protection operating mode, to avoid engine damage,
allow the engine to cool before attempting any
repair. The engine oil will be severely degraded.
Repair the cause of coolant loss, change the oil
and reset the oil life system. See ªEngine Oilº in
the Index.
5-26
Page 284 of 368

If you feel that winter tires are needed for your driving
conditions, Goodyear Eagle M+S EMT tires are available
in your original equipment sizes from an authorized
Goodyear EMT retailer. These tires will improve snow
traction while maintaining your vehicle's extended
mobility feature. When using winter tires on your vehicle,
be sure to use them on all four wheels. See
Buying
New Tires on page 5-59.
In¯ation -- Tire Pressure
The Tire±Loading Information label, which is on the rear
edge of the driver's door, shows the correct in¯ation
pressures for your tires when they're cold. ªColdº means
your vehicle has been sitting for at least three hours
or driven no more than 1 mile (1.6 km).
Notice:Don't let anyone tell you that underin¯ation
or overin¯ation is all right. It's not. If your tires
don't have enough air (underin¯ation), you can get
the following:
·Too much ¯exing
·Too much heat
·Tire overloading
·Bad wear
·Bad handling
·Bad fuel economyIf your tires have too much air (overin¯ation), you
can get the following:
·Unusual wear
·Bad handling
·Rough ride
·Needless damage from road hazards
When to Check
Check your tires once a month or more.
How to Check
Use a good quality pocket-type gage to check tire
pressure. You can't tell if your tires are properly in¯ated
simply by looking at them. Radial tires may look
properly in¯ated even when they're underin¯ated.
Be sure to put the valve caps back on the valve stems.
They help prevent leaks by keeping out dirt and
moisture.
If your vehicle is equipped with the Tire Pressure
Monitor, you can check tire in¯ation pressures while
driving. After you've reached a speed of 15 mph
(24 kmh) or more, press and release the GAGES button
on the Driver Information Center (DIC) until the front
tire pressures are displayed. Then, press and release
the GAGES button for the rear tire pressures.
5-56
Page 285 of 368

If the display doesn't show tire pressure, or if the
SERVICE TIRE MON SYS message appears see your
dealer for service. For more information, see
Tire
Pressure Monitor System (Except Z06) on page 5-57
andDriver Information Center (DIC) on page 3-44.
Tire Pressure Monitor System
(Except Z06)
The Tire Pressure Monitor (TPM) has a sensor on each
road wheel that transmits to a receiver on the
instrument panel.
The system operates on a radio frequency subject to
Federal Communications Commission (FCC) Rules and
with Industry and Science Canada.
This device complies with Part 15 of the FCC Rules.
Operation is subject to the following two conditions:
(1) this device may not cause harmful interference, and
(2) this device must accept any interference received,
including interference that may cause undesired
operation.This device complies with RSS±210 of Industry and
Science Canada. Operation is subject to the following
two conditions: (1) this device may not cause
interference, and (2) this device must accept any
interference received, including interference that may
cause undesired operation of the device.
Changes or modi®cations to this system by other than
an authorized service facility could void authorization to
use this equipment.
If a tire's in¯ation pressure is between 5 psi (35 kPa)
and 25 psi (170 kPa), you will see a message on
the Driver Information Center. This message will show
which tire is underin¯ated and two chimes will sound. An
example would be LOW TIRE PRESSURE-LR. This
would mean that the in¯ation pressure in your left rear
tire is between 5 psi (35 kPa) and 25 psi (170 kPa).
If the in¯ation pressure in the tire drops below
5 psi (35 kPa), the message would read FLAT TIRE-LR
and four chimes will sound. See
Driver Information
Center (DIC) on page 3-44.
The TPM will also alert you if a tire's pressure is higher
than 42 psi (290 kPa). The message will show which
tire is overin¯ated and two chimes will sound. An
example would be HIGH PRESSURE-LR. This would
mean that the in¯ation pressure in your left rear tire
is higher than 42 psi (290 kPa). See
Driver Information
Center (DIC) on page 3-44.
5-57
Page 286 of 368

If a tire pressure message appears on the Driver
Information Center, stop as soon as you can. Have the
tire pressures checked and set to those shown on
your Tire-Loading Information label. See
In¯ation -- Tire
Pressure on page 5-56.
{CAUTION:
When the LOW TIRE PRESSURE or FLAT TIRE
message is displayed on the Driver Information
Center, your vehicle's handling capabilities will
be reduced during severe maneuvers. If you
drive too fast, you could lose control of your
vehicle. You or others could be injured. Don't
drive over 55 mph (90 km/h) when the LOW
TIRE PRESSURE or FLAT TIRE message is
displayed. Drive cautiously, and check your
tire pressures as soon as you can.
Tire Rotation
The tires on your vehicle are different sizes front to rear.
Due to this, your tires should not be rotated. Each tire
and wheel should be used only in the position it is in.
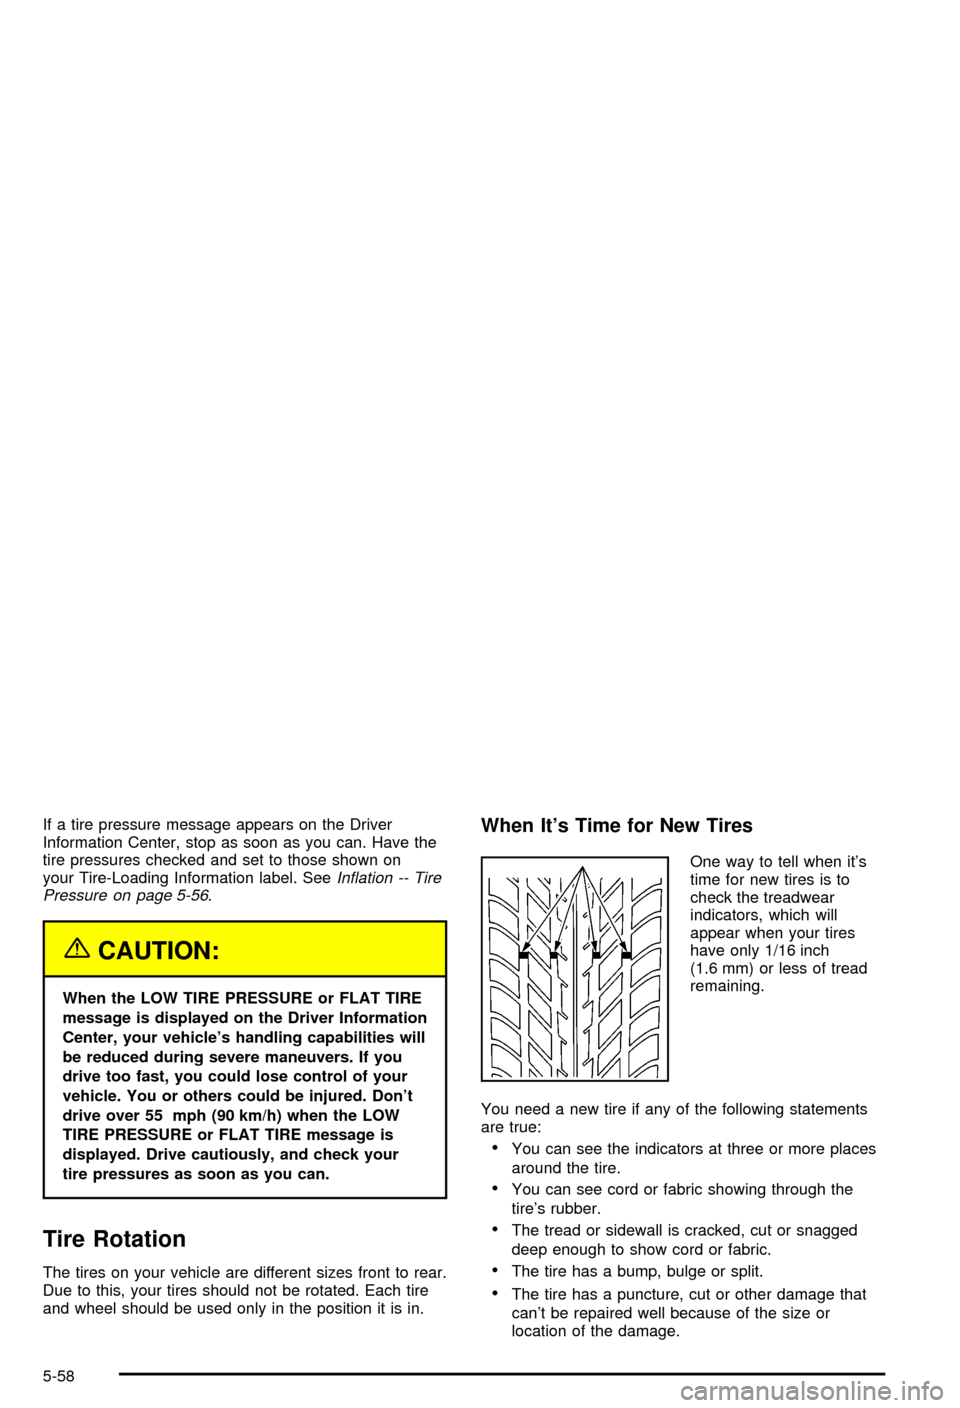
When It's Time for New Tires
One way to tell when it's
time for new tires is to
check the treadwear
indicators, which will
appear when your tires
have only 1/16 inch
(1.6 mm) or less of tread
remaining.
You need a new tire if any of the following statements
are true:
·You can see the indicators at three or more places
around the tire.
·You can see cord or fabric showing through the
tire's rubber.
·The tread or sidewall is cracked, cut or snagged
deep enough to show cord or fabric.
·The tire has a bump, bulge or split.
·The tire has a puncture, cut or other damage that
can't be repaired well because of the size or
location of the damage.
5-58
Page 293 of 368

{CAUTION:
Getting under a vehicle when it is jacked up is
dangerous. If the vehicle slips off the jack, you
could be badly injured or killed. Never get
under a vehicle when it is supported only by
a jack.
{CAUTION:
Raising your vehicle with the jack improperly
positioned can damage the vehicle and even
make the vehicle fall. To help avoid personal
injury and vehicle damage, be sure to place
the jack in the proper location before raising
the vehicle.If you ever use a jack to lift your Corvette, such as to
display it at a show, follow the instructions that
came with the jack, and be sure to use the correct lifting
points to avoid damaging your vehicle.
Notice:Lifting your vehicle improperly can damage
your vehicle and result in costly repairs not
covered by your warranty. To lift your vehicle
properly, follow the advice in this part.
To help prevent vehicle damage:
·Be sure to place a block or pad between the
jack and the vehicle.
·Make sure the jack you're using spans at least
two crossmember ribs.
·Lift only in the areas shown in the following
pictures.
For additional information, see your dealer and the
Chevrolet Corvette service manual.
5-65
Page 358 of 368

Customer Assistance Information........................ 7-7
Courtesy Transportation.................................. 7-7
Customer Assistance for Text Telephone
(TTY) Users.............................................. 7-4
Customer Assistance Offices........................... 7-4
Customer Satisfaction Procedure..................... 7-2
GM Mobility Program for Persons with
Disabilities................................................ 7-5
Reporting Safety Defects to General Motors....7-10
Reporting Safety Defects to the Canadian
Government............................................7-10
Reporting Safety Defects to the United States
Government.............................................. 7-9
Roadside Assistance Program......................... 7-6
Service Publications Ordering Information........7-10
D
Daytime Running Lamps..................................3-13
Defensive Driving............................................. 4-2
Defogging and Defrosting.................................3-27
Disabling the Theft-Deterrent Feature.................3-77
Disarming the System.....................................2-17
Doing Your Own Service Work........................... 5-3
Door............................................................... 2-9
Locks.......................................................... 2-9
Power Door Locks.......................................2-10
Downshifting (Manual Transmission)..................2-29Driver Information Center (DIC).........................3-44
DIC Controls and Displays............................3-45
DIC Warnings and Messages........................3-53
Other Messages..........................................3-61
Driver............................................................1-13
Position, Safety Belt.....................................1-13
Driving On Snow or Ice...................................4-28
Driving Through Deep Standing Water...............4-21
Driving Through Flowing Water.........................4-21
Driving..........................................................4-18
At Night.....................................................4-18
City...........................................................4-22
Defensive..................................................... 4-2
Drunken....................................................... 4-2
Freeway.....................................................4-23
Hill and Mountain Roads..............................4-25
In Rain and on Wet Roads...........................4-19
Winter........................................................4-27
Dual Automatic Climate Control System.............3-22
E
Electrical System............................................5-84
Accessory Power Plug.................................5-84
Add-On Equipment......................................5-84
Fuses and Circuit Breakers...........................5-86
Headlamp Wiring.........................................5-85
4
Page 360 of 368

Fuel (cont.)
Fuels in Foreign Countries.............................. 5-6
Gage.........................................................3-42
Gasoline Octane........................................... 5-4
Gasoline Speci®cations.................................. 5-5
System Inspection.......................................6-13
Fuses...........................................................5-86
Fuses and Circuit Breakers...........................5-86
Windshield Wiper.........................................5-85
G
Gage............................................................3-42
Check Gages Warning Light..........................3-42
Engine Coolant Temperature.........................3-38
Engine Oil Pressure.....................................3-41
Fuel..........................................................3-42
Speedometer..............................................3-31
Tachometer.................................................3-31
Voltmeter Gage...........................................3-34
Gasoline......................................................... 5-4
Octane........................................................ 5-4
Speci®cations............................................... 5-5
Glove Box.....................................................2-39
GM Mobility Program for Persons with
Disabilities.................................................... 7-5
H
Hatch/Trunk Lid Release..................................2-12
Hatch/Trunk...................................................2-11
Hazard Warning Flashers................................... 3-4
Headlamp High/Low-Beam Changer.................... 3-7
Headlamp Wiring............................................5-85
Headlamps Doors...........................................3-12
Headlamps on Reminder................................... 3-7
Headlamps....................................................5-47
Bulb Replacement.......................................5-47
Halogen Bulbs............................................5-47
Head-Up Display (HUD)...................................3-17
Highway Hypnosis...........................................4-25
Hill and Mountain Roads..................................4-25
Hood............................................................5-10
Checking Things Under................................5-10
Release.....................................................5-11
Horn............................................................... 3-5
How to Add Coolant to the Coolant
Surge Tank.................................................5-31
How to Add Fluid............................................5-22
How to Check and Add Fluid............................5-23
How to Check Lubricant...................................5-46
How to Check Power Steering Fluid..................5-35
How to Check................................5-20, 5-21, 5-56
How to Remove and Replace the
Floor Mats..................................................2-40
How to Use This Manual...................................... ii
6