CHEVROLET CORVETTE 2007 6.G Owners Manual
Manufacturer: CHEVROLET, Model Year: 2007, Model line: CORVETTE, Model: CHEVROLET CORVETTE 2007 6.GPages: 488, PDF Size: 2.62 MB
Page 161 of 488
ICruise Control. SeeCruise Control
on page 164.
PExterior Lamps Control. SeeExterior
Lamps on page 168.
Turn and Lane-Change Signals
(Auto Signal)
The turn signal has two upward (for right) and
two downward (for left) positions. These positions
allow you to signal a turn or a lane change.
To signal a turn, move the multifunction lever all
the way up or down. When the turn is �nished,
the lever will return automatically.
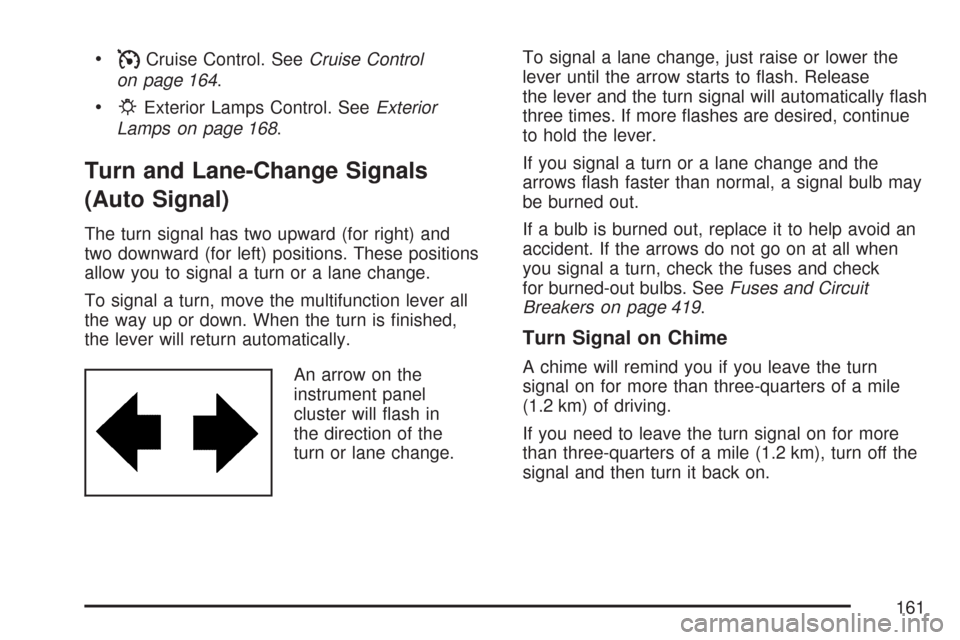
An arrow on the
instrument panel
cluster will �ash in
the direction of the
turn or lane change.To signal a lane change, just raise or lower the
lever until the arrow starts to �ash. Release
the lever and the turn signal will automatically �ash
three times. If more �ashes are desired, continue
to hold the lever.
If you signal a turn or a lane change and the
arrows �ash faster than normal, a signal bulb may
be burned out.
If a bulb is burned out, replace it to help avoid an
accident. If the arrows do not go on at all when
you signal a turn, check the fuses and check
for burned-out bulbs. SeeFuses and Circuit
Breakers on page 419.
Turn Signal on Chime
A chime will remind you if you leave the turn
signal on for more than three-quarters of a mile
(1.2 km) of driving.
If you need to leave the turn signal on for more
than three-quarters of a mile (1.2 km), turn off the
signal and then turn it back on.
161
Page 162 of 488
Headlamp High/Low-Beam Changer
To change the headlamps from low beam to
high, push the turn signal lever all the way forward.
To change from high to low beam, pull the lever
rearward.
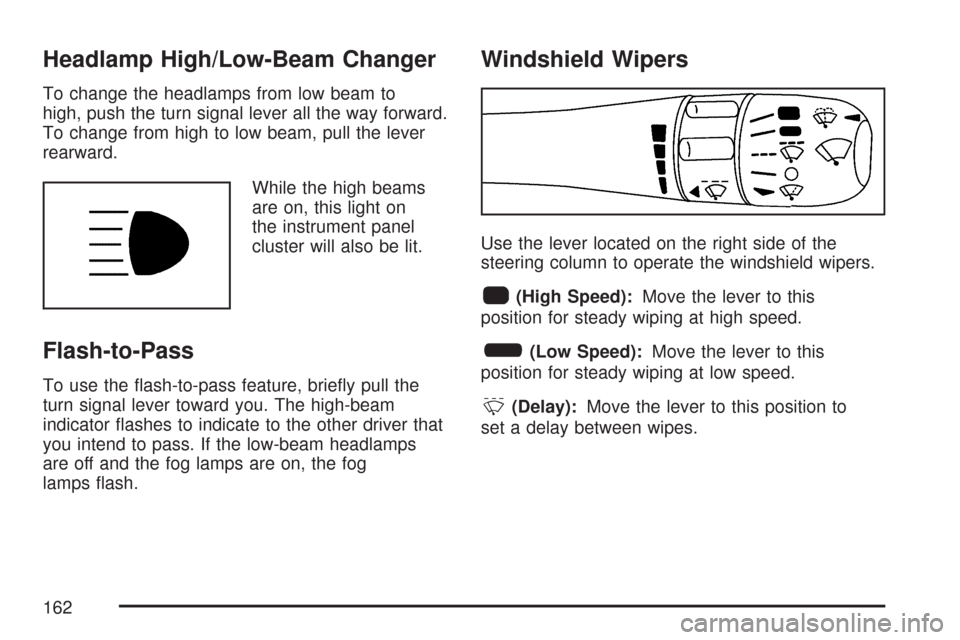
While the high beams
are on, this light on
the instrument panel
cluster will also be lit.
Flash-to-Pass
To use the �ash-to-pass feature, brie�y pull the
turn signal lever toward you. The high-beam
indicator �ashes to indicate to the other driver that
you intend to pass. If the low-beam headlamps
are off and the fog lamps are on, the fog
lamps �ash.
Windshield Wipers
Use the lever located on the right side of the
steering column to operate the windshield wipers.
1(High Speed):Move the lever to this
position for steady wiping at high speed.
6(Low Speed):Move the lever to this
position for steady wiping at low speed.
&(Delay):Move the lever to this position to
set a delay between wipes.
162
Page 163 of 488
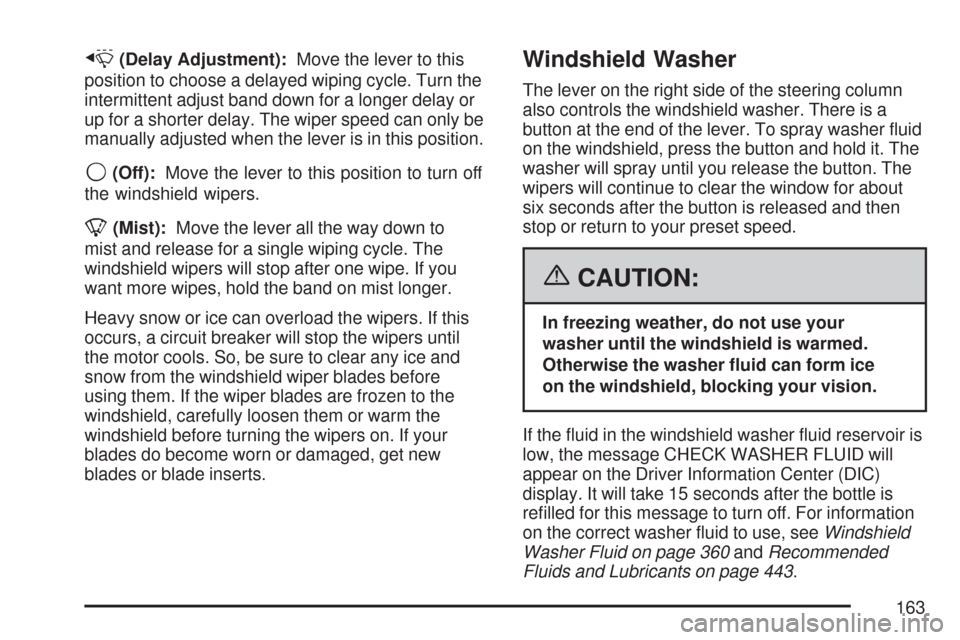
x(Delay Adjustment):Move the lever to this
position to choose a delayed wiping cycle. Turn the
intermittent adjust band down for a longer delay or
up for a shorter delay. The wiper speed can only be
manually adjusted when the lever is in this position.
9(Off):Move the lever to this position to turn off
the windshield wipers.
8(Mist):Move the lever all the way down to
mist and release for a single wiping cycle. The
windshield wipers will stop after one wipe. If you
want more wipes, hold the band on mist longer.
Heavy snow or ice can overload the wipers. If this
occurs, a circuit breaker will stop the wipers until
the motor cools. So, be sure to clear any ice and
snow from the windshield wiper blades before
using them. If the wiper blades are frozen to the
windshield, carefully loosen them or warm the
windshield before turning the wipers on. If your
blades do become worn or damaged, get new
blades or blade inserts.
Windshield Washer
The lever on the right side of the steering column
also controls the windshield washer. There is a
button at the end of the lever. To spray washer �uid
on the windshield, press the button and hold it. The
washer will spray until you release the button. The
wipers will continue to clear the window for about
six seconds after the button is released and then
stop or return to your preset speed.
{CAUTION:
In freezing weather, do not use your
washer until the windshield is warmed.
Otherwise the washer �uid can form ice
on the windshield, blocking your vision.
If the �uid in the windshield washer �uid reservoir is
low, the message CHECK WASHER FLUID will
appear on the Driver Information Center (DIC)
display. It will take 15 seconds after the bottle is
re�lled for this message to turn off. For information
on the correct washer �uid to use, seeWindshield
Washer Fluid on page 360andRecommended
Fluids and Lubricants on page 443.
163
Page 164 of 488
Cruise Control
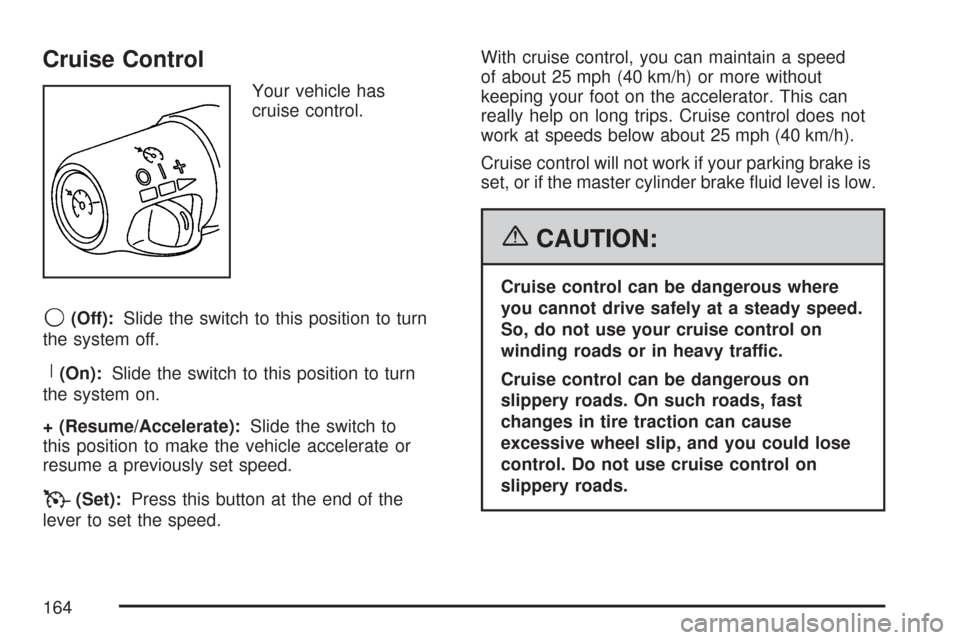
Your vehicle has
cruise control.
9(Off):Slide the switch to this position to turn
the system off.
R(On):Slide the switch to this position to turn
the system on.
+ (Resume/Accelerate):Slide the switch to
this position to make the vehicle accelerate or
resume a previously set speed.
T(Set):Press this button at the end of the
lever to set the speed.With cruise control, you can maintain a speed
of about 25 mph (40 km/h) or more without
keeping your foot on the accelerator. This can
really help on long trips. Cruise control does not
work at speeds below about 25 mph (40 km/h).
Cruise control will not work if your parking brake is
set, or if the master cylinder brake �uid level is low.
{CAUTION:
Cruise control can be dangerous where
you cannot drive safely at a steady speed.
So, do not use your cruise control on
winding roads or in heavy traffic.
Cruise control can be dangerous on
slippery roads. On such roads, fast
changes in tire traction can cause
excessive wheel slip, and you could lose
control. Do not use cruise control on
slippery roads.
164
Page 165 of 488
If your vehicle is in cruise control, and has the
Traction Control System (TCS), and it begins to
limit wheel spin, the cruise control automatically
disengages. SeeTraction Control System
(TCS) on page 281. When road conditions allow
you to safely use it again, you can turn cruise
control back on.
Setting Cruise Control
{CAUTION:
If you leave your cruise control on when
you are not using cruise, you might hit a
button and go into cruise when you do not
want to. You could be startled and even
lose control. Keep the cruise control switch
off until you want to use cruise control.
1. Move the cruise control switch to on.
2. Get up to the speed desired.
3. Press in the set button at the end of the lever
and release it.
4. Take your foot off the accelerator pedal.When the cruise control is engaged, the
CRUISE SET TO XX MPH message displays
on the Driver Information Center (DIC).
SeeOther Messages on page 232.
Resuming a Set Speed
Suppose you set your cruise control at a desired
speed and then you apply the brake. This, of
course, disengages the cruise control. But you
do not need to reset it.
Once you are going about 25 mph (40 km/h) or
more, you can move the cruise control switch
brie�y from on to resume/accelerate.
You will go right back up to your chosen speed
and stay there.
If you hold the switch at resume/accelerate the
vehicle keeps going faster until you release
the switch or apply the brake. Do not hold the
switch at resume/accelerate, unless you want
the vehicle to go faster.
165
Page 166 of 488
Increasing Speed While Using
Cruise Control
There are two ways to go to a higher speed:
Use the accelerator pedal to get to the higher
speed. Press the set button at the end of the
lever, then release the button and the
accelerator pedal. You will now cruise at the
higher speed. If the accelerator pedal is held
longer than 60 seconds, cruise control will
turn off.
Move the cruise switch from on to resume/
accelerate. Hold it there until you get up to the
speed desired, and then release the switch.
To increase your speed in very small amounts,
move the switch brie�y to resume/accelerate.
Each time you do this, your vehicle will go
about 1 mph (1.6 km/h) faster.
Reducing Speed While Using
Cruise Control
Press and hold the set button until you reach
the lower speed you want, then release it.
To slow down in very small amounts, brie�y
press the set button. Each time you do this,
you will go about 1 mph (1.6 km/h) slower.
Passing Another Vehicle While Using
Cruise Control
Use the accelerator pedal to increase your speed.
When you take your foot off the pedal, your
vehicle slows down to the cruise control speed
you set earlier.
Using Cruise Control on Hills
How well your cruise control will work on hills
depends upon your speed, load, and the
steepness of the hills. When going up steep
hills, you might want to step on the accelerator
pedal to maintain the vehicle’s speed. When going
downhill, you might have to brake or shift to a
lower gear to keep the vehicle’s speed down.
Of course, applying the brake turns off the cruise
control. Many drivers �nd this to be too much
trouble and do not use cruise control on steep hills.
166
Page 167 of 488
Cruise Control in Sport (S) and Manual
Paddle Shift Gear Selection
When your vehicle is in Sport (S) and the manual
paddle shift controls are not being used, cruise
control operates in the same manner as Drive (D).
When your vehicle is in Sport (S) and the
manual paddle shift controls are being used,
cruise control operates as follows:
If cruise control is active and a gear is
selected with the manual paddle shift controls,
the vehicle maintains vehicle speed in the
driver selected gear and will not automatically
up-shift or down-shift the transmission
while the driver’s gear selection is active.
If driving in hilly terrain, cruise control may
not be able to maintain vehicle speed if an
up-shift or down-shift is not selected by
the driver. While driving on hilly terrain and
cruise control is active with a manual paddle
shift gear selection, the driver must select
the proper gear for the terrain or select Drive
(D) on the gear range selector for full
automatic transmission operation.
Ending Cruise Control
To end a cruise control session, step lightly on
the brake pedal. If your vehicle has a manual
transmission, lightly tapping the clutch will also end
a cruise control session.
Move the cruise control switch to off to turn the
system completely off.
When cruise control is disengaged, the CRUISE
DISENGAGED message displays on the Driver
Information Center (DIC). SeeDIC Warnings and
Messages on page 214.
Erasing Speed Memory
When you turn off the cruise control or the
ignition, the cruise control set speed memory
is erased.
167
Page 168 of 488
Exterior Lamps
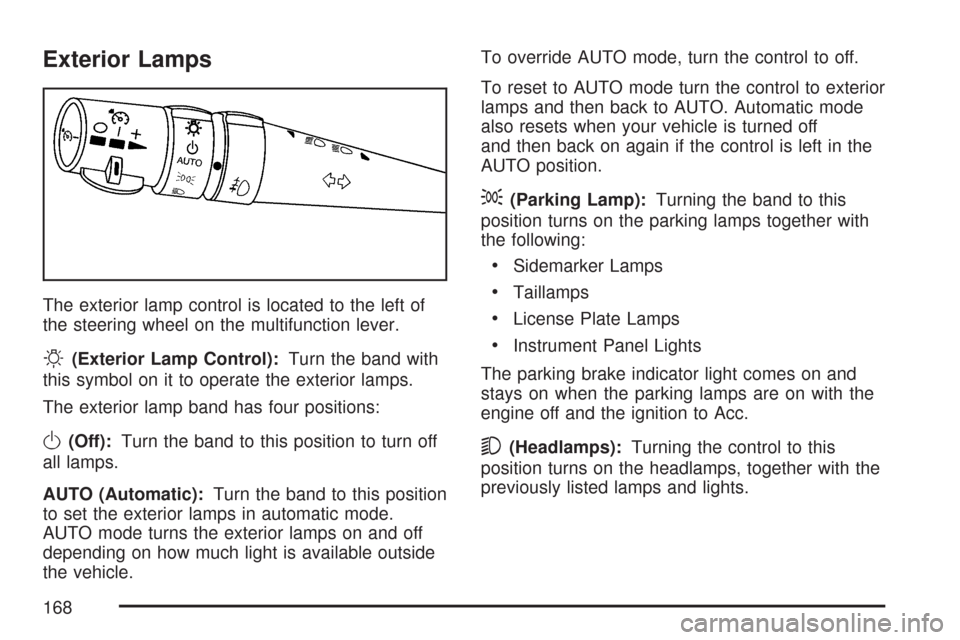
The exterior lamp control is located to the left of
the steering wheel on the multifunction lever.
O(Exterior Lamp Control):Turn the band with
this symbol on it to operate the exterior lamps.
The exterior lamp band has four positions:
O(Off):Turn the band to this position to turn off
all lamps.
AUTO (Automatic):Turn the band to this position
to set the exterior lamps in automatic mode.
AUTO mode turns the exterior lamps on and off
depending on how much light is available outside
the vehicle.To override AUTO mode, turn the control to off.
To reset to AUTO mode turn the control to exterior
lamps and then back to AUTO. Automatic mode
also resets when your vehicle is turned off
and then back on again if the control is left in the
AUTO position.
;(Parking Lamp):Turning the band to this
position turns on the parking lamps together with
the following:
Sidemarker Lamps
Taillamps
License Plate Lamps
Instrument Panel Lights
The parking brake indicator light comes on and
stays on when the parking lamps are on with the
engine off and the ignition to Acc.
5(Headlamps):Turning the control to this
position turns on the headlamps, together with the
previously listed lamps and lights.
168
Page 169 of 488
Wiper Activated Headlamps
This feature activates the headlamps and parking
lamps after the windshield wipers have been in
use for approximately 15 seconds and deactivates
and returns to ambient lighting conditions
15 seconds after the wipers are turned off.
If the exterior lamp control has been turned off or
is in the parking lamp position while the wiper
control is active in any position, the HEADLAMPS
SUGGESTED message appears on the Driver
Information Center (DIC). SeeDIC Warnings and
Messages on page 214.
When the ignition is turned off, the wiper-activated
headlamps will immediately turn off.
Headlamps on Reminder
A warning chime will sound if the exterior lamp
control is left on in either the headlamp or parking
lamp position and the driver’s door is opened
with the ignition off.
Daytime Running Lamps (DRL)
Daytime Running Lamps (DRL) can make it easier
for others to see the front of your vehicle during
the day. DRL can be helpful in many different
driving conditions, but they can be especially
helpful in the short periods after dawn and before
sunset. Fully functional daytime running lamps
are required on all vehicles �rst sold in Canada.
The DRL system will make the front turn signal
lamps come on when the following conditions
are met:
It is still daylight and the ignition is on.
The exterior lamp control is in the
AUTO position.
The transmission is not in PARK (P) or
the parking brake is off.
The parking brake is off or the vehicle
speed is greater than 8 mph (13 km/h).
When DRL are on, only the front turn signal lamps
will be on. No other exterior lamps such as the
parking lamps, taillamps, etc. will be on when the
DRL are being used. Your instrument panel
will not be lit up either.
169
Page 170 of 488
When it is dark enough outside, the front turn
signal lamps will turn off and normal low-beam
headlamps will turn on.
When it is bright enough outside, the regular
lamps will go off, and the front turn signal lamps
will take over. If you start your vehicle in a
dark garage, the automatic headlamp system
will come on immediately. Once you leave
the garage, it will take approximately one minute
for the automatic headlamp system to change
to DRL if it is light outside. During that delay, the
instrument panel cluster may not be as bright
as usual. Make sure your instrument panel
brightness knob is in the full bright position.
SeeInstrument Panel Brightness on page 172for
more information.
If it is dark enough outside and the exterior lamp
control is off, a HEADLAMPS SUGGESTED
message will display on the Driver’s Information
Center (DIC). This message informs the driver that
turning on the exterior lamps is recommended.
SeeDIC Warnings and Messages on page 214.Turning the exterior lamp control to off a
second time, or turning on the headlamps will
remove the HEADLAMPS SUGGESTED message
in the DIC. If the parking lamps or the fog lamps
were turned on instead, the HEADLAMPS
SUGGESTED message will continue to be
displayed.
As with any vehicle, you should turn on the
regular headlamp system when you need it.
To turn off the DRL, turn the exterior lamp control
to the off position or shift into PARK (P). The
DRL will stay off until the control is toggled again
or the vehicle is shifted out of PARK (P).
This procedure applies only to vehicles �rst sold
in the United States.
170