set clock CHEVROLET CORVETTE 2008 6.G Owners Manual
[x] Cancel search | Manufacturer: CHEVROLET, Model Year: 2008, Model line: CORVETTE, Model: CHEVROLET CORVETTE 2008 6.GPages: 432, PDF Size: 2.4 MB
Page 78 of 432
Hatch/Trunk Lid Release
There are several ways to release the hatch/trunk lid.
If your vehicle has an automatic transmission, the shift
lever must be in PARK (P). For manual transmission
vehicles, the parking brake must be set when the ignition
is started for the hatch/trunk release to operate. The
parking brake does not need to be set when the ignition
is off for the hatch/trunk release to operate. SeeParking
Brake on page 2-32.
Press the hatch/trunk
Vlid release button, located on
the instrument panel to the left of the steering wheel.
The theft-deterrent alarm system must not be armed.
Press the hatch/trunk
}lid release button on
the keyless access transmitter. SeeKeyless Access
System on page 2-5.
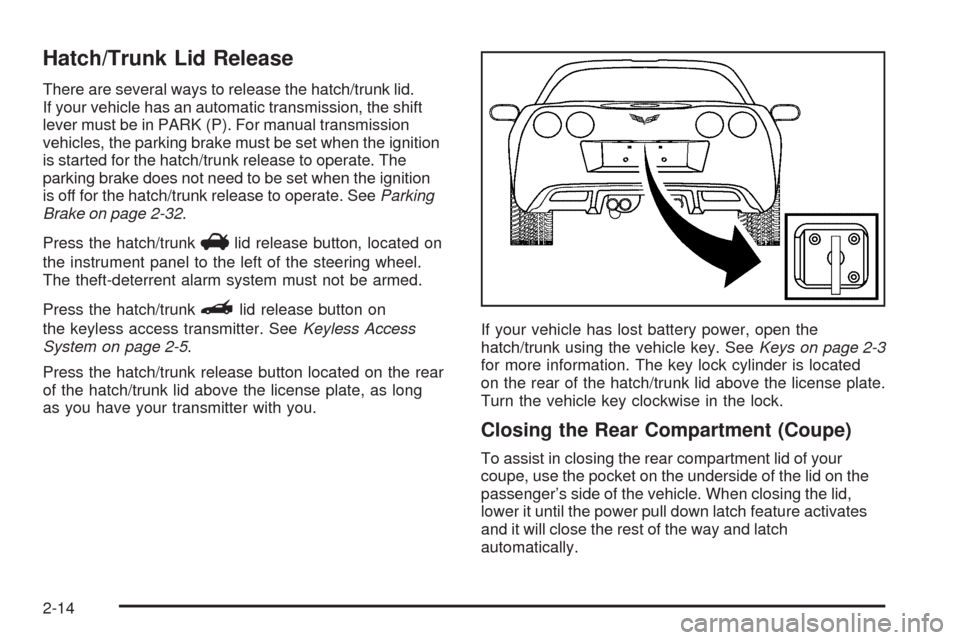
Press the hatch/trunk release button located on the rear
of the hatch/trunk lid above the license plate, as long
as you have your transmitter with you.If your vehicle has lost battery power, open the
hatch/trunk using the vehicle key. SeeKeys on page 2-3
for more information. The key lock cylinder is located
on the rear of the hatch/trunk lid above the license plate.
Turn the vehicle key clockwise in the lock.
Closing the Rear Compartment (Coupe)
To assist in closing the rear compartment lid of your
coupe, use the pocket on the underside of the lid on the
passenger’s side of the vehicle. When closing the lid,
lower it until the power pull down latch feature activates
and it will close the rest of the way and latch
automatically.
2-14
Page 127 of 432
Notice:Lowering the convertible top when there
are objects in the storage area could damage
it or break the glass rear window. Always verify that
no objects are in the storage area before lowering
the convertible top.
Notice:Lowering the top if it is damp, wet, or dirty
can cause stains, mildew, and damage to the
inside of your vehicle. Dry off the top before
lowering it.
Notice:If you lower the top on your vehicle in cold
weather (0°F/-18°C or lower), you may damage
top components. Do not lower the top in cold
weather.
Notice:If you raise or lower the convertible top
while the vehicle is in motion, you could damage the
top or the top mechanism. The repairs would not
be covered by your warranty. Always put an
automatic transmission in PARK (P) or a manual
transmission in NEUTRAL before raising or lowering
the convertible top.Lowering the Manual Convertible Top
1. Park on a level surface. Shift an automatic
transmission into PARK (P) and set the parking
brake. Shift a manual transmission into NEUTRAL
and set the parking brake.
2. Make sure the ignition is off.
3. Make sure the trunk is closed.
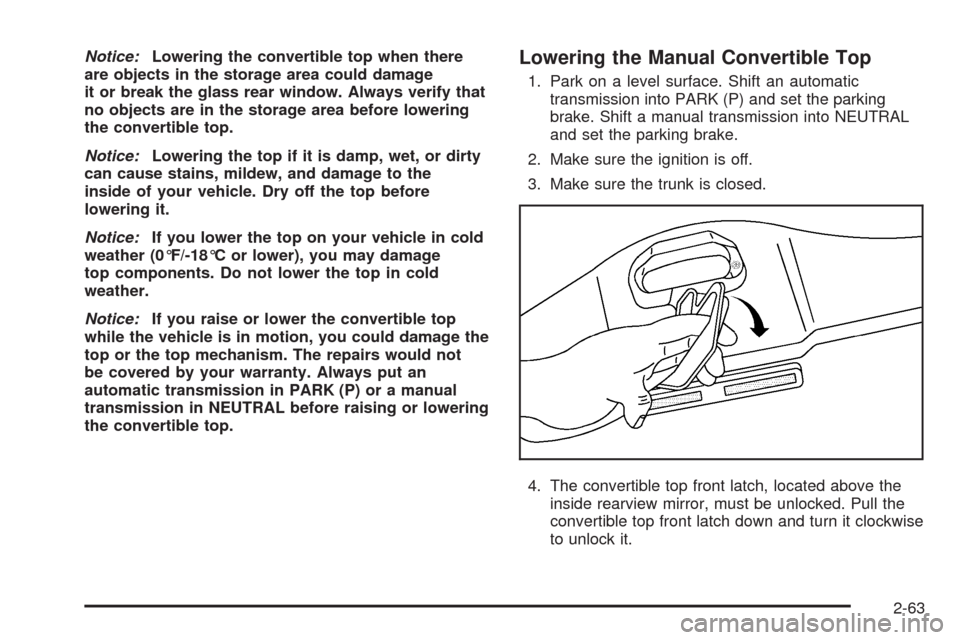
4. The convertible top front latch, located above the
inside rearview mirror, must be unlocked. Pull the
convertible top front latch down and turn it clockwise
to unlock it.
2-63
Page 133 of 432
Lowering the Power Convertible Top
1. Park on a level surface. Start the engine. Shift an
automatic transmission into PARK (P) and set the
parking brake. Shift a manual transmission into
NEUTRAL, and set the parking brake.
2. Make sure the trunk is closed and the rear trunk
partition in the rear storage area is in the fastened
upright position, and that no objects are forward
of the divider. See “Rear Trunk Partition” under
Rear Storage Area on page 2-54.
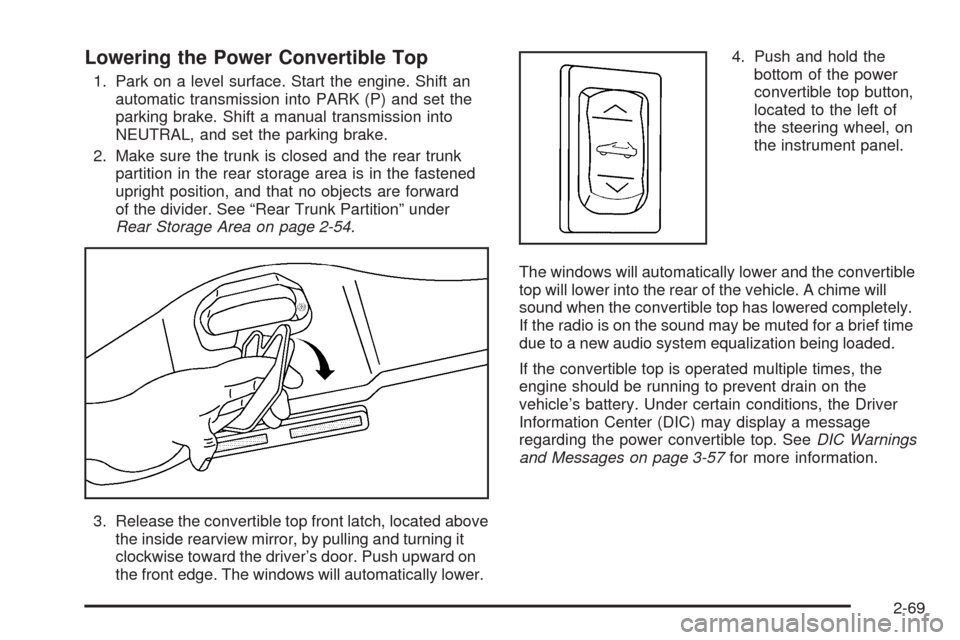
3. Release the convertible top front latch, located above
the inside rearview mirror, by pulling and turning it
clockwise toward the driver’s door. Push upward on
the front edge. The windows will automatically lower.4. Push and hold the
bottom of the power
convertible top button,
located to the left of
the steering wheel, on
the instrument panel.
The windows will automatically lower and the convertible
top will lower into the rear of the vehicle. A chime will
sound when the convertible top has lowered completely.
If the radio is on the sound may be muted for a brief time
due to a new audio system equalization being loaded.
If the convertible top is operated multiple times, the
engine should be running to prevent drain on the
vehicle’s battery. Under certain conditions, the Driver
Information Center (DIC) may display a message
regarding the power convertible top. SeeDIC Warnings
and Messages on page 3-57for more information.
2-69
Page 134 of 432
Raising the Power Convertible Top
Notice:If you raise or lower the convertible top
while the vehicle is in motion, you could damage the
top or the top mechanism. The repairs would not
be covered by your warranty. Always put an
automatic transmission in PARK (P) or a manual
transmission in NEUTRAL before raising or lowering
the convertible top.
1. Park on a level surface. Start the engine. Shift an
automatic transmission into PARK (P) and set the
parking brake. Shift a manual transmission into
NEUTRAL and set the parking brake.
2. Make sure the trunk lid is closed and the rear trunk
partition in the rear storage area is in the fastened
upright position, and that no objects are forward
of the divider. See “Rear Trunk Partition” under
Rear Storage Area on page 2-54.
3. Push and hold the top of the power convertible top
button. The top will raise and the windows will lower
if they were in the raised position. A chime will
sound when the top is raised completely.4. After the convertible top is completely raised,
release the power convertible top button.
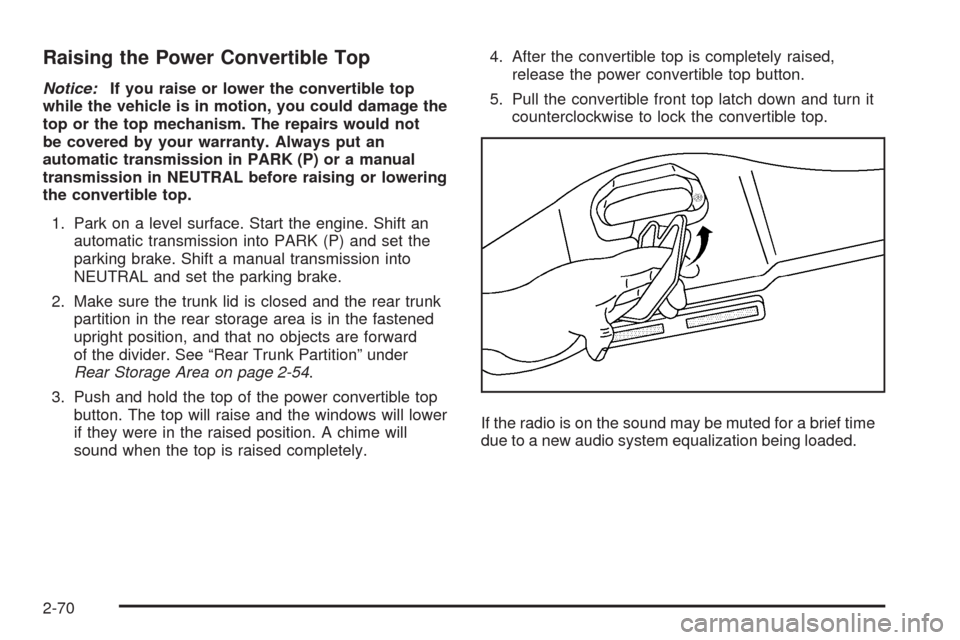
5. Pull the convertible front top latch down and turn it
counterclockwise to lock the convertible top.
If the radio is on the sound may be muted for a brief time
due to a new audio system equalization being loaded.
2-70
Page 138 of 432
Tire Pressure Light.......................................3-44
Malfunction Indicator Lamp.............................3-45
Engine Oil Pressure Gage.............................3-48
Security Light...............................................3-49
Fog Lamp Light............................................3-49
Lights On Reminder......................................3-50
Highbeam On Light.......................................3-50
Fuel Gage...................................................3-50
Driver Information Center (DIC).......................3-51
DIC Operation and Displays...........................3-52
DIC Warnings and Messages.........................3-57
Other Messages...........................................3-74
DIC Vehicle Personalization............................3-75Audio System(s).............................................3-84
Setting the Clock..........................................3-85
Radio(s)......................................................3-85
Using an MP3..............................................3-98
XM Radio Messages...................................3-102
Navigation/Radio System..............................3-103
Theft-Deterrent Feature................................3-103
Audio Steering Wheel Controls......................3-103
Radio Reception.........................................3-104
Diversity Antenna System.............................3-105
XM™ Satellite Radio Antenna System............3-105
Section 3 Instrument Panel
3-2
Page 221 of 432
Setting the Clock
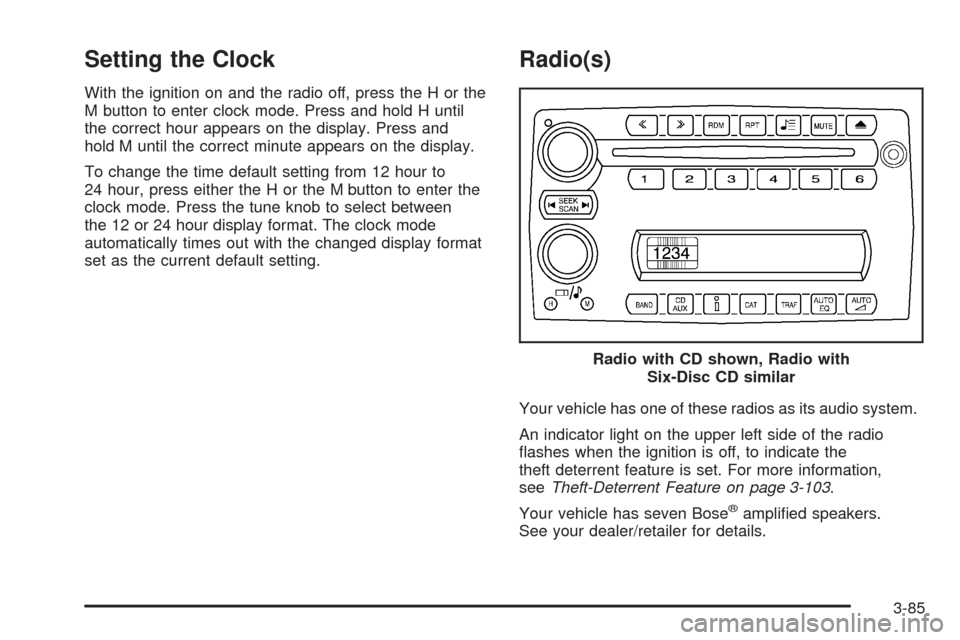
With the ignition on and the radio off, press the H or the
M button to enter clock mode. Press and hold H until
the correct hour appears on the display. Press and
hold M until the correct minute appears on the display.
To change the time default setting from 12 hour to
24 hour, press either the H or the M button to enter the
clock mode. Press the tune knob to select between
the 12 or 24 hour display format. The clock mode
automatically times out with the changed display format
set as the current default setting.
Radio(s)
Your vehicle has one of these radios as its audio system.
An indicator light on the upper left side of the radio
�ashes when the ignition is off, to indicate the
theft deterrent feature is set. For more information,
seeTheft-Deterrent Feature on page 3-103.
Your vehicle has seven Bose
®ampli�ed speakers.
See your dealer/retailer for details.Radio with CD shown, Radio with
Six-Disc CD similar
3-85
Page 222 of 432
Radio Data System (RDS)
The audio system has a Radio Data System (RDS).
RDS features are available for use only on FM stations
that broadcast RDS information.
With RDS, the radio can do the following:
Seek to stations broadcasting the selected type of
programming.
Receive announcements concerning local and
national emergencies.
Display messages from radio stations.
Seek to stations with traffic announcements.
This system relies upon receiving speci�c information
from these stations and works only when the information
is available. In rare cases, a radio station can broadcast
incorrect information that causes the radio features
to work improperly. If this happens, contact the radio
station.
While the radio is tuned to an RDS station, the station
name or call letters display. RDS stations can also
provide the time of day, a program type (PTY) for current
programming, and the name of the program being
broadcast.
Playing the Radio
Top Knob (Power/Volume):Press to turn the system
on and off. Turn clockwise or counterclockwise to
increase or decrease the volume.
4(Information):For RDS, press to change what
display while using RDS. The display options are station
name, RDS station frequency, PTY, and the name of
the program (if available).
For XM™ (if equipped), press while in XM™ mode to
retrieve four different categories of information related to
the current song or channel: Artist, Song Title,
Category or PTY, Channel Number/Channel Name.
To change the default on the display, press until you
see the desired display, then hold for two seconds.
The radio produces one beep and the selected display
is now the default.
AUTO
n(Automatic Volume):Automatic volume
automatically adjusts the audio system to make up
for road and wind noise as you drive, by increasing the
volume as vehicle speed increases.
Set the volume at the desired level. Press this button
to select AUTO VOLUME MIN (minimum), AUTO
VOLUME MED (medium), or AUTO VOLUME MAX
(maximum). Each higher setting provides more volume
compensation at faster vehicle speeds. To turn
automatic volume off, press this until AUTO VOLUME
OFF displays.
3-86
Page 234 of 432
Using the Auxiliary Input Jack
The radio system has an auxiliary input jack located on
the right side of the faceplate. This is not an audio
output; do not plug the headphone set into the front
auxiliary input jack. An external audio device such as an
iPod, laptop computer, MP3 player, CD changer, etc.
can be connected to the auxiliary input jack for use
as another source for audio listening.
Drivers are encouraged to set up any auxiliary device
while the vehicle is in PARK (P). SeeDefensive
Driving on page 4-2.
To use a portable audio player, connect a 3.5 mm
(1/8 inch) cable to the radio’s front auxiliary input jack.
When a device is connected, the radio displays AUX
INPUT DEVICE and begins playing audio from that
device.
Top Knob (Power/Volume):Turn clockwise or
counterclockwise to increase or decrease the volume of
the portable player. Additional volume adjustments
might need to be made from the portable device.
BAND:Press to listen to the radio while a portable audio
device is playing. The portable audio device continues
playing, so you might want to stop it or turn it off.CD/AUX (CD/Auxiliary):Press to play a CD while a
portable audio device is playing. Press again and
the system begins playing audio from the connected
portable audio player. If a portable audio player is
connected, AUX INPUT DEVICE displays. If a portable
audio player is not connected, AUX INPUT DEVICE
does not display.
Using an MP3
MP3 CD-R Disc
MP3 Format
If you burn your own MP3 disc on a personal computer:
Make sure the MP3 �les are recorded on a
CD-R disc.
Do not mix standard audio and MP3 �les on
one disc.
Make sure playlists have a .mp3 or .wpl extension,
other �le extensions might not work.
Files can be recorded with a variety of �xed or
variable bit rates. Song title, artist name, and album
are available for display by the radio when
recorded using ID3 tags version 1 and 2.
3-98
Page 420 of 432
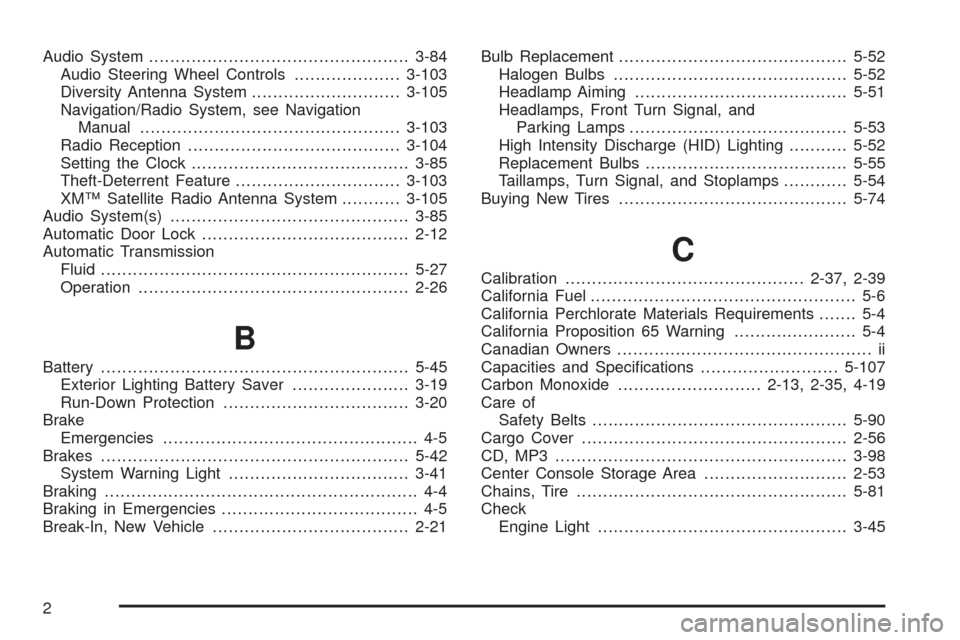
Audio System.................................................3-84
Audio Steering Wheel Controls....................3-103
Diversity Antenna System............................3-105
Navigation/Radio System, see Navigation
Manual.................................................3-103
Radio Reception........................................3-104
Setting the Clock.........................................3-85
Theft-Deterrent Feature...............................3-103
XM™ Satellite Radio Antenna System...........3-105
Audio System(s).............................................3-85
Automatic Door Lock.......................................2-12
Automatic Transmission
Fluid..........................................................5-27
Operation...................................................2-26
B
Battery..........................................................5-45
Exterior Lighting Battery Saver......................3-19
Run-Down Protection...................................3-20
Brake
Emergencies................................................ 4-5
Brakes..........................................................5-42
System Warning Light..................................3-41
Braking........................................................... 4-4
Braking in Emergencies..................................... 4-5
Break-In, New Vehicle.....................................2-21Bulb Replacement...........................................5-52
Halogen Bulbs............................................5-52
Headlamp Aiming........................................5-51
Headlamps, Front Turn Signal, and
Parking Lamps.........................................5-53
High Intensity Discharge (HID) Lighting...........5-52
Replacement Bulbs......................................5-55
Taillamps, Turn Signal, and Stoplamps............5-54
Buying New Tires...........................................5-74
C
Calibration.............................................2-37, 2-39
California Fuel.................................................. 5-6
California Perchlorate Materials Requirements....... 5-4
California Proposition 65 Warning....................... 5-4
Canadian Owners................................................ ii
Capacities and Speci�cations..........................5-107
Carbon Monoxide...........................2-13, 2-35, 4-19
Care of
Safety Belts................................................5-90
Cargo Cover..................................................2-56
CD, MP3 .......................................................3-98
Center Console Storage Area...........................2-53
Chains, Tire...................................................5-81
Check
Engine Light...............................................3-45
2
Page 421 of 432
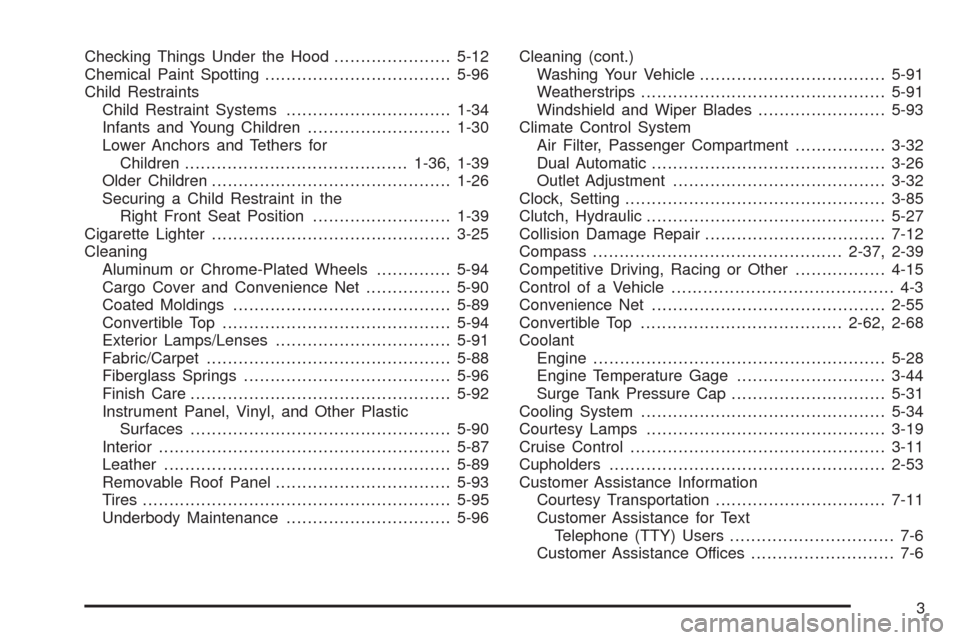
Checking Things Under the Hood......................5-12
Chemical Paint Spotting...................................5-96
Child Restraints
Child Restraint Systems...............................1-34
Infants and Young Children...........................1-30
Lower Anchors and Tethers for
Children..........................................1-36, 1-39
Older Children.............................................1-26
Securing a Child Restraint in the
Right Front Seat Position..........................1-39
Cigarette Lighter.............................................3-25
Cleaning
Aluminum or Chrome-Plated Wheels..............5-94
Cargo Cover and Convenience Net................5-90
Coated Moldings.........................................5-89
Convertible Top...........................................5-94
Exterior Lamps/Lenses.................................5-91
Fabric/Carpet..............................................5-88
Fiberglass Springs.......................................5-96
Finish Care.................................................5-92
Instrument Panel, Vinyl, and Other Plastic
Surfaces.................................................5-90
Interior.......................................................5-87
Leather......................................................5-89
Removable Roof Panel.................................5-93
Tires..........................................................5-95
Underbody Maintenance...............................5-96Cleaning (cont.)
Washing Your Vehicle...................................5-91
Weatherstrips..............................................5-91
Windshield and Wiper Blades........................5-93
Climate Control System
Air Filter, Passenger Compartment.................3-32
Dual Automatic............................................3-26
Outlet Adjustment........................................3-32
Clock, Setting.................................................3-85
Clutch, Hydraulic.............................................5-27
Collision Damage Repair..................................7-12
Compass
...............................................2-37, 2-39
Competitive Driving, Racing or Other.................4-15
Control of a Vehicle.......................................... 4-3
Convenience Net............................................2-55
Convertible Top......................................2-62, 2-68
Coolant
Engine.......................................................5-28
Engine Temperature Gage............................3-44
Surge Tank Pressure Cap.............................5-31
Cooling System..............................................5-34
Courtesy Lamps.............................................3-19
Cruise Control................................................3-11
Cupholders....................................................2-53
Customer Assistance Information
Courtesy Transportation................................7-11
Customer Assistance for Text
Telephone (TTY) Users............................... 7-6
Customer Assistance Offices........................... 7-6
3