fog light CHEVROLET CORVETTE 2010 6.G Owners Manual
[x] Cancel search | Manufacturer: CHEVROLET, Model Year: 2010, Model line: CORVETTE, Model: CHEVROLET CORVETTE 2010 6.GPages: 472, PDF Size: 11.44 MB
Page 9 of 472

A.Outlet Adjustment on page 4‑27.
B. Head-Up Display (HUD)
on page 4‑16(If Equipped).
C. Turn Signal/Multifunction Lever
on page 4‑4.
Cruise Controlon page 4‑7. Fog Lampson
page 4‑13. Exterior Lamps on page 4‑11.
D. Manual Shift Paddles (If Equipped). See Automatic
Transmission Operation on page 3‑26.
E. Driver Information Center (DIC) on page 4‑47.
F. Instrument Panel Cluster on page 4‑30.
G. Windshield Wipers
on page 4‑6and Windshield
Washer on page 4‑6.
H. DIC Operation and Displays on page 4‑47.
I. Hazard Warning Flashers on page 4‑3.
J. Audio System(s) on page 4‑80.
K. Dual Automatic Climate Control System
on
page 4‑22.
L. Fuel Door Release Button. See Filling the
Tank
on page 6‑9. Hatch/Trunk Release Button.
See “Hatch/Trunk Lid Release” underHatchon
page 3‑14.
M. Instrument Panel Brightness on page 4‑15.
N. Power Folding Top Switch (If Equipped). See Convertible Top (Manual)
on page 3‑59orConvertible Top (Power) on page 3‑66. O.
Bluetooth
®on page 4‑96(If Equipped).
Audio Steering Wheel Controlson page 4‑107(If Equipped).
P. Tilt Wheel on page 4‑3.
Q. Horn on page 4‑3.
R. Telescopic Wheel Button (If Equipped). See Tilt Wheel on page 4‑3.
S. Ignition Positions on page 3‑23.
T. Heated Seats
on page 2‑4(If Equipped).
U. Shift Lever (Automatic Shown). See Automatic
Transmission Operation
on page 3‑26or Manual
Transmission Operation on page 3‑32.
V. Active Handling System on page 5‑8.
W. Accessory Power Outlet(s) on page 4‑20.
X. Selective Ride Control on page 5‑14.
Y. Cupholders on page 3‑50.
Z. Ashtray(s) and Cigarette Lighter on page 4‑21.
AA. Parking Brake on page 3‑34.
AB. Glove Box on page 3‑50.
AC. Instrument Panel Fuse Block on page 6‑101.
1-3
Page 169 of 472
Section 4 Instrument Panel
Instrument Panel Overview. . . . . . . . . . . . . . . . . . . . . . . . 4-3
Hazard Warning Flashers . . . . . . . . . . . . . . . . . . . . . . . 4-3
Horn . . . . . . . . . . . . . . . . . . . . . . . . . . . . . . . . . . . . . . . . . . . . 4-3
Tilt Wheel . . . . . . . . . . . . . . . . . . . . . . . . . . . . . . . . . . . . . . . 4-3
Turn Signal/Multifunction Lever . . . . . . . . . . . . . . . . . . 4-4
Turn and Lane-Change Signals (Auto Signal) . . . 4-5
Headlamp High/Low-Beam Changer . . . . . . . . . . . . 4-5
Flash-to-Pass . . . . . . . . . . . . . . . . . . . . . . . . . . . . . . . . . . . 4-5
Windshield Wipers . . . . . . . . . . . . . . . . . . . . . . . . . . . . . . 4-6
Windshield Washer . . . . . . . . . . . . . . . . . . . . . . . . . . . . . 4-6
Cruise Control . . . . . . . . . . . . . . . . . . . . . . . . . . . . . . . . . . 4-7
Exterior Lamps . . . . . . . . . . . . . . . . . . . . . . . . . . . . . . . . . 4-11
Wiper Activated Headlamps . . . . . . . . . . . . . . . . . . . 4-12
Headlamps on Reminder . . . . . . . . . . . . . . . . . . . . . . 4-12
Daytime Running Lamps (DRL) . . . . . . . . . . . . . . . . 4-12
Fog Lamps . . . . . . . . . . . . . . . . . . . . . . . . . . . . . . . . . . . . 4-13
Twilight Sentinel
®. . . . . . . . . . . . . . . . . . . . . . . . . . . . . . 4-14
Exterior Lighting Battery Saver . . . . . . . . . . . . . . . . . 4-15
Instrument Panel Brightness . . . . . . . . . . . . . . . . . . . 4-15
Courtesy Lamps . . . . . . . . . . . . . . . . . . . . . . . . . . . . . . . 4-15
Entry/Exit Lighting . . . . . . . . . . . . . . . . . . . . . . . . . . . . . 4-15
Reading Lamps . . . . . . . . . . . . . . . . . . . . . . . . . . . . . . . . 4-15
Battery Run-Down Protection . . . . . . . . . . . . . . . . . . 4-16
Head-Up Display (HUD) . . . . . . . . . . . . . . . . . . . . . . . 4-16
Accessory Power Outlet(s) . . . . . . . . . . . . . . . . . . . . . 4-20
Ashtray(s) and Cigarette Lighter . . . . . . . . . . . . . . . 4-21 Climate Controls
. . . . . . . . . . . . . . . . . . . . . . . . . . . . . . . . . . 4-22
Dual Automatic Climate Control System . . . . . . . 4-22
Outlet Adjustment . . . . . . . . . . . . . . . . . . . . . . . . . . . . . . 4-27
Passenger Compartment Air Filter . . . . . . . . . . . . . 4-28
Warning Lights, Gauges, and Indicators . . . . . . . . 4-29
Instrument Panel Cluster . . . . . . . . . . . . . . . . . . . . . . . 4-30
Speedometer and Odometer . . . . . . . . . . . . . . . . . . . 4-32
Tachometer . . . . . . . . . . . . . . . . . . . . . . . . . . . . . . . . . . . . 4-32
Safety Belt Reminders . . . . . . . . . . . . . . . . . . . . . . . . . 4-32
Airbag Readiness Light . . . . . . . . . . . . . . . . . . . . . . . . 4-33
Passenger Airbag Status Indicator . . . . . . . . . . . . . 4-34
Voltmeter Gauge . . . . . . . . . . . . . . . . . . . . . . . . . . . . . . . 4-35
One-to-Four Shift Light (Manual Transmission) . . . . . . . . . . . . . . . . . . . . . . . . . . . . . . . 4-36
Brake System Warning Light . . . . . . . . . . . . . . . . . . . 4-36
Antilock Brake System (ABS) Warning Light . . . . . . . . . . . . . . . . . . . . . . . . . . . . . . . 4-37
Traction Control System (TCS) Warning Light . . . . . . . . . . . . . . . . . . . . . . . . . . . . . . . . 4-38
Active Handling System Light . . . . . . . . . . . . . . . . . . 4-39
Engine Coolant Temperature Gauge . . . . . . . . . . . 4-40
Tire Pressure Light . . . . . . . . . . . . . . . . . . . . . . . . . . . . 4-40
Malfunction Indicator Lamp . . . . . . . . . . . . . . . . . . . . 4-41
Engine Oil Pressure Gauge . . . . . . . . . . . . . . . . . . . . 4-44
Security Light . . . . . . . . . . . . . . . . . . . . . . . . . . . . . . . . . . 4-45
4-1
Page 170 of 472
Section 4 Instrument Panel
Fog Lamp Light . . . . . . . . . . . . . . . . . . . . . . . . . . . . . . . . 4-45
Lights On Reminder . . . . . . . . . . . . . . . . . . . . . . . . . . . 4-45
Highbeam On Light . . . . . . . . . . . . . . . . . . . . . . . . . . . . 4-45
Fuel Gauge . . . . . . . . . . . . . . . . . . . . . . . . . . . . . . . . . . . . 4-46
Boost Gauge (ZR1 Only) . . . . . . . . . . . . . . . . . . . . . . 4-47
Driver Information Center (DIC) . . . . . . . . . . . . . . . . . . 4-47
DIC Operation and Displays . . . . . . . . . . . . . . . . . . . 4-47
DIC Warnings and Messages . . . . . . . . . . . . . . . . . . 4-52
Other Messages . . . . . . . . . . . . . . . . . . . . . . . . . . . . . . . 4-70
DIC Vehicle Personalization . . . . . . . . . . . . . . . . . . . 4-71 Audio System(s)
. . . . . . . . . . . . . . . . . . . . . . . . . . . . . . . . . . 4-80
Setting the Clock . . . . . . . . . . . . . . . . . . . . . . . . . . . . . . 4-80
Radio(s) . . . . . . . . . . . . . . . . . . . . . . . . . . . . . . . . . . . . . . . 4-81
Using an MP3 . . . . . . . . . . . . . . . . . . . . . . . . . . . . . . . . . 4-92
XM Radio Messages . . . . . . . . . . . . . . . . . . . . . . . . . . . 4-95
Navigation/Radio System . . . . . . . . . . . . . . . . . . . . . . 4-96
Bluetooth
®. . . . . . . . . . . . . . . . . . . . . . . . . . . . . . . . . . . . . 4-96
Theft-Deterrent Feature . . . . . . . . . . . . . . . . . . . . . . 4-106
Audio Steering Wheel Controls . . . . . . . . . . . . . . . 4-107
Radio Reception . . . . . . . . . . . . . . . . . . . . . . . . . . . . . . 4-108
Diversity Antenna System . . . . . . . . . . . . . . . . . . . . 4-109
XM™ Satellite Radio Antenna System . . . . . . . . 4-109
4-2
Page 173 of 472
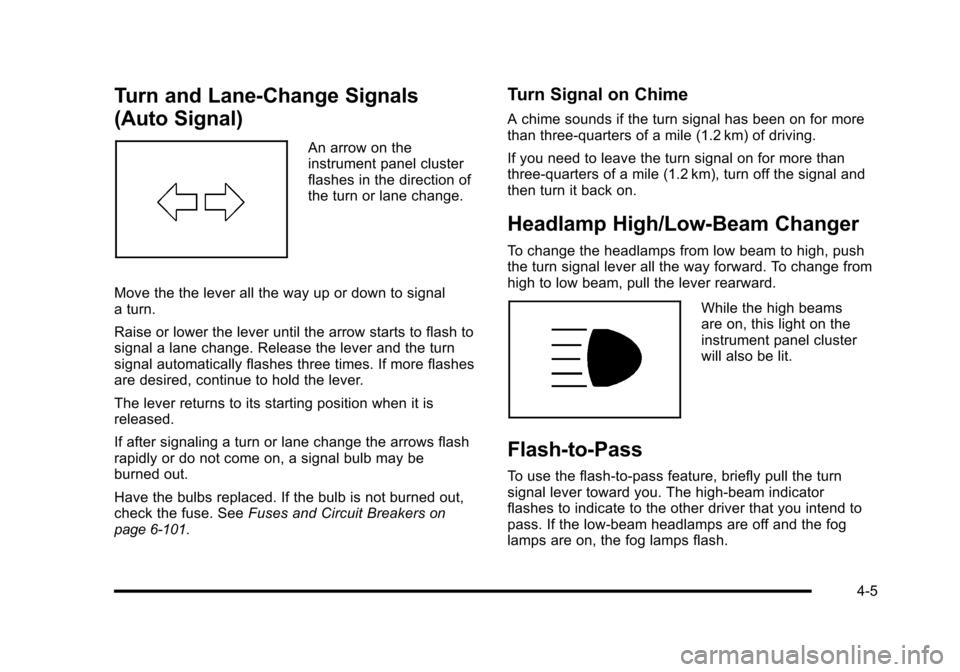
Turn and Lane-Change Signals
(Auto Signal)
An arrow on the
instrument panel cluster
flashes in the direction of
the turn or lane change.
Move the the lever all the way up or down to signal
a turn.
Raise or lower the lever until the arrow starts to flash to
signal a lane change. Release the lever and the turn
signal automatically flashes three times. If more flashes
are desired, continue to hold the lever.
The lever returns to its starting position when it is
released.
If after signaling a turn or lane change the arrows flash
rapidly or do not come on, a signal bulb may be
burned out.
Have the bulbs replaced. If the bulb is not burned out,
check the fuse. See Fuses and Circuit Breakers
on
page 6‑101.
Turn Signal on Chime
A chime sounds if the turn signal has been on for more
than three‐quarters of a mile (1.2 km) of driving.
If you need to leave the turn signal on for more than
three‐quarters of a mile (1.2 km), turn off the signal and
then turn it back on.
Headlamp High/Low-Beam Changer
To change the headlamps from low beam to high, push
the turn signal lever all the way forward. To change from
high to low beam, pull the lever rearward.
While the high beams
are on, this light on the
instrument panel cluster
will also be lit.
Flash-to-Pass
To use the flash-to-pass feature, briefly pull the turn
signal lever toward you. The high-beam indicator
flashes to indicate to the other driver that you intend to
pass. If the low-beam headlamps are off and the fog
lamps are on, the fog lamps flash.
4-5
Page 181 of 472
When it is bright enough outside, the regular lamps
go off, and the front turn signal lamps will take over.
If the vehicle is started in a dark garage, the automatic
headlamp system comes on immediately. Once the
vehicle leaves the garage, it takes approximately
one minute for the automatic headlamp system to
change to DRL if it is light outside. During that delay,
the instrument panel cluster may not be as bright as
usual. Make sure the instrument panel brightness knob
is in the full bright position. See Instrument Panel
Brightness
on page 4‑15for more information.
If it is dark enough outside and the exterior lamp control
is off, a HEADLAMPS SUGGESTED message will
display on the Driver's Information Center (DIC).
See DIC Warnings and Messages on page 4‑52.
Turning the exterior lamp control to off a second
time, or turning on the headlamps will remove the
HEADLAMPS SUGGESTED message in the DIC. If the
parking lamps or the fog lamps were turned on instead,
the HEADLAMPS SUGGESTED message will continue
to be displayed.
The regular headlamp system should be turned on
when needed. To turn off the DRL, turn the exterior lamp control to the
off position or shift into P (Park). The DRL will stay off
until the control is toggled again or the vehicle is shifted
out of P (Park).
This procedure applies only to vehicles first sold in the
United States.
Fog Lamps
Use fog lamps for better vision in foggy or misty
conditions.
The fog lamps control is located on the multifunction
lever next to the exterior lamp control.
#
(Fog Lamps) : Turning the band to this position will
turn the fog lamps on.
When you turn the fog lamps on, the fog lamp light will
appear on the instrument panel cluster to indicate that
the fog lamps and the parking lamps are on.
If you turn the high-beam headlamps on, the fog lamps
will turn off. They will turn on again when you switch to
low-beam headlamps.
The ignition must be on for the fog lamps to operate.
Some localities have laws that require the headlamps
to be on along with the fog lamps.
4-13
Page 192 of 472

N(Air Delivery Mode Control) : Press this button to
manually lock in the current air delivery setting and to
stop the automatic mode control. Pressing
Ndeletes
AUTO from the digital display and the mode graphics
will be shown. To change the setting, press
Nagain.
The AUTO button must be pressed to return to the
automatic mode selection.
To change the current mode, select one of the following:
H (Vent) : Air is directed to the instrument panel outlets,
with some air directed to the floor outlets.
% (Bi-Level) : Air is divided between the instrument
panel and floor outlets.
6 (Floor) : Air is directed to the floor outlets, with some
air directed to the windshield and side window defogger
outlets.
- (Floor/Defog) : This mode clears the windows of fog
or moisture. Air is directed to the windshield and the
floor outlets, with a small amount to the side window
outlets. In this mode, the system automatically turns
off the recirculation and runs the air-conditioning
compressor unless the outside temperature is at or
below freezing. The recirculation mode cannot be
selected while in the defog mode. 1(Defrost) :
This mode clears the windows of fog or
frost more quickly. Air is directed to the windshield,
with a small amount directed to the side window outlets.
The indicator light comes on and the digital display will
show the defrost mode symbol and fan speed when the
front defrost mode is being used. In this mode, the
system automatically turns off the recirculation and
runs the air-conditioning compressor, unless the
outside temperature is at or below freezing.
Recirculation cannot be selected while in the defrost
mode. Pressing
1again will return the system to the
last operating mode.
For severe ice conditions, turn the driver's temperature
knob to 32°C (90°F) while in defrost mode.
Do not drive the vehicle until all the windows are clear.
^ (Air Conditioning Off) : Press to turn the air
conditioning compressor off. Press AUTO to return
to automatic operation. When in AUTO, the air
conditioning compressor comes on automatically,
as needed.
Air conditioning does not operate at temperatures below
about 2°C to 4°C (35°F to 40°F). In temperatures above
4°C (40°F), the air conditioning cannot be turned off in
defrost and defog, as it helps to remove moisture from
the vehicle. It also helps to keep the windows clear.
4-24
Page 193 of 472
You may notice a slight change in engine performance
when the air-conditioning compressor shuts off and
turns on again. This is normal. The system is designed
to make adjustments to help with fuel economy while
still maintaining the selected temperature.
On hot days, open the windows to let hot inside air
escape; then close them. This helps to reduce the time
it takes for the vehicle to cool down. It also helps the
system to operate more efficiently.
For quick cool down on hot days press the AUTO
button and adjust the temperature to a cool, comfortable
setting. To achieve maximum cool down, do the
following: 1. Select
Hmode.
2. Press
?.
3. Select the a/c on.
4. Select the coolest temperature.
5. Select the highest fan speed. Using these settings together for long periods of time
may cause the air inside of your vehicle to become too
dry. To prevent this from happening, after the air in the
vehicle has cooled, turn the recirculation mode off.
The air conditioning system removes moisture from the
air, so a small amount of water might drip under the
vehicle while idling or after turning off the engine.
This is normal.
?
(Recirculation) : Press to turn the recirculation
mode on or off. An indicator light comes on to show
that recirculation is on. This mode prevents outside air
from entering your vehicle. It can be used to prevent
outside air and odors from entering your vehicle and
to help cool the air inside your vehicle more quickly.
Recirculation mode is not available in defrost or
defog mode.
4-25
Page 194 of 472
Sensors
The solar sensor on the vehicle monitors the solar
heat and uses the information to maintain the selected
temperature when operating in AUTO mode by
automatically adjusting the temperature, fan speed
and air delivery system. The system may also supply
cooler air to the side of the vehicle facing the sun.
The recirculation mode will also be activated, as
necessary. Do not cover the solar sensor located
on the top of the instrument panel near the windshield
or the system will not work properly.
There is also a sensor located behind the front bumper.
This sensor reads the outside air temperature and helps
to maintain the temperature inside the vehicle. Any
cover on the front of the vehicle could give a false
reading in the temperature.
If the outside temperature goes up, the displayed
temperature will not change until:
.The vehicle's speed is above 19 km/h (12 mph) for
five minutes.
.The vehicle's speed is above 52 km/h (32 mph) for
two and a half minutes. These delays prevent false readings. If the temperature
goes down, the outside temperature will be shown when
you start the vehicle. If it has been turned off for less
than three hours, the temperature will be recalled from
the previous vehicle operation.
There is also an inside temperature sensor located to
the left of the ignition switch. The automatic climate
control system uses this sensor to receive information,
so if you block or cover it, the system will not function
properly.
Rear Window Defogger
The rear window defogger uses a warming grid to
remove fog or frost from the rear window.
The rear window defogger only works when the engine
is running.
=(Rear Window Defogger) :
Press to turn the
rear window defogger on or off. Be sure to clear
as much snow from the rear window as possible.
An indicator light comes on to show that the rear
window defogger is on.
4-26
Page 213 of 472
The engine oil pressure can also be displayed using the
GAGES button on the Driver Information Center (DIC).
See Driver Information Center (DIC) on page 4‑47.
Security Light
For information regarding
this light and the vehicle's
security system, see
Theft-Deterrent System
on page 3‑19.
Fog Lamp Light
The fog lamp light comes
on when the fog lamps
are in use.
The light goes out when the fog lamps are turned off.
See Fog Lamps
on page 4‑13for more information.
Lights On Reminder
This light comes on
whenever the parking
lamps are on.
See Headlamps on Reminder
on page 4‑12for more
information.
Highbeam On Light
This light comes on when
the high-beam headlamps
are in use.
See Headlamp High/Low-Beam Changer
on page 4‑5for more information.
4-45
Page 402 of 472
Appearance Care
Interior Cleaning
The vehicle's interior will continue to look its best if
it is cleaned often. Although not always visible, dust
and dirt can accumulate on the upholstery. Dirt can
damage carpet, fabric, leather, and plastic surfaces.
Regular vacuuming is recommended to remove
particles from the upholstery. It is important to keep
the upholstery from becoming and remaining heavily
soiled. Soils should be removed as quickly as possible.
The vehicle's interior may experience extremes of heat
that could cause stains to set rapidly.
Lighter colored interiors may require more frequent
cleaning. Use care because newspapers and garments
that transfer color to home furnishings may also transfer
color to the vehicle's interior.
When cleaning the vehicle's interior, only use cleaners
specifically designed for the surfaces being cleaned.
Permanent damage may result from using cleaners
on surfaces for which they were not intended. Use
glass cleaner only on glass. Remove any accidental
over-spray from other surfaces immediately. To prevent
over-spray, apply cleaner directly to the cleaning cloth. Notice:
Using abrasive cleaners when cleaning
glass surfaces on the vehicle, could scratch the
glass and/or cause damage to the rear window
defogger. When cleaning the glass on the vehicle,
use only a soft cloth and glass cleaner.
Many cleaners contain solvents that may become
concentrated in the vehicle's breathing space.
Before using cleaners, read and adhere to all safety
instructions on the label. While cleaning the vehicle's
interior, maintain adequate ventilation by opening the
vehicle's doors and windows.
Dust may be removed from small buttons and knobs
using a small brush with soft bristles.
Products that remove odors from the vehicle's
upholstery and clean the vehicle's glass can be
obtained from your dealer/retailer.
6-90