tire pressure CHEVROLET CORVETTE 2014 7.G Owner's Guide
[x] Cancel search | Manufacturer: CHEVROLET, Model Year: 2014, Model line: CORVETTE, Model: CHEVROLET CORVETTE 2014 7.GPages: 376, PDF Size: 4.94 MB
Page 296 of 376
Black plate (68,1)Chevrolet Corvette Owner Manual (GMNA-Localizing-U.S./Canada/Mexico-
6007198) - 2014 - CRC - 2/5/14
10-68 Vehicle Care
There is only enough sealant to seal
one tire. After usage, the sealant
canister and sealant/air hose
assembly must be replaced. See
“Removal and Installation of the
Sealant Canister”following.
Using the Tire Sealant and
Compressor Kit to Temporarily
Seal and Inflate a
Punctured Tire
Follow the directions closely for
correct sealant usage.
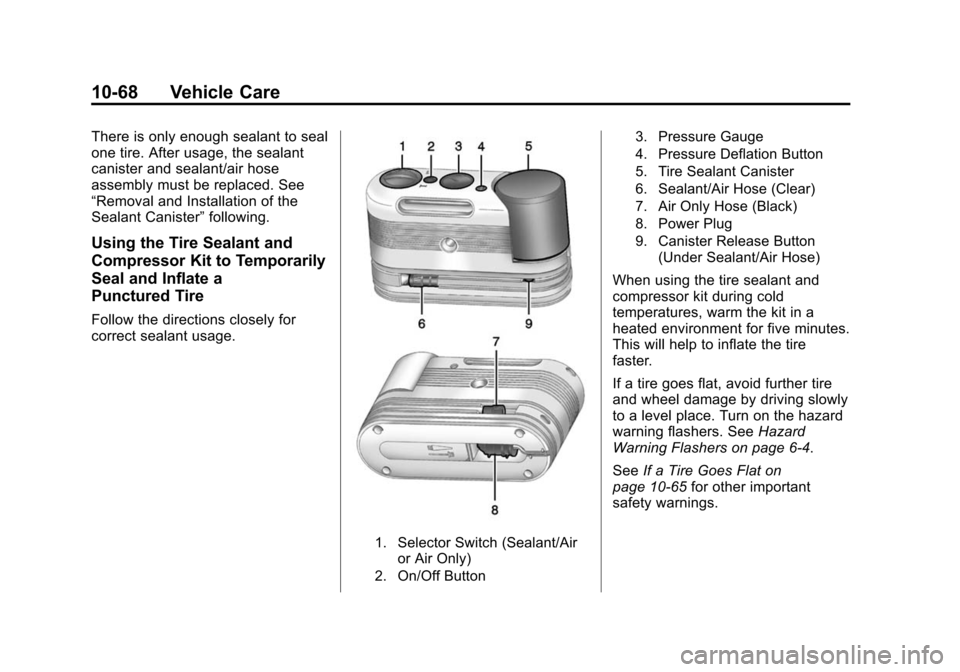
1. Selector Switch (Sealant/Air
or Air Only)
2. On/Off Button 3. Pressure Gauge
4. Pressure Deflation Button
5. Tire Sealant Canister
6. Sealant/Air Hose (Clear)
7. Air Only Hose (Black)
8. Power Plug
9. Canister Release Button
(Under Sealant/Air Hose)
When using the tire sealant and
compressor kit during cold
temperatures, warm the kit in a
heated environment for five minutes.
This will help to inflate the tire
faster.
If a tire goes flat, avoid further tire
and wheel damage by driving slowly
to a level place. Turn on the hazard
warning flashers. See Hazard
Warning Flashers on page 6-4.
See If a Tire Goes Flat on
page 10-65 for other important
safety warnings.
Page 297 of 376
Black plate (69,1)Chevrolet Corvette Owner Manual (GMNA-Localizing-U.S./Canada/Mexico-
6007198) - 2014 - CRC - 2/5/14
Vehicle Care 10-69
Do not remove any objects that
have penetrated the tire.
1. Remove the tire sealant andcompressor kit from its storage
location. See Storing the Tire
Sealant and Compressor Kit on
page 10-74.
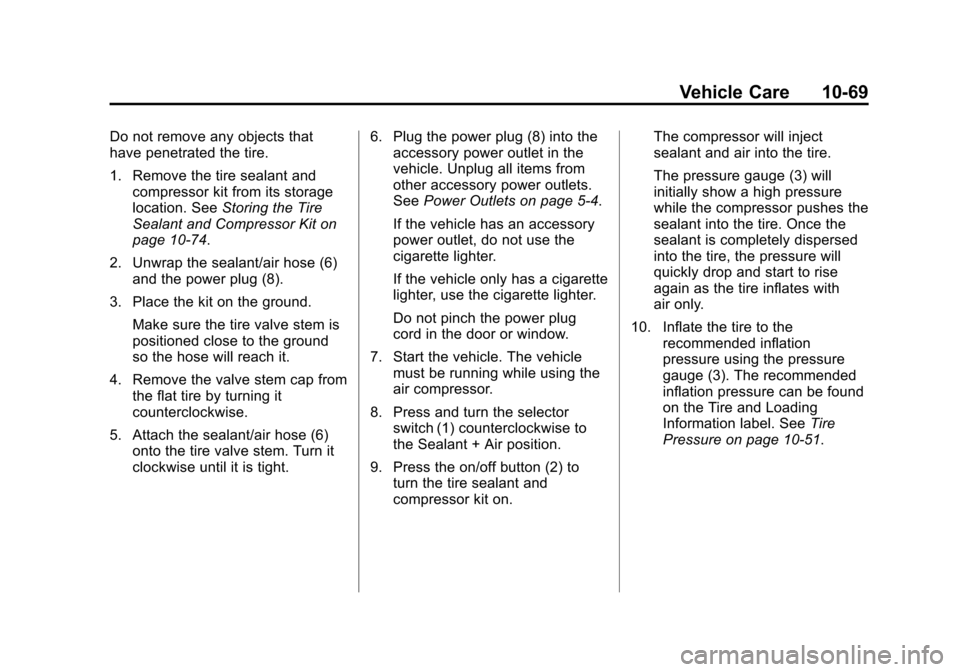
2. Unwrap the sealant/air hose (6) and the power plug (8).
3. Place the kit on the ground. Make sure the tire valve stem is
positioned close to the ground
so the hose will reach it.
4. Remove the valve stem cap from the flat tire by turning it
counterclockwise.
5. Attach the sealant/air hose (6) onto the tire valve stem. Turn it
clockwise until it is tight. 6. Plug the power plug (8) into the
accessory power outlet in the
vehicle. Unplug all items from
other accessory power outlets.
See Power Outlets on page 5-4.
If the vehicle has an accessory
power outlet, do not use the
cigarette lighter.
If the vehicle only has a cigarette
lighter, use the cigarette lighter.
Do not pinch the power plug
cord in the door or window.
7. Start the vehicle. The vehicle must be running while using the
air compressor.
8. Press and turn the selector switch (1) counterclockwise to
the Sealant + Air position.
9. Press the on/off button (2) to turn the tire sealant and
compressor kit on. The compressor will inject
sealant and air into the tire.
The pressure gauge (3) will
initially show a high pressure
while the compressor pushes the
sealant into the tire. Once the
sealant is completely dispersed
into the tire, the pressure will
quickly drop and start to rise
again as the tire inflates with
air only.
10. Inflate the tire to the recommended inflation
pressure using the pressure
gauge (3). The recommended
inflation pressure can be found
on the Tire and Loading
Information label. See Tire
Pressure on page 10-51.
Page 298 of 376

Black plate (70,1)Chevrolet Corvette Owner Manual (GMNA-Localizing-U.S./Canada/Mexico-
6007198) - 2014 - CRC - 2/5/14
10-70 Vehicle Care
{Caution
If the recommended pressure
cannot be reached after
approximately 25 minutes, the
vehicle should not be driven
farther. The tire is too severely
damaged and the tire sealant and
compressor kit cannot inflate the
tire. Remove the power plug from
the accessory power outlet and
unscrew the inflating hose from
the tire valve. SeeRoadside
Assistance Program on
page 13-5.
11. Press the on/off button (2) to turn the tire sealant and
compressor kit off. The tire is not sealed and will
continue to leak air until the
vehicle is driven and the
sealant is distributed in the tire,
therefore, Steps 12–18 must be
done immediately after
Step 11.
Be careful while handling the
tire sealant and compressor kit
as it could be warm after
usage.
12. Unplug the power plug (8) from the accessory power outlet in
the vehicle.
13. Turn the sealant/air hose (6) counterclockwise to remove it
from the tire valve stem.
14. Replace the tire valve stem cap.
15. Replace the sealant/air hose (6), and the power plug (8)
back in their original location.
16. If the flat tire was able to inflateto the recommended inflation
pressure, remove the
maximum speed label from the
sealant canister (5) and place it
in a highly visible location. Do
not exceed the speed on this
label until the damaged tire is
repaired or replaced.
17. Return the equipment to its original storage location in the
vehicle.
18. Immediately drive the vehicle 8 km (5 mi) to distribute the
sealant in the tire.
Page 299 of 376
Black plate (71,1)Chevrolet Corvette Owner Manual (GMNA-Localizing-U.S./Canada/Mexico-
6007198) - 2014 - CRC - 2/5/14
Vehicle Care 10-71
19. Stop at a safe location andcheck the tire pressure. Refer
to Steps 1–11 under “Using the
Tire Sealant and Compressor
Kit without Sealant to Inflate a
Tire (Not Punctured).”
If the tire pressure has fallen
more than 68 kPa (10 psi)
below the recommended
inflation pressure, stop driving
the vehicle. The tire is too
severely damaged and the tire
sealant cannot seal the tire.
See Roadside Assistance
Program on page 13-5.
If the tire pressure has not
dropped more than 68 kPa
(10 psi) from the recommended
inflation pressure, inflate the
tire to the recommended
inflation pressure.
20. Wipe off any sealant from the wheel, tire, and vehicle. 21. Dispose of the used sealant
canister (5) and sealant/air
hose (6) assembly at a local
dealer or in accordance with
local state codes and practices.
22. Replace with a new canister assembly available from your
dealer.
23. After temporarily sealing the tire using the tire sealant and
compressor kit, take the
vehicle to an authorized dealer
within 161 km (100 mi) of
driving to have the tire repaired
or replaced.
Using the Tire Sealant and
Compressor Kit without
Sealant to Inflate a Tire (Not
Punctured)
To use the air compressor to inflate
a tire with air only and not sealant:
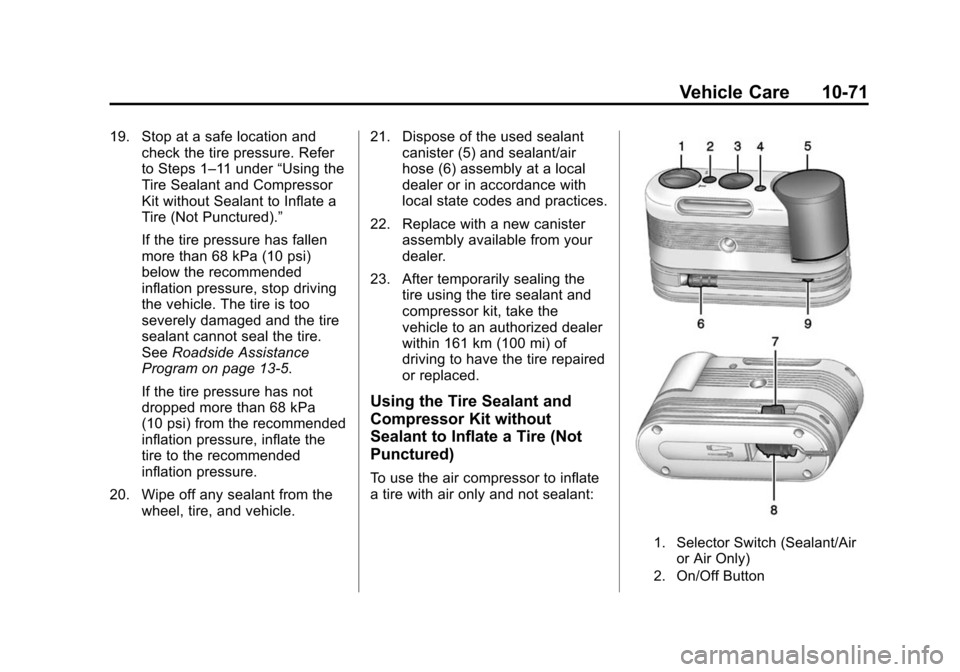
1. Selector Switch (Sealant/Air
or Air Only)
2. On/Off Button
Page 300 of 376
Black plate (72,1)Chevrolet Corvette Owner Manual (GMNA-Localizing-U.S./Canada/Mexico-
6007198) - 2014 - CRC - 2/5/14
10-72 Vehicle Care
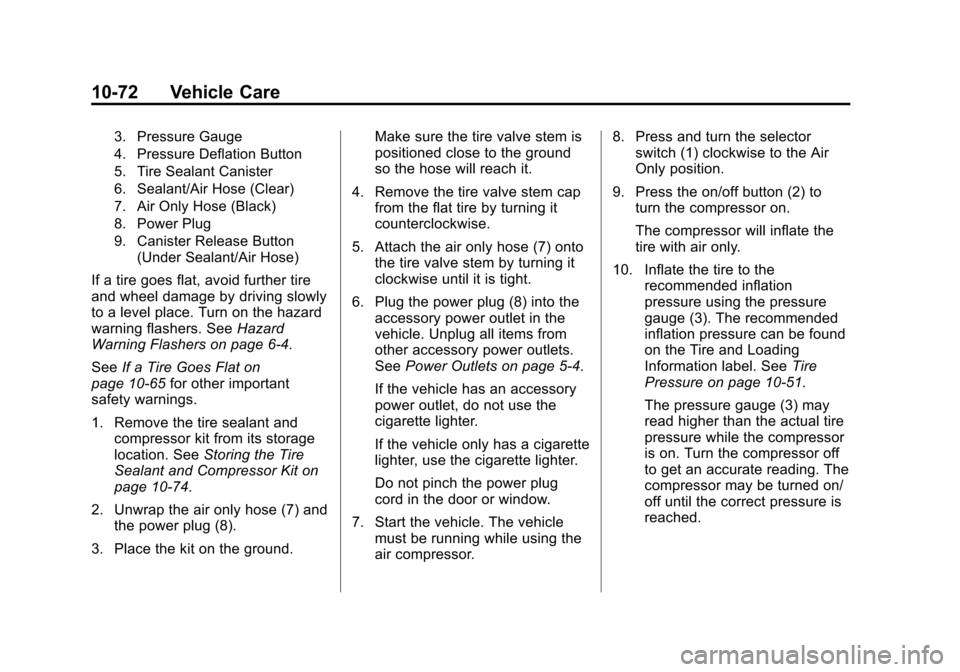
3. Pressure Gauge
4. Pressure Deflation Button
5. Tire Sealant Canister
6. Sealant/Air Hose (Clear)
7. Air Only Hose (Black)
8. Power Plug
9. Canister Release Button(Under Sealant/Air Hose)
If a tire goes flat, avoid further tire
and wheel damage by driving slowly
to a level place. Turn on the hazard
warning flashers. See Hazard
Warning Flashers on page 6-4.
See If a Tire Goes Flat on
page 10-65 for other important
safety warnings.
1. Remove the tire sealant and
compressor kit from its storage
location. See Storing the Tire
Sealant and Compressor Kit on
page 10-74.
2. Unwrap the air only hose (7) and the power plug (8).
3. Place the kit on the ground. Make sure the tire valve stem is
positioned close to the ground
so the hose will reach it.
4. Remove the tire valve stem cap from the flat tire by turning it
counterclockwise.
5. Attach the air only hose (7) onto the tire valve stem by turning it
clockwise until it is tight.
6. Plug the power plug (8) into the accessory power outlet in the
vehicle. Unplug all items from
other accessory power outlets.
See Power Outlets on page 5-4.
If the vehicle has an accessory
power outlet, do not use the
cigarette lighter.
If the vehicle only has a cigarette
lighter, use the cigarette lighter.
Do not pinch the power plug
cord in the door or window.
7. Start the vehicle. The vehicle must be running while using the
air compressor. 8. Press and turn the selector
switch (1) clockwise to the Air
Only position.
9. Press the on/off button (2) to turn the compressor on.
The compressor will inflate the
tire with air only.
10. Inflate the tire to the recommended inflation
pressure using the pressure
gauge (3). The recommended
inflation pressure can be found
on the Tire and Loading
Information label. See Tire
Pressure on page 10-51.
The pressure gauge (3) may
read higher than the actual tire
pressure while the compressor
is on. Turn the compressor off
to get an accurate reading. The
compressor may be turned on/
off until the correct pressure is
reached.
Page 301 of 376
Black plate (73,1)Chevrolet Corvette Owner Manual (GMNA-Localizing-U.S./Canada/Mexico-
6007198) - 2014 - CRC - 2/5/14
Vehicle Care 10-73
If you inflate the tire higher
than the recommended
pressure you can adjust the
excess pressure by pressing
the pressure deflation
button (4) until the proper
pressure reading is reached.
This option is only functional
when using the air only
hose (7).
11. Press the on/off button (2) to turn the tire sealant and
compressor kit off.
Be careful while handling the
tire sealant and compressor kit
as it could be warm after
usage.
12. Unplug the power plug (8) from the accessory power outlet in
the vehicle.
13. Disconnect the air only hose (7) from the tire valve stem, by
turning it counterclockwise, and
replace the tire valve stem cap. 14. Replace the air only hose (7)
and the power plug (8) and
cord back in its original
location.
15. Place the equipment in the original storage location in the
vehicle.
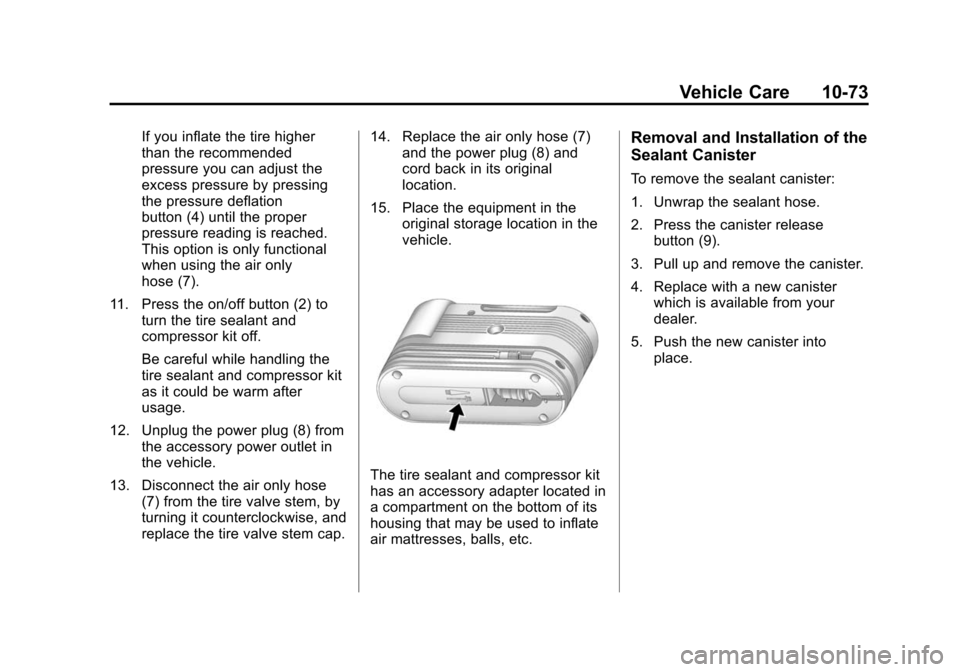
The tire sealant and compressor kit
has an accessory adapter located in
a compartment on the bottom of its
housing that may be used to inflate
air mattresses, balls, etc.
Removal and Installation of the
Sealant Canister
To remove the sealant canister:
1. Unwrap the sealant hose.
2. Press the canister releasebutton (9).
3. Pull up and remove the canister.
4. Replace with a new canister which is available from your
dealer.
5. Push the new canister into place.
Page 319 of 376
Black plate (3,1)Chevrolet Corvette Owner Manual (GMNA-Localizing-U.S./Canada/Mexico-
6007198) - 2014 - CRC - 2/5/14
Service and Maintenance 11-3
Maintenance
Schedule
Owner Checks and Services
At Each Fuel Stop
.Check the engine oil level. See
Engine Oil on page 10-10.
Once a Month
.Check the tire inflation
pressures. See Tire Pressure on
page 10-51.
.Inspect the tires for wear. See
Tire Inspection on page 10-56.
.Check the windshield washer
fluid level. See Washer Fluid on
page 10-26.
Engine Oil Change
When the CHANGE ENGINE OIL
SOON message displays, have the
engine oil and filter changed within
the next 1 000 km/600 mi. If driven
under the best conditions, the
engine oil life system might not
indicate the need for vehicle service
for more than a year. The engine oil
and filter must be changed at least
once a year and the oil life system
must be reset. Your trained dealer
technician can perform this work.
If the engine oil life system is reset
accidentally, service the vehicle
within 5 000 km/3,000 mi since the
last service. Reset the oil life
system when the oil is changed.
See Engine Oil Life System on
page 10-16.
Required Services Every
12 000 km/7,500 mi
.Check engine oil level and oil
life percentage. If needed,
change engine oil and filter, and
reset oil life system. See Engine
Oil on page 10-10 andEngine
Oil Life System on page 10-16.
.Check engine coolant level. See
Engine Coolant on page 10-22.
.Check windshield washer fluid
level. See Washer Fluid on
page 10-26.
.Visually inspect windshield wiper
blades for wear, cracking,
or contamination. See Exterior
Care on page 10-78. Replace
worn or damaged wiper blades.
See Wiper Blade Replacement
on page 10-33.
Page 320 of 376

Black plate (4,1)Chevrolet Corvette Owner Manual (GMNA-Localizing-U.S./Canada/Mexico-
6007198) - 2014 - CRC - 2/5/14
11-4 Service and Maintenance
.Check tire inflation pressures.
SeeTire Pressure on
page 10-51.
.Inspect tire wear. See Tire
Inspection on page 10-56.
.Visually check for fluid leaks.
.Inspect engine air cleaner filter.
See Engine Air Cleaner/Filter on
page 10-18.
.Inspect brake system.
.Visually inspect steering,
suspension, and chassis
components for damaged, loose,
or missing parts or signs of
wear. See Exterior Care on
page 10-78.
.Check restraint system
components. See Safety System
Check on page 3-14.
.Visually inspect fuel system for
damage or leaks.
.Visually inspect exhaust system
and nearby heat shields for
loose or damaged parts.
.Lubricate body components. See
Exterior Care on page 10-78.
.Check starter switch. See Starter
Switch Check on page 10-31.
.Check automatic transmission
shift lock control function. See
Automatic Transmission Shift
Lock Control Function Check on
page 10-32.
.Check parking brake and
automatic transmission park
mechanism. See Park Brake and
P (Park) Mechanism Check on
page 10-32.
.Check accelerator pedal for
damage, high effort, or binding.
Replace if needed.
.Visually inspect gas strut for
signs of wear, cracks, or other
damage. Check the hold open
ability of the strut. See your
dealer if service is required.
Page 352 of 376
Black plate (14,1)Chevrolet Corvette Owner Manual (GMNA-Localizing-U.S./Canada/Mexico-
6007198) - 2014 - CRC - 2/5/14
13-14 Customer Information
These data can help provide a
better understanding of the
circumstances in which crashes and
injuries occur. NOTE: EDR data are
recorded by your vehicle only if a
non-trivial crash situation occurs; no
data are recorded by the EDR under
normal driving conditions and no
personal data (e.g., name, gender,
age, and crash location) are
recorded. However, other parties,
such as law enforcement, could
combine the EDR data with the type
of personally identifying data
routinely acquired during a crash
investigation.
To read data recorded by an EDR,
special equipment is required, and
access to the vehicle or the EDR is
needed. In addition to the vehicle
manufacturer, other parties, such as
law enforcement, that have the
special equipment, can read the
information if they have access to
the vehicle or the EDR.
GM will not access this data or
share it with others except: with the
consent of the vehicle owner or,if the vehicle is leased, with the
consent of the lessee; in response
to an official request by police or
similar government office; as part of
GM's defense of litigation through
the discovery process; or, as
required by law. Data that GM
collects or receives may also be
used for GM research needs or may
be made available to others for
research purposes, where a need is
shown and the data is not tied to a
specific vehicle or vehicle owner.
OnStar®
If the vehicle is equipped with
OnStar®and has an active
subscription, additional data may be
collected through the OnStar
system. This includes information
about the vehicle’s operation;
collisions involving the vehicle; the
use of the vehicle and its features;
and, in certain situations, the
location and approximate GPS
speed of the vehicle. Refer to the OnStar Terms and Conditions and
Privacy Statement on the OnStar
website.
Infotainment System
If the vehicle is equipped with a
navigation system as part of the
infotainment system, use of the
system may result in the storage of
destinations, addresses, telephone
numbers, and other trip information.
See the infotainment manual for
information on stored data and for
deletion instructions.
Radio Frequency
Identification (RFID)
RFID technology is used in some
vehicles for functions such as tire
pressure monitoring and ignition
system security, as well as in
connection with conveniences such
as Remote Keyless Entry (RKE)
transmitters for remote door locking/
unlocking and starting, and
in-vehicle transmitters for garage
door openers. RFID technology in
Page 358 of 376
Black plate (4,1)Chevrolet Corvette Owner Manual (GMNA-Localizing-U.S./Canada/Mexico-
6007198) - 2014 - CRC - 2/5/14
14-4 OnStar
After the call ends, press the“Go”
button on the navigation screen to
begin driving directions.
Once directions have been
downloaded to the navigation
system, the route must be canceled
through the navigation system.
Destinations can also be
downloaded on the go. For
information about eNav, Destination
Download, and coverage maps, see
www.onstar.com (U.S.) or
www.onstar.ca (Canada).
Connections
OnStar Hands-Free Calling allows
calls to be made and received from
the vehicle. The vehicle can also be
controlled from a cell phone through
the OnStar RemoteLink
®mobile
app. For coverage maps, see
www.onstar.com (U.S.) or
www.onstar.ca (Canada).
OnStar Mobile App
Download the OnStar RemoteLink
mobile app to your Apple®,
Android™ and BlackBerry®devices
to check vehicle fuel level, oil life,
or tire pressure; to start the vehicle
(if equipped) or unlock it; or to
connect to an OnStar Advisor. For
OnStar RemoteLink information and
compatibility, see www.onstar.com
(U.S.) or www.onstar.ca (Canada).
Hands-Free Calling
1. PressQ. System responds:
“OnStar ready.”
2. Say “Call.”System responds:
“Please say the name or number
to call.”
3. Say the entire number without pausing, including a “1”and the
area code. System responds:
“OK calling.”
Calling 911 Emergency
1. PressQ. The system responds
“OnStar Ready,” followed by
a tone.
2. Say “Call.”The system responds
“Please say the name or number
to call.”
3. Say “911”without pausing. The
system responds “911.”
4. Say “Call.”The system responds
“OK, dialing 911.”
Retrieve My Number
1. PressQ. System responds:
“OnStar ready.”
2. Say “My number.” System
responds: “Your OnStar
Hands-Free Calling number is,”
then says the number.
End a Call
PressQ. System responds: “Call
ended.”