inspection CHEVROLET CORVETTE 2019 Owner's Manual
[x] Cancel search | Manufacturer: CHEVROLET, Model Year: 2019, Model line: CORVETTE, Model: CHEVROLET CORVETTE 2019Pages: 367, PDF Size: 6.8 MB
Page 91 of 367

Chevrolet Corvette Owner Manual (GMNA-Localizing-U.S./Canada/Mexico-
12032182) - 2019 - crc - 5/8/18
90 Seats and Restraints
Securing an Add-On Child
Restraint in the Vehicle
{Warning
A child can be seriously injured or
killed in a crash if the child
restraint is not properly secured in
the vehicle. Secure the child
restraint properly in the vehicle
using the vehicle's seat belt,
following the instructions that
came with that child restraint and
the instructions in this manual.
To help reduce the chance of injury,
the child restraint must be secured
in the vehicle. Child restraints must
be secured in vehicle seats by lap
belts or the lap belt portion of a
lap-shoulder belt. A child can be
endangered in a crash if the child
restraint is not properly secured in
the vehicle.
When securing an add-on child
restraint, refer to the instructions
that come with the restraint which
may be on the restraint itself or in a booklet, or both, and to this manual.
The child restraint instructions are
important, so if they are not
available, obtain a replacement
copy from the manufacturer.
Keep in mind that an unsecured
child restraint can move around in a
collision or sudden stop and injure
people in the vehicle. Be sure to
properly secure any child restraint in
the vehicle
—even when no child is
in it.
In some areas of the United States
and Canada, Certified Child
Passenger Safety Technicians
(CPSTs) are available to inspect
and demonstrate how to correctly
use and install child restraints. In
the U.S., refer to the National
Highway Traffic Safety
Administration (NHTSA) website to
locate the nearest child safety seat
inspection station. For CPST
availability in Canada, check with
Transport Canada or the Provincial
Ministry of Transportation office.
Securing the Child Within the
Child Restraint
{Warning
A child can be seriously injured or
killed in a crash if the child is not
properly secured in the child
restraint. Secure the child
properly following the instructions
that came with that child restraint.
Lower Anchors and
Tethers for Children
(LATCH System)
Some child restraints have a LATCH
system. As part of the LATCH
system, your child restraint may
have lower attachments and/or a top
tether. The LATCH system can help
hold the child restraint in place
during driving or in a crash. Some
vehicles have lower and/or top
tether anchors designed to secure a
child restraint with lower
attachments and/or a top tether.
Page 115 of 367
Chevrolet Corvette Owner Manual (GMNA-Localizing-U.S./Canada/Mexico-
12032182) - 2019 - crc - 5/8/18
114 Instruments and Controls
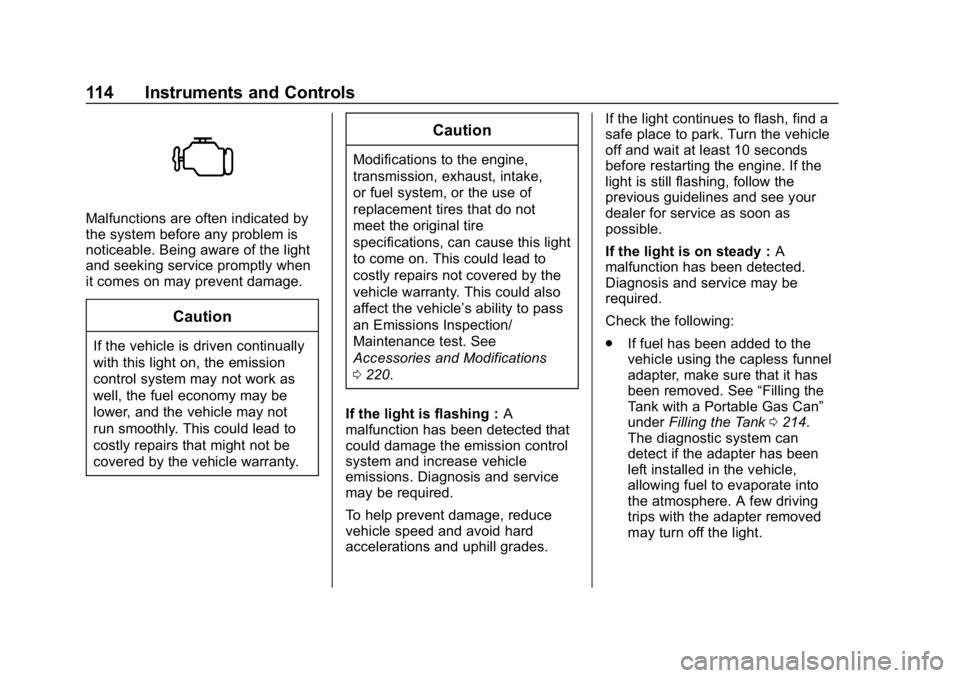
Malfunctions are often indicated by
the system before any problem is
noticeable. Being aware of the light
and seeking service promptly when
it comes on may prevent damage.
Caution
If the vehicle is driven continually
with this light on, the emission
control system may not work as
well, the fuel economy may be
lower, and the vehicle may not
run smoothly. This could lead to
costly repairs that might not be
covered by the vehicle warranty.
Caution
Modifications to the engine,
transmission, exhaust, intake,
or fuel system, or the use of
replacement tires that do not
meet the original tire
specifications, can cause this light
to come on. This could lead to
costly repairs not covered by the
vehicle warranty. This could also
affect the vehicle’s ability to pass
an Emissions Inspection/
Maintenance test. See
Accessories and Modifications
0220.
If the light is flashing : A
malfunction has been detected that
could damage the emission control
system and increase vehicle
emissions. Diagnosis and service
may be required.
To help prevent damage, reduce
vehicle speed and avoid hard
accelerations and uphill grades. If the light continues to flash, find a
safe place to park. Turn the vehicle
off and wait at least 10 seconds
before restarting the engine. If the
light is still flashing, follow the
previous guidelines and see your
dealer for service as soon as
possible.
If the light is on steady :
A
malfunction has been detected.
Diagnosis and service may be
required.
Check the following:
. If fuel has been added to the
vehicle using the capless funnel
adapter, make sure that it has
been removed. See “Filling the
Tank with a Portable Gas Can”
under Filling the Tank 0214.
The diagnostic system can
detect if the adapter has been
left installed in the vehicle,
allowing fuel to evaporate into
the atmosphere. A few driving
trips with the adapter removed
may turn off the light.
Page 116 of 367
Chevrolet Corvette Owner Manual (GMNA-Localizing-U.S./Canada/Mexico-
12032182) - 2019 - crc - 5/8/18
Instruments and Controls 115
.Poor fuel quality can cause
inefficient engine operation and
poor driveability, which may go
away once the engine is warmed
up. If this occurs, change the
fuel brand. It may require at
least one full tank of the proper
fuel to turn the light off.
See Recommended Fuel
(LT1 6.2L V8 Engine) 0212 or
Recommended Fuel (LT4 and
LT5 6.2L Supercharged
V8 Engines) 0213.
If the light remains on, see your
dealer.
Emissions Inspection and
Maintenance Programs
If the vehicle requires an Emissions
Inspection/Maintenance test, the
test equipment will likely connect to
the vehicle's Data Link
Connector (DLC).
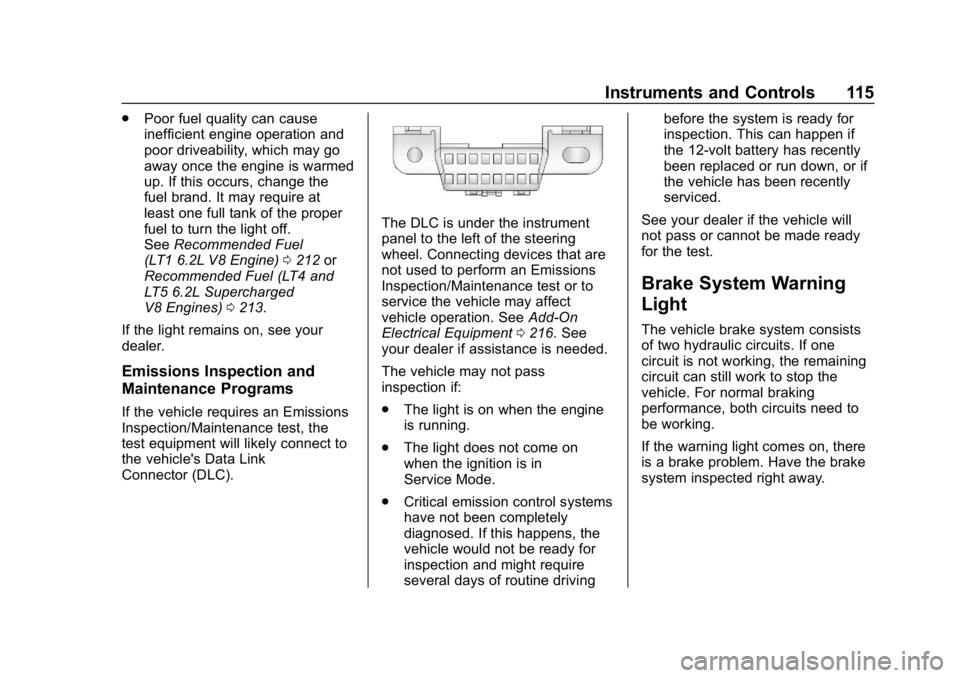
The DLC is under the instrument
panel to the left of the steering
wheel. Connecting devices that are
not used to perform an Emissions
Inspection/Maintenance test or to
service the vehicle may affect
vehicle operation. See Add-On
Electrical Equipment 0216. See
your dealer if assistance is needed.
The vehicle may not pass
inspection if:
. The light is on when the engine
is running.
. The light does not come on
when the ignition is in
Service Mode.
. Critical emission control systems
have not been completely
diagnosed. If this happens, the
vehicle would not be ready for
inspection and might require
several days of routine driving before the system is ready for
inspection. This can happen if
the 12-volt battery has recently
been replaced or run down, or if
the vehicle has been recently
serviced.
See your dealer if the vehicle will
not pass or cannot be made ready
for the test.
Brake System Warning
Light
The vehicle brake system consists
of two hydraulic circuits. If one
circuit is not working, the remaining
circuit can still work to stop the
vehicle. For normal braking
performance, both circuits need to
be working.
If the warning light comes on, there
is a brake problem. Have the brake
system inspected right away.
Page 182 of 367
Chevrolet Corvette Owner Manual (GMNA-Localizing-U.S./Canada/Mexico-
12032182) - 2019 - crc - 5/8/18
Driving and Operating 181
Do not turn the engine off when the
vehicle is moving. This will cause a
loss of power assist in the brake
and steering systems and disable
the airbags.
If the vehicle must be shut off in an
emergency:1. Brake using a firm and steady pressure. Do not pump the
brakes repeatedly. This may
deplete power assist, requiring
increased brake pedal force.
2. Shift the vehicle to N (Neutral). This can be done while the
vehicle is moving. After shifting
to N (Neutral), firmly apply the
brakes and steer the vehicle to
a safe location.
3. Come to a complete stop. Shift to P (Park) with an automatic
transmission, or Neutral with a
manual transmission. Turn the
ignition off.
4. Set the parking brake. See Electric Parking Brake 0195.{Warning
Turning off the vehicle while
moving may cause loss of power
assist in the brake and steering
systems and disable the airbags.
While driving, only shut the
vehicle off in an emergency.
If the vehicle cannot be pulled over,
and must be shut off while driving,
press and hold ENGINE START/
STOP for longer than two seconds,
or press twice within five seconds.
ACC/ACCESSORY (Amber
Indicator Light) : This mode allows
the use of some electrical
accessories when the engine is off.
With the ignition off, pressing the
button one time without the brake
pedal applied will place the ignition
system in ACC/ACCESSORY.
The ignition will switch from ACC/
ACCESSORY to off after
five minutes to prevent battery
rundown. ON/RUN/START (Green Indicator
Light) :
This mode is for driving and
starting. With the ignition off, and
the brake pedal applied, pressing
the button once will place the
ignition system in ON/RUN/START.
Once engine cranking begins,
release the button. Engine cranking
will continue until the engine starts.
See Starting the Engine 0182. The
ignition will then remain in ON/RUN.
Service Mode
This power mode is available for
service and diagnostics, and to
verify the proper operation of the
malfunction indicator lamp as may
be required for emission inspection
purposes. With the vehicle off, and
the brake pedal not applied,
pressing and holding ENGINE
START/STOP for more than
five seconds will place the vehicle in
Service Mode. The instruments and
audio systems will operate as they
do in ON/RUN, but the vehicle will
not be able to be driven. The engine
will not start in Service Mode. Press
ENGINE START/STOP again to turn
the vehicle off.
Page 217 of 367
Chevrolet Corvette Owner Manual (GMNA-Localizing-U.S./Canada/Mexico-
12032182) - 2019 - crc - 5/8/18
216 Driving and Operating
Warning (Continued)
and the vehicle damaged if this
occurs. To help avoid injury to you
and others:. Dispense fuel only into
approved containers.
. Do not fill a container while
it is inside a vehicle, in a
vehicle's trunk, pickup bed,
or on any surface other than
the ground.
. Bring the fill nozzle in
contact with the inside of
the fill opening before
operating the nozzle.
Contact should be
maintained until the filling is
complete.
. Do not smoke while
pumping fuel.
. Avoid using electronic
devices.
Trailer Towing
General Towing
Information
{Warning
Never tow a trailer with your
vehicle. It was not designed or
intended to tow a trailer.
Conversions and
Add-Ons
Add-On Electrical
Equipment
{Warning
The Data Link Connector (DLC) is
used for vehicle service and
Emission Inspection/Maintenance
testing. See Malfunction Indicator
Lamp (Check Engine Light) 0113.
A device connected to the DLC —
such as an aftermarket fleet or
driver-behavior tracking device —
may interfere with vehicle
systems. This could affect vehicle
operation and cause a crash.
Such devices may also access
information stored in the vehicle’s
systems.
Page 219 of 367
Chevrolet Corvette Owner Manual (GMNA-Localizing-U.S./Canada/Mexico-
12032182) - 2019 - crc - 5/8/18
218 Vehicle Care
Vehicle Care
General Information
General Information . . . . . . . . . . 219
California Proposition65 Warning . . . . . . . . . . . . . . . . . 219
California Perchlorate Materials Requirements . . . . . 220
Accessories and Modifications . . . . . . . . . . . . . . . . 220
Lifting the Vehicle . . . . . . . . . . . . 220
Vehicle Checks
Doing Your Own Service Work . . . . . . . . . . . . . . . 223
Hood . . . . . . . . . . . . . . . . . . . . . . . . . 223
Engine Compartment Overview . . . . . . . . . . . . . . . . . . . . 225
Engine Oil . . . . . . . . . . . . . . . . . . . . 232
Engine Oil Life System . . . . . . . 237
Automatic Transmission Fluid . . . . . . . . . . . . . . . . . . . . . . . . 238
Manual Transmission Fluid . . . 239
Hydraulic Clutch . . . . . . . . . . . . . . 239
Engine Air Cleaner/Filter . . . . . . 239
Cooling System (Engine) . . . . . 242
Cooling System (Aero Panel) . . . . . . . . . . . . . . . . . . . . . . . 246 Cooling System (Intercooler on
LT4 and LT5 Engines) . . . . . . . 247
Engine Overheating . . . . . . . . . . 247
Washer Fluid . . . . . . . . . . . . . . . . . 248
Brakes . . . . . . . . . . . . . . . . . . . . . . . 249
Brake Fluid . . . . . . . . . . . . . . . . . . . 250
Battery - North America . . . . . . 251
Rear Axle . . . . . . . . . . . . . . . . . . . . 252
Starter Switch Check . . . . . . . . . 253
Park Brake and P (Park) Mechanism Check . . . . . . . . . . 254
Wiper Blade Replacement . . . . 254
Windshield Replacement . . . . . 255
Gas Strut(s) . . . . . . . . . . . . . . . . . . 255Headlamp Aiming
Headlamp Aiming . . . . . . . . . . . . 256
Bulb Replacement
Bulb Replacement . . . . . . . . . . . . 257
High Intensity Discharge (HID) Lighting . . . . . . . . . . . . . . . . . . . . . 257
LED Lighting . . . . . . . . . . . . . . . . . 257
License Plate Lamp . . . . . . . . . . 257
Electrical System
Electrical System Overload . . . 258
Fuses . . . . . . . . . . . . . . . . . . . . . . . . 258
Engine Compartment Fuse Block . . . . . . . . . . . . . . . . . . . . . . . . 259 Rear Compartment Fuse
Block . . . . . . . . . . . . . . . . . . . . . . . . 262
Wheels and Tires
Tires . . . . . . . . . . . . . . . . . . . . . . . . . . 265
Winter Tires . . . . . . . . . . . . . . . . . . 266
Run-Flat Tires . . . . . . . . . . . . . . . . 266
Low-Profile Tires . . . . . . . . . . . . . 267
Competition Oriented Tires . . . 268
Summer Tires . . . . . . . . . . . . . . . . 269
Tire Sidewall Labeling . . . . . . . . 269
Tire Designations . . . . . . . . . . . . . 270
Tire Terminology andDefinitions . . . . . . . . . . . . . . . . . . 271
Tire Pressure . . . . . . . . . . . . . . . . . 274
Tire Pressure for High-Speed Operation . . . . . . . . . . . . . . . . . . . 275
Tire Pressure Monitor System . . . . . . . . . . . . . . . . . . . . . . 275
Tire Pressure Monitor Operation . . . . . . . . . . . . . . . . . . . 276
Tire Inspection . . . . . . . . . . . . . . . . 278
Tire Rotation . . . . . . . . . . . . . . . . . 279
When It Is Time for New Tires . . . . . . . . . . . . . . . . . . . . . . . . 280
Buying New Tires . . . . . . . . . . . . . 280
Different Size Tires and Wheels . . . . . . . . . . . . . . . . . . . . . . 282
Uniform Tire Quality Grading . . . . . . . . . . . . . . . . . . . . . 282
Page 250 of 367
Chevrolet Corvette Owner Manual (GMNA-Localizing-U.S./Canada/Mexico-
12032182) - 2019 - crc - 5/8/18
Vehicle Care 249
Caution (Continued)
.Do not mix water with
ready-to-use washer fluid.
Water can cause the
solution to freeze and
damage the washer fluid
tank and other parts of the
washer system.
. When using concentrated
washer fluid, follow the
manufacturer instructions for
adding water.
. Fill the washer fluid tank
only three-quarters full when
it is very cold. This allows
for fluid expansion if
freezing occurs, which could
damage the tank if it is
completely full.
Brakes
Brake Wear
Disc brake pads have built-in wear
indicators that make a high-pitched
warning sound when the brake pads
are worn and new pads are needed. The sound can come and go or be
heard all the time the vehicle is
moving, except when applying the
brake pedal firmly.
{Warning
The brake wear warning sound
means that soon the brakes will
not work well. That could lead to
a crash. When the brake wear
warning sound is heard, have the
vehicle serviced.
Caution
Continuing to drive with worn-out
brake pads could result in costly
brake repair.
Under certain weather or operating
conditions, occasional brake squeal
might be heard with the vehicle's
performance braking system. This
brake system is designed for
superior fade resistance and
consistent operation using high performance brake pads. Brake
squeal is normal and does not affect
system performance.
If equipped with high performance
brake linings, there could be an
increased build-up of brake dust as
well as minor noises as compared
to standard brake linings.
Brake linings should always be
replaced as complete axle sets.
Brake Wear (ZR1, Z06, and Grand
Sport with J57 Ceramic Brakes)
This vehicle does not have built-in
brake pad wear indicators. Periodic
visual inspection is required to
determine when to replace the
brake pads.
The ZR1, Z06, and Grand Sport
Coupe with J57 models also have
an electronic brake pad wear sensor
system. When pads are worn, the
CHANGE BRAKE PADS message
displays in the Driver Information
Center. Some driving conditions or
climates can cause a brake squeal
when the brakes are first applied or
Page 251 of 367
Chevrolet Corvette Owner Manual (GMNA-Localizing-U.S./Canada/Mexico-
12032182) - 2019 - crc - 5/8/18
250 Vehicle Care
lightly applied. Brake linings should
always be replaced as complete
axle sets.
Brake Rotor Wear
ZR1, Z06, and Grand Sport models
may have ceramic brake rotors.
Rotors should be visually inspected
whenever the brake pads are
replaced. Rotors also need to be
weighed before brake pads are
replaced to confirm that the rotor
mass is greater than the wear-out
mass printed on then rotor. The
rotor can be reused if the weight of
the rotor is above the mass limit.
Rotor inspection and weighing
methods can be found in the service
manual.
Brake Pedal Travel
See your dealer if the brake pedal
does not return to normal height,
or if there is a rapid increase in
pedal travel. This could be a sign
that brake service may be required.
Replacing Brake System Parts
Always replace brake system parts
with new, approved replacement
parts. If this is not done, the brakes
may not work properly. The braking
performance expected can change
in many other ways if the wrong
replacement brake parts are
installed or parts are improperly
installed.
Cold Weather Brake Operation
High performance brake
components may bind and clunk
when moving the vehicle. This may
be noticeable after parking when the
brakes have been wet, such as
when driving in the rain or after a
car wash. This is normal for brakes
with high friction pads and does not
affect the operation of the brakes.
Apply the brakes several times until
the binding or clunking stops. Drive
the vehicle and apply the brakes
several times if it is washed before
long-term storage.
Brake Fluid
The brake/clutch master cylinder
reservoir is filled with GM approved
DOT 4 brake fluid as indicated on
the reservoir cap. SeeEngine
Compartment Overview 0225 for
the location of the reservoir.
Checking Brake Fluid
Place the vehicle in P (Park) or
Neutral with the parking brake
applied if equipped with a manual
transmission. On a level surface,
the brake fluid level should be
between the minimum and
maximum marks on the brake fluid
reservoir.
Page 254 of 367
Chevrolet Corvette Owner Manual (GMNA-Localizing-U.S./Canada/Mexico-
12032182) - 2019 - crc - 5/8/18
Vehicle Care 253
heard. A fluid loss could indicate a
problem. Have it inspected and
repaired.
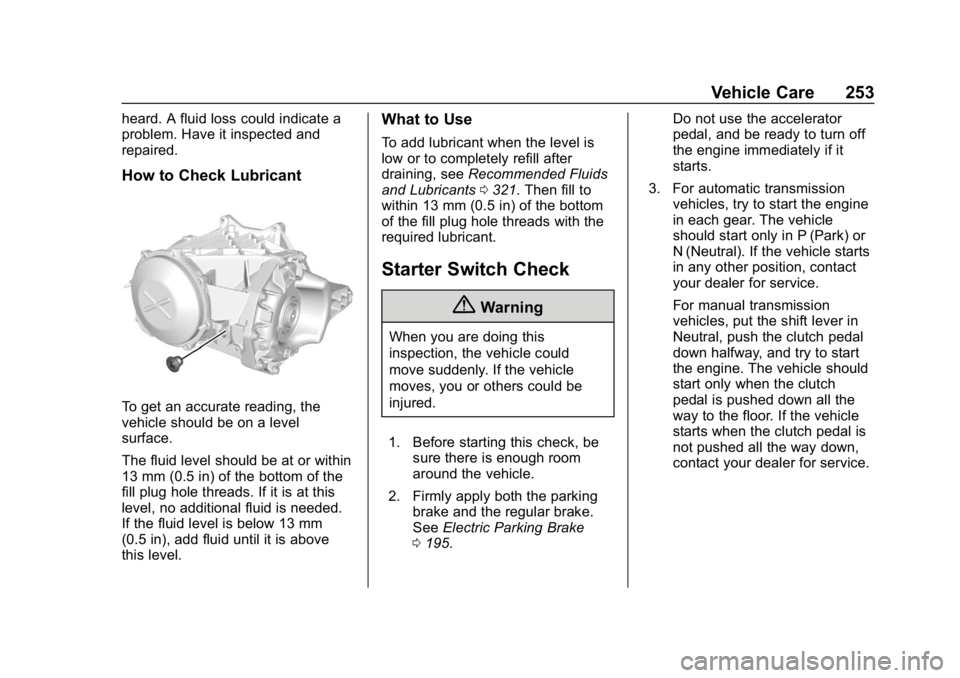
How to Check Lubricant
To get an accurate reading, the
vehicle should be on a level
surface.
The fluid level should be at or within
13 mm (0.5 in) of the bottom of the
fill plug hole threads. If it is at this
level, no additional fluid is needed.
If the fluid level is below 13 mm
(0.5 in), add fluid until it is above
this level.
What to Use
To add lubricant when the level is
low or to completely refill after
draining, seeRecommended Fluids
and Lubricants 0321. Then fill to
within 13 mm (0.5 in) of the bottom
of the fill plug hole threads with the
required lubricant.
Starter Switch Check
{Warning
When you are doing this
inspection, the vehicle could
move suddenly. If the vehicle
moves, you or others could be
injured.
1. Before starting this check, be sure there is enough room
around the vehicle.
2. Firmly apply both the parking brake and the regular brake.
See Electric Parking Brake
0 195. Do not use the accelerator
pedal, and be ready to turn off
the engine immediately if it
starts.
3. For automatic transmission vehicles, try to start the engine
in each gear. The vehicle
should start only in P (Park) or
N (Neutral). If the vehicle starts
in any other position, contact
your dealer for service.
For manual transmission
vehicles, put the shift lever in
Neutral, push the clutch pedal
down halfway, and try to start
the engine. The vehicle should
start only when the clutch
pedal is pushed down all the
way to the floor. If the vehicle
starts when the clutch pedal is
not pushed all the way down,
contact your dealer for service.
Page 268 of 367
Chevrolet Corvette Owner Manual (GMNA-Localizing-U.S./Canada/Mexico-
12032182) - 2019 - crc - 5/8/18
Vehicle Care 267
Warning (Continued)
drive over 80 km/h (50 mph) when
the low tire warning light is
displayed. Drive cautiously and
check the tire pressures as soon
as possible.
Run-flat tires can be driven on with
no air pressure. There is no need to
stop on the side of the road to
change the tire. Continue driving;
however, do not drive too far or too
fast. Driving on the tire may not be
possible if there is permanent
damage. To prevent permanent
damage, the tire can be driven with
no air pressure for up to 80 km
(50 mi) at speeds slower than
80 km/h (50 mph). As soon as
possible, contact the nearest
authorized GM or run-flat servicing
facility for inspection and repair or
replacement.
When driving on a deflated run-flat
tire, avoid potholes and other road
hazards that could damage the tire
and/or wheel beyond repair. When a tire has been damaged, or if driven
any distance while deflated, check
with an authorized run-flat tire
service center to determine whether
the tire can be repaired or should be
replaced. To maintain the run-flat
feature, all replacement tires must
be run-flat tires.
To locate the nearest GM or run-flat
servicing facility, call Customer
Assistance.
The valve stems on run-flat tires
have sensors that are part of the
TPMS. See
Tire Pressure Monitor
System 0275. These sensors
contain batteries that are designed
to last for 10 years under normal
driving conditions. See your dealer
for wheel or sensor replacement.
Caution
Using liquid sealants can damage
the tire valves and tire pressure
monitor sensors in the run-flat
tires. This damage is not covered
(Continued)
Caution (Continued)
by the vehicle warranty. Do not
use liquid sealants in run-flat
tires.
Low-Profile Tires
Low-Profile Performance Tires
The original equipment tires on
this vehicle are classified as
low-profile performance tires.
These tires are designed for
very responsive driving on wet
or dry pavement; however, they
may produce more road noise
and tend to wear faster.
Caution
Low-profile tires are more
susceptible to damage from road
hazards or curb impact than
standard profile tires. Tire and/or
wheel assembly damage can
occur when coming into contact (Continued)