roof CHEVROLET CORVETTE 2021 Owner's Manual
[x] Cancel search | Manufacturer: CHEVROLET, Model Year: 2021, Model line: CORVETTE, Model: CHEVROLET CORVETTE 2021Pages: 338, PDF Size: 6.56 MB
Page 7 of 338
Chevrolet Corvette Owner Manual (GMNA-Localizing-U.S./Canada/Mexico-
14622938) - 2021 - CRC - 2/10/21
6 Keys, Doors, and Windows
Keys, Doors, and
Windows
Keys and Locks
Keys . . . . . . . . . . . . . . . . . . . . . . . . . . . . . . . . . . . . . 6
Remote Keyless Entry (RKE) System . . . . . 7
Remote Keyless Entry (RKE) SystemOperation . . . . . . . . . . . . . . . . . . . . . . . . . . . . . . 7
Remote Vehicle Start . . . . . . . . . . . . . . . . . . . 12
Door Locks . . . . . . . . . . . . . . . . . . . . . . . . . . . . . . 14
Delayed Locking . . . . . . . . . . . . . . . . . . . . . . . . 16
Automatic Door Locks . . . . . . . . . . . . . . . . . . 16
Lockout Protection . . . . . . . . . . . . . . . . . . . . . . 17
Doors
Hood . . . . . . . . . . . . . . . . . . . . . . . . . . . . . . . . . . . 17
Hatch (Trunk) . . . . . . . . . . . . . . . . . . . . . . . . . . . 19
Vehicle Security
Vehicle Security . . . . . . . . . . . . . . . . . . . . . . . . 22
Vehicle Alarm System . . . . . . . . . . . . . . . . . . 22
Immobilizer . . . . . . . . . . . . . . . . . . . . . . . . . . . . . 23
Immobilizer Operation . . . . . . . . . . . . . . . . . . 23
Exterior Mirrors
Convex Mirrors . . . . . . . . . . . . . . . . . . . . . . . . . 24
Power Mirrors . . . . . . . . . . . . . . . . . . . . . . . . . . 24
Folding Mirrors . . . . . . . . . . . . . . . . . . . . . . . . . 25 Heated Mirrors . . . . . . . . . . . . . . . . . . . . . . . . . 26
Automatic Dimming Mirror . . . . . . . . . . . . . 26
Reverse Tilt Mirrors . . . . . . . . . . . . . . . . . . . . 26
Interior Mirrors
Interior Rearview Mirrors . . . . . . . . . . . . . . . 26
Manual Rearview Mirror . . . . . . . . . . . . . . . . 26
Automatic Dimming Rearview Mirror . . . 26
Rear Camera Mirror . . . . . . . . . . . . . . . . . . . . 26
Windows
Windows . . . . . . . . . . . . . . . . . . . . . . . . . . . . . . . 28
Power Windows . . . . . . . . . . . . . . . . . . . . . . . . 29
Rear Windows . . . . . . . . . . . . . . . . . . . . . . . . . . 30
Sun Visors . . . . . . . . . . . . . . . . . . . . . . . . . . . . . . 31
Roof
Roof Panel . . . . . . . . . . . . . . . . . . . . . . . . . . . . . . 31
Convertible Top . . . . . . . . . . . . . . . . . . . . . . . . 34
Keys and Locks
Keys
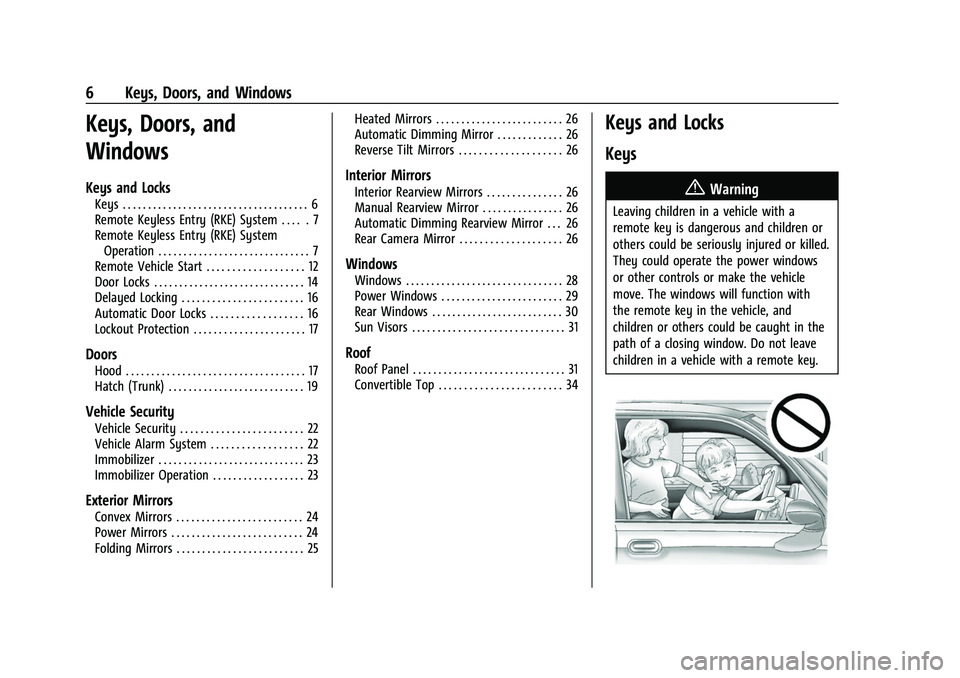
{Warning
Leaving children in a vehicle with a
remote key is dangerous and children or
others could be seriously injured or killed.
They could operate the power windows
or other controls or make the vehicle
move. The windows will function with
the remote key in the vehicle, and
children or others could be caught in the
path of a closing window. Do not leave
children in a vehicle with a remote key.
Page 24 of 338
Chevrolet Corvette Owner Manual (GMNA-Localizing-U.S./Canada/Mexico-
14622938) - 2021 - CRC - 2/10/21
Keys, Doors, and Windows 23
Disarming the Alarm System
To disarm the alarm system or turn off the
alarm if it has been activated, do one of the
following:
.PressKon the remote key.
.Unlock the vehicle using the Keyless
Access system.
.Start the vehicle.
To avoid setting off the alarm by accident:
.Lock the vehicle after all occupants have
left the vehicle and both doors are closed.
.Always unlock a door with the remote
key or use the Keyless Access system.
Unlocking the driver door with the key will
not disarm the system or turn off the alarm.
How to Detect a Tamper Condition
IfKis pressed on the remote key and the
horn chirps and the lights flash three times,
a previous alarm occurred while the system
was armed.
If the alarm has been activated, a message
will appear on the DIC.
Inclination Sensor and Intrusion Sensor
In addition to the standard theft-deterrent
system features, this system may also have
an inclination sensor and intrusion sensor.
The inclination sensor can activate the alarm
if it senses movement of the vehicle, such
as a change in vehicle orientation.
The intrusion sensor monitors the vehicle
interior, and can activate the alarm if it
senses unauthorized entry into the vehicle’s
interior. Do not allow passengers or pets to
remain in the vehicle when the intrusion
sensor is activated.
Before arming the theft-deterrent system
and activating the intrusion sensor:
.Make sure both doors and windows are
completely closed.
.Secure any loose items such as
sunshades.
.Make sure there are no obstructions
blocking the sensors.
Intrusion and Inclination Sensors Disable
Switch
It is recommended that the intrusion and
inclination sensors be deactivated if pets are
left in the vehicle or if the vehicle is being
transported. When the roof panel is off, or the
convertible top is down, the intrusion
system is turned off.
With the vehicle turned off, press
oon the
overhead console, next to OnStar. The
indicator light will display momentarily,
indicating that these sensors have been
disabled until the next time the alarm
system is armed.
Immobilizer
See Radio Frequency Statement 0316.
Immobilizer Operation
The vehicle has a passive theft-deterrent
system.
The security light comes on in the
instrument cluster if there is a problem with
arming or disarming the theft-deterrent
system. This light also comes on briefly
when the engine is started.
Page 32 of 338
Chevrolet Corvette Owner Manual (GMNA-Localizing-U.S./Canada/Mexico-
14622938) - 2021 - CRC - 2/10/21
Keys, Doors, and Windows 31
Sun Visors
Pull the sun visor down to block glare.
Detach the sun visor from the center mount
to pivot to the side window and,
if equipped, extend along the rod.
Roof
Roof Panel
If equipped with a removable roof panel,
use the following procedures to remove or
install it.
Caution
If a roof panel is dropped or rested on its
edges, the roof panel, paint, and/or
weatherstripping may be damaged.
(Continued)
Caution (Continued)
Always place the roof panel in the
stowage receivers after removing it from
the vehicle.
Caution
Use care when storing and removing the
roof panel. The roof panel pins and
vehicle finish could be damaged if the
roof contacts the rear of the vehicle.
Removing the Roof Panel
{Warning
Do not remove a roof panel while the
vehicle is moving. The panel could fall
into the vehicle and strike an occupant
and cause you to lose control. It could
also fly off and strike another vehicle.
Remove the roof panel only when the
vehicle is parked.
It may be necessary to have help removing
the roof panel.
To remove: 1. Shift transmission into P (Park). 2. Turn the ignition off and set the parking
brake.
3. Lower both sun visors.
4. Open the rear hatch/trunk and remove any items that may interfere with proper
storage of the roof panel.
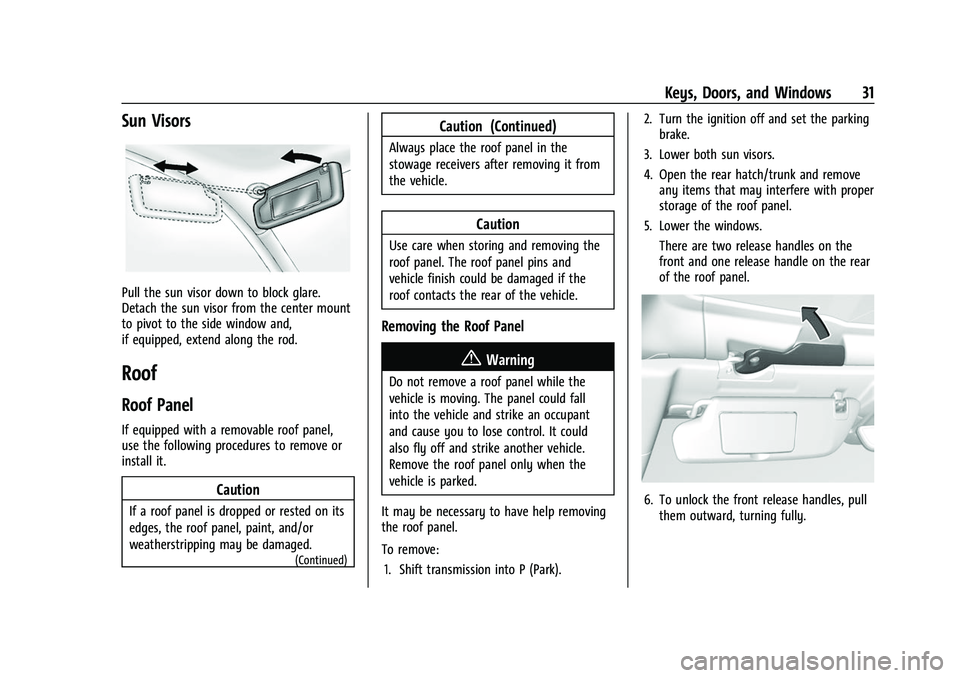
5. Lower the windows. There are two release handles on the
front and one release handle on the rear
of the roof panel.
6. To unlock the front release handles, pullthem outward, turning fully.
Page 33 of 338
Chevrolet Corvette Owner Manual (GMNA-Localizing-U.S./Canada/Mexico-
14622938) - 2021 - CRC - 2/10/21
32 Keys, Doors, and Windows
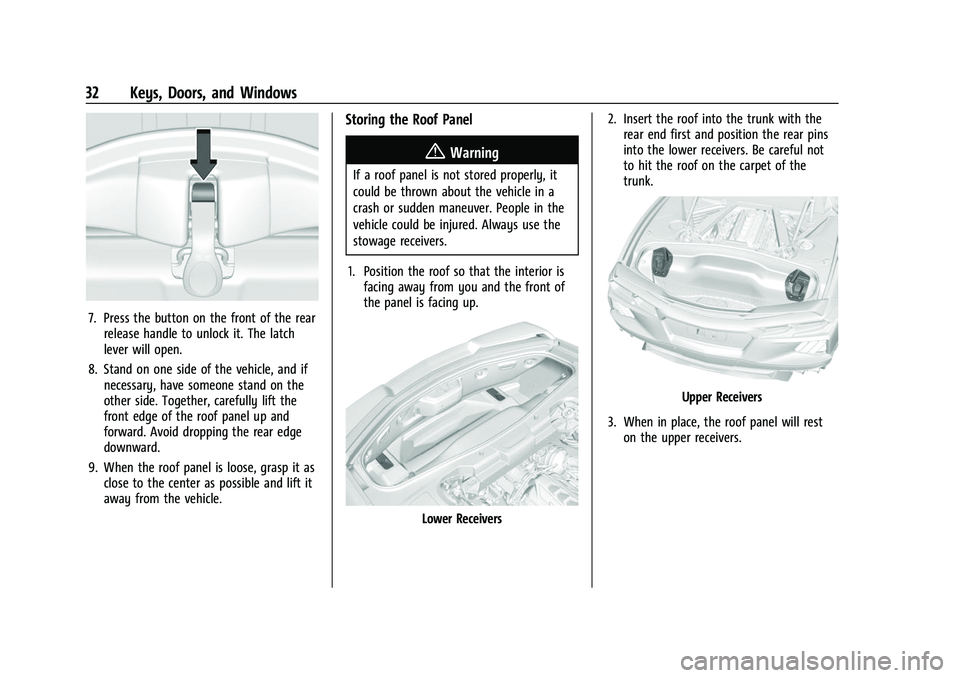
7. Press the button on the front of the rearrelease handle to unlock it. The latch
lever will open.
8. Stand on one side of the vehicle, and if necessary, have someone stand on the
other side. Together, carefully lift the
front edge of the roof panel up and
forward. Avoid dropping the rear edge
downward.
9. When the roof panel is loose, grasp it as close to the center as possible and lift it
away from the vehicle.
Storing the Roof Panel
{Warning
If a roof panel is not stored properly, it
could be thrown about the vehicle in a
crash or sudden maneuver. People in the
vehicle could be injured. Always use the
stowage receivers.
1. Position the roof so that the interior is facing away from you and the front of
the panel is facing up.
Lower Receivers 2. Insert the roof into the trunk with the
rear end first and position the rear pins
into the lower receivers. Be careful not
to hit the roof on the carpet of the
trunk.
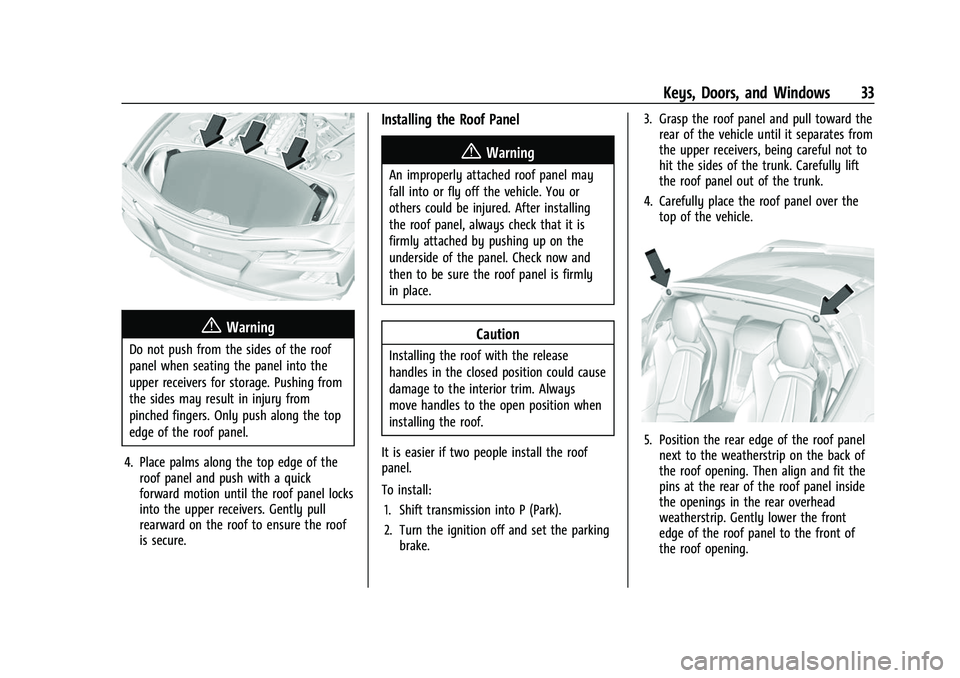
Upper Receivers
3. When in place, the roof panel will rest on the upper receivers.
Page 34 of 338
Chevrolet Corvette Owner Manual (GMNA-Localizing-U.S./Canada/Mexico-
14622938) - 2021 - CRC - 2/10/21
Keys, Doors, and Windows 33
{Warning
Do not push from the sides of the roof
panel when seating the panel into the
upper receivers for storage. Pushing from
the sides may result in injury from
pinched fingers. Only push along the top
edge of the roof panel.
4. Place palms along the top edge of the roof panel and push with a quick
forward motion until the roof panel locks
into the upper receivers. Gently pull
rearward on the roof to ensure the roof
is secure.
Installing the Roof Panel
{Warning
An improperly attached roof panel may
fall into or fly off the vehicle. You or
others could be injured. After installing
the roof panel, always check that it is
firmly attached by pushing up on the
underside of the panel. Check now and
then to be sure the roof panel is firmly
in place.
Caution
Installing the roof with the release
handles in the closed position could cause
damage to the interior trim. Always
move handles to the open position when
installing the roof.
It is easier if two people install the roof
panel.
To install: 1. Shift transmission into P (Park).
2. Turn the ignition off and set the parking brake. 3. Grasp the roof panel and pull toward the
rear of the vehicle until it separates from
the upper receivers, being careful not to
hit the sides of the trunk. Carefully lift
the roof panel out of the trunk.
4. Carefully place the roof panel over the top of the vehicle.
5. Position the rear edge of the roof panelnext to the weatherstrip on the back of
the roof opening. Then align and fit the
pins at the rear of the roof panel inside
the openings in the rear overhead
weatherstrip. Gently lower the front
edge of the roof panel to the front of
the roof opening.
Page 35 of 338
Chevrolet Corvette Owner Manual (GMNA-Localizing-U.S./Canada/Mexico-
14622938) - 2021 - CRC - 2/10/21
34 Keys, Doors, and Windows
6. Check that the weatherstripping on eachside of the roof panel is under the panel.
7. Make sure the front release handles are in the fully open position.
8. Push the roof firmly downward to engage the pins.
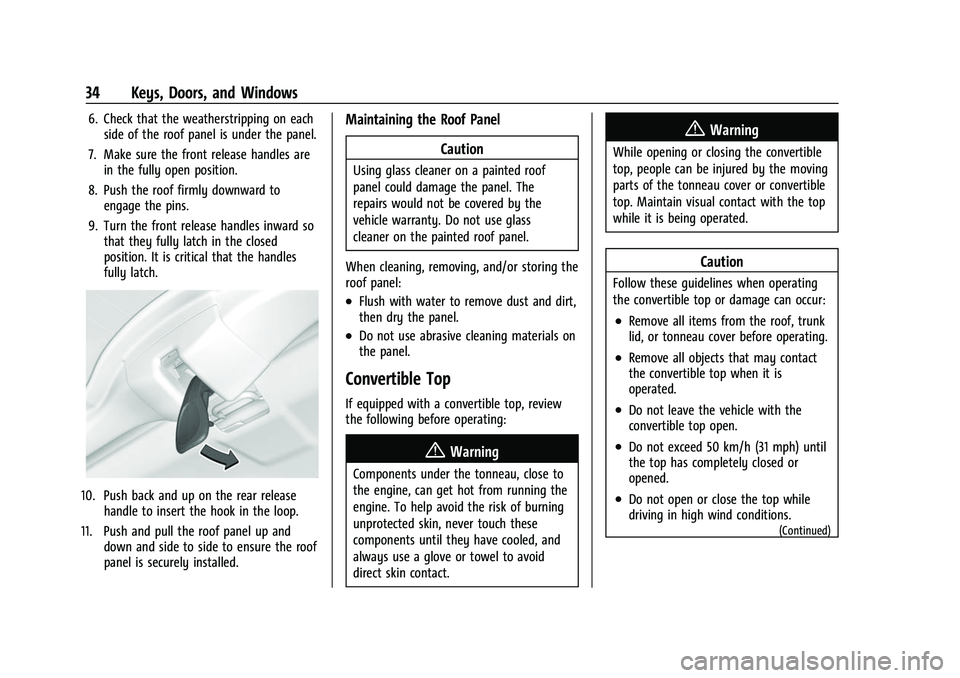
9. Turn the front release handles inward so that they fully latch in the closed
position. It is critical that the handles
fully latch.
10. Push back and up on the rear release handle to insert the hook in the loop.
11. Push and pull the roof panel up and down and side to side to ensure the roof
panel is securely installed.
Maintaining the Roof Panel
Caution
Using glass cleaner on a painted roof
panel could damage the panel. The
repairs would not be covered by the
vehicle warranty. Do not use glass
cleaner on the painted roof panel.
When cleaning, removing, and/or storing the
roof panel:
.Flush with water to remove dust and dirt,
then dry the panel.
.Do not use abrasive cleaning materials on
the panel.
Convertible Top
If equipped with a convertible top, review
the following before operating:
{Warning
Components under the tonneau, close to
the engine, can get hot from running the
engine. To help avoid the risk of burning
unprotected skin, never touch these
components until they have cooled, and
always use a glove or towel to avoid
direct skin contact.
{Warning
While opening or closing the convertible
top, people can be injured by the moving
parts of the tonneau cover or convertible
top. Maintain visual contact with the top
while it is being operated.
Caution
Follow these guidelines when operating
the convertible top or damage can occur:
.Remove all items from the roof, trunk
lid, or tonneau cover before operating.
.Remove all objects that may contact
the convertible top when it is
operated.
.Do not leave the vehicle with the
convertible top open.
.Do not exceed 50 km/h (31 mph) until
the top has completely closed or
opened.
.Do not open or close the top while
driving in high wind conditions.
(Continued)
Page 36 of 338
Chevrolet Corvette Owner Manual (GMNA-Localizing-U.S./Canada/Mexico-
14622938) - 2021 - CRC - 2/10/21
Keys, Doors, and Windows 35
Caution (Continued)
.Do not operate the convertible top
multiple times in a short period of
time without starting the engine to
avoid draining the vehicle battery.
.Only store the vehicle with the top
fully closed.
Opening the Convertible Top —Driver Door
Switch
1. Ensure the roof and tonneau cover are clear of any objects.
2. The trunk must be closed.
3. Start the vehicle or place it in ACC/ ACCESSORY.
4. When possible, operate the convertible top when the vehicle is stopped. The top
can be operated while driving below
50 km/h (31 mph) and will stop if that
speed is exceeded. The top operation will
take approximately 17 seconds. Make
sure the top operation can be completed
before that speed is reached.
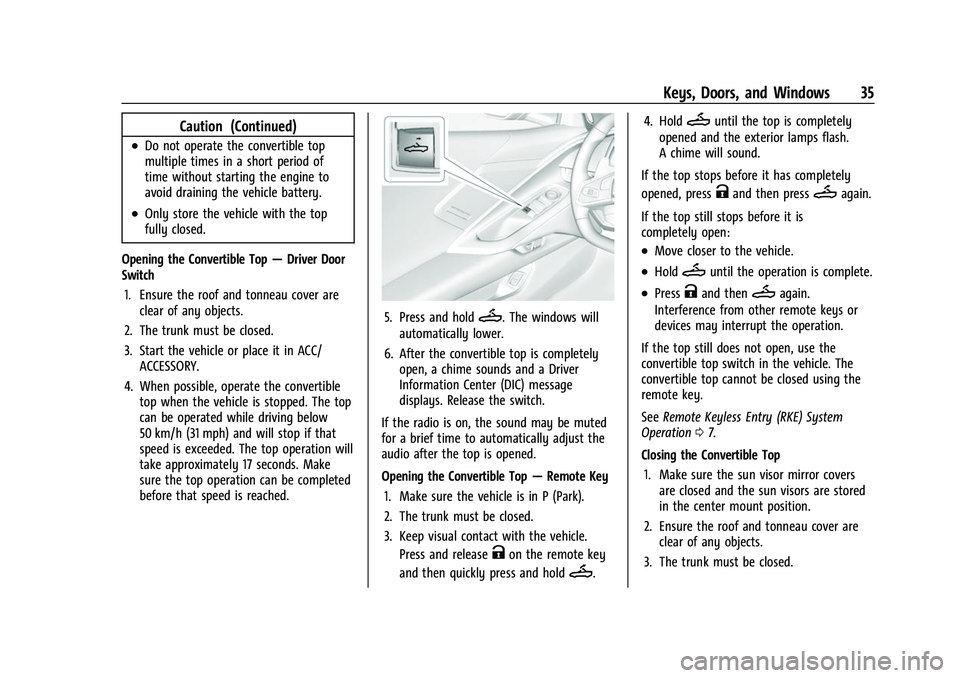
5. Press and holdM. The windows will
automatically lower.
6. After the convertible top is completely open, a chime sounds and a Driver
Information Center (DIC) message
displays. Release the switch.
If the radio is on, the sound may be muted
for a brief time to automatically adjust the
audio after the top is opened.
Opening the Convertible Top —Remote Key
1. Make sure the vehicle is in P (Park).
2. The trunk must be closed.
3. Keep visual contact with the vehicle. Press and release
Kon the remote key
and then quickly press and hold
M. 4. Hold
Muntil the top is completely
opened and the exterior lamps flash.
A chime will sound.
If the top stops before it has completely
opened, press
Kand then pressMagain.
If the top still stops before it is
completely open:
.Move closer to the vehicle.
.HoldMuntil the operation is complete.
.PressKand thenMagain.
Interference from other remote keys or
devices may interrupt the operation.
If the top still does not open, use the
convertible top switch in the vehicle. The
convertible top cannot be closed using the
remote key.
See Remote Keyless Entry (RKE) System
Operation 07.
Closing the Convertible Top 1. Make sure the sun visor mirror covers are closed and the sun visors are stored
in the center mount position.
2. Ensure the roof and tonneau cover are clear of any objects.
3. The trunk must be closed.
Page 76 of 338
Chevrolet Corvette Owner Manual (GMNA-Localizing-U.S./Canada/Mexico-
14622938) - 2021 - CRC - 2/10/21
Instruments and Controls 75
INT :Move the lever up to INT for
intermittent wipes, then turn the
Nband
up for more frequent wipes or down for less
frequent wipes.
OFF : Use to turn the wipers off.
1X : For a single wipe, briefly move the
wiper lever down. For several wipes, hold
the wiper lever down.
f: Pull the windshield wiper lever
toward you to spray washer fluid and
activate the wipers. The wipers will continue
until the lever is released or the maximum
wash time is reached. When the lever is
released, additional wipes may occur
depending on how long the windshield
washer had been activated. See Washer
Fluid 0249 for information on filling the
windshield washer fluid reservoir.
Clear snow and ice from the wiper blades
and windshield before using them. If frozen
to the windshield, carefully loosen or thaw
them. Damaged blades should be replaced.
See Wiper Blade Replacement 0253.
Heavy snow or ice can overload the wiper
motor.
{Warning
In freezing weather, do not use the
washer until the windshield is warmed.
Otherwise the washer fluid can form ice
on the windshield, blocking your vision.
{Warning
Before driving the vehicle, always clear
snow and ice from the hood, windshield,
washer nozzles, roof, and rear of the
vehicle, including all lamps and windows.
Reduced visibility from snow and ice
buildup could lead to a crash.
Wiper Parking
If the ignition is turned off while the wipers
are on LO, HI, or INT, they will
immediately stop.
If the windshield wiper lever is then moved
to OFF before the driver door is opened or
within 10 minutes, the wipers will restart
and move to the base of the windshield.
If the ignition is turned off while the wipers
are performing wipes due to windshield
washing, the wipers continue to run until
they reach the base of the windshield.
Compass
The vehicle may have a compass display on
the center stack. The compass receives its
heading and other information from the
Global Positioning System (GPS) antenna,
Electronic Stability Control, and vehicle
speed information.
The compass system is designed to operate
for a certain number of miles or degrees of
turn before needing a signal from the GPS
satellites. When the compass display shows
CAL, drive the vehicle for a short distance in
an open area where it can receive a GPS
signal. The compass system will
automatically determine when a GPS signal
is restored and provide a heading again.
Clock
Set the time and date using the
infotainment system. See "Time / Date"
under Settings 0154.
Page 138 of 338
Chevrolet Corvette Owner Manual (GMNA-Localizing-U.S./Canada/Mexico-
14622938) - 2021 - CRC - 2/10/21
Infotainment System 137
.The vehicle changes directions more than
once, or the vehicle is turning on a turn
table in a parking lot.
.The vehicle is entering and/or exiting a
parking lot, garage, or a lot with a roof.
.The GPS signal is not received.
.A roof carrier is installed on the vehicle.
.Tire chains are installed on the vehicle.
.The tires are replaced or worn.
.The tire pressure for the tires is incorrect.
.This is the first navigation use after the
map data is updated.
.The 12-volt battery has been disconnected
for several days.
.The vehicle is driving in heavy traffic
where driving is at low speeds, and the
vehicle is stopped and started repeatedly.
Problems with Route Guidance
Inappropriate route guidance can occur
under one or more of the following
conditions:
.The turn was not made on the road
indicated.
.Route guidance might not be available
when using automatic rerouting for the
next right or left turn.
.The route might not be changed when
using automatic rerouting.
.There is no route guidance when turning
at an intersection.
.Plural names of places might be
announced occasionally.
.It could take a long time to operate
automatic rerouting during high-speed
driving.
.Automatic rerouting might display a route
returning to the set waypoint if heading
for a destination without passing through
a set waypoint.
.The route prohibits the entry of a vehicle
due to a regulation by time or season or
any other regulation which may be given.
.Some routes might not be searched.
.The route to the destination might not be
shown if there are new roads, if roads
have recently changed, or if certain roads
are not listed in the map data. SeeMaps
0 129.
To recalibrate the vehicle's position on the
map, park with the vehicle running for two
to five minutes, until the vehicle position
updates. Make sure the vehicle is parked in a location that is safe and has a clear view
of the sky and away from large
obstructions.
If the System Needs Service
If the navigation system needs service, see
your dealer.
Map Data Updates
The map data in the vehicle is the most
up-to-date information available when the
vehicle was produced.
See www.gmnavdisc.com for details on
ordering, purchasing, and installing a new or
replacement SD card. Features are subject to
change. For more information on this
feature, see my.chevrolet.com/learn.
Database Coverage Explanations
Coverage areas vary with respect to the
level of map detail available for any given
area. Some areas feature greater levels of
detail than others. If this happens, it does
not mean there is a problem with the
system. As the map data is updated, more
detail can become available for areas that
previously had limited detail. See
Map Data
Updates 0137.
Page 196 of 338
Chevrolet Corvette Owner Manual (GMNA-Localizing-U.S./Canada/Mexico-
14622938) - 2021 - CRC - 2/10/21
Driving and Operating 195
Cell phone chargers can interfere with the
operation of the Keyless Access system.
Battery chargers should not be plugged in
when starting or turning off the engine.1. Press the brake pedal, then press ENGINE START/STOP on the instrument panel.
If there is no remote key in the vehicle
or if there is something causing
interference with it, the Driver
Information Center (DIC) will display a
message.
2. When the engine begins cranking, let go of the button and the engine cranks
automatically until it starts.
If the battery in the remote key is weak,
the DIC will display a message. The
vehicle can still be driven.
See “Starting the Vehicle with a Low
Remote Key Battery” underRemote
Keyless Entry (RKE) System Operation 07
. If the remote key battery is dead,
insert it into the cupholder remote key
pocket to enable engine starting.
3. Do not race the engine immediately after starting it. Operate the engine and
transmission gently until the oil warms
up and lubricates all moving parts. 4. If the engine does not start and no DIC
message is displayed, wait 15 seconds
before trying again to let the cranking
motor cool down.
If the engine does not start after five to
10 seconds, especially in very cold
weather (below −18 °C or 0 °F), it could
be flooded with too much gasoline. Try
pushing the accelerator pedal all the way
to the floor while cranking for up to
15 seconds maximum. Wait at least
15 seconds between each try, to allow
the cranking motor to cool down. When
the engine starts, let go of the
accelerator. If the vehicle starts briefly
but then stops again, repeat these steps.
This clears the extra gasoline from the
engine.
Caution
Cranking the engine for long periods of
time, by pressing ENGINE START/STOP
immediately after cranking has ended,
can overheat and damage the cranking
motor, and drain the battery. Wait at
least 15 seconds between each try, to let
the cranking motor cool down.
Stopping the Engine
Shift to P (Park) and press and hold ENGINE
START/STOP on the instrument panel, until
the engine shuts off. If the transmission is
not in P (Park), the engine shuts off and the
vehicle goes into the accessory mode. The
DIC displays SHIFT TO PARK. When shifted to
P (Park) the vehicle turns off.
If the remote key is not detected inside the
vehicle when it is turned off, the DIC
displays a message.
Retained Accessory Power (RAP)
When the ignition is turned from on to off,
the following features (if equipped) will
continue to function for up to 10 minutes,
or until the driver door is opened. These
features will also work when the ignition is
in RUN or ACC/ACCESSORY:
.Infotainment System
.Power Windows (during RAP this
functionality will be lost when any door
is opened)
.Sunroof (during RAP this functionality will
be lost when any door is opened)
.Auxiliary Power Outlet
.Audio System
.OnStar System