oil temperature CHEVROLET CORVETTE C7 2018 Owners Manual
[x] Cancel search | Manufacturer: CHEVROLET, Model Year: 2018, Model line: CORVETTE C7, Model: CHEVROLET CORVETTE C7 2018Pages: 353, PDF Size: 6.48 MB
Page 4 of 353
Chevrolet Corvette Owner Manual (GMNA-Localizing-U.S./Canada/Mexico-
11374030) - 2018 - crc - 3/29/17
Introduction 3
{Danger
Danger indicates a hazard with a
high level of risk which will result
in serious injury or death.
{Warning
Warning indicates a hazard that
could result in injury or death.
Caution
Caution indicates a hazard that
could result in property or vehicle
damage.
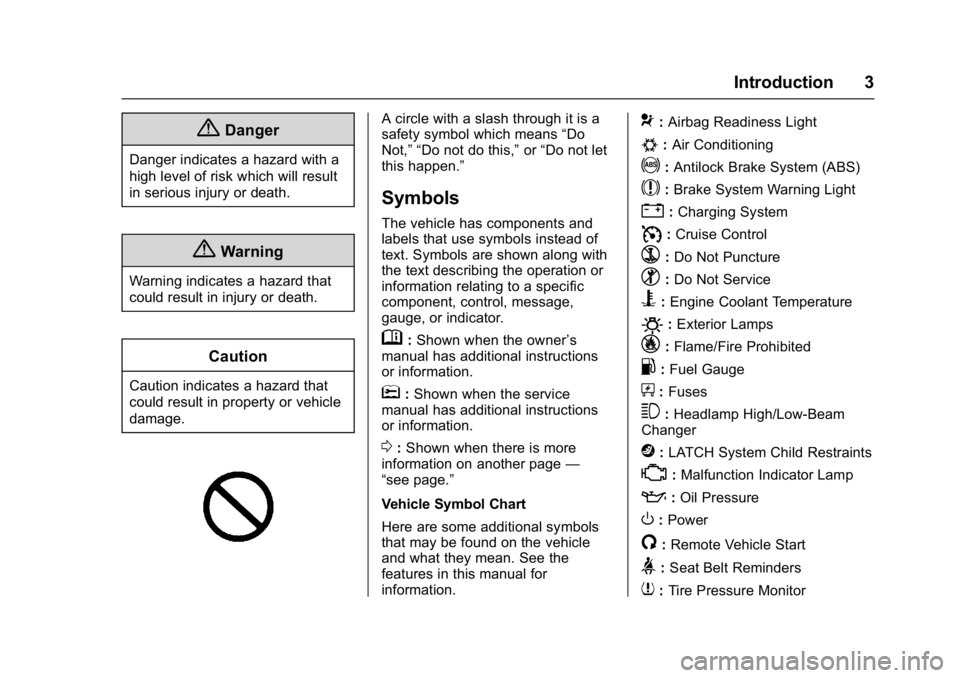
A circle with a slash through it is a
safety symbol which means“Do
Not,” “Do not do this,” or“Do not let
this happen.”
Symbols
The vehicle has components and
labels that use symbols instead of
text. Symbols are shown along with
the text describing the operation or
information relating to a specific
component, control, message,
gauge, or indicator.
M: Shown when the owner ’s
manual has additional instructions
or information.
*: Shown when the service
manual has additional instructions
or information.
0: Shown when there is more
information on another page —
“see page.”
Vehicle Symbol Chart
Here are some additional symbols
that may be found on the vehicle
and what they mean. See the
features in this manual for
information.
9: Airbag Readiness Light
#:Air Conditioning
!:Antilock Brake System (ABS)
$:Brake System Warning Light
":Charging System
I: Cruise Control
`:Do Not Puncture
^:Do Not Service
B:Engine Coolant Temperature
O:Exterior Lamps
_: Flame/Fire Prohibited
.:Fuel Gauge
+: Fuses
3:Headlamp High/Low-Beam
Changer
j: LATCH System Child Restraints
*:Malfunction Indicator Lamp
::Oil Pressure
O:Power
/:Remote Vehicle Start
>:Seat Belt Reminders
7: Tire Pressure Monitor
Page 35 of 353
Chevrolet Corvette Owner Manual (GMNA-Localizing-U.S./Canada/Mexico-
11374030) - 2018 - crc - 4/4/17
34 Keys, Doors, and Windows
A maximum of two remote starts,
or a remote start with an extension,
are allowed between ignition cycles.
After two remote starts, or a remote
start with an extension, the ignition
must be turned on and then off
before the remote start procedure
can be used again.
Canceling a Remote Start
To cancel a remote start, do any of
the following:
.Press and hold
/until the
parking lamps turn off.
. Turn on the hazard warning
flashers.
. Turn the vehicle on and then off.
Conditions in Which Remote Start
Will Not Work
The remote start will not operate if
any of the following occur:
. The ignition is in any mode other
than off.
. The RKE transmitter is in the
vehicle.
. The hood is not closed. .
The hazard warning flashers
are on.
. There is an emission control
system malfunction.
. The engine coolant temperature
is too high.
. The oil pressure is low.
. Two remote vehicle starts, or a
remote start with an extension,
have already been used.
. The vehicle is not in P (Park).
Door Locks
{Warning
Unlocked doors can be
dangerous.
. Passengers, especially
children, can easily open
the doors and fall out of a
moving vehicle. The doors
can be unlocked and
opened while the vehicle is
moving. The chance of
being thrown out of the
(Continued)
Warning (Continued)
vehicle in a crash is
increased if the doors are
not locked. So, all
passengers should wear
seat belts properly and the
doors should be locked
whenever the vehicle is
driven.
. Young children who get into
unlocked vehicles may be
unable to get out. A child
can be overcome by
extreme heat and can suffer
permanent injuries or even
death from heat stroke.
Always lock the vehicle
whenever leaving it.
. Outsiders can easily enter
through an unlocked door
when you slow down or stop
the vehicle. Locking the
doors can help prevent this
from happening.
Page 95 of 353
Chevrolet Corvette Owner Manual (GMNA-Localizing-U.S./Canada/Mexico-
11374030) - 2018 - crc - 3/29/17
94 Instruments and Controls
Instruments and
Controls
Controls
Steering Wheel Adjustment . . . . 95
Steering Wheel Controls . . . . . . . 95
Horn . . . . . . . . . . . . . . . . . . . . . . . . . . . 95
Windshield Wiper/Washer . . . . . . 95
Compass . . . . . . . . . . . . . . . . . . . . . . 96
Clock . . . . . . . . . . . . . . . . . . . . . . . . . . 96
Power Outlets . . . . . . . . . . . . . . . . . 97
Warning Lights, Gauges, and
Indicators
Warning Lights, Gauges, andIndicators . . . . . . . . . . . . . . . . . . . . 98
Instrument Cluster . . . . . . . . . . . . . 99
Speedometer . . . . . . . . . . . . . . . . . 104
Odometer . . . . . . . . . . . . . . . . . . . . . 104
Trip Odometer . . . . . . . . . . . . . . . . 104
Tachometer . . . . . . . . . . . . . . . . . . . 104
Fuel Gauge . . . . . . . . . . . . . . . . . . . 105
Boost Gauge . . . . . . . . . . . . . . . . . 106
Engine Coolant Temperature Gauge . . . . . . . . . . . . . . . . . . . . . . 106
Seat Belt Reminders . . . . . . . . . 107
Airbag Readiness Light . . . . . . . 108
Passenger Airbag Status Indicator . . . . . . . . . . . . . . . . . . . . 108 Charging System Light . . . . . . . 109
Malfunction Indicator Lamp . . . 109
Brake System Warning
Light . . . . . . . . . . . . . . . . . . . . . . . . . 111
Electric Parking Brake
Light . . . . . . . . . . . . . . . . . . . . . . . . 112
Service Electric Parking Brake Light . . . . . . . . . . . . . . . . . . . . . . . . 112
Antilock Brake System (ABS) Warning Light . . . . . . . . . . . . . . . 112
Traction Off Light . . . . . . . . . . . . . 113
Traction Control System (TCS)/ Electronic Stability Control
Light . . . . . . . . . . . . . . . . . . . . . . . . 113
Electronic Stability Control (ESC) Off Light . . . . . . . . . . . . . . 113
Engine Coolant Temperature Warning Light . . . . . . . . . . . . . . . 114
Tire Pressure Light . . . . . . . . . . . 114
Engine Oil Pressure Light . . . . . 115
Low Fuel Warning Light . . . . . . . 115
Security Light . . . . . . . . . . . . . . . . . 115
High-Beam On Light . . . . . . . . . . 116
Lamps On Reminder . . . . . . . . . . 116
Cruise Control Light . . . . . . . . . . 116
Door Ajar Light . . . . . . . . . . . . . . . 116
Information Displays
Driver Information Center (DIC) . . . . . . . . . . . . . . . . 116
Head-Up Display (HUD) . . . . . . 118
Vehicle Messages
Vehicle Messages . . . . . . . . . . . . 123
Engine Power Messages . . . . . 123
Vehicle Speed Messages . . . . . 124
Vehicle Personalization
Vehicle Personalization . . . . . . . 124
Universal Remote System
Universal Remote System . . . . 131
Universal Remote System Programming . . . . . . . . . . . . . . . 131
Universal Remote System Operation . . . . . . . . . . . . . . . . . . . 133
Page 103 of 353
Chevrolet Corvette Owner Manual (GMNA-Localizing-U.S./Canada/Mexico-
11374030) - 2018 - crc - 3/29/17
102 Instruments and Controls
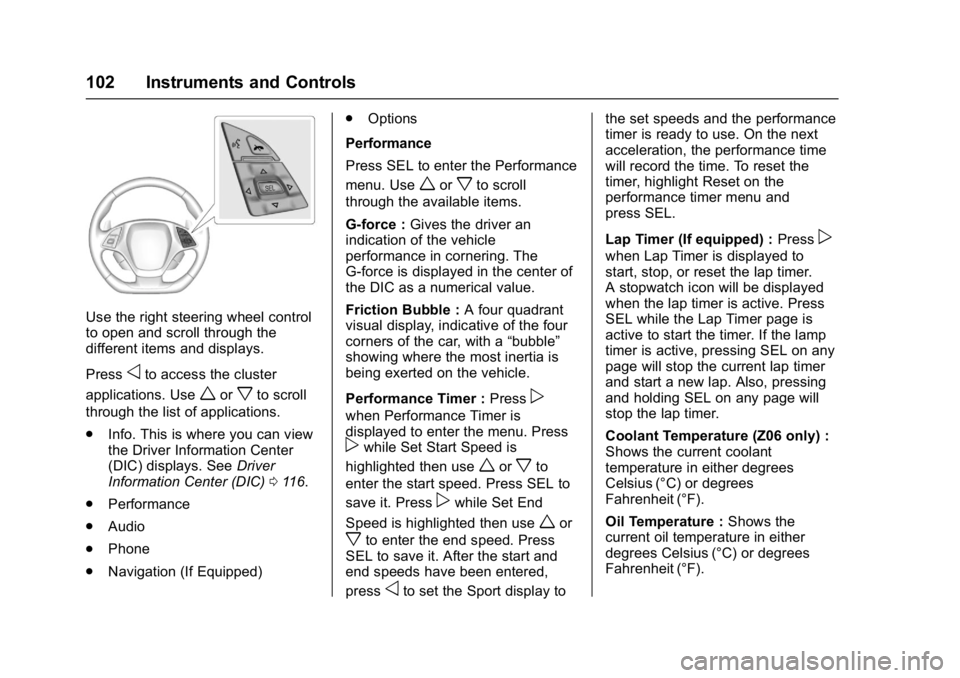
Use the right steering wheel control
to open and scroll through the
different items and displays.
Press
oto access the cluster
applications. Use
worxto scroll
through the list of applications.
. Info. This is where you can view
the Driver Information Center
(DIC) displays. See Driver
Information Center (DIC) 0116.
. Performance
. Audio
. Phone
. Navigation (If Equipped) .
Options
Performance
Press SEL to enter the Performance
menu. Use
worxto scroll
through the available items.
G-force : Gives the driver an
indication of the vehicle
performance in cornering. The
G-force is displayed in the center of
the DIC as a numerical value.
Friction Bubble : A four quadrant
visual display, indicative of the four
corners of the car, with a “bubble”
showing where the most inertia is
being exerted on the vehicle.
Performance Timer : Press
p
when Performance Timer is
displayed to enter the menu. Press
pwhile Set Start Speed is
highlighted then use
worxto
enter the start speed. Press SEL to
save it. Press
pwhile Set End
Speed is highlighted then use
wor
xto enter the end speed. Press
SEL to save it. After the start and
end speeds have been entered,
press
oto set the Sport display to the set speeds and the performance
timer is ready to use. On the next
acceleration, the performance time
will record the time. To reset the
timer, highlight Reset on the
performance timer menu and
press SEL.
Lap Timer (If equipped) :
Press
p
when Lap Timer is displayed to
start, stop, or reset the lap timer.
A stopwatch icon will be displayed
when the lap timer is active. Press
SEL while the Lap Timer page is
active to start the timer. If the lamp
timer is active, pressing SEL on any
page will stop the current lap timer
and start a new lap. Also, pressing
and holding SEL on any page will
stop the lap timer.
Coolant Temperature (Z06 only) :
Shows the current coolant
temperature in either degrees
Celsius (°C) or degrees
Fahrenheit (°F).
Oil Temperature :Shows the
current oil temperature in either
degrees Celsius (°C) or degrees
Fahrenheit (°F).
Page 104 of 353
Chevrolet Corvette Owner Manual (GMNA-Localizing-U.S./Canada/Mexico-
11374030) - 2018 - crc - 3/29/17
Instruments and Controls 103
Oil Pressure :Shows the current oil
pressure in either kilopascal (kPa) or
in pounds per square inch (psi).
Battery Voltage : Shows the
current battery voltage.
Transmission Fluid
Temperature : Shows the
temperature of the transmission fluid
in either degrees Celsius (°C) or
degrees Fahrenheit (°F).
Tire Temperature : Shows tire
temperature status as either Cold,
Warm, or Hot. Warm is typical for
normal driving while Hot is typical
for aggressive driving. Unknown
may be displayed if tire temperature
information is unavailable.
eLSD and Wheel Slip : Displays
when the Electronic Limited-Slip
Differential (eLSD) is active and
intervening with the vehicle’s normal
operation. The display also displays
slip percentage in a range of low,
medium, and high.
See Limited-Slip Differential
(Stingray without Z51 Only) 0200 or
Limited-Slip Differential (Z06, Grand
Sport, and Stingray with Z51) 0200. Audio
While the audio app is open, use
w
orxto change the radio station or
seek to the next or previous track,
depending on the current audio
source. Press SEL to enter the
Audio menu. In the Audio menu
browse for music, select from the
favorites, or change the audio
source.
Phone
Press SEL to enter the Phone
menu. In the Phone menu, if there is
no active phone call, view recent
calls, or scroll through contacts.
If there is an active call, mute or
unmute the phone or switch to
handset or hands-free operation.
Navigation
If equipped, press SEL to enter the
Navigation menu. Displays a map or
turn by turn directions. If there is no
active route, press
pto resume the
last route and turn the voice
prompts on/off. If there is an active route, press SEL to cancel route
guidance or turn the voice prompts
on/off.
Options
Press SEL to enter the Options
menu. Use
worxto scroll
through items in the Options menu.
Units : Press
pwhile Units is
displayed to enter the Units menu.
Choose US or Metric units by
pressing SEL while the desired item
is highlighted.
Display Theme : Press
pto enter
the Display Theme menu. Select
from Link to Drive Mode, Track,
Sport, or Tour for the cluster theme.
Head-up Display (HUD) Rotation :
This feature allows for adjusting the
angle of the HUD image. Press
p
on the steering wheel controls while
Head-up Display Rotation is
highlighted to enter Adjust Mode.
Press
worxto adjust the angle of
the HUD display. Press SEL to
Page 105 of 353
Chevrolet Corvette Owner Manual (GMNA-Localizing-U.S./Canada/Mexico-
11374030) - 2018 - crc - 3/29/17
104 Instruments and Controls
confirm and save the setting. To
cancel the setting, press
o. The
vehicle must be in P (Park).
Speed Warning : The Speed
Warning display allows the driver to
set a speed that they do not want to
exceed. To set the Speed Warning,
press
pwhen Speed Warning is
displayed. Enable the speed
warning and then use
worxto
adjust the value. Press SEL to set
the speed. Once the speed is set,
this feature can be turned off by
pressing SEL while viewing this
page. If the selected speed limit is
exceeded, a pop-up warning is
displayed with a chime.
Pocket Gauges : Press
pwhile
Pocket Gauges is displayed to enter
the menu and select gauges that
can be displayed for the Sport
theme on the left or right of the
display area. Choose from Oil
Pressure Gauge, Oil Temperature
Gauge, Battery Voltage,
Transmission Fluid Temperature
Gauge, Horsepower, or a blank
gauge. Software Info :
Press
pwhile
Software Info is highlighted to
display open source software
information.
Speedometer
The speedometer shows the
vehicle's speed in either kilometers
per hour (km/h) or miles per
hour (mph).
Odometer
The odometer shows how far the
vehicle has been driven, in either
kilometers or miles.
Trip Odometer
The trip odometer shows how far
the vehicle has been driven since
the trip odometer was last reset.
The trip odometer is accessed and
reset through the Driver Information
Center (DIC). See Driver
Information Center (DIC) 0116.
Tachometer
The tachometer displays the engine
speed in revolutions per
minute (rpm).
Caution
If the engine is operated with the
rpm’s in the warning area at the
high end of the tachometer, the
vehicle could be damaged, and
the damage would not be covered
by the vehicle warranty. Do not
operate the engine with the rpm’s
in the warning area.
Page 158 of 353
Chevrolet Corvette Owner Manual (GMNA-Localizing-U.S./Canada/Mexico-
11374030) - 2018 - crc - 4/4/17
Driving and Operating 157
The vehicle may straighten out.
Be ready for a second skid if it
occurs.
. Slow down and adjust your
driving according to weather
conditions. Stopping distance
can be longer and vehicle
control can be affected when
traction is reduced by water,
snow, ice, gravel, or other
material on the road. Learn to
recognize warning clues —such
as enough water, ice, or packed
snow on the road to make a
mirrored surface —and slow
down when you have any doubt.
. Try to avoid sudden steering,
acceleration, or braking,
including reducing vehicle speed
by shifting to a lower gear. Any
sudden changes could cause
the tires to slide.
Remember: Antilock brakes help
avoid only the braking skid.Track Events and
Competitive Driving
{Danger
High-performance features are
intended for use only on closed
tracks by experienced and
qualified drivers and should not
be used on public roads.
High-speed driving, aggressive
cornering, hard braking, and other
high-performance driving can be
dangerous. Improper driver inputs
for the conditions may result in
loss of control of the vehicle,
which could injure or kill you or
others. Always drive safely.
Participating in track events or other
competitive driving without following
the instructions provided may affect
the vehicle warranty. See the
warranty manual before using the
vehicle for racing or other
competitive driving. See Competitive
Driving Mode 0197. A manual transmission is
recommended for extended track
usage at higher ambient
temperatures. Consult the Track
Preparation Guide for additional
information. See your dealer.
Be sure to follow all service
procedures before driving the
vehicle at track events or
competitively.
Engine Sound Management
Setting
Caution
Do not place the vehicle in
Engine Sound Management
–
Stealth mode. Damage could
result to exhaust valve actuators.
Engine Oil
Caution
If the vehicle is used for track
events and competitive driving,
the engine may use more oil than (Continued)
Page 163 of 353
Chevrolet Corvette Owner Manual (GMNA-Localizing-U.S./Canada/Mexico-
11374030) - 2018 - crc - 4/4/17
162 Driving and Operating
2. Laps 2 and 3 should begradually driven faster and
more aggressively, while
allowing for reduced brake
output and increased stopping
distance due to brake fade.
3. Drive Lap 4 near full speed, while allowing for reduced
brake output and increased
stopping distance due to
brake fade.
4. Laps 5 and 6 should be cool down laps.
5. Lap 7 should be normal driving or an easy out lap.
Front Compartment Air
Deflector Panel
Prior to the track event, when
ambient temperatures are above
27 °C (80 °F), the panel between
the front fascia extension and the
front cradle can be removed to
maximize cooling air flow to the
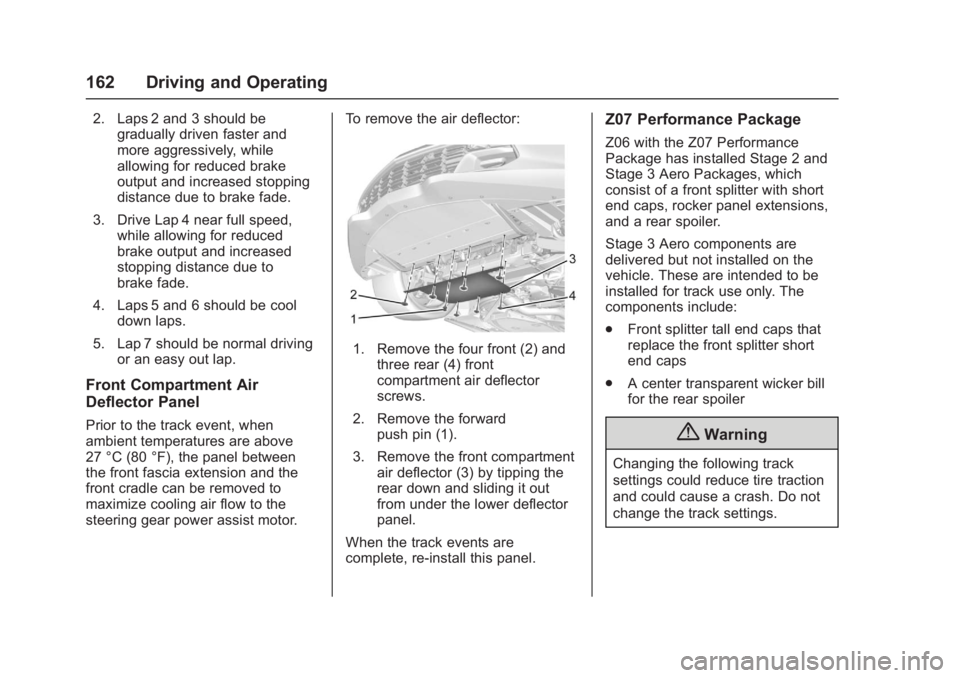
steering gear power assist motor. To remove the air deflector:
1. Remove the four front (2) and
three rear (4) front
compartment air deflector
screws.
2. Remove the forward push pin (1).
3. Remove the front compartment air deflector (3) by tipping the
rear down and sliding it out
from under the lower deflector
panel.
When the track events are
complete, re-install this panel.
Z07 Performance Package
Z06 with the Z07 Performance
Package has installed Stage 2 and
Stage 3 Aero Packages, which
consist of a front splitter with short
end caps, rocker panel extensions,
and a rear spoiler.
Stage 3 Aero components are
delivered but not installed on the
vehicle. These are intended to be
installed for track use only. The
components include:
. Front splitter tall end caps that
replace the front splitter short
end caps
. A center transparent wicker bill
for the rear spoiler
{Warning
Changing the following track
settings could reduce tire traction
and could cause a crash. Do not
change the track settings.
Page 225 of 353
Chevrolet Corvette Owner Manual (GMNA-Localizing-U.S./Canada/Mexico-
11374030) - 2018 - crc - 3/29/17
224 Vehicle Care
Checking Engine Oil (Z06,
Grand Sport, and Stingray
with Z51)
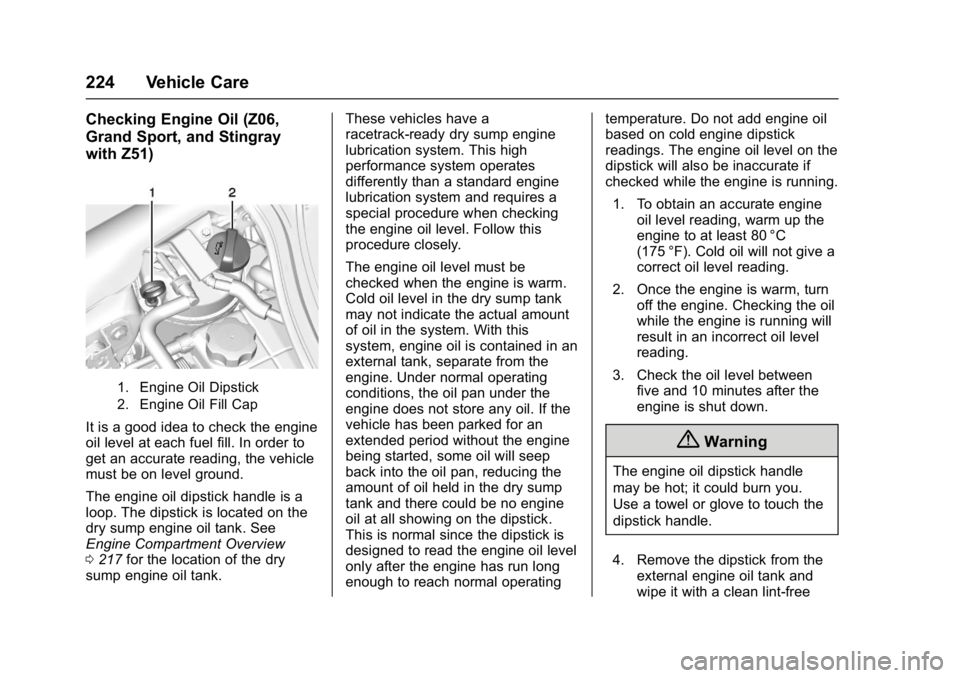
1. Engine Oil Dipstick
2. Engine Oil Fill Cap
It is a good idea to check the engine
oil level at each fuel fill. In order to
get an accurate reading, the vehicle
must be on level ground.
The engine oil dipstick handle is a
loop. The dipstick is located on the
dry sump engine oil tank. See
Engine Compartment Overview
0217 for the location of the dry
sump engine oil tank. These vehicles have a
racetrack-ready dry sump engine
lubrication system. This high
performance system operates
differently than a standard engine
lubrication system and requires a
special procedure when checking
the engine oil level. Follow this
procedure closely.
The engine oil level must be
checked when the engine is warm.
Cold oil level in the dry sump tank
may not indicate the actual amount
of oil in the system. With this
system, engine oil is contained in an
external tank, separate from the
engine. Under normal operating
conditions, the oil pan under the
engine does not store any oil. If the
vehicle has been parked for an
extended period without the engine
being started, some oil will seep
back into the oil pan, reducing the
amount of oil held in the dry sump
tank and there could be no engine
oil at all showing on the dipstick.
This is normal since the dipstick is
designed to read the engine oil level
only after the engine has run long
enough to reach normal operatingtemperature. Do not add engine oil
based on cold engine dipstick
readings. The engine oil level on the
dipstick will also be inaccurate if
checked while the engine is running.
1. To obtain an accurate engine oil level reading, warm up the
engine to at least 80 °C
(175 °F). Cold oil will not give a
correct oil level reading.
2. Once the engine is warm, turn off the engine. Checking the oil
while the engine is running will
result in an incorrect oil level
reading.
3. Check the oil level between five and 10 minutes after the
engine is shut down.
{Warning
The engine oil dipstick handle
may be hot; it could burn you.
Use a towel or glove to touch the
dipstick handle.
4. Remove the dipstick from the external engine oil tank and
wipe it with a clean lint-free
Page 228 of 353
Chevrolet Corvette Owner Manual (GMNA-Localizing-U.S./Canada/Mexico-
11374030) - 2018 - crc - 3/29/17
Vehicle Care 227
Caution
Failure to use the recommended
engine oil or equivalent can result
in engine damage not covered by
the vehicle warranty.
Viscosity Grade
Use SAE 5W-30 viscosity grade
engine oil.
Cold Temperature Operation: In an
area of extreme cold, where the
temperature falls below −29 °C
(−20 °F), an SAE 0W-30 oil may be
used. An oil of this viscosity grade
will provide easier cold starting for
the engine at extremely low
temperatures. When selecting an oil
of the appropriate viscosity grade, it
is recommended to select an oil of
the correct specification. See
“Specification” earlier in this section.
For track events or competitive
driving, use Mobil 1 15W-50 engine
oil. A Driver Information Center
(DIC) message will display at high
oil temperatures. See Driver
Information Center (DIC) 0116.
Engine Oil Additives/Engine
Oil Flushes
Do not add anything to the oil. The
recommended oils meeting the
dexos1 specification are all that is
needed for good performance and
engine protection.
Engine oil system flushes are not
recommended and could cause
engine damage not covered by the
vehicle warranty.
What to Do with Used Oil
Used engine oil contains certain
elements that can be unhealthy for
your skin and could even cause
cancer. Do not let used oil stay on
your skin for very long. Clean your
skin and nails with soap and water,
or a good hand cleaner. Wash or
properly dispose of clothing or rags
containing used engine oil. See the
manufacturer's warnings about the
use and disposal of oil products.
Used oil can be a threat to the
environment. If you change your
own oil, be sure to drain all the oil
from the filter before disposal. Never
dispose of oil by putting it in the trash or pouring it on the ground,
into sewers, or into streams or
bodies of water. Recycle it by taking
it to a place that collects used oil.
Engine Oil Life System
When to Change Engine Oil
This vehicle has a computer that
indicates when to change the
engine oil and filter. This is based
on a combination of factors which
include engine revolutions, engine
temperature, and miles driven.
Based on driving conditions, the
mileage at which an oil change is
indicated can vary considerably. For
the oil life system to work properly,
the system must be reset every time
the oil is changed.
Z06, Grand Sport, and Stingray with
Z51 have a racetrack-ready dry
sump engine lubrication system.
This high performance system
operates differently than a standard
engine lubrication system and
requires a special procedure when
changing the engine oil and filter.
See
Engine Oil 0222.