CHEVROLET CRUZE LIMITED 2016 2.G Owners Manual
Manufacturer: CHEVROLET, Model Year: 2016, Model line: CRUZE LIMITED, Model: CHEVROLET CRUZE LIMITED 2016 2.GPages: 357, PDF Size: 6.49 MB
Page 131 of 357
Chevrolet Cruze Limited Owner Manual (GMNA-Localizing-U.S./Canada-
9282844) - 2016 - crc - 9/3/15
130 Lighting
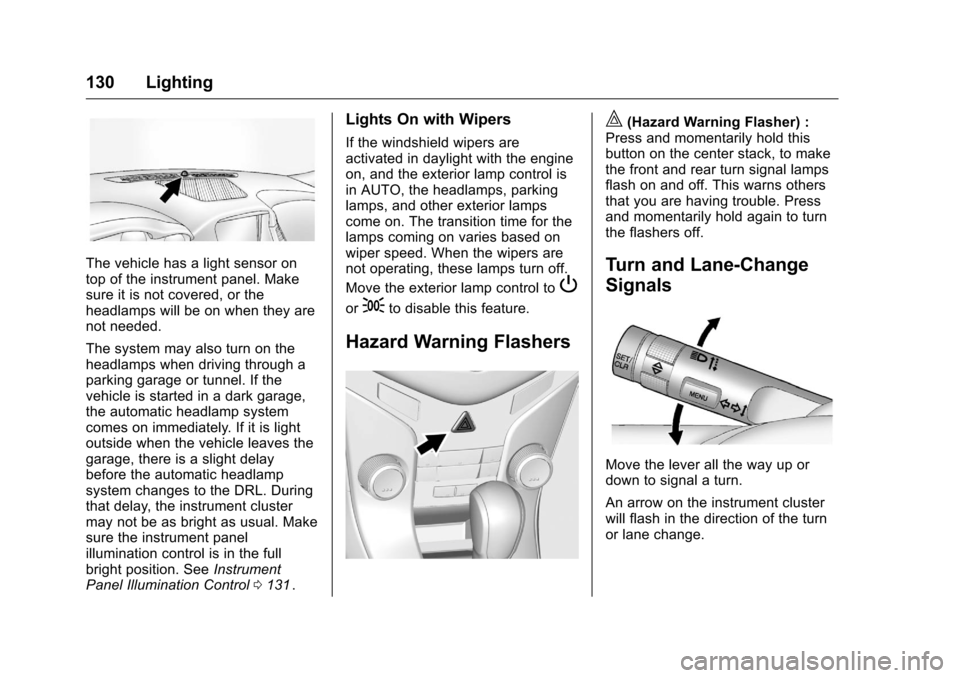
The vehicle has a light sensor on
top of the instrument panel. Make
sure it is not covered, or the
headlamps will be on when they are
not needed.
The system may also turn on the
headlamps when driving through a
parking garage or tunnel. If the
vehicle is started in a dark garage,
the automatic headlamp system
comes on immediately. If it is light
outside when the vehicle leaves the
garage, there is a slight delay
before the automatic headlamp
system changes to the DRL. During
that delay, the instrument cluster
may not be as bright as usual. Make
sure the instrument panel
illumination control is in the full
bright position. SeeInstrument
Panel Illumination Control 0131
ii.
Lights On with Wipers
If the windshield wipers are
activated in daylight with the engine
on, and the exterior lamp control is
in AUTO, the headlamps, parking
lamps, and other exterior lamps
come on. The transition time for the
lamps coming on varies based on
wiper speed. When the wipers are
not operating, these lamps turn off.
Move the exterior lamp control to
P
or;to disable this feature.
Hazard Warning Flashers
|(Hazard Warning Flasher) :
Press and momentarily hold this
button on the center stack, to make
the front and rear turn signal lamps
flash on and off. This warns others
that you are having trouble. Press
and momentarily hold again to turn
the flashers off.
Turn and Lane-Change
Signals
Move the lever all the way up or
down to signal a turn.
An arrow on the instrument cluster
will flash in the direction of the turn
or lane change.
Page 132 of 357
Chevrolet Cruze Limited Owner Manual (GMNA-Localizing-U.S./Canada-
9282844) - 2016 - crc - 9/3/15
Lighting 131
Raise or lower the lever until the
arrow starts to flash to signal a lane
change. The turn signal flashes
three times.
The lever returns to its starting
position when it is released.
If after signaling a turn or lane
change the arrow flashes rapidly or
does not come on, a signal bulb
may be burned out. Replace any
burned out bulbs. If a bulb is not
burned out, check the fuse. See
Fuses and Circuit Breakers0250
ii.
Front Fog Lamps
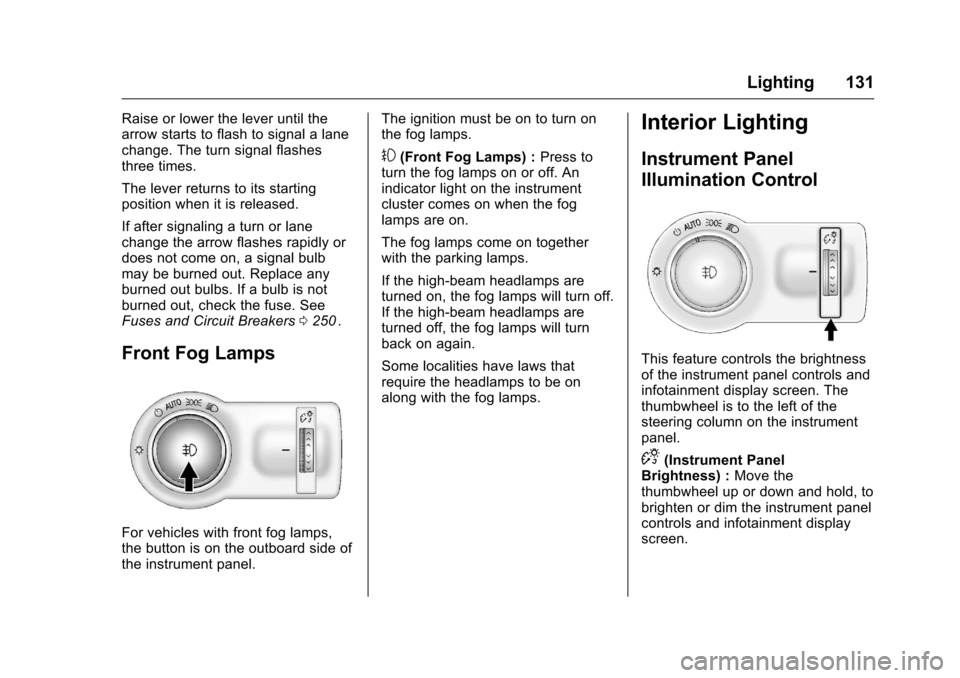
For vehicles with front fog lamps,
the button is on the outboard side of
the instrument panel. The ignition must be on to turn on
the fog lamps.
#(Front Fog Lamps) :
Press to
turn the fog lamps on or off. An
indicator light on the instrument
cluster comes on when the fog
lamps are on.
The fog lamps come on together
with the parking lamps.
If the high-beam headlamps are
turned on, the fog lamps will turn off.
If the high-beam headlamps are
turned off, the fog lamps will turn
back on again.
Some localities have laws that
require the headlamps to be on
along with the fog lamps.
Interior Lighting
Instrument Panel
Illumination Control
This feature controls the brightness
of the instrument panel controls and
infotainment display screen. The
thumbwheel is to the left of the
steering column on the instrument
panel.
D(Instrument Panel
Brightness) : Move the
thumbwheel up or down and hold, to
brighten or dim the instrument panel
controls and infotainment display
screen.
Page 133 of 357
Chevrolet Cruze Limited Owner Manual (GMNA-Localizing-U.S./Canada-
9282844) - 2016 - crc - 9/3/15
132 Lighting
Courtesy Lamps
The courtesy lamps come on
automatically when any door is
opened and the dome lamp is in the
door position.
Dome Lamps
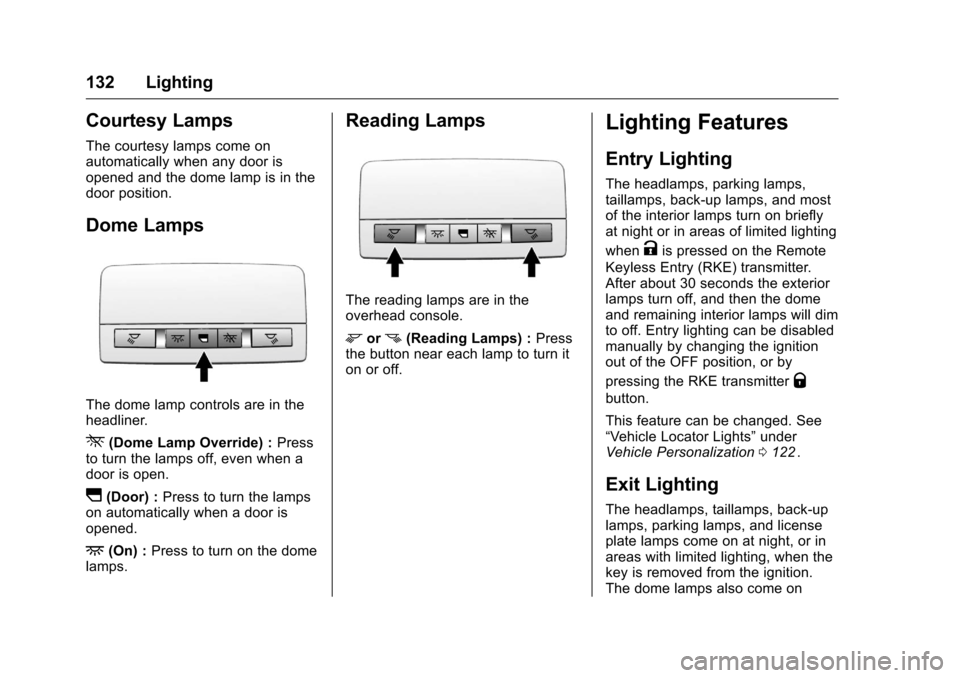
The dome lamp controls are in the
headliner.
*(Dome Lamp Override) :Press
to turn the lamps off, even when a
door is open.
I(Door) : Press to turn the lamps
on automatically when a door is
opened.
+(On) : Press to turn on the dome
lamps.
Reading Lamps
The reading lamps are in the
overhead console.
morn(Reading Lamps) : Press
the button near each lamp to turn it
on or off.
Lighting Features
Entry Lighting
The headlamps, parking lamps,
taillamps, back-up lamps, and most
of the interior lamps turn on briefly
at night or in areas of limited lighting
when
Kis pressed on the Remote
Keyless Entry (RKE) transmitter.
After about 30 seconds the exterior
lamps turn off, and then the dome
and remaining interior lamps will dim
to off. Entry lighting can be disabled
manually by changing the ignition
out of the OFF position, or by
pressing the RKE transmitter
Q
button.
This feature can be changed. See
“Vehicle Locator Lights” under
Vehicle Personalization 0122
ii.
Exit Lighting
The headlamps, taillamps, back-up
lamps, parking lamps, and license
plate lamps come on at night, or in
areas with limited lighting, when the
key is removed from the ignition.
The dome lamps also come on
Page 134 of 357
Chevrolet Cruze Limited Owner Manual (GMNA-Localizing-U.S./Canada-
9282844) - 2016 - crc - 9/3/15
Lighting 133
when the key is removed from the
ignition. The exterior lamps and
dome lamps remain on after the
door is closed for a set amount of
time, then automatically turn off.
If equipped with Keyless Access,
the exterior lamps and dome lamps
automatically turn on when the
driver door is opened after the
ignition is turned off. SeeIgnition
Positions (Keyless Access) 0181
iior
Ignition Positions (Key Access)
0 183
ii.
The exterior lamps turn off
immediately by turning the exterior
lamp control off.
This feature can be changed. See
Vehicle Personalization 0122
ii.
Battery Power Protection
The battery saver feature is
designed to protect the vehicle's
battery.
If some interior lamps are left on
and the ignition is turned off, the
battery rundown protection system
automatically turns the lamp off after
some time.
Exterior Lighting Battery
Saver
The exterior lamps turn off about
10 minutes after the ignition is
turned off, if the parking lamps or
headlamps have been manually left
on. This protects against draining
the battery. To restart the 10-minute
timer, turn the exterior lamp control
to the
Oposition and then back to
the
;or2position.
To keep the lamps on for more than
10 minutes, the ignition must be in
the ACC/ACCESSORY or ON/RUN/
START position.
Page 135 of 357
Chevrolet Cruze Limited Owner Manual (GMNA-Localizing-U.S./Canada-
9282844) - 2016 - crc - 9/3/15
134 Infotainment System
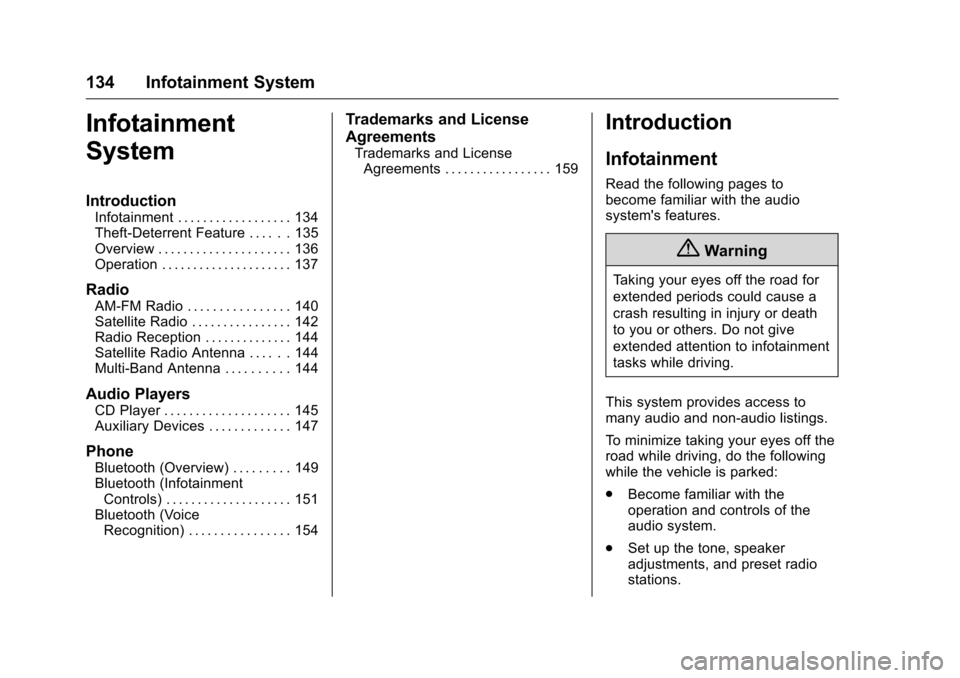
Infotainment
System
Introduction
Infotainment . . . . . . . . . . . . . . . . . . 134
Theft-Deterrent Feature . . . . . . 135
Overview . . . . . . . . . . . . . . . . . . . . . 136
Operation . . . . . . . . . . . . . . . . . . . . . 137
Radio
AM-FM Radio . . . . . . . . . . . . . . . . 140
Satellite Radio . . . . . . . . . . . . . . . . 142
Radio Reception . . . . . . . . . . . . . . 144
Satellite Radio Antenna . . . . . . 144
Multi-Band Antenna . . . . . . . . . . 144
Audio Players
CD Player . . . . . . . . . . . . . . . . . . . . 145
Auxiliary Devices . . . . . . . . . . . . . 147
Phone
Bluetooth (Overview) . . . . . . . . . 149
Bluetooth (InfotainmentControls) . . . . . . . . . . . . . . . . . . . . 151
Bluetooth (Voice Recognition) . . . . . . . . . . . . . . . . 154
Trademarks and License
Agreements
Trademarks and LicenseAgreements . . . . . . . . . . . . . . . . . 159
Introduction
Infotainment
Read the following pages to
become familiar with the audio
system's features.
{Warning
Taking your eyes off the road for
extended periods could cause a
crash resulting in injury or death
to you or others. Do not give
extended attention to infotainment
tasks while driving.
This system provides access to
many audio and non-audio listings.
To minimize taking your eyes off the
road while driving, do the following
while the vehicle is parked:
. Become familiar with the
operation and controls of the
audio system.
. Set up the tone, speaker
adjustments, and preset radio
stations.
Page 136 of 357
Chevrolet Cruze Limited Owner Manual (GMNA-Localizing-U.S./Canada-
9282844) - 2016 - crc - 9/3/15
Infotainment System 135
For more information, seeDefensive
Driving 0171ii.
Caution
Contact your dealer before adding
any equipment.
Adding audio or communication
equipment could interfere with the
operation of the engine, radio,
or other systems, and could
damage them. Follow federal
rules covering mobile radio and
telephone equipment.
The vehicle has Retained
Accessory Power (RAP). With RAP,
the audio system can be played
even after the ignition is turned off.
See Retained Accessory Power
(RAP) 0188
ii.
The vehicle may have a base radio,
which is included in this manual.
See the infotainment manual for
information on the connective radio
and the navigation system, audio
players, phone, and voice
recognition. There is also information on settings and
downloadable applications (if
equipped).
Theft-Deterrent Feature
The theft-deterrent feature works by
learning a portion of the Vehicle
Identification Number (VIN) to the
infotainment system. The
infotainment system does not
operate if it is stolen or moved to a
different vehicle.
Page 137 of 357
Chevrolet Cruze Limited Owner Manual (GMNA-Localizing-U.S./Canada-
9282844) - 2016 - crc - 9/3/15
136 Infotainment System
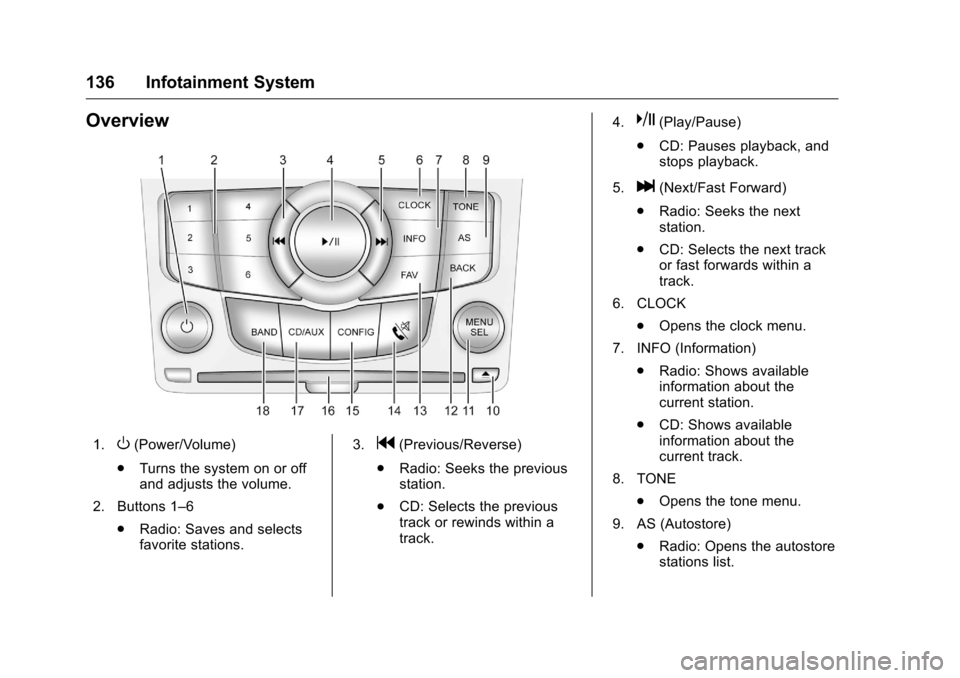
Overview
1.O(Power/Volume)
. Turns the system on or off
and adjusts the volume.
2. Buttons 1–6 .Radio: Saves and selects
favorite stations. 3.g(Previous/Reverse)
. Radio: Seeks the previous
station.
. CD: Selects the previous
track or rewinds within a
track. 4.
k(Play/Pause)
. CD: Pauses playback, and
stops playback.
5.
l(Next/Fast Forward)
. Radio: Seeks the next
station.
. CD: Selects the next track
or fast forwards within a
track.
6. CLOCK .Opens the clock menu.
7. INFO (Information) .Radio: Shows available
information about the
current station.
. CD: Shows available
information about the
current track.
8. TONE .Opens the tone menu.
9. AS (Autostore) .Radio: Opens the autostore
stations list.
Page 138 of 357
Chevrolet Cruze Limited Owner Manual (GMNA-Localizing-U.S./Canada-
9282844) - 2016 - crc - 9/3/15
Infotainment System 137
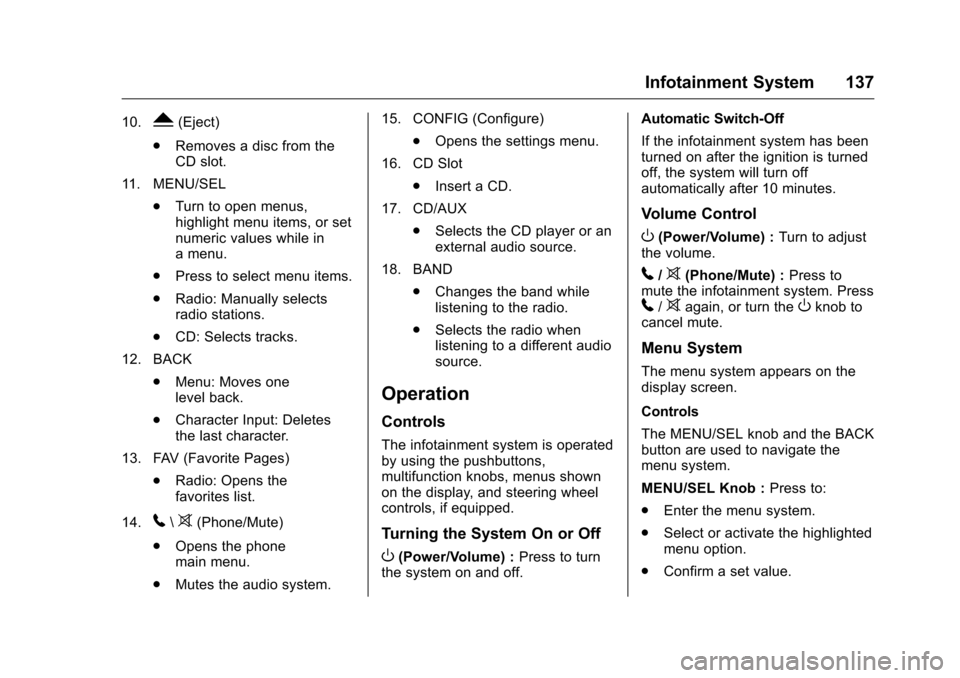
10.Y(Eject)
. Removes a disc from the
CD slot.
11. MENU/SEL .Turn to open menus,
highlight menu items, or set
numeric values while in
a menu.
. Press to select menu items.
. Radio: Manually selects
radio stations.
. CD: Selects tracks.
12. BACK .Menu: Moves one
level back.
. Character Input: Deletes
the last character.
13. FAV (Favorite Pages) .Radio: Opens the
favorites list.
14.
5\>(Phone/Mute)
. Opens the phone
main menu.
. Mutes the audio system. 15. CONFIG (Configure)
.Opens the settings menu.
16. CD Slot .Insert a CD.
17. CD/AUX .Selects the CD player or an
external audio source.
18. BAND .Changes the band while
listening to the radio.
. Selects the radio when
listening to a different audio
source.
Operation
Controls
The infotainment system is operated
by using the pushbuttons,
multifunction knobs, menus shown
on the display, and steering wheel
controls, if equipped.
Turning the System On or Off
O(Power/Volume) : Press to turn
the system on and off. Automatic Switch-Off
If the infotainment system has been
turned on after the ignition is turned
off, the system will turn off
automatically after 10 minutes.
Volume Control
O(Power/Volume) :
Turn to adjust
the volume.
5/>(Phone/Mute) : Press to
mute the infotainment system. Press
5/>again, or turn theOknob to
cancel mute.
Menu System
The menu system appears on the
display screen.
Controls
The MENU/SEL knob and the BACK
button are used to navigate the
menu system.
MENU/SEL Knob : Press to:
. Enter the menu system.
. Select or activate the highlighted
menu option.
. Confirm a set value.
Page 139 of 357
Chevrolet Cruze Limited Owner Manual (GMNA-Localizing-U.S./Canada-
9282844) - 2016 - crc - 9/3/15
138 Infotainment System
.Turn a system setting on or off.
Turn to:
. Highlight a menu option.
. Select a value.
BACK : Press to:
. Exit a menu.
. Return from a submenu screen
to the previous menu screen.
. Delete the last character in a
sequence.
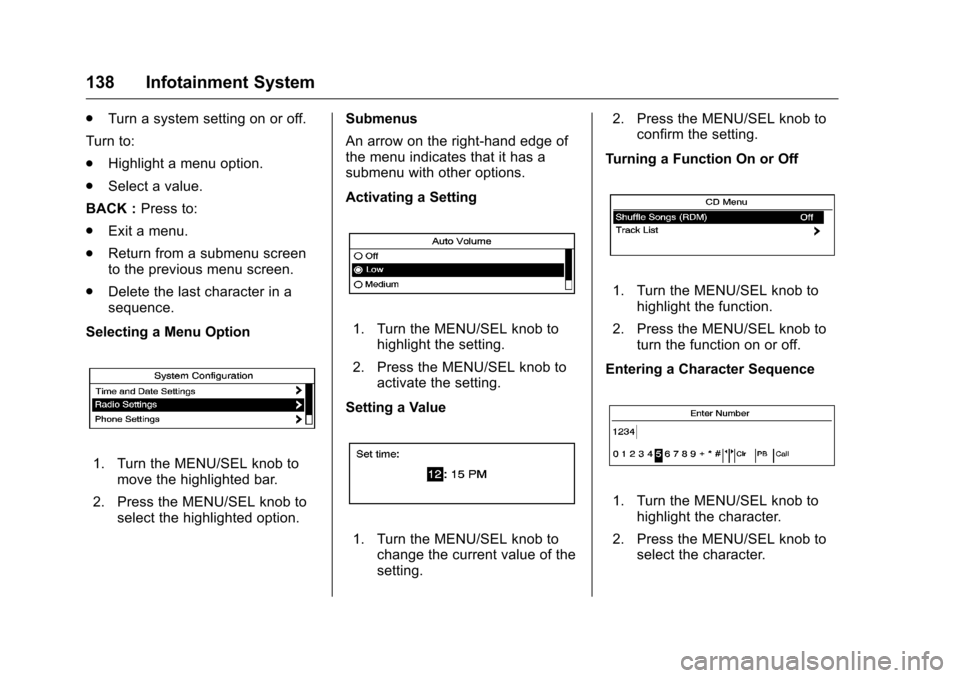
Selecting a Menu Option
1. Turn the MENU/SEL knob to move the highlighted bar.
2. Press the MENU/SEL knob to select the highlighted option. Submenus
An arrow on the right-hand edge of
the menu indicates that it has a
submenu with other options.
Activating a Setting
1. Turn the MENU/SEL knob to
highlight the setting.
2. Press the MENU/SEL knob to activate the setting.
Setting a Value
1. Turn the MENU/SEL knob to change the current value of the
setting. 2. Press the MENU/SEL knob to
confirm the setting.
Turning a Function On or Off
1. Turn the MENU/SEL knob to highlight the function.
2. Press the MENU/SEL knob to turn the function on or off.
Entering a Character Sequence
1. Turn the MENU/SEL knob to highlight the character.
2. Press the MENU/SEL knob to select the character.
Page 140 of 357
Chevrolet Cruze Limited Owner Manual (GMNA-Localizing-U.S./Canada-
9282844) - 2016 - crc - 9/3/15
Infotainment System 139
Press the BACK button to delete the
last character in the sequence or
press and hold to delete the entire
character sequence.
Audio Settings
The audio settings can be set for
each radio band and each audio
player source.
To quickly reset an audio setting
value to 0:1. Press the TONE button.
2. Select the audio setting.
3. Press and hold the MENU/SEL knob until the value changes
to 0.
Press the BACK button to go back
to the Tone Settings menu.
Adjusting the Treble, Midrange,
and Bass 1. Press the TONE button.
2. Select Treble, Midrange, or Bass.
3. Select the value.
Press the BACK button to go back
to the Tone Settings menu. Adjusting the Fader and Balance
1. Press the TONE button.
2. Select Fader or Balance.
3. Select the value.
Press the BACK button to go back
to the Tone Settings menu.
Adjusting the EQ (Equalizer)
If equipped with an equalizer: 1. Press the TONE button.
2. Select EQ presets.
3. Select the setting.
Press the BACK button to go back
to the Tone Settings menu.
System Settings
Configuring the Number of
Favorite Pages
To configure the number of available
favorite pages:
1. Press the CONFIG button.
2. Select Radio Settings.
3. Select Radio Favorites.
4. Select the number of available favorite pages. 5. Press the BACK button to go
back to the System
Configuration menu.
Auto Volume
The auto volume feature
automatically adjusts the radio
volume to compensate for road and
wind noise as the vehicle speeds up
or slows down, so that the volume
level is consistent.
The level of volume compensation
can be selected, or the auto volume
feature can be turned off. 1. Press the CONFIG button.
2. Select Radio Settings.
3. Select Auto Volume.
4. Select the setting.
5. Press the BACK button to go back to the System
Configuration menu.
Maximum Startup Volume
The maximum volume played when
the radio is first turned on can
be set. 1. Press the CONFIG button.