sensor CHEVROLET DURAMAX 2006 Owners Manual
[x] Cancel search | Manufacturer: CHEVROLET, Model Year: 2006, Model line: DURAMAX, Model: CHEVROLET DURAMAX 2006Pages: 100, PDF Size: 0.71 MB
Page 9 of 100

•When the winter cover is used, the temperature
sensor found on the inside rearview mirror will not
function properly. The temperature that is shown will
be incorrect.
Installation Instructions
The following instructions explain how to install and
remove your vehicle’s winter cover. When installing
or removing the cover please refer to the “Usage
Guidelines” mentioned previously. When you first try to fit
the cover it may appear to be undersized. This is due to
the nature of the special vinyl, which will stretch during
installation to ensure a tight fit. For this reason, the initial
installation of the cover is best performed when the winter
cover is warm. If you are required to use a front license
plate, simply cut the black stitches on the back of the
patch.
Grille Cover Installation
1. Pre-bend all the small black tabs into the
shape of a J.
2. Fasten the snaps.
3. Wrap the elastic loop around the hood stopper.
4. Hook all the tabs to the edge of the grille.
5. Hook all clips to the bottom of the grille.
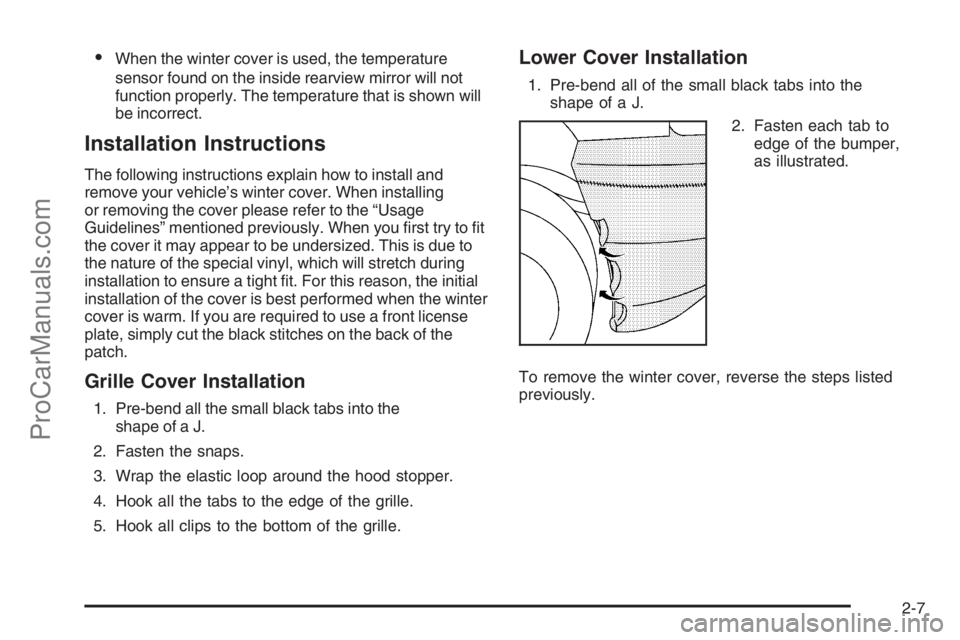
Lower Cover Installation
1. Pre-bend all of the small black tabs into the
shape of a J.
2. Fasten each tab to
edge of the bumper,
as illustrated.
To remove the winter cover, reverse the steps listed
previously.
2-7
ProCarManuals.com
Page 37 of 100

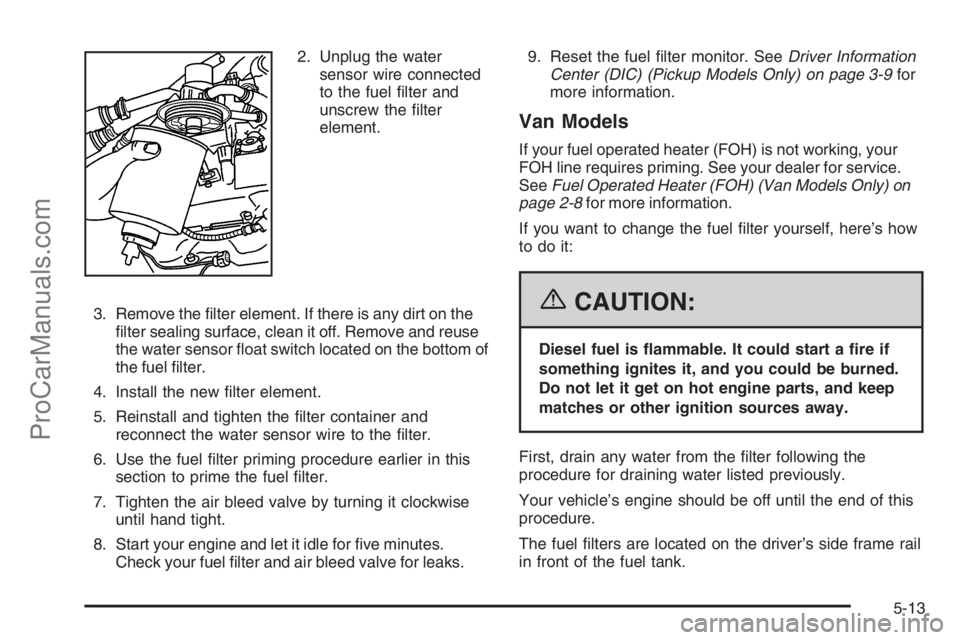
2. Unplug the water
sensor wire connected
to the fuel filter and
unscrew the filter
element.
3. Remove the filter element. If there is any dirt on the
filter sealing surface, clean it off. Remove and reuse
the water sensor float switch located on the bottom of
the fuel filter.
4. Install the new filter element.
5. Reinstall and tighten the filter container and
reconnect the water sensor wire to the filter.
6. Use the fuel filter priming procedure earlier in this
section to prime the fuel filter.
7. Tighten the air bleed valve by turning it clockwise
until hand tight.
8. Start your engine and let it idle for five minutes.
Check your fuel filter and air bleed valve for leaks.9. Reset the fuel filter monitor. SeeDriver Information
Center (DIC) (Pickup Models Only) on page 3-9for
more information.
Van Models
If your fuel operated heater (FOH) is not working, your
FOH line requires priming. See your dealer for service.
SeeFuel Operated Heater (FOH) (Van Models Only) on
page 2-8for more information.
If you want to change the fuel filter yourself, here’s how
to do it:
{CAUTION:
Diesel fuel is �ammable. It could start a �re if
something ignites it, and you could be burned.
Do not let it get on hot engine parts, and keep
matches or other ignition sources away.
First, drain any water from the filter following the
procedure for draining water listed previously.
Your vehicle’s engine should be off until the end of this
procedure.
The fuel filters are located on the driver’s side frame rail
in front of the fuel tank.
5-13
ProCarManuals.com
Page 38 of 100

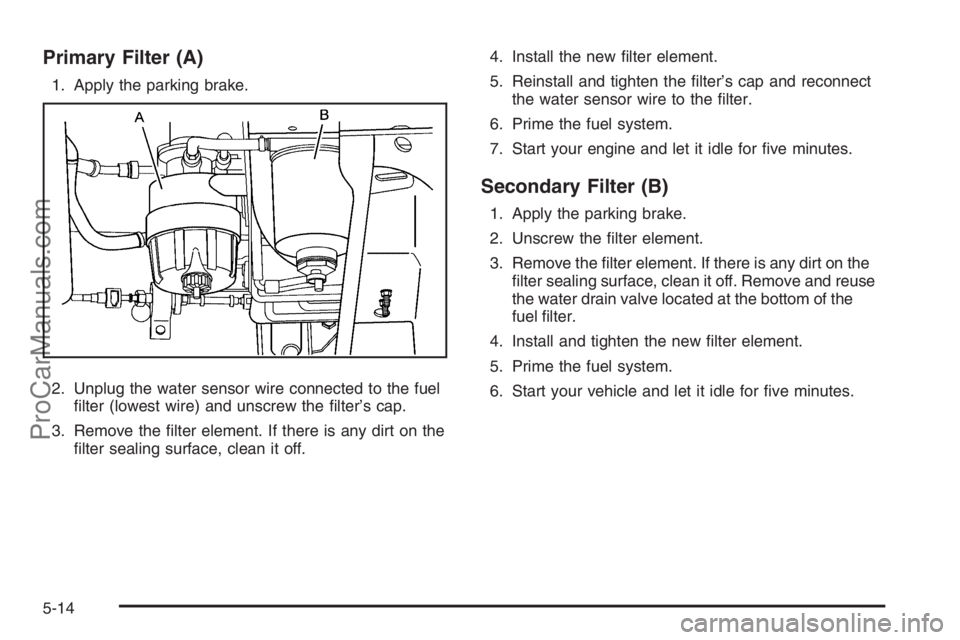
Primary Filter (A)
1. Apply the parking brake.
2. Unplug the water sensor wire connected to the fuel
filter (lowest wire) and unscrew the filter’s cap.
3. Remove the filter element. If there is any dirt on the
filter sealing surface, clean it off.4. Install the new filter element.
5. Reinstall and tighten the filter’s cap and reconnect
the water sensor wire to the filter.
6. Prime the fuel system.
7. Start your engine and let it idle for five minutes.
Secondary Filter (B)
1. Apply the parking brake.
2. Unscrew the filter element.
3. Remove the filter element. If there is any dirt on the
filter sealing surface, clean it off. Remove and reuse
the water drain valve located at the bottom of the
fuel filter.
4. Install and tighten the new filter element.
5. Prime the fuel system.
6. Start your vehicle and let it idle for five minutes.
5-14
ProCarManuals.com